

Page 1

1
AP791412 Etna weather station
Weather Station Clock
Functions:
Display time
Calendar (date, week, year—year display: 2003 to
2052)
Alarm & Snooze
Temperature (Fahrenheit/Centigrade: 0℃ to 50℃ or
32℉ to 122℉
Humidity: 20% to 99%
Weather forecast
Moon Phase
USER GUIDE
Page 2

2
Power: DC 1.5V;
Accuracy : ±1.5℃, ±5%
Manual
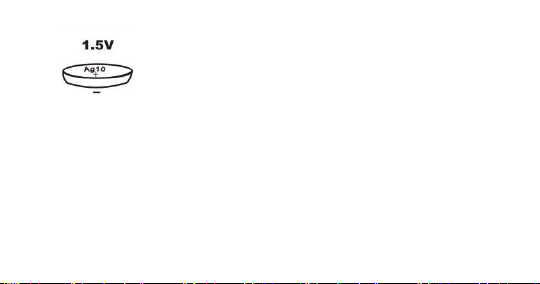
A. Battery: 1 Button Cell Battery (AG10 or LR1130)
1) If battery is in, first take the battery cover then tear off
the transparent leaf insulator from the battery
compartment. You will hear a “Beep” sound. The clock
is now ready to set.
(Note: please keep the transparent leaf insulator away
from the children.
When you took out the transparent leaf but nothing
Page 3
3
displayed, please press the batteries cover or
open the battery cover and press down the
battery to reach the sliding switch contacts until
please use a needle to take out the battery and unwrap the
slice then insert the button cell again until you hear the BEEP
sound. )
2) If you find there is no battery in the battery box, please
3) Battery is to be inserted with the correct polarity.
4) Exhausted battery has to be removed from the product.
5) The supply terminals are not to be
you hear “BEEP” sound. If nothing happen,
insert the button cell battery according to the left display.
Page 4

4
short-circuited.
6) How to remove and insert the battery:
A) Using a screwdriver (not included) remove the
battery cover from the back of the product.
B) Install/remove button cell battery, making sure the
(+) and (-) ends face the proper direction.
C) Replace cover and tighten with screwdriver (not
included).
B. Time Setting:
1) With a “BEEP” sound, the display showing 12:00,1/1,
WED (DAY), and the temperature is the present
Page 5

5
condition.
2) Press and hold SET key for 3 seconds to enter time
setting mode, the 12 hr starts flashing. Press ADJ key to
select 12hr/24hr mode.
3) Press SET key. The word starts flashing then press ADJ
to set hour then press SET key to confirm and enter the
setting of minute, then press MODE key to confirm the
setting.
C. Date Setting:
1) Press MODE key two times to enter Date Setting.
2) Press and hold SET key for 3 seconds to enter
Page 6

6
date setting mode. Press ADJ to set year then press
SET to enter the month setting;
3) Following the above the month is flashing, press ADJ to
set the month;
4) Press again the SET key, using ADJ to set the date.
(Week will be automatically set.), then press MODE to
confirm the setting.
D. Alarm Setting:
1) At normal condition, press MODE key one time to enter
Alarm Time.
2) Press and hold SET key for 3 seconds to enter
Page 7
7
Alarm setting. Press ADJ to set the alarm time. It is
same as the time setting, must press MODE to confirm
the time.
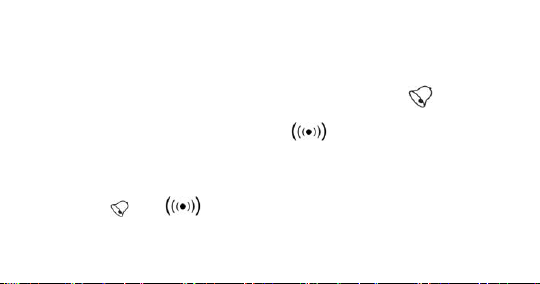
3) Press ADJ key then the alarm on, the “ ” would
display on the screen.
4) Press ADJ key again, the“ ”appear in the screen.
The full time alarm open, it means every hour would the
alarm starts.
5) Following the above setting, press ADJ again the
“ ”& “ ”are all display in the screen. It means
the alarm and every hour alarm is working.
Page 8

8
6) Finally, press ADJ key again, to set all the alarms off.
7) After alarm setting, press MODE key twice time back to
normal condition.
E. Snooze Function:
When alarm sounds, press SNZ key, “z” shining, 5 minutes
later alarm again. It can be repeated for three times.
F. Temperature and Humidity Display:
1) At normal condition, press SET key to select ℃/℉.
2) Press MIN/MAX key to check the max and min
temperature and humidity record since power is on. To
set the time period for max and min
Page 9

9
temperature and humidity, press and hold MIN/MAX key
for 3 seconds to clear the records and displaying --℃
--%, then the clock will start to register the max and min
value of temperature and humidity.
G. Moon Phase:
Moon phase will be automatically set.
Remark:
Explanation for the weather forecast as follows:
a) It is only a reference for the weather forecast.
b) The changing in the weather forecast is basing on the
Boolean calculation of the temperature and humidity in
Page 10

10
the CMOS chip.
c) It would display cloudy within 24 hours after the power
on.
Distributor: Cool collection, Budapest,
POB:176, 1476, Hungary
Corporate registration nr: 01-09-276783
 Loading...