

Page 1
The hood cannot be repositioned
after being installed, so check
positioning with adhesive
covered and rid of any
obstructions before installing.
Sensor sound suppression hood (Sssh) upgrade
These instructions tell you how to install the Sensor sound suppression hood
option (part # 7051A1072) in any 6- or 12-slot Sensor Installation Rack .
The hood reduces the sound produced by the Sensor ventilation fan by
surrounding it with an enclosure lined with sound absorbing foam. A properly
installed enclosure does not reduce ventilation fan efficiency.
Note: Sensor racks with standard 10 inch clearance above the cooling fan
have been tested with the hood in place. No significant increase in
rack temperature was observed. However, installers should be sure
objects on a wall or ceiling do not impede the free flow of cooling air
from the hood exhaust openings.
A typical upgrade can be performed without using tools. Cleaning supplies to
remove dust and oil from the installation will probably be required.
Preparing the hood installation surface
1. Shut off rack power at the main circuit breaker.
Warning! Servicing a dimmer rack with power on may result in death
or injury from electrical shock.
2. Clean dust buildup from the top of the rack with a vacuum or a damp rag.
3. Remove any oil or grease residue from the top of the rack with a mild
detergent or degreaser solution and allow the surface to dry completely.
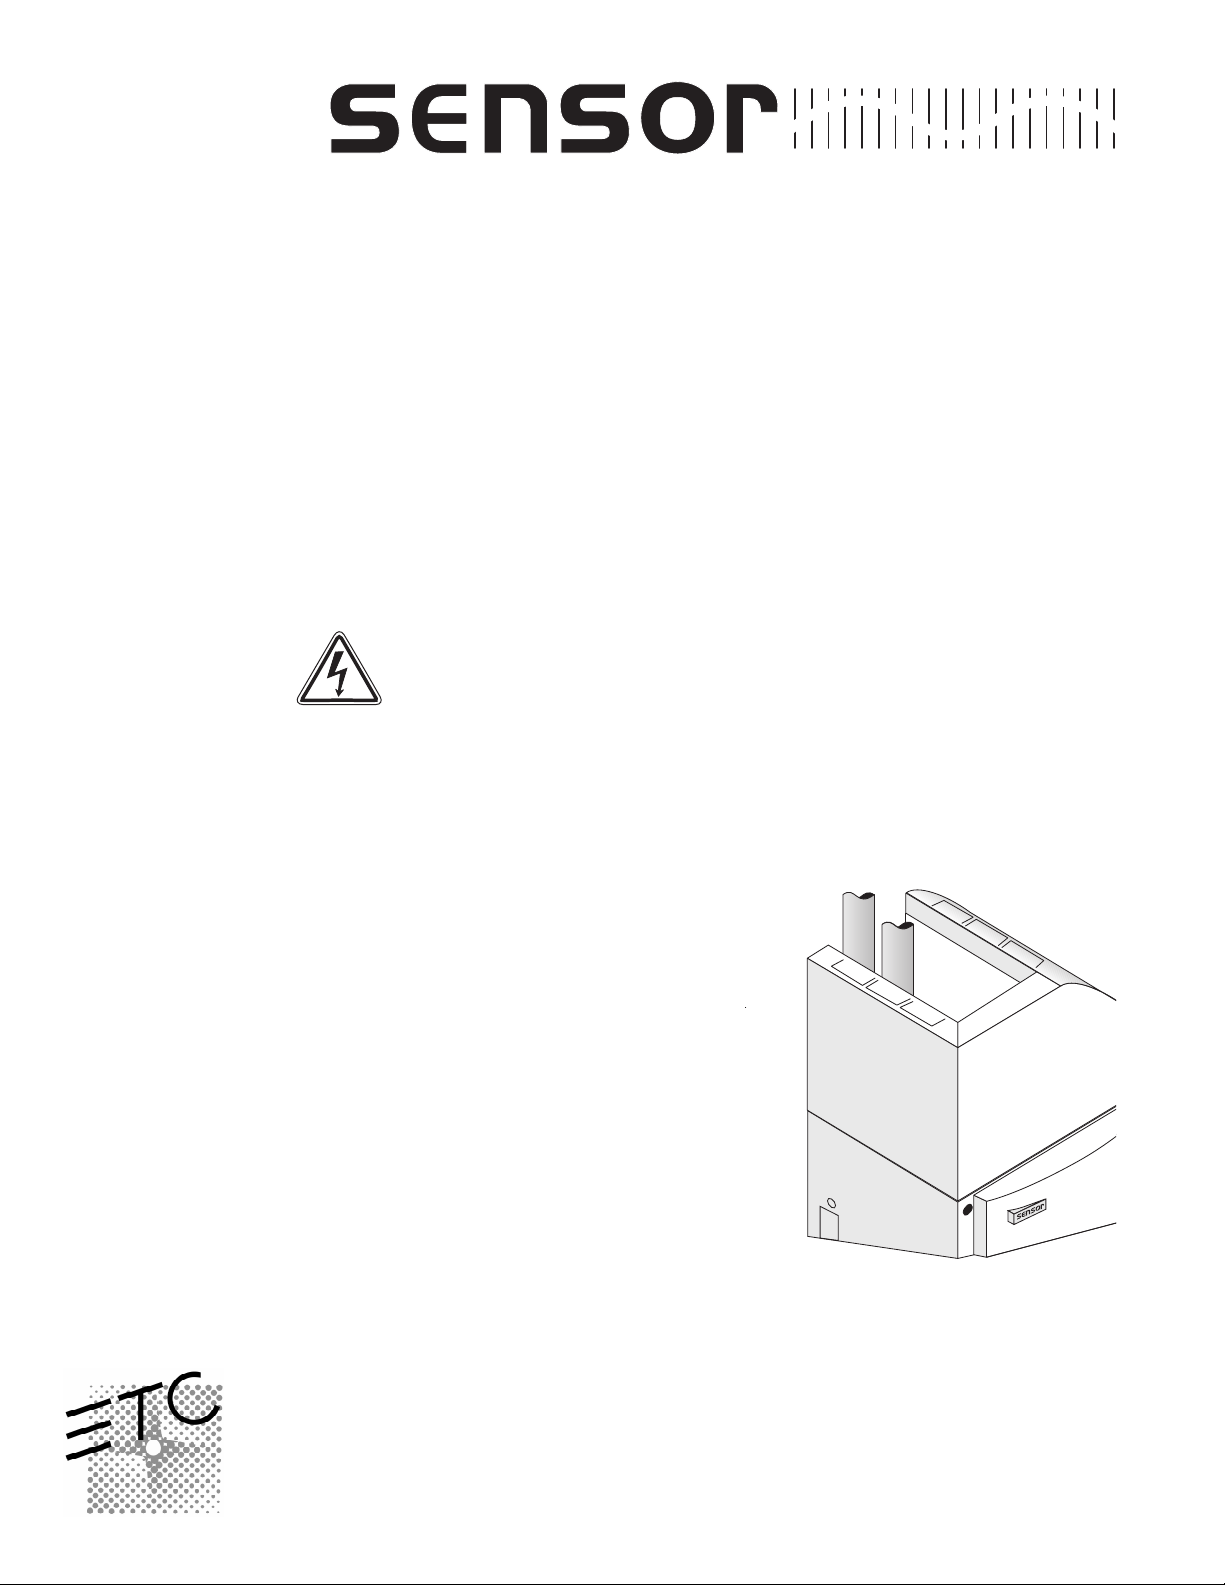
4. Position the hood on top the dimmer cabinet as shown below. Make sure
the hood can be positioned with the front flush to the edge of the dimmer
cabinet while completely covering (not obstructing) the ventilation fan.
Figure 1: Positioning the hood for installation
Electronic Theatre Controls
North America 3030 Laura Lane • Middleton, Wisconsin 53562, USA • Tel: (+1) 608 831 4116 • Fax: (+1) 608 836 1736
Europe 5 Victoria Industrial Estate, Victoria Road • London, W3 6UU, England • Tel: (+44) 181 896 1000 • Fax: (+44) 181 896 2000
Asia Room 605-606, Tower III, Enterprise Square, 9 Sheung Yuet Road • Kowloon Bay, Hong Kong • Tel: (+852) 2799 1220 • Fax: (+852) 2799 9325
Web www.etcconnect.com • Email mail@etcconnect.com • Copyright 2000 • Specifications subject to change • 7051M1017A
Page 2
Installing the hood
Remove the adhesive strip covers on
the bottom of the hood before
installing it permanently.
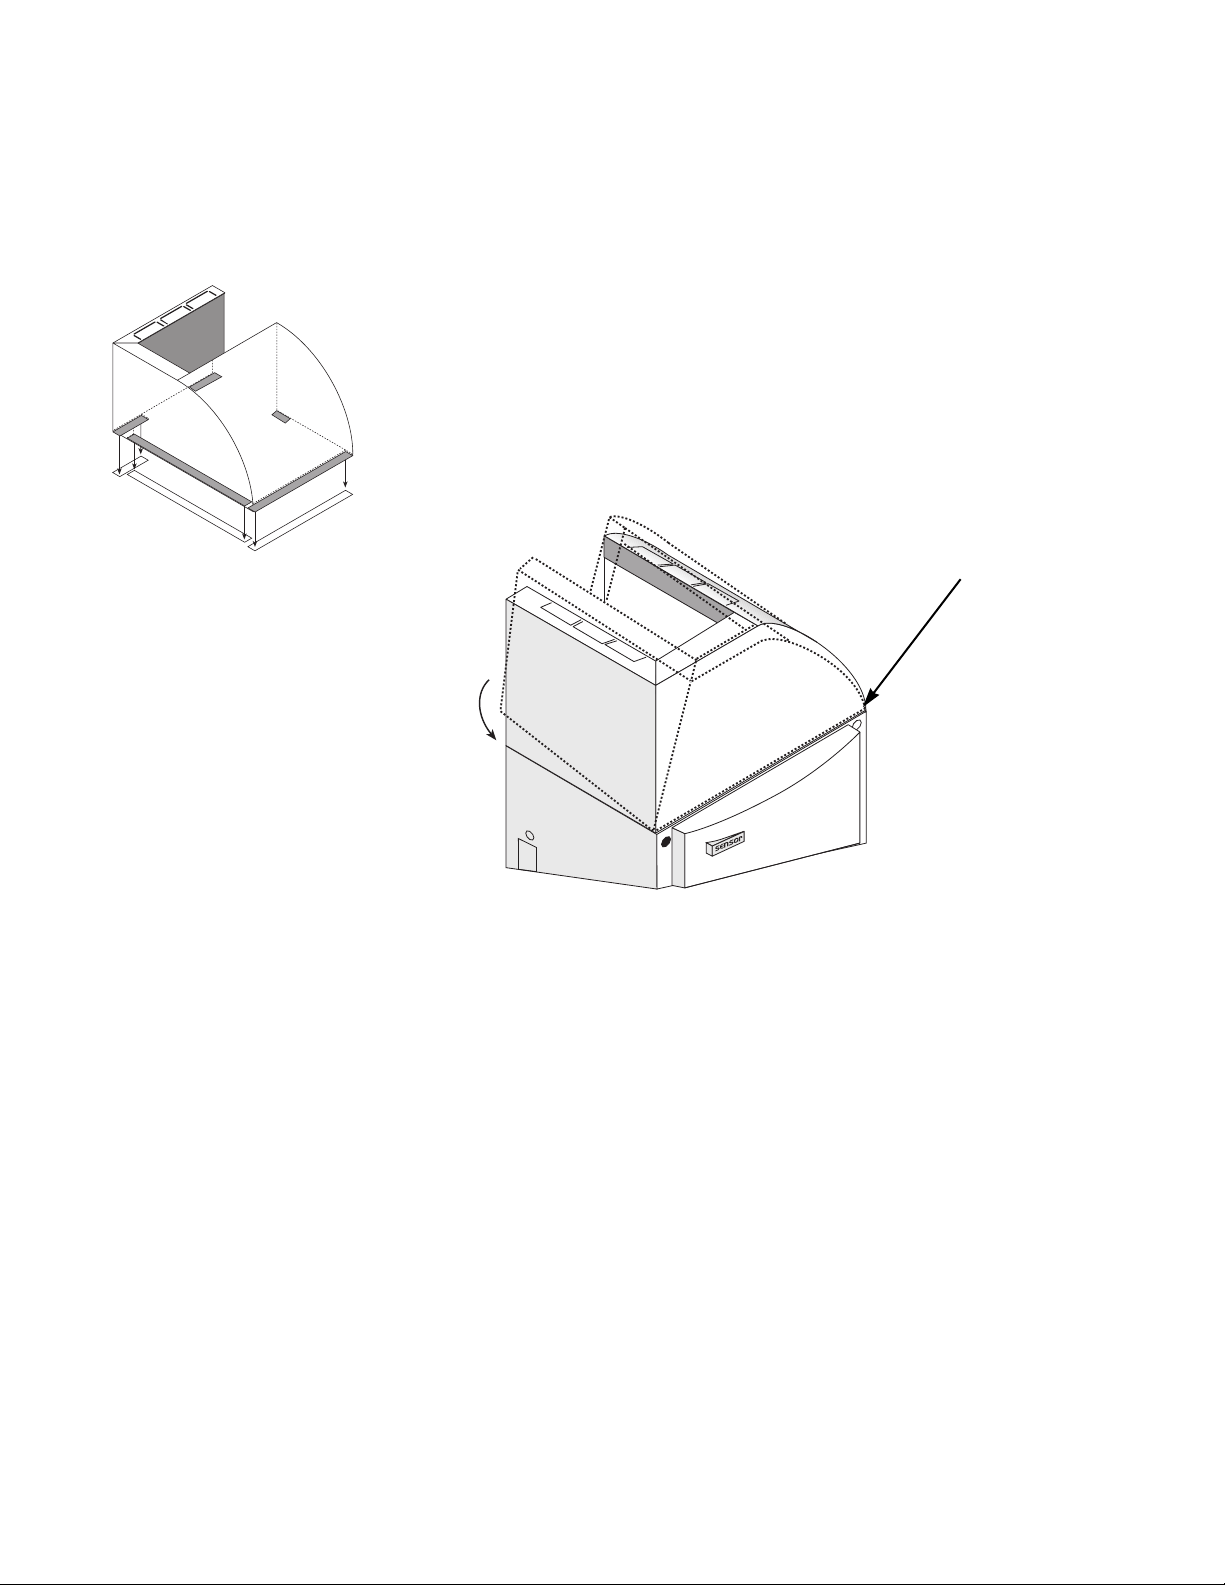
Figure 2: Exposing the adhesive
1. Remove the covers to expose the adhesive strips on the bottom of the hood.
Note: After exposing the adhesive, handle the hood by the sides to avoid
touching the adhesive.
2. Position the front edge of the hood flush with the front of the dimmer
cabinet and lower it into position.
3. Verify the hood is in position and press down firmly over the adhesive strips.
4. Installation is complete. Allow the hood to stay in place for 30 minutes to
completely set the adhesive. After the adhesive has set, the hood can be
removed when necessary by separating the Velcro strips securing it to the
top of the dimmer cabinet.
After exposing the adhesive,
position the front edge of the
hood first, then tilt it down to
secure the entire hood.
When the hood is in place,
press down firmly on the entire
hood and allow the adhesive to
set for 30 minutes.
Figure 3: Installing the hood
Sensor Sssh option 2
 Loading...