

Page 1
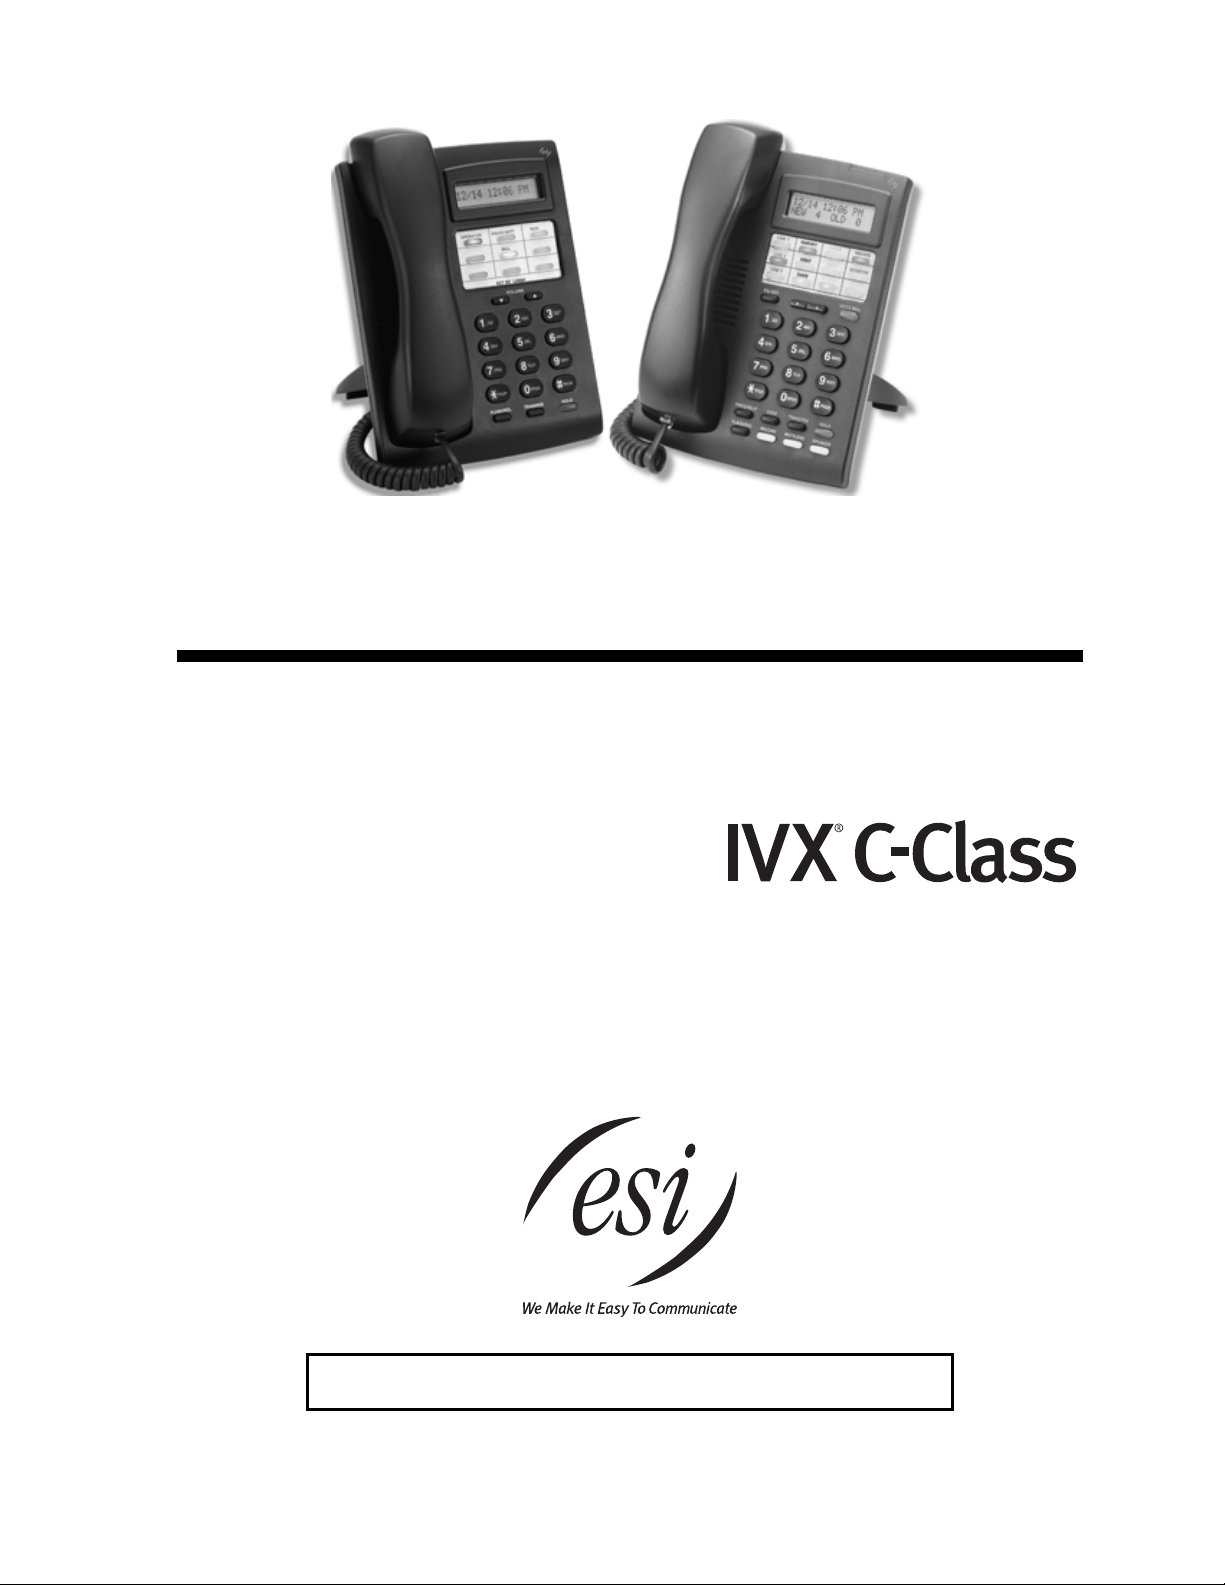
ESI Feature Phone
User’s Guide
FOR
0450-0512
Rev. B
Visit http://www.esiusers.com for up-to-date help.
Page 2

About ESI
ESI (Estech S ystems, Inc.) is a p rivately held corporation based in P lano, Texas, near t he i nt ernationall y
known “Tel ecom Corridor.” Founded i n 1987, ESI designs and builds innovati ve t el ecommunications
products for businesses lik e yours. Because of their powerful com bi nation of value an d f eatures,
ESI products are consistentl y recognized by indu st ry publications and l eaders.
Copyright © 2005 E SI (Estech Systems, I nc.).
Visit ESI on the Web at http://www.esi-estech.com.
Microsoft is a registered trademark of Microsoft Corporation. Intel is a registered trademark of Intel Corporation. Certain ESI products are protected by
various U.S. Patents, granted and pending. Product information contained herein is subject to change without notice. ESI is an ISO 9001:2000certified company.
Page 3

Table of contents
Introduction...............................................................................................................................................................A.1
24-Key Feature Phone ................................................................................................................................................................................A.2
12-Key Feature Phone ................................................................................................................................................................................A.3
Connecting your ESI phone........................................................................................................................................................................A.4
Help mode (Verbal User Guide)..............................................................................................................................B.1
User programming: An introduction......................................................................................................................C.1
User programming menu ............................................................................................................................................................................C.1
ESI Feature Phone operation..................................................................................................................................D.1
Display...........................................................................................................................................................................................................D.1
Status indicator lamp....................................................................................................................................................................................D.1
Caller ID ........................................................................................................................................................................................................D.1
Keys...............................................................................................................................................................................................................D.2
Dial tone........................................................................................................................................................................................................D.3
Basic phone use...........................................................................................................................................................................................D.4
Direct station selection.................................................................................................................................................................................D.4
Transferring an outside call to another station...........................................................................................................................................D.5
Conference calling .......................................................................................................................................................................................D.6
Call forwarding..............................................................................................................................................................................................D.7
Call waiting....................................................................................................................................................................................................D.7
Hold/exclusive hold operation .....................................................................................................................................................................D.8
Paging........................................................................................................................................................................................................ D.10
Call pickup.................................................................................................................................................................................................. D.10
Optional feature......................................................................................................................................................................................... D.10
Special keys..............................................................................................................................................................E.1
FLASH, REDIAL, RELEASE......................................................................................................................................................................E.1
Esi-Dex..........................................................................................................................................................................................................E.1
Override ring.................................................................................................................................................................................................E.5
Headset operation........................................................................................................................................................................................E.5
Outside dial tone preference .......................................................................................................................................................................E.5
Line keys.......................................................................................................................................................................................................E.6
Optional features ..........................................................................................................................................................................................E.6
Analog stations.........................................................................................................................................................F.1
Caller ID ........................................................................................................................................................................................................F.1
Placing calls..................................................................................................................................................................................................F.1
Transferring outside calls.............................................................................................................................................................................F.1
Call forwarding..............................................................................................................................................................................................F.1
Call waiting....................................................................................................................................................................................................F.2
Call hold ........................................................................................................................................................................................................F.2
Paging...........................................................................................................................................................................................................F.2
Call pick-up...................................................................................................................................................................................................F.2
Index
Page 4

(This page included for pagination purposes only.)
Page 5

User’s Guide Introduction
Introduction
Accessing the r i ch E S I feature set is sim ple and easy through the straightfor ward design of ESI’s
Feature Phones. Each feature has been designed for ease of use while providing capa bilities needed in
an advanced business phone.
You will be able to learn man y of the features by simply using your phone; and this User’s Guide will
introduce you t o t he wide variety of f eatures offered by your ESI phone sy st em and how to use your
phone effectively to achieve maxim um benefits.
What it covers
• 24-Key Featur e P hone
• 12-Key Featur e P hone
• Analog phone ope rat i on
How it’s arranged
• Section A — Int roduction and phone illustrations
• Section B — User help
• Section C — User p rogramming
• Section D — Phone operation
• Section E — Special keys and features
• Section F — A nal og st at i ons
• Index
A.1
Page 6

Introduction User’s Guide
24-Key Feature Phone
The 24-Key Feature Phone has a vari et y of programmable and built-in features. The 24-Key Feat ure
Phone’s built -in voice prompt s make it easy to progra m and use.
ESI-DEX feature key
(pg. E.1)
Speaker
P/UP (pickup) key
(pg. D.10)
PROG/HELP
feature key
for phone pr o gra mming
as well as access
to Verbal User’s Guide
and tutorial (pg. B.1)
Volume/scroll keys
Fxed featu r e k ey s
(pg. D.2)
Status indicator light (pg. D.1)
2-line, 32- c h ar ac t er display
12 program mable feat ure
keys (pg. C.1)
VOICE MAIL and
RECORD keys
(non-functional
when used with
this phone system)
PAGE key (pg. D. 10)
Microphone for
buil t-in speakerphone
Hint: You can perform direct programming by holding down a progr am mable feature key for at least
two se conds (similar to how you might progr am a car radio button). Thi s isn’t applicable to the
fixed feature keys.
A.2
Page 7

User’s Guide Introduction
12-Key Feature Phone
The 12-Key Feature Phone includes the basic, most co m m only us ed phone features.
Volume/scroll keys
1-line,
16-char ac t er dis p lay
Speaker
9 programmable
feature keys
P/UP (pickup) key
(pg. D.10)
PAGE key (pg. D. 10)
for phone pr o gra mming
to Verbal User’s Guide
PROG/HELP
feature key
as well as access
and tutorial (pg. B.1)
Fxed featu r e k ey s
(pg. D.2)
Notes: The following features are not avail able on the 12-Key Feature Phone.
Certain special f eatures; see page E.6.
Esi-Dex.
A CONFERENCE key and MUTE/DND key must be set on one of the nine pro grammable feature keys
to utilize those features.
Hint: You can perform direct programming by holding down a progr am mable feature key for at least
two se conds (similar to how you might progr am a car radio button). Thi s isn’t applicable to the
fixed feature keys.
A.3
Page 8

Introduction User’s Guide
Connecting your ESI phone
Use the diag ram (below) to connect your ESI phone. The diagram represent s the panel on the
phone’s under side.
Note: The “Top of phone” and “Bot tom of p hone” references in this diagram shows the c orrect vertical
orient ation of the phon e — i.e., the part with the display is the top.
Line cord
to wall
Handset
12-Key Featur e P hone
24-Key Featur e P hone
• Connect s like a basic phone.
• Handset pl ugs into right -side jack.
• Line cord plugs into left-side jack.
A.4
Page 9

User’s Guide Help mode (Verbal User Guide)
Help mode (Verbal User Guide)
Your ESI phone s ystem ’s Help mode (also called the Verbal User Guide) — a carefully conceiv ed
combination of spoken information, display readouts and even key illum i nat ion when appropriate — is a
powerful tool to help you learn how to use the system’s many features.
Tutorial
When your stati on is idle, press PROG/HELP, and then follow t he spoken Help menu to:
• Learn how to use the phone
• Hear a description of how any key is used
• Hear a complet e tutorial on phone operation
Help during st ation programm ing
To hear a detailed description of a function you wish to program, press PROG/HELP while programming
it.
Help during a call
Press PROG/HELP while on a call and this will place t he call on hold, whereupon you can use Help
mode to hear a description of the functi on you wish to perform. When you exit Help mode, you will be
reconnected to the call.
While you are either in He lp mode or programming your phone, y our station will be temporarily pla ced
in DND (se e “MUTE/DND,” page D. 3). Anyone calling yo ur stat ion while you are in DND will be
disconnected after four minutes.
Exiting Help mode
To exit Help mode, sim ply hang up.
Visit www.esiusers.com for up-to-dat e help.
B.1
Page 10

Help mode (Verbal User Guide) User’s Guide
(This page included for pagination purposes only.)
B.2
Page 11

User’s Guide User programming: An introduction
User p rogramming: An introduction
Voice prompts will play menu and sub-menu options to access the desired feature. Y ou don't have to wait
for the entire prompt to be played. Therefore, once you’ve become familiar with the p rompts (see “User
programming menu,” below), you can quickly set any frequently used feature.
Program m ing hel p
During any of the programming ste ps, press PROG/HELP to hear a m ore detailed desc ri pt i on of the
feature and related programmi ng opt ions.
Exiting pr ogr am m ing mode
To exit programm i ng m ode, simply hang up.
User programming menu
Overview
2 Programma bl e feat u re keys
(Station keys, line keys, speed-dial keys, other feature keys)
3 Station options
1 Call waiting/background announce
3 Headset operation
4 Outside dial tone preference
5 Hands-free answer
4 Station audibles
1 Station ring tone
2 Station ring volume
Note: Backgrou nd an no un ce, and s ele ctions 3 and 5 under station opt ions, are not av ailable on a 12-K ey
Feature Phone.
2 Programmable feature keys
There are two methods for program m ing your phone:
• Direct programming — Select the key y ou want to program, and hold it down for at least two
seconds. This not only init iates programm ing but also le ts you immediately program t hat specific key .
• Traditional programming — Press PROG/HELP. The Verbal User Guide will speak to you,
walking you through the full menu, during which you ca n choose the approp ri ate option.
Direct pr ogr amm i ng ex ampl e:
You wish to set one of the keys to dial a co-worker, whose extension is 105. Hold down the
key for at least two seconds. This automatically puts you in feature key programming. Follow
the prompts to enter 1 0 5. (This has allowed you to skip two st eps — pressing PROG/HELP
and selecting a menu option — that you’d have had to perform if using t raditio nal
programming.)
C.1
Page 12

User programming: An introduction User’s Guide
A
How the programmable feature keys can be set
• Line keys — If a line num ber (1 through 12) i s programmed, the programmable feature key
becomes a line ke y providing the app ropriate lamp information and manual outs i de-line access.
• Station keys — If the dialed digits input are a three-d i gi t number, t he program m abl e f eature key
will become a station key providing the appropriate lamp information and easy access or
transfer. Three-digit numbers entered can be:
– User extens io ns (100–123)
– System speed -dial numbers (600–699)
• Speed-dial keys — I n addition to prog ram mi ng a programmable f eat ure key with a system
speed-dial number, you can create personal speed-dial keys for automatic diali ng of frequentl y
called outsi de num bers. If you prog ram 9 (or 8 or 7) plus a phone number , the programmable
feature key becomes a speed-dial k ey. When you progra m a speed-dial key , t here's no need to
insert a pau se af t er the 9 (or 8 or 7). The speed-dial number can be u p t o 24 characters long.
Use the up scroll key () t o ent er special characters in a dial string. Enter th e phone number
(24 digits, m axim um) followed by #. Do not include an outside line a cc ess code (i.e., don’t add
9, 8 or 7) befor e t he num ber.
To insert a special character , press the right scroll key () to select the desired sp ecial cod e :
# ,
, F or P. Press # to conf irm the insert ed character and co nt i nue. Press # # to complete
the entry .
Code What it produce s
# # DTMF t one
DTMF to ne
F Flash hook
P 2-second pause
Use the down a rrow key () to ba c kspace.
Once the number i s s aved, you can use the sc roll keys to move back a nd forth to view the
number. To edit the number, you must delete it and enter the correct number.
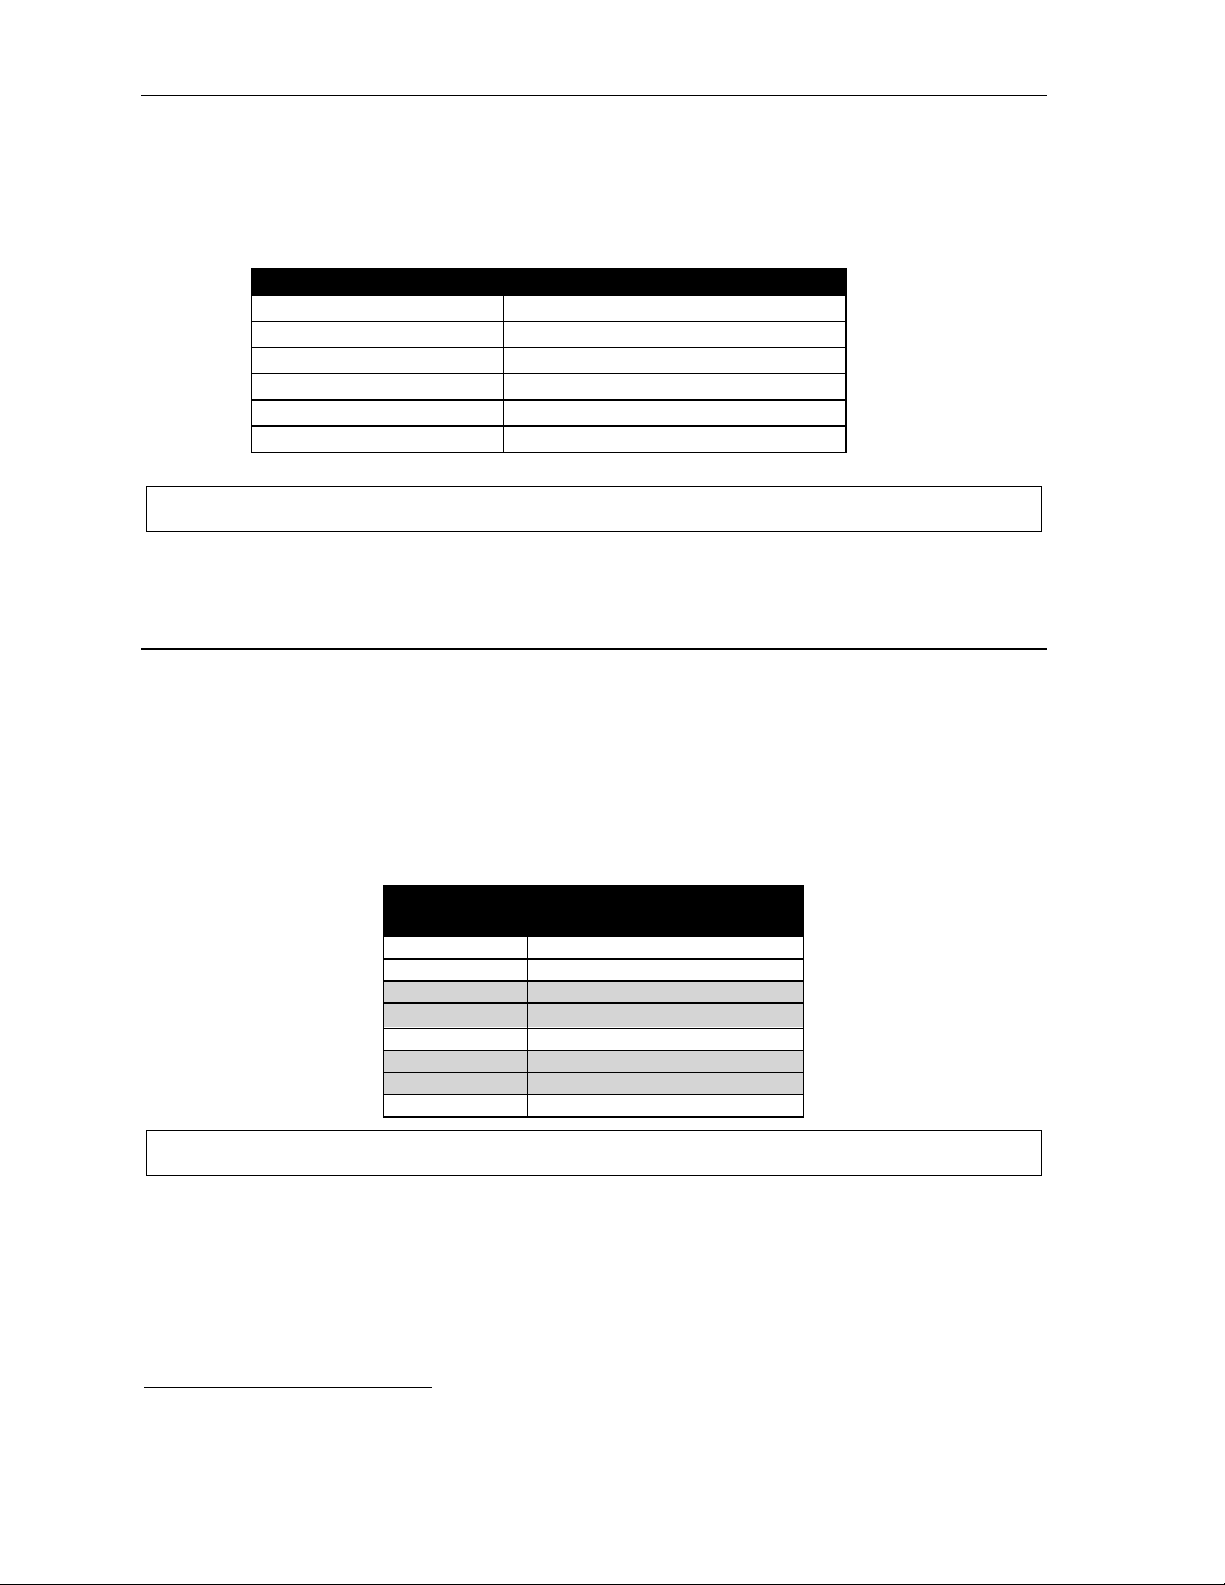
• Other feature key s — I f you ent er feature codes, the programmable f eat ure key will serv e as an
enable/disa bl e key for that feature. The Installer may have progr am m ed certain station s f or
accessing additional features; consult your S ystem Administrator for your access (see page E.6).
Keys’ LED activity during programming
Key type and LED in dication
Mode Station key
Currently bein g programm ed and
previously assigned
Currently bein g programm ed and
previously unassigned
Programm ing mode — Was assi gned or
viewe d in current session
ssigned in a previous programming
session and not yet viewed in
current se ssi o n
Never assigned and not yet viewed in
current se ssi o n
Flashing red Flashing green Flashing amber
Flashing red Flashing red Flashing red
Blinki ng r ed Blinki ng gr e en Blinki ng am ber
Solid r ed Solid green Solid amber
Off Off Off
Line key
Feature k ey
or spe ed-dial key
C.2
Page 13

User’s Guide User programming: An introduction
3 Station options
The station options sub-menu (PROG/HELP 3) lets you act i vate or deactivate several features
your statio n ca n provide. At each opt i on sub-menu, 1 enables th e option and 0 disables it. (Each
option list ed below is explain ed elsewhere in thi s manual, as noted.)
1 Call waiting/Background announce
See page D.7 fo r call waiting and p age D. 8 for background announce.
3 Headset operation1
See page E.5.
4 Outside dial tone preference
See page E.5.
5 Hands-free answer1
See page D.3.
Note: Background announce, and sel ecti ons 3 and 5, ar e not avai labl e on a 12-Key Featur e Phone.
4 Station audibles
The station audibles program m i ng provides control of the following audible items:
1 S t a t ion ring tone
You can select from six possible tones to help distinguish it from other nearby ringing phones.
Press or to select a tone, then press # to accept i t .
2 S t a t ion ring volume
Press and to set the desir ed ringer volume (range: off to high), then press # to accept it.
1
Not available on the 12-Key Feature Phone.
C.3
Page 14

User programming: An introduction User’s Guide
(This page included for pagination purposes only.)
C.4
Page 15
User’s Guide ESI Feature Phone operation
ESI Feat ure Phone op eration
Display
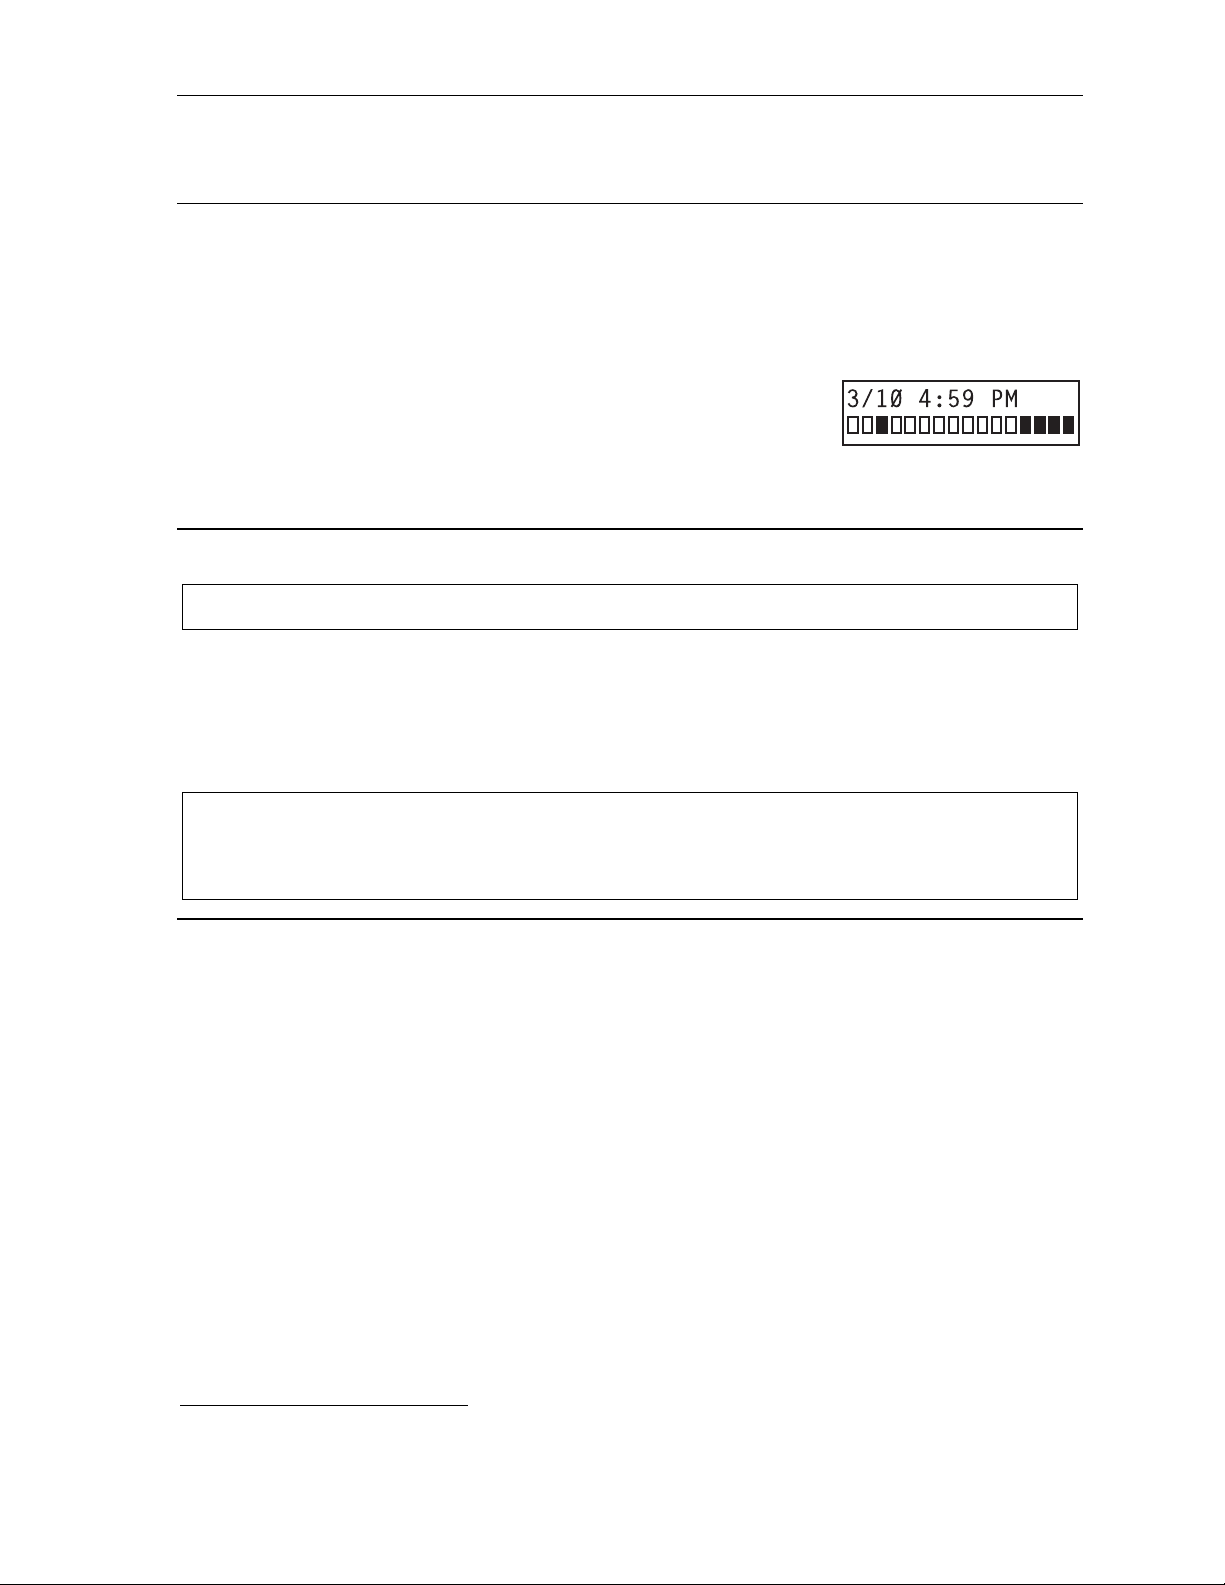
When your phone (or station) i s not i n use, the display will show the current date and time, activated
features such as DND (do not disturb; see “MUTE/DND,” page D.3) and monitor mode, and — on a 24-Key
Feature Phone — the system’s current line usage. A 12-Key Feature Phone does not display line usage.
Each block on the bottom line of the display will represent an in dividual
24-Ke y Feature P hone
line (as in the example, right). Incoming calls usual l y a re assigned
beginning with Line 1 at the far-left line indicator. Outgoi ng calls are
assigned from the highest numbered l i ne beginning at t he f ar right.
As you use your ESI F eat ure Phone, its disp l ay changes frequentl y
to give you deta i l ed information during call proces sing and voice
mail operations.
Line in use
Available line
Status indicator lamp
Note: This it em is not applicable to the 12-Key Feature Phone.
The red status indicator lamp, located at the top of the 24-Key Feature Phone, indicates three conditions:
• Phone is off-hook — Light glows s ol i d red.
• Phone is ringing — Light “flut ters” continuously.
For example, if a user is wearing a headset, it can be difficult to know whether he/she is on a call. So, just
look at the status indica tor lam p — i f i t’s glowing solid red, the person is, indeed on a call.
Note: If more than one of these two conditions is true at the same station, the light will behave according to
the fol lowing priority: off-ho ok, then ringing. Here’s an example. If the phone begins to ring, the light will
“flut ter” continuously; and, if you then pick up the hand set or press SPEAKER to take the call, the light
glows so li d red be c au se th e off - hook c on dit i on ha s th e hig her pr io ri ty of the tw o co ndit i o ns.
Caller ID
If you subscribe t o Caller ID from your telephone service provider , the phone’s display will show an
outside call er’s name and/or number.
caller status — such as UNAVAILABLE, PRIVATE or NO DATA SENT. Caller ID information will appear
also on analog phones with Caller I D displays.
1
If you don’t subscribe to Call er ID, th e LCD will sho w whi ch line is re cei ving the call , in stead of the cal le r’s name or number.
2
Caller ID will not appear with call-waiting.
1
In some instance s, the service prov i der can send only a general
2
D.1
Page 16
ESI Feature Phone operation User’s Guide
Keys
Programmable feature keys
The programmable feature keys at the top of the Feature P hone — 12 on the 24-Key , and nine on the
12-Key — have been p re-programmed by the i nst aller. You may wi sh t o add to or change some of these
keys to perform different functions explained throughout this manual. Press PROG/HELP to verify current
settings ( see page C.1).
Note: Key codes for CONFERENCE and MUTE/DND for a 12-Ke y Feature Phone must be pr ogrammed on a
programmable f eature key to use these functions. See page E.6.
Fixed-feature keys
The fixed -feature keys on the phone are permanentl y labeled as to thei r usage. The FLASH/RDL and
MUTE/DND keys both have dual pur poses; your ESI phone system will gover n t hi s by permitting on l y
the appropriate function when either is pressed, depending on the ci rcumstances at that m om ent . The
different phone m odels have some dif ferent fixed-feature keys.
Notes: The fixe d keys on the 24-Key Feature Phone vary from tho se on the 12-Key Feature Phone. The
12-Ke y Feature Phone’s programmable feature keys can be set for cert ain optional features (d escribed
on page E.6) t hat c ome a s fix ed-featur e key s on the 2 4-K ey Fe at ur e Pho ne.
The VOICE MAIL and RECORD keys on the 24-Key Feature Phone are n on-functional on this
phone s ystem.
Keys’ LEDs (lamps)
The LEDs (light-emitting diodes ), or lamps, associated wi th t he programmable and f ixed keys aid in
determining the stat us of their function. In general:
• Green indicates a f unction associat ed wi t h your phone.
• Red indicates an occurrence at anot her station.
• A solidly lit lamp indicates in-use status.
• Blinking indicat es an action, such a s ringing or holding, is required; a fast blink calls for
immediate action.
As an example, a blinking red key is a call ringing at another station; blinking green signifies ringing at
your station. (See also “Line keys,” page E.6.)
SPEAKER key and speakerphone oper ation
Note: The 12-Key Feature Phone has neither a SPEAKER key nor speakerphone. It does have a speaker,
but this is useful onl y for on-hook diali ng; when the called person answers, you must pick up th e
handset t o sp ea k to him/ h er. The 12-Key Fe ature Phone al so can be us e d for zo ne p agi ng.
For hands-free conversation, use the SPEAKER key. When an outside call rings, you can press SPEAKER
to connect to t he caller via your phone’s built-in speakerphone. T hi s li ghts the SPEAKER key’s LED. O r,
while using the handset, you can s witch a call to the sp eakerphone by pressing SPEAKER and hanging
up the handset. (To revert to t he handset from speake rphone mode, lift the handset again.) To perform
group listening — i.e., have a handset conversation along with t he caller’s voice broadcast over your
speake r — p ress SPEAKER while on a handset conversation but do not hang up the handset.
D.2
Page 17

User’s Guide ESI Feature Phone operation
Hands-free answer (internal calls only)
You can program your phone to enable or disable hands-free answer — press PROG/HELP 3 5. With
hands-free enabled, an internal call to your station generates a short ring and a double connect tone, then
automatical l y connects the caller to your speake rphone. With hands-free disabled, an internal call to
your statio n generates a singl e-ring cadence; out side calls ring wi th a double-ring cadence.
Note: The 12- Key Feat ure Phone supports only hands-free listening. You must pick up the handset to
respond to the caller.
Volume/scroll keys
The two smaller keys just above the d i al pad labeled and serve two purposes:
• Adjusting the vo l u me heard through t he handset and speaker — Your phone will maintain the
chosen volume set ting until you change i t.
• Serving as scroll keys fo r operations (su ch as Esi-Dex or programming) that may show several
entries on the display, such as special characters: #,
, P, and F.
MUTE/DND key
To disable your handset or speaker microphone during a conversation (either with the handset or speaker),
press MUTE/DND. While the mute function is activated, the MUTE/DND LED will blin k rap idly and the
displa y show s “MUTED.”
Soft feature keys
Soft feature keys are dynamic: when used, they constantly change your ESI Feature Phon e’ s status.
These soft keys, located under the display, include ESI-DEX
Along with spoken and displayed comm ands, they guide you through the use of Esi-Dex (page E.1),
various programming activities and controlli ng the volume of your phone’s handset and spe a k er.
1
, PROG/HELP, and scroll keys ( and ).
Dial tone
When you first l i f t your handset, you will hear an internal di al tone that al l ows you to call othe r st at i ons
or perform other internal functions. To gain an outside dial tone, dial 9 (or 8 or 7)
programmable feature key that has been set as a line key. (A line key, when pressed, automati c al ly
gains an outside l ine. Consult your System Admi ni st rat or if you have questio ns.)
2
or press a
1
Not available on the 12-Key Feature Phone.
2
What you dial to reach an outside line depends on your system’s particular setup. If you’re not sure, consult your
System Administrator .
D.3
Page 18
ESI Feature Phone operation User’s Guide
Basic phone use
Note: References to the SPEAKER key and speakerphone apply to only the 24-Ke y Feature Phone, not the
12-Ke y Feature Phone (which lacks both it ems).
Outside calls
To answer (double-ring cadence): Lift the handset or press SPEAKER.
To place: Li f t the handset or press SPEAKER. Then either press an unlit line key or dial 9 (or 8 or 7)
to be assigned an outside dial tone.
To hang up: Replace the hand set or — if using the speakerphone — press SPEAKER.
Internal calls
To answer (singl e- ring caden ce ): In h and s-f ree mo de, an swer di re ctly t hro ugh th e sp eaker pho ne or pick
up the handset. Or, to answer a ringing call, lift the handset or press SPEAKER.
To place: Lif t the handset and dial t he extension number or press a station key ( see “Direct stati on
select,” p. D.4).
To hang up: Replace the hand set or press RELEASE or press the station key again or — if using the
speakerphone — press SPEAKER.
Shortcut for either outside or internal calls:
If you press a station key or dial an extension nu m ber, the phone system automaticall y activates
the speak er p hone.
Direct station selection
Programming some of the programmable feature keys (see p. C.1) as station ke ys wi ll provide direct
access to those stations as well as providing lamp information as to their status. T he station keys’
LEDs indicates the status of the st at i on assigned to each key:
If a station key’s LED is . . . The statio n assigned to that k ey is . . .
Unlit Available; cur rently unused
Red; steadi l y lit In use
Red; blin kin g Ringin g from a not her ca ll
Green; steadily lit Connected to you
Green; blinking Ringin g from y our cal l
Amber; ste adily lit In DND mode
(Continued)
D.4
Page 19

User’s Guide ESI Feature Phone operation
To call another station program m ed i nt o one of your station keys:
1. Press an available (unl i t) station key.
2. The called station will sound a short ri ng followed by a d oubl e connect tone.
3. The phone system will act ivate the called st ation’s speakerphone (or the station will ring if that
station’s user has hands-free answer disabled ).
4. To disconnect when finished, do one of the following:
(a.) Replace the handset.
or
(b.) (if in hands-free mode) Press the st at i on key again.
or
(c.) Press SPEAKER (if in hands-free mode).
If you press a key for a station that’s in use (red; steadily lit), you will “camp onto” the station, where its
Feature Phone’s display will tell its user that you’re waiting (see “Call waiting,” page D.7).
If you press a key for a station that’s in DND (amber; st eadily lit), you’ll be forwarded directly to the
person’s mailbox.
Transferring an outside call to another station
Blind transfer
1. While connected to an outside call, press a stat ion key (or pre ss TRANSFER and then dial the
extension num ber).
2. Hang up immediately to perf orm a blind transfer.
Note: If the called person does not answer, the caller will be disconnected after four minutes.
Supervised transfer — announcing the caller to the called person
1. Do not hang up (as in “Blind transfer , ” above); instead, wai t until the call ed person answers.
2. Announce the caller (e. g., “Hello; I have Bill on th e line and I’m transferring him t o you n ow.”)
3. Hang up.
Note: If the t ransferred-to person d oes not an swer in step 1, press the station key again or press FLASH
to be reconnected to the original caller.
D.5
Page 20

ESI Feature Phone operation User’s Guide
Conference calling
Note: On stations with a 12-Key Feature Phone, a programm able feature key m ust be set to 570 in order to
initiate a conference call. For more inf ormation, see pag e E.6.
To create a conference call:
1. Establish the first ca l l .
2. Press CONF t o place the call on hold.
3. Place a second call as you normally would.
4. Once connected to the second call, press CONF again to connect all of you together.
Note: Repeat these steps to add a fourth member t o the conference.
A total of four members can be in c onferences within the system at any one time.
If the newest a dded-on member does not answer, press his/ her station key ag ai n or press FLASH to
return to t he original conferees. If you place any incoming calle r on HOLD or exclusive HOLD ( see
“Hold/exclusive hold operat i on,” page D.8), you can add that caller, as well, to the conf erence by
pressing CONF, retrievi ng the call from hold (or exclusive hold) and pressing CONF again.
Any member of the conference can drop out by simply hanging up. However, when the station that
created the conf erence hangs up, all m em bers in the conferen ce are disconnected. I ndividual stati ons
or lines conne ct ed to the conference can be dropped fro m the conference by press i ng t heir station o r
line key (lit green).
Note: Your installer or Syst em Administrator may have enabled tr unk-to-trunk conferencing (unsupervised
conferencing) for your statio n. If so, the steps to initiating such a conference are the sam e as for
performing any other conference (see abo ve); the differe nce is that you may hang up, thus exiting the
conference, b ut the remaining m em bers won’t be disconnected. (If thi s feature isn’t en abled, your
hanging u p di sco nn e cts al l mem bers.)
Important: USE OF FEATURES, SUCH AS TRUNK-TO-TRUNK TRANSFER, THAT REQUIRE TRUNK-TO-TRUNK CONNECTIONS
WILL INCREASE THE RISK OF TOLL FRAUD. IN NO EVENT SHALL ESTECH SYSTEMS, INC. BE LIABLE FOR ANY
DIRECT, INDIRECT, INCIDENTAL OR CONSEQUENTIAL DAMAGES WHATSOEVER INCLUDING, BUT NOT LIMITED
TO, FRAUDULENT T OLL CHARGES, LOSS O F BUSINESS PROFITS, BUSINESS INTERRUPTIONS, OR ANY OTHER
COSTS OR DAMAGES RELATED THERETO, ARISING FROM THE USE OF THESE FEATURES.
Privacy release
This feature makes it easy to “conf erence-in” on a cal l : j ust press a line key assigned to the out side line
the call is using, and you’ll automatically join the call.
1
1
This feature may not be available on your system, depending on how it has been programmed. If you wish to enable this feature
on your phone system, contact your System Administrator.
D.6
Page 21
User’s Guide ESI Feature Phone operation
Call forwarding
Yu can temporarily call-forward all of your calls to another st ation.
On an ESI phone:
1. Dial 5 6 5.
2. Dial the extension number t o which the system should forward all calls.
Note: If the forwarded-to station is busy or does not answer a forwarded call, the call will be disconnected
If you frequently call-forward your phone, you can program a programmable feature key as a call forwarding
key to automatically turn forwarding on and off. If you always forward to the same extension, you can
program a key with both 5 6 5 and the e xt ension number. (For mo re information, see “Programmable
feature keys, ” p. C.1.) The call f orwarding key will be solid gree n to indicate that it is active.
Call waiting
If you have enabled call waiting for y o ur st at i on (PROG/HELP 3 1) and a second call co m es in while you
are on another, you’ll hear a tone in your earpiece and the bottom line of yo ur display will indicate that a
second call is waiting. You can ignore the call waiting an d it will be either disconnected or t ransferred to
a destination set by the Install er.
To toggle between the two calls on a 24-K ey Feature Phone, pres s FLASH. To drop either call, press
RELEASE while connected to the call to be dropped: this disconnect s t he call and automati cal ly reconnects you to the other call.
On a 12-Key Featu re P hone, press the hoo k swi tch quickly to toggle between two calls (FLASH), or
hold the hook switch down to release the call (RELEASE).
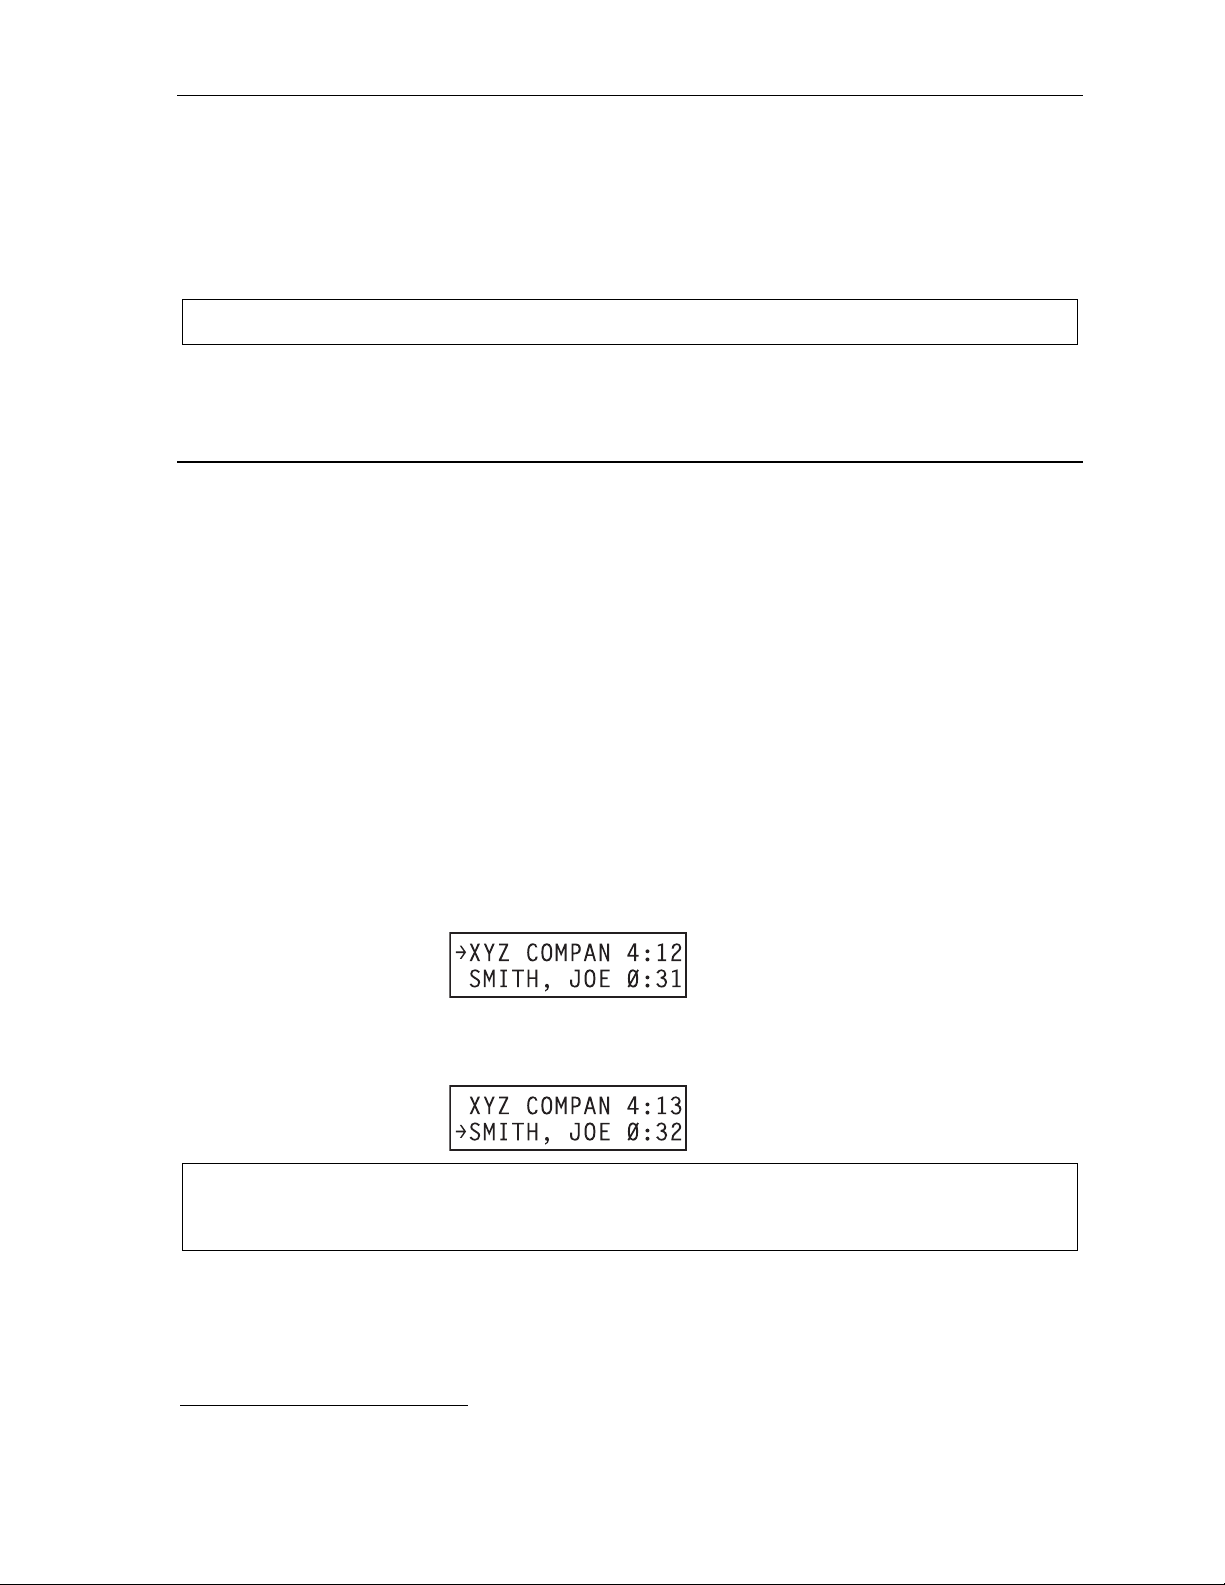
Call waiting display
Be sure to check the display when you’re using call waiting. Initially, the first line shows the name or number
of you r ori gi na l c all (d ep e ndi ng o n ho w th e ca ll wa s cr ea ted ) an d th e c al l du rat i on. T he se co nd lin e s how s
the name or number of the call waiting along with the duration of that call. The arrow on the display will
move between the first and second lines, indicating to which call you are connected.
1. You’re connected to XYZ Company, when you hear a beep and see that Joe Smith is calling:
24-Key
Feature
Phone
(In t hi s example, Joe’s call is being transferred to you; it’s been in the system f or 31 seconds.)
2. You press FLASH and are connected t o Joe. Note how the arrow moves to indicate the change
of connectio n:
24-Key
Feature
Phone
Note: If Caller ID is not used, the Line number will appear instead of the caller’s name or number. If Caller ID
is used, in some instances the local telephone service provider will only show a general caller status
such as Unavailable, Private, or No Data Sent.
1
Here’s an example:
1
A 12-Key Feature Phone will show only the first caller. Even if you hang up from the first call, the second call’s Caller ID
information will not appear.
D.7
Page 22

ESI Feature Phone operation User’s Guide
(
g)
Station-to-station call waiting
You can call, or transfer a call t o, another station that is in use (as indicated by the fact that its station
key, if one exists for it on your E S I Feature Phone, is glowing red). This ge nerates a call waiti ng tone in
the other stat i on’s earpiece and puts a call waiting i ndication on the bott om l ine of that station’s display ,
as explained in “Call waitin g display” (above). If the person i gnores the call waiting, your call or the
transferred call will be di sconnected after four minutes.
Background announce fea tur e
During call wai ting, you can also make a brief, pri vate background announcement1 to the station's
earpiece (if i t s user has enabled the background announce feature; see “S t ation options,” page C.3).
A background an nounce key must have bee n programmed at your stat ion by programming code 5 6 9
at a programmable feature key ( see page C.1).
1. During call waiting (as described previously), press and hold the programmed announce key to speak;
the key will glow green if background announce is permitted or red if it isn’t permitted. The called station
will hear your voice o ver the outside person’s voice. The outside cal l er, however, can’t hear you.
The called person can respond by pr essing FLASH, which place s t he original call on hold.
2. Release the key when you are f i nished speaking.
Note: The bac kground a nnounce f eature works only between ESI Feature Phones2 — and only if (a.) the
calle d pers on h as all o we d call wait i n g and bac kgr ou n d ann ou nce and (b.) t he called person is using
his/her handset. The background announce key will be green (if these conditions are met), indicating
that a background announce can be m ade.
Hold/exclusive hold operation
The difference between hold and exclusive hold
Your ESI Feat ure Phone lets you put a call on either hold or e xclusive hold. Each puts a call into a
standby mode, but here’s the difference between the two:
• Hold
• Exclusive hold
Hold
To place a c a ll on hold
While on an outside call, press HOLD to place the call on hold. The HOLD ke y LE D wi ll light solid red
on your ESI Feature Phone and will bli nk red on all othe r phones. Also, your E S I Feature Phone’s
display will show the quant it y, and numerical line identifications, of the calls cu rre ntly on hold throughout
your ESI phone s ystem :
3
allows anyone on the ESI phone system to retrie ve the call. Users con nected to outside calls
can press HOLD to place t he call on hold. The sy stem i dentifies held calls as being in numeri cally
identified lines — e.g., “Line One,” “Line Four,” etc.
For example, if you need to transf er a call to anothe r st ation and know the person is in the building
but not at his/her desk, you might page him/her to pi ck up a “call on Line One.”
4
keeps the call only at the station where the user pressed HOLD.
Oldest (and Newest Calls
recalling) holding
12-Key
Feature
Phone
Oldest
and recallin
24-Key
Feature
Phone
Newest
1
Not available on the 12-Key Feature Phone
2
I.e., non-ESI analog phones on the system can neither send nor receive background announcements.
3
On previous ESI systems, this feature was called park.
4
On previous ESI systems, this feature was called just hold.
D.8
Page 23

User’s Guide ESI Feature Phone operation
To retrieve a held call
To retrieve a held call from the same ESI Feature Phone where it was put on hold, press HOLD a ga i n and
dial the appropriate line number (using the display for reference).
To retrieve a held call from any idle E SI Feature Phone on the system, press HOLD and dial the
appropriate li ne number.
Note: If your phone has any line keys programmed (see p. C.1), each will blink red wh en a call is on hold on
its li nes; in such cases, just press that line key to retrieve the held call.
After you press HOLD, the display will help you choose the line number to retrieve: the top row will
show how many cal l s are on hold and the second row will show al l held calls in the system. Newly held
calls are adde d f rom t he right side of the second row.
Note: If more calls are on hold than the display can show, each side of the display’s second row will show an
arrow, indicat ing that more lines have c alls on hold. Press the corresponding scroll key (either to
scroll to the left or to scroll to the right) to view the other li ne num ber s where calls ar e hol di ng.
A call that is not retrieved from hold within four minutes will be disconnected.
Exclusive hold
To place a call on exclusive hold
To place an outside call on exclusi ve hold on an ESI Feature Phone, press HOLD fo r at l east one
second. The display will b rief ly appear as follows . . .
12-Key
Feature
Phone
. . . and then retur n to its normal state. This exclusive hold will caus e the HOLD key to light solid red on
just that Feature Phone (i.e., where t he key was pressed ) and none other in the sy st em .
24-Key
Feature
Phone
To retrieve a call from exclusive hold
To reconnect to a call from the ESI F eat ure Phone where the call was placed on exclusive hold, you
may do any of the following:
(a.) From a phone i dl e state, press HOLD f or at least one full second.
(b.) Press the blinking programmable feature key (see p. C. 1) that you know is p re-programmed for
that outsid e l i ne. This will reconnect you immediat el y t o the call.
(c.) Press HOLD briefly and dial the appropriate outside line number. Only the ESI Feature Phone
where the call was placed on exclusive hold will display an “E” next to the line (identified by
number) on whic h the call is holdin g. (That line numbe r won’t appear on the hold display on any
other ESI Feature Phone, because no ot her Feature Phone can retrieve that c a ll .) In the example
below, the Feature Phone has a call on exclusive hold on l i ne 9.
12-Key
Feature
Phone
24-Key
Feature
Phone
D.9
Page 24

ESI Feature Phone operation User’s Guide
Paging
Your ESI phone system can be programmed to allow paging through an overhead paging system and/or
paging throu gh some or all of the system ’s Feature Phone speakers.
Overhead pagi ng
Station number 199 is d esi g nat e d as th e ov erhead paging port. If th e ESI p h one system h a s b een
connected to an overhead paging system, you can page by dialing 1 9 9 and making your announcement
after the tones. If you frequently page, assign 1 9 9 to a program m ab le f e at ure k e y (s ee pa ge C.1 ) .
Paging through phones
Press PAGE to page through all of the ESI Feature Phone speak ers. The Installe r m ay have added an
overhead page sy st em t o the page zone.
Note: Phones in use or in do-not-disturb mode will not carry a page through their speakers.
To page for pickup of an out s ide call
To page someone to pick up an outside call:
1. Place the call on hold b y pr essing HOLD.
2. Verify the line numbe r from the display.
3. Page the person and announ ce t he hold location f or retrieval. Fo r example:
“Sarah, you h ave a call on Line Two — Sarah, Line Two, please.”
Call pickup
From your station, you can answer a call ringing at another station by pressing and then either dia li ng
the extensio n or (if the destinat i on is programmed int o one of your keys; see “Programmable feature
keys,” p. C.1) pressing the station key for the ringing station.
During night mode
ringing outside call.
1
, i f a night bell is in u se inste ad of the night greeti ng, press PICK UP 0 to access the
Optional feature
Operator station
If your stati on has been designated as the operator station, you will al so rec eiv e ca lls w hen a caller
dials 0 the f rom a st at ion.
As the operator, you may be responsi bl e to manually change t he day/night mode
you must program a programmable feature key to perform this (initial ly, the upper left key will be the
day/night mode K ey). Each time the key is pressed the di splay will change: DAY or NG T. If you select
DAY (day mode) or NGT (night mode), the system will operate i n t he selected mode unti l you manually
change it agai n.
1
of the system; if so,
1
For more information, consult your System Administrator.
D.10
Page 25

User’s Guide Special keys
Special keys
FLASH, REDIAL, RELEASE
FLASH
The FLASH key se rves sever a l p urposes:
• Getting a fresh dial tone without replacing the handset — When connected to an outside line, press
FLASH to automatically disconnect and receive fresh outside dial tone. (See also “RELEASE,” below.)
1
• Sending a flash hook signal — If operating behind Centrex
flash hook signal automatically to either the phone company’s central office or the ho st PBX. Either
may use this signal to provide yo u wi t h additional feat ures.
• Toggling between calls — If you hear a call waiting tone whil e on a call, press FLASH to toggle
between the t wo c al l s.
REDIAL
The REDIAL key allows you to autom atically call a stored name and number.
or a PBX, press FLASH to transmit a
To redial the last number called, press REDIAL e i t her when your stat i on is idle or afte r you first lift the
handset or press SPEAKER.
2
RELEASE
The RELEASE key serves several purposes:
• If pressed when connected to a call t hrough the handset, it disconnects the call and gives yo u
internal dial t one.
• If pressed when you’re connected to a call via the spe akerphone, it disconnects the call.
• If pressed during call waiting, it drops the current call an d automatically con nects to the waiti ng c a ll .
Note: The hookswitch also act s as a com bi nat i on FLASH/RELEASE key (and is the only way to perform
these fun ctions on a 12-K ey Feature Phone, whi ch ha s nei t her a FLASH key nor a RELEASE key).
T o send a flash hook signal, quickly press the hoo kswitch once.
To release (disconnect), hold down the hookswitch for one second.
Esi-Dex
Esi-Dex3 (“ea sy Dex ”) i s a po we rf ul fe at u re t hat le t s you a cce s s an d a uto -d ia l st o r ed nam e s an d num be r s.
You may access name s and numbers from as man y as four different Dexes (i.e., inde xes ):
Dex Source
Personal Dex Names you’ ve stored for yo ur us e (s ee “Ad di ng nam e s to yo ur Per so nal Dex, ” E.2)
Statio n Dex All statio n names programmed by the Installer
System Dex4 All syst em sp eed-dial name s set up by th e Syst em Adm ini st ra t or
1
A special service your phone company may offer. See your System Administrator for further details.
2
Not available on 12-Key Feature Phone.
3
Not available on 12-Key Feature Phone.
4
The Sy stem Dex is available only if the S ystem Administrator has program med system-wide speed-dial numbers.
E.1
Page 26
Special keys User’s Guide
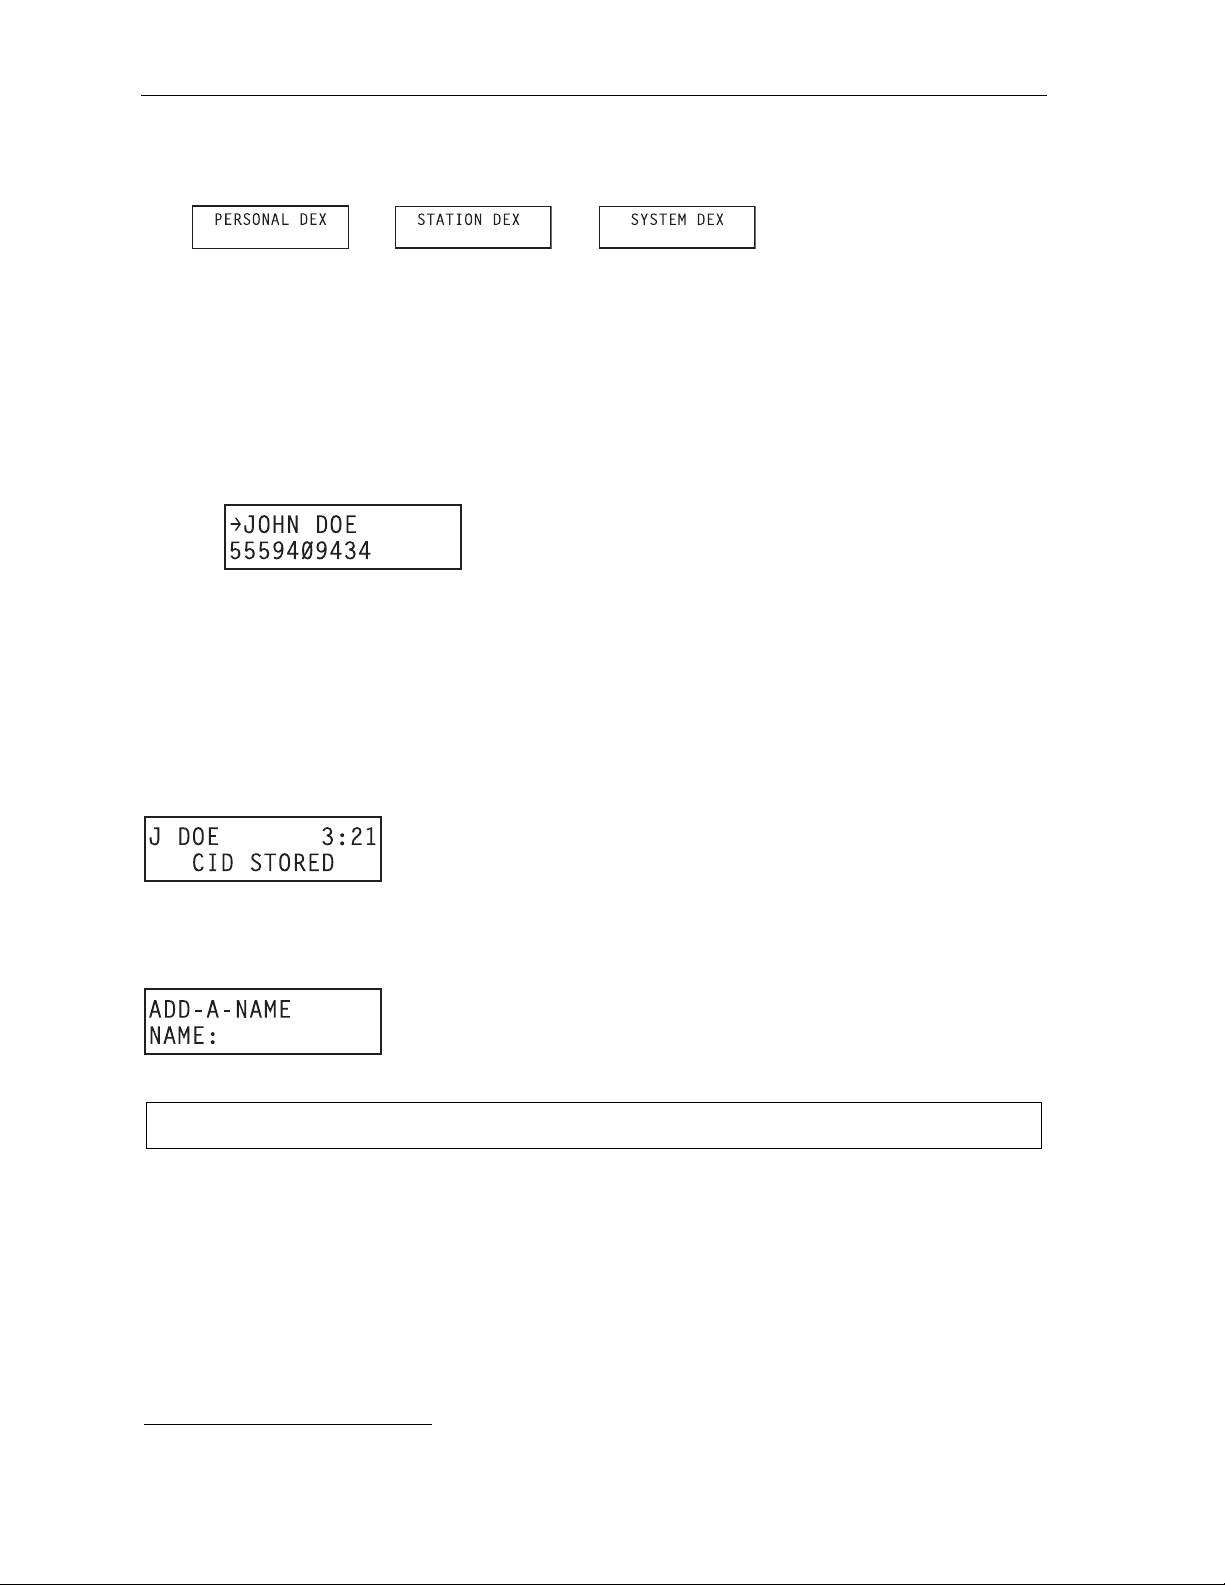
Auto-dialing using Esi- Dex
1. While your station is i dle (or just af t er receiving dia l t one), repeatedl y press ESI-DEX to select the
desired Dex:
2. Choose the desired name f rom t he selected Dex, us ing one of two methods.
Either:
(a.) Scroll — Press the scroll key s (
the name (names will appear in the order in which they were stored in t he Dex).
. . . Or . . .
(b.) Dial-by-name — Dial up to t he f irst three char act ers
mailbox name. F or example: if you wa nt to call John Do e, di al 5 6 4 (because it spells J O H).
You’ll begin to see names that begin with those lett ers. You can then use the scroll keys (
and
) until you fi nd t he desired name and num ber.
and ) to look up an d down t hrough the Dex until you find
1
of the extension, department, or guest
3. Press ESI-DEX again to dial the number.
Adding names to y o ur P er sona l D ex
You can add names t o your Personal Dex by usi ng either the Caller ID method or the manual method.
Caller ID method
Whenever a Caller ID name appears on y our phone’s displa y while you’re talk i ng on an incoming call or
retrievi ng a m essage, press ESI-DEX to automatically store the name and num ber in your Personal
Dex. The display confirms:
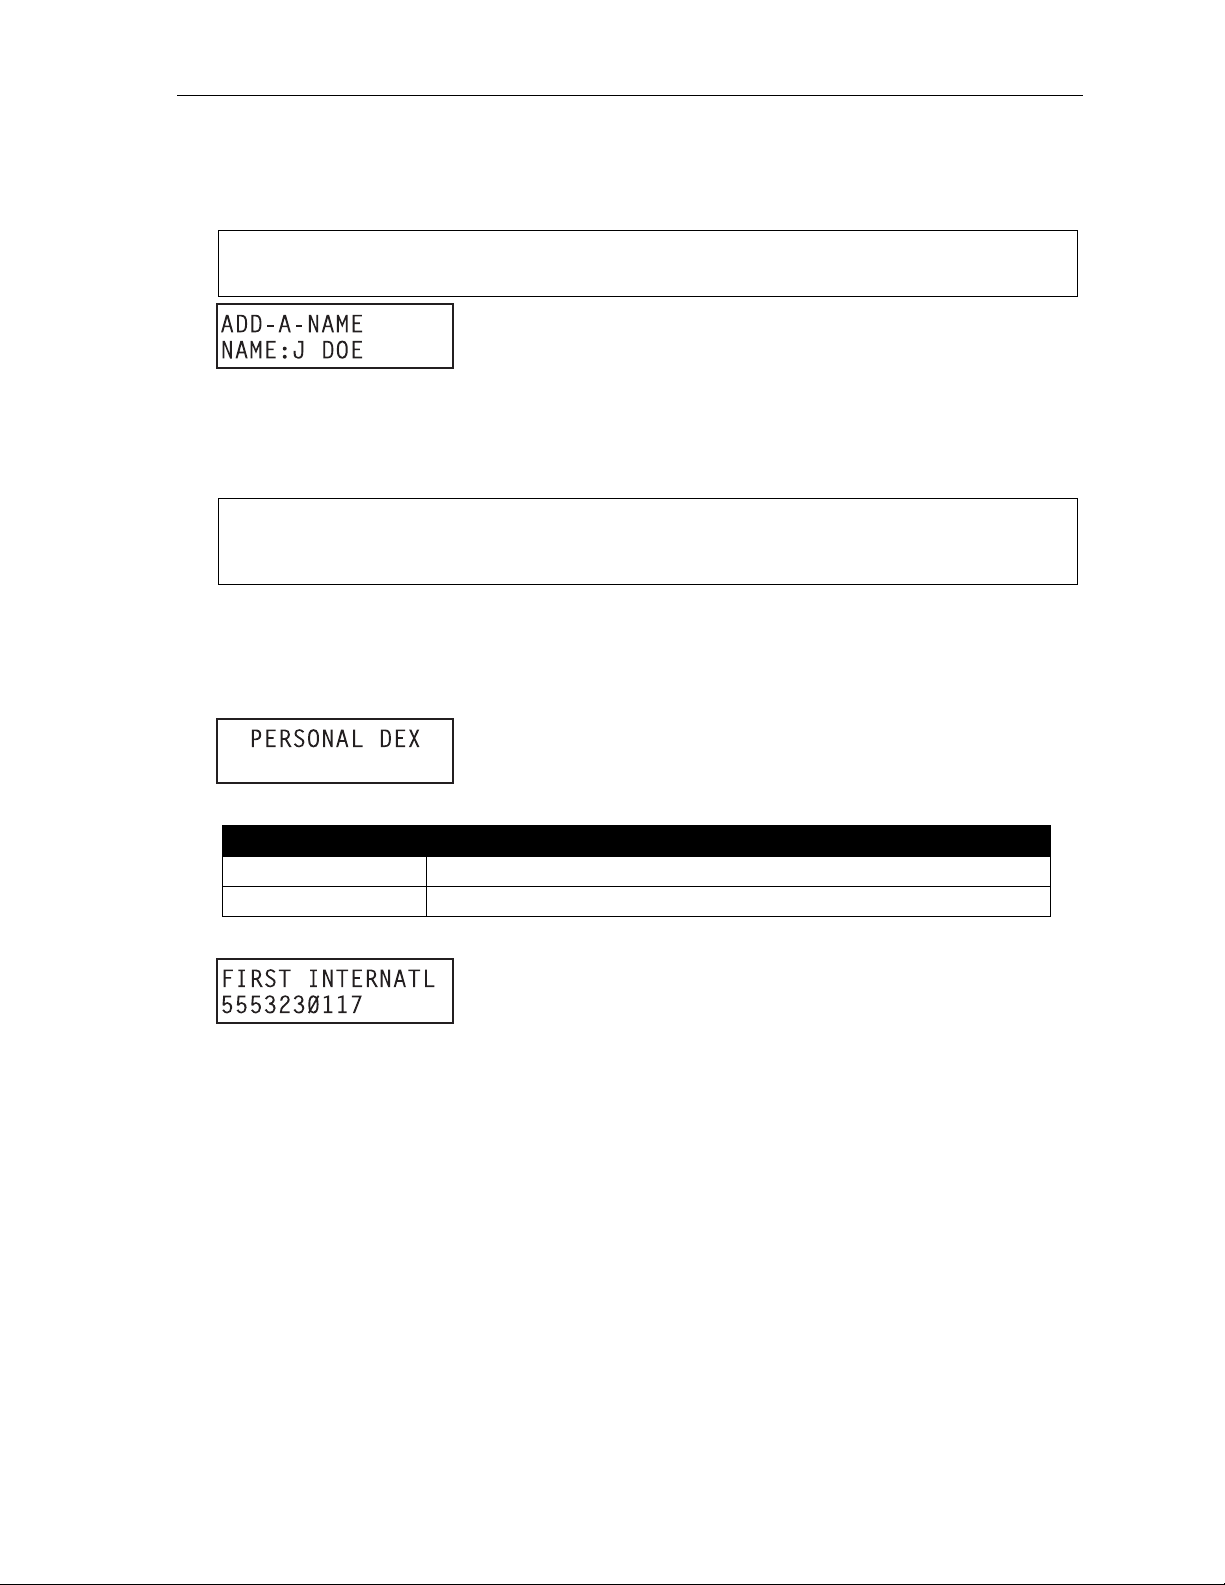
Manual method
While your st at i on is idle, press ESI-DEX until prom pt ed to “ADD-A-NA M E ” . . .
. . . and then ent er the name and the number as prompted.
Note: If needed, press PROG/HELP for assistance.
(Continued)
1
You can also dial just one or two characters, and then press # to enter.
E.2
Page 27
User’s Guide Special keys
1. To enter each character f or the name, press the di al pad key that includes the desired character.
The key’s possible character entries will change each time you press the key.
2. When the desired character appears, press # to confirm its entry. The cursor will move to the next
character position. Use and (the scroll keys) t o back up or to insert a space.
Example: To enter a B, press 2 twice (the possible options through which to scroll are A, B, C an d 2).
When B appear s, pres s # to confirm and move to the next entry.
3. Repeat steps 1–2 until t he nam e is complete. T he nam e m ay contain up to 15 charact ers (a space
is a character, too).
4. Press # again when finished entering the name.
5. Now, enter the number — including t he line access cod e 9 (or 8 or 7).
Note: Use the scroll ke y to e nter sp eci al c haracters; u se the s croll key to backspace. You also can
use the scroll keys to view the n umber afte r it’s saved. To change the number, you must delete i t
and then re-enter it as d esired.
6. Press # to confirm t he entry.
Deleting nam es fr om your P ers onal D ex
1. While your station is i dle (or just af t er receiving dia l t one), repeatedl y press ESI-DEX to select the
Personal De x:
2. Choose the desired name f rom t he selected Dex, us ing one of the two following methods:
Press repeatedly ... To ...
or (scroll keys)
(A dialpad key) Scroll through only the names t hat correspond to the three letter s on the ke y
Scroll throug h all names in the li st from the beginning or end
3. When the desired name and numb er appears . . .
. . . delete the entry by pre ssing either HOLD.
E.3
Page 28

Special keys User’s Guide
Using Esi-Dex: An example
Let’s say you’ re on a call with the X Y Z Com pany — XYZ COMPANY appears on your display — and
you wish to sav e the name and number for f uture use. Just pr ess ESI-DEX. Your display will confirm
that the inform ation has been stored.
described bel ow for the 24-Key ES I Feature Phone.
1. Press ESI-DEX until you see PERSONAL DEX on the display.
1
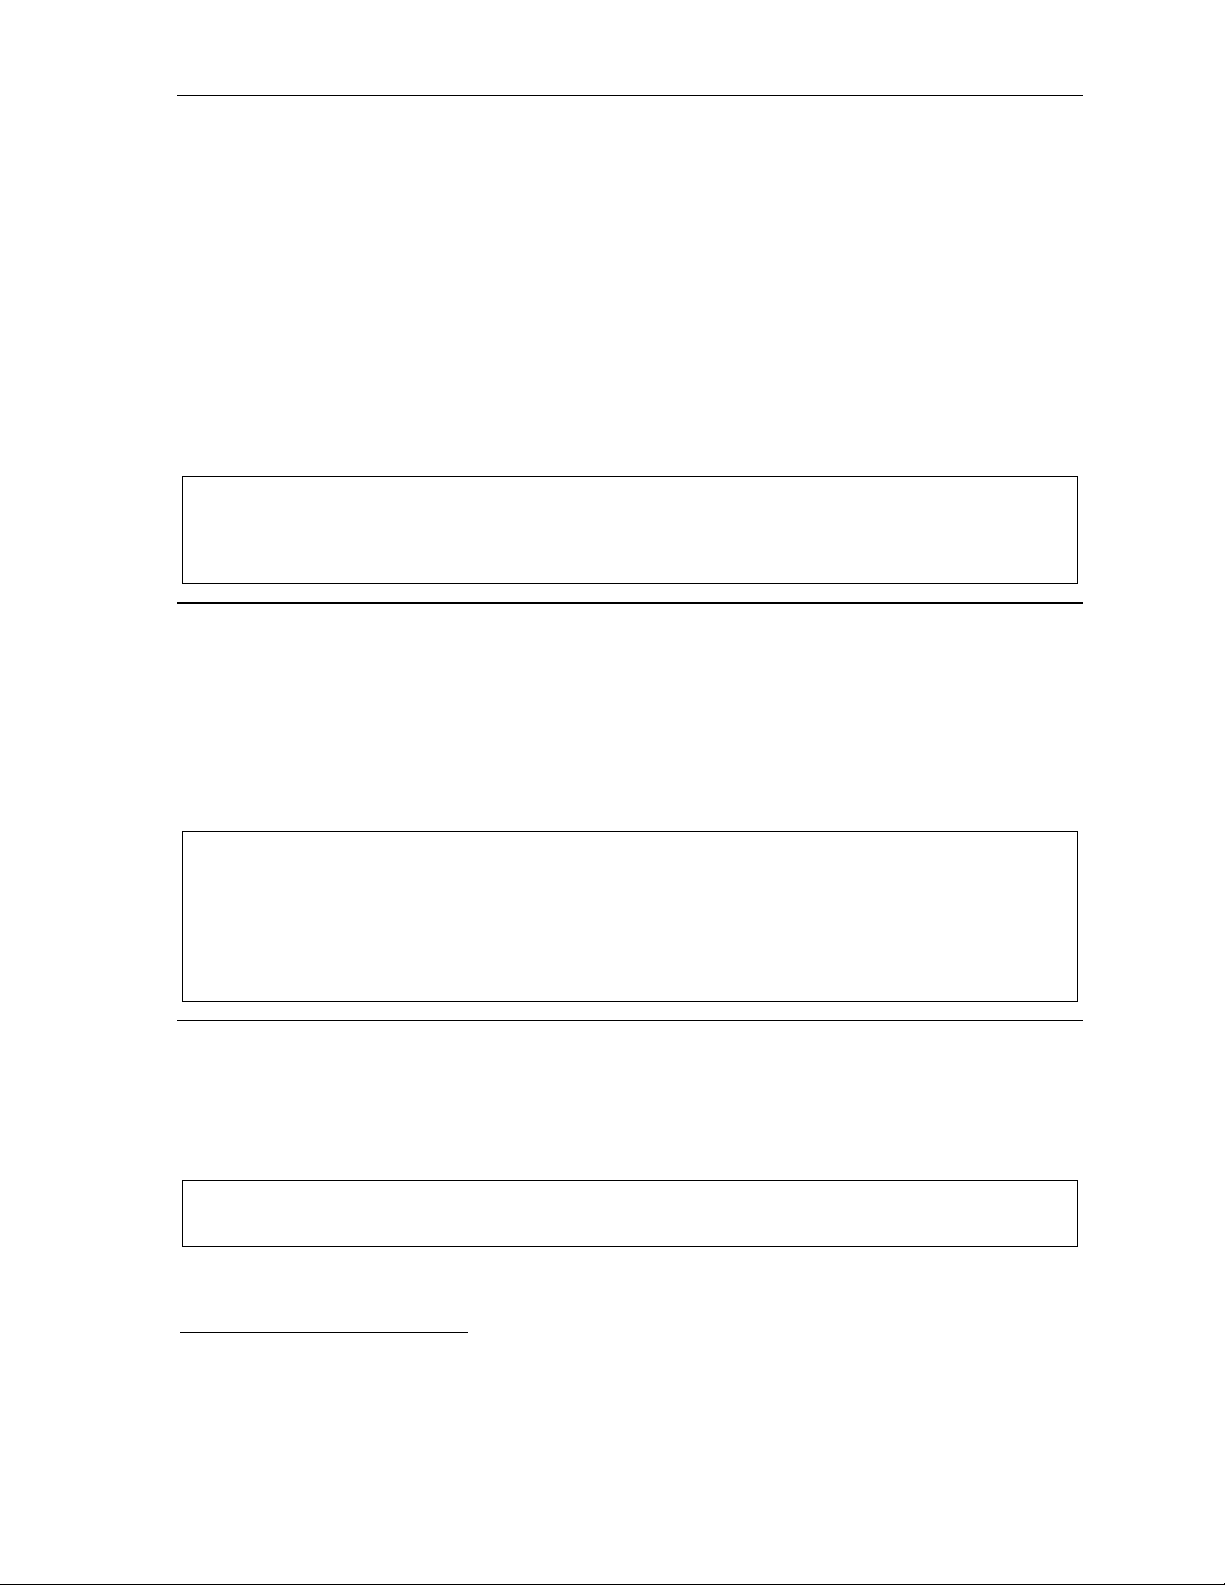
Then, to call the XYZ Company in the future, use Esi-De x as
2. Enter 9 2 5 (W A L). The display will show the fir st st ored name that starts with the ch aracter range
from WAJ to YCL.
3. Press the scroll keys (
and ) until XYZ COMPANY appears in the display.
4. Press ESI-DEX again. This dials t he num ber for the XYZ Com pany.
Important: The num ber dialed ( if stored from a Caller ID ) will b e the numb er for the actual line used by the
caller, and may be different than the caller’s listed number. Additionally, some local calls may not
be auto-dialed correctly , depending on the limitatio ns of your area’s local dialing plan. You may
wish to create a manual li sting for these. Consult your Administrat or if you need furt her
assistance.
System speed-dialing with Esi-Dex
If your admini strator has program m ed system speed-dial numbers, you can acces s one of these
numbers either via Esi-Dex, a s explained in the f oregoing discussi on, or auto-dial it by dialing its
corresponding three-digit access number (in the range 600–699).
Example: If an out-of -town factory lo cation has been programmed as system speed-dial acce ss number 605,
you ca n lift the handset, receive internal dial tone, dial 6 0 5 and this will automatically dial the
factory’s number. Y ou m ay also program 605 (in this example) as a programmable feature key (see
page C.1).
1
If the number is already in your Personal Dex, the message ALREADY STORED will appear on the display. This indicates
Esi-Dex has prevented storing the same number multiple times.
E.4
Page 29
User’s Guide Special keys
Override ring
The override ring feat ure1 lets you place a call — st at i on-to-station or outside line — when another ca ll
is ringing.
Placing a ca ll us ing the ov er r ide r ing fea tur e
First, program a feature key2 to be an override ring key — by assigning to it the fun cti on code 5 8 0.
Then, to bypas s an incoming station or l ine call:
1. Before you begin the call, pres s t he override ri ng key you programmed. Wh en you do this,
don’t take the hand set off-hook and don’t press either a pre-a ssigned headset key (see E.7), a
preprogrammed l i ne key or SPEAKER
2. Once you receive dial ton e, pick up the handset and proceed with your call as you normall y would.
The incoming c al l will be disconne ct ed or rerouted to the forwarding destination your I nst aller or
System Administ ra tor has set for your st ation.
Notes: Any other feature keys not mentioned in this section will neither answer a call nor initiate the override
ring feature.
Use of the override ring key also overrides any outside dial tone preference (see page E.5) that may
have bee n set for your st ati on.
1
.
3
Headset operation
You can use a headset4 with your ESI Feature Phone. You must program one of your programmable
feature keys t o be a h eadset key
1
(see “Other feature keys,” page C.2) that you’ll use to connect to or
disconnect from a call. The key will blink green when a call is ringing and glow green when connected. If
you have a headset connected and the ph one is off-hook, pressing the scroll keys (
and ) will
adjust the headset volume. A f ter you initiate or answer a call using th e headset key, l i f ting the phone’s
handset automati cally takes you out of headset mode. To swit ch back to headset mode whil e on a call,
press the head set key again and then place t he phone’s handset on-hoo k.
Notes: On a Generat ion I system,5 you must have a headset k ey1 programm ed as on e of your pr o gra mma bl e
feature keys (see “Other feature keys,” page C.2) that you’ll us e to conne ct or disconnect from a call .
The key will blink green when a call is ringing and glow gr e en whe n conn e cte d. Y ou tur n heads et
mode on or off in user programming (PROGRAM 3 3). If you turn off headset mode while the headset
key is glowing green (i.e., in use), the phone will sta y off-hook until you again turn on h eadset mode.
If a headset key is programmed, t he phone handset must be in the cradle for proper headset operation.
Outside dial tone preference
If you make mostl y outside calls, you m ay f ind this settin g hel pful. It tells your station to connect
automatical ly t o an available outs i de l i ne; i.e., you don’t have to di al 9 (or 8 or 7) before the phone
number. Therefore, when you lift the handset or press SPEAKER
outside dial t one from the highe st -numbered line avai l able to you.
Note: T o place an internal call whi le in this mode, press the appropriate stat ion key or (a.) press TRANSFER
to switch to internal dial tone and (b.) then dial the extension num ber.
1
, you will i m m ediately receive a n
6
1
Not available on the 12-Key Feature Phone.
2
See “Programmable f eature keys,” page C.1, for full details.
3
The override ring feature has no effect on calls ringing in from a hold recall or a queued line.
4
Not all headsets are compatible with your ESI Feature Phone; contact your ESI Reseller for a list of compatible models.
5
If unsure which system you have, consult your System Administrator.
6
This aspect (i.e., that it’s always the highest line available to you) can’t be changed.
E.5
Page 30
Special keys User’s Guide
Line keys
If some of your programmable featu re keys have been prog ram m ed as line keys (or you can program
line keys using PROG/HELP 2), press an unli t key to access the line. An outside call transferred to your
station can be answered by simply lif ting the handset o r pressing SPEAKER
the line key. The LED indication s f or the line keys a re:
LED Line status
Solid red In use
Solid green Connected to your station
Blinking red Ringin g at another stati o n
Blinki ng gre en Ringin g at your stat i on
Slowly bl inking red On hold by another station
Slowly bl inking green Held by you
Note: Dialing 9 (or 8 or 7) to be assigned a line automatically is always available.
Privacy release
This feature makes it easy to “conf erence-in” on a cal l : j ust press a line key assigned to the out side line
the call is using, and you’ll automatically join the call.
2
1
. Y ou do not have to press
Optional features
The followi ng optional features may be accessible from your stat ion. See the Adm i ni st rator for details.
In many of the cases you can dial the appropriate feat ure code (one that starts with 5) to activate or use
the feature. I n some instances, you must use a programm abl e f eature key to serve a s an on/ off key for
the feature (see “Programmable f eat ure keys,” page C.1).
• Other feature key s — I f you ent er one of the following feature codes, the programmable feature key
will serve as an enable/disable key for that feature. The Installer may have programmed certain
stations fo r accessing additional feature s; consult your System Administrator for your access.
Code(s)
199 Overhead page
564 Headset
565 Call forward
565YYY Call forward to an ext ension
569 Background announce
570 Conference
578 Mute/DND
580 Override ring
Note: Gray-shaded items are the only key codes av ail able for the 12- Ke y Feat ure Ph on e.
Key usage
1
Not available on 12-Key Feature Phone.
2
This feature may not be available on your system, depending on how it has been programmed. If you wish to enable this feature
on your phone system, contact your System Administrator.
E.6
Page 31

User’s Guide Special keys
Headset key (Code 564)
This key provides for easy conne ct i ng t o/disconnecting from calls when operating in headset m ode (see
“Headset operation,” page E.5). Press the key to receive dial tone o r to answer a ringing call . Press the
key again or pres s RELEASE to di sc onnect from the call .
Call-forward key (Code 565 or 565XXX)
If you frequently call-fo rward your phone ( see “Call forwa rdi ng,” page D.7), you can program a
programmable feature key as a call forwarding ke y to automaticall y tu rn f orwarding on and off. If you
always forward to the same extension, you can program a key with both 5 6 5 and the ext en si on n um ber .
Background announce key (Co de 569)
During call wai ting, you can also make a brief, pri vate background announcement (see “Background
announce feat ure,” page D.8) to the station's ear pi ece (if the station user has enabled the background
announce feat ure). Hold down the ke y unt i l you hear a beep, t hen begin talking; rel ease the key
when finishe d.
Override ring (Code 580)
The override ring feat ure lets you place a call — st at i on-to-station, outside line — or leave a voice
message when another ca l l i s ringing. For full details on use of t his feature, see “Ov e rride ring,”
page E.5.
E.7
Page 32

Special keys User’s Guide
(This page included for pagination purposes only.)
E.8
Page 33

User’s Guide Analog stations
Analog station s
If your stat ion has been installed as an analog station , it will be able to use only a standard-type
telephone. B ecause the phone isn’t digitally integrated to t he phone system (like the ES I Feature
Phones), its operat ion and capabilities will be different.
Tip: To use a cordless phone in conjunction with an ESI Feature Phon e, program a program mable fe ature key
(5 6 5) t o easily forward calls to the cordless phone when out of your office.
FLASH
A flash-hook, or FLASH — a momentary bre ak in the connection — is r equired to perform m any of the
station oper ations below. You can generate a FLASH by m om entarily depressin g t he hook switch (or , if
your phone is so equipped, press t he sp ecial key on your phone).
Caller ID
1
If you subscribe to Caller ID from your telephone service provider , the Caller ID display will show an
outside call er’s name and/or number.
2
In some instance s, the service prov i der can send only a general
caller status — such as UNAVAILABLE, PRIVATE, or NO DATA SENT.
On internal station-to-station calls, the Caller ID display will show the extension number as the calling
number, and t he stat ion name as the caller’s name. On E si-Link calls, the Caller ID disp lay will show the
location number and extension as the calling number, and the remote locati on’s station nam e and “short
3
name”
as the calle r’ s name.
Note: Caller ID will not display with call-waiting.
Placing calls
When you first l i f t the handset you will hear internal dial tone. Dial 9 (o r 8 or 7) to access an outside l i ne
and dial the number. To place an internal call, simply dial the extension number.
Transferring outside calls
While connected to an outside call, FLASH and dial the extension number. Hang up immediately t o
perform a blind transfer , wai t until the called pe rson answers, anno unce the caller and then hang up. If
the transferred-to person does not answer, FLASH to be reconnected to the original call er.
Call forwarding
Your stati on has been pre-prog ramm ed by t he Installer to call-forward your phone to the mailbox when
your statio n i s busy or does not an swer. In addition you can temporarily call-forwa rd al l of your calls to
another stati on.
Lift the hand set , di al 5 6 5 and dial the exte nsion number (or # and t he m ai l box number) to whi ch t he
system sh ould fo rward all cal ls.
Note: If the forward ed-to station is b usy or does not answer a forwarded call, the ESI phone system wil l return
the call to the mailbox.
To turn of f call forwarding, di al 5 6 5 * without selecting a destinati on, and hang up.
1
If you're not sure about the installation of your station, contact your System Administrator.
2
If you don’t subscribe to Caller ID, the display will show (instead of the caller’s name or number) which line is receiving the call.
3
For example, the Installer might have programmed “DAL” as the short name for a remote location in Dallas.
F.1
Page 34

Analog stations User’s Guide
Call waiting
If you have enabl ed call waiting for your station ( XXX 5 3, where xxx represents your extens ion
number), you will hear a tone in your earpiece. FLAS H t o toggle between the original call and the call
waiting. To drop either call, hang up while connected to the call to be dropped. When your phone rings,
lift the handset and you will be reconnected to the other caller.
Call hold
This is used t o pl ace callers on hold f or retrieval from any station w i t hi n t he ESI phone system.
Putting a c a ll on hold
While on an outside call, FLASH and dial . A short voice prompt will tell which line number the
call is using; you will th en receive internal dial tone.
Retri e v ing a call from on hol d
From internal di al tone, dial and the line number where the call is on h ol d.
Dial
Hold recall
If a held call is not retrieved during the period of time (set by the I nsta ller), it will recall to your phone if
your station is idle. You will hear three short ring t ones. Lift the hands et; you will be connected to the
held call.
0 to answer the o l dest held call in th e system.
If you are on a call when t he recall occurs, you will hear a call wait ing t one. To toggle betwe en the two
calls, FLASH (or hang up, wait for ring, then answer). If a call plac ed on hold is not ret ri eved it will either
be disconnected or follow fo rwarding set by the I nstaller or Administrator .
Paging
This function allows for paging through an overhe ad paging system and/or designated available
telephone speakers.
Press # to access all available stations.
Note: A page will not be sent to t he speakers of pho nes in us e.
Tip: To page for pick up of an outside call, put the caller on hold by dialing . A voice prompt will
indicate the line number. Then page the person and announce the line number for retrieval. For
example: “John, y ou hav e a cal l on lin e 1. John, pic k up li ne 1, ple as e.”
Overhead pagi ng
Station number 199 is d esi g nat e d as th e ov erhead paging port. If th e ESI p h one system h a s b een
connected to an overhead paging system, you can page by dialing 1 9 9 and making your announcement
after the tones.
Call pick-up
A call ringing at another station can be picked-up by pressing and dialing the extension number.
Dialing
0 will answer the longest ringing outside call.
F.2
Page 35

Index
/▲ keys. See Volume/scroll keys
12-Key Feature Phone, A.3
24-Key Feature Phone, A.2
Attendant operation, D.10
Background announce, D.8
Background announce key, E.7
Basic phone use, D.4
Blind transfer, D.5
Call forward key, E.7
Call forwarding, D.7
Call pick-up, D.10
Call waiting, D.7
Background announce, D.8
Station-to-station, D.8
Caller ID, D.1
Analog stations, F.1
Conference calling, D.6
Dial tone, D.3
Preference, E.5
Direct station select, D.4
DSS. See Direct station select
Esi-Dex, E.1
Personal Dex
Adding names, E.2
Deleting names, E.3
System speed dialing, E.4
Exclusive hold. See Hold
Fixed feature keys, D.2
FLASH key, E.1
Hands-free answer, D.3
Headset key, E.7, F.1
Headset operation, E.5
Hold, D.8
Difference between hold and exclusive hold, D.8
Exclusive hold, D.9
Retrieving a call, D.9
Retrieving a held call, D.9
Internal calls, D.4
LEDs, D.2
Line keys, E.6
Messa ge light. See Status indicator lamp
MUTE/DND key, D.3
Operator station, D.10
Optional features, E.6
Outside calls, D.4
Blind transfer, D.5
Supervised transfer, D.5
Transferring, D.5
Outside dial tone preference. See Dial tone
Paging, internal, D.10
Overhead paging port (199), D.10, F.2
Paging through phones, D.10
Personal Dex. See Esi-Dex
Phone use
Basic, D.4
Programmable feature keys, C.1, D.2
REDIAL key, E.1
RELEASE ke y, E.1
Ring tone, C.3
Ring volume, C.3
Scroll keys. See V o lume/scroll keys
SPEAKER key , D.2
Speed-dial keys, C.2
Station keys, C.2
Station options, C.3
Station audibles, C.3
Ring tone, C.3
Ring volume, C.3
Status indicator lamp, D.1
Supervised transfer, D.5
Transferring an outside call, D.5
User programming
Exiting programming mode, C.1
Programmable feature keys, C.1
Volume/scroll keys, D.3
Special characters, C.2
Page 36

www.esi-estech.com
 Loading...