

Page 1
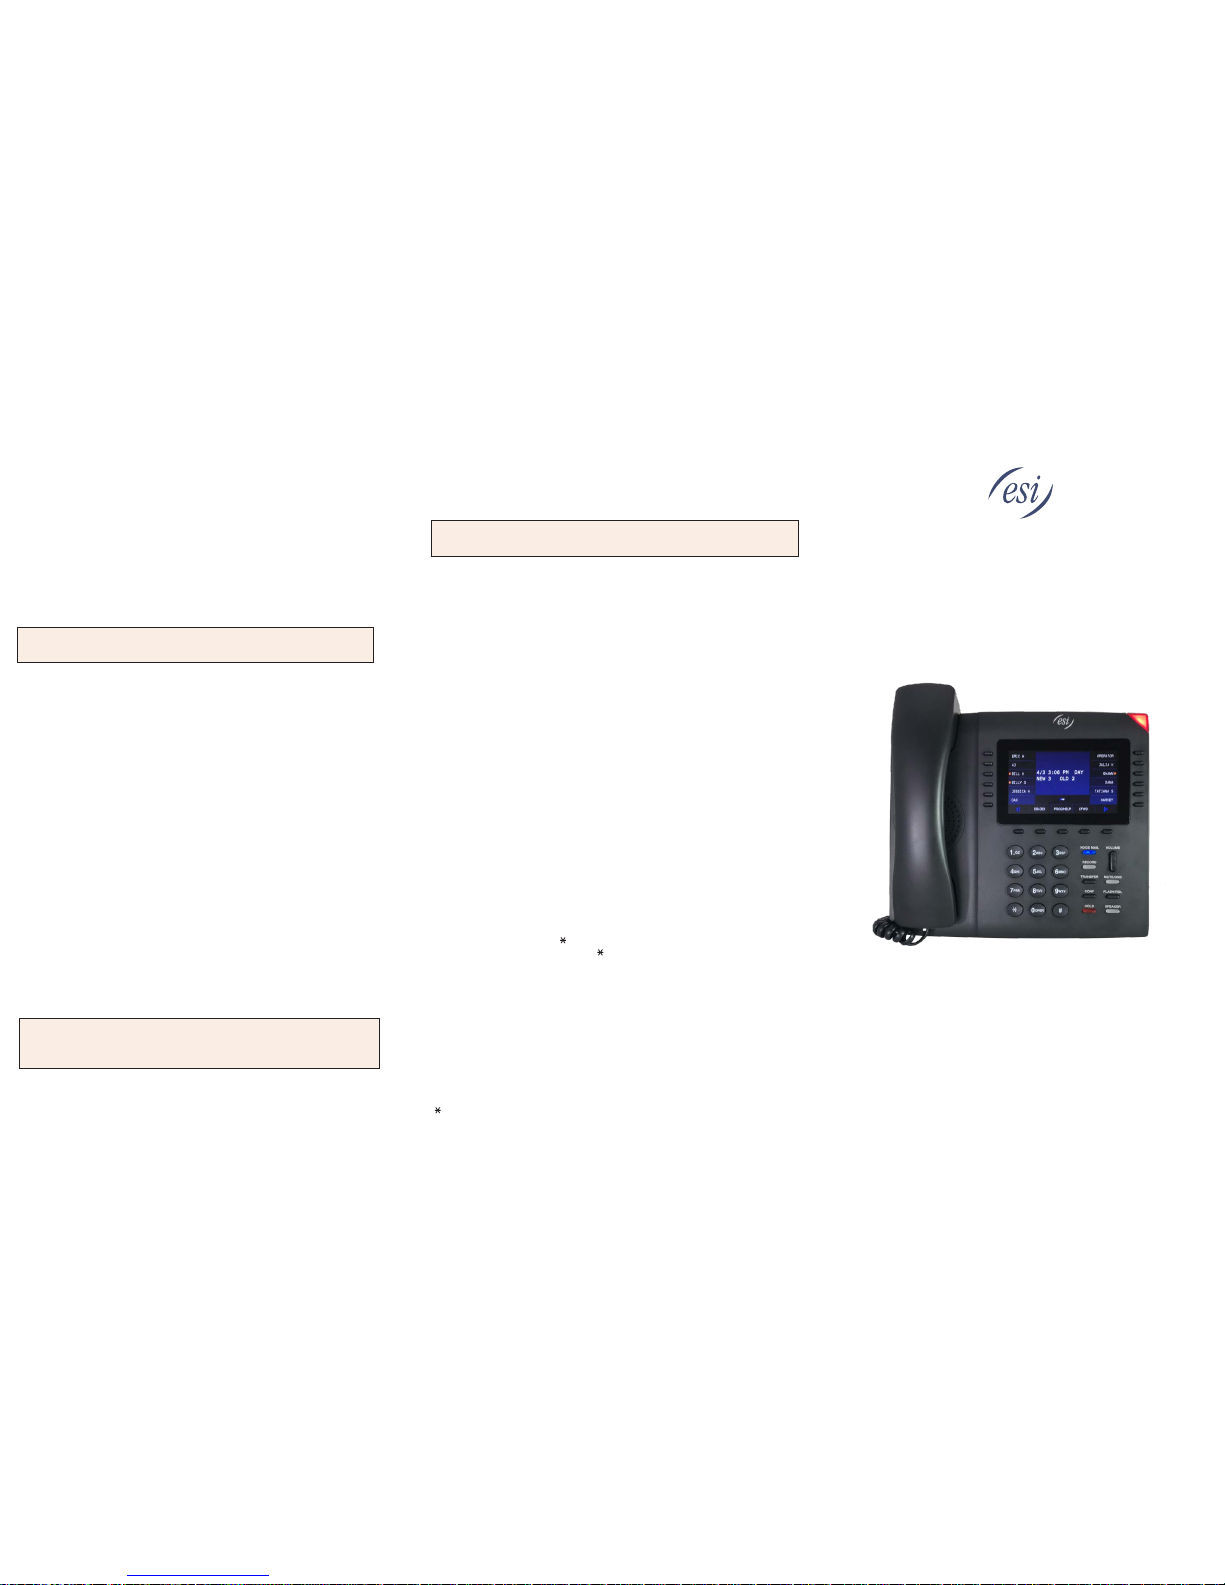
Getting Started with the
dPhone4
Personalizing your phone
Press PROG/HELP to access programming, and then select from the menu
choices. During any progra
mming step, you can press PROG/HELP for a
detailed description of the
feature
Copyright © 2018 ESI (Es
tech Systems, Inc.). • 0450-1503 Rev. B
Voice mail
2. To access new or old voice message, press VOICE MAIL.
3. When you hear the prompt, enter your password and press #.
4. Select the desired voice mail message and follow the prompts to repeat, forward,
delete, reply, hear the next message, or save the message.
Note: New voice mails are indicated by the NEW/OLD message on the display.
This will only appear when there are new messages.
0 Help
1 How to use the phone
2 How to use voice mail
3 Phone features
4 User tutorial
1 Select personal greeting
1 Record
2 Delete
3 Hear
3 Station options
1 Call waiting
2 Personal greeting reminder
4 Dial tone preference
5 Hands-free answer
6 Monitor mode
4 Station audibles
1 Station ring tone
2 Station ring volume
3 Message ring
5 Password
1 Enter
2 Delete
3 Hear
4 Security level
6 External notification
7 Personal Call Routing
9 Message Recycle Bin
Programmable feature keys
There are two methods
for programming your phone:
• Direct programming — Select the key you want to program, and
hold it down for at
least two seconds. This not only initiates programming but also lets you immediately
program that specific key.
• Traditional programming — Press PROG/HELP. The Verbal User Guide will speak to
you, walking you through the full menu, during which you can choose the appropriate
option.
The programmable feature keys can be programmed as:
• Line keys — If programmed with a two-digit line number, the key will become a line
key providing lamp information and outside line access.
• Station keys — If programmed with a three- or four-digit extension number, the key
will provide station lamp status and direct station access and transfer.
• Speed-dial keys — Can be used for automatic dialing of frequently called outside
numbers. Enter the line access code (9, 8, or 7) plus the phone number.
• Additional-feature keys — Depending on your system, these may include day/night
control, service observing, agent log-on, system speed dial, personal greeting, etc. See
the System Administrator for assistance.
Note: Certain items shown in the menu above may not be applicable to y
our
specific ESI system. Consult your System Administrator for more information.
2 Programmable feature
keys
Voice Mail Menu
You can press any of the following keys anytime during the message or during the
prompt following the message.
1 Pause: Pauses playback for one minute or until pressed again. 2
2 Time/date to number: Toggles the display between the time/date and the Caller
ID number (if available).
3 Reply: To automatically reply to a message from another user (within the
system). Begin recording your reply at the tone; press 1 to stop. You will then be
returned to the original message for further action.
4 Rewind: Rewinds playback four seconds for each time you press it during
message playback. If pressed after the message has finished, returns you to the
message’s beginning.
5 Fast forward: Advances playback four seconds each time you press it.
6 Copy: Copies the message to another user’s mailbox or to a Quick Group. To add
an introduction, press 1 when prompted. The phone system will respond with the
mailbox greeting and record tone. When you’ve finished your recording, press 1 to
stop.
7 Delete: Deletes the message.
9 Save: Saves the message. It will be played as an old message the next time
messages are retrieved. 9 9 Saves the message as a new message.
Hang up when finished. (If you hang up while a message is playing back, the
message will remain a “new” message.)
Retrieving voice mail remotely
1. Dial into the phone system.
2. At the auto attendant enter and your station number (or have the operator
transfer you by pressing VOICE MAIL and your station number.
The phone system will announce the number of new and old messages and play
the oldest new message.
The following key presses are aviailable for remote access:
2 Time/date to number: Toggles the upper display between the time/date and the
Caller ID number (if available).
5 Access user programming —
Lets you change the personal greetng and
password.
8 Main greeting — Returns
you to the main greeting.
0 Operator — Transfers you to the operator.
# Leave a
message In another mailbox — When prompted, enter the user’s
mailbox number.
To disconnect — Use before hanging up (if pressed during playback of a
message, the message will be saved).
Once you have programmed a programmable feature key, the default system name for
the item (e.g., a person’s name for a station key) will
appear. You can customize that
name (up to 10 characters in length)
on a per-extension basis by using your phone’s
dialpad.
Important programming options
Mailbox personal greetings
You can record up to three personal greetings (PROG/HELP 1), and then change
between them as desired.
Example: “Hi, this is Bill. I’m away from my desk or on the phone. You may reach
the operator by dialing 0 now; or leave me a detailed message and I’ll
respond to it promptly.”
Message Recycle Bin (un delete)
Your phone system stores your 10 most recently deleted messages in a Message
Recycle Bin (PROG/HELP 9) to allow you to recover mes
sages that may have
been deleted in error.
Page 2
To make a supervised transfer, wait for the call to be answered by the transfer-to
destination. After confirming that the person will accept the call, simply hang up to
complete the transfer. To cancel the supervised transfer and return to the initial
caller, press TRANSFER again. This must be done before the transfered-to station
answers.
Transferring a call directly to mailbox
To transfer an outside call to another user’s mailbox, press VOICE MAIL, and then
dial the extension number. Even though you both will hear the personal greeting,
you can hang up at any time to release the call to the mailbox.
Three-way Conference
While connected to a call, press CONF, call another station or outside person, and
then press CONF again. Repeat this procedure to add another person (up to the
maximum, including you, that your ESI system allows) to the conference. Hang up
to disconnect all persons in the conference. If the newest added-on person does not
answer, press his/her station key again or press FLASH/RDL to return to the
original conferees.
Call Forwarding
Press CFWD with the key directly under the display and then press a station key (or
enter an extension) to forward your call to that station. To disable call forwarding, dial
CFWD and hang up.
Mute/DND
Mute — While on a call, press MUTE/DND to disable outbound audio via the
microphone in your phone’s speaker, handset, or (optional) headset. The key will
blink amber to indicate muting is enabled. To disable muting, press MUTE/DND
again. (The phone will automatically disable muting when you hang up the call.)
DND mode — When the phone is idle, press MUTE/DND to put the phone in DND
(do-not-disturb) mode. This will send incoming calls directly to voice mail. The key
will light solid amber to indicate that DND mode is enabled. To disable DND mode,
press MUTE/DND again.
P/UP (Call pickup)
A call ringing at another station or group can be answered from your station by
pressing P/UP( key), then the appropriate blinking station key or entering the
extension number (e.g., P/UP 1 0 3 to pick up a call on extension 103).
Page
To page through all available stations, press PAGE 0. To page in only a
programmed paging zone, press PAGE (# key) and the one-digit paging zone
designation (in a range of either 1–3 or 1–9, depending upon your system).
Dialing 911
Dialing 911 from a local phone (i.e., not from a remotely installed IP phone) places
an emergency call and also notifies the system operator via a spoken and displayed
prompt.
Display Screensaver
Once the phone is idle for 30 minutes the display will revert to a screensaver. This
feature is not programmable.
SHAWN
JULIA
EDDIE
JOHN F
GEORGE
BECKI
1/24 3:56 PM
NEW 3 OLD 9
LINE 1
LINE 2
AGENT IN
CID KEY
MSG MON ITR
VIRT AN S 1
ESI-DEX PROG/HELP CFWD
Let’s Get Started!
Placing an external call
1. Lift the handset (or press SPEAKER or HEADSET)
2. Enter the phone number from the dial pad preceded by the line access
number 9 (or 8 or 7). Or press an unlit line key instead.
3. To end the call either replace the handset or press SPEAKER or HEADSET.
Answering a call
1. When the phone rings lift the handset, (or press SPEAKER or HEADSET).
2. If your station is set for hands-free answer, intercom calls will be
automatically output to your speaker.
3. Connecting to a second inbound call
4. If you receive a second call while you’re on an active call, the display will
show the call on the second row and you’ll hear a beep, indicating the new
call.
5. To switch between active calls, press FLASH/RDL (or the applicable line
key).
HOLD
While on an active call press HOLD to place a caller on hold. To pick up a held
call from any station
, press HOLD and the line number where the call is held
. For
example, 1 2 for line 12 — to pick up the call.
To place a caller on exclusive hold (for pick up only at your station) press HOLD
for at least one second. The display will show an “E” next to the outside line
where the call is on hold just for your station. Pickup the held call by press HOLD
and the line number.
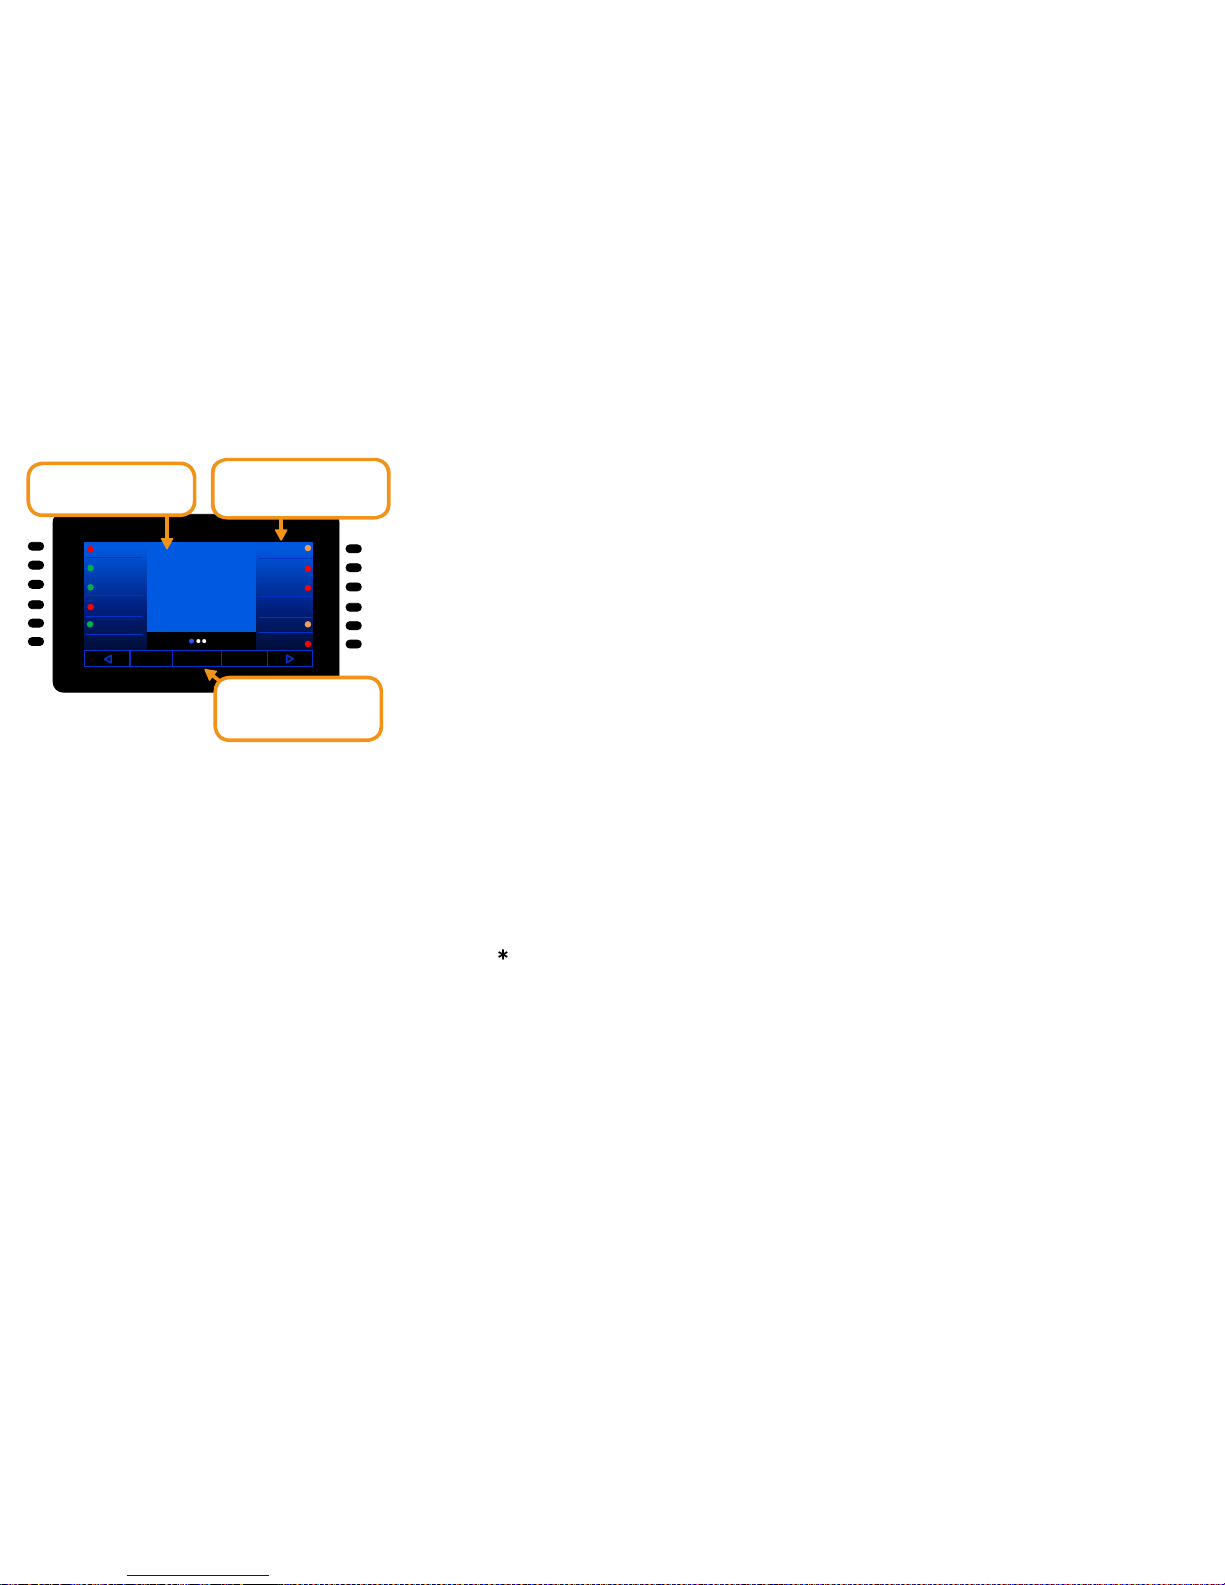
The left and right side of the center
screen is a list of programmable
feature keys. There are 12 keys per
page; 3 pages; 36 total.
When your phone is idle, the
Home Screen shows date/time and
new voice mail message count.
The bottom row of soft keys
connects you to the User
Programming, Help, ESI-Dex,
and Call Forward.
Call transfer
1. While on an active call, press TRANSFER.
2. Dial the number to which you want to transfer the call (or press a
programmable feature key to which that number has been assigned) and then
press #.
3. To make a “blind” transfer, hang up immediately.
Special Programmable Feature Keys
Agent login/out
This feature allows an agent to log into and out of an automatic call distribution
(ACD) queue to manage incoming calls.
1. To log in, press Agent Login/out. The key lights solid green and “Agent
Logged In” appears in the display.
2. To log out, press Agent Login/out again.
Solid red
=
“Winking” amber =
Solid green
=
Blinking red =
Blinking green =
Solid amber =
Ringing from another ca
ll
Ringing from your call
Off-premises
In use
Do-not-disturb (DND)
Connected to y
ou
Placing an intercom call
Lift the handset and press a station key or dial the extension number; (or, without
lifting the handset, press a station key to call the station through your speaker).
The station LEDs indicate:
Caller ID Key
This presents a list of the last 25 dialed, answered, and missed calls to/from your
extension.
Monitor mode
You can program your phone to allow hearing a message as it is being left in your
mailbox, for your selective interception.
Recording
1. This feature allows you to record a call. Not all users have access to this
feature. Recordings are accessed by pressing VOICE MAIL then RECORD.
2. While on an active call, press Record. As recording begins, the Record key
lights solid green and “Recording” appears in the display.
3. To end the recording, press Stop or hang up.
Headset
To use a headset, first assign 5 6 4 to a programmable feature key (headset key);
then plug the headset into the back of the phone. To answer a call, press the
headset key you programmed (to release the call, press the headset key again).
You can still use the handset
or speaker mode at any time by lifting the handset or
pressing SPEAKER.
For details on Electronic Hookswitch headset control, see the User's Guide. (ESI
does not guarantee compatibility with all headsets.)
Notable Features
ESI-Dex
Access a station list (STA), corporate
list (SYS), or create a personal contact list
(PER). Those systems using Esi-Link can also access a location list to contact
users across systems. Esi-Dex is also helpful when programming DSS keys by
providing a list of features.
Status indicator
The red message light, located at the right corner of the phone, indicates three
conditions. A phone that’s off-hook glows solid red (first priority), continuously
“flutters” when ringing (second priority) and blinks when that station has new
voice mail waiting (third priority). The indicator will light
according to the priority of the condition.
Using help mode
Your phone’s help mode is designed to help you learn about phone features. To
access one of these topics, press PROG/HELP and choose from the menu. While
programming a feature on your phone, you can press PROG/HELP to hear a more
detailed description of that feature. The on-board user tutorial — PROG/HELP 0 —
explains all aspects of call and message handling in a logical, step-by-step manner.
 Loading...