

Escalade sports P2012 User Manual
CHATSWORTH STORE DISPLAYER
P2012 / 527.25136
READ THESE
INSTRUCTIONS
CAREFULLY!
ATTACH LEGS TO TABLE AS FOLLOWS:
1. Flip table over so that bottom of table is facing up and
remove legs #4, leg panels #5, leg facades #7 and
hardware kit from bottom of table.
FLIPPING T ABLE OVER REQUIRES AT LEAST THREE
ADUL TS. DO NOT REST WEIGHT OF TABLE ON
APRONS OR ON LEGS AT AN ANGLE.
Tools Needed:
n Two 1/2" Open End Wrenches
n One Phillips Screwdriver
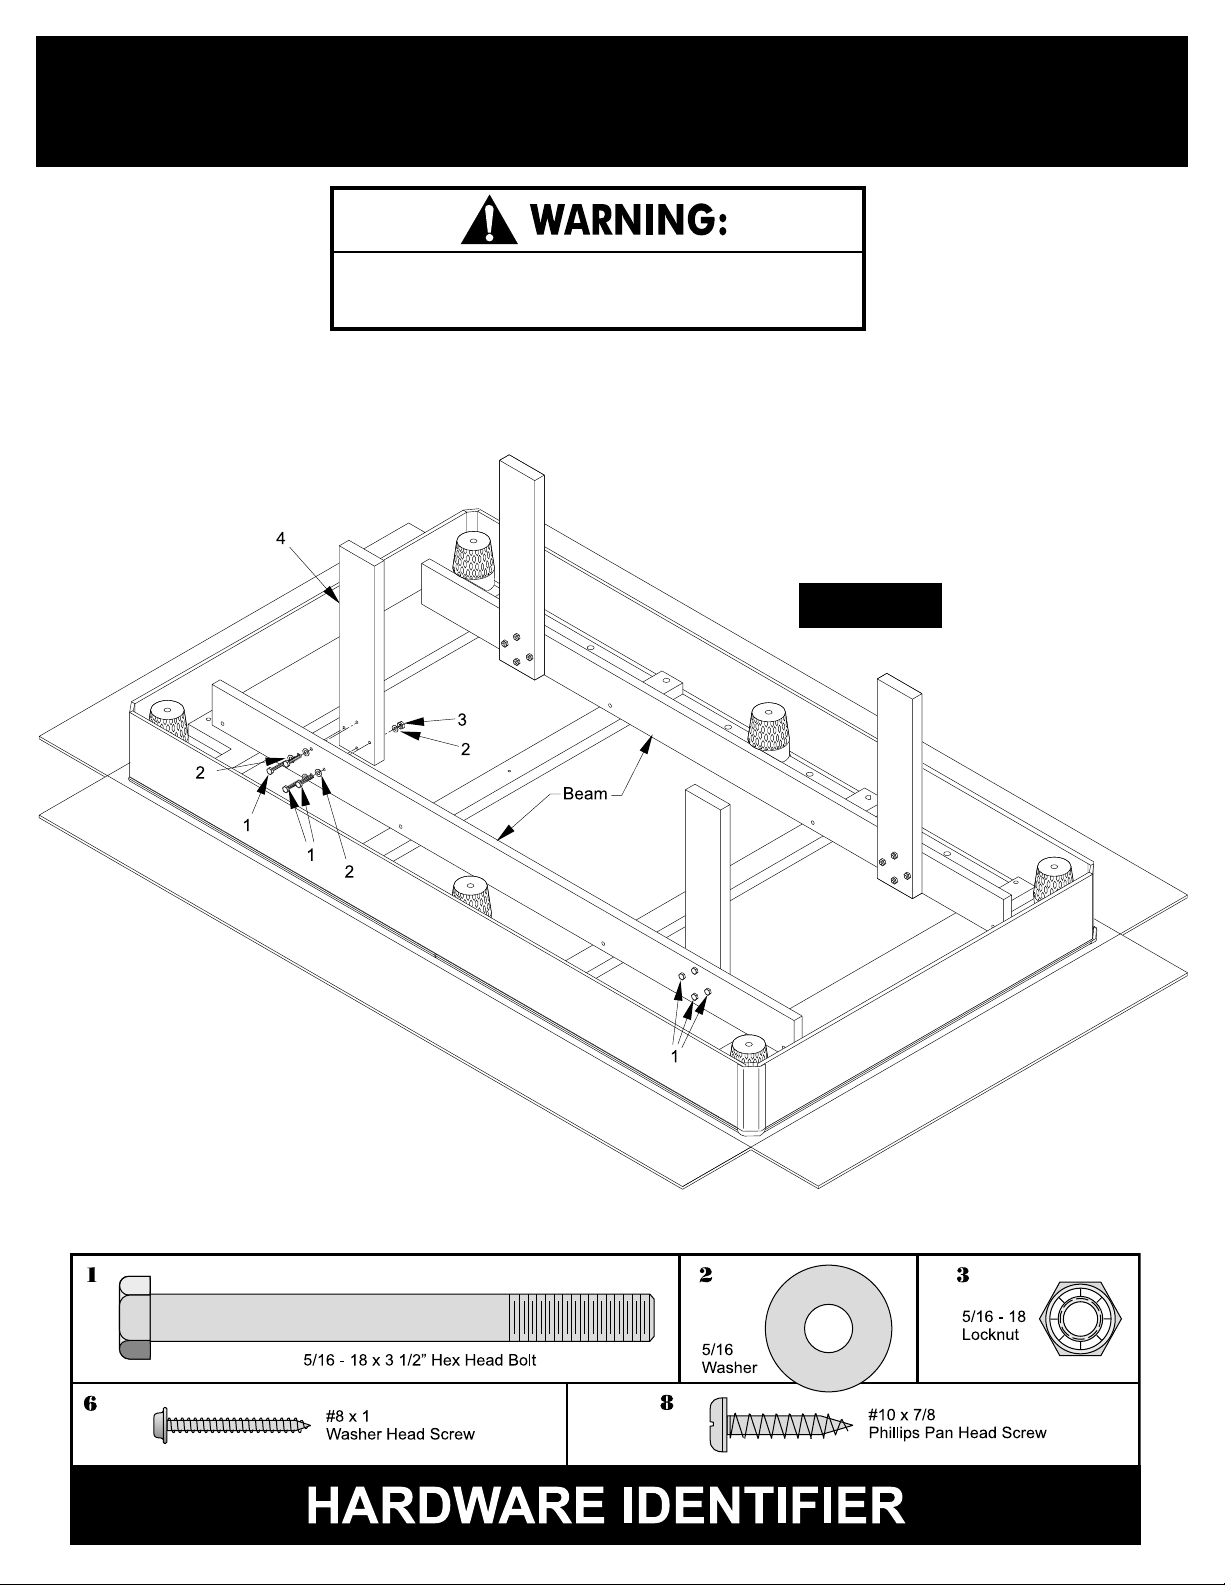
2. Attach four legs #4 to the inside of beams, as shown in
Figure 1, using four hex bolts #1, eight washers #2 and
four hex nuts #3 for each leg. Tighten bolts tight.
Figure 1
For aid in identifying the different hardware used in this assembly, use the hardware identifier below. Each number refers to the numbers shown in
the illustrations within this manual.
FLIPPING T ABLE OVER REQUIRES AT LEAST THREE
ADUL TS. DO NOT REST WEIGHT OF TABLE ON
APRONS OR ON LEGS A T AN ANGLE.
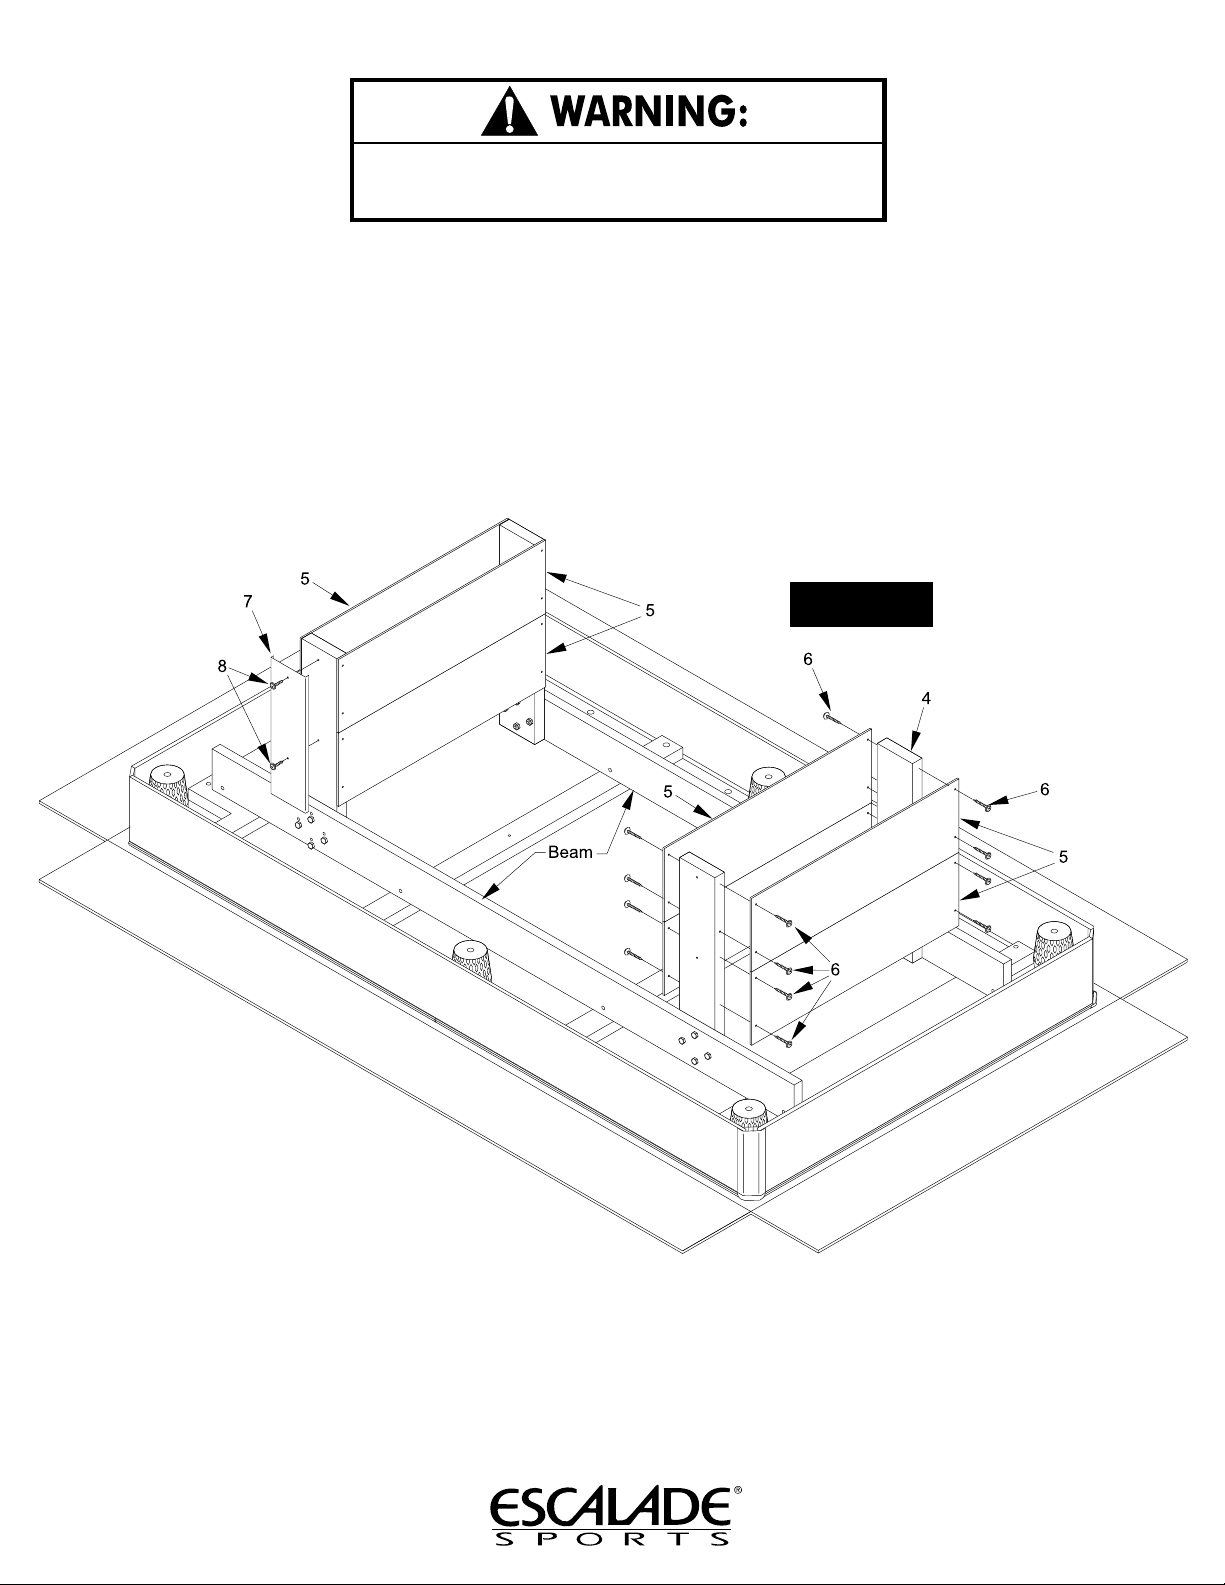
3. Attach eight leg panels #5 to legs #4 as follows: Attach
the bottom leg panels first using the pilot hole in the edge
of leg #4 and four screws #6 for each leg panel. Note:
Legs have only one pilot hole on each edge. Pilot
hole is to locate leg panel. Remaining screws can be
installed without pilot holes. Butt top leg panel #5 up
to bottom leg panel and secure in place using four
screws #6 for each leg panel #5. See Figure 2
4. Attach metal leg facades #7 to legs #4 using two screws
#8. Locate leg facade #8 by lining up the holes in the
facade with the starter holes in the leg post. See Figure 2
5. Carefully turn table upright. IMPORTANT! Do NOT
allow weight of table to set on aprons or on legs at
an angle. Lift table, flip table over and set table down
flat on all four legs.
Figure 2
Copyright © 2002
2L-6731-00
 Loading...