

Page 1

Ericsson W20
Fixed Wireless Terminal for WCDMA/HSDPA
Mobile Networks
User's Guide
Page 2

Ericsson W20
Fixed Wireless Terminal for WCDMA/HSDPA
Mobile Networks
User's Guide
.
Copyright
© Ericsson Enterprise AB 2006 - All Rights Reserved
Disclaimer
No part of this document may be reproduced in any form without the written
permission of the copyright owner.
The contents of this document are subject to revision without notice due to
continued progress in methodology, design and manufacturing. Ericsson shall
have no liability for any error or damage of any kind resulting from the use of
this document.
Trademark List
Windows
MSN Messenger
All other brand and product names are trademarks or registered trademarks of
their respective holders.
®
®
Windowsis a registered trademark of Microsoft
Corporation.
MSN Messenger
Microsoft Corporation.
is a registered trademark of
ii
1/1551-CRH 102 167 PA15 2006-08-16
Page 3

.
Contents
1 Introduction 1
1.1 Structure of this Guide 1
1.2 Product Overview 1
1.2.1 Indicators and Connectors 2
2 Configuration and Management 5
2.1 Accessing Internal Web Pages 5
2.2 Overview Page 6
2.2.1 Changing Password 6
2.2.2 Alarms 7
2.2.3 Network Information 8
2.3 Configuration Wizard 9
2.3.1 Internet Access 9
2.3.2 Wireless LAN Access 11
2.4 Internet 18
2.4.1 Traffic Statistics 19
2.4.2 Authentication 20
2.5 LAN 22
2.5.1 Connected Devices 23
2.5.2 Traffic Statistics 23
2.5.3 Port Status 24
2.6 Wireless LAN 24
2.6.1 Radio Channels 25
2.6.2 Network Name 26
2.6.3 Connected Devices 27
2.6.4 Security 27
2.6.5 Whitelist 29
2.7 DHCP Server 29
2.8 NAT 31
1/1551-CRH 102 167 PA15 2006-08-16 iii
Page 4

Contents
2.8.1 UPnP IGD 31
2.8.2 Application Level Gateways 32
2.8.3 Port Forwarding 32
2.9 File and Printer Sharing 34
2.9.1 File Sharing 35
2.9.2 Printer Sharing 35
2.10 System 36
2.10.1 Configuration Backup and Restore 37
2.10.2 Reboot 37
2.10.3 Software Upgrade 37
2.11 Event Log 39
3 PC Configuration 41
3.1 IP Settings 41
3.1.1 Obtaining IP Settings Automatically 41
3.1.2 Configuring Static IP Address 43
3.2 Wireless LAN Settings 43
3.2.1 Siting the Wireless PC 43
3.2.2 Installing the Wireless LAN Interface 43
3.2.3 Configuring PC Access to the Ericsson W20 44
3.3 File and Printer Sharing Settings 44
3.3.1 Accessing a Shared Device 45
3.3.2 Checking Workgroup Settings 45
3.3.3 Setting Up a Mapping to a Storage Device 46
3.3.4 Setting Up Connection to a Network Printer 47
4 Trouble-Shooting 49
4.1 No Access to Ericsson W20 Web Pages 50
4.2 No Internet Access 50
4.3 Slow or Intermittent Internet Connection 51
4.4 No Access to a Certain Internet Application 51
4.5 No LAN Connection 52
4.6 No Wireless LAN Connection 52
iv 1/1551-CRH 102 167 PA15 2006-08-16
Page 5

Contents
4.7 Slow or Intermittent Wireless LAN Connection 53
4.8 No Access to Shared Files or Network Printer 54
Glossary 55
1/1551-CRH 102 167 PA15 2006-08-16
v
Page 6

Page 7

Introduction
1 Introduction
This chapter describes the structure of this guide and gives a brief product
overview.
1.1 Structure of this Guide
This User’s Guide contains information that is needed to configure and
manage the Ericsson W20 Fixed Wireless Terminal (FWT). The following
chapters are included:
• Chapter
gives a brief product overview.
• Chapter
information about how to perform configuration and management of the
Ericsson W20.
• Chapter
computers to work with the Ericsson W20.
• Chapter
issues that could occur during installation, configuration, and use of the
Ericsson W20.
• The Glossary includes abbreviations and explanations to technical
terms used in this guide.
1 – “Introduction” – provides information about this guide and
2 – “Configuration and Management” – provides detailed
3 – “PC Configuration” – gives instructions for configuring your
4 – “Trouble-Shooting” – tells you how to solve a number of
1.2 Product Overview
The Ericsson W20 FWT is an advanced small office and home router with
wireless Internet access. The key benefits of the product are:
• Wireless Broadband Services at Reliable High Speed
The Ericsson W20 uses WCDMA/HSDPA radio access to provide highspeed data capabilities to the local network.
• Advanced Networking
The Ericsson W20 supports an advanced local network setup. It
provides IP routing, Ethernet switching, DHCP service, and NAT.
1/1551-CRH 102 167 PA15 2006-08-16
1
Page 8

Introduction
• File and Printer Sharing
Network storage and printing are supported through USB connection of
up to two mass storage devices and one printer at the same time.
• Local Wireless Access with High-level Security
The Ericsson W20 is a WLAN access point for the wireless local
network including WEP, WPA, and WPA2 with pre-shared keys for
WLAN security.
UMTS/GSM
WLAN
Ethernet
Figure 1 Example of Ericsson W20 Setup
USB
For more information about the Ericsson W20, see www.ericsson.com/fwt
1.2.1 Indicators and Connectors
The Ericsson W20 is equipped with five status indicators located on the
front panel of the unit, see Figure 1. A general description of each indicator
is provided in the table below (from top to bottom):
2 1/1551-CRH 102 167 PA15 2006-08-16
Page 9

Introduction
Table 1 Front Panel Indicators
Text Status Description
Power
Mobile Network
Internet
Wireless LAN
Alarm
Green Power is on.
Unlit Power is off.
Green
Yellow
Flashing
Unlit
The UMTS network is available.
The GSM network is available.
Searching for a connection.
No connection to the mobile network.
Green Connection to Internet established.
Unlit No Internet connection.
Green The wireless LAN is active
The wireless LAN is inactive.
Red
Error. Various error conditions are
specified on the Overview web page.
Unlit No error.
The Ethernet LAN connectors (LAN1- LAN4) on the connectors’ panel
have two built-in indicators each.
The left indicator shows the speed of data traffic between the Ericsson W20
and the connected client. If the speed is 100 Mbps, the indicator is green.
When the indicator is unlit, the speed is 10 Mbps.
The indicator to the right is green when a LAN connection is established
and flashes to show data traffic activity.
The connectors on the Ericsson W20 are positioned as shown in the
following illustration:
Figure 2 Connectors panel
1/1551-CRH 102 167 PA15 2006-08-16
3
Page 10

Introduction
A description of each connector is provided in the table below (from left to
right):
Table 2 Connectors
Label Description
10-28 VDC
Reset
USB
LAN 1 - 4
Power input for connecting the power supply adapter.
Button used to restore the Ericsson W20 configuration to
factory default settings. The following procedure resets all
configurable values back to factory default, including the
Ericsson W20 login user name and password.
1. Disconnect the power cable from the Ericsson
W20.
2. Press and hold the Reset
button with the tip of a
pen and then reconnect the power cable. Keep the
button pressed for at least 20 seconds.
3. The Ericsson W20 restarts and comes online with
the factory default settings.
USB connectors, for connecting the Ericsson W20 to USB
devices.
Ethernet LAN connectors (RJ45), for connecting the
Ericsson W20 to client PCs or an Ethernet switch/hub.
4 1/1551-CRH 102 167 PA15 2006-08-16
Page 11
Configuration and Management
2 Configuration and Management
Follow the instructions in the Quick Installation Guide to install the
Ericsson W20. When the installation is finished, the Ericsson W20 internal
web pages are available for configuration and status control.
This chapter provides detailed information about configuration and
management of the Ericsson W20.
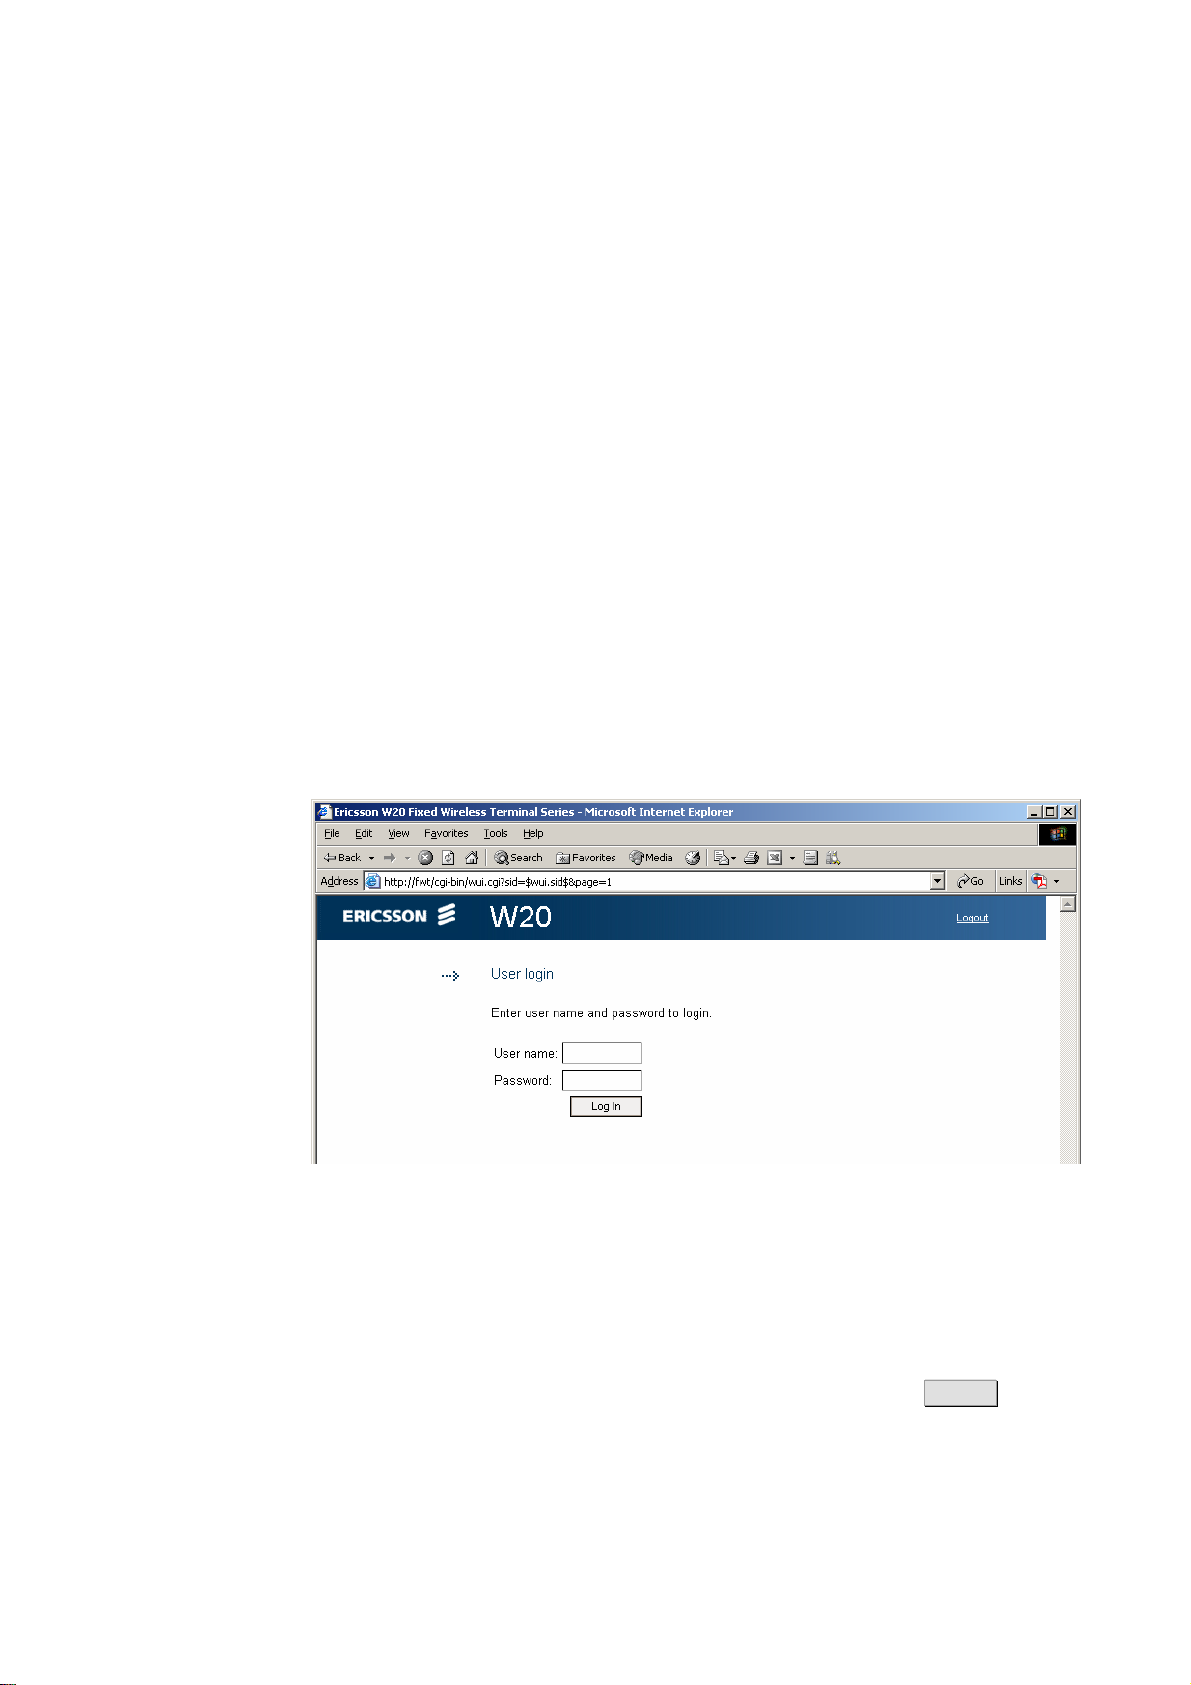
2.1 Accessing Internal Web Pages
Start a web browser and type http://192.168.1.1 in the Address (URL)
field. The Ericsson W20 User
Login page is displayed.
Note: If
Figure 3 User Login page
The default login user name and password both are “user”. You are
recommended to change the password, see section
Password
you change the Ericsson W20 internal IP address, you have to
use the new address to access the web pages.
2.2.1 – “Changing
”.
Type user in both the User name and Password fields. Click Log In .
The Overview page is displayed:
1/1551-CRH 102 167 PA15 2006-08-16
5
Page 12

Configuration and Management
Figure 4 Overview page
The left-hand menu includes configuration topics described one by one in
the following sections.
Apart from the links menu to the left, each web page includes a Logout
to make it possible to log out whenever it is desired.
2.2 Overview Page
The Overview page includes the possibility to change password, the
entrance to the Configuration Wizard, see section
Wizard
2.2.1 Changing Password
The default Ericsson W20 login password is “user”. You are recommended
to change the password.
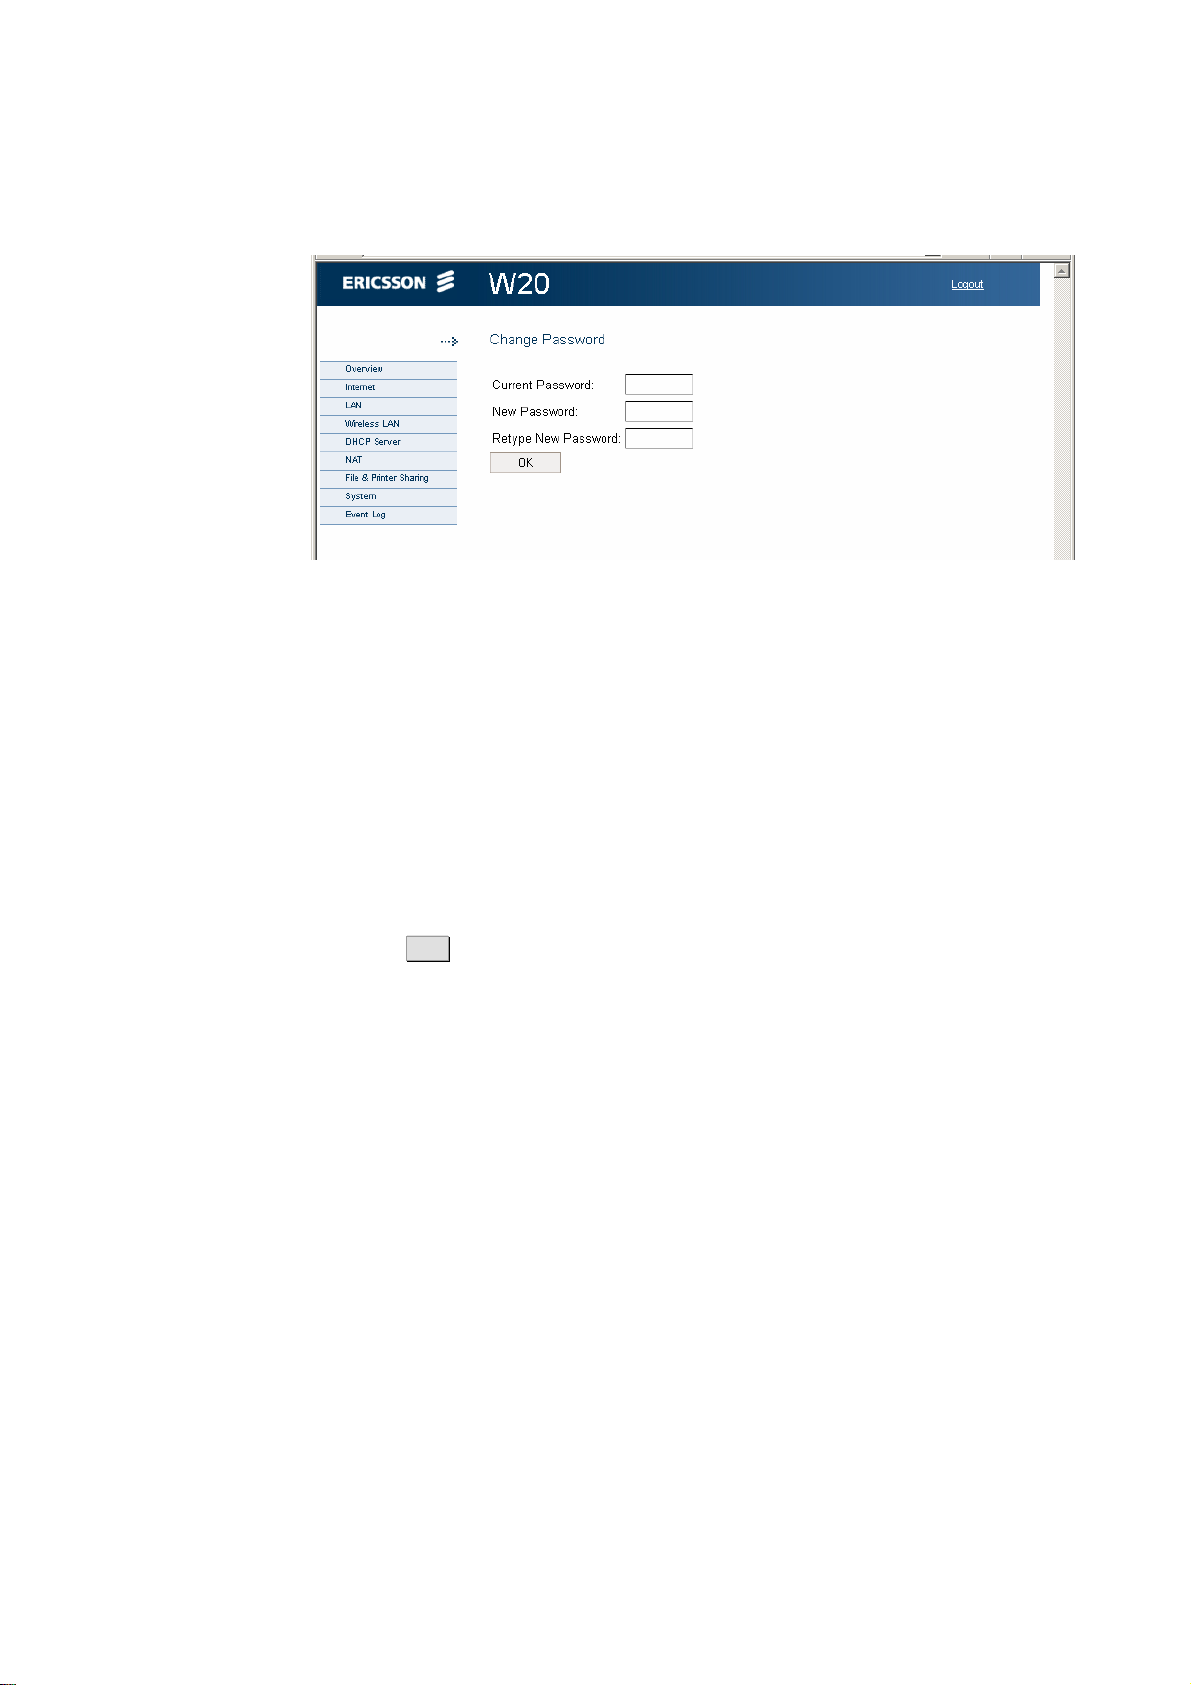
1. Click Change Password
”, alarm information, and basic network information.
on the Overview page. The Change
Password page is displayed:
link
2.3 – “Configuration
6 1/1551-CRH 102 167 PA15 2006-08-16
Page 13
Configuration and Management
Figure 5 Change Password page
2. Type the old password in the Current
time you change password, the old password is user.
3. Type the new password in the New
Password fields.
Note: The password is case-sensitive (distinguish between
uppercase and lowercase letters) and can include up to eight
characters (letters and/or numbers).
4. Click OK .
2.2.2 Alarms
Alarms are generated when it is impossible to send or receive data. If an
alarm occurs, the Alarm indicator on the Ericsson W20 front panel is red
and one of the following messages is displayed in the Alarms section on
the Overview page:
No
alarms reported
Password field. If it is the first
Password and Retype New
The Ericsson W20 has not detected any
alarm.
No
SIM card detected
No
PIN code entered
SIM
card locked
1/1551-CRH 102 167 PA15 2006-08-16
There is no SIM card available, or the
SIM card is incorrectly inserted into the
Ericsson W20 unit.
A PIN code is required to establish an
Internet connection.
The SIM card is blocked. The PUK is
required to unblock the SIM card.
7
Page 14

Configuration and Management
SIM card permanently
locked
Alarm
detection not
working
Unknown
alarm
For information about how to react on an alarm, see section
Shooting”.
2.2.3 Network Information
The Network Information section on the Overview page includes a
selection of the Internet and LAN settings also displayed on the
Internet.and LAN
The Internet information includes connection status and basic settings.
Details about the following items are displayed:
IP
Address
pages respectively.
The IP address automatically assigned to the
Ericsson W20 by the mobile network.
The SIM card cannot be unblocked. A
new SIM card is required.
The Ericsson W20 alarm detection
function is not working.
The Ericsson W20 cannot identify the
alarm.
4 – “Trouble-
Connection
The radio access technique currently used to enable
Internet access. It can be either
UMTS
or
GSM
Service
Network
provider
registration
The name of the mobile network operator.
The current mobile network registration mode, which
can be one of the following:
Not
registered, not searching
Registered,
home network
Searching
Registration
denied
Unknown
Roaming
The LAN
(Local Area Network) section includes information about the
following item:
W20
IP Address
The local identity of the Ericsson W20.
8 1/1551-CRH 102 167 PA15 2006-08-16
Page 15
Configuration and Management
2.3 Configuration Wizard
The Configuration Wizard guides you step by step through the basic setup
of the mobile network connection and optionally for the wireless LAN
access point.
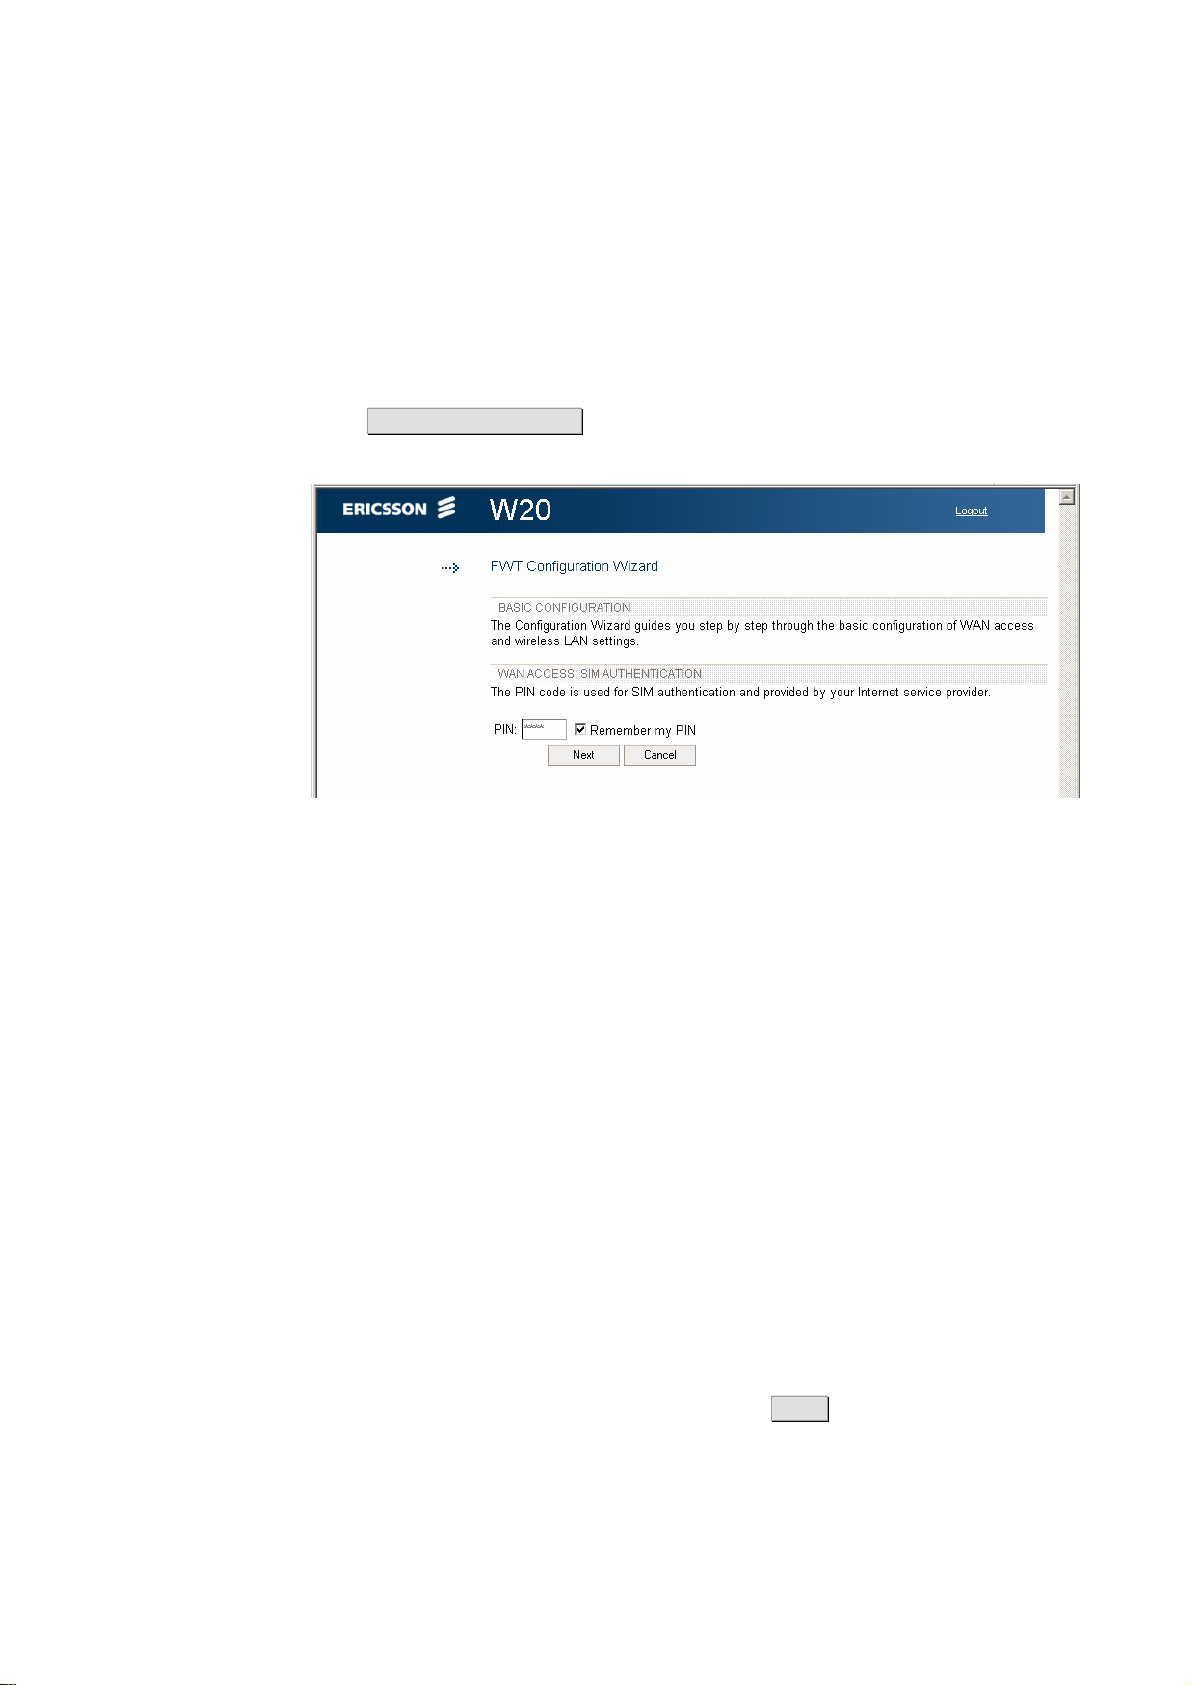
on the Overview page to start the wizard. The Click Configuration Wizard
first page of the wizard; WAN Access: SIM Authentication is displayed:
Figure 6 WAN Access: SIM Authentication page
2.3.1 Internet Access
The first part of the Configuration Wizard includes Internet authentication.
Depending on the current Internet service setup, the requests on
authentication may differ. The service provider provides the required
authentication details.
Note: Only enter details that you have received from your service
provider and leave other fields empty.
SIM Authentication
The service provider provides you with a SIM card. This SIM card contains
information about the subscription and is associated with a PIN (Personal
Identification Number) and a PUK (Personal Unblock Key) code.
Type the PIN in the PIN
see Figure 5. Thereafter, you can select the Remember
box. This makes SIM authentication automatic and you will not have to
enter the PIN in case of a system restart. Click Next to proceed.
field on the first page of the Configuration Wizard,
my PIN check
1/1551-CRH 102 167 PA15 2006-08-16
9
Page 16
Configuration and Management
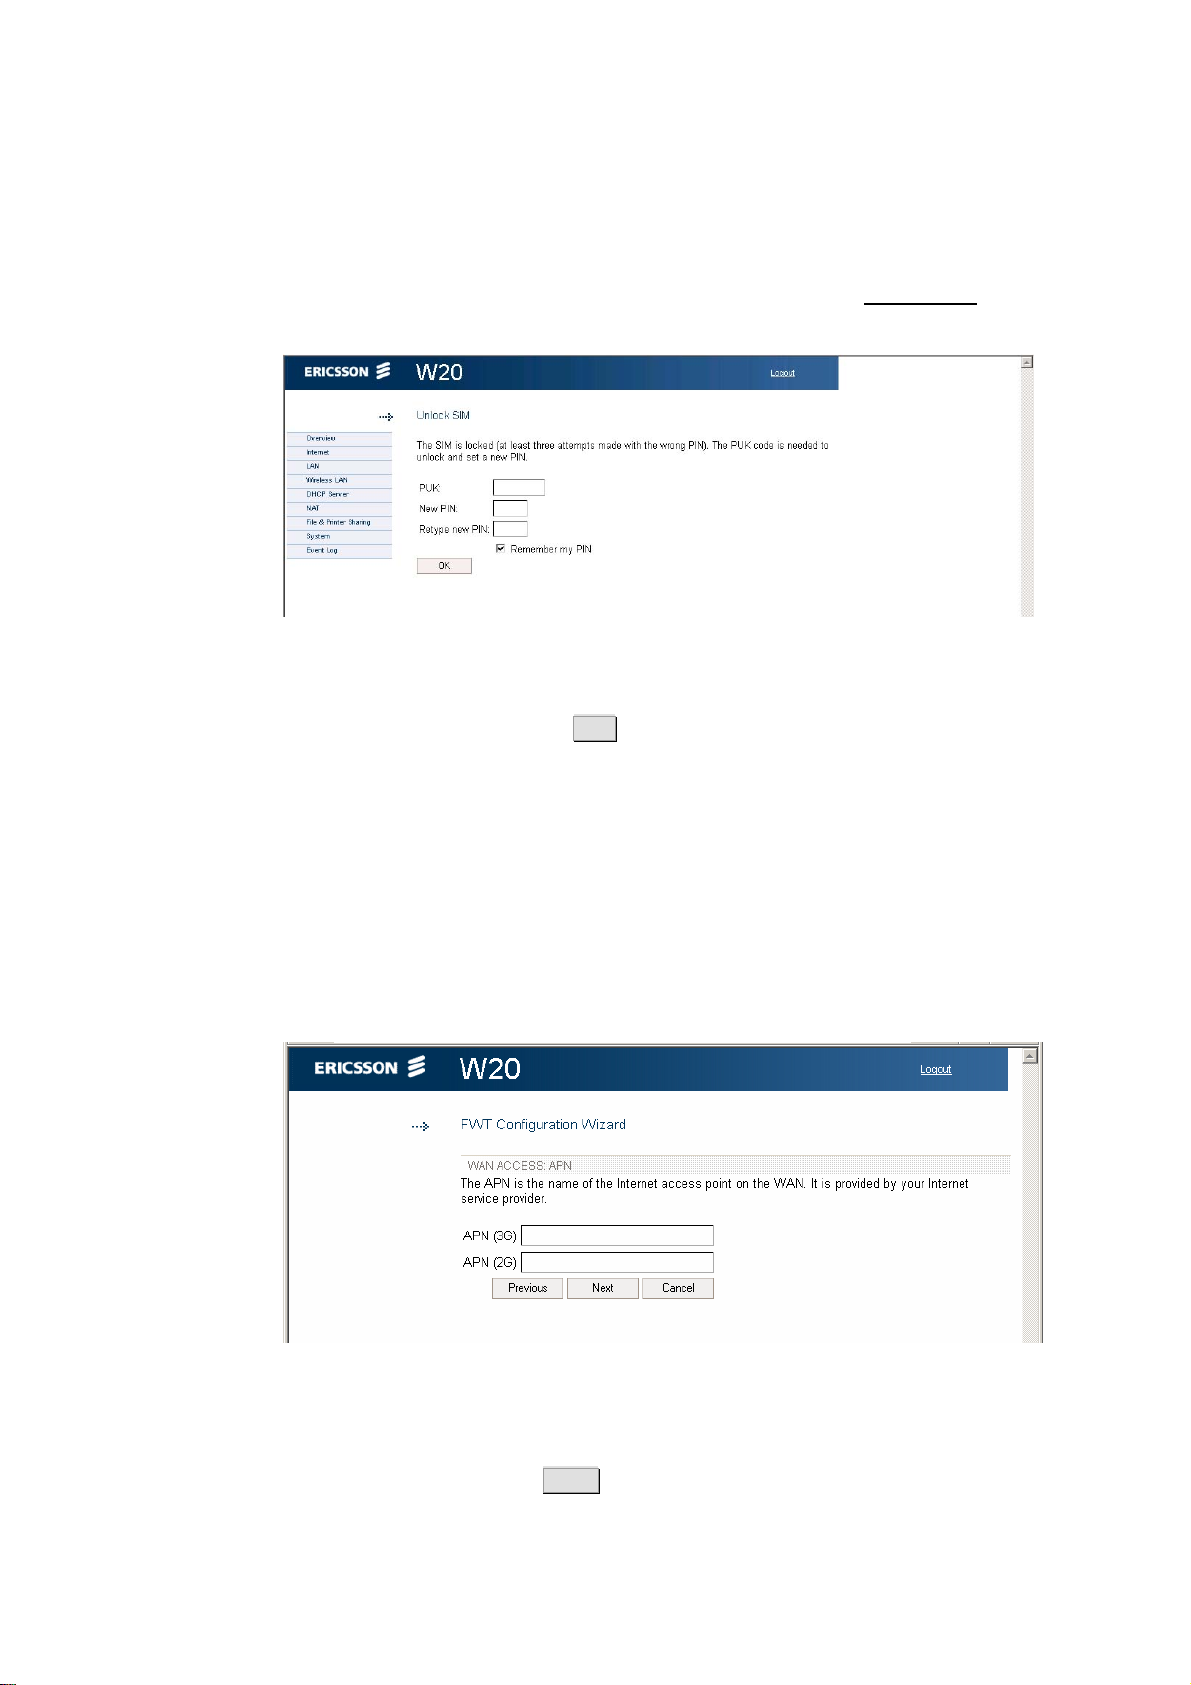
If three attempts have been made with the wrong PIN, the SIM card is
blocked. The PUK is required to unblock the card. Click the Unlock SIM
link. The Unlock
Figure 7 Unlock SIM page
SIM page is displayed:
Type the PUK in the PUK field and type a new PIN in the New
PIN and
Retype new PIN fields. Click OK . The Overview page is displayed.
Note: If ten attempts have been made with the wrong PUK, the SIM card
is permanently blocked. A new SIM card is required.
APN
An APN (Access Point Name) is a reference to the Internet access point on
the service provider’s network. It usually has the format
<name.service_provider.country>. Different APNs for the GSM (2G) and
UMTS (3G) networks may be required.
Figure 8 WAN Access: APN page
Type the APN(s) in the APN
(2G) and APN (3G) fields on the WAN
Access: APN page. Click Next to proceed.
10 1/1551-CRH 102 167 PA15 2006-08-16
Page 17
Configuration and Management
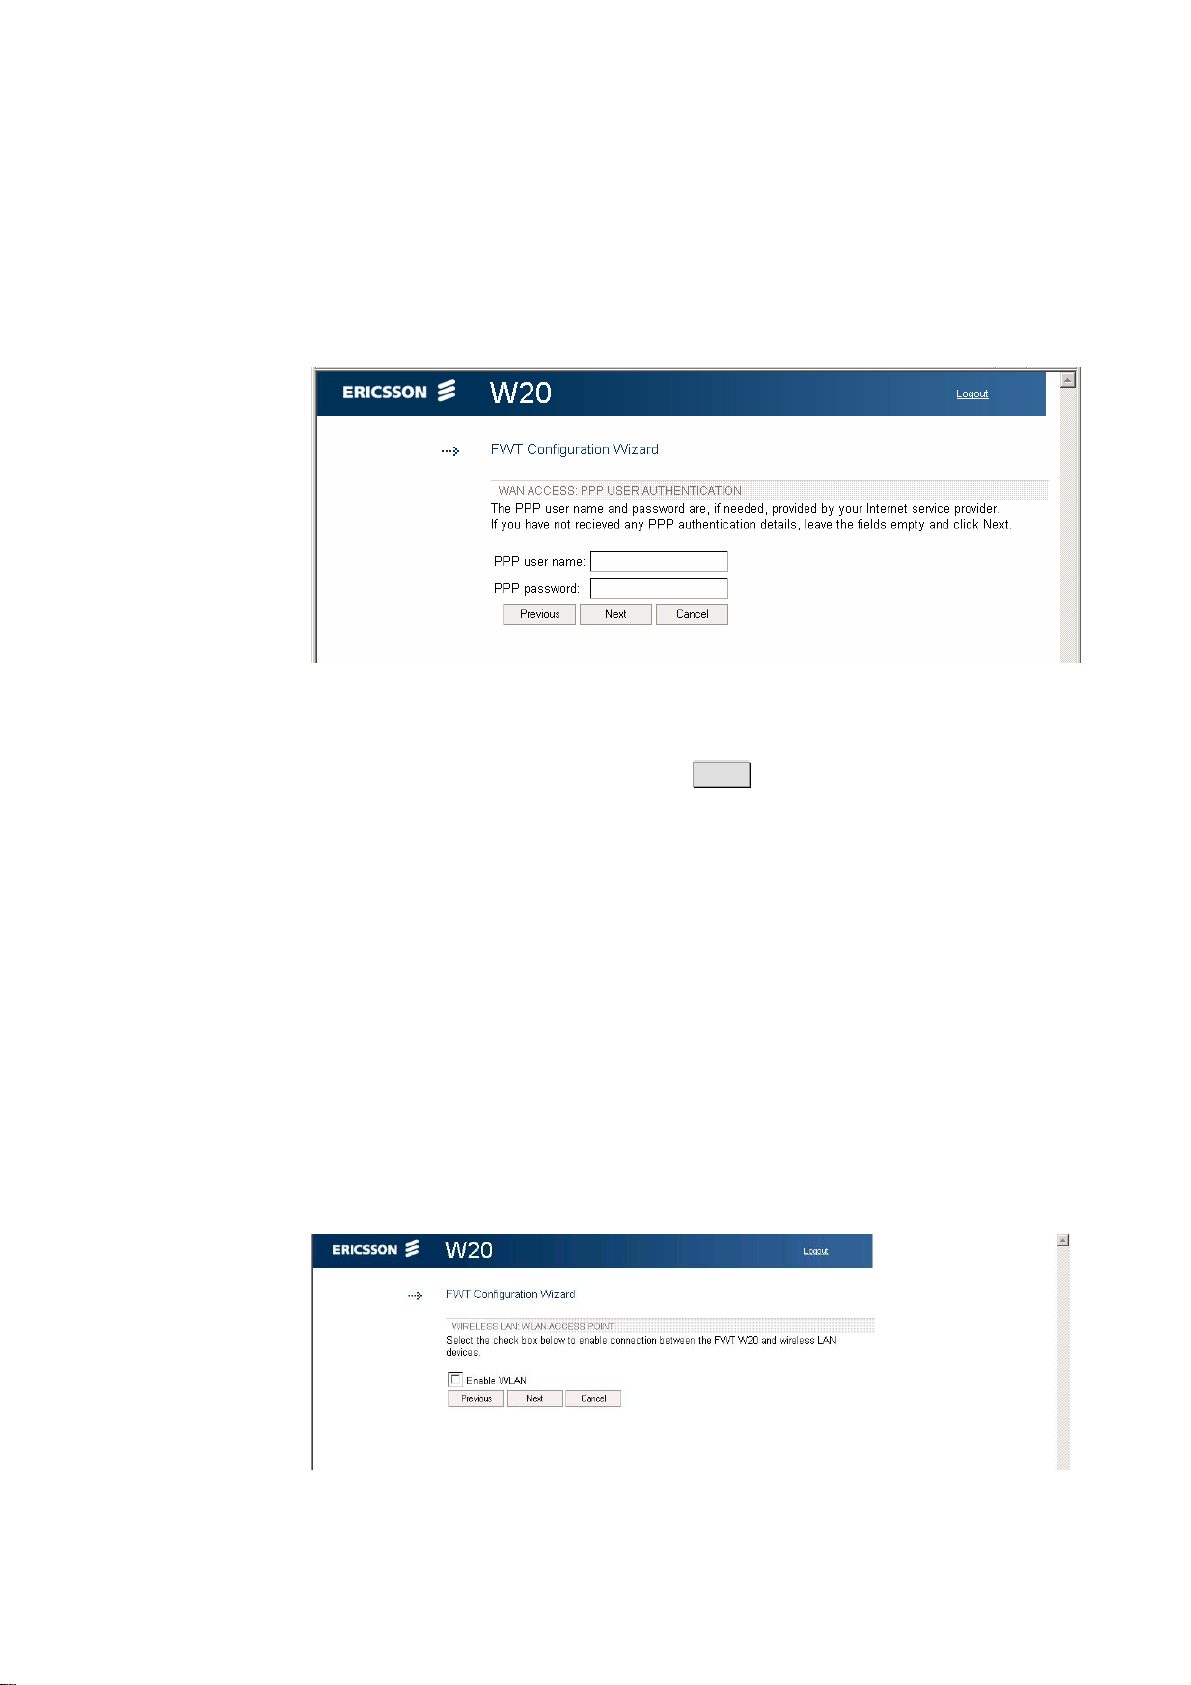
PPP User Authentication
The PPP (Point-to-Point Protocol) Internet mode may require individual
user authentication.
Figure 9 WAN Access: PPP User Authentication page
Fill in the PPP
user name and PPP password fields on the WAN Access:
PPP User Authentication page. Click Next to proceed.
2.3.2 Wireless LAN Access
The second part of the Configuration Wizard includes configuration of the
Wireless LAN (WLAN). A Wireless LAN is a local network that
communicates through wireless connections.
Note: The wireless setup typically requires configuration of both the
Ericsson W20 and the wireless clients. For more information about
configuring wireless clients, see
Access Point
The Ericsson W20 is a WLAN Access Point (AP) for the local network
providing the wireless client(s) with Internet and LAN access.
3.2 – “Wireless LAN Settings”.
Figure 10 Wireless LAN: WLAN Access Point page
1/1551-CRH 102 167 PA15 2006-08-16
11
Page 18

Configuration and Management
To enable connection of one or more wireless devices to the Ericsson W20,
select the Enable
Point page and click Next to proceed.
If you are not going to set up any wireless LAN, just click Next on the
Wireless LAN: WLAN Access Point page. The last page of the wizard,
where you can review and confirm your settings, is displayed:
WLAN check box on the Wireless LAN: WLAN Access
Figure 11 Confirm page
Check the information on this page and click Finish to confirm the
settings.
Region
To make sure the Ericsson W20 operates on correct radio frequencies
according to local regulations, you have to state in which region you reside.
After this you cannot select any radio channel that would be against the
regulations.
Figure 12 Wireless LAN: Region page
Select your country domain from the Region list on the Wireless
LAN:
Region page and click Next to proceed.
12 1/1551-CRH 102 167 PA15 2006-08-16
Page 19
Configuration and Management
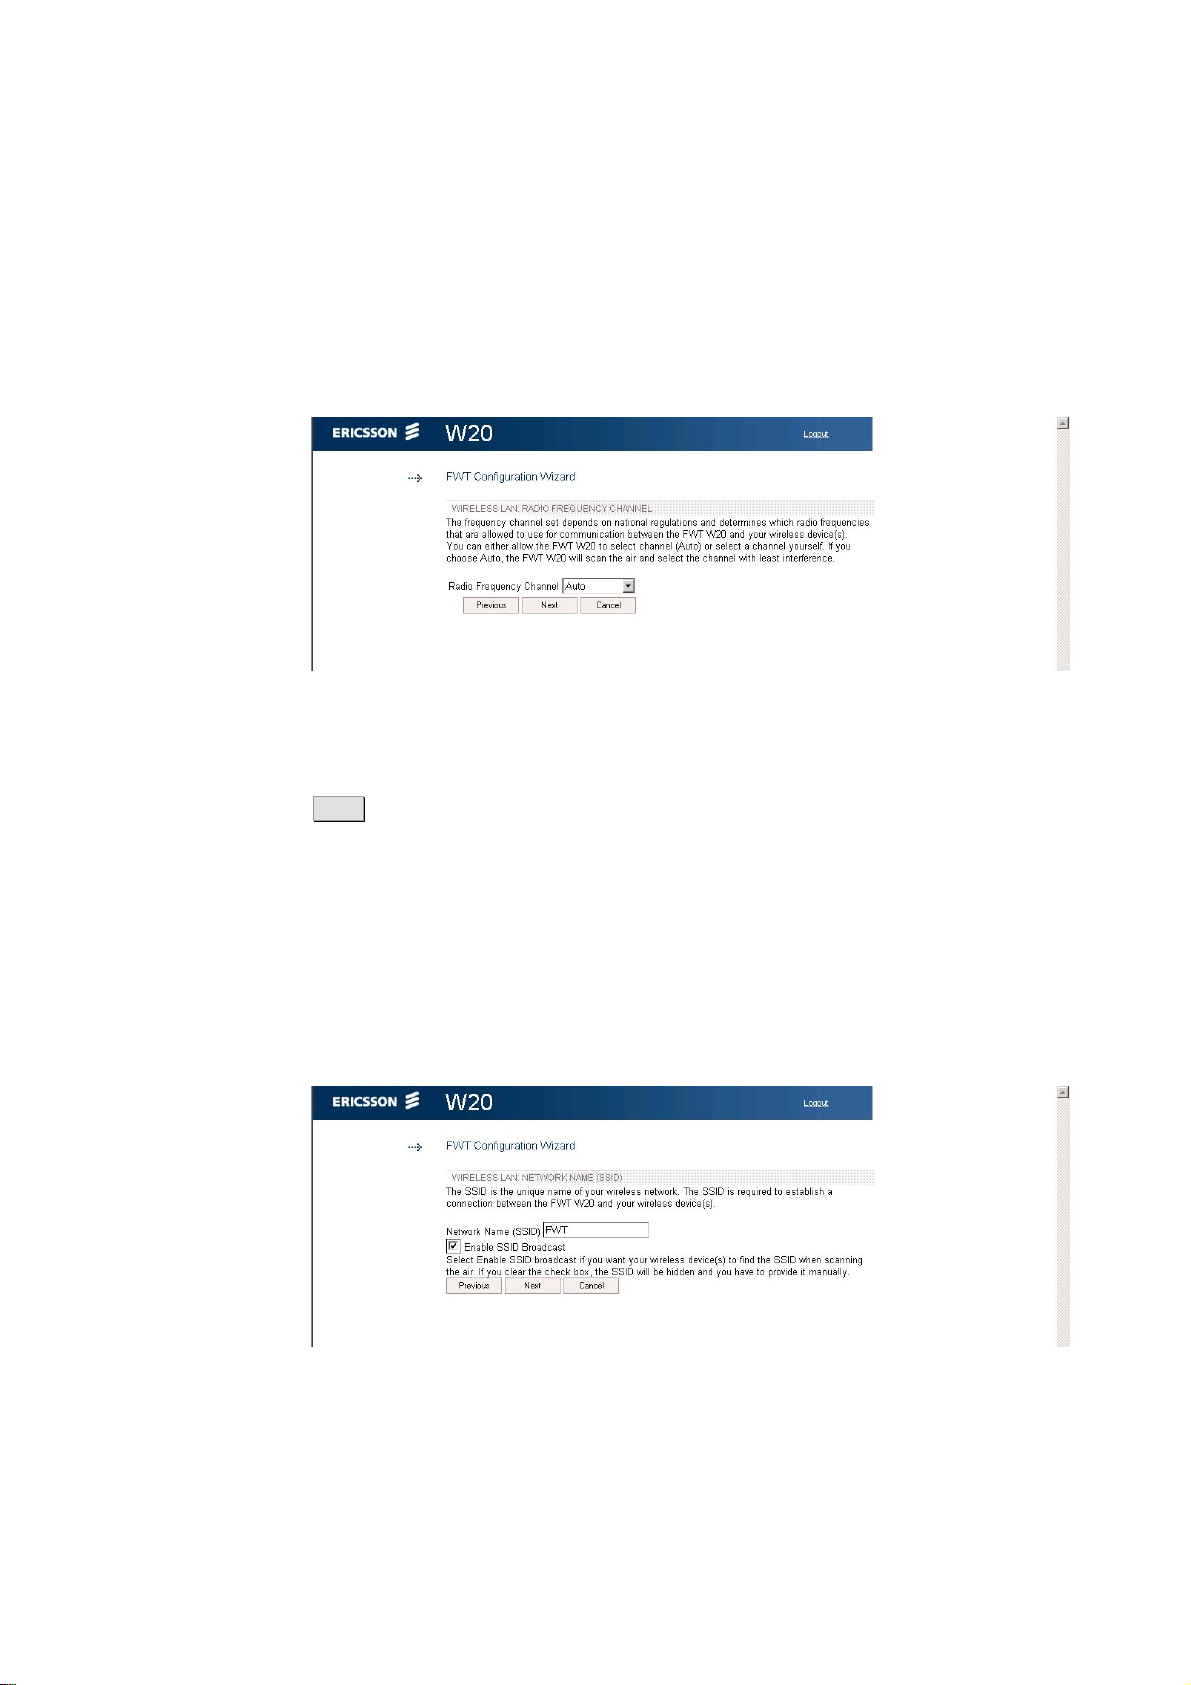
Channel Selection
The maximum number of regulatory channels to use for wireless
communication is 13. Available channels depend on local regulations. You
can select one of the available channels yourself, or let the Ericsson W20
automatically select a channel.
Figure 13 Wireless LAN: Radio Channel page
Select either Auto
or a channel number from the Radio Frequency
Channel list on the Wireless LAN: Radio Frequency Channel page. Click
Next to proceed.
Network Name
All devices on the local wireless network share a common Service Set
IDentifier (SSID) or network name. This name is required to establish
connection between the Ericsson W20 and the wireless client(s), and to
distinguish the wireless network from any other(s) that may be in use
nearby. It ensures that only devices configured with the same network
name as the one set on the Ericsson W20 can obtain access to it.
Figure 14 Wireless LAN: Network Name page
The default network name can be changed to any combination of numbers,
letters, or both with a maximum length of 127 characters. Type the new
1/1551-CRH 102 167 PA15 2006-08-16
13
Page 20

Configuration and Management
name in the Network name (SSID) field on the Wireless LAN: Network
Name page.
If the SSID broadcast option is enabled, your local wireless device(s) will
find the network name when scanning the air. If the option is disabled, the
network name is hidden and has to be manually provided to the wireless
device(s). To disable network name broadcast, clear the Enable
broadcast check box on the Wireless LAN: Network Name page.
Click Next to proceed.
Authentication
The wireless data transmissions can be protected from potential intruders
and eavesdroppers through standard authentication and encryption
methods. Authentication is used to restrict access to the wireless network.
Encryption is the translation of data into a form that cannot be easily
understood by unauthorized users. The encrypted data can only be sent
and received by users with access to a private encryption key.
SSID
WEP (Wired Equivalent Privacy) is considered to be a low security option.
WEP encrypted data is translated into blocks of either 64 bits length or 128
bits length.
WPA (Wi-Fi Protected Access) and its successor WPA2 are the most
reliable security options. WPA encryption uses the Temporal Key Integrity
Protocol (TKIP) while WPA2 encryption follows the Advanced Encryption
Standard (AES). AES offers a higher level of security and is approved for
sensitive corporate and government data transmission.
Figure 15 Wireless LAN: Authentication page
Note: Make sure that the operating system(s) and wireless LAN
interface(s) of the wireless client(s) support the selected authentication
method.
14 1/1551-CRH 102 167 PA15 2006-08-16
Page 21

Configuration and Management
Select one of the authentication methods from the Authentication list on
the Wireless LAN: Authentication page. Click Next to proceed.
If you select Open, the last page of the wizard, where you can review and
confirm your settings, is displayed. Check the information on this page and
click Finish to confirm the settings.
Figure 16 Confirm page
If you select WEP
(64 bit), the Wireless LAN: WEP-64 page is displayed:
Figure 17 Wireless LAN: WEP-64 page
1/1551-CRH 102 167 PA15 2006-08-16
15
Page 22

Configuration and Management
If you select WEP (128 bit), the Wireless LAN: WEP-128 page is
displayed:
Figure 18 Wireless LAN: WEP-128 page
If you select WPA, the Wireless
LAN: WPA is displayed:
Figure 19 Wireless LAN: WPA page
If you select WPA2, the Wireless
LAN: WPA2 is displayed:
Figure 20 Wireless LAN: WPA2 page
16 1/1551-CRH 102 167 PA15 2006-08-16
Page 23

Configuration and Management
WEP Encryption Key
The WEP encrypted data can only be sent and received by users with
access to a private encryption key. This means that each device on your
wireless network has to be configured with the same key as the Ericsson
W20 in order to allow encrypted data transmissions.
A 64-bit data encryption key includes 10 characters. A 128-bit data
encryption key includes 26 characters. Only the hexadecimal numbers 0 to
9 and letters A to F are allowed.
Fill in the Pass
phrase / Key field on the Wireless LAN: WEP-64 page or
the Wireless LAN: WEP-128 page. Click Next to proceed.
WPA/WPA2 Pass Phrase
WPA and WPA2 authentication and encryption require a pass phrase. Each
device on your wireless network has to be configured with the same pass
phrase as the Ericsson W20. The encryption master key is derived from the
pass phrase and the network name (SSID) of the device.
On the Wireless
pass phrase in the Pass
LAN: WPA or Wireless LAN: WPA2 page, type a unique
phrase / Key field. A WPA or WPA2 pass phrase
is case sensitive and consists of between 8 and 63 characters. It is
recommended that the pass phrase contains at least 20 characters. Click
Next to proceed.
Confirming Settings
On the last page of the Configuration Wizard, the Internet and Wireless
LAN settings are displayed:
Figure 21 Confirm page
Check the information on this page and click Finish to confirm the
settings.
1/1551-CRH 102 167 PA15 2006-08-16
17
Page 24

Configuration and Management
2.4 Internet
The Ericsson W20 connects to the Internet through mobile (radio)
communication using the UMTS (3G) network. If the UMTS network is not
available, the GSM (2G) network is used as fall-back. Connection details
are displayed on the Internet page:
Figure 22 Internet page
The following information is displayed on the Internet page:
The mobile network (UMTS or GSM) signal quality
available at the Ericsson W20 location. This signal
quality affects the performance of the unit. If two or
more bars are displayed, the connection is usually
acceptable.
Link
Status
The Internet access status, either
Up
or
Down
If the link is up, connection is established.
18 1/1551-CRH 102 167 PA15 2006-08-16
Page 25

Configuration and Management
Mode
Connection
Service provider
Network
registration
Address
IP
DNS
1
DNS
2
The protocol used for the Internet data traffic:
PPP
(Point-to-Point Protocol)
The radio access technique currently used to enable
Internet access. It can be either
UMTS
or
GSM
The name of the mobile network operator.
The current mobile network registration mode, which
can be one of the following:
Not
registered, not searching
Registered,
home network
Searching
Registration
denied
Unknown
Roaming
The IP address automatically assigned to the
Ericsson W20 by the mobile network.
The IP address to the DNS server.
The IP address to the secondary DNS server.
2.4.1 Traffic Statistics
The Traffic Statistics section includes information about the following
items:
Transmitted
packets
Received
packets
Error
Overruns
Dropped
Note: The data size and packet counters have the upper limits of 4 GiB
and 2
32
packets (more than 4 billion packets). When these limits
have been reached, the counters wrap around to zero.
The total size (and number) of transmitted data
packets.
The total size (and number) of received data
packets.
The number of invalid data packets.
The number of packet loss due to too many
incoming data packets.
The number of dropped data packets.
1/1551-CRH 102 167 PA15 2006-08-16
19
Page 26

Configuration and Management
2.4.2 Authentication
Internet access requires authentication of the Ericsson W20. Depending on
the current Internet service setup, the authentication requests may differ.
Your service provider provides the Ericsson W20 SIM card and details
needed for authentication.
The following authentication details may be required:
PIN
The Personal Identification Number, which is used for
SIM authentication.
Remember
PIN
my
If enabled, SIM authentication is automatic and you
will not have to enter the PIN in case of a system
restart.
APN
(3G)
The 3G Access Point Name, which is a reference to
the UMTS Internet access point on the service
provider’s network. The APN usually has the format
<name.service_provider.country>.
APN
(2G)
The 2G Access Point Name, which is a reference to
the GPRS/EDGE Internet access point on the service
provider’s network. The APN usually has the format
<name.service_provider.country>.
PPP
user name
The Point-to-Point Protocol Internet mode user name,
which is used for user authentication.
PPP
password
The Point-to-Point Protocol Internet mode password,
which is used for user authentication.
If you have not used the configuration wizard for configuration of Internet
access, or authentication is required because of a reset to factory default
configuration, fill in the PIN, APN
PPP
password fields. For automatic SIM authentication in case of a
(2G), APN (3G), PPP user name, and
system restart, select the Remember my PIN check box. Click Apply .
Note: Only enter details that you have received from your service
provider and leave other fields empty.
Unblocking SIM Card
If three attempts have been made with the wrong PIN, the SIM card is
blocked. The PUK is required to unblock the card. Click the Unlock SIM
that will be displayed beside the PIN field. The Unlock
SIM page is
link
displayed:
20 1/1551-CRH 102 167 PA15 2006-08-16
Page 27

Configuration and Management
Figure 23 Unlock SIM page
Type the PUK in the PUK field and type a new PIN in the New
PIN and
Retype new PIN fields. Click OK . The Overview page is displayed.
Note: If ten attempts have been made with the wrong PUK, the SIM card
is permanently blocked. A new SIM card is required.
Changing Authentication Details
If SIM authentication is verified, you cannot edit the PIN field. To change
PIN, click Change PIN
. The Change PIN page is displayed:
Figure 24 Change PIN page
Type the current and new PIN in the corresponding fields and click OK.
If you want to change the APN, PPP user name, or PPP password, type the
new value in the corresponding field on the Internet page and click Apply .
1/1551-CRH 102 167 PA15 2006-08-16
21
Page 28

Configuration and Management
2.5 LAN
The LAN (Local Area Network) configuration includes the details of the
connections between the Ericsson W20 and other local devices.
Figure 25 LAN page
The following information and configuration options are displayed on top of
the LAN page:
IP address
W20
Subnet
mask
The LAN address of the Ericsson W20.
The subnet mask, which determines the range of IP
addresses on the subnet.
If you want to change the W20 IP address, make sure that the new address
is not included in the DHCP server IP address range, displayed on the
DHCP
See section
Server page. The default range is 192.168.1.2 – 192.168.1.100.
2.7 – “DHCP Server” for instructions on how to change the
DHCP server IP address range.
Before you change the W20 IP address or subnet mask you also have to
make sure that the DHCP server IP address range is included in the new
subnet. If you want to change the subnet not to include the DHCP IP
address range, you first have to disable the DHCP server. See section
– “
DHCP Server” for instructions.
2.7
22 1/1551-CRH 102 167 PA15 2006-08-16
Page 29

Configuration and Management
To change the W20 IP address or subnet mask, type the new value in the
corresponding field and click Apply to save the settings.
Note: If you change the LAN IP address while connected to the Ericsson
W20 web pages through a web browser, you will be disconnected.
You have to redirect the web browser to the new address in order
to confirm the new settings. Type the new LAN IP address in the
Address (URL) field and press the key.
2.5.1 Connected Devices
The Connected Devices table includes information about all connected
LAN devices.
MAC
Address
IP
address
Name
Connection
2.5.2 Traffic Statistics
The following information is displayed in the Traffic Statistics section on
the LAN page:
Transmitted
packets
Received
packets
Error
The MAC (Media Access Control) address of the
device.
The IP address of the device.
The unique name of the device.
The type of connection, which is either
Ethernet
or
USB
The total size (and number) of transmitted data
packets on the LAN.
The total size (and number) of received data packets
on the LAN.
The number of invalid data packets.
Overruns
Dropped
Note: The data size and packet counters have the upper limits of 4 GiB
and 2
have been reached, the counters wrap around to zero.
1/1551-CRH 102 167 PA15 2006-08-16
The number of packet loss due to too many
incoming data packets.
The number of dropped data packets.
32
packets (more than 4 billion packets). When these limits
23
Page 30

Configuration and Management
2.5.3 Port Status
The Port Status table shows the connection(s) to the LAN (1 - 4) ports on
the Ericsson W20 unit. The status for each port is Up or Down.
2.6 Wireless LAN
A Wireless LAN (WLAN) is a local network that communicates through
wireless connections. The Ericsson W20 is a WLAN Access Point (AP) for
the local network providing wireless client(s) with Internet and LAN access.
The WLAN settings are displayed on the Wireless
ensure the security of your wireless LAN, you are recommended to change
the default settings.
Figure 26 Wireless LAN page
LAN web page. To
To enable the Ericsson W20 AP features providing the local wireless
device(s) with Internet and LAN access, select the Enable
box on the Wireless LAN page and click Apply .
Note: The wireless setup typically requires configuration of both the
Ericsson W20 and the wireless clients. For more information on
configuration of wireless clients, see section
Settings
24 1/1551-CRH 102 167 PA15 2006-08-16
”.
WLAN check
3.2 – “Wireless LAN
Page 31

Configuration and Management
2.6.1 Radio Channels
There are 13 regulatory radio channels predefined for the transportation of
data in a wireless LAN. Local regulations determine which of these
channels that can be used by the Ericsson W20.
The following settings concerning radio frequencies are displayed and
possible to modify on the Wireless
LAN page:
Region
The country domain, which is one of the
following:
Europe
US
Canada
South
Africa
Australia
Zeeland
New
Malaysia
Singapore
Radio
Frequency
The radio channel for wireless LAN
communication, either
Auto
(default) or
1-13
Transmit
Power [dbm]
The radio transmission level that
determines the signal range:
0-20
Default is 20.
To make sure the Ericsson W20 operates on correct radio frequencies
according to local regulations, you have to state in which region you reside.
After this you cannot select any radio channel which would be against the
local regulations. Select your country domain from the Region list on the
Wireless
LAN page.
Use the Radio channel list to select which one of the allowed radio
channels to use, or let the Ericsson W20 automatically select a channel
(Auto). If you want information about adjacent wireless networks to make
your choice, click Scan for wireless networks
networks page is displayed:
1/1551-CRH 102 167 PA15 2006-08-16
. The Scan for wireless
25
Page 32

Configuration and Management
Figure 27 Scan for wireless networks page
When the scanning is finished, the following information about identified
wireless networks is displayed:
MAC
Address
Network
Name
Channel
RSSI
Use this information to decide which channel to use for the Ericsson W20
wireless network. Click Back
you can select this channel.
To avoid interference with other wireless networks, the transmit power level
can be reduced. If you want to change the transmit power level according
to your specific conditions, select an appropriate level from the Transmit
Power [dbm] list.
Click Apply to save the settings.
2.6.2 Network Name
The MAC address of the access point of
the wireless network.
The name of the wireless network.
The radio channel used by the wireless
network.
The radio signal strength.
to return to the Wireless LAN page where
All devices on the local wireless network share a common Service Set
IDentifier (SSID) or network name. This name is required to establish
connection between the Ericsson W20 and other wireless device(s) and to
distinguish the wireless network from any other(s) that may be in use
nearby. It ensures that only devices configured with the same network
name as the one set on the Ericsson W20 can obtain access to it.
26 1/1551-CRH 102 167 PA15 2006-08-16
Page 33

Configuration and Management
The following settings concerning the network name are displayed and can
be modified on the Wireless
LAN page:
Network
Enable
name (SSID)
SSID broadcast
The name of the wireless network.
If this check box is selected the network
name will be broadcasted, otherwise
hidden.
The default network name can be changed to any combination of numbers,
letters, or both, with a maximum length of 127 characters. Type the new
name in the Network
name (SSID) field.
If the SSID broadcast option is enabled, the local wireless client(s) will find
the network name when scanning the air. If the option is disabled, the name
is hidden and has to be manually provided to the wireless client(s). To
disable network name broadcasting, clear the Enable
check box on the Wireless
LAN page.
Click Apply to save the settings.
2.6.3 Connected Devices
The Connected Devices list includes the MAC (Media Access Control)
addresses of all wireless devices currently connected to the Ericsson W20.
SSID broadcast
2.6.4 Security
The wireless data transmissions can be protected from potential intruders
and eavesdroppers through standard authentication and encryption
methods. Authentication is used to restrict access to the wireless network.
Encryption is the translation of data into a form that cannot be easily
understood by unauthorized users. The encrypted data can only be sent
and received by users with access to a private encryption key.
The following authentication methods are supported by the Ericsson W20:
WEP
WEP (Wired Equivalent Privacy) is considered to be a low security option.
The data is encrypted into blocks of either 64 bits length or 128 bits length.
The encrypted data can only be sent and received by users with access to
a private encryption key. Each device on your wireless network has to be
manually configured with the same key as the Ericsson W20 in order to
allow encrypted data transmissions.
1/1551-CRH 102 167 PA15 2006-08-16
27
Page 34

Configuration and Management
WPA and WPA2
WPA (Wi-Fi Protected Access) and its successor WPA2 are considered to
be the most reliable security options. WPA encryption uses the Temporal
Key Integrity Protocol (TKIP) while WPA2 encryption follows the Advanced
Encryption Standard (AES). AES offers a higher level of security and is
approved for sensitive corporate and government data transmission.
WPA and WPA2 authentication require a pass phrase. Each device on your
wireless network has to be manually configured with the same pass phrase
as the Ericsson W20. The encryption master key is derived from the pass
phrase and the network name (SSID) of the device.
The following wireless LAN authentication details are displayed and can be
modified on the Wireless
LAN page:
Authentication
The authentication method, which can be one of the
following:
Open
WEP
64-bit
WEP 128-bit
WPA
WPA2
Pass
Key
phrase /
The WEP 64-bit data encryption or 128-bit data
encryption key or the WPA or WPA2 authentication
and encryption pass phrase.
Enable
whitelist
If this check box is selected, only wireless devices
added to the whitelist are allowed to access the
Ericsson W20.
Select an authentication method from the Authentication
list.
Note: Make sure that the operating system(s) and wireless LAN
interface(s) of the wireless client(s) support the selected
authentication method.
If you have selected WEP 64-bit or WEP 128-bit, type the key for
encryption in the Pass
phrase / Key field. A 64-bit data encryption key
includes 10 characters. A 128-bit data encryption key includes 26
characters. Only the hexadecimal numbers 0 to 9 and letters A to F are
allowed.
If you have selected WPA or WPA2, type the pass phrase for
authentication and encryption in the Pass
phrase / Key field. A WPA or
WPA2 pass phrase is case sensitive and consists of between 8 and 63
characters. For security reasons, you are recommended to use a pass
phrase that contains at least 20 characters.
Click Apply to save the settings.
28 1/1551-CRH 102 167 PA15 2006-08-16
Page 35

Configuration and Management
2.6.5 Whitelist
The Whitelist is a list of up to 20 WLAN client MAC (Media Access Control)
addresses that are allowed to access the Ericsson W20. A MAC address is
the unique hardware number of a device. It has the form of
xx:xx:xx:xx:xx:xx, where x is either a letter A – F or a number.
To find out about the MAC address of a PC using Microsoft Windows, open
a command prompt and type ipconfig
is displayed. The MAC address is found on the Physical
To add a client to the whitelist, type the MAC address of the client in the
Whitelist field on the Wireless LAN page and click Add .
Click Apply to save the settings.
/all. A list of system properties
Address row.
2.7 DHCP Server
The Ericsson W20 incorporates a DHCP (Dynamic Host Configuration
Protocol) server that assigns dynamic IP addresses to local clients. The IP
addresses are collected from a predefined range of available addresses.
The default address range is suitable for most local networks.
The DHCP server uses the concept of a "lease”, that is the amount of time
that a given IP address will be valid for a specific device. If the lease time
expires and the device is still connected, the lease is automatically
renewed.
Figure 28 DHCP Server page
1/1551-CRH 102 167 PA15 2006-08-16
29
Page 36

Configuration and Management
The following configuration options are displayed on the DHCP
server
page:
Enable
DHCP server
If this check box is selected the DHCP server is
working, otherwise it is turned off.
IP
address range
from
IP
address range to
The first IP address in a range of IP addresses
that can be assigned to the LAN clients.
The last IP address in a range of IP addresses
that can be assigned to the LAN clients.
Max
Lease Time [sec]
The IP address lease time, specified in
seconds:
min: 60
max: 2147483647
To disable the DHCP server. Clear the Enable
the DHCP
Server page.
DHCP server check box on
If you for some reason want to configure your connected devices with static
addresses, make sure that the addresses are outside the DHCP server IP
address range.
To change the range of available addresses, change the IP addresses in
address range from and IP address range to fields.
the IP
Note: The DHCP server IP address range has to be on the same subnet
as the Ericsson W20 LAN IP address. The IP address range must
not include the Ericsson W20 IP address. For instructions on how
to change the W20 IP address or subnet mask, see section
“
LAN”.
In the Maximum
lease time [sec] field, enter the time (in seconds) you
2.5 –
want the LAN device to lease the IP address before it is reassigned.
Click Apply to save the settings.
30 1/1551-CRH 102 167 PA15 2006-08-16
Page 37

Configuration and Management
2.8 NAT
The Network Address Translation (NAT) service provides the LAN devices
with Internet access. All communication from the LAN to the Internet
appears to come from the IP address of the Ericsson W20. In this way,
details about the local devices remain private and it is not possible to
access a local device directly from the Internet.
Figure 29 NAT page
2.8.1 UPnP IGD
The Ericsson W20 supports the Universal Plug and Play (UPnP) Internet
Gateway Device (IGD) standard. UPnP IGD is used to provide automatic
port forwarding allowing communication between certain Internet
applications and the local network. When UPnP IGD is enabled, programs
like MSN Messenger
pass the NAT service.
To disable UPnP IGD, clear the Enable UPnP check box on the NAT page
and click Apply .
®
and most network enabled games are allowed to
1/1551-CRH 102 167 PA15 2006-08-16
31
Page 38

Configuration and Management
2.8.2 Application Level Gateways
From a security perspective, certain Internet applications, for example FTP
applications that open additional ports upon transfer, are especially
problematic to handle. An Application Level Gateway (ALG) provides a
translation and transportation service for such a specific application.
Incoming data packets are checked against existing NAT and packet
filtering rules, IP addresses are evaluated and a detailed packet analysis is
performed. If necessary, the contents of a packet are modified and if a
secondary port is required, the ALG will open one. The Ericsson W20
includes ALG support for the following applications:
Application Protocol Port
File Transfer Protocol (FTP) TCP 21
number
Trivial File Transfer Protocol (TFTP) UDP 69
The ALG for each application does not require additional configuration. The
supported ALGs can be enabled and disabled individually. To disable an
ALG, clear the corresponding check box on the NAT page and click
Apply .
2.8.3 Port Forwarding
Port forwarding is used to allow incoming access to a specific local network
device, for example an internal web server.
Note: Port forwarding requires a public IP address of the Ericsson W20.
The Ericsson W20 IP address is displayed on the Internet
the IP address begins with 10, 172, or 192, it is probably private.
In this case, no incoming access from the Internet is allowed. For
more information on public and private IP addresses, contact your
service provider.
Adding an Instance
page. If
To add a new port forwarding instance, click Add instance
in the Port
Forwarding section on the NAT page. The Add Port Forwarding page is
displayed:
32 1/1551-CRH 102 167 PA15 2006-08-16
Page 39

Configuration and Management
Figure 30 Add Port Forwarding page
Fill in the Protocol, NAT
and click Apply .
Port, Server Name/IP, and Server Port fields
Example
In the following example, port forwarding is used to allow incoming access
to an internal web server.
Protocol: TCP
NAT Port: 80
Server Name/IP: 192.168.1.101
Server Port: 8080
When one or more port forwarding instances are added, the following
details are displayed for each instance in the Port
Forwarding table on the
NAT page:
NAT
Port
The NAT port number that the data traffic is allowed
to be transported on.
Server
Server
Name/IP
Port
The name or IP address of the destination unit.
The destination port, which identifies the type of
service that is directed, for example web service on
port 8080.
Prot
1/1551-CRH 102 167 PA15 2006-08-16
The data traffic protocol; UDP or TCP.
33
Page 40

Configuration and Management
Editing an Instance
To edit a port forwarding instance, click the corresponding Edit
Port
Forwarding section on the NAT page. The Edit Port Forwarding
Instance page is displayed.
Change one or more value(s) in the Protocol, NATT Port, Server Name/IP,
or Server Port field(s) and click Apply .
2.9 File and Printer Sharing
The Ericsson W20 supports local network storage and printing. It is
possible to have two USB storage devices or a USB storage device and a
USB printer connected to the Ericsson W20 at the same time. When an
external hub is connected, the Ericsson W20 supports connection of up to
two storage devices and one printer at the same time.
When a storage device or network printer is connected to Ericsson W20,
information about the device is displayed on the File
page. If this page is open when you connect the device, a refresh of the
page is required for the new information to be displayed.
link in the
& Printer Sharing
Figure 31 File & Printer Sharing page
34 1/1551-CRH 102 167 PA15 2006-08-16
Page 41

Configuration and Management
To access a shared file or printer from a PC on your LAN, you may need
the following information, displayed on the File
& Printer Sharing page.
Host
name
Workgroup
The name of the Ericsson W20 on the local network.
The common name of all devices sharing the same
resources on the local network.
To change the host name or workgroup, type the new name in the
corresponding field and click Apply .
For information about setting up connections from a PC to shared files or a
network printer, see section
2.9.1 File Sharing
The Ericsson W20 supports USB connection of up to two mass storage
devices at the same time. The included files are shared with all devices on
the LAN. All local users have full access to the shared files.
Note: If the mass storage device contains more than one partition, only
the first partition is shared.
Information about file sharing device(s) is displayed on the File & Printer
Sharing page:
3.3 – “File and Printer Sharing Settings”.
Share name
The name of the shared resource on your local
network.
Storage
device
Connection
speed
The manufacturer name of the device.
The speed of the data transmissions between the
storage device and the Ericsson W20:
High
Full
Low
To give a file sharing device a specific name, type this name in the
corresponding Share name field and click Apply.
2.9.2 Printer Sharing
The Ericsson W20 supports sharing of a network printer, connected to one
of the USB ports. Depending on the printer type, the installation may
require some specific drivers, provided by the printer manufacturer, for
installation on the client PCs.
Speed (480 Mbit/s),
Speed (12 Mbit/s) or
Speed (1,5 Mbit/s)
1/1551-CRH 102 167 PA15 2006-08-16
35
Page 42

Configuration and Management
Information about the shared printer is displayed on the File & Printer
Sharing page:
Share name
Printer
Connection
To give your network printer a specific name, type this name in the Share
name field and click Apply.
speed
2.10 System
The System page includes system information and management functions,
used to update and restore the Ericsson W20.
The name of the shared printer on your local
network.
The manufacturer name of the printer.
The speed of the data transmissions between the
printer and the Ericsson W20:
High
Speed (480 Mbit/s),
Full
Speed (12 Mbit/s) or
Low
Mbit/s) Speed (1,5
Figure 32 System page
36 1/1551-CRH 102 167 PA15 2006-08-16
Page 43

Configuration and Management
2.10.1 Configuration Backup and Restore
The Ericsson W20 configuration can be restored to factory default settings,
or to any previous configuration locally stored in a backup file.
Backing Up a Configuration
It is possible to back up a configuration that you want to save for future
purposes.
To back up a configuration, click Backup in the Configuration Backup
and Restore section on the System page. Follow the instructions on the
screen to select a location for the configuration file.
Note: Do not modify a configuration file. If you do, the file will be invalid
and not accepted if you want to make a restore.
Restoring a Configuration
If you wish to revert to previous settings, you can perform a configuration
restore from a previously stored backup file.
Note: Do not modify a configuration file. If you do, the file will be invalid
and not accepted if you want to make a restore.
To restore from a configuration file, click Browse… in the Configuration
Backup and Restore section on the System page. Follow the instructions
on the screen to locate the configuration file. The selected file will be
displayed in the text field in the Configuration
section.
Click Restore to restore the configuration from the backup file. A
confirmation message is displayed.
2.10.2 Reboot
To restart the Ericsson W20, click Reboot in the Reboot section on the
System page. The Ericsson W20 is restarted. The restart does not result in
any configuration changes.
Backup and Restore
2.10.3 Software Upgrade
The current Ericsson W20 software version is displayed on top of the
System page. New software versions can be either automatically or
manually installed.
1/1551-CRH 102 167 PA15 2006-08-16
37
Page 44

Configuration and Management
Automatic Software Installation
Automatic software upgrade is supported through remote management.
Your service provider regularly upgrades the Ericsson W20 with the most
recent software version. To enable automatic software upgrade, select the
Enable
appropriate interval from the Select
Apply to save the settings.
Installing new Software from File
If your service provider provides a new software version for your Ericsson
W20, you are recommended to upgrade the Ericsson W20.
To check for new software versions, click Check in the Software Upgrade
section on the System page.
automatic software upgrade check box and choose an
an update interval [days] list. Click
To install new software on the Ericsson W20, make sure that the new
software file is available on your PC. Then click Browse… in the Software
Upgrade section. Follow the instructions on the screen to locate the
configuration file. The selected file will be displayed in the Software
image
field.
Click Upgrade to upgrade the Ericsson W20 with the new software
version. The following page is displayed:
Figure 33 Software Upgrade page – initiating upgrade
The information on this page is updated every tenth second. When the
upgrade is finished, the following page is displayed:
38 1/1551-CRH 102 167 PA15 2006-08-16
Page 45

Configuration and Management
Figure 34 Software Upgrade page – upgrade complete
2.11 Event Log
On the Event Log page, a list of the Ericsson W20 logs is displayed:
Figure 35 Event Log page
If persistent logging is enabled, the logs will remain after a system restart.
To enable this feature, select the Persistent
Event Log page and click Apply.
1/1551-CRH 102 167 PA15 2006-08-16
logging check box on the
39
Page 46

Configuration and Management
Each row in the log list displays the time and date when an alarm occurred,
the type of alarm, and a brief statement indicating its cause.
To view only a selection of the logs in the list, select a filter level from the
Display
corresponds with the Alarm indicator on the Ericsson W20 unit and the
information in the Alarms
Click Refresh to update the list with new information. The most recent
errors are listed at the bottom of the list.
list. Available log levels are Alarm and All. The Alarm log level
section on the Overview page.
40 1/1551-CRH 102 167 PA15 2006-08-16
Page 47

PC Configuration
3 PC Configuration
The connection to the Ericsson W20 may require specific PC configuration.
This chapter includes instructions on how to configure Internet Protocol (IP)
settings, establish wireless connection(s) with the Ericsson W20 and
access a shared network storage device or printer. The descriptions include
examples from Windows XP and 2000. If you use another operating
system, refer to the system documentation or online help.
3.1 IP Settings
The Ericsson W20 automatically assigns the IP settings to your PC(s). You
only need to configure the PC(s) according to the instructions below to
accept the information. In some cases however, you may want to configure
IP settings manually. See section
3.1.2 – “Configuring Static IP Address”.
If you have connected your LAN PC(s) to the Ericsson W20, follow the
instructions that correspond to the operating system installed on your PC in
the following sub-sections.
If you want to allow wireless PCs to access your device, you also have to
follow the instructions in section
3.2 – “Wireless LAN Settings”.
3.1.1 Obtaining IP Settings Automatically
Follow the instructions that correspond to the operating system installed on
your PC.
Windows
1 In the Windows task bar, click the Start button, and then click Control
2 If you are using Category View, Click Network
XP
Panel. The Control Panel window is displayed.
and Internet
Connections and then Network Connections. If you are using
Classic View, double-click Network Connections. The Network
Connections window is displayed.
3 Double-click the icon corresponding to your network interface card
(NIC). This icon is usually labeled Local
Area Connection Properties window is displayed with a list of
currently installed network items.
1/1551-CRH 102 167 PA15 2006-08-16
Area Connection. The Local
41
Page 48

PC Configuration
4 Ensure that the Internet Protocol TCP/IP check box is selected and
click Properties .
5 In the Internet Protocol (TCP/IP) Properties window, select Obtain
an IP address automatically and Obtain DNS server address
automatically.
6 Click OK twice to confirm your changes and close the windows, and
then close the Control Panel window.
Windows
2000
First, check for the IP protocol and, if necessary, install it:
1. In the Windows task bar, click the Start button, point to Settings, and
then click Control Panel.
2. Double-click the Network and Dial-up Connections icon.
3. In the Network
and Dial-up Connections window, right-click the
Local Area Connection icon, and then click Properties.
The Local
Area Connection Properties dialog box is displayed with a
list of currently installed network components. If the list includes
Internet Protocol (TCP/IP), then the protocol has already been
enabled. Skip to step 11.
4. If Internet Protocol (TCP/IP) does not display as an installed
component, click Install… .
5. In the Select Network Component Type dialog box, select Protocol,
and then click Add… .
6. Select Internet Protocol (TCP/IP) in the Network Protocols list, and
then click OK .
You may be prompted to install files from your Windows 2000
installation CD or other media. Follow the instructions to install the files.
7. If prompted, click OK to restart your computer with the new settings.
Next, configure the PCs to accept IP information assigned by the Ericsson
W20:
8. In the Windows task bar, click the Start button, point to Settings, and
then click Control Panel.
9. Double-click the Network
and Dial-up Connections icon.
10. In the Network and Dial-up Connections window, right-click the
Local
Area Connection icon, and then click Properties.
42 1/1551-CRH 102 167 PA15 2006-08-16
Page 49

PC Configuration
11. In the Local Area Connection Properties dialog box, select Internet
protocol (TCP/IP), and then click Properties .
12. In the Internet Protocol (TCP/IP) Properties dialog box, click the
Obtain an IP address automatically option button. Also click the Obtain
DNS server address automatically option button.
13. Click OK twice to confirm your changes and close the windows, and
then close the Control Panel window.
3.1.2 Configuring Static IP Address
Most users need not to configure static IP settings. Automatic configuration
is appropriate in most cases.
For information about static IP configuration, see the operating system
documentation or online help.
Note: Make sure that the IP address of the client is on the same subnet
as the Ericsson W20. The IP address range of the Ericsson W20
subnet is displayed on the DHCP
3.2 Wireless LAN Settings
This section provides a general description of what is required to make your
wireless devices work with the Ericsson W20.
Before you follow the instructions below, you need to configure the
Ericsson W20 wireless LAN settings, see section
3.2.1 Siting the Wireless PC
The coverage of the wireless LAN depends on a number of factors,
including the distance between the Ericsson W20 and the PC and the
occurrence of obstacles, such as walls and electrical equipment.
Server page.
2.6 – “Wireless LAN”.
Guidelines on siting the hardware components of your wireless network are
provided by your wireless LAN interface provider.
3.2.2 Installing the Wireless LAN Interface
Each PC on your wireless LAN must be fitted with a wireless LAN interface,
such as a wireless network card. You also have to install the corresponding
driver files for your particular wireless LAN interface on your PC. The driver
1/1551-CRH 102 167 PA15 2006-08-16
43
Page 50

PC Configuration
files and instructions on how to install them are provided together with the
interface.
3.2.3 Configuring PC Access to the Ericsson W20
The configuration steps below will vary depending on both the operating
system and the wireless LAN interface installed on the PC. These steps
provide a basic outline. For specific instructions, refer to the documentation
provided with your wireless LAN interface.
Configure the following wireless parameters on each of the wireless PCs:
− Set the wireless LAN interface to use infrastructure mode. This
configures the PCs to access each other and the Internet through
the Ericsson W20.
− Configure the network
network name and channel configured on the Ericsson W20. This
information can usually be obtained through WLAN scanning. The
network name is case sensitive.
− If you are using Wired Equivalent Privacy (WEP) security,
configure the same encryption key that is configured on the
Ericsson W20.
− If you are using Wi-Fi Protected Access (WPA or WPA2) security,
configure the same pass phrase that is configured on the Ericsson
W20. The pass phrase is case sensitive.
− Configure the IP settings using the procedure described in section
3.1 – “Configuring Internet Settings”.
name (SSID) and channel to match the
3.3 File and Printer Sharing Settings
When a USB mass storage device or network printer is connected to the
Ericsson W20, information about the device is displayed on the File
Printer Sharing page.
&
In some cases, you have to make sure that your PC belongs to the same
workgroup as the Ericsson W20. Follow the instructions in section
“
Checking Workgroup Settings” to check the workgroup on your PC.
If you want to configure a network drive mapping to a shared device, follow
the instruction in section
Device
44 1/1551-CRH 102 167 PA15 2006-08-16
” and 3.3.4 – “Setting Up Connection to a Network Printer”.
3.3.3 – ”Setting Up a Mapping to a Storage
3.3.2 –
Page 51

PC Configuration
3.3.1 Accessing a Shared Device
To access a shared device from a PC using Windows 2000 or XP, follow
the steps below:
1. In the Windows task bar, click the Start button, and then click Run….
2. Type \\<host
name>\<share Name>
name and Share name are displayed on the Ericsson W20 File &
Printer Sharing page. Click OK .
3. The shared resource is displayed. Double-click on the shared file to
open it.
3.3.2 Checking Workgroup Settings
The following sections include instructions on how to check the workgroup
settings on a PC using Windows XP or 2000.
Windows
Follow the steps below to check the workgroup settings on a PC using
Windows XP:
1. In the Windows task bar, click the Start button, and then click Control
2. If you are using Category View, click Performance and Maintenance
XP
Panel. The Control
Panel window is displayed.
and then See basic information about your computer. If you are
using Classic View, double-click System. The System
window is displayed.
in the Open field. The Host
Properties
3. Click the Computer
4. Click Change…. The Computer Name Changes window is displayed.
5. Make sure that the Workgroup name is exactly the same as on the
Ericsson W20 File
the workgroup either on the PC or on the Ericsson W20.
6. If you decide to change the workgroup on the PC, type the correct
name in the Workgroup field and click OK . If you do not want to
make any changes, click Cancel. The Computer Name Changes
window is closed.
7. If you have changed the workgroup settings, follow the instructions on
the screen to restart the PC.
1/1551-CRH 102 167 PA15 2006-08-16
Name tab.
& Printer Sharing page. If not, you have to change
45
Page 52

PC Configuration
Windows 2000
Follow the steps below to check the workgroup settings on a PC using
Windows 2000:
1. In the Windows task bar, click the Start button, and then click Settings
and Control Panel. The Control
Panel window is displayed.
2. Double-click the System icon. The System Properties window is
displayed.
3. On the Network Identification tab, click Properties. The Identification
Changes window is displayed.
4. Make sure that Workgroup is selected in the Member of section and
that the name of the workgroup is exactly the same as on the Ericsson
W20 File
& Printer Sharing page. If not, select the Workgroup option
and type the name in the field. If there is already a workgroup name,
although not the same as on the Ericsson W20, you have to change
the workgroup either on the PC or on the Ericsson W20.
5. If you have made any changes, click OK . Otherwise, click Cancel.
The Identification Changes window is closed.
6. If you have changed the workgroup settings, follow the instructions on
the screen to restart the PC.
3.3.3 Setting Up a Mapping to a Storage Device
The following sections include instructions on how to configure a mapping
to a mass storage from a PC using Windows XP or 2000.
Windows
Follow the steps below to set up a connection to a shared storage device
from a PC using Windows XP:
1. In the Windows task bar, click the Start button, and then click My
2. From the Tools menu, select Map Network Drive…. The My Network
3. Select a drive that is not already used from the Drive list.
XP
Computer. The My Computer window is displayed.
Drive window is displayed.
4. In the Folder field, type \\<host_name>\<share_name>. You find
the host name and share name on the File
46 1/1551-CRH 102 167 PA15 2006-08-16
& Printer Sharing page.
Page 53

PC Configuration
5. Click Finish. The Map Network Drive window is closed. The device is
displayed in the My Computer window as a new partition.
Windows
2000
Follow the steps below to configure a connection to a shared storage
device from a PC using Windows 2000:
1. Right-click the My
The Map
Network Drive window is displayed.
Computer icon and select Map Network Drive...
2. Select a drive that is not already used from the Drive list.
3. In the Folder field, type \\<host_name>\<share_name>. You find
the host name and share name on the File
& Printer Sharing page.
4. Click Finish. The Map Network Drive window is closed. The device is
displayed in the My Computer window as a new partition.
3.3.4 Setting Up Connection to a Network Printer
Follow the steps below to set up a set up a mapping to a network printer
from a PC using Windows XP or 2000:
Windows
Follow the steps below to set up a connection to a network printer on a PC
using Windows XP:
1. In the Windows task bar, click the Start button, and then click Control
XP
Panel. The Control
Panel window is displayed.
2. If you are using Category View, click Printers and Other Hardware
and then Printers and Faxes. If you are using Classic View, doubleclick Printers
displayed.
3. From the File
started.
4. Follow the instructions in the wizard to install the printer.
1/1551-CRH 102 167 PA15 2006-08-16
and Faxes. The Printers and Faxes window is
menu, select Add Printer. The Add Printer Wizard is
47
Page 54

PC Configuration
Windows 2000
Follow the steps below to set up a connection to a network printer on a PC
using Windows 2000:
1. From the Start menu, select Settings and then Control
Control
Panel window is displayed.
Panel. The
2. Double-click the Printers icon. The Printers Window is displayed.
3. Double-click the Add Printer icon. The Add Printer Wizard is started.
4. Follow the instructions in the wizard to install the printer.
48 1/1551-CRH 102 167 PA15 2006-08-16
Page 55

Trouble-Shooting
4 Trouble-Shooting
This chapter describes how to solve a number of issues that could occur
during installation, configuration, and use of the Ericsson W20. More
information is available at www.ericsson.com/fwt.
Before you try any of the methods described in this chapter, make sure that
the connected cables are securely inserted and that the Power indicator on
the Ericsson W20 is green.
If none of the suggested methods solve your problem, you are
recommended to:
1. Restart the Ericsson W20.
2. Reset the Ericsson W20 to factory default configuration.
3. Contact your service provider.
To restart the Ericsson W20, click the Reboot button on the System web
page. If you cannot access the Ericsson W20 web pages, remove the
power cable to disconnect the Ericsson W20 from power and wait a
moment before reconnecting the cable.
To reset the settings to factory default, disconnect the Ericsson W20 from
power by removing the power cable. Then use a tip of a pen to press the
Reset button while reconnecting the power cable. Keep the Reset button
pressed for at least 20 seconds.
The factory default configuration contains the original settings of your
Ericsson W20. When you install your Ericsson W20 and access the web
pages for the first time, the configuration file contains the factory default
configuration.
Note: A reset to factory default configuration cannot be undone. If you
reset the Ericsson W20 to default configuration, all your previous
configuration changes are replaced. If you have previously
changed the user name and password, the Login page will be
displayed. You have to login to the web pages with the default user
name and password (user in both fields).
1/1551-CRH 102 167 PA15 2006-08-16
49
Page 56

Trouble-Shooting
4.1 No Access to Ericsson W20 Web Pages
If you cannot access the Ericsson W20 internal web pages, take the
following actions to identify and solve the problem:
• Check that the PC is configured to obtain an IP address automatically
using DHCP. If not, change the PC TCP/IP settings. For instructions,
see section
of your operating system.
• If the W20 IP address has been changed and you do not know the
current IP address, use the Reset button to reset the Ericsson W20 to
factory default configuration (see above). This will set the IP address to
192.168.1.1 and the web page address to http://192.168.1.1.
• Make sure you are using the correct login details. If the default
password has been changed and you do not know the current
password, use the Reset button to reset the Ericsson W20 to factory
default configuration (see above). This will reset the login details to
default values. The default user name and password both are “user”.
3.1.1 – “Obtaining IP Settings Automatically” or the manual
• If the PC is connected to the Ericsson W20 via an Ethernet cable,
check that at least one of the corresponding LAN connector indicators
is illuminated. If not, make sure that the cable is properly connected or
try with another Ethernet cable.
• If you are using a wireless PC, make sure that the Wireless
indicator on the front panel of the Ericsson W20 unit is illuminated. If
not, connect an Ethernet cable between the PC and the Ericsson W20
to establish a connection. The wired connection is required for the
initial wireless LAN configuration of the Ericsson W20.
• If the PC is assigned a static IP address, make sure that the DNS
server settings of the PC correspond with the Ericsson W20
configuration. For information, see the operating system documentation
or online help.
4.2 No Internet Access
If you cannot access the Internet from any of your local devices, take the
following actions to identify and solve the problem:
• Check that the Ethernet cable is properly connected and that at least
one of the corresponding LAN connector indicators is illuminated.
LAN
• Make sure that the GSM/UMTS antenna is properly connected and
tightened to the Ericsson W20 antenna connector.
50 1/1551-CRH 102 167 PA15 2006-08-16
Page 57

Trouble-Shooting
• Check the Alarm indicator on the front panel of the Ericsson W20 unit.
If it is red, see the information in the Alarms section on the Overview
page.
• On the Internet page, check that the PIN field is filled in and that there
is no error message beside this field. If there is a message saying No
SIM, verify that a valid SIM card is correctly inserted and then retype
the PIN code on the Internet page. If the message says Set
retype the PIN code. If the SIM
PUK is required to unblock the card.
blocked message is displayed, the
PIN, only
• On the Internet page, check that the APN
APN
(3G) and APN (2G) fields.
• On
indicator
attach an external antenna (indoor window or outdoor roof mounted).
External antennas are available as accessories to the Ericsson W20.
Internet
the page, verify that the mobile network signal quality
displays at least one bar. If not, move the Ericsson W20 or
is correctly entered in the
4.3 Slow or Intermittent Internet Connection
If your Internet connection is unacceptable slow or regularly dropping, take
the following actions to identify and solve the problem:
• On the Internet page, verify that the Connection is UMTS. If not, move
the Ericsson W20 or attach an external antenna (indoor window or
outdoor roof mounted). External antennas are available as accessories
to the Ericsson W20.
• On
indicator displays at least two bars. If not, try to move the Ericsson W20
or attach an external antenna.
Internet
the page, verify that the mobile network signal quality
4.4 No Access to a Certain Internet Application
If you cannot access a certain Internet application or specific type of data,
take the following actions to identify and solve the problem:
• If the application uses FTP or TFTP, check the NAT page to make sure
that the ALG supporting the Internet application is enabled.
• If the application requires UPnP IDG, check that UPnP
the NAT page.
1/1551-CRH 102 167 PA15 2006-08-16
51
is enabled on
Page 58

Trouble-Shooting
4.5 No LAN Connection
If you cannot access the local network from a PC that is connected to one
of the LAN ports on the Ericsson W20, or to an Ethernet switch or hub that
is connected to the Ericsson W20, take the following actions to identify and
solve the problem:
• Check that the corresponding LAN connector indicator is green. If not,
check that the Ethernet cable(s) is properly connected.
• Check that the PC is configured to obtain IP address automatically
using DHCP. If not, change the PC TCP/IP settings. For instructions,
see section
manual of your operating system.
3.1.1 – “Obtaining IP Settings Automatically” or refer to the
4.6 No Wireless LAN Connection
If you cannot access the local network from a wireless device, take the
following actions to identify and solve the problem:
• Check that the Wireless
W20 unit is illuminated. If not, connect an Ethernet cable between the
PC and the Ericsson W20 to establish a connection. The wired
connection is required for the initial wireless LAN configuration of the
Ericsson W20.
• Verify that the wireless LAN interface installed on the wireless client is
active.
• Move the Ericsson W20 to another location. Make sure that the mobile
network signal is still acceptable before finalizing the installation.
• Check that the Transmit
configured in accordance with your requirements on wireless network
coverage. The maximum transmit power value is “20”.
• Configure the Ericsson W20 wireless LAN authentication method to
Open. This will verify if the wireless LAN connection is working without
encryption. If so, the problem is related to the security settings. See the
information below to get help to identify the problem.
LAN indicator on front panel of the Ericsson
power [dbm] on the Wireless LAN page is
• Verify that the operating system and wireless LAN interface of the client
supports the Ericsson W20 authentication and encryption method
(WEP 64-bit, WEP 128-bit, WPA, or WPA2). The Ericsson W20
security settings are displayed on the Wireless
security method is not supported, configure the Ericsson W20 to use
another method.
52 1/1551-CRH 102 167 PA15 2006-08-16
LAN web page. If the
Page 59

Trouble-Shooting
• Verify that the network name (SSID) on the Ericsson W20 and the
wireless client are the same. Note that the network name is case
sensitive.
• If you are using WEP, make sure that the encryption key length (64-bit
or 128-bit) is the same on the Ericsson W20 and the wireless client.
• If you are using WEP, make sure that the wireless client is configured
with the same encryption key as the Ericsson W20. Check that the
encryption key consists of hexadecimal characters only.
• If you are using WPA or WPA2, make sure that the pass phrase is the
same on the Ericsson W20 and the wireless client. Note that the pass
phrase is case sensitive.
• If Whitelist is enabled, make sure that the wireless client is included on
this list.
• If the wireless client uses a static IP address, make sure that this IP
address is on the same subnet as the Ericsson W20. For instructions
on how to check the client’s IP address, see the operating system
documentation or online help. The W20 IP address and subnet mask is
displayed on the LAN page.
• Make sure that your Ericsson W20 network does not use the same
radio channel as other wireless devices in the premises, for example
security systems. The radio channel is displayed on the Wireless
page. To avoid interference, let the Ericsson W20 select a channel
automatically (Auto) or manually change the radio channel currently
used.
• Keep the Ericsson W20 away from electrical devices that disturb the
radio signals, for example microwave ovens.
4.7 Slow or Intermittent Wireless LAN Connection
If your wireless connections to the local network are unacceptable slow or
regularly dropping, take the following actions to identify and solve the
problem:
LAN
• Move the Ericsson W20 to another location. Make sure that the mobile
network signal is still acceptable before finalizing the installation.
• Make sure that your Ericsson W20 network does not use the same
radio channel as other wireless devices in the premises, for example
security systems. The radio channel is displayed on the Wireless
page. To avoid interference, let the Ericsson W20 select a channel
1/1551-CRH 102 167 PA15 2006-08-16
LAN
53
Page 60

Trouble-Shooting
automatically (Auto) or manually change the radio channel currently
used.
• Keep the Ericsson W20 away from electrical devices that disturb the
radio frequency signals, for example microwave ovens.
• Check that the Transmit
configured in accordance with your requirements on wireless network
coverage. The maximum (default) value is “20”.
Power [dbm] on the Wireless LAN page is
4.8 No Access to Shared Files or Network Printer
If you cannot access a shared storage device or network printer that is
connected to one of the USB connectors of the Ericsson W20, take the
following action to identify and solve the problem:
• Disconnect the USB device from the Ericsson W20, and then reconnect
it.
• Make sure that the PC belongs to the same workgroup as the Ericsson
W20. For instructions, see section
Settings
Printer Sharing web page.
• If you have problems accessing a storage device, make sure that the
device is using the FAT file system. Note that only one partition is
available.
. The Ericsson W20 workgroup is displayed on the File &
3.3 - File and Printer Sharing
• If you have problems accessing a network printer, make sure that any
printer specific drivers are installed on the PC.
54 1/1551-CRH 102 167 PA15 2006-08-16
Page 61

Glossary
Glossary
2G
The second generation wireless
communications technology, introducing
digital voice encoding. Low speed data
services are supported.
3G
The third-generation wireless
communications technology. 3G includes
enhanced voice, data, and video capabilities,
improved availability, broad bandwith and
high speed.
ALG
Application Layer Gateway.
An ALG provides a translation and
transportation service for an Internet
application. If necessary, the contents of a
data packet are modified and if a secondary
port is required, the ALG will open one.
AES
Advanced Encryption Standard.
An encryption method used by WPA2.
Compared with TKIP, AES offers a higher
level of security and is approved for sensitive
corporate and government data transmission.
AP
Access point.
An Internet device that seamlessly connects
wired and wireless networks. Access points
attached to a wired network support the
creation of multiple radio cells that enable
roaming throughout a facility.
APN
Access Point Name.
A reference to the Internet access point of an
Service provider.
Authentication
The process to verify the identity of a user
requesting network access.
Broadcasting
To simultaneously send the same message to
multiple recipients.
CDMA
Code Division Multiple Access.
A general term describing mobile air interface
technologies based on “spread spectrum”
digital radio access methods, offering benefits
including increased capacity, quality and
security. CDMA is fundamental to 3G mobile
systems.
Channel
A channel determines the radio frequency
used by an access point to pass data traffic to
wireless clients. Available channels depend
on region specific regulations.
DHCP
Dynamic Host Configuration Protocol.
A protocol used to provide a framework for
passing configuration information on a
TCP/IP network.
DHCP server
Dynamic Host Configuration Protocol server.
A configuration server, capable of configuring
network devices with a variety of information
required for their operation.
DNS
Domain Name System (or Service).
The way that Internet domain names are
located and translated into IP addresses.
1/1551-CRH 102 167 PA15 2006-08-16 55
Page 62

Glossary
EDGE
Enhanced Data rates for Global Evolution.
A technology that gives GSM the capacity to
handle services for the third generation of
mobile telephony. EDGE provides three times
the data capacity of GPRS.
Encryption
The
translation of data into a form that cannot
be easily understood by unauthorized users.
Data passing between an access point and
network clients can use encryption to protect
from interception and eavesdropping.
Encryption key
A sequence of characters used for data
encryption. The encrypted data can only be
sent and received by users with access to the
encryption key.
Ethernet
The most common LAN technology, used in
both wired and wireless networks. An
Ethernet LAN typically uses coaxial cables or
special grades of twisted pair wires.
FAT
File Allocation Table.
A file system used for the Microsoft Windows
operating systems.
FTP
File Transfer Protocol.
A protocol for exchanging files over the
Internet. FTP is most commonly used to
download and upload files from and to
servers.
FWT
Fixed Wireless Terminal.
A terminal providing residential and small
office users with broadband services like
high-speed data, voice, and fax connectivity.
Internet access is provided through the
mobile communications network.
Gateway
A network point that acts as an entrance to
another network.
GPRS
General Packet Radio Service.
A packet-based mobile communications
system building on GSM. Advantages over
standard GSM include higher data
transmission speeds, more efficient use of
radio resources and continuous connection to
the network to facilitate more advanced nonvoice services.
GSM
Global System for Mobile Communication.
The second generation mobile system
originally developed in Europe. GSM is
oriented to voice and circuit mode data.
Host
A device (usually a computer) connected to a
network.
HSDPA
High Speed Downlink Packet Access.
The new standardized evolution of WCDMA
that will enable downlink speeds of up to 14
Mbps.
IGD
Internet Gateway Device.
See UPnP IGD.
IMEI
International Mobile Equipment Identity.
The IMEI number of a mobile device is a 15
digit unique code that is used to identify the
device on a network.
IP
Internet Protocol.
A part of a suite of protocols that effectively
defines the Internet as we know it. Specifies
addressing and control information for routing
data packets over networks.
56 561/1551-CRH 102 167 PA15 2006-08-16
Page 63

Glossary
IP address
The address of a host on the Internet,
consisting of four numbers, each from 0 to
255, separated by periods, for example
192.168.1.1. An IP address consists of a
network ID that identifies the particular
network the host belongs to, and a host ID
uniquely identifying the host itself on that
network. A network mask is used to define
the network ID and the host ID.
LAN
Local Area Network.
A computer network limited to the immediate
area, such as a home, office, or small
building.
Lease time
The amount of time that an dynamically
assigned IP address will be valid for a specific
device.
MAC address
Media Access Control address.
The permanent hardware address of a device
assigned by its manufacturer. MAC
addresses are expressed as six pairs of
hexadecimal characters (0-9 and A-F), with
each pair separated by colons. For example:
1a:2b:23:5b:66:9a
Mass Storage
Various techniques and devices used to store
large amounts of data. An example of a mass
storage device is a hard disk.
NAT
Network Address Translation.
A service performed by many routers that
translates a network’s IP address into a
private IP address for each device on the
LAN. Only the router and the LAN know these
addresses; the outside world sees only the
public IP address when talking to a computer
on the LAN.
Network mask
A sequence of bits applied to an IP address
to select the network ID while ignoring the
host ID. Bits set to 1 mean “select this bit”
while bits set to 0 mean “ignore this bit”. For
example, if the network mask 255.255.255.0
is applied to the IP address 100.10.50.1, the
network ID is 100.10.50, and the host ID is 1.
See also subnet mask.
Packet
The units of data transmitted on a network.
Each packet contains a payload (the data),
plus overhead information such as where it
came from (source address) and where it will
go (destination address).
Pass Phrase
A secret password used for WPA and WPA2
wireless data encryption. The encryption is
based on a WPA master key that is derived
from the pass phrase and the network name
(SSID).
PC
Personal Computer.
A computer designed for use by one person
at a time.
PIN
Personal Identification Number.
A secret code used for individual access to
for example computer networks. Generally, a
PIN is made up of 4 to 10 digits.
PPP
Point-to-Point Protocol.
A protocol for serial data transmission that is
used to carry IP (and other protocol) data
between the service provider and your
computer.
Private
IP Address
A private IP Address is typically assigned to a
client on a LAN (Local Area Network) and is
not used outside the LAN. Private IP
addresses are typically used when multiple
computers share the same Internet
connection.
1/1551-CRH 102 167 PA15 2006-08-16 57
Page 64

Glossary
Protocol
A set of rules governing the transmission of
data. In order for a data transmission to work,
both ends of the connection have to follow the
rules of the protocol.
PSK
Pre-Shared Key.
An easy-to-set-up home mode for network
access allowing for manually entering of keys
and pass phrases.
Public IP Address
A public IP address is a globally unique
number that identifies a device on the
Internet. Anyone on the Internet can connect
to the device using the public address.
PUK
Personal Unblocking Key.
A secret code made up of 8 to 10 digits. The
PUK is used to reativate a SIM card that has
been blocked.
Roaming
The movement between microcells in a radio
network. Roaming service is used to provide
network access independent of where the
user resides and what service provider that is
running the network.
Routing
The forwarding of data between a local
network and the Internet on the most efficient
route, based on the data’s destination IP
address and current network conditions. A
device that performs routing is called a router.
RSSI
Received Signal Strength Indicator.
The RSSI is an indicator of the strength of the
received radio signal.
SIM
Subscriber Identity Module.
The “smart card” required by all mobile
customers to operate their phones. Carries
authentication, billing and information about
the individual subscriber, as well as address
book and other personalized information.
SSID
Service Set Identifier.
A unique network name that differentiates
one wireless device from another. Wireless
PCs configured with the same SSID can
access the same network.
Subnet
A portion of a network. The subnet is
distinguished from the larger network by a
subnet mask that selects some of the
computers of the network and excludes all
others. The subnet’s devices remain
physically connected to the rest of the
network, but they are treated as though they
were on a separate network.
Subnet mask
A mask that defines a subnet. See also
Network mask.
Switching
Routing data traffic by setting up temporary
connections between two or more network
points. This will take the data toward its
intended destination.
TCP
Transmission Control Protocol.
See TCP/IP.
58 581/1551-CRH 102 167 PA15 2006-08-16
Page 65

Glossary
TCP/IP
Transmission Control Protocol / Internet
Protocol.
The basic protocols used on the Internet.
TCP is responsible for dividing data up into
packets for delivery and reassembling them
at the destination. IP is responsible for
delivering the packets from source to
destination. When TCP and IP are bundled
with higher-level applications such as HTTP,
FTP, Telnet, and so on, TCP/IP refers to this
whole suite of protocols.
TFTP
Trivial File Transfer Protocol.
A TCP/IP protocol commonly used for
software downloads.
TKIP
Temporal Key Integrity Protocol.
A protocol used for WPA data encryption. It
ensures that a unique master key is
generated for each packet, supports message
integrity and sequencing rules, and supports
re-keying mechanisms. TKIP avoids the
problems of WEP static keys by dynamically
changing data encryption keys.
UDP
User Datagram Protocol.
A connection-less transport service that
dispenses with the reliability services
provided by TCP. UDP gives applications a
direct interface with IP and the ability to
address a particular application process
running on a host via a port number, without
setting up a connection session.
UPnP
Universal Plug and Play.
A networking architecture that provides
compatibility among networking equipment,
software, or between equipment and
software.
UPnP IGD
UPnP Internet Gateway Device.
A standard used by UPnP aware clients, such
as MSN Messenger, to work properly from
behind a NAT.
UMTS
Universal Mobile Telecommunications
Service.
A 3G wireless system that delivers highbandwidth data and voice services to mobile
users. UMTS has an air interface based on
WCDMA and a core network based on the
General Packet Radio Service (GPRS).
URL
Uniform Resource Locator.
The address of a resource on the Internet.
USB
Universal Serial Bus.
An interface for connecting peripherals such
as storage devices and printers to a host.
WAN
Wide Area Network.
A network of computers that covers a large
geographical distance. With respect to the
Ericsson W20, WAN refers to the Internet.
WCDMA
Wideband CDMA.
The radio access technology for wideband
wireless access supporting 3G services. It
allows very high speed multimedia services
like wireless Internet access and
videoconferencing. WCDMA is also known as
CDMA DS (Direct Sequence).
WEP
Wired Equivalent Privacy.
A method for data encryption on wireless
networks. Data is encrypted into blocks of
either 64 bits length or 128 bits length. The
encrypted data can only be sent and received
by users with access to a private encryption
key.
1/1551-CRH 102 167 PA15 2006-08-16 59
Page 66

Glossary
Wireless
A common term used to describe
telecommunications in which radio waves
(rather than some form of wire) carry the
signal over part or all of the communication
path.
WLAN
Wireless Local Area Network.
A WLAN is a network in which a mobile user
can connect to a LAN through a wireless
(radio) connection. The IEEE 802.11 standard
specifies the technologies for wireless LANs.
WPA
Wi-Fi Protected Access.
An authentication and encryption standard for
wireless networks. WPA addresses the
security limitations of WEP, providing a
stronger data encryption method; TKIP. WPA
data encryption is based on a WPA master
key. The master key is derived from the pass
phrase and the network name (SSID) of the
device.
WPA2
Wi-Fi Protected Access 2.
An enhanced version of WPA. For data
encryption, WPA2 uses AES instead of TKIP.
60 601/1551-CRH 102 167 PA15 2006-08-16
Page 67

Glossary
1/1551-CRH 102 167 PA15 2006-08-16 61
Page 68

Ericsson Enterprise AB
www.ericsson.com 1/1551-CRH 102 167 PA15 2006-08-16
© Ericsson Enterprise AB 2006 - All Rights Reserved
 Loading...