

Page 1

The symbol on our products signifies that they have been certified according to the EMC
directive 89/ 336 /E EC, the Tel e com munication s dire cti ve 91/ 263/ EE C, a nd t he Low Volt age
directive 73/ 23/ E EC when applicable. The products fulfil the re qui r ements according to the
following standards :
Cellular Phones and Accessories in Combination:
ETS 300 342-1 EMC f or Euro p ea n digi ta l c ell ul ar t el ecommu nications.
Accessories Without Direct Connecti on to a Cellular Phone:
EN 50081 Electro magnet ic compat ability , Generic Emission Standard, and EN 50082
Electromagnetic compatability, Generic Immunity Standard.
First edition (December 1996)
This manua l is publ ishe d by Ericsson Mobile Communications AB, without any warranty.
Improvements and changes to this manual necessitated by typographical errors, inaccuracies of
current informat ion, or improve men ts to programs an d/ or equi pme nt , may be made by Ericsson
Mobile Communications AB a t any time and without noti ce. Such changes will, howe ve r,
be incorporated int o new edi tions of th is manu al.
All rights rese r ved.
Ericsson Mobile Communications AB, 199 6.
Publication numbe r : EN/LZT 126 1353 R1A
Printed in Sweden
INNOVATRON PATENTS
This manual describes Ericsson GH688
Page 2

Guidelines fo r Safe an d Ef ficient U se
Important: Read this information before using your portable phone.
General
Since its introduction in the mid 198 0s the port-
able phone is one of the most exci tin g and inno-
vative products ever develope d. With it, you
can stay in contact wi th your office, your home,
emergency services, and others.
Your telep hone is a radio transmitter and re-
ceiver. When it is ON it receive s and also se nds
out radio frequency (RF) energy. Depending
upon the type of mobile ph one you have pur-
chased, it operates in different freq uen cy ranges
and emplo ys commonly used modulation tech-
niques. Whe n you use your phone , the syste m
handling your call controls the power level at
which your phone tra nsmi ts.
For the safe and efficient
operation of your phone,
observe t hese guidelines
Exposure to radio frequency
energy
The International Commission on Non-Ionizing
Radiati on Prot ecti on (ICN IRP), sp onsor ed b y
the World Healt h Organ izat i on (WHO ) , publ ish-
ed a statement in 1996 which sets limits for ex-
posure to RF fields from handhe l d m obile
phone. Acc ording to this statement , which is
based on the available body of research, there is
no evidence that mobile terminals meeting the
recommended limits can cause any adverse
health effects. All Erics son telephones confor m
to the ICNIRP recommendations, and interna-
tional exposure standards , s uch as:
CENELEC European Pre-standard
ENV50166-2
ANSI/IEEE C95. 1-199 2 (USA, Asia- Pacific)
If you want to limit RF exposure even further,
you may choose to con trol th e durat ion of your
calls and oper at e your phone in the most power
efficient manner.
Efficient phone operation
How to use your phone for optimum perform-
ance with minimum power consumption:
Hold the phone as you w ould any ot her tel e-
phone. While speaking directly into t he mouth-
piece, angle the a ntenn a in a dire cti on up and
over your shoulder. If the an tenna is exte nda bl e,
it should be extended during a call.
Do not hold the antenna when the phone is IN
USE. Holding the antenna affects call quality,
may cause the phone to operate at a higher
power level than needed and shorten talk and
standby times.
Antenna care and replacement
Do not use the phone with a damaged an tenna .
Replace a damaged antenna imm ediately. Con-
sult your manual to s ee if you m ay change the
antenna yourself. If so, use only an Ericsson ap-
proved antenna. Otherwise, take your phone to
a qualified s er vice cen tre f or repa ir.
Use only the designated Ericsson antenna. Un-
authorized antenna s, m odificat ions , or attac h-
ments could damage the phone and may viol ate
the appropria te re gulat i ons .
Do not use an antenna designed for any other
type of portable telephone than the telephone
you have purchased.
Driving
Check the laws and regulations on the use of
telephone s in the areas where you drive. Al w a ys
obey them. A lso, when using your phone wh ile
driving, please:
Give full attention to dri vi ng.
Use hands-free oper ati on, i f avai lable.
Pull off the road and park before making or an-
swering a call if driving conditions so require.
ii EN/LZT 126 1353 R1A
Page 3

RF energy ma y a f fect some electronic systems
in motor vehicles. In addition, some vehicle
manufacturers forbid the use of mobile phones
in their vehicles. Che ck wit h your vehicl e man u-
facturer’s representative to be sure your phone
will not affect the electr onic sys tems of your ve-
hicle.
Electronic devices
Most modern elect r onic equ ipment , for exam -
ple, equipment in hospitals and cars, is shielded
from RF energy. Howe ver, RF ene rgy from tele-
phones may affect some electronic equipment.
Turn your phone OFF in health care facilities
when regulation s posted in the are as instruct
you to do so. Always request permiss ion before
using your phone near medical equ ip ment.
Mobile telephones may affect the operation of
some implan te d card iac pa ce mak er s, equ ipment
for people with hearing impairments and other
medically implanted equipment. Pa cemaker pa-
tients should be aware that the use of a mobile
phone very clos e t o a pa cemaker may cause th e
device to malfunction. Avoid placing the phone
over the pacemaker, i.e. in your breast pocket.
When using the phone, place it at your ear oppo-
site the pacemaker. If a distance of 15cm. is
kept between the phone and the pacemaker, the
risk of interference i s limit e d. Contact your car -
diologist for more in f ormat ion.
Aircraft
Turn your phone OFF bef ore boarding an y air-
craft.
Use it on the ground only wi t h crew pe rmi ss io n
Turn off your phone before the aircra ft lea ves
the ground. Do not use it in the air.
To prevent possibl e interference wit h ai rcraft
systems, safety r egula tions r equ ire you to ha ve
permission from a crew member to use your
phone while the plane is on the ground. To pre-
vent interference wi t h communicat ion s yste ms,
you must not use your ph one whil e the pla ne is
in the air.
Power Supply
Connect AC (P ower suppl y) only to designated
power sources as marked on the product.
To reduce risk of damage to electr ic cord, re-
move from outlet by holding onto AC adapter
rather than cord .
Make sure the cord is located so that it will not
be stepped on, tripped over or otherwise sub-
jected to damage or stress.
To reduce risk of electric shock, unplug unit
from power source before attempting any clean-
ing, then use soft cloth dampened on with water.
Children
Do not allow children to pla y wit h your phone.
It is not a toy. Children could hurt themselves
or others (by poking themsel ves or others in the
eye with the antenna for example). Chil dren
could also damage the phone or make calls that
increase your telephone bills.
Blasting areas
To avoid in te rfering with blast ing operations,
turn your unit OFF when in a “blasting area” or
in areas posted “turn off two-way radio”. Con-
struction crews often use remote control RF de-
vices to set off explosives .
Potentially explosive atmospheres
Turn your phone OFF when in any area with a
potentia ll y explosive atmosphere. It is rar e, but
your phone or its accessories could generate
sparks. Sparks in such areas could cause an ex-
plosion or fire resulting in bodily injury or even
death.
Areas with a potential ly exp losi ve atm osphere
are ofte n, but not always, clearly marked. They
include fuelling a reas , such as petrol s tat ions,
below deck on boats, fuel or chemical transfer
or storage facilities, an d areas where the air c on-
tains chemicals or particles, such as grain, dust,
or metal powd ers.
Do not transport or store flammable gas, liquid,
or explosives in the compartment of your vehi-
cle which contains your ph one and acces s ories .
Product care
Do Not expose product to water or moisture.
EN/LZT 126 1353 R1A iii
Page 4

Example: bathtub, l aun d r y sink, wet/damp bas e-
ment, swimming pools, etc.
Do Not expose product to extre me t empe ra -
tures such as fou nd near a hot radiator or st ove,
or in a car parked in the sun.
Do not expose product to extreme cold tem-
peratures such as a car parked outdoors in win-
ter.
Do Not expose product to lit candles, ciga-
rettes, cigars, open flames, etc.
Use only Ericsson Original accessories. Fail-
ure to do so ma y result in loss of perf ormance,
fire, electric shock, or injury, and will void the
warranty.
Do Not attempt t o di sa ss emble the product. D o-
ing so will voi d warranty. This product does
not contain consumer ser vicea ble components.
Service should only be performed by Author-
ized Service Centres.
Table of Contents
Guide lin es for Sa fe and Effici ent Us e ii
General ii
For the safe and effi c i en t operati o n of your
phone, observe the se gui delines ii
1. The Phone 1
2. Making the P hone R eady for Use 2
To insert the SIM card 2
To attach the battery 3
To charge the batter y 3
About the battery 4
3. Turning the P hone On 4
To turn the phone on 4
To choose a lan guage
other than English in the display 5
To set the time 5
To turn the phone off 6
4. About the Keypad and Display 6
Key Functions 6
Indicators in the Di sp la y 7
5. Making and Receiving Calls 7
To make a domestic call 7
To end a cal l 8
Last number re-dial 8
Automatic re-dialling function 8
To make an int e rnational call 8
To make an emergency call 8
To receive a call 8
6. When a Call Is in Progress 9
To change th e volume 9
To mute the microphone 9
To use the display as a scratch pad 9
To send tone signals 9
7. About the Phone’s Menus 11
Display texts and symbols
in the menu system 13
To enter letter s 13
CHECK and SPECI AL
CHARACTERS Menus 14
8. Using the Phone Book
(PHONE BOOK Menu) 15
To store a phone number 15
To recall a phone number using the nam e 16
iv EN/LZT 126 1353 R1A
Page 5

To recall a phone number
using the p os i ti on 17
To change a phone number, name
or memory position 17
To erase a phone number 17
To erase ALL phone numbers
from the Phone memory 18
To copy ALL ph one numbe rs from th e
Card memory to the Phone memory
and vice versa 18
To copy phone numbers ONE BY ONE
from the Card memory to the Phone
memory and vice versa 18
The ANSWERED CALLS Mem ory 19
The DIALLED NUMBERS memory 19
9. Personalisin g Yo ur Phone
(SETTINGS Menu) 20
To set the level of the ringing signal 20
To set the volume of the ear piece or
handsfree loudspeaker 21
To choose the type of rin gin g signal 21
To compose your own rin gin g signal 21
To choose the type of message signal 21
To choose manual or automat ic key lo ck 21
To choose the key sound 21
To set the illumination of the dis pl ay
and keypad 22
To be reminded of the conversation
time spent during a cal l 22
To choose call time or call cost display 22
To choose answering mode when using
the phone with handsfree equi pme nt 22
To personalise the greeting displayed
each time the phone is turned on 22
To have your phone number displaye d
each time the phone is turned on 23
To select another language in the displ ay 23
To personalise the names of the two lines
if you have the 2 Line service 23
To activate data men us 23
To reset the phone 23
10. Protecting Your SIM Card and Phone
(ACCESS and KEYLOCK Menus) 24
Card Lock 24
Phone Lock 25
Call Barring 25
Locking the keypad 26
11. Setting Time, Date and Alarm
(CLOCK Menu) 27
Clock (Time of Day) 27
Calendar (Today’s Date) 27
Alarm 28
12. Diverting Incoming Calls
(DIVERT Men u) 29
To activate a particular call di ver t 29
To check the status of a call dive rt 30
To cancel a call dive rt 30
To cancel ALL call dive rts 30
To review the status of ALL call diverts 30
13. Using Ot her Networks
(NETWORKS Menu) 31
To sele ct a network 31
To choose automatic or manual
network search mode 31
To create a l is t o f preferred networks
on your SIM card 32
To start an automat i c network search 33
14. Sending DTMF Tones 35
Automatic DTMF 35
DTMF pause function 35
Using several pauses 35
Pre-programmed DTMF signalling 35
15. Who Is Calling? 36
To receive a call 36
Answere d calls 36
Unanswered calls 37
To hide your phone number
when making a call 37
To send your phone number
when making a call 37
16. Handling Two Calls Simultaneously 38
To activate the Call Waiting se r vic e 38
To make a second call
while a call is in progress 38
To receive a se c ond call
while engaged in a call 38
To switch between two calls 38
To end the current call 38
To receive a thi rd call 39
EN/LZT 126 1353 R1A v
Page 6

Transfe rr in g a Call 39
17. Conference Calls 39
To initiate a conference call 39
To have a priva te conversation
with one of the members 40
To release one of the members 40
To end the conference ca l l 40
18. Answering Service 40
To activate the Voicemail function 40
To call your answering service 41
19. Sending and Receiving Text Messages
(SMS) 41
To set p hone for text mes sagin g 42
To receive a message 42
To read stored messages 43
Own messages 43
20. Using Ar ea Information (AI ) 45
To turn area information on or off 45
To decide which t ype s of AI mes sage
you wish to receive 45
To receive area information 46
To review recei ved mess ages 46
21. Two Line Service 47
To select a line 47
Different settings for each line 47
To person alise the names of the two lin es 47
22. Knowing the Call T i me/C all C ost 48
To check the time or cost of the last call 48
To check the total call tim e or call cost 48
To reset the total call time/ cost meter 48
To determine the call cost 48
Specifying a total am ount of money
that can be used for making calls 49
23. Restricted Usage with Fixed Numbers 50
Activat in g the Fixe d Dial lin g funct ion 50
Storin g fixed nu mbers 50
To change a stored numbe r 51
24. Data Menus 51
25. Using the P h on e ’s Buil t -I n
Calculat or 52
To make a calcul a tion 52
26. Composing Your O w n R i nging Signal 52
About the phone’s note system 52
Simple melody 52
27. Problems You Can Solve 54
The phone does not come on 54
Phone lo ck ed is displayed, followed
by the prompt
Enter lock code 54
Insert card is displayed 54
Wrong PI N or Wrong PIN2
is displaye d 54
Card blocked . Unb lock? is displayed 54
BLOCKED. Contact card provider
is displayed 55
Enter PUK2 is displayed 55
Emergency calls only is displayed 55
No network
is displayed 55
A key symbol is displayed in the middle
line of the display 56
You have chosen a wrong language
in the display 56
Indicator lig ht blinks red 56
vi EN/LZT 126 1353 R1A
Page 7
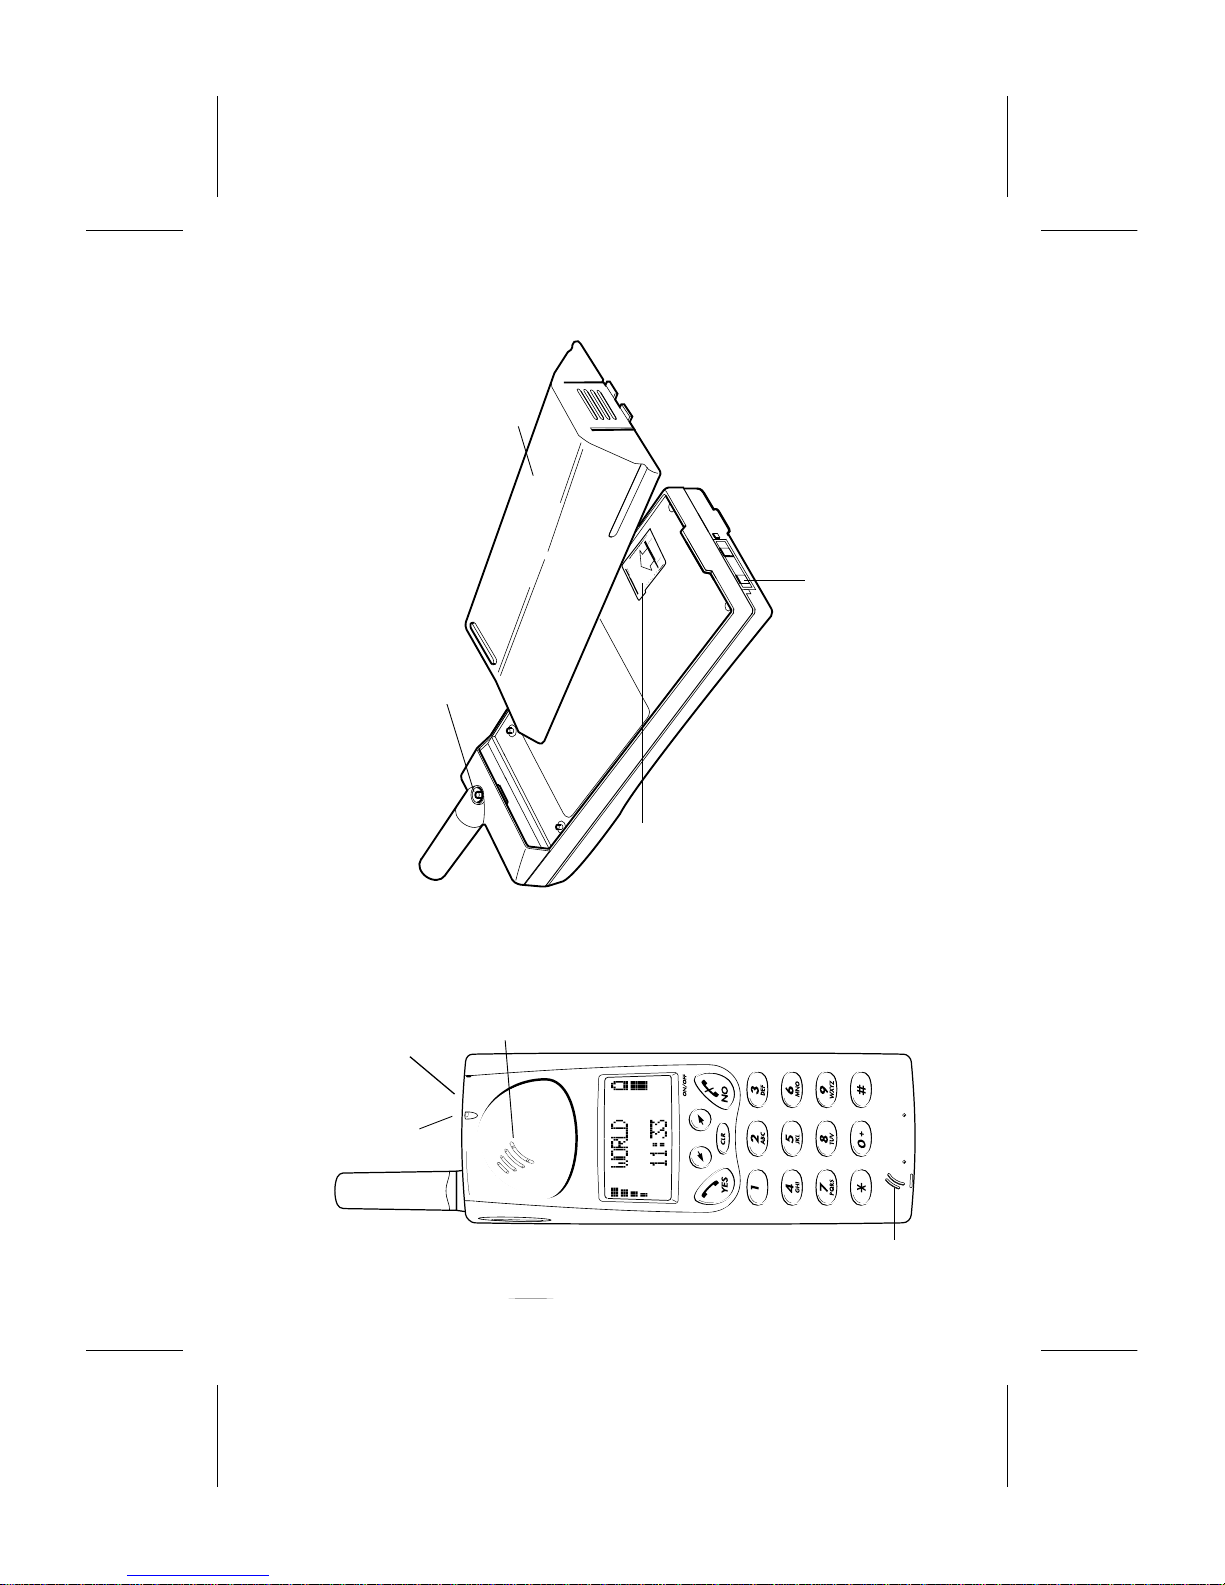
1. The Phone
Beeper
Indicator
light
Ear
piece
Antenna
Volume
keys
Display
Keypad
Micro-
phone
Battery
SIM card holder
Charging connector
External antenna connector
EN/LZT 126 1353 R1A 1
Page 8

2. Making the Phone Ready for Use
This chapter describes h o w you assemble the phone, what the SIM Card is, and how
you handle the battery.
To insert the SIM card
When you become a subscriber of a network op-
erator, you obta i n a S IM card with a pers onal se-
curity code, the PI N code. The SIM card
contains a computer chip that keeps track of
your phone numbe r, the se rvices that you have
ordered from your netw ork opera t or, and your
phone book information.
Before you can use the phone, you must insert
the SIM card into the phone.
1. Release the card holder by sliding it from you.
2. Unfold the holder.
3. Slide the mini SIM card into the holder.
Make certain that the angled corner is top
right.
4. Fold down the card holder.
5. Lock the card holder by sliding it towards you.
Mini SIM card
Card holder
4.
2.
5.
1.
3.
2 EN/LZT 126 1353 R1A
Page 9

To attach the batte ry
1. Place the batte r y on top of the phone
2. Press until you hear a click.
Removing the batter y:
Make sure the phone is turned off.
1. Press the locking catch on the bottom of the
batter y.
2. Lift the battery up and away from the phone.
To charge the battery
Have the battery attached to the phone .
1. Connect the charger to the mains.
A green indicator lamp on the charger lights
up.
2. Connect the charger to the phone. The flash
symbol on the plug must face upwards.
The phone now star t s to charge t he bat tery.
To indicate this, a battery icon in the display
is filled and emptied continuously and the in-
dicator lamp on the top of the phone shows a
stead y red light. When the batte ry is fully
charged, the indicator light shows a steady
green light.
While you are char ging the bat tery you can
turn the phone on and use it. However , the
charging time will be longer.
Disconnect in g the charger :
Lift the plug up and pull it out .
2.
1.
1.
2.
2.
1.
2.
1.
EN/LZT 126 1353 R1A 3
Page 10
About the battery
Your phone is suppli ed with a Nick el Me tal Hy-
dride batter y. The battery is not charged before
shipment, even though there mi ght be en ough
power to turn the phone on.
Low Battery Alarm
As a reminder that the battery soon needs re-
charging or replaci n g, an alar m signa l (a lon g
beep) soun ds and the me ss a ge ‘Battery low’ ap-
pears for ten seconds in the display.
In addition, the indi ca tor light on the top of the
phone starts blinking red. If the phone is left
on, the low bat tery alarm will be repeated sev-
eral times and, finally, the phone wil l turn itself
off when the battery is no longer able to power
it satisfactoril y. It is not possible to turn the
phone on again. Instead the battery must be re-
charged, or rep la ced with a charged one.
3. Turning the Phone On
This chapter describes h o w to turn the phone on and off, how to choose another
language than English in the display, if this is desired, and how to set the phone’s
clock.
To turn the phone on
1. Press and hold down the NO (ON/OFF) key until
you hear a click. The displa y will pr ompt you
to enter your PIN (the security code that fol-
lows your SIM Card).
Enter
PIN
2. Enter your PIN. The digi t s appea r a s sta rs (
*
)
in the display. If you enter a wrong digit, you
can erase it by pressing the
CLR key.
3. Press
#
or YES.
If you entered your PIN correctly, you wil l
be welcomed by your phone. Then the phone
searches for a network.
When a network is f ound, the phone bee ps
three times. The indicator light on top of the
phone blinks green once ever y second.
The display show s :
You can now make and receive calls. Th is is
called stand by mode.
4
A NET
7
2
8
00:00
Network
Country
Battery
meter
Signal
strength
meter
Time
4 EN/LZT 126 1353 R1A
Page 11
●
If you are not using the phone, the illumi-
nation of the display and keypad is auto-
maticall y t urn ed of f after 10 seconds.
Pressing any key will turn the illumination
on again.
If the indicator light does not start
to blink green and the name of a
network does not appear in the
display:
●
If the message ‘Emergency calls only’ is dis-
played, you are in coverage of a network but
you are not allowed to use that network.
However, in an emergency, you can call the
international emergency number 112. R efer
to chapter 5. Making and Receiving Calls.●If the message ‘No network’ is displayed,
there is no network within range, or the re-
ceived signal is to weak. You have to move
to obtain a sufficiently strong signal.
To choose a language other
than English in the display
Your phone is normally delivered with English
text in th e display. T o select a differe nt lan-
guage:
1. Press t he
L
or
R
key repeatedly until ‘Set-
tings’ ap pears in the displ ay:
MENU
~ Settings
2. Press YES to se lec t th e SETTINGS menu.
3. Press
L
or
R
repeatedly un til ‘Language’
appears.
SETTINGS
~ Language
(English)
4. Press YES to select the ‘Language’ function.
5. Press
L
or
R
repeatedly until the desired
language , f or example Ger man, appea rs.
SPRACHE
~ Deutsch
6. Press YES to select that language.
7. Press CLR to leave the SETTINGS menu.
If you s elected a wrong language
by mistake
To return to English text, enter the following
sequence:
*#
0000
#
To set the time
The time is shown in the bottom li ne of the dis-
play. When the phone is delivered, the clock is
normally not set.
1. Press
L
or
R
key repeat edl y until ‘Clock’
appe ar s i n th e display :
MENU
~ Clock
2. Press YES to sel ect t he CLOCK menu.
3. Press
L
or
R
repeatedly unti l ‘ Set clock’
appears.
CLOCK
~Set clock
(00:00)
4. Press YES to select the ‘Set clock’ function.
SET CLOCK
(00:00)
_-:--
5. Enter the time in hours and minutes in the 24-
hour format, for example 13 :01.
EN/LZT 126 1353 R1A 5
Page 12
SET CLOCK
(00:00)
13:01
6.Press YES to confirm the setting.
7. Press CLR to le av e th e CLOCK menu.
You can have the time presented in the 12-hour
(a.m./p.m.) format. You can also have today’s
date presented in the display. Refer to chapter
11. Setting Time, Date and Alarm.
To turn the phone off
Press and hold down the NO (ON/OFF) key until
the disp lay is turn ed off.
4. About the K eypad an d Display
Key Funct ions
They keys have other functions when you have
accessed the phone’s menu system. Refer to
chapter 7. About the Phone’s Menus.
YES
Used to make a call after a phone
number has been entered.
Used to answer an incomin g call .
ON/OFF
Used to turn the phone on or off.
Press a nd hold down the key until
the display turns on or off.
To turn the phone off, the phone
must be in standby mode.
NO
Used to en d a cal l.
Used to eject an incomi ng call .
Left Arrow and Right Arrow
Used to to access the Menu system.
Clear
Erases digits fr om the bottom li ne
of the display. Hold down to erase
all digits simultaneously.
If held down while a call is in pro-
gress, it disconnects the microphone
(Mute function).
Numeric keys
Used to enter the digits 0 – 9.
If held down, the 0 key enters the in-
ternational character “+”.
Star
Used to enter the characte r
*
.
If held down, it enters a p (paus e)
character.
Hash
Used to enter the characte r
#
.
If held down, it enters a ¤ character.
Used to termina te the input of PIN
and security codes.
Can be used t o recall a phone n u m-
ber from the Phone Book (enter the
number of the memory position and
then press #).
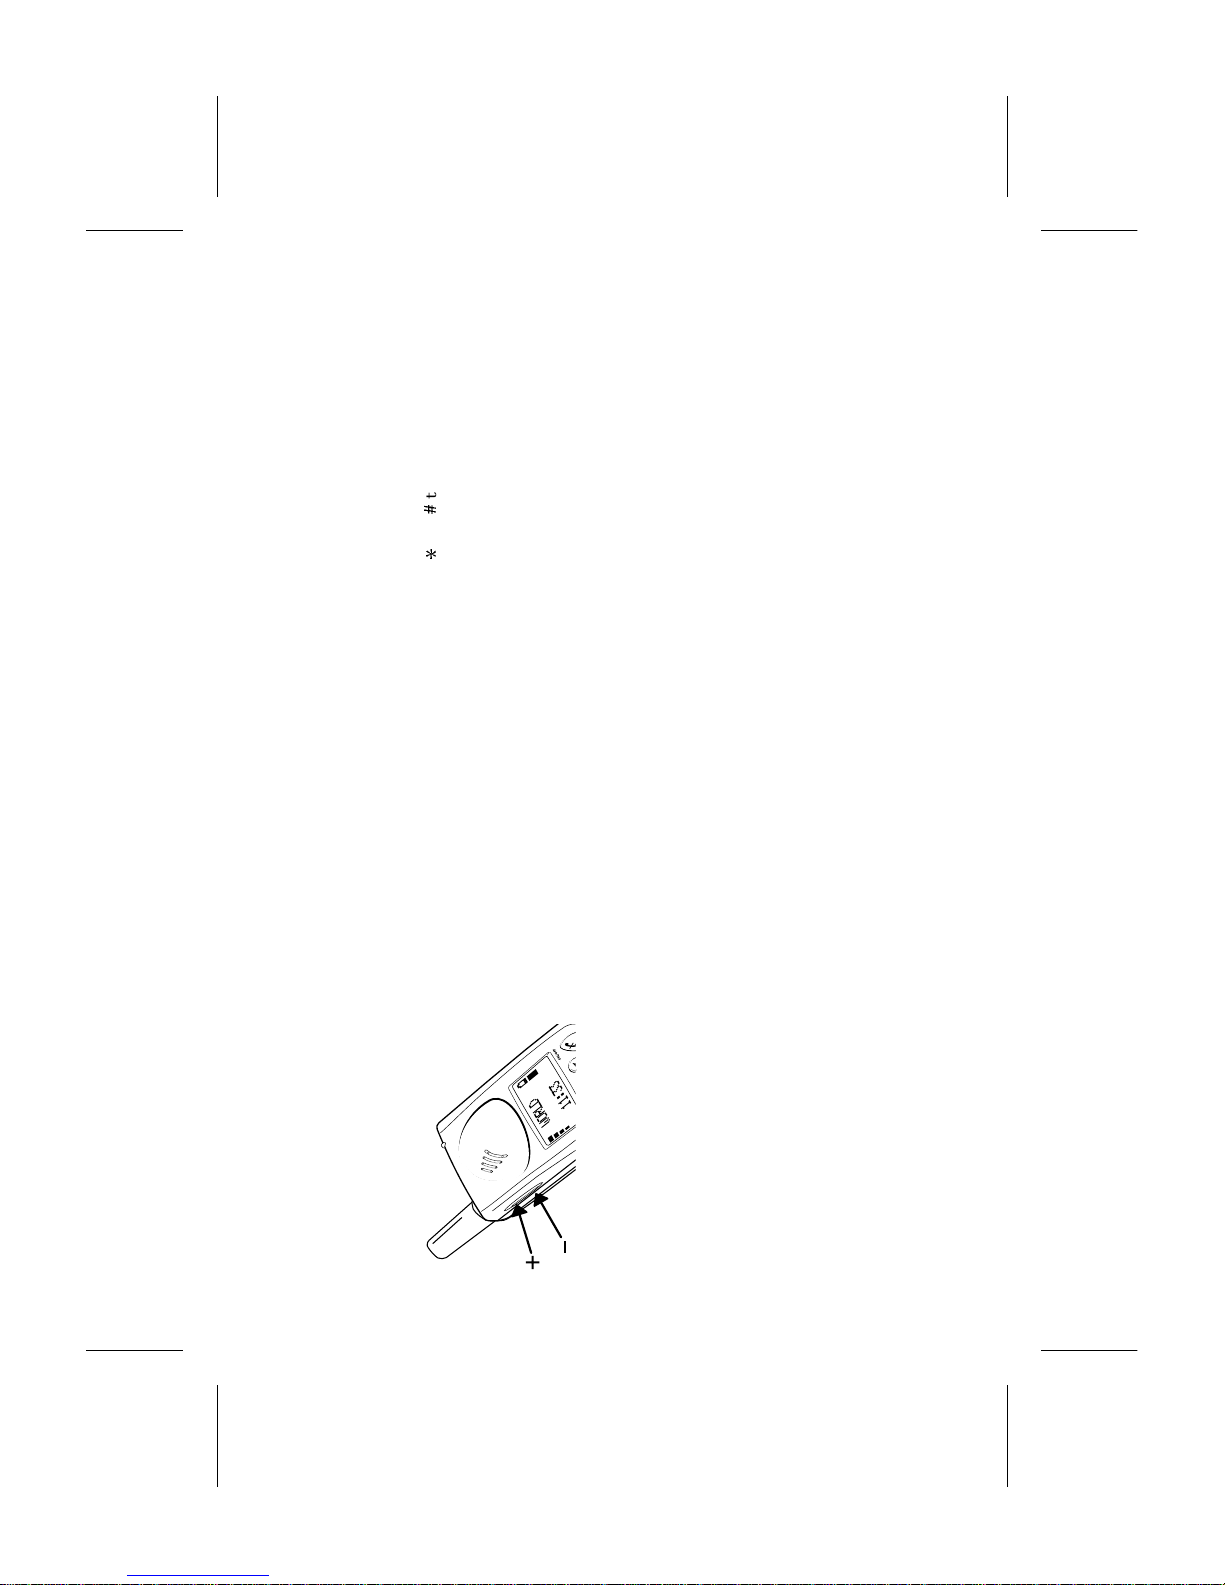
Volume keys at the side of the
phone
Used during a call to increase or de-
crease the volume of the ear piece
or handsfree loudspeaker. The re are
five volume steps indicat e d by
small squares in the bottom line of
+
–
6 EN/LZT 126 1353 R1A
Page 13
the di splay.
You can have independent volume
settings when you use the phone as
a handheld unit and when you use it
with various hand sfre e equi pmen t.
The volume se tti ngs will remain un-
changed after you have turned the
phone off.
Indicator s in the Display
Signal Strengt h meter . The more
bars that are shown, the higher the
signal st rength.
Battery meter. The fuller the icon,
the better the batter y charge.
The keyp a d is lo c ked. Press
L
fol-
lowed by
YES to unlock.
The alarm function is activat ed .
All incoming calls are diverted to
another number.
The ringin g signal is turned off.
You have received a text messa ge
(SMS).
The line currently selected if you
have the Two Line servi c e.
5. Making and Receiving Calls
This chapter describes h ow to make and receive calls, h ow to make international and
emergency calls,
The instructions in this chapter assume that you
have turned the phone on and you are within
the coverage of a network.
When you are abroad, you may use other n et-
works, provided your home network has agree-
ment that allo ws you to use the networks. You
can read more about this in chapter 13. Using
Other Net works.
To make a domestic call
1. Enter the area code and phone number. The
digits are shown in the di splay.
●
To erase a digit, press CLR. ●To erase all digits, press and hold down
CLR until the digits disappear.
2. Press YES to make the call. The display shows
‘Calling’, followed by ‘Connecting’.
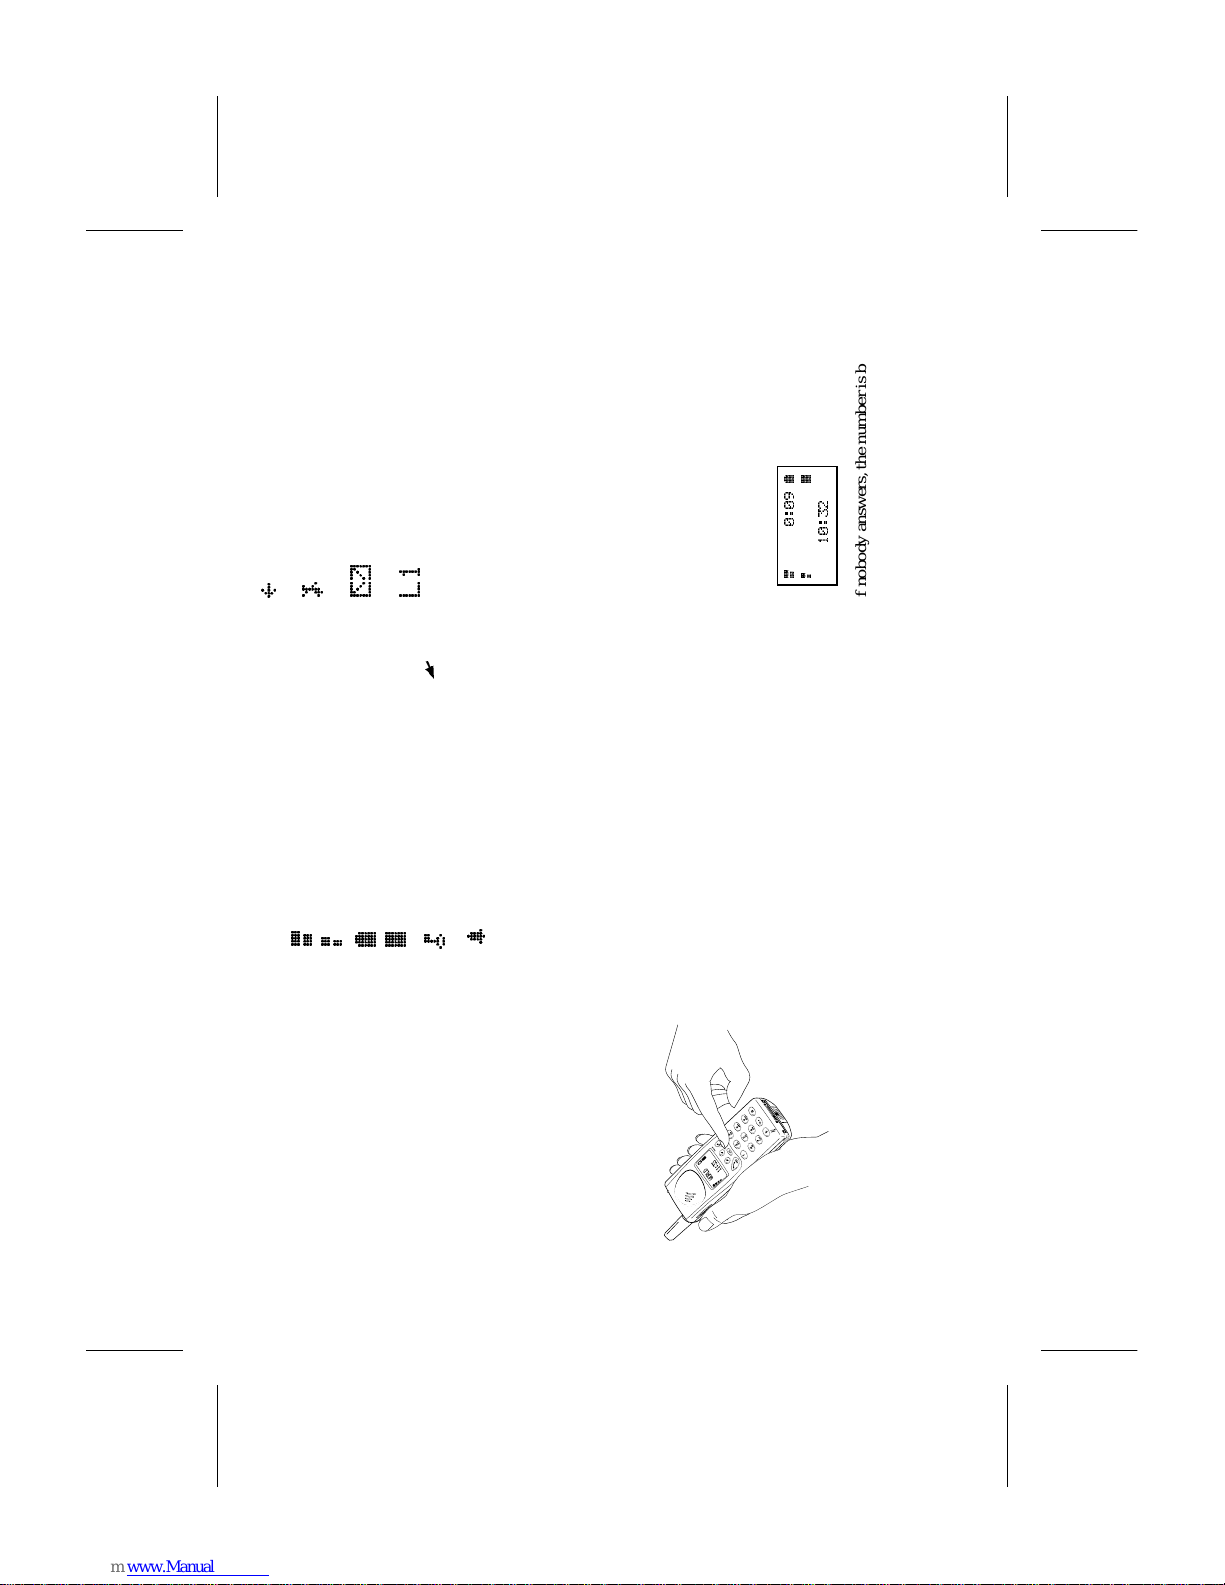
When the call is answe red, a Call Time
meter in the top line of the display shows the
elapsed time in minutes and seconds.
4
0:09
7
2 8
10:32
If nobody answer s, t he number is busy, or you
cannot get through, press
NO. The number is
stored in a memor y, so you can easily repe at the
Mm
L1
4
2
7
8
K
l
S
B
EN/LZT 126 1353 R1A 7
Page 14
call. See Last Number Re-dial below.
To end a call
When the conversation is finished, press NO.
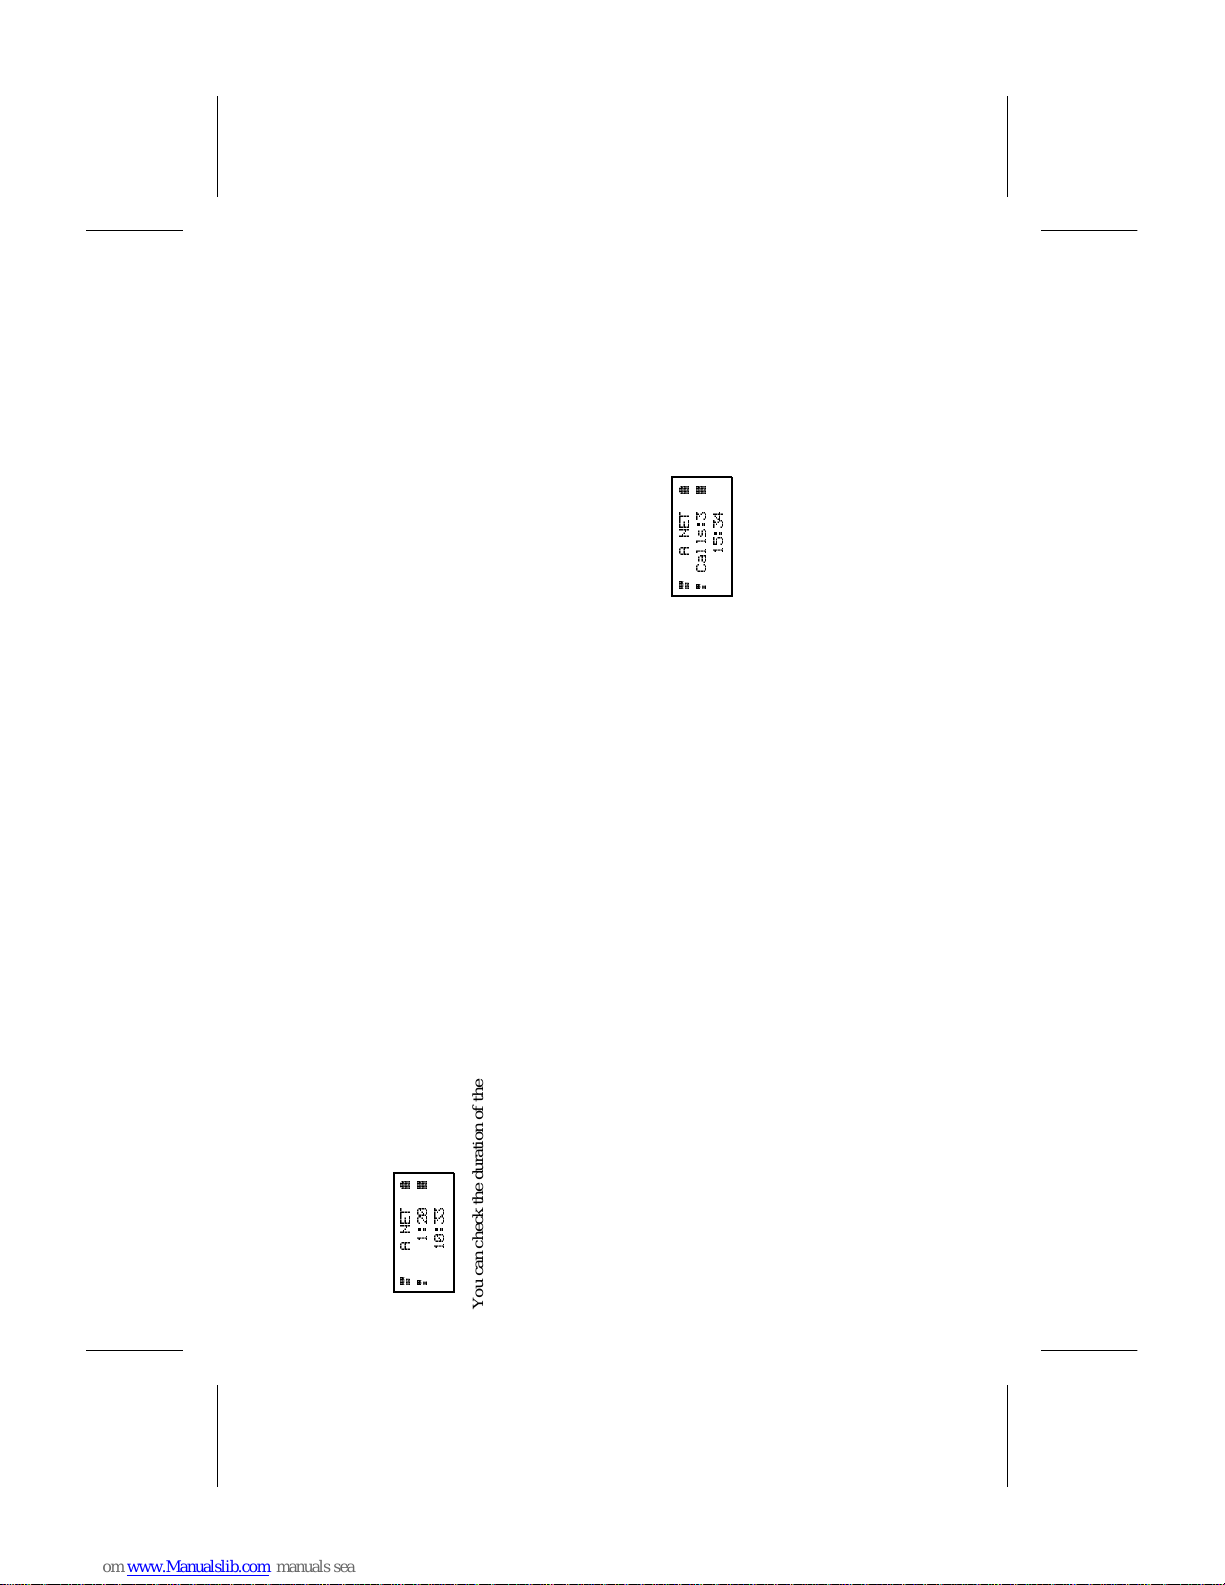
The Call Time met e r shows the durat ion of the
call for three seconds.
4
A NET
7
2
1:20
8
10:33
You can check t he duration of the last ca ll l at er
on. Refer to chapt er 22. K n owi ng t he Cal l
Time/Call Cost.
Last number re-dial
To recall the last called number from memory,
press
YES. The display shows ‘Call?’, together
with the number. Press
YES to make the ca ll.
Automatic re-dialling
function
If the connection of a call fails and the re-
ceiver’s network a dmi ts it, the displa y shows
‘Retry?’ Pr ess
YES to re-dial the number, othe r-
wise
NO.
If you pres s
YES, the number will automatically
be re-dialled until the cal l is answere d, or 10
times at the most . If you press any key, or you
receive a call, the re-diall i n g is interrup te d.
If the re-diall i ng is successful, the p h one rin g s
twice to inform you.
To make an international call
1. Press and hold the 0 key until the interna-
tional character + is displayed. (The + will be
replaced by the international prefix for the
country you are call i n g from.)
2. Enter the country code, the area code (without
any leadin g zero) and the phone nu mber .
3. Press YES to make the call.
To make an emergency call
Enter 112 ( th e int er nati onal emergency number)
and press
YES. The display shows ‘Emer-
gency’.
112 can be used in a n y country with or without
a SIM Card inserted, provided a GSM network
is within range.
To receive a call
When you receive a cal l, the phone rin gs, the in-
dicator light on the top of the phone rapi dl y
blinks g r ee n and the display sho ws ‘ Answer?’
To answer the call
Press YES to answer the call
When the call is finished, press
NO.
To reject the call
Press NO, or press a volume key twice, when
the phone rings. If the caller’s ne twork supports
it, the caller wi ll hear a busy tone .
Unanswered calls
If you have been unable to answer, the number
of unanswered calls will be shown in the dis-
play until you pres s
CLR.
4
A NET
7
2
Calls:3
8
15:34
8 EN/LZT 126 135 3 R 1A
Page 15
6. When a Call Is in Progress
During a call you can c hange the volume of the ear piece, mute t he microphone, use
the display as a scratch pad and send DTMF tones.
To change the volu me
You can use the volume keys to increase or de-
crease the ear piece volume.
To mute the microphone
Press and hold down the CLR key. ‘Mute’ is
shown i n th e di splay.
To resume conversation, release the
CLR key.
To use the display as a
scratch pad
You can enter a phone number on the keypad.
When you end the call, the number remains in
the dis pl ay.
To call the number, pres s
YES.
You can also store the number in the phone
book. Refer to chapter 8. Using the Ph one
Book.
To send tone signals
You can send DTMF tones by pressing keys
0 – 9,
*
and
#
to, for example to perform ban k-
ing by phone or to contr ol an an swering ma-
chine. You can read more about the use of
DTMF tones in chapter 14. Sending DTMF
Tones.
EN/LZT 126 1353 R1A 9
Page 16

10 EN/LZT 126 1353 R1A
Page 17

7. About the Phone’s Menus
You control the functions of your phone by a menu system. Thi s chapter describes
how you navigate through the menu system.
EN/LZT 126 1353 R1A 11
Page 18
Mail
Ph one book
Keylock
On?
Clock
4
A NET
7
2 8
16:43
Calculator Settings Access
Networks Divert Info
Change to
Line 2?
Set alarm
Set clock
Set time
Clock mode
Date mode
Name recall
Position recall
Store
Edit
Erase
Erase all
from phone
Copy all
Copy
Answered calls
Dialled numbers
Ring level
Ear volume
Ring type
Edit melody
Mail alert
Keylock
Key sound
Light
Minute minder
Call info
Answering
Mode
Greeting
Phone No
Language
Data menus
Line 1 tag
Master Reset
Read Messages
Card Messages
Send messages
Missed calls
Set VoiceM
Area info
Standby display
Select net
Search mode
Edit list
New search
All calls
On busy
No reply
Unreachable
Cancel all
Check all
Barring
Call waiting
Card lock
Change
PIN/PIN2 code
Phone lock
Last Call
Total calls
This menu
only appears
if your
network offers
the 2 Line
service and
you have
subscribed
to it.
12 EN/LZT 126 1353 R1A
Page 19
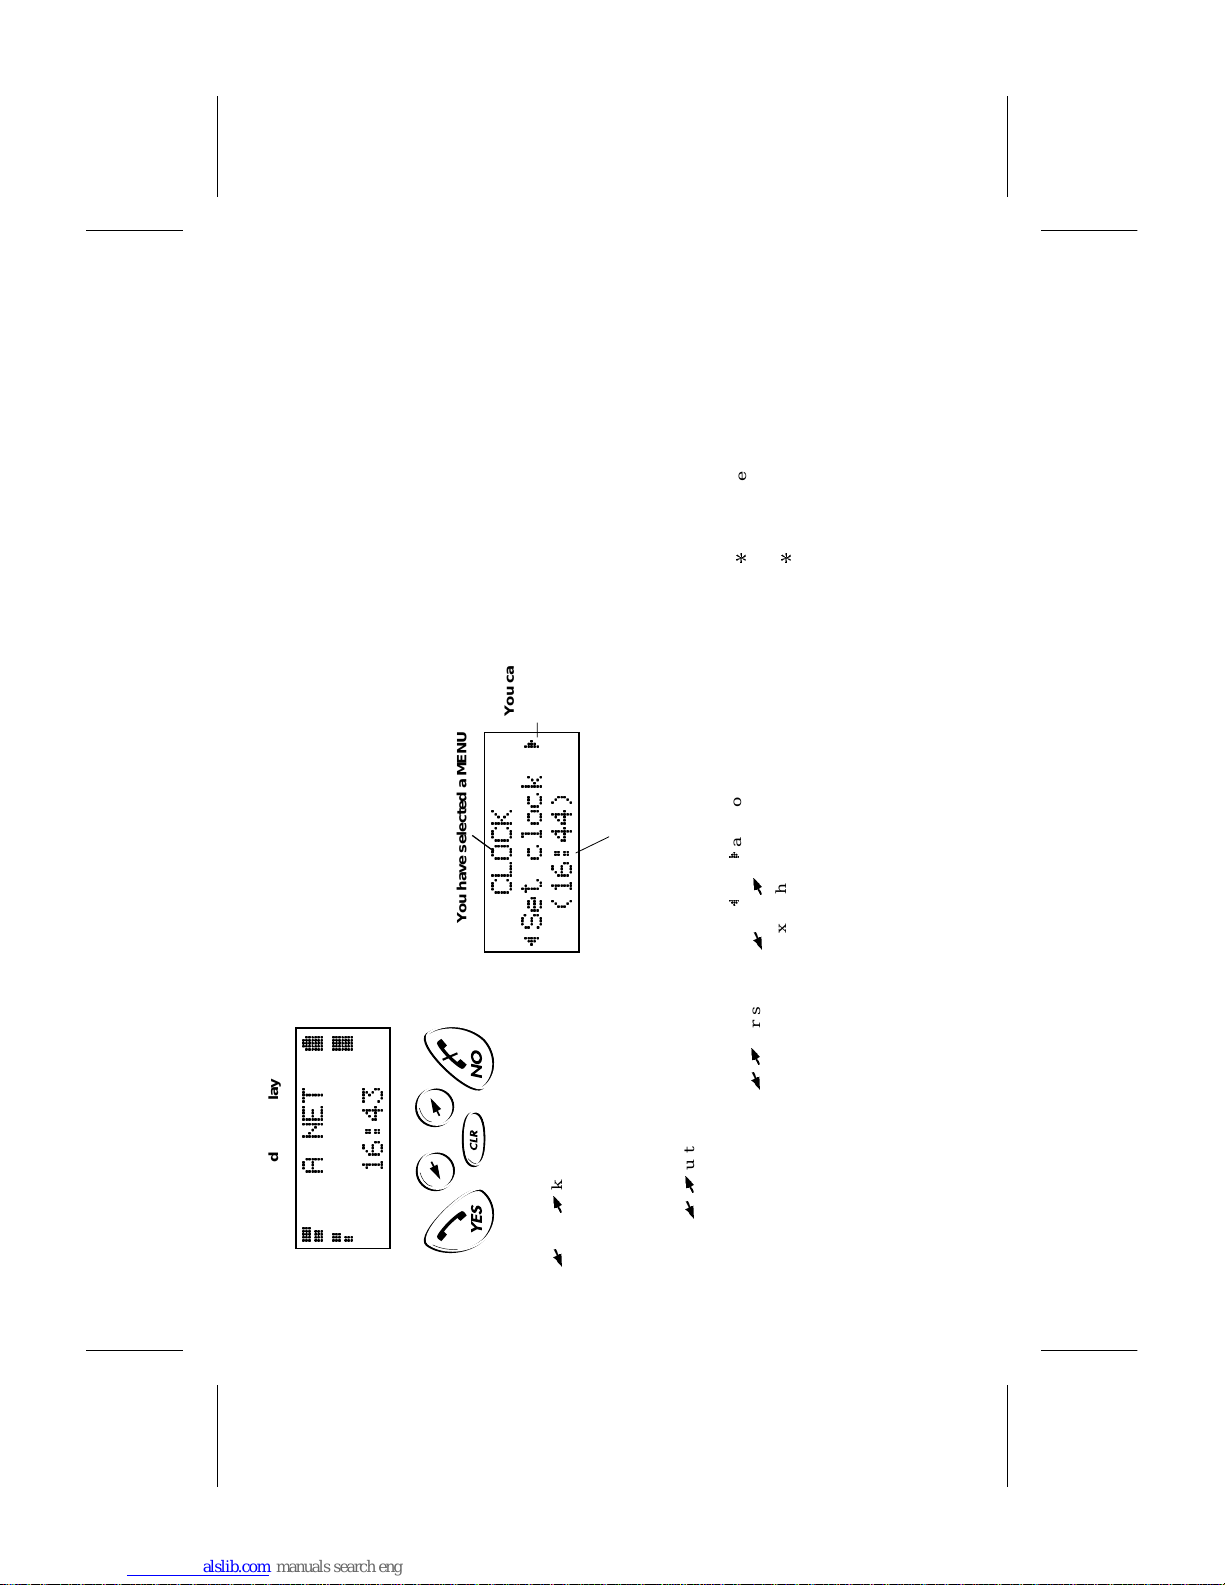
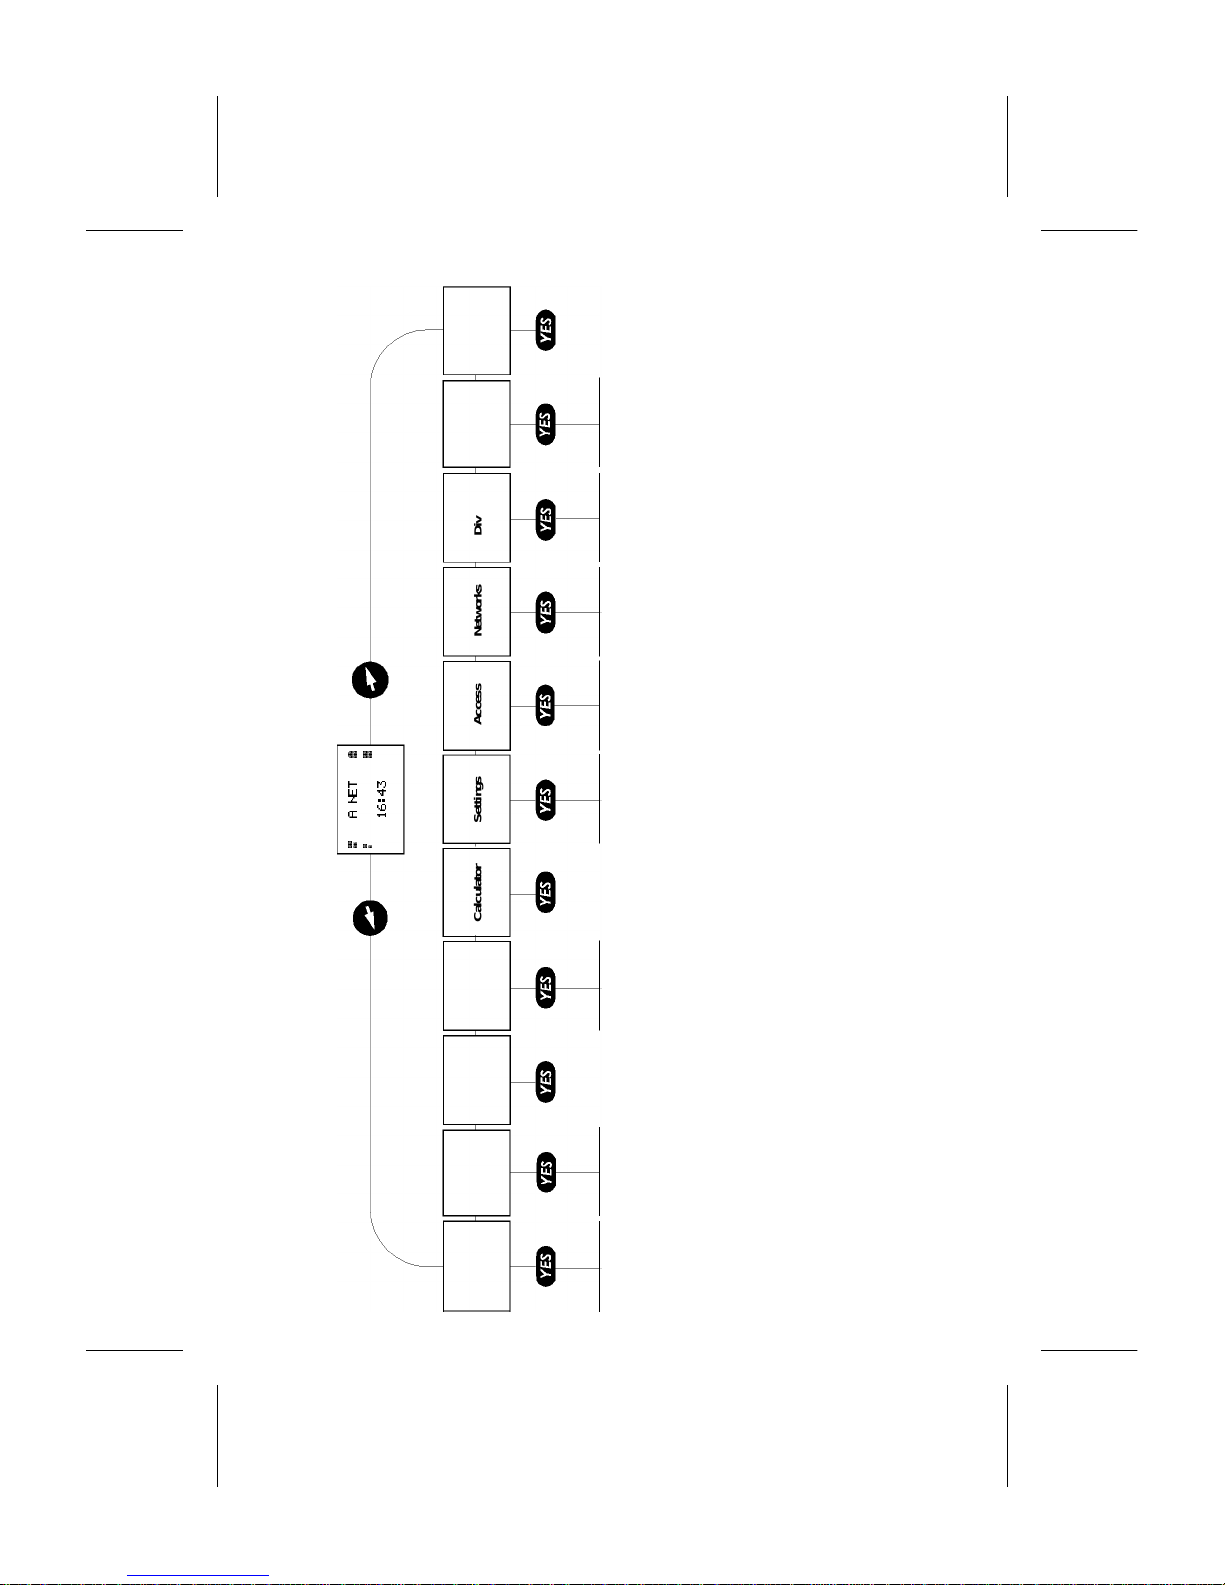
The menus are arranged in a continuous loop .
The
L
and
R
keys allow y o u to a cc e ss the
menu system and then scroll from menu to
menu.
When you reach the desired menu, press
YES to
select it.
Most of the menus have a number of functions.
Scroll with
L
/
R
unti l you reac h the desired
function. Then press
YES to select it.
In the same way, a functi on has a number of set-
tings that you can reach using
L
/
R
. Pre ss
YES to confirm the setting chosen.
The
NO key allows you to leave a setting un-
changed. It can also be used to move back from
a function to a menu, from a menu to the
standby displ ay.
Pressing the
CLR key always takes you back to
the standby display.
You will leave the menu system automatically if
you do not press a key within 60 seconds or if
you receive a call.
Display texts and symbols
in the menu system
UPPER-CASE letters are used to indicate the
menu or function selected.
When
L
and
R
are shown, you can scroll with
L
and
R
.
Text within brackets indicates the current set-
ting for the displayed function.
To enter le tte rs
With some function s you can enter lette rs and
other characte rs using the numer i c keys.
Press the appropriate k ey, 1 – 9, 0 or # (repeat-
edly) unt i l t he desired lett er, character or digit
appears in the displ ay. For example, to enter an
A, press t he 2 key once. To enter a B, press the
2 key twice.
1 Space - ? ! , . : " ’ ( ) 1
2 A B C Å Ä Æ à Ç 2 Γ
3 D E F è É 3 ∆ Φ
4 G H I ì 4
5 J K L 5 Λ
6 M N O Ñ Ö Ø ò 6
7 P Q R S ß 7 Π Σ
8 T U V Ü ù 8
9 W X Y Z 9
0 0 + & @ / $ % £ Θ Ξ Ψ Ω
# # *
To enter a digit, you can also press and hold
down the numeric key.
To enter lower-case letters
Enter the letter, for example an A, and then
press
*
. An a appears .
Lower-case letters will now appear until you
press
*
again.
4
A NET
7
2
8
16:43
Standby display
You have selecte d a MENU
You can
scroll
through the
FUNCTIONS
The current SETTING for
the displayed function
CLOCK
~Set cl oc k
(16:44)
EN/LZT 126 1353 R1A 13
Page 20
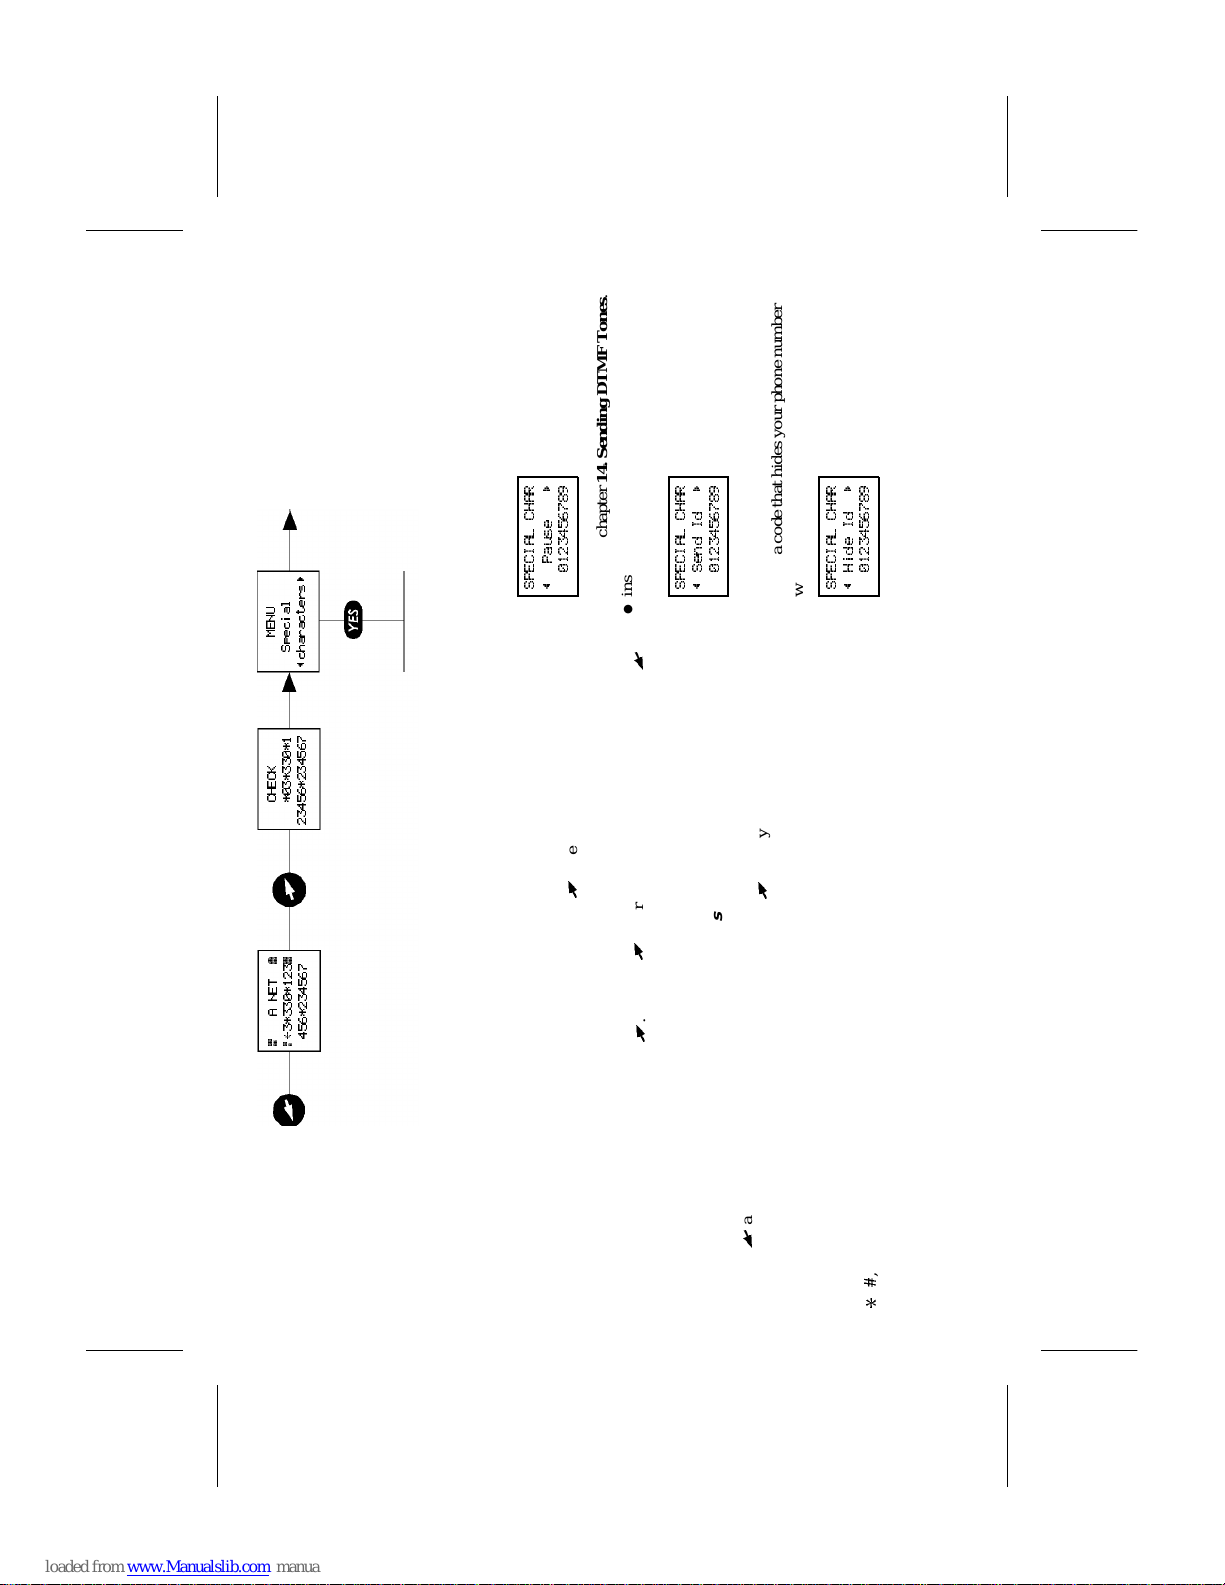
CHECK and SPECIAL
CHARACTERS Menus
If you have entered characters into the bottom
line of the display, eit her th e SPECI AL CHAR-
ACTERS or the CHECK menu appear s whe n
you enter the menu system by pressing
R
.
If you have not entered any characters, that is,
the time of day is shown in the bottom line,
none of these menus will appear . Neithe r wil l
they appear if you access the menu system by
pressing
L
and then scroll further with this
key.
To check the first characte r s
If you enter more than 20 characte rs (0 – 9 and
*
,
#
, + or p), the first characters will disappear
from the display. Instead, a left arrow is shown
on the left in the second line, in front of the
characters.
Pressing
R
takes you to the CHECK menu,
which lets you see the first characters.
If you wish to enter a special char acte r, press
R
. To return to the standby display, press
L
.
To insert special characters
If you have entered less than 20 characters ,
pressing
R
takes you direct to the SPECIAL
CHARACTERS menu.
This menu l ets yo u:
●
insert a pause character (p) to separate the
phone number fr om a c ode that you wi sh to
send as DTMF tones.
SPECIAL CHAR
~ Pause
0123456789
Refer to chapter 14. S ending DT MF Tones .●insert a code that shows your phone number
when making a call.
SPECIAL CHAR
~ Send Id
0123456789
Refer to chapter 15. Who Is Call i ng?●insert a code that hides your p hone numb er
when making a call.
SPECIAL CHAR
~ Hide Id
0123456789
Refer to chapter 15. Who Is Call i ng?
Pause
Send Id
Hide Id
4
A NET
7
2l
3*330*123
8
456*23 45 67
CHECK
*03*330*1
23456*234567
MENU
Special
~characters
14 EN/LZT 126 1353 R1A
Page 21

8. Using the Phone Book (PHONE BOOK Menu)
This chapter describes how you can create a personal phone book by storing phone
numbers and accompanying names on the SIM card (card memory) and in the phone
(phone memory). The PHONE BOOK menu also inc ludes functions for recalling the
last dialled numbers. If you have the CLI (Calling Line Identification) service you can
also recall the last answered numbers.
Card memory
The memory positions in the Card memory are
numbered from 1 onwards . The actual number
of memory positions available depends on your
SIM card.
Phone memory
The Phone memory can hold up to 99 phone
numbers. The memory positions are designated
¤1 – ¤99.
In the PHONE BOOK menu, press
#
to enter
the ¤ character. Outside the PHONE BOOK
menu, you must press and hold down
#
to enter
the ¤ character.
International numbers:
If you intend to use your phone both home and
abroad, you sh ould st ore all phone numbers as
international phone numbers, that is, with t he in-
ternational “+” character and the country code
before the area c ode and the number.
●
To enter the “+” character, press and hold
down the 0 key. ●If a leading 0 is included in the area code,
omit it.
Speed dialling facility
The phone numbers that you store in positions 1
– 9 in the card memory can be called by enter-
ing the position number and then pressin g
YES.
You should, therefore, save positions 1 – 9 for
important numbers.
To store a phone number
1. Enter the phone number to be stored.
2. Press
L
, followed by YES to select the
PHONE BOOK menu.
PHONE BOOK
~ Store
123456789
3. Press YES to select the ‘Store’ function.
4.The first free memory position in the card
memory is suggested in the top line of the
display.
STORE 1
Name;_
0123456789
If you wish to store the phone number in that
position, g o to step 5.
If you wish to store the phone number in a
different position, press
R
twice to move
the cursor (
–
) to th e top line, enter the num-
ber of the memory position, followed by
R
.
●
To enter the number of a memory position
in the phone memory, for example ¤1,
press
#
to enter the ¤ character .
●
If you pres s
#
twice, the first free mem-
ory position in the phone memory is ap-
pears.
5. If you wish to store the phone number with -
out an accompanying name, go to step
7.
6 Enter the first letter of the name by pressing
the appropriate numeric key as many times as
EN/LZT 126 1353 R1A 15
Page 22

required. For example, press the 9 key three
times to enter the letter Y. See the table in
chapter 7. About the Phone’s Menus.
Enter the next lette r whe n the cu rsor ha s
moved to the next letter position.
●
To change between upper-case and lower-
case l et t er s, pr ess
*
●
To enter a space, press the 1 key. To enter
a hyphen, press the 1 key twice.●To erase the last letter, press CLR.●You can move back with
L
and then in-
sert or erase lett er s. Move forwar d with
R
.
7.Press YES to store the number (and name).
Alternative met h od to store a
number
PHONE BOOK
~ Store
Instead of entering the phone number before
going to the PHONE BOOK menu, you can se-
lect th e ‘Store’ function from the PHONE
BOOK menu
STORE 4
Name:_
and then enter (the name) and phone number.
Overwrite p r otect ion
STORE 10
Used
Overwrite?
This message appears if you try to store a phone
number in a position which already contains a
phone number. You can then:
a. Store the number in a different position.
Press
NO and enter the number of the posi-
tion.
b. Store the number in the se lect e d positi on, thus
erasi ng the old nu mber (and name) . Pres s
YES.
Card memory full
If you try to store a phone number when all po-
sitions are occupied, a positi on number in the
Phone memory will be suggested in the top line
of the display.
Both me mo ries full
If both memories become full, no position num-
ber will be suggested,
If you do wish to store the ph one numb er , yo u
have to enter the number of an alread y occu -
pied position, thus eras ing the old number (and
name).
To recall a phone number
using the name
1. Press CLR to erase any digits from the display.
2. Press
L
, followed by YES to select the
PHONE BOOK menu.
PHONE BOOK
Name
~ recall
3. Then pres s YES to select t he ‘Name recall’
function.
4. Enter one or more of the letters in the name in
their correct order and press
YES.
If the name shown is not the desired one,
scroll through the phone book using
R
or
L
until you find the name.
5. Press YES to call the number or NO to return
to stand-by.
Alternative method to recall a
number
Press CLR to erase any digits from the display.
Press
L
, followed by a numeric key. For exam-
ple, to recall a name beginnin g wi t h A , pr es s
the 2 key. T o recall a name beginning with E,
press the 3 key twi c e.
If the name displayed is not the des i re d one ,
scroll with
R
or
L
.
16 EN/LZT 126 1353 R1A
Page 23

To recall a phone number
using the position
1.Press CLR to erase any digi ts fr om th e di splay.
2.Press
L
, followed by YES to select th e
PHONE BOOK menu.
3. Then press
R
,
PHONE BOOK
Position
~ recall
followed by YES to sele c t th e ‘Position re-
call’ function.
4. Enter the position nu mber and press YES.
●
To enter a number in the phone memory,
for example ¤1, press
#
to enter the ¤ char-
acter.
●
If you entered the w r ong position number,
scroll through the card or phone memor y
using
R
or
L
until you find the phone
number.
5.Press YES to call the number or NO to retu rn
to standby.
Recalling a number without
entering the phone book menu
1. Enter the position nu mber and then press
#
.
●
To enter a number in the phone memory,
for example ¤1, you must hold down
#
to
enter the ¤ character.
2. Press YES to call the number, or scroll with
R
until you find the number you wish to
call. Then pr ess
YES to call it.
Speed dialling
1. Enter the position number 1–9.
2. Press YES to make the call.
To change a phone number,
name or memory position
Select ‘Ed it’ from the PHONE BOOK menu.
EDIT
~ Find pos
Position:
a. Enter the position number and press YES.
b. If you wish to enter the name, press
R
.
EDIT
~Find name
Name:
Enter the full name and press YES.
EDIT 11
Name:CRIS_
012345678901
You can now change the position number (in
the top line), the name (in the middle line) or
the phone number (in the bottom line) .
When the cursor is positioned to the right of the
characters in a line, you can m ove the curs or to
the next line by pre ss i ng
R
and then make the
changes in that line.
Press
CLR (repeatedly) to erase the last charac-
ter(s) in a line. Then enter the new characters.
You ca n al so move the cursor back with
L
EDIT 11
Name:C_RIS
012345678901
and erase characters to the left of the cursor, or
insert characters in the cursor’s position.
EDIT 11
Name:CH_RIS
012345678901
When you are finished with the changes, press
YES.
To erase a phone number
Select ‘Erase’ from the PHONE BOOK menu
ERASE
Position: _
Enter the position number and press YES, or
scroll with
L
/
R
until you find the position
number with the (name) and number you wish
to erase.
ERASE 11
~ CHRIS
Erase?
EN/LZT 126 1353 R1A 17
Page 24

Press YES to erase the (name) and number.
Alternative met h od to erase a
phone number
Recall the nu mber using ‘Name recall’ or ‘Po-
sition recall’.
CHRIS
~ (11)
012345678901
Press and hold down CLR. The quest i on
‘Erase?’ appears. Press
YES to erase the (name)
and number.
To erase ALL phone
numbers from the Phone
memory
From the PHONE BOOK menu, se lect ‘Erase
all from phone’.
ERASE ALL
Erase 7
¤ positions?
Press YES to erase all numbers (and names).
To copy ALL phone
numbers from the Card
memory to the Phone
memory and v ice ver sa
Select ‘Copy all’ from the PHONE BOOK
menu.
COPY ALL
~Card
r
Phone
To copy from the Card memory
to the Phone memory
Press YES.
COPY CARD
From start
position: _
Enter the number of the first position in the
Card memory you wish to copy, for example 1,
and press
YES.
COPY CARD
To start
position:¤_
Enter the number of the first position in the
Phone memory you wish to copy to, for exam-
ple 10, a nd press
YES.
Old pos will
be erased
Start copy?
Press YES to start t he co pying.
To copy from the Phone memory
to the Card memory
Select ‘Copy all’ from the PHONE BOOK
menu.
COPY ALL
~Card
r
Phone
Press
R
or
L
.
COPY ALL
~Phone
r
Card
Press YES.
COPY PHONE
From start
position:¤_
Enter the number of the fi rst position in the Phone
memory you wish to copy and press
YES.
COPY PHONE
To start
position: _
Enter the number of the first position in the
Card memory you wish to copy to and press
YES.
Press
YES to start the c opying.
To copy phone numbers
ONE BY ONE from the Card
memory to the Phone
memory and vice versa
Select ’Copy’ from the PHONE BOOK menu.
18 EN/LZT 126 1353 R1A
Page 25

COPY
~Card>Phone
To copy from the Card memory
to the Phone memory
Press YES.
COPY CARD
From start
position: _
Enter the number of the first position in the
Card me m or y you wi sh to co p y and then pr es s
YES.
COPY CARD
To start
position:¤_
Enter the number of the first position in the
Phone memory you wish to c opy to and then
press
YES.
TOM
1
Copy to ¤10?
Press YES to copy. The next position in the Card
memory is di sp lay ed.
JERRY
2
copy to ¤11?
Press:
●
YES to copy.●NO
or
R
to go on to the next position in
the Card memory.
●
CLR to copy to another position in the
Phone mem ory. Enter the number of the
position and press
YES.
●
CLR twice to interrupt copying.
To copy from the Phone memory
to the Card memory
Select ‘Copy’ from the PHONE BOOK menu.
COPY
~Card
r
Phone
Press
R
or
L
.
COPY
~Phone
r
Card
Press YES.
COPY PHONE
From start
position:¤_
To copy from the Phone memory to the Card
memory, use the
YES, NO,
L
and CLR keys in
the same way as when copying from the C ard
memory to the Phone memory as described in
the preceding section.
The ANSWERED CALLS
Memory
If you subscribe to the Calling Line Identifica-
tion (CLI) service of your network, the num-
bers of the last 5 answered calls are stored in a
memory in the phone, the Answered Calls
memory.
To recall the l a st a n swe red
numbers
PHONE BOOK
Answered
~ calls
Refer to chapter 15. Who Is Calling?
The DIALLED NUMBERS
memory
The last 5 numbers called are stored in on the
SIM card if the SIM card allows this. Other-
wise, they are stored in a memory in the phone.
To recall the last dialled numbers
1 Press CLR to erase any digits from the display.
2. Press
L
, followed by YES to select the
PHONE BOOK menu. Then press
L
, fol-
lowed by
YES to select th e ‘Dialled Nu m-
bers’ function. The number last called is
shown.
EN/LZT 126 1353 R1A 19
Page 26
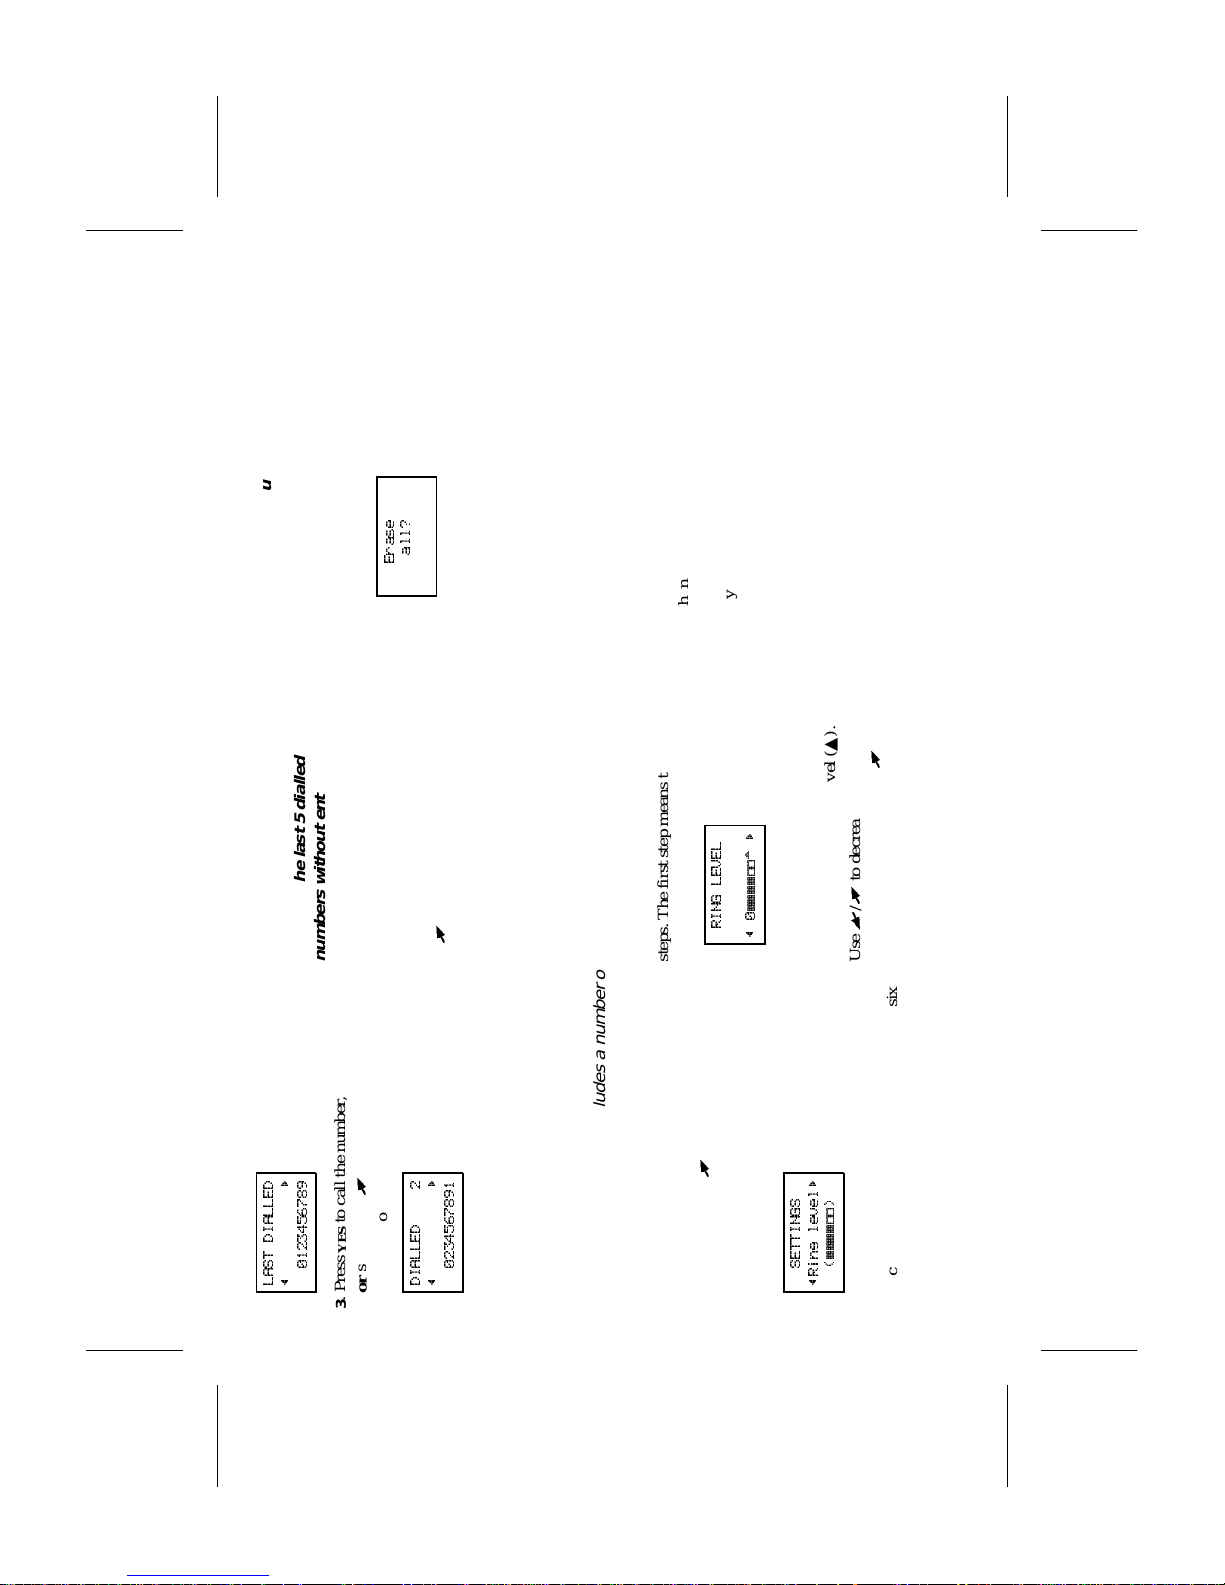
LAST DIALLED
~
0123456789
3.Press YES to call the number ,
or scroll with
R
until you find the number
you wish to call.
DIALLED 2
~
0234567891
Then pr es s YES to call it.
To recall the last 5 dialled
numbers without entering the
PHONE BOOK menu
1. Press CLR to erase any digits from the display.
2. Press YES. The number last called is shown.
3. Press YES to call the number, or scroll with
R
until you find the number you wish to
call . Th en pr ess
YES.
To erase ALL num ber s from the
Dialled Digits memory
Select ‘Diall ed n u mb ers‘ from the PHONE
BOOK menu.
Press and hold down
CLR.
Erase
all?
Press YES.
9. Personalising Your Phone (SETTINGS Menu)
The SETTINGS menu includes a number of functions which let you adapt your phone
to your personal needs in different situations.
The functions in the SETTINGS menu are de-
scribed in the order in which they appear when
you scroll with the
R
key.
To set the level o f the
ringing signal
SETTINGS
~Ring level
(
QQQQqq
)
Select ‘ Rin g level’ fr o m the SETTINGS menu,
You can set the level of the ringing signal i n six
steps. The first step mea ns that two clicks wi l l
be heard when you receive a call.
RING LEVEL
~ 0
QQQQqqU
You can also turn the ringing signal off (0) or
choose a ringing signal that rises in steps from
the lowest to the highest level (▲).
Use
L
/
R
to decrease or increase the level. If
you increase the level using
R
, you will hear
the phone ring.
Use the volume keys at the side of the phone to
change the level silently if you do not wish to
distur b other peo pl e .
If you turn the ringing signal off, all audible sig-
nals will al so be turned off. Y ou will , however,
be informed of an incoming call by the indica-
tor light on the top of the phone and th e displa y.
As a reminder tha t the rin gin g signal is turn ed
off, an icon in the shape of a crossed music sym -
bol is shown on the right in the bottom line of
the display.
20 EN/LZT 126 1353 R1A
Page 27

4
A NET
7
2
8
17:00
S
You can have one volume setting when the
phone is used as a handheld unit and another
setting when the phone is powered from an ex-
ternal source, for example, when it is used as a
handsfree phon e in a car.
To set the volume of the ear
piece or handsfree
loudspeaker
Select ‘Ear vo lu me ’ from the SETTINGS
menu.
During a ca ll you c an adjust the volu me by
pressing the keys at the side of the phone. The
‘Ear volume ’ function lets you set the volume
when the phone is in standb y m ode.
EAR VOLUME
~
QQQqq
You can use either the
L
/
R
keys or the vol-
ume keys at the side of the phone to adjust the
volume.
You can have independ ent vo lu m e settings
when you use the phone as a handheld un it and
when you use it with various hands fr ee equ ip -
ment.
To choose the type of
ringing signal
Select ‘Ring type’ from the SETTINGS menu.
RING TYPE ~ Medium
You can set the tone of the ringin g signal in
three steps: l ow, medium or high. You can also
choose a mixed tone or a melod y.
If you scroll with the
L
/
R
keys you will hea r
the various type s of rin ging signal s . If you do
not wish to disturb othe r pe ople, use the volu m e
keys at the side of the phone to scroll silently.
You can have one tone setting when th e phone
is used as a handheld unit and another set ting
when the phone is powered from an extern al
source.
To compose your own
ringing signal
SETTINGS
~EditMelody
You can compose your own rin ging signal. Re-
fer to ch apter 26. Composing Your Own Ring-
ing Signa l.
To choose the type of
message signal
Select ‘Ma il alert’ from the SETTINGS menu.
MAIL ALERT
~ Tone
You can choose wheth er clicks , tone s or neithe r
(silent) will be heard when you receive a text
messa ge ( SMS).
To choose manual or
automatic key lock
Select ‘Keylock’ from the SETTI NG S menu.
KEYLOCK
~ Manual
You can choose either manual or automatic key-
pad lock.
In automatic m ode the ke ypa d is lock ed 25 sec-
onds after the last key was pressed. In manual
mode you have to sel ect the KEYLOCK menu
to activate the lock.
Refer to the section Locking the keypad in
chapter 10. Protecting Your SIM Card and
Phone.
To choose the key sound
Select ‘Key sound’ from the SETTINGS menu.
EN/LZT 126 1353 R1A 21
Page 28

KEY SOUND
~ Click
You can choose whether click s, tones or neither
(silent) will be heard when you press the keys.
To set the illumination of
the display and keypad
Select ‘Light’ from the SETTINGS menu.
LIGHT
~ Light
(Auto)
The illumina tion ca n be set to autom a tic, tur ned
off, or turned on all the time.
In the automatic mode, the illumina tion is
turned off 20 seconds after the last key was
pressed. It will be turned on again when a ke y is
pressed , or when a call or message is receive d.
You can have one setting when the phon e is
used as a handheld unit and another s ett in g
when the phone is powered from an ext er nal
source.
To be reminded of the
conversation time spent
during a call
Select ‘Min (ute) Min der’ from the SET-
TINGS menu.
MINUTE
MINDER
~ (On)
This function gives an indication of the time
spent during con ver sation by emittin g a sh ort
beep every full minut e.
To choose call time or call
cost display
Select ‘Call in f o’ from the SETTI NGS menu.
CALL INFO
~Time: All
During an outgoin g ca ll, the cal l time i s show n
in the display. The ‘Last Call’ and ‘Tot(al)
Calls’ functions in the INFO menu let you
check the elap se d tim e of outgoing calls.
With the ‘Call Info’ function you can choose to
have the call time displayed for all calls, both
incoming and outgoing.
You can also have the call cost displayed, pro-
vided you have subs cr ib ed t o thi s featur e.
To choose answering mode
when using the phone with
handsfree eq u ipmen t
Select ‘Ans wer ing mode’ from the SET-
TINGS me nu.
This submenu includes tw o functions, Any key
and Auto, which are useful when the phone is
used with hands free equip ment .
To be able to answer a call by
pressing ANY key
ANSWER MODE
~ Any key
(Off)
If you turn this function on, you can answer an
incoming call by pressing any key except the
NO key if the phone is used with handsfre e
equipment.
To choose automatic answering
ANSWER MODE
~ Auto
(Off)
If you choose automati c an swering mode, an in-
coming call will be answered automatically af-
ter one ringing signal if the phone is used with
handsfree equipmen t.
To person a l ise the gree t ing
displayed each time the
phone is turned on
If the greeti ng text can be retrieved from your
SIM card, yo u cannot change it.
Select ‘Greeting’ from th e SETTI NG S menu.
22 EN/LZT 126 1353 R1A
Page 29

GREETING
~ New text
( )
Instead of the greeting Welcome, you can have
your phone displa y a welcome greeting that you
choose yourself.
Enter the greeting text using the numeric ke ys.
Refer to the table in chapter 7. About the
Phone’s Menus.
The Greeting function also lets you turn the
greeting text off.
GREETING
~ Off
To have your phone number
displayed each time the
phone i s turned on
If your phone number cannot be retrieve d fr om
your SIM card, you can enter it yoursel f.
Select ‘Phone no’ from the SETTINGS menu .
NUMBER
~ Phone no
( )
Enter the number and press YES.
Fax and/or data number:
If your SIM card allows it, you can also enter
your fax and/or data number .
NUMBER
~ Fax no
( )
NUMBER
~ Data no
( )
To select ano th er la n gu age
in the display
The phone is normally delivered with English
text in the displa y .
SETTINGS
~ Language
(English)
The ‘Language’ function lets you select a lan-
guage other than English, for example German .
SPRACHE
~ Deutsch
In addition, you can choose an Auto(matic) al-
ternative. The language in the display will then
be determined by you r SIM card.
To reset to English, you can enter the sequence
*#
0000
#
at any time .
To personalise the names of
the two lines if you have the
2 Line service
SETTINGS
~Line 2 Tag
(Line 1)
This functio n only app ears if you have the 2
Line service.
Refer to chapter 21. 2 Line Servi ce .
To activate data menus
SETTINGS
~Data menus
(Off)
This function lets you turn two data menus on.
You should do so if you use your phone wit h
the Mobile Office kit and a persona l c ompute r.
Refer to chapter 24. Data Menus.
If you do not use your phone with a Mobi le Of-
fice kit, you should not turn the dat a m enus on .
To reset the phone
SETTINGS
Master
~ reset
You can reset all settings to their factory-pro-
grammed values.
To reset the phone, you must enter the same se-
EN/LZT 126 1353 R1A 23
Page 30

curity code that is used to turn the phone lock
on or off. Refer to the des cr ip tion of the phone
lock in chapter 10. Protecti ng Y our SIM Card and Phone. The factory-programmed security
code is 0000.
10. Protecting Your SIM Card and Phone
(ACCESS and KEYLOCK Menus)
The ACCESS menu includes a number of security functions that you can use to
protect your SIM card and phone. You can also control the cost of the calls by
preventing the making and receiving of certain calls (Call Barring). The KEYLOCK
menu lets you lock the keypad so that unintentional key action has no effect.
Card Lock
Your SIM card is protected b y a card lock.
When you purchase your S IM card, you obtai n
a 4- to 8-digit PIN code.
SIM stands for Subscri be r Identi ty Modul e.
PIN stands f or Persona l Ident ifi ca tion Number .
Each time you turn the phone on, you have to
enter the PIN code and then press # (or
YES).
If the PIN is entered incorrectly three times in
succession, the SIM card will be blocked. This
is indicated by the message ‘Card blocked Un-
block?’ Should this happen, refer to chapt er
27. Problem s You Can Sol ve .
To change the PIN code
ACCESS
~ Change
Pin code
If you do not like the original P IN, you ma y
change it to a code you find easy to remember.
To change the PIN code, sele ct ‘Ch ange PIN
code’ from the ACCESS menu.
Enter the ol d (the current) PIN and press # (or
YES).
Next, ente r the new PIN and press # (or
YES).
Finally, at the prompt ‘Repeat new PIN’, enter
the new PIN for the second time.
The message ‘New PIN’ confirms th at the PIN
has been changed.
If the m essa ge ‘Matching error’ appears, the
new PIN was ent er ed inc orrectly.
If the m essa ge ‘Wrong PIN’ appears, followed
by ‘Enter Old PIN’, th e old PIN was entered in-
correctly.
To change the PIN2 code
ACCESS
~ Change
Pin2 code
Depending on the network you use, some serv-
ices require that you enter a second PIN code,
the PIN2 code.
To change the PIN2 code, sel ect ‘Chang e PIN2
code’ from the ACCESS menu. Follow the
same procedure as for changin g the P IN code
above.
24 EN/LZT 126 1353 R1A
Page 31

To activate/di sactiva te the Card
Lock
This fu nction only applies if your SIM card al-
lows you di s activate the card loc k.
The disp la y sh ows e it he r:
ACCESS
Lock
~ card
or
ACCESS
Unlock
~ card
Press YES. Then enter your PIN and press # (or
YES).
The message ‘Locked’ (‘Unlocked’) confirms
that the card lock is now acti vat ed (di sa cti -
vated) .
Phone Lock
The phone lock protects the phone agains t unau-
thorised use in the event of theft. It is not acti-
vated when you purchase the phone. Y ou
should, h owe ver, activate is as soon as possible
and also change the factory-programmed secu-
rity code of 0000 to any 3- to 8-digit personali sed
code.
There are two levels of locking the phone:
Full Lock and Autolock.
If the Fu ll Lock is activated, the m essage
‘Phone locked’ is displayed briefl y, each time
the phone is turned on. The message i s followe d
by the prompt ‘Enter lock code’. The user then
has to ente r a sec urity cod e an d pre ss # (or
YES) to be able to use the phone.
If the Autol ock is activated, the message
‘Phone locked’ and the prompt ‘Enter lock
code’ will not appear until a different SIM
card is inserted in the phone. After the security
code has been entered correctly, the phone can
be used with new SIM card. The us er wil l not
be asked to enter the secur ity code until the
original SIM ca rd or a diff eren t S IM card is in-
serted.
To change the security code
ACCESS
~Phone lock
Change code
Select ‘Ph one lock Change code’ from the
ACCESS menu and follow the same procedure
as for changing the PIN code.
To lock/unlock the phone
ACCESS
~Phone lock
(Unlocked)
Select ‘Ph one lock’ from the ACCESS menu.
The current setting ’Full Lock‘, ‘Autolock’ or
’Unlocked’ is shown between brackets.
Select the desired setting. En ter the security
code (3-8 digits) and press # (or
YES).
‘PHONE LOCK’ is displayed, togethe r with
the new setting.
Call Barring
This service may no t be ava ilab le on al l net-
works or may requ ire a sepa rat e subs cr i ptio n.
The Call Barring service of the cellular net-
work allows you to bar differe nt types of outgo-
ing and incoming calls to restrict the use of
your phone.
You ca n bar:
●
All outgoing calls – ‘All outgoing calls’●All outgoing international calls – ‘All outgo-
ing int ca ll s ’●All outgoing international calls except to
your home country – ‘Int outgoing when
roam’●All incoming calls – ‘All in c omi ng c al ls ’●All incoming calls when you are abroad
(when roaming) – ‘All incoming when
roam’
To ensure that a call bar is not changed by
someone else, a password, which comes with
your subscript i on, is necessary to activate or
cancel a call bar.
EN/LZT 126 1353 R1A 25
Page 32

To activate, check the status or
cancel a particular call bar
ACCESS
~ Barring
Select ‘Barring’ from the ACCESS menu.
BARRING
All outgoing
~ calls
The first barring option is ‘All outgoing calls’.
To choose another barring option, scroll with
L
/
R
.
Press YES t o se l ect the desired bar ring option.
In this example we will choose ‘All outgoing
int(ernational) calls’.
ALL OUTGOING
INT CALLS
~ Activate
Select the desired option: ‘Activate’,‘Get
status’ or ’Cancel’.
Enter your passw ord and then pres s
#
or
YES.
There may be a short delay before the network
responds. In the mean tim e , the mess age ‘Please
wait’ is displayed. This is followed by a mes-
sage which i nforms whether t he call bar is acti-
vated or not.
If you divert your incomi ng ca lls (ref er to chap-
ter 12. Diverting Incoming Calls) you cannot
activate some barring opti ons. Lik e wise, if you
bar calls, you cannot activate some call divert
options.
To cancel ALL call bars
BARRING
~Cancel all
Select the ‘Canc el all’ option.
Enter your password and p ress # (or
YES).
The message ‘Please wait’ appears, f ollowed
by a message that confirms that al l call bars are
cancelled.
To change your passwor d
The password for the Barring service comes
with your subscrip tion . You can easi l y change
the password as often as you like.
BARRING
Change
~ password
Select the ‘Change pas sword’ option.
Enter the ol d (the current) password and press
#
(or
YES).
Enter the new passw or d an d then pres s # (o r
YES).
Enter the new password again and then press #(or YES).
The message ‘Please wait’ appears, f ollowed
by a message that confirms that th e p assword
has been changed.
Locking the keypad
You can lock the keypad so that unintentional
key action has no effect if the phone is turned
on.
An icon in the shape of a key (
K
) on the left in
the middle line of the display informs you that
the ke y p a d is locked.
4
A NET
7
2K
8
07:15
Calls to the international emergency number
112 can be made when the keypad is loc ked.
If the phone’s alar m sou nds , you can turn it off
by pressi ng any k ey.
The keypad remains locked un ti l you:
●
answer an incoming call by pressing YES.
You may also reject t he cal l by pressing
NO
●
replace the battery●unlock the ke ypad yourself
Automatic keypad l ock
The ‘Keylock’ function in the SETTINGS
menu lets you choose manual or automatic
keyp a d lo ck .
If you have chosen the automatic mode, the
keypad is locked automativally 25 seconds after
the las t ke y was pressed .
26 EN/LZT 126 1353 R1A
Page 33
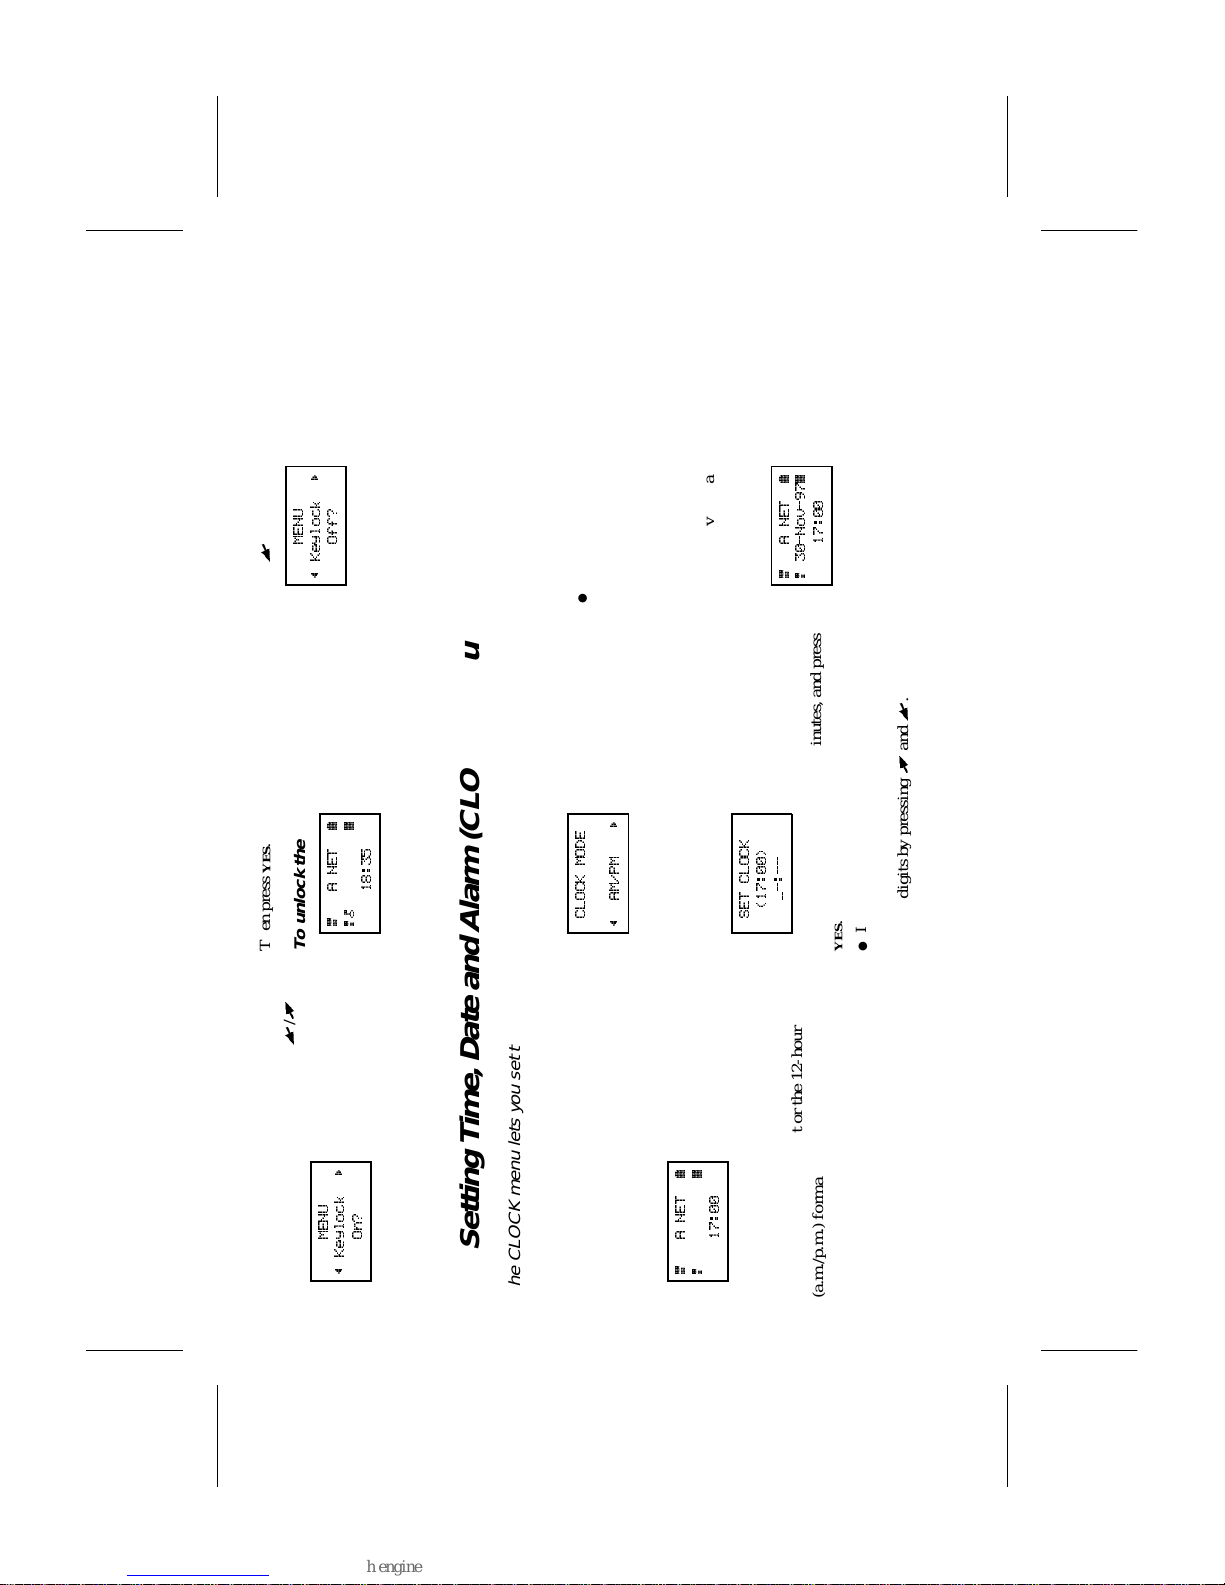
To lock the keypad manually
Scroll to the KEYLOCK menu with
L
/
R
.
MENU
~ Keylock
On?
Then pr ess YES.
To unlock the keypad
4
A NET
7
2K
8
18:35
Press
L
,
MENU
~ Keylock
Off?
followed by YES.
11. Setting Time, Date and Alarm (CLOCK Menu)
The CLOCK menu lets you set the time of the day and today’s date. It also lets you
activate the alarm function.
Clock (Time of Day)
The time is shown continuousl y in the bottom
line of the display when the phone is in stand-
by mode.
4
A NET
7
2
8
17:00
To change the time format
The hours and minutes can be presented in
either the 24-hour format or the 12-hour
(a.m./p.m.) format.
Select ‘Clock mode’ from the CLOCK menu.
CLOCK MODE
~ AM/PM
Choose the desired mode and press YES.
To set the clock
Select ‘Set Clock’ from t he CLOCK menu.
SET CLOCK
(17:00)
_-:--
Ente r the t i me , in hours and min utes, and pr es s
YES.
●
If you wish to kee p the minute digit s , jus t en-
ter the hour digits. You can also change the
hour digits by pressing
R
and
L
.
●
If you have chosen the 12-hour format in the
‘Clock mode’ function, you can change from
a.m. to p.m., or vice versa, b y pressin g * or #.
Calendar (Today’s Date)
You can have toda y’ s date prese nt ed in the mid-
dle line of the display when the phone is in
stand-by mode.
4
A NET
7
2
30-Nov-97
8
17:00
To choose the date format
Select ‘Date mode’ from the CLOCK menu.
Scroll to the desired format, for example:
EN/LZT 126 1353 R1A 27
Page 34
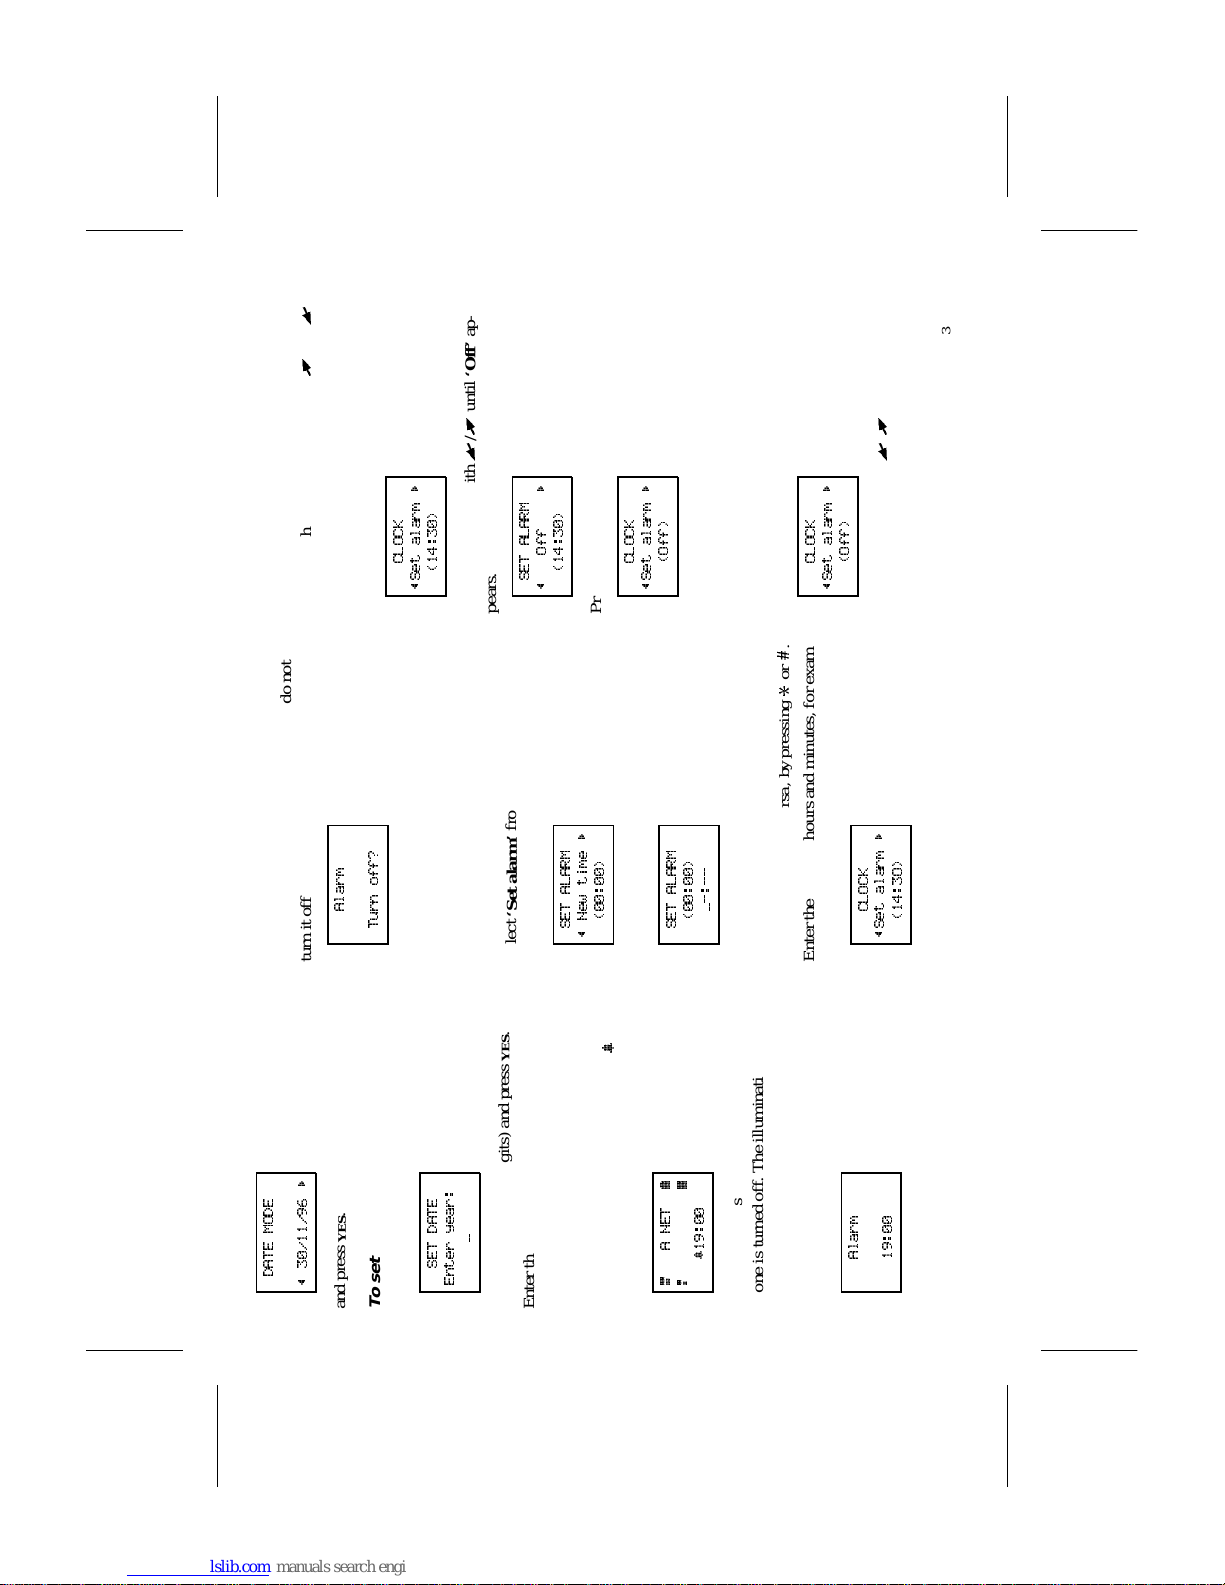
DATE MODE
~ 30/11/96
and pres s YES.
To set today’s date
Select ‘ Set Date’.
SET DATE
Enter year:
_
Enter the year (two digits) and press YES.
Enter the month and the day in the same way.
Alarm
The phone has an alarm functi on. When it is ac-
tivated, an icon in the shape of a bell (
B
) is
shown prior to the time of day.
4
A NET
7
2 8
B
19:00
The alarm will sound a t the time s et, even if the
phone is turned off. The illumination of the
keys and the displ a y will flas h, too.T he s ound
level of the alar m d epe nds on the setting of the
rin g ing sig nal level.
Alarm
19:00
The alarm will sound for 60 seconds and it will
be repeated every nine minutes if you do not
turn it off. To turn it off, you can press any key.
Alarm
Turn off?
Press YES if you do not want the alarm to be re-
peated.
To set the time and turn the alarm
function on
Select ‘Set alarm’ fr om the CLOCK menu and
scroll to the ‘New time’ option.
SET ALARM
~ New time
(00:00)
Press YES.
SET ALARM
(00:00)
_-:--
If you have chosen the a.m./p .m. forma t in th e
‘Clock mode ’ func ti on , you can cha nge fr om
a.m. to p.m., or vice versa, by pressing
*
or
#
.
Enter the time, in hours and minutes, for exam -
ple 14:30, and then press
YES.
CLOCK
~Set alarm
(14:3O)
If you wish to keep the minute digits, just enter
the hour digits and press
YES. You can also
change the hour digits by pressing
R
and
L
.
To turn the alarm functi on off
CLOCK
~Set alarm
(14:30)
Press YES. Scroll with
L
/
R
until ‘Off’ ap-
pears.
SET ALARM
~ Off
(14:30)
Press YES.
CLOCK
~Set alarm
(Off)
To turn the alarm functi on on
without changing the time of the
alarm
CLOCK
~Set alarm
(Off)
Press YES. Scroll with
L
/
R
until ‘On’ ap-
pears.
28 EN/LZT 126 1353 R1A
Page 35

SET ALARM
~ On
(14:30)
Press YES.
CLOCK
~Set alarm
(14:3O)
12. Diverting Incoming Calls (DIVERT Menu)
If you want to make certain that your incoming calls are taken care of when you are
unable to answer them, you can use the
Call Divert service of the cellular network to
divert (forward) them to another phone number.
The Call Divert service lets you:
●
divert calls if you already are engaged i n a
call – On busy●divert calls that you do not answer (within
normally 30 se c onds) – N o r eply●divert calls when you ha ve turned of f the
phone or you are unreachable – Unreach-
abl(e)
You may use all thre e cal l divert s and you m a y
divert the call s t o di ffer ent phone numbers, de-
pendent on the situa t ion.
You may also divert All calls, rega rdless o f
whether your ph one is turn ed on or off, or you
are unreachable. If turned on, the phone will not
ring if a call is received.
If you have chosen to divert all calls, an arrow
is shown on the left in the bottom line of the dis-
play as a reminder.
4
A NET
7
2 8
l
17:30
If you activa te th e Al l cal ls di vert, all other di-
verts will be cancelled automa tic ally. They will,
however, be activated again when yo u cancel
the A ll calls divert.
To activate a particular call
divert
The first option in the DIVERT men u is ‘All
calls’.
DIVERT
~All calls
To choose an ot her divert, ‘On busy’, ‘No re-
ply’ or ‘Unr eachabl(e)’, scroll with
L
/
R
.
Press
YES to select the des ir ed divert. In this ex-
ample we wil l choose ‘On b usy’ .
ON BUSY
~ Activate
The first option is ‘Activate’. Press YES to se-
lect it.
ON BUSY
Activate
~Enter no:
EN/LZT 126 1353 R1A 29
Page 36

You may now:
a. Enter the phone number to which you want
your calls to be diverted, including th e area
code, and then press
YES.
b.Enter an international number. Press and
hold down the 0 key to insert the interna-
tional cha ra ct er “+”. Then enter the country
code, the area code and the phone nu mber .
Note that a leading 0 in an area code must be
omitted. Fi nally, press
YES.
c. Recall the number from the Phone Book.
Press
L
and then recall the number. Finally,
press
YES.
If you used t he ON busy divert on an earlier
occasion and then cancelled it, the phone
number to which the ca lls were diverted wil l
be suggested. To keep the nu mber , just press
YES. Otherwise, erase the number using the
CLR key and enter the new number.
There may be a short delay before the network
responds. In the mean tim e , the mess age ‘Please
wait’ is displayed. This is followed by the mes-
sage ’On bus y Divert ON’, together with the
phone number.
Incoming calls will now be diverted to this
phone number when you are engaged in a call.
If you bar calls (refer to Call Barring in chap -
ter 9, Protecting the SI M Ca rd an d the Phone )
you cannot activate so me divert opti ons. Like-
wise, if you divert calls , you ca nnot ac tiv at e
some barring options.
As a reminder, the dis play will inform you
about any activated call divert each ti me you
turn the phone on.
To check the status
of a call divert
Select the desired call divert from the DIVERT
menu.
DIVERT
~ On Busy
(Active)
Press YES and scroll to the ‘Ge t status’ option.
ON BUSY
~Get status
Press YES to check the status. The message
‘Please wait’ appears, followed by either the
phone number and ‘Active’ if the call divert is
activated, or ‘Off’ if it is not activated.
To cancel a call divert
Select the desired call divert from the DIVERT
menu
DIVERT
~ On Busy
(Active)
Press YES and scroll to the ‘Cance l ’ opt i on.
ON BUSY
~ Cancel
Press YES to cancel the call divert. The me ss a g e
‘Please wait’ appears, followed by a message
which informs you that the call divert has been
cancelled.
To cancel ALL call diverts
DIVERT
~Cancel all
Select the ‘Cancel all ’option from the DI-
VERT menu.
The message ‘Please wait’ appears, followed
by a message which in f orms you tha t all cal l di-
verts have been cance lle d.
To review the status of ALL
call diverts
Select the ’Check all“ option from t he DI-
VERT menu.
DIVERT
~Check all
The message ‘Please wait’ appears, followed
by information about all call diverts, whether
they are activated or not.
30 EN/LZT 126 1353 R1A
Page 37

13. Using Other Networks (NETWORKS Menu)
When you are abroad, you may use other networks, provided your home network has
an agreement that allows you to use the networks. This is called roaming.
When you turn the phone on, it normally selects
its home network. If this is not within range, f or
example when you are abroad, you may use an -
other network, provided your home network
has an agreemen t which al l ows you use this net-
work.
The NETWORKS menu includes a number of
functions which you can use to determine how
the phone searches for a network. You may also
select a network yourself from those within
range.
To select a network
NETWORKS
~Select net
Select ‘Select net’ from the NETW ORKS
menu.
The message ‘Please wait’ is dis pl ayed brie fl y.
a. If the home network is within range and you
are using it, its name is displayed with the
message Current .
If you are usi n g anot her net w ork, th e na me
of the home network is displayed with the
message Home.
Instead of the full name of a country and a
network, an abbreviation is displayed when
you use the NETWORKS menu.
If you wish to see the f ul l name of a net-
work, press
*
.
b. If the home network is not within range,
the name of a nother network is displayed
with the message ‘Current’, ‘Preferred’,
‘Available’ or ‘Forbidden’ .
●
‘Current’ means th at th e network is cur-
rentl y used.●‘Preferred’ means that the name of the
network is included in a list of preferred
networks on your SIM card. Refer to the
descripti on of the Edi t List function be low.●‘Available’ means that you are allowed to
use the network.●‘Forbidden’ means that you are not al-
lowed to use the network. You can, how-
ever, make emergency calls. See also the
next section, List of Forbi dde n Net w orks.
c.If no network is within range, the message
‘No network’ is displayed.
If more than one network is wit hin ran ge, the
name of the other networks can be displayed
one by one by pressing
R
.
When the network you wish to use is displayed,
press
YES to select it.
List of Forbidden Networks
The names of the forbidden ne tworks are stored
in a list on your SIM card. If such a netw ork is
in range, it will be omitted when the phone
searches f or a netw ork (automat i c sea rch mode).
If the state of things changes, and your home
network and a forbidd en net w ork have come t o
an agreement that allows you to use the forbid-
den network, you can sel ect t his ne twork
though the message ‘Forbidden’ is displayed.
By doing so, you will dele t e the na me of th e ne t-
work from the list of forbidden networks .
To choose automatic or
manual network search
mode
Select ‘Searchmode’ from the NETWORKS
menu. Then choose ‘Auto’ (automatic search
mode) or ‘Manual’ (ma nua l sea rch m ode).
EN/LZT 126 1353 R1A 31
Page 38

Automatic search mode
NETWORKS
~Searchmode
(Auto)
In the first place, the phone searches for its
home network. If this is not available, the
phone will search for an ot her a vaila bl e net w ork
from those within range.
The order of pr ef erence in which the phone
will select a network, in case the home network
is not within ran ge, is determin ed by a list of
preferred networks on your S IM card.
Manual search mode
NETWORKS
~Searchmode
(Manual)
The phone will select its home network in th e
first place and the ne twork that was last used in
the second place. If none of these networks is
within range, the question ’Se lec t net work?’
appears.
To select a ne twork, press
YES. Then proc e e d as
describe d above unde r To select a network.
To create a list of preferr ed
networks on your SIM card
If you wish, you can crea t e a list which de fines
the order of preference in whi ch the phone will
select a network duri n g automat i c ne twork s e-
lection when the home network is not within
range.
The number of networks that can be stored in
the list depends on your S IM car d.
The ‘Edit List’ function lets you review the net-
works in the list, add networks to the list, de-
lete networks from the list and re-arrange the
order of the networks.
To review the l i st of net w or ks
NETWORKS
~Edit list
To review the list , se lect ‘Edit list’ from the
NETWORKS menu. The message ‘Please
wait’ is displayed briefly.
EDIT LIST
AB CDEF *
~ 1
The name of the first networ k is di sp la y e d. If a
* is also displ ayed, t his indic a tes that the net-
work is within range.
To see the full name of a network, press
*
.
You can scroll through the other networks in
the list with
L
/
R
.
To add a network to the list
EDIT LIST
AB CDEF *
~ 1
Scroll to the position where you wish to insert
the network.
a. If you scroll to the first free position , the
question ‘Add net?’ appears
b. If you scroll to a position that alread y is occu-
pied, you mus t press
YES and then scroll with
L
/
R
until ‘Add net’ appears.
Press
YES and then scro ll with
L
/
R
until you
find the desired network.
If the desired network does not appear, press
YES when the question Othe r? appears. Then
enter the 3-di gi t coun tr y num b er and the 2 -digi t
network number.
Finally, press
YES to add the network to the list.
To delete a network from the list
EDIT LIST
AB CDEF *
~ 1
Scroll to the network you wish to delete and
press
YES.
Scro l l until ‘Erase’ appears.
Press
YES to delete the network from the list.
32 EN/LZT 126 1353 R1A
Page 39

To re-arrange the order of the
networks in the list
EDIT LIST
AB CDEF *
~ 1
Scroll to the network you wish t o m o ve and
press
YES.
‘Move’ is display e d . Pre ss
YES and then ente r
the new position within in the list.
To start an automatic
network search
NETWORKS
~New search
You can start an automatic ne twork sea rch at
any timeby selecting the ‘Newsearch’ fuction
from th e NETWORKS menu.
EN/LZT 126 1353 R1A 33
Page 40

34 EN/LZT 126 1353 R1A
Page 41
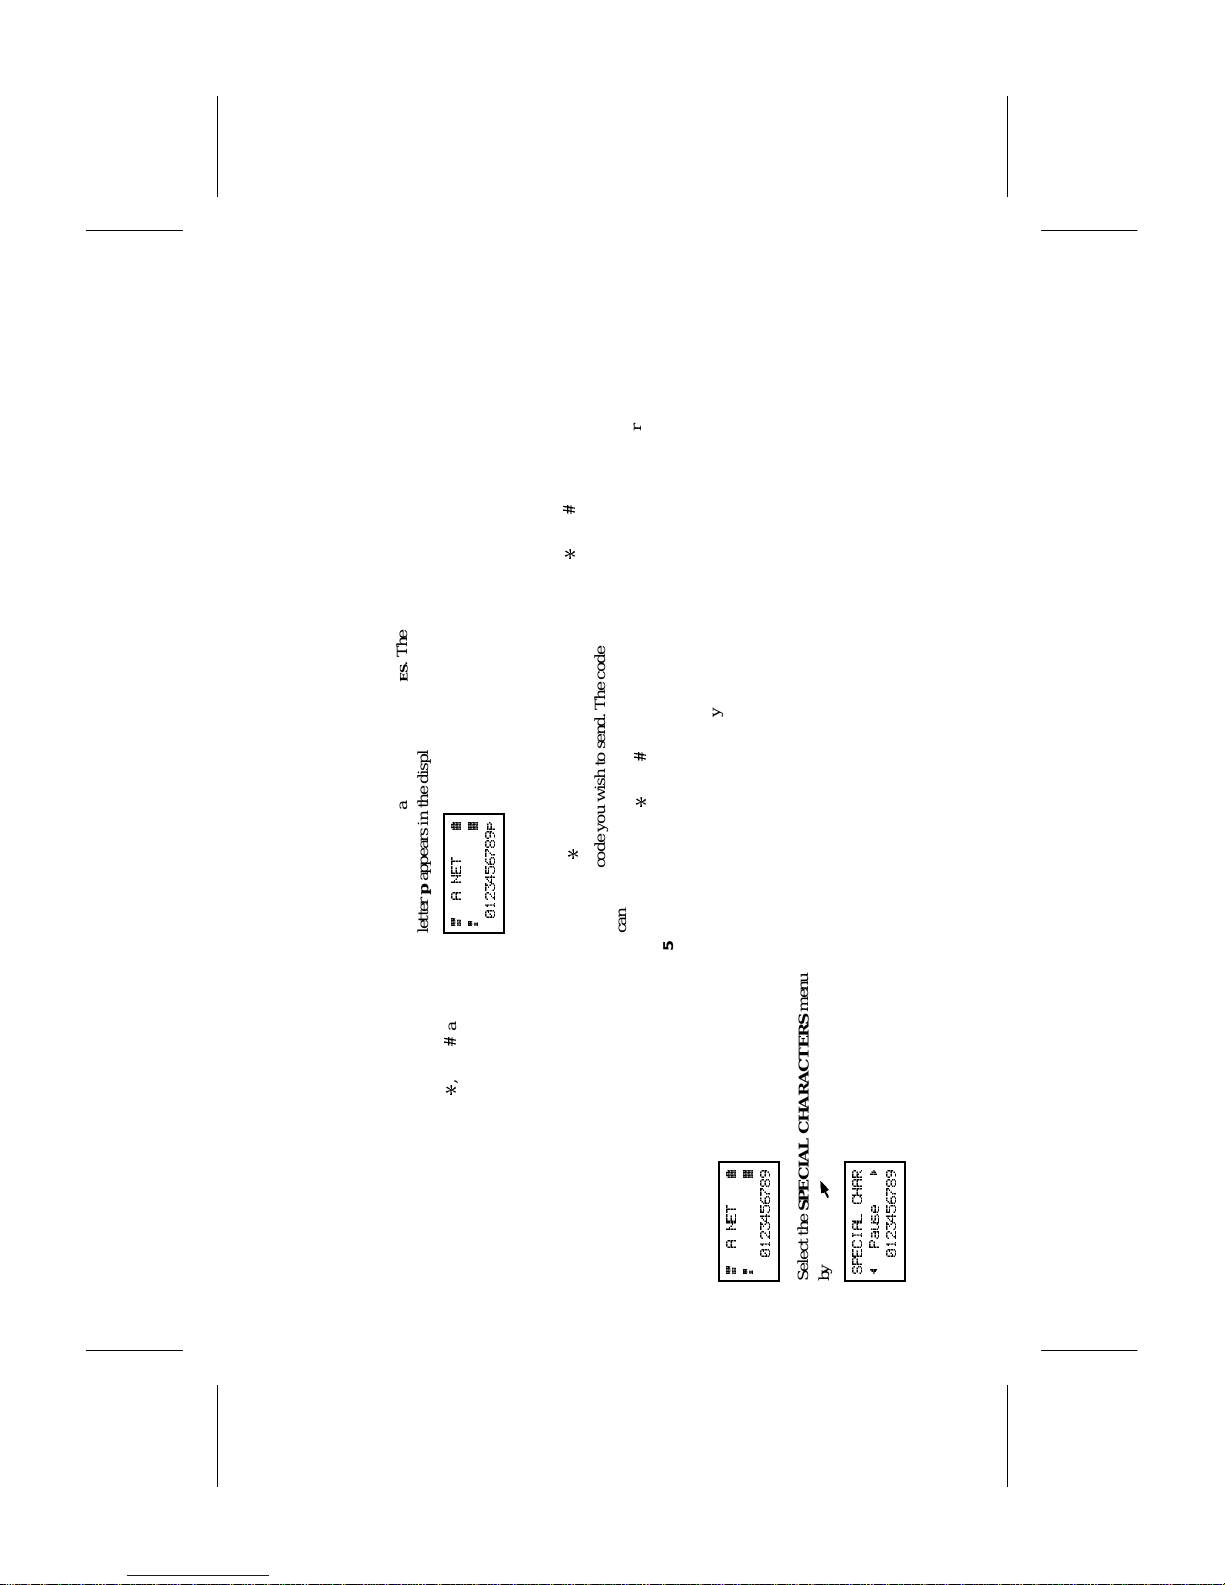
14. Sending DTMF Tones
You can use your phone to send DTMF (Dual Tone Multi Frequency) tones . This
feature can be used for a variety of purposes, such as banking by phone or controlling
an answering machine.
Automatic DTMF
You can send DTMF tones during a call. Y ou
can send the chara cte rs 0 – 9,
*
, and
#
as
DTMF tones by pressing the corresponding
keys.
DTMF pause function
If you wish to send a code, for example your
personal access number, it might be helpful to
use the pause function. Before you make the
call, you enter both the phone number and the
code, sepa ra t ed by a pause character.
To make a call and send a code
1. Enter the desired phone number.
4
A NET
7
2 8
0123456789
2. Select th e SPECIAL CHARACTERS menu
by pres sing
R
, followed by
YES.
SPECIAL CHAR
~ Pause
0123456789
3. Enter a pause character by pressing YES. The
letter p appears in the display.
4
A NET
7
2 8
0123456789p
Shortcut:
You can also enter a pause character by hold-
ing down
*
.
4. Enter the code you wish to send. The code
can be any combination of the digits 0 – 9
and the character s
*
and
#
.
5. Press YES to make the call.
When the call has been connected, the phone
number disappears from the displa y. The c ode
is sent automa tically, chara ct er by character, af-
ter a delay of 3 seconds. The message ‘Send-
ing’ is displayed while the code is sent.
Using several pauses
You can enter sever al pauses, for example:
PHONE. NO. p CODE1 p CODE2
When the call has been connected, the code, fol-
lowin g the first pause character, will be sent
automatical ly after 3 seconds. To send the next
code, press
YES.
Pre-programmed DTMF
signalling
You can store a code in the phone book in the
same way as you store a phone number. The
code can be any combination of the characters
0 – 9,
*
and
#
.
The maximum numb er o f characters that you
can st o r e i n the Card Memor y de p ends on your
SIM. In the Phone Mem ory you can store up to
80 characters.
To send the code
1. Call the desired phone number and wai t until
the call has been connected.
2. Recall the code from the phone book.
3. Send the c ode by pre ss i n g YES.
The characters are sent one by one. In the mean-
time th e message ‘Sending’ is display ed.
EN/LZT 126 1353 R1A 35
Page 42

Alternative met h od
You can store both a phone number and a code,
separated by a pause character in the phone
book.
To send the code:
1. Recall the phone number and the code from
the phone book.
2. Press YES to make the call. When the call is
connected, the code is sent aut om atically af-
ter 3 se conds.
15. Who Is Calling?
The Calling Line Identification (CLI) service allows you to see the caller’s phone
number in the display, giving you a chance to identify the caller. This service may not
be available on all networks and may require a separate subscription.
To receive a call
When an inc omin g call is receive d, the calle r’s
number appea rs in the display. If the caller’s
number and name is stored in the phone b o ok,
the caller’s name will be displayed too.
4
Answer?
7
2
Harry
8
+12345678901
Press YES to answer the call, or NO to rejec t it.
Answered calls
The phone numbers of the last 5 answere d calls
are stored in a memory in the phone – the An-
swered Numbers memory.
To review the p h one num b er s
of answered calls
1.From the PHONE BOOK menu, select ‘Re-
ceived calls’.
RECEIVED 1
~ Jennifer
23456789012
The last caller’s number and name (if the name
is stored in the phone book) appea r.
2. To see the other numbers (and names), scroll
with
R
.
To call the number in the display
Press YES.
To erase ALL num ber s from
memory
RECEIVED 3
~ Seaman
+34567890123
1. Press and hold down CLR.
Erase
all?
2. Press YES.
ERASED
36 EN/LZT 126 1331 R1A
Page 43

Unanswer ed calls
The phone numbers of the last 10 unanswe re d
or rejected calls are stored in a memory in the
phon e – the Missed Calls memory.
To review the phone numbers
of unanswered calls
1.From the MAIL menu, select ‘Missed call s’.
MISSED CALLS
~ 14:51 R+45678901243
The las t caller’s number or name (if the
number is stored in the phone book) appear s,
together with th e t ime when the call was re-
ceived.
If no information about a call er ’s number
was received, the number is replaced by the
the message ‘Unidentified’. If a caller
wanted to withold his or her number , the mes-
sage rea ds ‘Restricte d’.
2. To see the other unanswer ed calls, scroll wi th
R
.
MISSED CALLS
~ 20-11-96
Unidentifi ed
The day after a call has was receive d, the time
of the call is replaced with the date. You can
toggle betwee n date and time by pressing *.
To call the number in the display
Press YES.
To erase a “number” from the
display
1. Press CLR.
MISSED CALLS
~ Erase? RUnidentifi ed
2. Press YES.
To hide your phone number
when making a call
Normally, your phone number will be sent
when you make calls. If you do not wish your
number to be sent on a particular call, you can
use the ‘Hide Id’ function in the SPECIAL
CHARACTERS menu to suppress the number:
1. Enter the phone number you wish to call.
2. Press
R
, followed by YES. The SPECIAL
CHARACTERS menu ap pears.
3. Scroll to ‘Hide Id’ with
R
.
4. Press YES to make the call. A speci al code is
inserted prior to the phone number .
To send your phone nu mber
when making a call
If you subscribe to norma lly withhold your
phone number when making calls, you can use
the ‘Send Id’ function in the SPECIAL
CHARACTERS menu to send your phone
number on a particul ar call:
1. Enter the phone number you wish to call.
2. Press
R
, followed by YES. The SPECIAL
CHARACTERS menu display appea rs .
3. Scroll to ‘Send Id’ with
R
.
4. Press YES to make the call. A special cod e is
inserted prior to the phone number .
EN/LZT 126 1353 R1A 37
Page 44

16. Handling Two Calls Simultaneously
The phone allows you to handle two calls simultaneously. This means that you may
hold a call in progress and make or answer a second call, and then s witch between
them. This service may not be available on all networks.
To activate the Call Waiting
service
To be able to receive a second call, you must a c-
tiva te th e Call Waiting service.
1.From the ACCESS menu, select the ‘Call
Waiting’ function .
CALL WAITING
~ Activate
2.Press YES to activate it.
There may be a short del ay before the net-
work responds. In the meantime, the message
‘Please Wait’ is displayed. This is followed
by the message ‘Call Waiting ON’.
You may turn the Call Waiting service off by
selecting ‘Cancel’. ’Get status’ lets you check
whether the service is activate d or not.
To make a second call
while a call is in progress
Method 1
If anything else but the time is shown in the bot-
tom line of the display, erase it with the
CLR
key.
1. Press YES to put the current call on hold. The
message ‘1 on hold ’ ( 1st ca l l on hol d) ap-
pears.
2. Enter the number you wish to call, or recall i t
from the phone book, and press
YES.
Method 2
Enter the number you wish to call and press
YES. The message ‘1 on hold’ appears.
To receive a second call
while engaged in a call
You will hear a tone in the ear piece and the
message ‘Call Wait’ appears in the display if
the ‘Ca ll Waiting’ funct ion is activated.
Do one of the following to:
a. End the current call and accept the waiting
call by pressing
NO. The phone rings, and the
question ‘Ans wer ?’ a ppears. Press
YES to an-
swer the waiting call.
b. Put the current call on hold and accept the
waiting call by pressing
YES. The message
‘1 on hold’ appears.
c. Reject the waiting call and continue the cur-
rent call by pressing 0, followed by
YES.
The waiting call is cleared. If the caller’s net-
work supports it, the caller will hear an en-
gaged (busy) tone.
If Divert On Busy is acti vated, the wait ing
call is diverted to the numb er you have speci -
fied.
To switch between two calls
When one call is active and the other is on hold,
you can switch between them by pressin g
YES.
To end the current call
End the curre nt cal l by pressing NO.
The message ‘Retrieve held call?’ appears.
Do one of the following:
38 EN/LZT 126 1331 R1A
Page 45

a. End the held ca ll by pressing NO.
b. Return to the held call by pressing YES within
three seconds.
If you do not pr es s
YES or NO within three sec-
onds, the message ‘Retrieve held call?’ disap-
pears from the display and the held call is
ended automatically.
To receiv e a third call
Provided the Cal l Wai t ing function is acti-
vated, you may rece ive a third call whe n you
are engaged in one call and have a secon d call
on hold. You will hear a tone in the ear piece
and the message ‘Call Wait’ appears in the di s-
play. You may either accept the third call or re-
ject it.
To accept:
Only one call can be on hold at a time. If you
wish to accept the thi rd call, you must , end the
first or the second call, or both. See To end the
current call above.
a. If you end the first or the second call, you can
accept the waiting call (the third call) by
pressing
YES.
b. If you end both calls, the phone rings and the
question ‘Ans wer ?’ appears in the display.
Press
YES to answer the waiting call.
To reject:
Press 0, followed by YES.
The third call is cleared. Provided the caller’s
network supports this function, the caller will
hear an engaged (busy) tone.
If Divert On Busy is activated, the waiting call
is diverted to the number you hav e spec ifi ed.
Transferring a Call
If you have one active call and another call on
hold, you can connect t he t wo calls b y pressing
4, followed by
YES. You are then disconnected
from both calls.
17. Conferen ce Calls
The Conference Call service allows you to have a joint conversation with up to five
people. You may put an individual or a group of conference members on hol d while
you add other people to the conference call. You may also put members of the
conference on hold while you talk to an individual. The Conference Call service may
not be available on all networks.
To initiate a conference call
1. Call the first person you wish to talk to in the
conference call.
2. Put the person on hold by pressing YES.
3. Call the second person you wish to talk to.
4
2 0:30
7
2
1 on hold
8
10:32
4. Press 3, followed by YES to join the two peo-
ple to the conference.
4
0:45
7
2
8
12 Conf
EN/LZT 126 1353 R1A 39
Page 46

5. You can put the conference group on hold
and then add a third member by repeating
step s 2 and 4.
4
1:40
7
2
8
123 Conf
You can add up to five members using the same
method.
To have a private
conversation with one of
the members
If you wish to have a private c onversati on wit h
one of the members, you can put the other mem-
bers on hold by pres sing 2, the number of the
member and
YES. For example, to talk to mem-
ber N o. 3 , press 2 3
YES.
4
3 2:34
7
2
Conf held
8
To join member No. 3 to the conference again,
press 3
YES.
To release one of the
members
4
3:07
7
2
8
123 Conf
To release one of the members from the confer-
ence, press 1, the number of the member and
YES.
For example, to release member No. 1, press
1 1
YES.
4
3:59
7
2
8
23 Conf
To end the conference call
To end the conference ca l l, pres s NO.
18. Answering Service
The answering service of your network lets your callers leave a voic e message when
you cannot or do not wish to answer calls. This service may not be available on all
networks and may require a separate subscription.
The Voicemail functi on o f your phone m a kes it
easy to can call your answering service t o l ist en
to recorded voice messages. Before you can use
the Voicemail function, you must activate it.
To activate the Voicemail
function
From the MAIL menu,select the ‘Set VoiceM’
function.
If the number to your answering ser vic e ca n be
retrieved f rom your SIM card, the number is
shown betwe en brackets . (This also app lies i f
you have entered the number yourself at an ear-
lier occasion and then turned the Voicemail
function off.)
40 EN/LZT 126 1331 R1A
Page 47

SET VOICEM
~ On
( 123)
Press YES to activate the Voicemail function.
If no number is shown between brackets,
SET VOICEM
~New number
( )
press YES.
Enter
new number
Enter the number . Pre ss YES to activate the
Voicemail function .
To call your answering
service
You can call your answering ser vice at any time
to listen to recorded messages.
From th e MAIL men u
MAIL
~Voice mail
select Voicemail to call your answering service.
Follow the instructi on s give n to you.
Further inf ormat i on about the us e of the ans wer -
ing service is found in the operating instructions
supplied b y your netw ork operator .
To turn the Voicemail function off
or change the number to your
answering service
From the MAIL menu, select the SetVoiceM
function.
SET VOICEM
~ Off
( 123)
Press YES to turn the Voicemail function off,
or scroll to ‘New number’ and enter the num-
ber..
19. Sending an d Rece iving Tex t Messa ges (S MS)
This opt i on m ay not be availa ble on all net -
works
The Short Message Service (SMS) allows you
to send a nd re ce i ve t ex t m e ss a ge s. A message
may contain up to 160 charact er s.
Text messages ca n be receive d when th e phone
is in stand-by mode, when you are engaged in a
call, or when incoming calls are diverted to an-
other phone number. If the phone is turned off,
when sombody sends a message to you, you
will receive the mess age whe n you turn the
phone on.
Messages memory
When you receive a text message, you may read
it at once. See To receive a message be low.
However, the messa ge is automat i ca lly stored
in the first free memory position in the Mes-
sages memory in the phone, allowing you to
read it later on.
A letter icon,
Mm
, is shown on the left in the
bottom line of display, as a reminder that one or
more unread messages has been re ceived.
The Messages memory can hold up to 10 mes-
sages. When all memory positions are occu-
pied, the oldest read message will be over-
written when a new message is rece ived .
If the Messages memory becomes full, new
messages will automatically be stored i n th e
SIM Card memory (see below). If the SIM card
EN/LZT 126 1353 R1A 41
Page 48

memory becomes full, the letter icon,
Mm
,
star ts blinking.
Messages remain in the Messages memory until
you erase them or unt il you in sert a differen t
SIM card.
SIM card memory
You can store imp ortant messages on your SIM
card so that you can retrieve them regardless of
which phone you use.
The number of messages that can be stored is
SIM-dependent.
To set phone for text
messaging
If the phone number to your Service Centre of
your netw ork cannot be retrie ved from your
SIM card, you must spe ci fy the number your-
self. Otherwise , you ca n not reply t o re ce ived
messages or send your own messages.
1.From the MAIL menu, select the ‘Send M es -
sages’ function.
OPTIONS
~Serv cent R( )
2.Press YES to select ‘Options’.
SERV CENT
Enter no:
3. Enter the Service Centre number and then
press YES. Press CLR to return to the stand-
by mode.
Your phone is now ready to send and receive
messages.
You are only able to send and receive mess ages
within your operator’s network.
To receive a message
When you receive a m essage, a message signal
sounds. You can decide whether tones or clicks
will be heard with the ‘Mail alert’ function in
the SETTI NGS menu. You can also turn the
message signal of f.
The indicator light on the top of the ph one ra p-
idly blinks green.
The display shows:
3
Message
7
2 8
Read?
To read the message at once, press YES.
If you wish to read it later on, press
NO.
To read the me ssag e
New
10:37
From:
‘New’ stands for a new, unread, message. Press
YES to read it.
You see the first three lines of the message.
Scroll forward through the message with
R
,
backward with
L
. To go three lines forward,
press the numeric ke y 3.
After th e l as t li ne ha s a pp e ar ed, t he qu estion
‘Reply?’ appears. If the caller wants you to re-
ply, the last lines will read ‘Reply Requested’,
Reply?, provided the network supports this.
You ca n n ow:
Press
L
to scroll backward through th e mes -
sage.
Press YES to reply to the message.
Press NO if you do not want to reply.
To reply to the m essage
If you an sw e red YES to the ques tion Reply?,
the following is displayed:
~ New
R
Press YES. An empty display ap pears. To ente r
your message, pr oceed as describe d under Own
Message s later in this chapter.
If you do not want to reply
If you an sw e red NO to the question Reply?, the
question ‘Eras e?’ app ears.
You ca n n ow:
42 EN/LZT 126 1331 R1A
Page 49
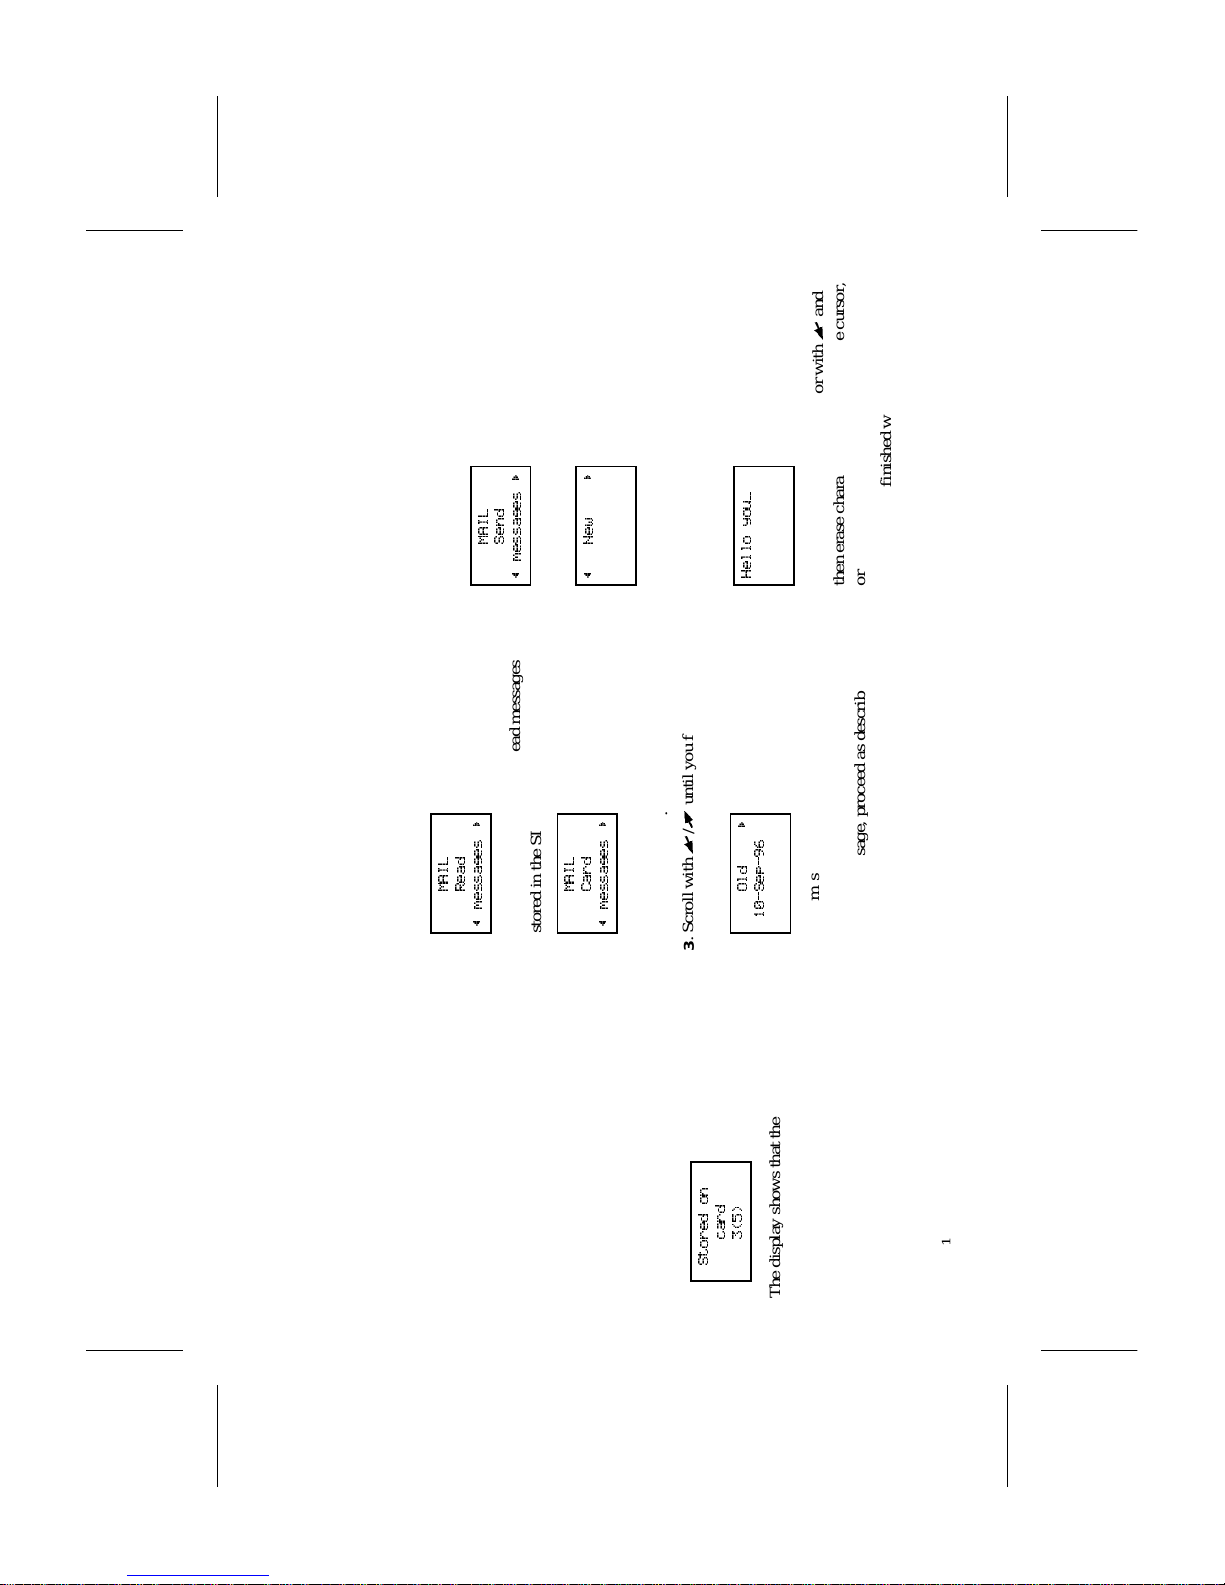
Press YES to erase the message from the Mes-
sages memor y. You will then automatically
come to the next message in the message list.
Press NO if you do not wish to erase the mes-
sage. The message will remain in the Messages
memory.
If you pressed NO, the que stion ‘ Store ?‘ a p -
pears.
Press YES to store the message in the S IM card
memory. The message is erased from the Mes-
sages memory.
Press NO if you do not wish to store the mes-
sage in the SIM card memory. The message re-
mains in the Messages memory.
You can press CLR anywhere within the mes-
sage to erase it. When the question ‘Eras e?’ ap-
pears, press YES.
If you store a message in the SIM
card memory
Stored on
card
3(5)
The display shows that the message i s, for ex-
ampe, the t hi rd of five that is p ossibl e t o store.
To call a phone number in a
message
Press YES whe n a phone number is fo und in
the display to call the number direct.
After the number has bee n cal led, the messa ge
is considered as read and it remains in the Mes-
sages memory.
To read stored messages
1. From the MAIL menu, scroll to ‘Read mes-
sages’ to read messages stored in the Mes-
sages memory,
MAIL
Read
~ messages
R
or to ‘Card messages’ to read messages
stored in the SIM card memory.
MAIL
Card
~ messages
R
2 Press YES to select ‘Read messages’ or
‘Card messages..
3. Scroll with
L
/
R
until you find the message
you are looking for and press YES to sele c t it.
Old
10-Sep-96
A read message is called ‘Old’, while an unread
message is called ‘New’.
To read a message, proceed as described under
To rece ive a message earlier in this chapter.
You may let a message remain in memory or
erase it in the same way as described under
To receive a message earlier in this chapter.
Own messages
You can write, send, repeat, and change types
of messages as follows.
To send messages
1.From the MAIL menu,
MAIL
Send
~ messages
select ‘Send m es sag es ’.
~ New
R
2. Press YES.
An empty displ ay appears.
3. Key in your message.
Hello you_
You can backspace the cursor with
L
and
then erase characters to the le ft of t he cursor,
or insert characters in the cursor’s position.
4. When you are finished with you message,
press YES.
EN/LZT 126 1353 R1A 43
Page 50
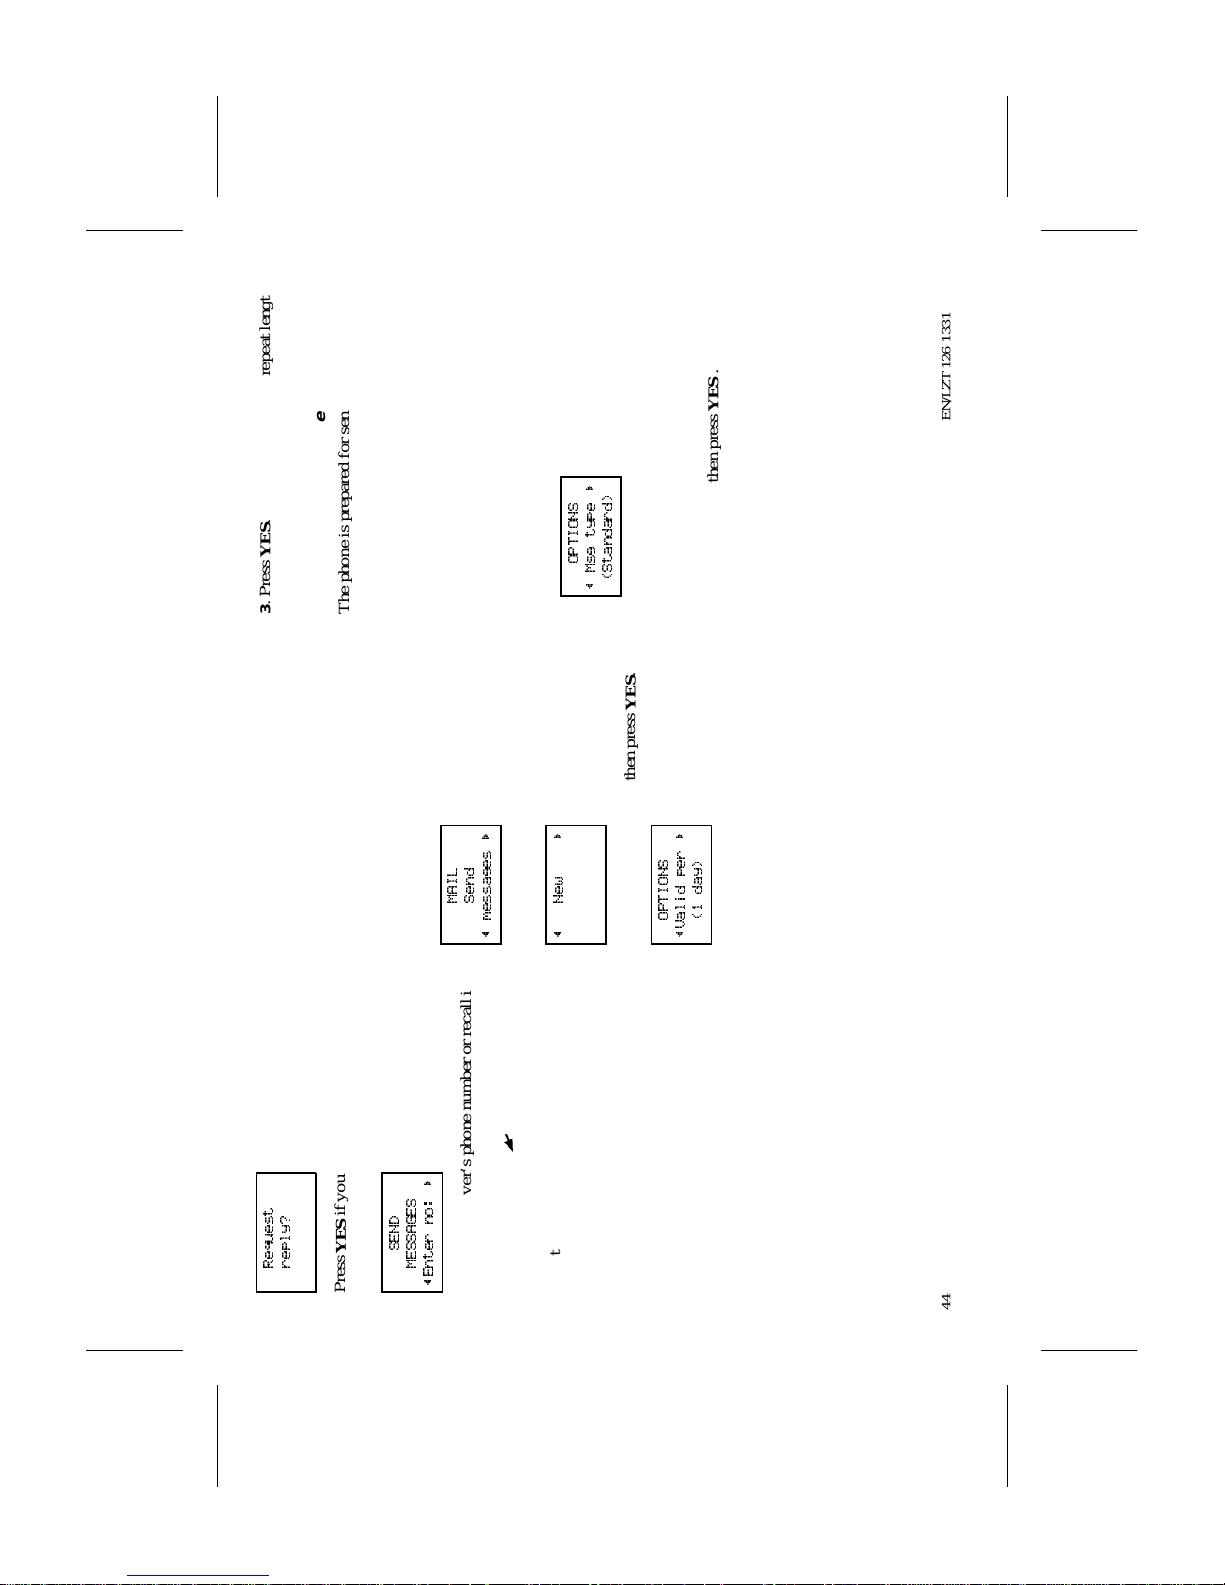
Request
reply?
Press YES if you wish the receiver to reply
to the message. Press NO if you do not.
SEND
MESSAGES
~Enter no:
R
5. Enter the receiver ’s phone number or recall i t
from the phone book. To access the PHONE
BOOK menu, press
L
.
6.Press YES to send the message or NO to
store the message for later use.
If you decided to send the message lat er, the
message is called ‘Written’ instead of ‘Sent’
when you access that message.
To repeat a message
when no an swer
If a message cannot be delivered because the re-
ceiver cannot be reache d, you can instruct yo ur
Service Centre to repeat a message for a certai n
amount of time: 1 hour, 12 hours, 1 day, 1 week
or maximum (operator-dependent).
1.From the MAIL menu,
MAIL
Send
~ messages
select ‘Send m es sag es ’.
~ New
R
2. Scroll to ‘Options’ and then press YES.
OPTIONS
L
Valid per
R
(1 day)
3. Press YES. Scroll to the desired repeat length
and then press YES.
To change message type
The phone is prepa re d for se ndi n g other ty pe s
of message. Your Service Ce ntre o f your net-
work may offer the facili t y t o c onvert a text
message into a format (fax, telex, voice, etc)
that suits the equipme nt th at re ceives the mes-
sage.
Consult your Service Centre for further inf orma-
tion about the formats types you can use.
1. Select ‘Options’ as described above and then
scroll to Message type.
OPTIONS
L
Msg type
R
(Standard)
‘Standard‘ stands for an ordinar y text mes-
sage (SMS).
2. Press YES. Scroll to the desired message type
(the format) and then press YES .
44 EN/LZT 126 1331 R1A
Page 51

20. Using Area Information (AI)
This featur e may not be available on al l net-
works
The ordinary Short Message Se r vice can be said
to be a personal service, with messages spe cifi-
cally and exclusive ly directed to you. The Area
Information (AI) is another, impers ona l , type
of text messa ge which is sent to a ll subscribers
in a certain cell of a network at the same time.
The information may be a local road report or a
local taxi phone number.
To turn area information on
or off
You can turn the AI presentation on/off with
the ‘Area info’ function in the MAIL menu.
MAIL
~Area info
(Off)
1.Press YES to select the ‘Area info’ function.
2. Scroll with
L
/
R
to ‘On’ or ‘Off’ dep ending
on whether you wish AI messages to be pre-
sented i n t he di s play or not.
3.Press YES.
To decide which types of AI
message you wish to receive
Each type of AI message is iden tifie d by a 3-
digit code. At present, the following me ssage
types exis t:
Code AI Message T ype
000 Ind ex
010 Fl as hes
020 H ospita ls
022 Doctors
024 Pha rma cy
030 Lon g -distance road r eport s
032 Local road reports
034 Taxis
040 Weather
050 District (base station identity)
052 Net work information
054 Operator services
056 Dire ctory enqui ries (nationa l)
057 Directory enquiries (international
058 Cust om e r car e (nati ona l)
059 Cust om e r car e (inte rna t ional )
Refer to the in for mation supplied by your net-
work operator, for informati on about the AI
services you can use.
AI message list
You can decide which t ype s of AI messa ge you
wish to receive. The phone’s ‘Area Info’ list
can hold up to 19 codes.
To insert a code
Provided you have turned on the presentation of
AI messages, you can access the ‘Area Info’
list from the MAIL menu.
MAIL
~Area info
(On)
1. Press YES to select the ‘Area info’ function.
2. If necessary, scroll with
L
/
R
to ‘Edit List’
and then press YES.
EDIT LIST
~ 1 022
The digit to the left indicates the position in
the list. You can scroll forward and backward
through the list with the
L
/
R
.
3. To insert a code, scroll to the first empty loca-
tion with
R
and press
YES.
4. Enter the new code. (Y ou onl y need to ente r
40 for code 040, since the ph one will add the
leadin g zer o aut om atically.)
EN/LZT 126 1353 R1A 45
Page 52
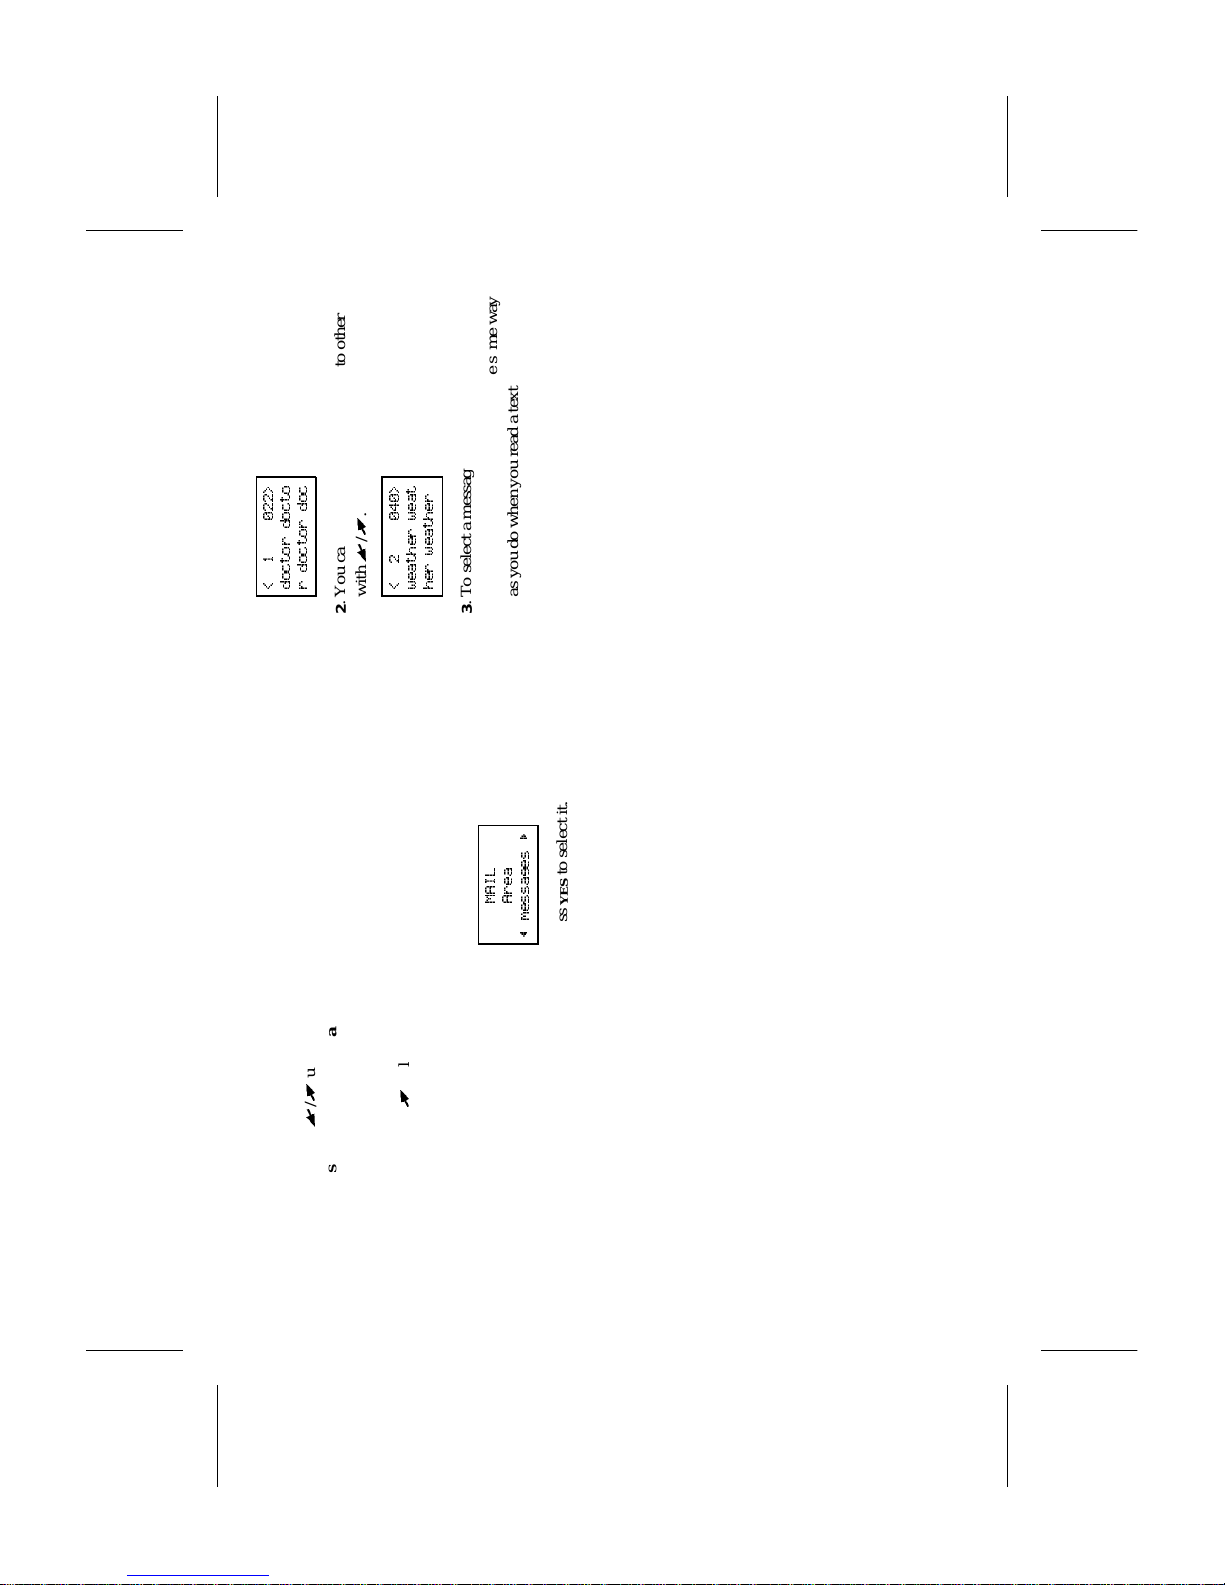
To erase or replace a code
If you wish to erase a code or replace a code,
scroll through the list with
L
/
R
until you fi nd
it and then press
YES. The question
‘Erase?’
appears.
a.To erase th e code, pr es s YES.
b.To replace the code, press
R
, followed by
YES. Enter the new cod e and pre ss YES.
To receive area information
An AI message is presente d immediat ely, un-
less you are engaged in a call.
An incoming call always interrupts the presenta-
tion of an AI message. When the call is fin-
ished, the AI presentation continues until com-
pleted.
To review received
messages
The last messa ge r eceived of the type, specified
by the code in positions 1 and 2 in the ‘Area
Info’ list, are stored in the phone.
You can read these messages vith the ‘Area
Messages’ function in the MAIL menu.
MAIL
Area
~ messages
1. Press YES to selec t it.
< 1 022>
doctor docto
r doctor doc
2. You can scroll from one message to other
with
L
/
R
.
< 2 040>
weather weat
her weather
3. To select a message, press YES.
4. To read a message, proceed in the same way
as you do when you read a text mes sa ge of
the SMS type.
46 EN/LZT 126 1331 R1A
Page 53

21. Two Line Service
Two voice lines with different phone numbers, Line 1 and Line 2, may be assigned to
your phone. The ability to receive and send text messages (SMS) is, however, only
available one Line 1. The Two Line service may not be available on all networks and
may require a separate subscription.
To select a line
If you have the Two Line service, you can
press
R
to reach a part icular menu which lets
you select Line 1
MENU
~Change to
Line1
or Line 2
MENU
~Change to
Line2
by pressing YE S.
Shortcut:
Instead of accessing the menu syst em, you can
press an d hold d o wn the 1 or 2 key to change
line, provided t he phone is in standby mode. If
you have entered digits into the bottom line of
the display, pr ess
CLR to erase before pressing
the 1 or 2 key.
The line se le ct ed is indicate d as ‘L1’ or ‘L2’ on
the left in the bottom line of the display.
4
A NET
7
2 8
L2 09:09
From now on, all outgoing calls are made on
the line selected. You can, however, be called
on both lines.
When you are called, the question ‘Answer?’ is
replaced by ‘Line1?’ or ‘Line2?’ depending on
the line currently select ed.
If you are already engaged in a call on one line,
you must end it to answer a call on the other
line.
Different settings for each
line
You can have differe nt setti n gs for each line,
for example the tone of the ringing signal, call
diverts, call bars and call waiting funct ion.
The call time meters in the INFO menu show
the call times (call c osts) for the line curren tly
selected.
To personalise the names of
the two lines
SETTINGS
~Line 1 Tag
(Line1)
In the SETTINGS menu there is a function,
Line 1 Tag or Line 2 Tag, depending on the
line currently selected, that lets you give each
line a name. Twelve characters can be entered
at th e most.
EN/LZT 126 1353 R1A 47
Page 54

22. Knowing the Call Time/Call Cost
This chapter describes the INFO menu and its functions.
During an outgoing call, the call time is shown
in the display.
SETTINGS
~Call info
(Time:Outg.)
With th e ‘Call inf o’ function in the SET-
TINGS menu you can have the time dis pl ayed
for all calls , both incoming and outgoing,
‘Time: All’.
You can also have the call cost or the number
of call units displ ayed, ‘Cost’, provided your
netw ork and your SIM card sup p ort this feat ure .
To check the time or cost of
the last call
Later on, you can check the cal l time/ cost of the
last incoming (or outgoing) call with the ‘Last
call’ in the INFO menu.
Select the INFO menu.
INFO
~Last call
3:12
Depending on the setting in the ‘Call Info’
function in the SETTINGS menu, yo u can
check:
a. the elapsed time of the last outgoing call in
(hours,) minutes and seconds
b. the elapsed time of the last incoming or out-
going call in (hours , ) mi nut es and seconds,
provided you have chosen ’Time: All’ in the
‘Call Info’ function in the SETTINGS menu
c.the cost (or the number of call units) of the
last incomin g or outgoing call, provided you
have subscr i bed to this fea tu re and ch o-
sen‘Cost’ in the ‘Call Info’ function in the
SETTINGS menu
To check the total call time
or call cost
Select the INF O menu and scroll to ‘Tot calls’.
INFO
~Tot calls
2:30:25
Depending on the setting in the ‘Call In fo’
function in the SETTINGS menu:
a. the elapsed t i me of a l l outgoin g ca ll s in
(hours,) minutes and seconds
b. the ela ps ed t i me of a ll i nc omin g and ou tg o-
ing calls in (hours,) in minutes and seconds
c. the cost (or the number of call units) of all in-
coming and outgoing calls
To reset the total call
time/co st mete r
INFO
~Tot calls
2:30:25
Press YES.
TOT CALLS
Reset?
Press YES to reset the meter.
INFO
~Tot calls
0:00
If you have chosen the call cost
option
You must enter the PIN2 code to reset the me-
ter.
To determine the call cost
This function only app ears if you have select e d
the ‘Cost ’ option in the ‘Call Info’ func tio n in
48 EN/LZT 126 1331 R1A
Page 55

the SETTINGS menu . It is a prerequisite that
your SIM card allows the call cost to be dis-
played.
Select ‘Price’ from the INFO menu
INFO
~ Price
Home
‘Home’ means that the number of call units
will be displayed during a call, and in the ‘Last
call’ and ‘Tot ca ll s’ functions.
The ‘Price’ functi on lets you enter and vary the
price per cal l uni t . The price e nt er ed wi ll be
stored on the SIM card.
To enter the price per call unit
INFO
~ Price
Home
Press YES.
PRICE
~New price
( 1.0)
Press YES.
Enter new
currency
Enter the currency with the numeric ke ys, for
example GBP for Pounds Sterlin g, and press
YES.
Enter new
value
GBP
Enter the price per call unit, for example 0.25,
and press
YES. To enter the decimal point, press
*
or #.
Enter
PIN2
Enter the PI N2 code and press # (or YES).
INFO
~ Home
GBP 0.25
To revert to displaying call units or
change the price
INFO
~ Price
GBP 0.25
Press YES.
PRICE
~New price
Home
a. To revert to displaying ca ll units , press YES.
b. To change the price, press
R
.
PRICE
~New price
(GBP 0.25)
Proceed as descri bed above under To enter the
price pe r call unit . If you wish to keep the se-
lected currency, just press
YES when the prompt
‘Enter new c urrency’ is displaye d.
Specifying a total amount of
money that can be used for
ma king cal ls
Provided both your network and your SIM card
support this feature, you can enter a total
amount of money that can be used to for mak-
ing calls. Afte r a call has bee n mad e, th e cal l’s
cost will be deducted from this amount. When
the amount has reached zero, n o more calls ca n
be made.
INFO
~ Credit
Unlimited
Select ‘Credit’ from the INFO menu
CREDIT
~New credit
and press YES.
EN/LZT 126 1353 R1A 49
Page 56
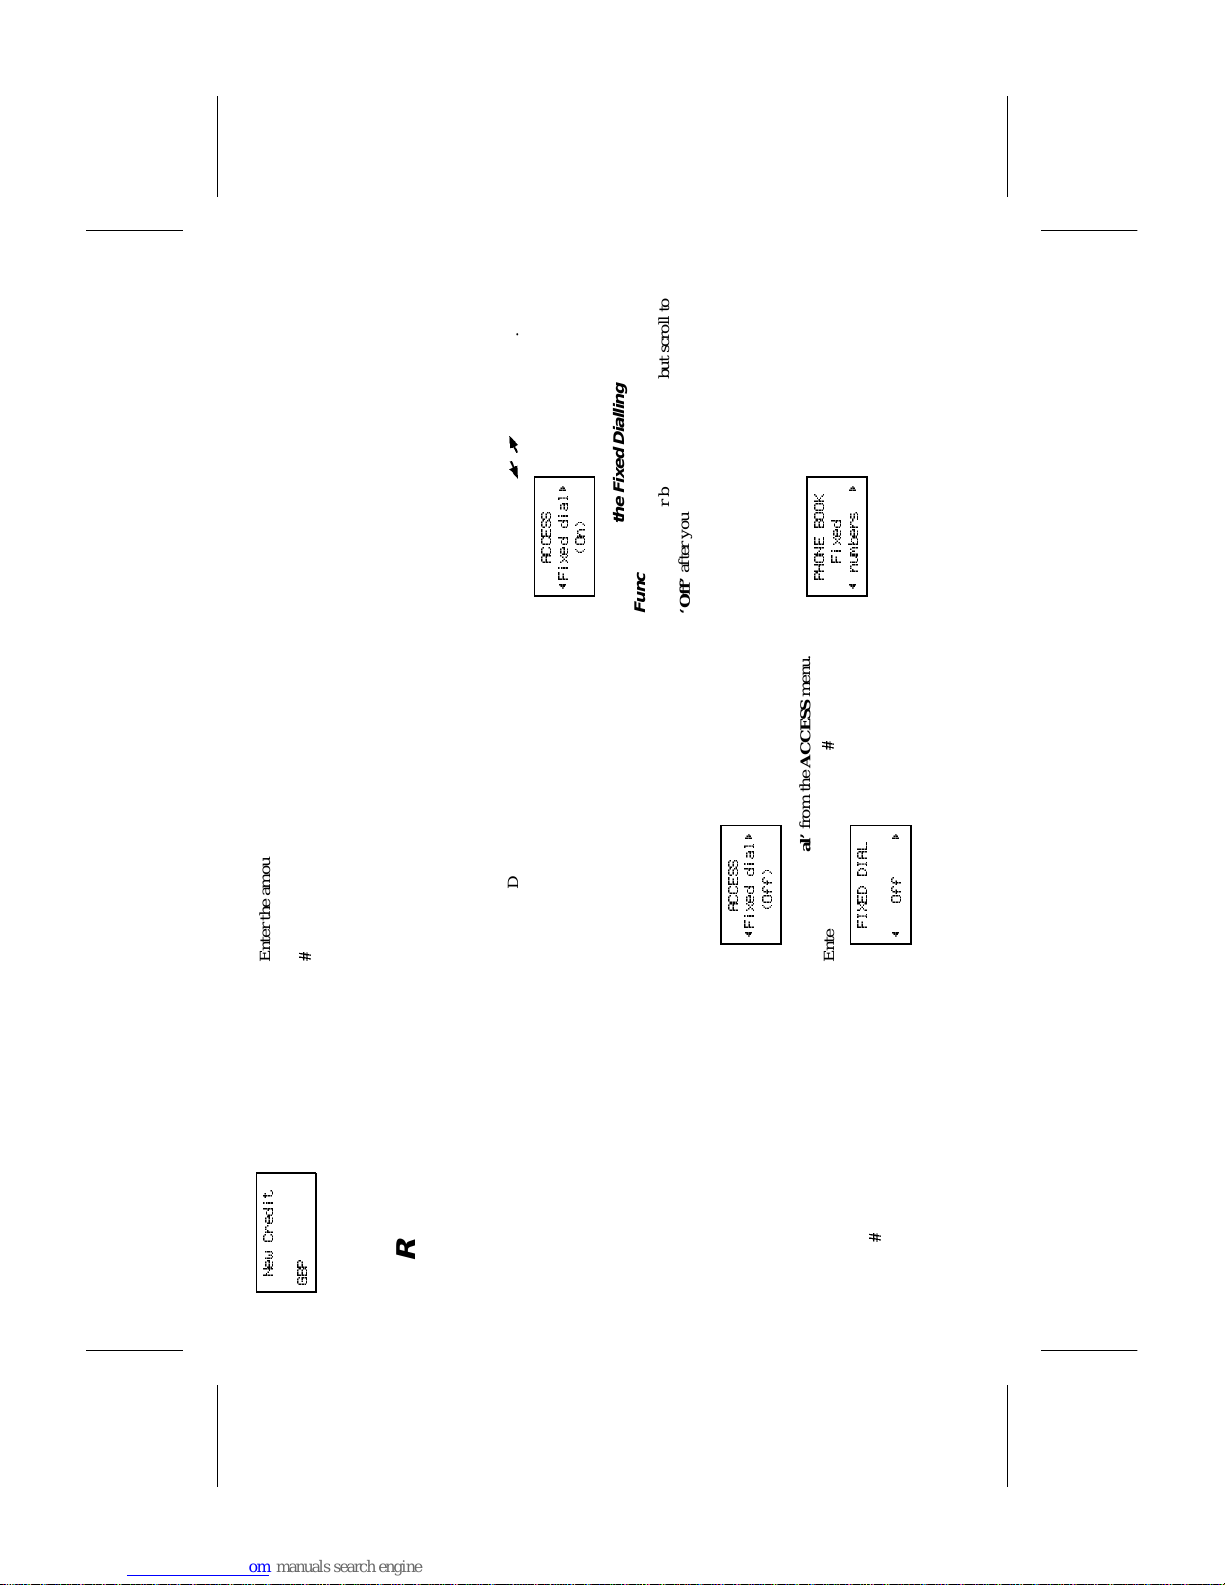
New Credit
GBP
Enter the amount, for example 30 pounds, and
press
YES. Then enter the PIN2 code and press
#
(or
YES).
23. Restricted U sage w ith Fix ed Nu mbers
Fixed Dialling is a method of restricting outgoing calls. It requires a SIM card that can
allows fixed numbers t o be stored. The fixed numbers are protected by the PIN2 code.
The Fixed Dialling function allows calls to be
made onl y to fixed numbers stored on the S IM
card. If an attempt is made to call ot her num-
bers, the message ‘Number not permitted’ ap-
pears in the display.
It is possible to store partial numbers, f or exam-
ple an area code, or an area code followed by
the first digits c omm on to severa l number s.
Storing 0123456 allows cal ls to be made to
012345600 and 012345625.
Also numbers beginning with the international
“+” character and countr y code can be stored,
allowing calls to be made from abroad.
Numbers including question marks (?) can be
stored. For example, storing 01234 56?0 all ows
calls to be made to 0123456710 and
0123456790. To enter a question mark, hold
down the
#
key.
The Fixed Dialling function does not prohibits
calls to the Internation al emergency number
112 and the Service Centre of the cellular net-
work. Network servi ce s such as Call Divert and
Call Barri ng cannot be used, however.
The maximum fixed numbers that can be stored
depends on your SIM card.
Activating the Fixed Dialling
function
ACCESS
~Fixed dial
(Off)
Select ‘Fixed dial’ from the ACCESS menu.
Enter the PI N2 code an d press
#
or (
YES).
FIXED DIAL
~ Off
Scro ll to ‘On’ with
L
/
R
and press YES.
ACCESS
~Fixed dial
(On)
Cancelling the Fixed Dialling
Function.
Proceed as described above above but scroll to
‘Off’ after you have entered the PIN2 code.
Storing fixed numbers
PHONE BOOK
Fixed
~ numbers
Select ‘Fixed numbers’ from the PHONE
BOOK menu.
50 EN/LZT 126 1331 R1A
Page 57

FIXED
NUMBERS
~ Edit
Scroll to ‘Store’ with
L
/
R
and press YES.
Enter the PIN2 code a nd press
#
or (
YES).
STORE F1
Name:_
Enter the name (optional) and the fixed number
in the same way as you would when you st ore
an ordinary phone number. Refer to t he descrip-
tion of the ‘Store’ function in chapter 8. Usi n g
the Phone Book.
To change a stored number
FIXED
NUMBERS
~ Edit
Select ‘Edit’ and scroll to the de si re d fixed
number.
~ (F3)
046
Press YES.
After you have entered the PIN2 code, you can
change the positition number, the name or the
fixed number in the same way as you would do
with an ordinary phone number. Refer to the de-
scription of the ‘Edit ’ function in chapter 8. Us-
ing the Phone Book.
24. Data Menus
The phone can be used with the Ericsson Mobile Office kit. This links the phone with
a desktop or laptop PC, allowing you to use data communication and fax services from
the PC.
The ‘Data menus’ function in the SETTINGS
menu lets you turn two data menus on.
SETTINGS
~Data menus
(On)
The one menu, SPEECH THEN FAX, will ap-
pear before the INFO menu when you scroll
with th e
R
key. The other menu, NEXT
CALL TYPE, will appear after the INFO
menu .
Refer to the description of the Mobile Off ice
kit for further inf ormat i on ab out th e use of the
two data menus.
If you wi sh to di ve rt incoming calls, you can di -
vert phone calls , fax call s and data call s to dif-
ferent numbers in the DIVERT menu.
You can set different ringing signal tones for in-
coming phone, fax and data calls in the ‘Ring
type’ function in the SETTINGS menu.
EN/LZT 126 1353 R1A 51
Page 58

25. Using the Phone’s Built-In Calculator
The calculator supports the four fundamental rules of arithmetic and percentages.
To make a calculation
In this example we will divid e 134 by 32.
Scroll to the CALCULATOR menu
MENU
L
Calculator
R
and pres s YES.
CALCULATOR
~ +
0
Enter 134.
CALCULATOR
~ +
134
Scroll with
L
/
R
to the division sign (/), and
press
YES.
Enter 32.
Scroll with
L
/
R
to the equ a l sign (=), a nd
press
YES for the result.
CALCULATOR
L
=
R
4.1875
To enter the decimal po int
Press
*
.
Shortcut:
Multiplying: Press
*
twice.
Equal sign: Press
#
26. Composing Your Own Ringing Signal
This chapter describes how you can record your own ring signal.
About the phone’s note
system
Your phone has the capabil i t y to handle a range
of tones spreading over two octaves.
Look in the table on the following pa ge to un-
derstand which n ote s and other n otati on corre-
sponds to which keys. The figuree on the fol-
lowing explains which ke y goes with which
note on the keypad.
If you hold down a key, you make the note
long.
Simple melody
The simple melody is Do-R e-Me. This song cor-
responds to the C, D, and E tones on a music
scale.
52 EN/LZT 126 1331 R1A
Page 59

1. Select ‘EditMelody’ from the SETTINGS
menu. To erase cha racters from the bottom
line of the display, use the CLR key.
The bottom line of the displa y should now
look like this.
_
2. Press the 1 key .
The displa y will now show a c.
3. Press the 2 key.
The displa y now looks like this:
cd_
4. Press the 3 key.
The display should now look like this:
cde_
5. Press YES to test th e melo dy .
The phone plays the melody and asks you if
you want to save it.
6. Press YES to save the melody as an alternative
in the ‘Ring type’ function in the SET-
TINGS menu.
List o f music al notation
Press t hi s : To:
1–9 insert notes, where 1 gives a C and 9 a high D.
#
increase or decrease the pitch in half tone steps.
Press once to s ha rp ( #), t wice t o flat (b), three times to get the normal
pitch.*insert a short pause (1/8).
L
R
scroll within the melody. Press and hold to get to the beginning or end
of the melody.
0 get either a higher or a lower octave f or the note you ha ve inse rted .
You know it is higher as a plus sign is added in front of the note name.
CLR erase the note to the left of the cursor. If you press and hold CLR, the
whole melody is erased.
EN/LZT 126 1353 R1A 53
Page 60

27. Problems You Can Solve
This chapter li sts s om e simple things y o u
should check before calling for service person-
nel. This could save the c ost of unnecess ar y
service.
The phone does not come
on
Handh eld pho ne:
Recharge or replace the ba tte r y.
Handsfree ph one in a vehicle :
If the phone come s on, but n ot the hands fr ee
equipment, ensure that the phone is properly in-
serted in its holder.
Check the fuse. The fuse hold er is fitte d to the
battery cable, near the vehicle’s battery.
Phone locked
is displayed,
followed by the prompt
Enter lock code
Phone
locked
Enter
lock code
The phone is locked to prevent unauthorised
use.
To unlock the phone
Enter your personal 3- to 8-digit security code
and press # (or
YES).
If you have forgotten
your security code
Contact your dealer. The only way to unlock
the phone is through using your security code.
Be aware that it , for security reasons, may take
some time to solve the problem.
Insert card
is displayed
Insert
card
No SIM card is inserted in the phone. Turn to
chapter 1. The Phone for the procedure of in-
serting the SIM card.
Wrong PIN
or
Wrong PIN2
is
displayed
Wrong
PIN
Wrong
PIN2
The PIN or the PIN2 code has bee n ente re d in-
correctly.
This message is followed by the prompt ‘Enter
PIN’ or ‘Enter PIN2’ .
Enter the PI N or PIN2 code correctly and press
# (or
YES).
Card blocked. Unblock?
is displayed
Card
blocked
Unblock?
This message appears if the PIN code has been
entered incorrectly three times in succession.
To unblock the SIM card
Press YES.
Enter code
to unblock
Enter your personal unblocking key (PUK)
and press #. You obtain the PUK from your net-
work operator or service provid er when yo u
purchase your SIM.
54 EN/LZT 126 1331 R1A
Page 61

Enter
new PIN
Enter the PIN code and press #. You can either
enter the cur rent PIN, or a new on e.
Repeat
new PIN
Enter the PIN code again and press #.
If you entered both the unblocking key and the
PIN code correctl y, the me ss a ge ‘New PIN’ ap-
pears.
Alternative met h od to unbl ock
the SIM ca rd
Card
blocked
Unblock?
To unblock the SIM card, enter the following
sequence:
* * 0 5 * UNBLOCK KEY * NEW PIN *
NEW PIN #
BLOCKED.
Contact card prov id er
is displayed
BLOCKED
Contact card
provider
The SIM card is permanently blocked after th e
unblocking code has been en te re d i ncorrectly
ten times in succession. Contact your network
operator or service provi de r.
Enter PUK2
is displayed
Enter
PUK2
The PIN2 c ode has been entered i ncorrectly
thre e t imes in s ucces si o n.
Enter your personal unblocking key 2 (PUK2)
and pre ss #.Y ou obt a in your PUK2 from your
network operator or service provi de r.
Enter
new PIN2
Enter the PI N2 code and press #. You can
either enter the current PIN2 code, or a new
one.
Repeat
new PIN2
Enter the PI N2 code again a nd press #.
If you entered both the unblocki n g key and the
PIN2 code correctl y, the me ss a ge New PIN ap-
pears.
Emergency calls on l y
is
displayed
0
Emergency
7
1
calls only
8
09:58
A network is in range but you are not allowed
to use this network.
You may, however, call the emergency number
112.
No network
is displayed
0
No network
7
0
8
18:10
This indicates that n o network is in ran ge. The
reason for this is either:
a. You are in an area which is not covered by a
netw ork.
b. The received signal is too weak. You have to
move to obtain a sufficiently strong signal.
Handsfree p hone in a vehic le:
Ensure that the phone is properly ins erted in its
holder.
Check the external ante nna and its c onnecti on.
EN/LZT 126 1353 R1A 55
Page 62

A key symbol is displayed
in the middle line of the
display
4
A NET
7
2K
8
12:32
The keypad is locked to prevent unintentional
key action.
To unlock the keypad
Press
L
, followed b y YES.
You have chosen a wrong
language in the display
To return to English text, enter the following se-
quence
*#
0000
#
Indicator light blinks red
This indicates that the battery is becoming ex-
hausted and soon needs recharging or replacing.
56 EN/LZT 126 1331 R1A
Page 63

Page 64

 Loading...