

Page 1

User’s Manual
English
EN
Page 2

The
the EMC directive 89/ 336 /EEC, the Telecommuni cat ions di rect i v e 91/263/EEC, and
the Low Vol ta ge directive 73/23/ EEC when applicable. The p rod ucts fulfil the r equir ements accor ding t o the following standards :
symbol on our products signifies that they have been certified accor ding to
Cellular Phones and Accessories in Comb inati on:
ETS 300 342-1 EMC for European digital cellular telecommunications.
Accessories Withou t Direct Connectio n to a Cellular Phone:
EN 50081 Electromagne t ic compatibility, Gener ic Em ission Standar d, and
EN 50082 Electromagne t ic compatibility, Gener ic Immunity Standard.
This manual descr ibes Eric sson GA628, all versions
First edit io n (Mar ch 199 7)
This m an u al is publ ished by Ericsso n Mobile Commun ication s A B, without any
warranty. Im pro v ements an d chan g es to this manual n ecessi tat ed by typogr aphi ca l errors, inaccura cies of cur r ent infor ma tion , or improvem e nt s to prog ram s and/ or eq uipment, may be made by Ericsson Mobile Communications AB at any time and
without noti c e. Such changes will, how ever, be incorpor at ed into n ew editions of this
manual.
All rights reserved.
© Ericsson Mobile Communications AB, 1997.
Publicati on nu mb er: LZT 126 1352/7 R1A
Printe d in Sweden
INNOVATRON PATENTS
Page 3

Guidelines for Safe and Efficient Use
Important: Read this information before using your portable phone
General
Since its introduction in the mid 1980s the portable
phone is one of the most exciting and innovative products ever developed. With it, you can stay in contact
with your office , your home, emerg enc y serv ice s, and
othe rs.
Your telephone is a radio transmitter and receiver.
When it is ON it receives and also sends out radio frequency (RF) energy . Depen ding upon the type of mobile phone you have purchase d, it operates in diff eren t
frequency ranges and employs commonly used modulation techniques. When you use your phone, the system handling your call controls the power level at
which your phone transmits.
For the safe and efficie nt operatio n of your phone , observe these guidelines.
Exposure to radio frequency energy
The International Commission on Non-Ionizing Radiation Protection (ICNIRP), sponsored by the World
Health Organization (WHO), published a statement in
1996 which sets limits for exposure to RF fields from
handheld mobile phone. According to this statement,
which is based on the available body of research, there
is no eviden ce tha t mob ile term inals meeting the recommended limits can cause any advers e health effects.
All Ericsson telephones conform to the ICNIRP recommendations, and international exposure standards,
such as:
•CENELEC European Pre-standard ENV50166-2
•ANSI/IEEE C95.1-1992 (USA, Asia- Pacific)
If you want to limit RF exposure even further, you
may choose to control the duration of your calls and
operate your phone in the most power effic ie nt man ner.
Efficient phone operation
How to use your phone for optimum performance with
minimum power consumption:
•Hold the phone as you would any other telephone.
While speaking directly into the mouthpiece, angle the an ten na in a direc tion up and over yo ur
shoulder. If the antenna is extendable, it should be
extended during a call.
•Do not hold the antenn a whe n the phone is IN
USE. Holding the antenna affects call quality,
may cause the phone to operate at a higher power
level than neede d and shorten talk and standby
times.
Antenna car e an d replac em ent
Do not use the phone with a damaged antenna. Replace a damaged antenna immediately. Consult your
manual to see if you may change the antenna yourself.
If so, use only an Ericsson approved antenna. Otherwise, take your phone to a qualified s ervice centre for
repair.
Use only the desig nated Ericsso n an te nn a. Unauthorized antennas, modifications, or attachments could
damage the phone and may violate the appropriate
regulations.
EN
Do not use an antenna designe d for any other typ e of
portable telephone than the telephone you have purchased.
Driving
Check the laws and regulations on the use of telephones in the areas where you drive. Always obey
them. Also, whe n usin g your phone while driving,
please :
•Give full attention to driving.
•Use hands-free operation, if available.
•P ull off the road and park before making or an-
swering a call if driving conditions so require.
RF energy may affect some electronic systems in motor vehicles. In additio n, s om e vehicle manufacture rs
forbid the use of mobile phones in their vehicles.
Check with your vehicle manufacturer’s representative
to be sure your phon e will not affe ct the electronic systems of your vehicle.
Electronic devices
Most modern ele c tron ic equipm e nt, for ex am p le,
equipment in hospitals and cars, is shielded from RF
energy. However, RF energy from telephones may affect some electronic equipment.
Turn your phone OFF in health care facilities when
regulations posted in the areas instruct you to do so.
Always request pe rmissio n be f ore using you r ph one
near medical equipment.
LZT 126 1352/7 R1A i
Page 4

Mobile tele p ho ne s may affe c t the ope ration of some
implanted cardiac pacemakers, equipment for people
with hearing impairments and other medically implanted equipment. Pacemaker patients should be
aware that the use of a mobile phone very clos e to a
pacemaker may cause the device to malfunction.
Avoid placing the phon e over the pace make r, i.e . in
your breast pocket. Whe n using the phone, place it at
your ear opposite the pacemaker. If a distance of
15cm. is kept between the phone and the pacemaker,
the risk of interference is limited. Contact your cardiologist for more information.
Aircraft
Turn your phone OFF before boarding any aircraft.
•Use it on the ground only with crew permission
•Turn off your phone before the aircraft leaves the
ground. Do not use it in the air.
To prevent possible interference with aircraft systems,
safety regulations require you to have permission from
a crew member to use your ph on e while the plane is
on the ground. To prevent interference with communication systems, you must not use your phone while the
plane is in the air.
Power Supply
•Conn ect AC (Power sup ply ) only to d es ignated
power sources as marked on the produc t.
•To reduce risk of damage to electric cord, remove
from outlet by holding onto AC adapter rather
than cord.
•Make sure the cord is located so that it will not be
stepped on, tripp ed ove r or otherw is e sub jec te d to
damage or stress.
•To reduce risk of electric shock, unplug unit from
power source before attempting any cleaning, then
use soft cloth dampened on with water.
Children
Do not allow child re n to pl ay with your ph on e. It is
not a toy. Children could hurt themselves or others (by
poking themselves or others in the eye with the antenna for example ). Child ren could also damage the
phone or make calls that incre ase your tele phon e bills .
Blasting areas
To avoid interf e ri n g with bl asting operatio ns, turn
your unit OFF when in a “blasting area” or in areas
posted “turn off two-way radio”. Construction crews
often use remote control RF de vic es to set off explo sives .
Potentially explosive
atmospheres
Turn your phone OFF when in any area with a potentially explosive atmosphere. It is rare, but your phone
or its accessories could generate sparks. Sparks in
such areas could cause an explosion or fire resulting in
bodily injury or even death.
Areas with a potentially explosive atmosphere are
often, but not always, clearly marked. They include fuelling areas, such as gas stations, below deck on boats,
fuel or chemical transfer or storage facilities, and areas
where the air contains chemicals or particles, such as
grain, dust, or metal powders.
Do not transport or store flam mab le gas, liquid, or ex plosives in the compartment of your vehicle which
contains your phone and acce s s ories.
Product care
•Do Not expose product to water or moisture. Ex-
ample: bathtub, laundry sink, wet/damp basement,
swim ming pools, etc.
•Do Not expose product to extreme temperatures
such as found near a hot radiator or stove, or in a
car parked in the sun.
•Do not expose product to extreme cold tempera-
tures such as a car parked outdoors in winter.
•Do Not expose product to lit candles, cig arette s,
cigars, open flames, etc.
•Use only Ericsson Original accessories. Failure
to do so may result in loss of performance, fire,
electric shoc k, or injury, and will void the warranty.
•Do Not attem pt to dis assemb le the product. Doing
so will void warranty. This product do es no t contain consumer serviceable components. Service
should only be performed by Authorized Service
Centres.
ii LZT 126 1352/7 R1A
Page 5

Table of Contents
Guidelines fo r Safe and
Efficient Use i
Assembly Instructions 1
Assemble and Charge
– Four Steps 1
1. Inserting SIM Card 1
2. Attaching Battery 2
3. Connecting Charger to Phone 2
4. Connecting Charger to Mains 3
About the Charging Function 3
About the Bat t er y and th e SI M
Card 3
Turning On the Phone
and General Informatio n 3
Turn ing On the P hone 3
About the Display 4
Learning about You r Phone 5
Making and Receiving
Calls 6
Maki ng a C a ll 6
Ending a Call 6
Making an International Call 6
Making an Emergency Call 6
Ret ry Fu nction 6
Rece i vi ng a Ca ll 6
Answering a Call 6
Rejecting a Ca ll 6
Putting a Call on Hold 7
Useful Information while
Talking 7
Changing Volume while
Talk ing 7
Muting Mic rophone 7
Using Phone as Scratch Pad 7
Sending T o ne Signals 7
Checking Time of Calls 7
About Calling Line
Identi fi c at i on ( CL I) 7
Handling Two Call s 8
Navigating the Menu
System 9
About the Menu System 9
Moving T h rou gh t he M en u
System 9
Selecting the Ring Vol Men u 9
Creating Your Own Phone
Book 11
About the Phone Book 11
Storing Num be rs on SIM Car d 11
Stor ing Num bers in Ph o ne’s
Memory 11
About Recalling Phone
Numbers 12
Position Recall 12
Deleting Storage Position 12
About Last Dialled Numb ers 13
About Unanswered Calls 13
Personalizing Your Phone 13
Chan g ing Ring V olume 13
About Rin g Type 13
About Display Language 13
Changin g Key Sound 14
Diverting Calls 14
About Diverting Calls 14
Diverti ng Yo u r Call s 14
Viewin g Status of Call Diver t 15
Cancel l ing Cal l Dive rt 15
Protecting Your Keypad ,
Phone an d SI M C a rd 15
About L ocks 15
Keypad Loc k 15
Card Lock (SIM) 15
Changin g PIN 16
Unbl o ck ing with PU K 16
Phone Loc k 16
(Un)Locki ng Phone 16
Barring Calls
– Restricting Calls 17
About Barring Call s 17
Activating Call Bars for Any
Call Type 17
Cancel l in g All Call Bar s 17
Sending and Receiving
Text Messages 18
About Text Messages 18
Chec ki ng S ubscript i o n 18
EN
LZT 126 1352/7 R1A iii
Page 6

Settin g Ser vice Cent e r Addres s 18
Sendin g SMS 18
Rece i vi ng a Message 18
Read ing an Old M essage 19
Receiving Area
Information 19
About Area Inform ati on 19
Activating the Area Information 20
Add i n g a C o d e 20
Erasing a Code 20
Changin g a Code 20
Knowing Durati o n of Cal ls 20
About Durat ion of Calls 20
Viewin g Call in g Inform ati on 20
Resetting a Ca ll Meter 21
Other Networks 21
About Choos i ng Network 21
Selecting a Network 21
Your Ph o ne and
Accessories 22
Front Pane l 22
Handsfr ee Equipme nt 22
PC-car d 22
Index 23
iv LZT 126 1352/7 R1A
Page 7

Assembly Instructions
This chapter des cribe s how yo u ass emb le th e phone, what the SIM Card is, and how you
handle the battery.
EN
Assemble and
Charge – Four Steps
● Insert the SIM Card.
● Attach the battery.
● Connect the charger to the phone.
● Connect the charger to the mains.
1. Inserting SIM Card
Insert the SIM Card into the SIM Card holder as
described in Figure 1 and lock the holder.
Make sure the cut corner of the SIM Card is
placed as in Figure 1.
Removing SIM Card
1. Make sure the battery is removed.
2. Lift up the SIM Card holder as described in
Figure 1.
3. Pull out the SIM Card.
14
235
Figure 1. Inserting SIM Card
LZT 126 1352/7 R1A 1
Page 8

2. Attaching Battery
Place the battery on top of the phone and push
until you hear a click (see Figure 2).
Attaching
Removing Battery
1. Make sure the phone is turned off.
2. Press the locking catch on the bottom of the
battery (see Figure 2).
3. Lift the battery up and away from the phone.
3. Connecting
Charger to Phone
Have the battery att ached to the phone and connect the charger as descri bed in Figure 3. The
flash symbol on the cha rger plug has to be
turned up.
Disconnecti ng Charger
Lift the plu g up and pull it out (see Figure 3).
Removing
Figure 2. Attaching and removing battery.
2 LZT 126 1352/7 R1A
Figure 3. Connecting and dis connect in g
charger.
Page 9
4. Connecting
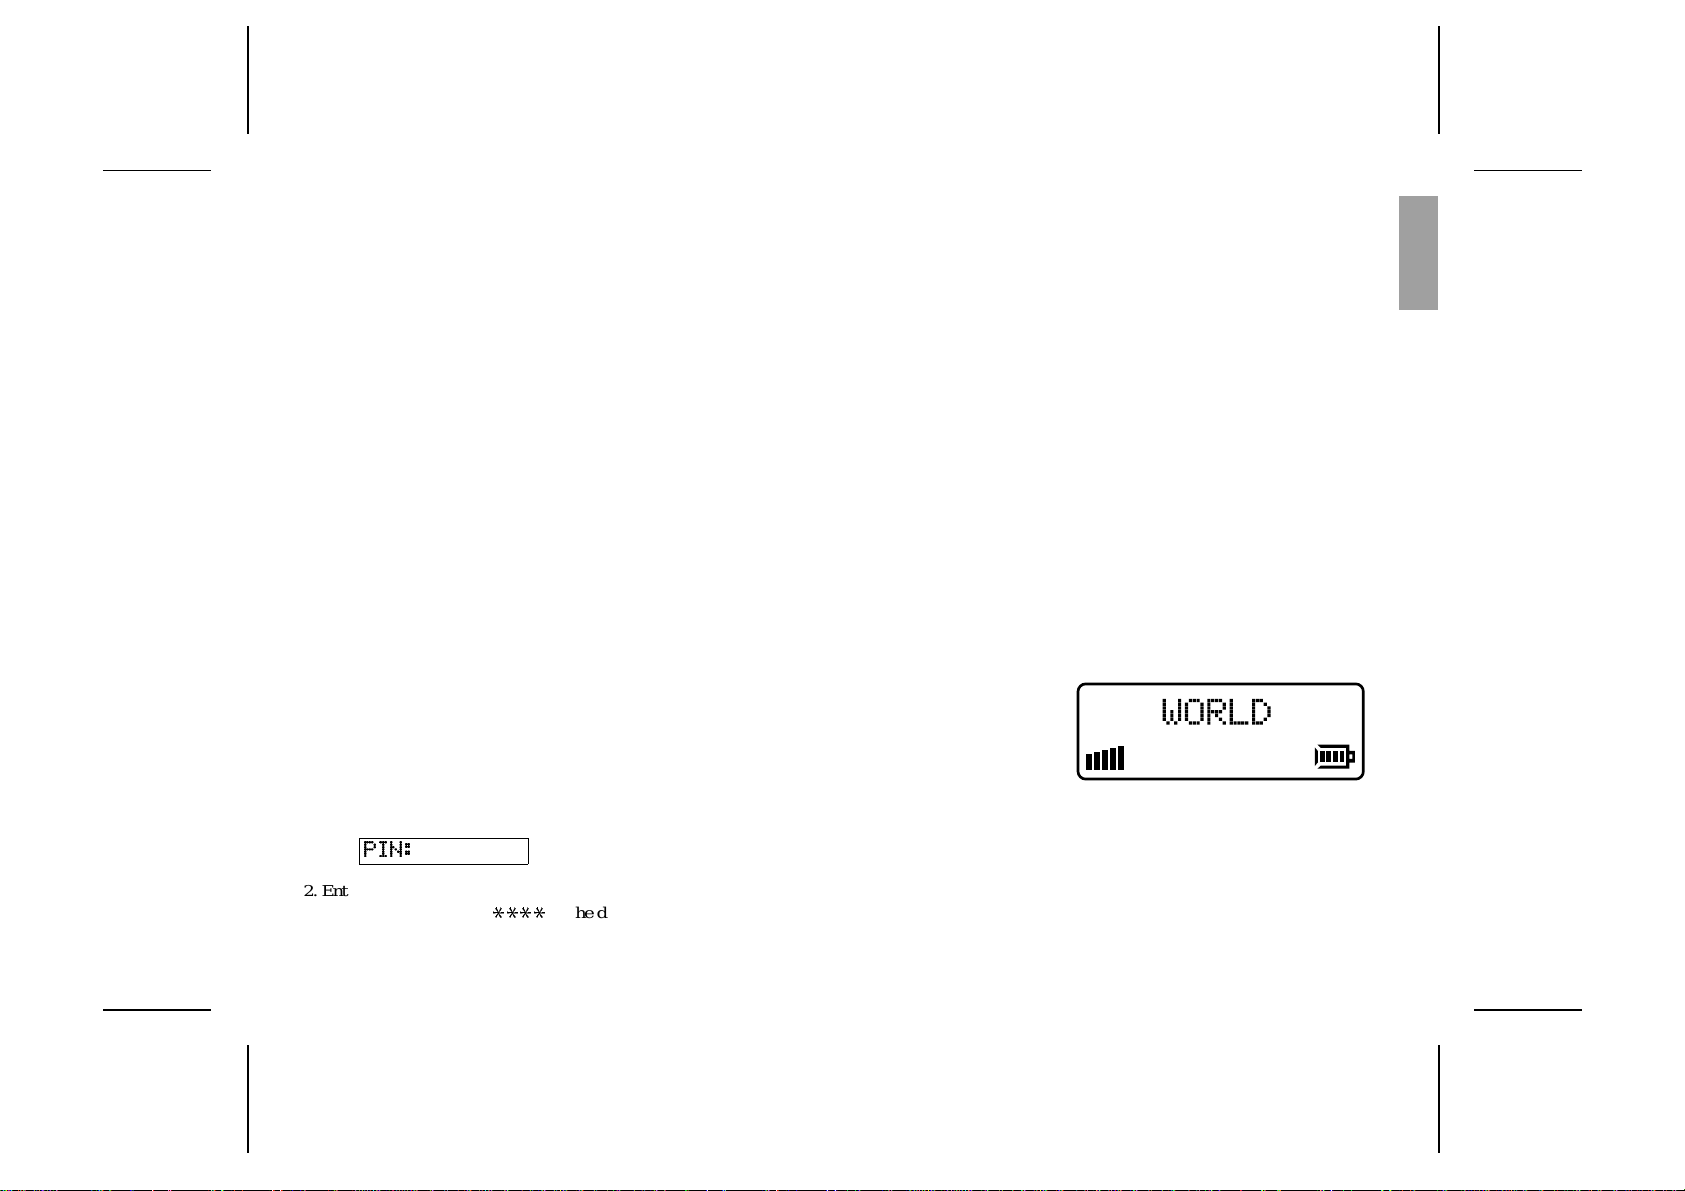
Figure 4. Sta ndby display.
Charger to Mains
Plug the charger into a mains socket. The phone
now starts to charge the batter y and you can see
the battery meter in the display move while
charging.
About the Charging
Function
When you connect external power to the ph one,
the battery is charged. When the battery is fully
charged, the charging stops. You cannot overcharge your batte ry.
When you ar e char gi n g the bat te ry you can use
your phone as normal; h owever the charging
time will be longer.
About the Battery
and the SIM Card
The Battery
Your phone is supplied with a Nicke l Meta l Hydride batter y. The battery is not charged before
shipment, even though there might be enough
power to turn the phone on.
Remember to re cycle the battery when you will
not use it anymore.
The S IM Car d
Befor e you can st a rt using your phone, you
need to order a SIM Card from a GSM service
provider. The SIM Card is a computer circuit
that keeps track of your phone number, the services that you have ordered from the service
provider, and your phone book information.
The SIM Card sometimes contains information
that lets the phone automat i ca lly change the display texts into the language of the SIM Card.
Your SIM Card is supplied with a security c ode
or PIN (Personal Identity Number) that you
need to enter into the phone to gain access to
the phone and network.
Turning On the Phone and General Information
This chapter des cribe s the disp lay inf orma tio n you receiv e from your phone when you use it.
EN
Turning On
the Phone
1. Press and hold down the NO key until you
hear a click. The display will prompt you to
enter the PIN (the security code that f ollows
your SIM Card).
PIN:
2. Enter the PIN and press YES.
The PIN is indi cated as
LZT 126 1352/7 R1A 3
****
in the display.
If you entered the PIN correctly, you will be
welcome d b y your phone. Then it searches
for a network.
When a network is found, the indicator light on
top of the phone flashes gree n once every second and the standby display is shown (see Figure 4).
Turning Off the Phone
● Press and hold the NO ke y unti l you hea r a
click and the display is dark.
Page 10
About the Display
Your phone display will help you to:
● Verify that you are dialling correctly.
● Check your battery status.
● Check your signal strength and service avail-
ability.
● Indicate t hat you have received m essages.
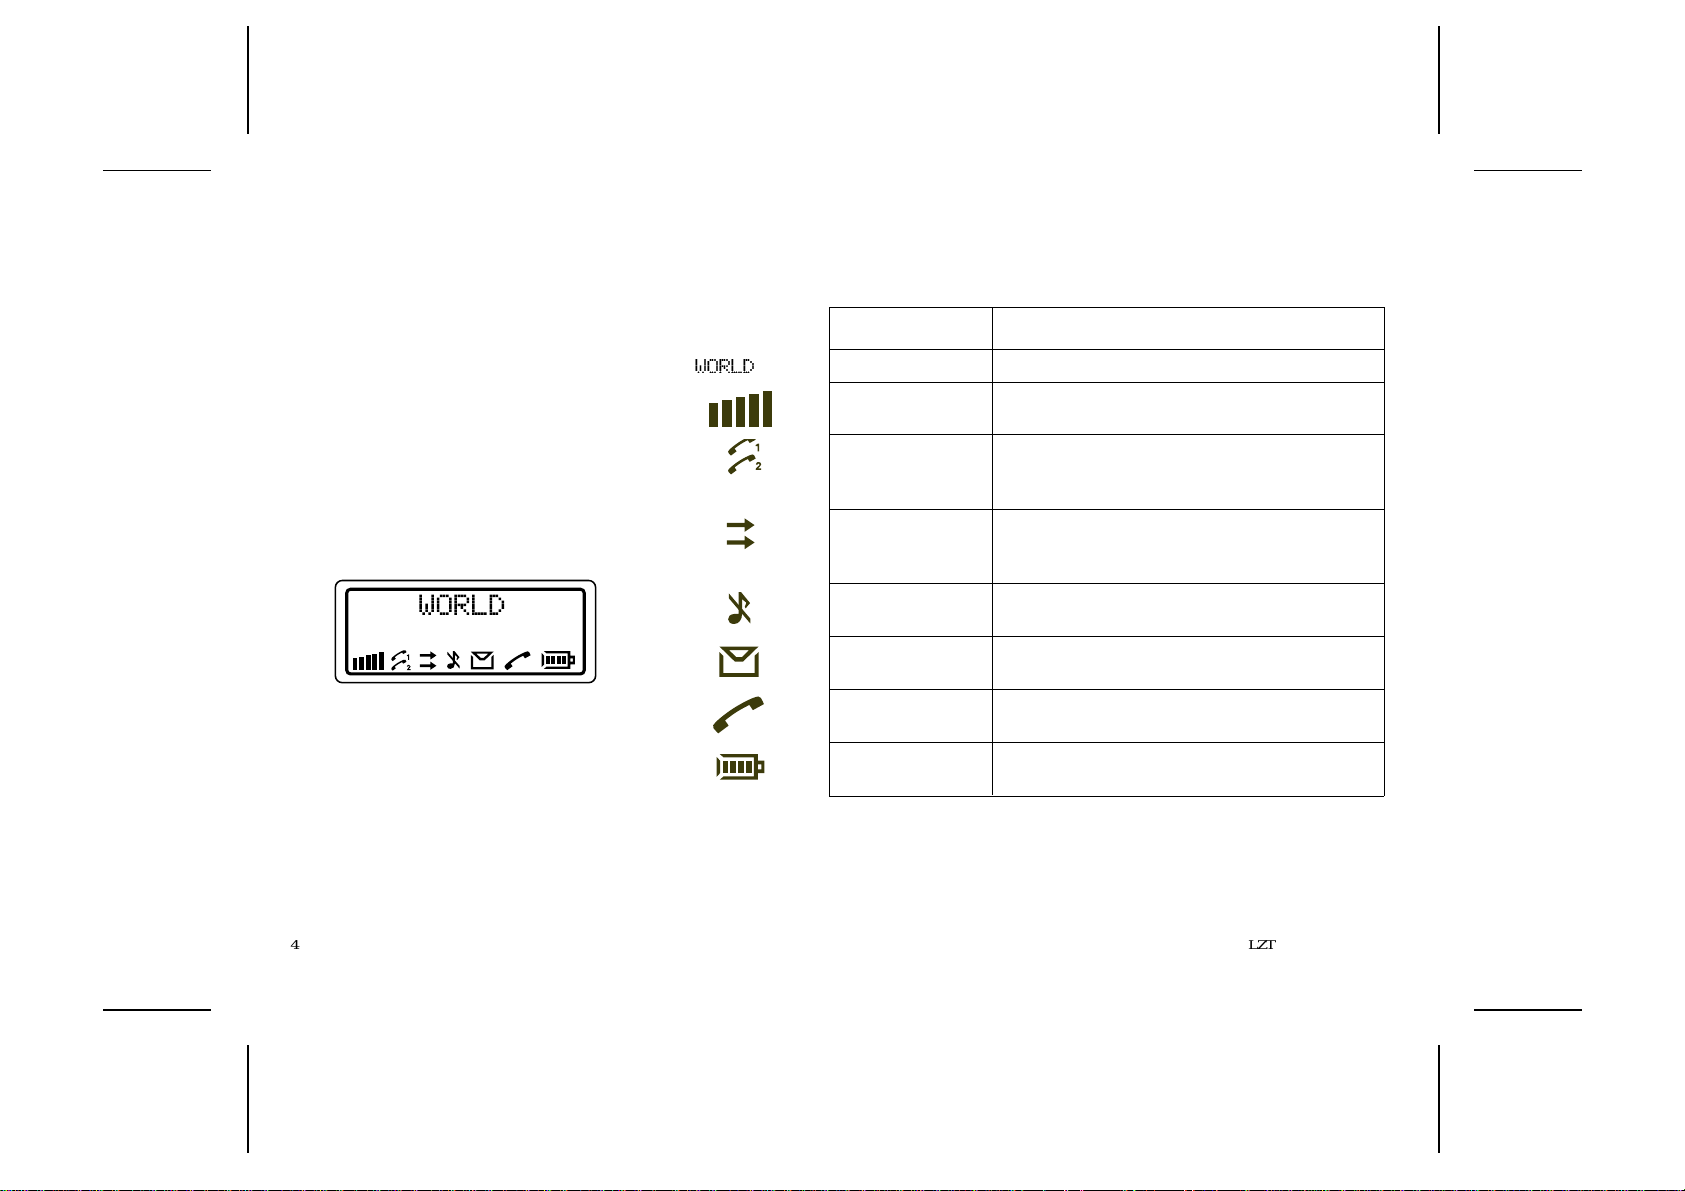
Looking at the Display
The picture below shows how the displa y looks
when the entire icon row is lit. Table 1 explains
what each icon means.
Note!
All icons may not be visible at all times.
Figure 5. Display wi th all icons lit.
WORLD
Table 1. Description of display ic ons.
Icon: Indicates:
Network T he name and countr y of the network.
Signal Stre n gth The receive d signa l stre n gth in five steps, dependi n g
on the strength of the signal.
Line Whether line 1 or 2 is active. The respective icon is
lit when the current line is activated. These icons
only show if you have t wo lines on your SIM Card.
Divert The divert arrow ind icat e s that the ph one has a
divert act i ve. The arrows corresp onds to the line th at
is diverted.
Silent Ring Signal Shows that no ring signal will sound whe n t he ph one
is ring ing.
Letter That you have received a short text me ss age or area
information.
Phone That you are engaged in a call.
Batter y The current battery strength – more bars means
more power remaining.
4 LZT 126 1352/7 R1A
Page 11

Learning about Your
10.
Figure 7. Semi-back view of your phone.
Phone
The parts list corresponds to Figure s 6 and 7:
1. Antenna
2. Stat us light
3. Beeper
4. Earpiece
5. Display
6. Keypad
7. Microphone
8. Charging connector
9. Battery
10. SIM Card holder
11. Phone clip holder
12. Extern al ante nn a conn ector
1.
3.
2.
4.
5.
6.
7.
12.
11.
9.
8.
EN
Figure 6. Front view of your phone.
LZT 126 1352/7 R1A 5
Page 12

Making and Receiving Calls
This chapter de scribe s how to you make and receive calls, make inte rnat ion al- and eme rgency calls.
Making a Call
1. Enter the area code and ph one numbe r. The
phone number is shown in the display.
If the number is longer than 12 digits, the beginning of the number will be shown as an arrow (see Figure 8).
Figure 8. Number with more than 12 digits.
To erase a digit, press
tire phone number, press and hold down
for a couple of seconds.
2. Press
YES to make the call. The displa y shows
Calling, followed by Connecting and the
phone icon is lit.
CLR. To erase the en-
CLR
Ending a Call
● Pres s NO to end the call.
Making an
International Call
1. Press and hold the zero key until the international + prefix is displayed.
2. Enter the countr y cod e, area c ode (wi t h out
an y leading zero) and the phone nu mber .
3. Press
YES to make the call.
Making an
Emergency Call
● Enter 112 (The international emergency num-
ber) and press
The 112 emergenc y number can be used in any
countr y with or with out a SIM Card , provide d a
GSM network is within range.
YES.
Retry Function
If the call connection fails or if the number you
are trying to reach is busy, the display shows
Retry?. Pres s
NO.
wise
If you press
be redialle d unti l the call is ans wer ed , or 10
YES to redial the numbe r, ot her-
YES, the number will automatically
times at the m ost. If you press any ke y, or you
receive a ca ll , th e re di al l i ng is interrupted.
If the rediall i ng is successful, the p h one rin g s
twice to inform you.
Receiving a Call
When you receive a call, the phone rings and
the indicat or light on the top of the phone blinks
green rapidly. The display shows Answer?
Answering a Call
● Pres s YES to answer the call
● When the call is finished, press NO.
Rejecting a Call
● Press NO when the phone rings.
The displa y now looks like this:
BusyTone
If the caller’s network s upport s it , the call er
will hear a busy tone.
If you have been unable to answer, or you have
rejected a call, the number of the unanswer ed
call will be shown in the MissedCall menu.
6 LZT 126 1352/7 R1A
Page 13

Putting a Call on Hold
● Press YES to put a call on hold.
To put the call off hold, pres s
YES again.
Useful Information while Talking
This chapter des cribes how you can: chan ge the volume of the ear piece ; us e the disp lay as a
scratch pad; send DTMF ton es; che ck the duratio n of the curren t call; show or hide your
phone number (CLI – Calling Line Identification); handle two calls simultaneously.
EN
Changing Volume
while Talking
During a call, you can use the arrow keys to increase or decr ea se th e ear pie ce volume.
Muting Microphone
● Press and hold the CLR key.
Using Phone
as Scratch Pad
1. Enter a phone number on the k e ypad while
talking.
When you end the call, the number rema ins
in the display.
2. Press
LZT 126 1352/7 R1A 7
YES to make the call in the display.
Sending
Tone Signals
During a ca ll you can press keys 0 – 9, * and
to send DTMF tones. For example, to perf orm
banking by phone or to control an answering
machine.
Checking
Time of Calls
When you start a call (incoming or outgoing),
the airtime is counted in minutes and seconds
and shown on the display, like this:
1:34
About Calling Line
Identification (CLI)
#
The Calling Line Identi fica tion se rvice shows
the caller’s phone nu mber when you receive a
call ( you have to order this servi ce from your
network provider). If the caller’s name is stored
in your phone book, you will see both the nam e
and number.
Showing Your
Phone Number
If you subscribe to normally withhold your
number when callin g, you can show the number
on a particul a r cal l.
1. Enter the number you wish to call.
2. Press R.
The display shows Send Id?
YES to make the call.
3. Press
Page 14

Hiding Your
Phone Number
If you subscribe to n ormal ly sh ow your number
when calling, you ca n hide your nu mber on a
particular call.
1. Enter the number you wish to call.
2Press R twice.
The display shows Hide Id?
3. Press
YES to make the call.
Handling Two Calls
Your phone can handle two calls simul tan eously. This all ows you to hold one ca ll and
make or receive an ot her , then you can swi tch be tween the two calls.
To be able to receive a second call, you must a ctivate the Call Wait function.
Activating the
Cal l W ait Functi on
● Pres s
*
43 # followed by YES.
The display will say Please Wait followed by
ON.
Deactivating the
Cal l W ait Functi on
● Pres s
#
43 # followed by YES.
Receiving a Second Call
While a Call Is in Progress
When you rece ive a se c ond call, you wil l hear a
tone in the earpiece an d the disp la y shows Cal l
Wait.
● Press YES answer the se c ond call. The curren t
call is put on hold.
The display now looks like this.
1 On Hold
● To reject the second call, press zero followed
YES.
by
Switching Between
Two Calls
● Press YES to switch between the two calls.
Ending the Current Call and
Return to the Held Call
1. Press NO t o end the curr ent call.
The disp la y shows Re trie ve? and you hear
two beeps.
2. Press
YES within three seconds to return to the
held call.
If you do not press
YES within three seconds,
the held call is aut omat i cal ly ended.
Making a Second Call while
a Call Is in Progress
● Enter the second phone number and press
YES. The first call is put on hold and the dis-
play looks like this:
1 On Hold
Receiving a Third Call
If you are engaged in one call and have a second one on hold, you may rece ive a thi rd call.
You will hear a tone in the ear piece a nd Cal l-
Wait is shown in the display.
You can only have one call on hold at a time, so
you need to end the first or second call before
you answer the call.
You can do one of the following:
● Pres s zero follow e d by YES to reject the third
call.
● End th e fi r st ca ll , re tr i e ve th e he ld cal l , and a n-
swer the incoming call
● End both calls. The phone rings and the ques-
tion Answer? appears in the display. Press
YES to answer the call.
8 LZT 126 1352/7 R1A
Page 15

Navigating the Menu System
This chapter des cribes how you navigate thro ug h the men u syst em to get maximu m use of
your phone.
EN
About the
Menu System
You control the functions of your ph one b y a
menu system.
Some menus have sub-menus that have individual settin gs. If the men u has sub-m e nus , thr ee
dots appear afte r the menu name. Se e the exa mple be l ow:
Settings...
Moving Through the
Menu System
Use these keys to m ove through the me nu s ystem and to find the dif ferent menus .
When you reach the desired menu, press
choose the menu. Use the L/R keys until yo u
reach the function or settin g you want. The n, in
the same way you chose a menu, press
select the settin g or functi on.
YES to
YES to
Press this: To:
YES confirm a setting or a selection.
NO reject a setting or a function.
CLR return to the standby display.
R
L
scroll to the right in the menu system.
scroll to the left in the menu system.
Glossary
These terms will be used throughout the manual.
Scroll: Pressin g the le ft or r ight arrow key to
move bet ween the menus.
Select: Scrolling to a menu and the n pre ss
Enter: Keying in letters or numbers from th e
keypad.
Selecting the
Ring Vol Menu
1. Press CLR to clear the display.
Press the right arrow ke y until you reach th e
Ring Vol menu .
YES.
2. Press
You are now in the Ring Vol menu.
3. Press the arrow keys to change the ring volume and then press
YES to confirm.
YES.
LZT 126 1352/7 R1A 9
Page 16

L
L
Store
L
Read
L
SendMm...
L
Mm R
AreaMm...
Menu Overview
RecallName
R
R
R
R
L
Ring Vol
L
Info...
L
MissedCall
L
DivertLine
L
Networks
R
R
R
R
R
L
Settings...
10 LZT 126 1352/7 R1A
R
L
Locks...
R
Page 17

Creating Your Own Phone Book
This chapter des cribes how you can store pho ne numb ers bo th on your SIM Card and in your
phone’s own memory.
EN
About the
Phone Book
You can store phone numbers b oth on your SIM
Card and in your phone’s own memory. The difference betwe en the two is you can rem ove the
SIM Card and use all those numbers in other
phones, while the phone’s memory always stays
the same no matter which SIM Card is inserted.
When you store phone numbers, you do not get
a real phone book. Instead you need to keep
track of where on the S IM Card or in the ph one
that you have stored your phone number.
You can store up to 50 phone numbers in the
phone memor y. The number of phone numbers
you can store on your SIM Card is SIM Card dependent .
International Numbers
If you intend to use your phone book both at
home and abroad, you should store all phone
numbers as international phone numbers, i.e.
with the international prefix “+” and the country
code before the area code (with out any lead ing
zero) and the number .
● To enter the plus prefix , press and h old the
zero until you see the plus in the display.
Speed Diallin g
The phone numbers th at you s tore in positions 1–
9
on the SIM Card can be called by entering the
position number and then pres sin g
should, therefore, save positions
tant numbers.
YES. You
1–9 for imp or-
Storing Numbers
on SIM Card
1. Enter the phone number you
wish to store.
2. Press the left arrow key until Stor e is sh own
and pres s
3. Enter the first letter of the name by pressing
the appropriate numeric key as many times as
required (see Table 2 f or all characte rs).
Enter the next letter when the cursor has
moved to the next letter posit ion. The number
of letters the name can have is SIM Card dependent.
Press
YES twice.
YES when you are done with the name.
4. If you want to store the phone number in the
storage position sugges ted in the displa y, go
directly to step 5.
If you want to store the number in a different
position, pres s
ber displayed and enter another number.
YES to confirm the p ositi on number.
5. Press
The display shows Stored.
If you have chosen a position number that is already occupied, Ove rwr ite? is disp lay ed. Press
YES to overwrite or NO to return to the position
number and change it.
CLR to erase the position num-
Storing Numbers
in Phone’s Memory
Follow the the same procedu re
as storing a phone number on the SIM Card up
to step 4. When you are prompted to set storage
position number, press # once to enter the ¤
character (which in dica tes stora ge in phone
mem ory) and twice to have the ph one suggesting the first free storage posi tion.
YES to confirm the storage.
Press
LZT 126 1352/7 R1A 11
Page 18

About Recalling
Phone Numbers
You can recall a phone number a n y time from
either the SIM Card or the phone memory. You
can recall the p hone numb er by eit her th e nam e
or the storage position numbe r.
Recalling by Name
1. Press CLR to erase any digits from th e di sp la y.
2. Sele c t th e RecallName menu.
You are prompted to enter a name.
3. Enter either the full name or t he firs t let t er and
YES.
press
The first name that matche s the lett er string is
displayed. If needed, scroll to the name you
want.
Press the * key to see the s torage position.
4. Press
YES to call the nu mber.
Position Recall
Recalling by Number
– Speed Dialling
1. Press CLR to erase an y di gi ts from th e di splay.
2. Enter a position number betw een
3. Press
YES to make the call.
1 and 9.
From SIM Card
1. Enter the position number and press #.
2. Press
YES to call the number,
4. Press
YES to call the nu mber,
or scroll until you find the number you want
to call and press
YES.
or scroll until you find the number you want
to call and press
● Press CLR or NO t o return t o the sta nd by dis-
YES.
play with the number showing.
From Phone Mem ory
1. Press an d h ol d # until the ¤ s ymbol is shown.
2. Enter the position number.
Deleting
Storage Position
1. Sele c t th e RecallName menu.
2. Choose the name you want to dele te, press
and hold
3. Press
CLR.
YES at the Erase pr o m pt.
3. Press # to recall nu mber.
Table 2. List of keypad numbers, symbols and letters.
Press * to get lower-case letters. Press and hold a key to get the number directly
Key Press the corresponding key this many times to get the symbol.
1 234567891011 12
1
2
3
4
5
6
7
8
9
0
#
space - ? ! , . : " ’ ( ) 1
ABCЕДЖаЗ2
DEFиЙ3
GHIм4
JKL5
M NOСЦШТ6
PQRSЯ7
T UVЬЩ8
WXYZ9
+&@/$%£ΘΞΨΩ 0
*#
12 LZT 126 1352/7 R1A
Page 19

About Last
Dialled Numbers
Your phone can store the 5 last diall ed number s.
Recalling From List of Last
Dialled Numbers
1. Press CLR to erase any digits from the display.
2. Press
YES. The number last calle d is shown.
3. Press
About
Unanswered Calls
Sometime s you are una ble to ans wer a cal l.
Then the phone keeps track of your lates t
missed calls in the MissedCall menu.
YES to call the number or scroll to the
number you want to call and then press
YES.
Checking
Unansw e red Call s
Selec t th e MissedCall menu a number, a name
or Unknown is shown.
Now do one of the following:
● Press YES to call the number.
● Press CLR to erase the call.
● Scroll between the entries.
Personalizing Your Phone
This chapter describes all the different ways you can personalize your phone to your own
requirements.
EN
Changing
Ring Volume
1. Select the Ring Vol menu.
2. Scroll to the desired ring volume, pr es s
Turning Off Ring Volume
1. Select the Ring Vol menu.
2. Press the left arrow key until no squares are lit
and pres s
The standb y displa y n ow looks like this :
LZT 126 1352/7 R1A 13
YES.
YES.
About Ring Type
You can choose be twe en dif ferent t ypes of rin g
signals.
Changing Ring Type
1. Select Ring T ype in the Settings menu.
The display now looks like this.
Melody 1?
2. Press the right or left arrow to li ste n to the different ring types.
3. Press
YES to select your preferred ring type.
About Display
Language
Your phone has ma ny languages that you ca n
choose for your display texts. If your SIM Card
supports the autom a tic fun cti on, the phone has
automatically chosen the SIM Card default language.
Note!
When you change language, you change all display texts immediately.
Page 20

Changin g Displ ay Lan guag e
1. Select Language in the Settings menu.
2. Scroll to the language you want to have for
the display texts.
3. Press
YES to select the l anguage.
Resetting Display
Language to Eng lish
1. Clear the di s pl ay.
2. Enter the di gi t st ri ng *#0000#.
Diverting Calls
This chapter de scribe s th e dive rt function.
Changing Key Sound
1. Select Key Sound in the Settings me nu.
2. Select the key sound you wa nt.
About Diverting Calls
When supported by your service provider, you
can use t he Dive rtLi ne menu to divert (forward) your ca lls to anot her number, f or exam ple your voice mail or home phone.
Note!
If your SIM Card and your serv ice provi de r support two line s, you need to set ea ch li ne s epa rately. Here we assume you have one line.
The divert service lets you divert:
● All ca ll s:regardle ss of if your telep hone is
turned on or off.
● Unanswered calls : if yo u do not an swer
within 30 sec onds , if your phone is busy,
turned off or out of reach of a network.
As a remind e r, the di splay wi l l inf orm yo u
about any activated call divert each time you
turn on the phone.
Diverting Your Calls
1. Select the DivertLine menu.
2. Select a divert option.
3. Chose Activat e and press
You may now do one of the foll owi ng:
● Enter a number at the prompt where you want
your calls to be diverted, i nc luding the area
code , and pr ess
● Press the left arrow key t o ent e r a nam e from
YES.
your phone book and press
● Use the phone number that is suggested and
YES.
press
You will only get a number suggested if you
have activated the divert function before.
There may be a short del a y bef or e the ne t -
YES.
YES.
work responds to your dive rt opt ion, and
14 LZT 126 1352/7 R1A
Page 21

your display will prompt you when the divert
is active (on or off).
Your standby di splay looks like this wh en t he
divert is active:
Viewing Status
of Call Divert
1. Select the Di vertLine menu.
2. Select the divert option you wis h to view an d
choose GetStatus.
There may be a short delay before the net-
work responds , and your displ ay will prompt
you which divert is act ive (on or off).
Cancelling Call Divert
1. Select the DivertLine menu.
2. Select the divert option you wish to cancel
and cho ose Cancel and press
There may be a short delay before the net-
work responds, but you will be prompted that
your divert is cancelled.
Protecting Your Keypad, Phone and SIM Card
This chapter des cribes the different locks th at you can use to protect your ph one. Thes e are
the only ways of prot ec tin g you r pho ne in case of thef t.
EN
YES.
About Locks
Your ph one ha s thre e ty pe s of l o cks:
● Keypad lock (does not protect i n case of theft)
● Card lock
● Phone lock
The card and phone locks are found in the
Locks menu and yo u fi nd the ke y pad lock i n
the Settings menu.
on when you are carrying it in a handbag or
pocket. When acti vat e d, the keypad lock is
turned on 20 sec onds after the last ke y action .
And the standb y displa y has a lock ic on.
The keypad rema in s l ock ed until you:
● answer or reject a call.
● unlock the keypad yourself.
Note!
You can always make the internat ional emergency call 112 when the keypa d is lo cked.
Keypad Lock
You can lock the keypad so that uninte nti ona l
key action has no effect if th e phone is turned
LZT 126 1352/7 R1A 15
Setting the Keypad Lock
1. Select Key Lock in the Settings menu.
2. Select Auto.
To turn off the automatic keypad lock, select
the Off option.
Unlockin g Keypad
● Press
L
and press YES.
Card Lock (SIM)
The card lock protects your
SIM Card. When the card lock
is active, you will always be
prompted to enter your PIN at startup.
Page 22

PINs a nd PUKs
When you buy your S IM Card, you obtai n a 4to 8-digit PIN (Personal Identity Number) and a
longer PUK (Personal Unblo cking Key). If your
SIM car d allows it, you c a n t ur n o ff the card
lock.
The PIN is the code that you enter to get access
to and activat e your su bscri pti on. P IN 2 is used
with special function s.
The PUK (and PUK 2) is a little longer code
that helps you unlock your phone when you
have forgotten the PIN (PIN 2).
Changing PIN
1. Select CardLock in the Locks menu.
2. Select NewPIN.
3. Enter the old PIN at the prompt and press
4. Enter the new PIN and press
YES.
YES.
5. Repeat the new PIN at the prompt and press
YES.
Unblocking with PUK
If you have entered the PIN incorrectly three
time s in a row, the disp lay will re ad:
PUK:
1. Enter your PUK and press YES.
2. Enter a new PIN at the prompt and press
YES.
3. Repeat the new PIN at the prompt and press
YES.
If you entered both the PUK and the PIN correctly, t he di splay will rea d:
New PIN
Phone Lock
The phone lock protects the
phone against unauthorize d use
of the phone if there is theft. The
phone lock is not activated when you buy the
phone.
These are the two types of phone locks:
Autolock: you need to enter the phone lock
code every time you change SIM
Card in the phone .
Full lock: you need to enter the phone lock
code every time you turn on the
phone.
Changin g Pho ne L ock Co de
1. Select Phone Lock in the Locks menu.
2. Select New C ode.
3. Enter 0000 at the pr omp t (th e fact or y defa ul t
code) or your own c ode and pres s
YES.
4. Key in a 4 to 8 digit pers ona l c ode at the
prompt and press
YES.
5. Repeat the new c ode at th e pr ompt and press
YES.
(Un)Locking Phone
1. Select Phone Lock in the Locks menu.
2. Select the desired lock option, f or example
Auto Lock.
3. Enter 0000 (the fact or y de fa ult code) or your
own phone lock code at the prompt and press
YES.
To unlock the phone, choose Unlock in the
Locks menu.
16 LZT 126 1352/7 R1A
Page 23

Barring Calls – Restricting Calls
This chapter describe s how you can bar (restrict ) calls to and from your phone. This fe ature is
available in your phon e, but might not be suppo rte d in your subs cript ion .
EN
About Barring Calls
The call barrin g ser vice let s you con trol which
kind of calls can be made to or from your
phone. This fea ture is convenie nt if you l end
your phone to somebody else. This feature is
GSM ser vice dependent.
Barring Options
Your phone supports the following barring options (but your subscription might not support
all):
● all outgoing calls – you cannot make any calls.
● all outgoing int ernational cal ls – you cannot
make any international calls.
● all outgoing int e rna t ional calls except to your
home country – you cannot make any international calls except to the SIM Card home
country.
● all incoming calls – you will not receive an y
calls.
● all incoming calls when you are abroad – you
will not receive a ny calls when abroad.
Note!
To activate any of the barring functions, you
need a passw ord that come s wi th your sub scri ption.
Activating Call Bars
for Any Call Type
1. Select Barring in the Settings menu.
2. Select eith er Incoming or O utgoing.
3. Select the barring option you want .
4. Select Activate.
5. Enter your password (provide d with your s ubscription) and press
YES.
There may be a short delay before the network responds and your displa y will prompt
you which call bars have been a cti vate d.
CLR to stop the responses from the net-
Press
work.
Cancelling
All Call Bars
1. Select Barring in the Settings menu.
2. Select the Cancel All opti on.
3. Enter your password at the prompt and pres s
YES.
There may be a short delay before the network responds and your displa y will prompt
you which call bars have been cancelled .
CLR to stop the responses from the net-
Press
work.
LZT 126 1352/7 R1A 17
Page 24

Sending and Receiving Text Messages
This chapter describes SMS, what you need to do before you can send me ssa ges, how you
send messages, and how you read messages. This service is network dependent.
About Text
Messages
The Short Message Ser vice (SMS ) function allows you to send and rece ive t ext mes sa ge s that
contain up to 160 characters. Text messages can
be received whe n the phone is in standb y m ode,
when you are engaged in a call, or when incoming calls are diverted to another phone number.
Also, if you have had your p hone turn ed of f for
a while the network will keep track of the message and send it to your phone as soon as it is
turned on.
After a message is rece i ved , it is left in the
phone’s memory, which works similar to a computer’s working memory. The message remains
in the phone’s memory until you read it. You
can even turn off the phone and the messa ge
will remain intact. If you, on the other hand,
change SIM Card, you will lose the unread message. This is beca use messa ges shoul d be personal.
Note!
You need to set the servi ce cente r number before you can send any messages. If you only
want to rece ive messages, you do not nee d to d o
anything.
Checking
Subscription
● Call your service provider to see which serv-
ices your subscript ion s upport s, or check the
service provide r’s ma nua l.
Setting Service
Center Address
1. Check the service center address (number) for
your service provid er.
2. Select Serv Cent in the Send menu.
3. Enter the service center address with the international pr efix and press
YES.
Sending SMS
1. Select New in the Send menu.
2. Enter your me s sage and press
also enter a phone numbe r.
See Table 2 for all letters and s ymbols available.
YES. You can
3. Enter the phone number you want to send
your message to and press
Or press the left arrow key to enter a name
you want to send to and press
The display now looks like this:
Mm
Sent!
YES.
YES.
Receiving a Message
When you receive a message the display looks
like this:
At the same time you will hear a beep as loud as
the ring signal and the green light on top of the
phone will flash.
Reading an
Incoming Message
1. Press YES when you have received a mess a ge.
The display will show you the time of the incoming SMS , you can see the dat e b y
pressi ng *.
18 LZT 126 1352/7 R1A
Page 25

2. Press YES.
The displa y will show you from which phone
number the messa ge is sent, or the name i f
stored in your phone book. The display could
now look like this:
Mm
Jenny
The arrow shows that you can start scrol lin g
through the message with the right arrow key
3. Press the right arrow key to read the message.
r
When you have read a message, you can do one
of the following:
● Call a phone number in the message by press-
YES.
ing
● Erase the message b y pressing YES at the
erase prompt .
● Store the message by pressing NO at the era se
prompt ( you ma y get a reply prompt if the
sender has requ ir ed a reply). Pres s
Store prompt and the message is stored on the
SIM Ca rd.
YES at the
Reading an
Old Message
1. Select the Read menu.
2. Scroll to the mess age you want to read an d
YES.
press
3. Read through the message by pressing the
right arrow key.
Erasing a Message
● Press CLR any time during the message and
YES on the question prompt.
answer
Receiving Area Information
This chapter describes how you can make your phone available fo r Area Info rmat ion (AI).Th i s
service is network dependent .
EN
About Area
Information
While the SMS function is a personal service
with messages directed to you, the Area Information is a broadcast type messa ge that is sent
to all subscr iber s in a cer ta i n cell , for exa mpl e a
section of a city, at the same time. You can set
your phone to receive only those types of messages you want to list e n to, e .g.: the local
weather forecast or the local traf fic report. Each
message is ident ified by a 3-digit c ode. Check
LZT 126 1352/7 R1A 19
with your service pr ovider for which messa ge
types are available in your netw ork.
When you rece ive an AI the disp la y looks like
this:
The default se tt i ng for the phone is that th e AI
service is turned off.
At present the following message type s e xi sts:
Code Title
000 Index
010 Flashes
020 Hospitals
022 Doctors
024 Pharmacy
030 Long-d ist anc e road reports
032 Local road reports
034 Taxis
040 Weather
Page 26

050 District
052 Netwo r k information
054 Operator services
056 Directory enquiries (national)
057 Directory enquiries (international)
058 Customer care (national)
059 Customer care (international)
Activating the
Area Information
● Select On in the AreaInfo sub-menu.
Adding a Code
1. Select EditList in the AreaInfo sub-menu.
2. Press the right arrow key to find the first
empty position and press
3. Enter a new code and press
The display could now look like this if you
have added the pharmacy title to the second
position:
2024
YES.
YES.
Knowing Duration of Calls
This chapter de scribe s how you can keep track of the durat ion of your calls.
Erasing a Code
1. Select Ed it List in the AreaInfo sub-menu.
2. Scroll to the position (to the left in the display) you wish to erase and press
3. Press
YES at the erase prompt.
YES.
Changing a Code
1. Select Ed it List in the AreaInfo sub-menu.
2. Scroll to the position (to the left in the display) you wish to change and press
3. Scroll to New Code and press
4. Enter the new code and pres s
YES.
YES.
YES.
About
Duration of Calls
Your phone is capable of keeping track of the
following:
Total Calls :
This feature shows the total time of all calls in
hours and minu tes s in ce the meter was last se t.
Outgoing Calls:
This featur e t ra cks the time of all your out goi ng
20 LZT 126 1352/7 R1A
calls in hours and minutes since the met er was
last s et.
Last Call:
This feature tracks the durat ion of your last call
in minutes and seconds.
The duration of t he cal l appears in the displ ay
after a call is fini shed. The total ti me of all calls
is recorded in the phone and is also defaul t .
Viewing Calling
Information
There are two ways to view the calling information:
● Look in the display for the duration of your
la s t ca ll wh en it is ended.
● Select the Info menu to view all op tion s.
Page 27

Resetting a
Call Meter
1. Select the Info menu.
2. Scroll to the meter option you want to reset
and pres s
3. Press
YES.
YES at the reset prompt.
Other Networks
This chapter describes how you select a different network when you are out of range of your
home service pro vide r’s network.
EN
About Choosing
Network
When you turn on the phone, it selects its home
network. If this is not within range, you mi ght
not be able to get any reception or, if you are
abroad, you can ch oose a different netw ork, provided your ser vice provi de r has an agree ment allowing you to use the network. This is called
roaming.
When you select the Netw orks menu, the phone
automatically s ea rches for all networks present
in the area you are in. Each network that is
found, has a status indication tellin g you
whether the network is available or forbidden.
LZT 126 1352/7 R1A 21
See the list below for a descri pt ion of th e statu s
indi cation :
Display: Meaning:
Network and # home network
Networ k and * curren tly us e d netw o rk
Network and A other available networks
Network and S other available network (given
priority by your home service
provider)
Networ k and F forbidden networks
Auto automatic network search
Note!
The status of forbidden net w orks can ch ange, so
it is important that you make a network search
to update the list, especially when you are visiting another country.
Auto is the ba si c setting for the network search
and selection. This setting means that your
phone ta kes care of all t he network search and
selection.
Selecting a Network
1. Select the Netw orks menu.
The phone perf orms a network sea rch and the
display shows the current network followed
by the network list.
2. Scroll through the network list to see which
networks are avail abl e .
YES to select a net work.
3. Press
When you have made a network selection,
Networks? is shown whenever the ph one
cannot c ontact the des ire d network. You can
now either:
● Select a new network.
● Set the phone to the aut omat ic sea rch mode.
Page 28

Setting Phone to Automatic
2. Scroll, after the search, to Auto and pre ss
YES.
Network Search
1. Sele c t th e Networks menu.
Your Phone and Accessories
This chapter describe s fe w of those acce sso ries that you buy for your phone.
Front Panel
You can change the front panel of your phone!
This allows you to match the phone to any of
your different m oods.
Changing the Fron t Pan el
1. Lift the front panel as describe d in Figure 9.
2. Place the new front pa nel on the ph one as describ ed i n Fi g ur e 9.
Handsfree Equipment
If you drive and use your phone, you can con nect it to a handsfree equipment. In s ome countries it is the law to have the mobile phone
connecte d to a handsfre e e quip me nt while driving.
Answering/Rejecting Calls
with Handsfree
● Press an y key, except NO, to answer a call.
NO rejects the call.
PC-card
Your phone is capable of receiving fax and data
calls through a PC-card (PCMC A). For best result with fax and data transmission, connect the
phone to a suitable Mobile Office Kit (ask your
retailer for which kit suits your ph one).
Figure 9. Changing front panel
22 LZT 126 1352/7 R1A
Page 29

Index
!
112 call 6
A
Accessori es 22
AI
See Area information
Alphabetic characters 12
Answering calls 6
Antenna 5
Area information 19
about 19
activating 20
adding code s 20
changing codes 20
er as i ng co des 20
Assembly instructions 1
Autolock 16
B
Barring calls
about 17
activating 17
cancelling 17
Battery 5
about 3
attaching 2
removing 2
status 4
Battery icon 4
Beeper 5
Busy tone 6
C
Call wait
activating 8
deac t ivate 8
Calling line iden tif ic atio n 7
Calls
answ erin g 6
barring 17
diverting, about 1 4
duration 20
emergency 6
ending 6
internation al 6
making 6
on hold 7
outgoing 20
receiving 6
rejecting 6
restricting 17
retry 6
total 20
Charger
connecting 2
connector 5
disconnecting 2
function 3
CLI 7
D
Dialling 4
Display 5
information 4
Divert icon 4
Diverting calls 14
about 14
cancellin g 15
view status 15
Duration of calls 20
E
Earpiece 5
Emergency calls 6
Enter 9
names in memory 11
number s in me mo ry 11
Erasing text message 19
External antenna connector 5
F
Front panel 22
Full lock 16
EN
LZT 126 1352/7 R1A 23
Page 30

G
General information 3
Glossary 9
H
Handsfree equpipme nt 22
I
International numbers
storing 11
International prefix 6
K
Key sound
changing 14
Keypad 5
lock 15
unlock 15
Keypad lock
activating 15
turning off 15
L
Language
automatic 3
display 13
display, changing 14
Language reset 14
Last dialled numbers
about 13
recalling 13
Letter icon 4
Line indicator icon 4
Locks
about 15
keypad 15
phone 16
SIM 15
Lower-c ase letters 12
M
Mains 3
Making calls 6
Memory
erasing names/numbers 12
phone 11
SIM 11
speed dialling 12
Menu system
about 9
overview 10
Messages
See Text messages
Microphone 5
mute 7
Moving through menus 9
Muting 7
N
Navigating the menus 9
Network
selecting 21
Nickel metal hydride 3
O
ON/OFF 3
Overview
menus 10
P
PC-card 22
Phone
locking 16
locking code 16
locks 16
memory 11
turning off 3
unlocking 16
Phone book
about 11
Phone clip holder 5
Phone icon 4
Phone num ber
deleting 12
hiding 8
showing 7
storing 11
PIN
about 16
changing 16
PIN 2 16
24 LZT 126 1352/7 R1A
Page 31

Position recall
from phone 12
from SIM 12
Protecting phone 15
PUK 16
about 16
R
Recalling
by name 12
by nu m ber 12
phone numbers 12
Receiving calls 6
Rejectin g calls 6
Retry 6
Ring signal
icon 4
See Ring volume
Ring type
about 13
changing 13
Ring volume
changing 13
muting 13
Roaming 21
S
Scroll 9
Select 9
Service center
setting 18
Setting ke ypad loc k 15
Signal s trength icon 4
SIM Card
about 3
holder 5
inserting 1
protecting 15
removing 1
SMS
See Text messages
Speed dialling 12
Status light 5
Stopping calls
See Barring calls
Storing numbers
Phone memo ry 11
SIM Card 11
T
Text message
about 18
erasing 19
reading 18
saving 19
sending 18
Turning off phone 3
Turning on phone 3
Two calls 8
U
Unanswe re d calls 1 3
Unblocking 16
EN
LZT 126 1352/7 R1A 25
 Loading...