

Ergotron Yes 20, YESCABGMPW Owner's Manual
Built with Anthro-DNA™
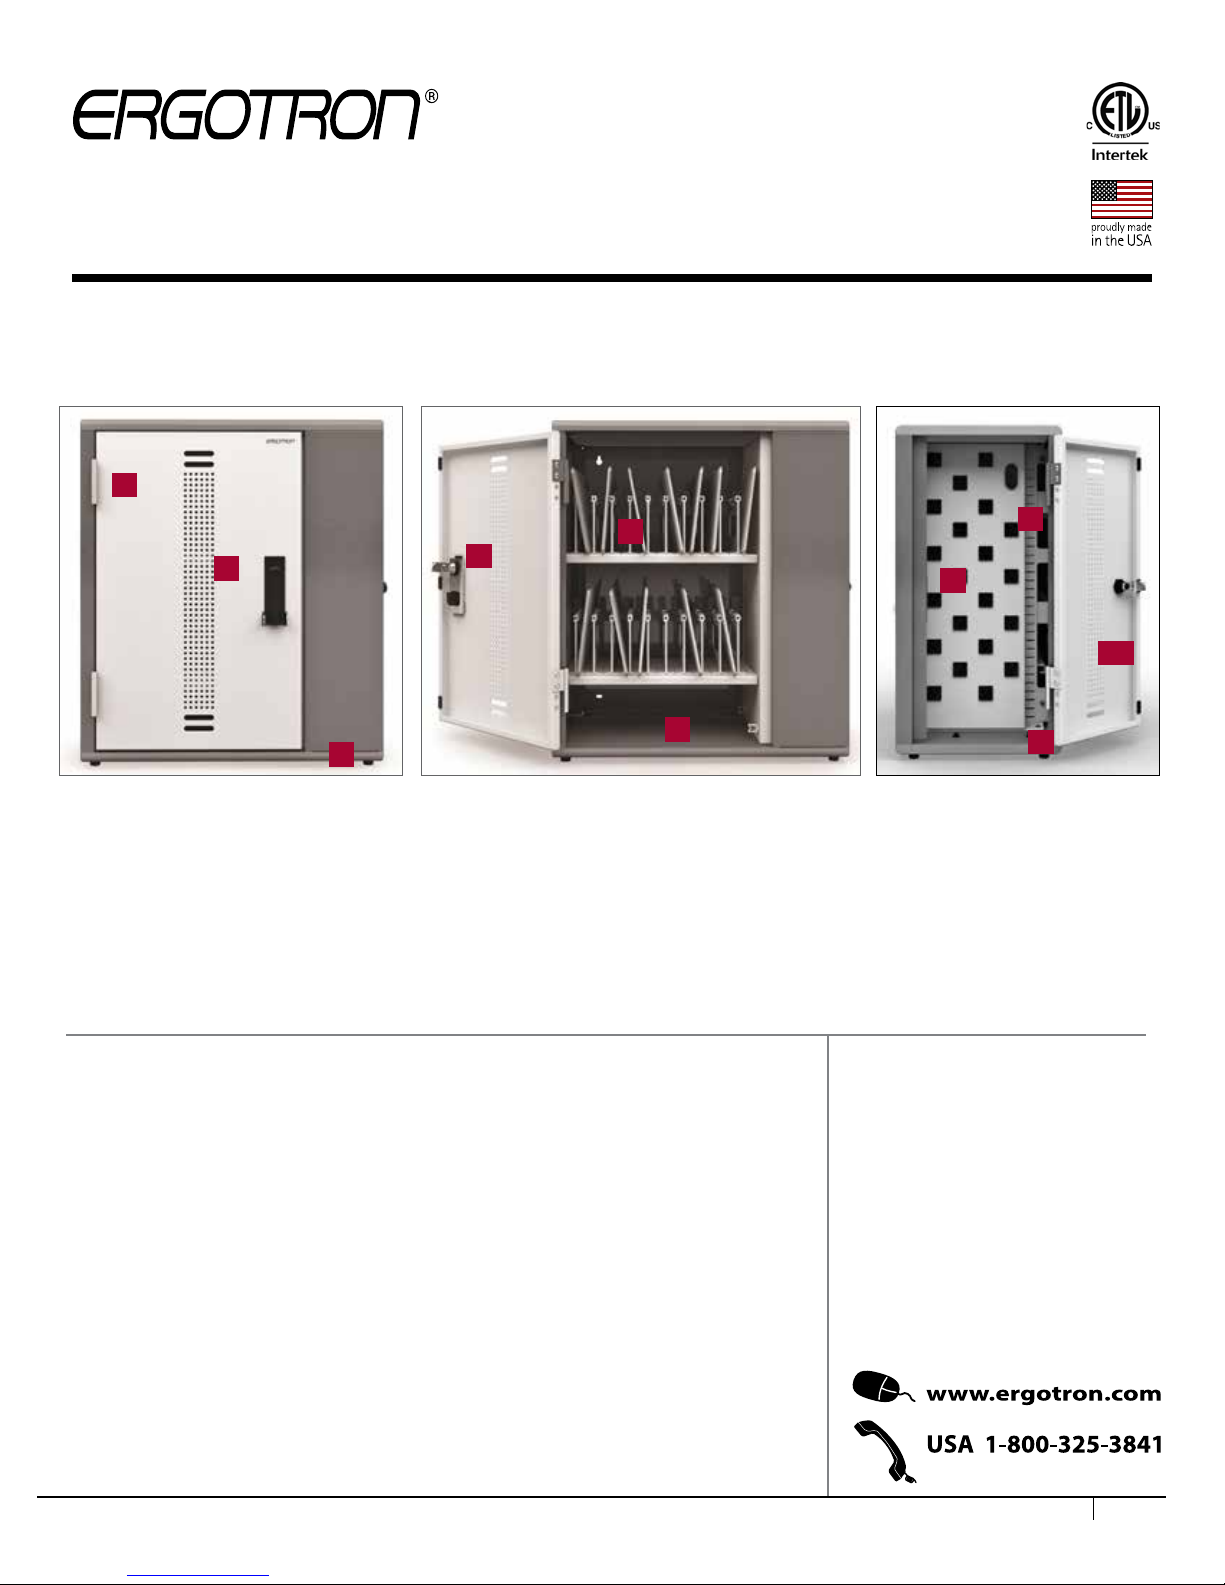
Components at a Glance
1
Owner's Manual for
Yes 20 Charging Wall
Cabinet for Tablets
Part # YESCABGMPW
5
2
4
6
3
Front of Cabinet (closed)
1. Locking front door to User area.
2. Locking door latch w/padlock
bracket.
3. Feet (for countertop installation)
This Cabinet is designed to automatically charge and store tablet, smart phone, and hand-held devices
safely and efciently. This cabinet supports 1-20 devices. Please review this manual before installing your
equipment to learn how to use the cabinet safely.
Front of Cabinet (open)
4. Lock mechanism
5. Bay dividers with
Cable Channels
6. Laptop cubby for host computer
7
8
10
9
Side of Cabinet (open)
7. Cord pass-through from front
of cabinet
8. Center divider with power outlets
9. Power cord access
10. Locking side door to IT area
Table of Contents
Getting Started .............. 2
The cabinet is listed to UL Information Technology Equipment 60950-1 safety standard.
AC input: 120VAC 60 Hz. Max amps: 12A.
For the latest User Installation Guide please visit: www.ergotron.com
300-5620-00 rev. C 11/16
Safety Notices ............... 2
Installing the Cabinet .......3
Loading Devices ............ 6
Troubleshooting Guide .. 7
Warranty ........................ 8
1 of 8

Getting Started
Important Safeguards - We want you to be safe!
These cabinets are electrical devices. Use care with them and follow
these important safeguards:
• Electrical devices are not toys. Children are often unaware of
the hazards associated with electrical devices, so this unit must
always be used by adults or with adult supervision.
Electrical Testing
• Before using your new charging cabinet, have a qualied
electrician verify the current draw does not exceed the rating of
the unit when all the devices are installed.
• Test the contact integrity of the wall outlet using a receptacle
tension tester such as a Woodhead 1760 or a Safeplug 1700.
• Test the branch circuit for ground integrity and branch circuit
protection.
• Do not use this unit outdoors.
• Liquids should not be stored in, set on or placed inside this unit.
• Never unplug this product from the outlet when your hands are
wet.
• Set the power switch to the down OFF position before you
unplug the unit from the wall, plug the unit into the wall, or plug in
devices.
• Be careful with the power cord. Do not jam the power cord
against sharp edges. Do not use the unit if the cord appears to be
damaged or if the ground prong is missing. When the unit is not
plugged in, wrap the power cord and store in the IT area.
• Do not use an extension cord with this unit.
• Inadequate repair can create signicant hazards to users and is
not covered by the warranty. Repairs should always be performed
by a qualied electrician.
• Do not plug in the unit if the switch, receptacles, or power cord
have been damaged or if the ground prong is missing from the
plug. If repairs are ever needed, they should be performed by a
qualied electrician.
Doors and Locks
The front doors on each cabinet feature a two-point keyed locking system
to protect your devices. To open a door, lift the bottom of the handle and
rotate it to the inside of the unit. Your unit shipped with 2 keys. Contact
Customer Care for replacements.
For added security, each front door features a padlock bracket to hold
your own padlock. When installed, your padlock restricts access to the
handle so the unit can’t be opened.
2 of 8
300-5620-00 rev. D 11/16
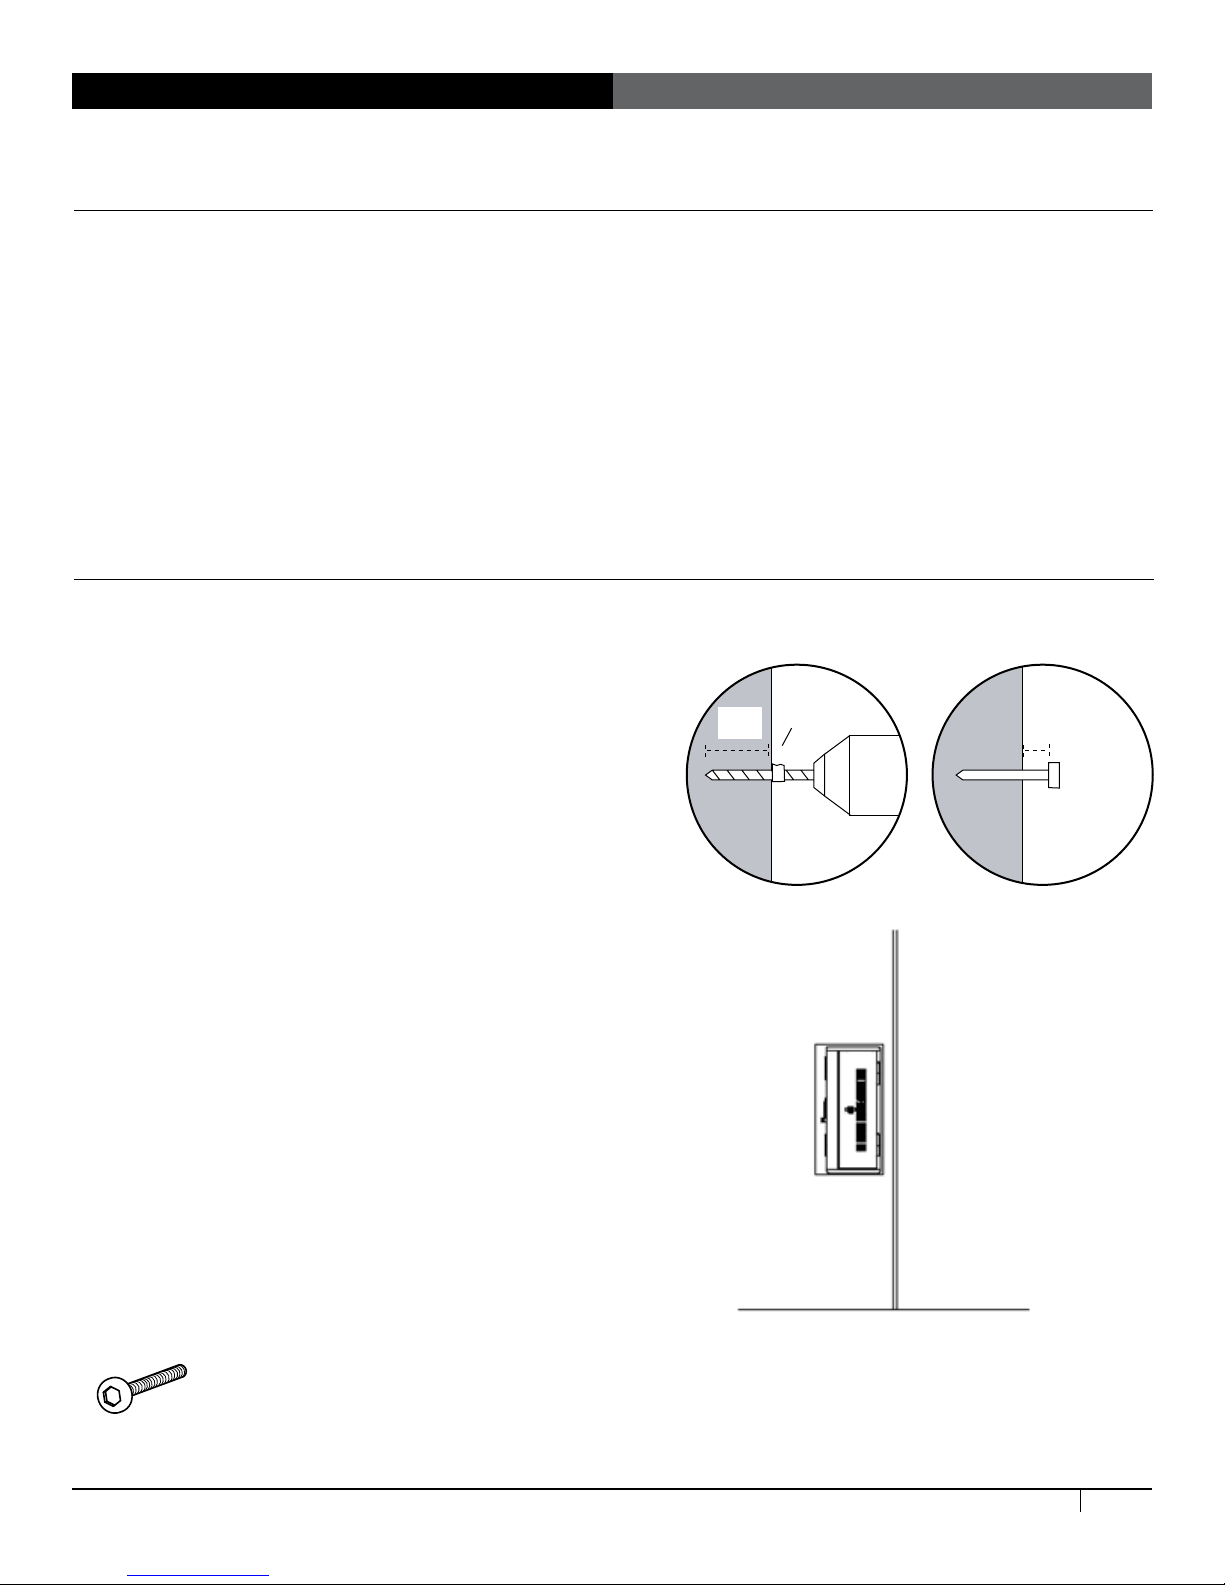
1-5/8" Screw
325-5086-00
Installing the Cabinet
STEP 1
Select the Mounting Location and Method
When choosing the right place to install your cabinet, be sure to check the location of your power source.
The power cord that comes with your cabinet is 10 ft long.
Your cabinet can be wall-mounted to wood wall studs or drywall, or bolt it to a countertop. If you’re
installing to wood wall studs, go to Step 2. If you’re installing into drywall, go to Step 3. If you're bolting to a
countertop, go to
Step 4. The cabinet also comes with cushioned feet; use them if you're placing your cabinet on a at
surface. See Step 5 for installation instructions.
NOTE: Your Yes Cabinet for Tablets can be mounted to other surfaces (like concrete or brick), and this
work should be done by a qualied contractor.
STEP 2
Wall-mount to Wood Wall Studs
This is a two-person step.
Determine the installation point for your cabinet.
Using a stud nder, locate the studs. While one
person holds the cabinet frame up to the wall at
the desired height, the other marks the height
of the top of the cabinet. Measure down 1-1/2"
along the studs to determine the position of the
screws and mark where the screws will go. Use
a level to make sure the marks are level.
1½"
Wall Stud Prole
Tape
¼"
Drill
Screw
Using a 1/8" drill bit, drill one hole in a stud
about
1-1/2" deep. How do you make sure that hole
is 1-1/2" deep? Measure that length on your
drill bit and mark it with a piece of masking tape.
Stop drilling when you reach the masking tape.
Repeat for the second screw.
Using a Phillips driver (or a power driver with a
Phillips bit), attach the rst 1-5/8" long screw at
that mounting point, but don’t tighten all the way
to the wall. Stop tightening when the screw head
is about 1/4" away from wall.
Lift the cabinet onto the wall. Mark the screw
position of the lower screws. Remove the
cabinet, drill the lower holes, and install the
lower screws. Lift the cabinet into place and
tighten all four screws.
Go to Step 6.
300-5620-00 rev. D 11/16
3 of 8
 Loading...