

Page 1
888-97-045-G-00 rev. C • 09/09
1/6
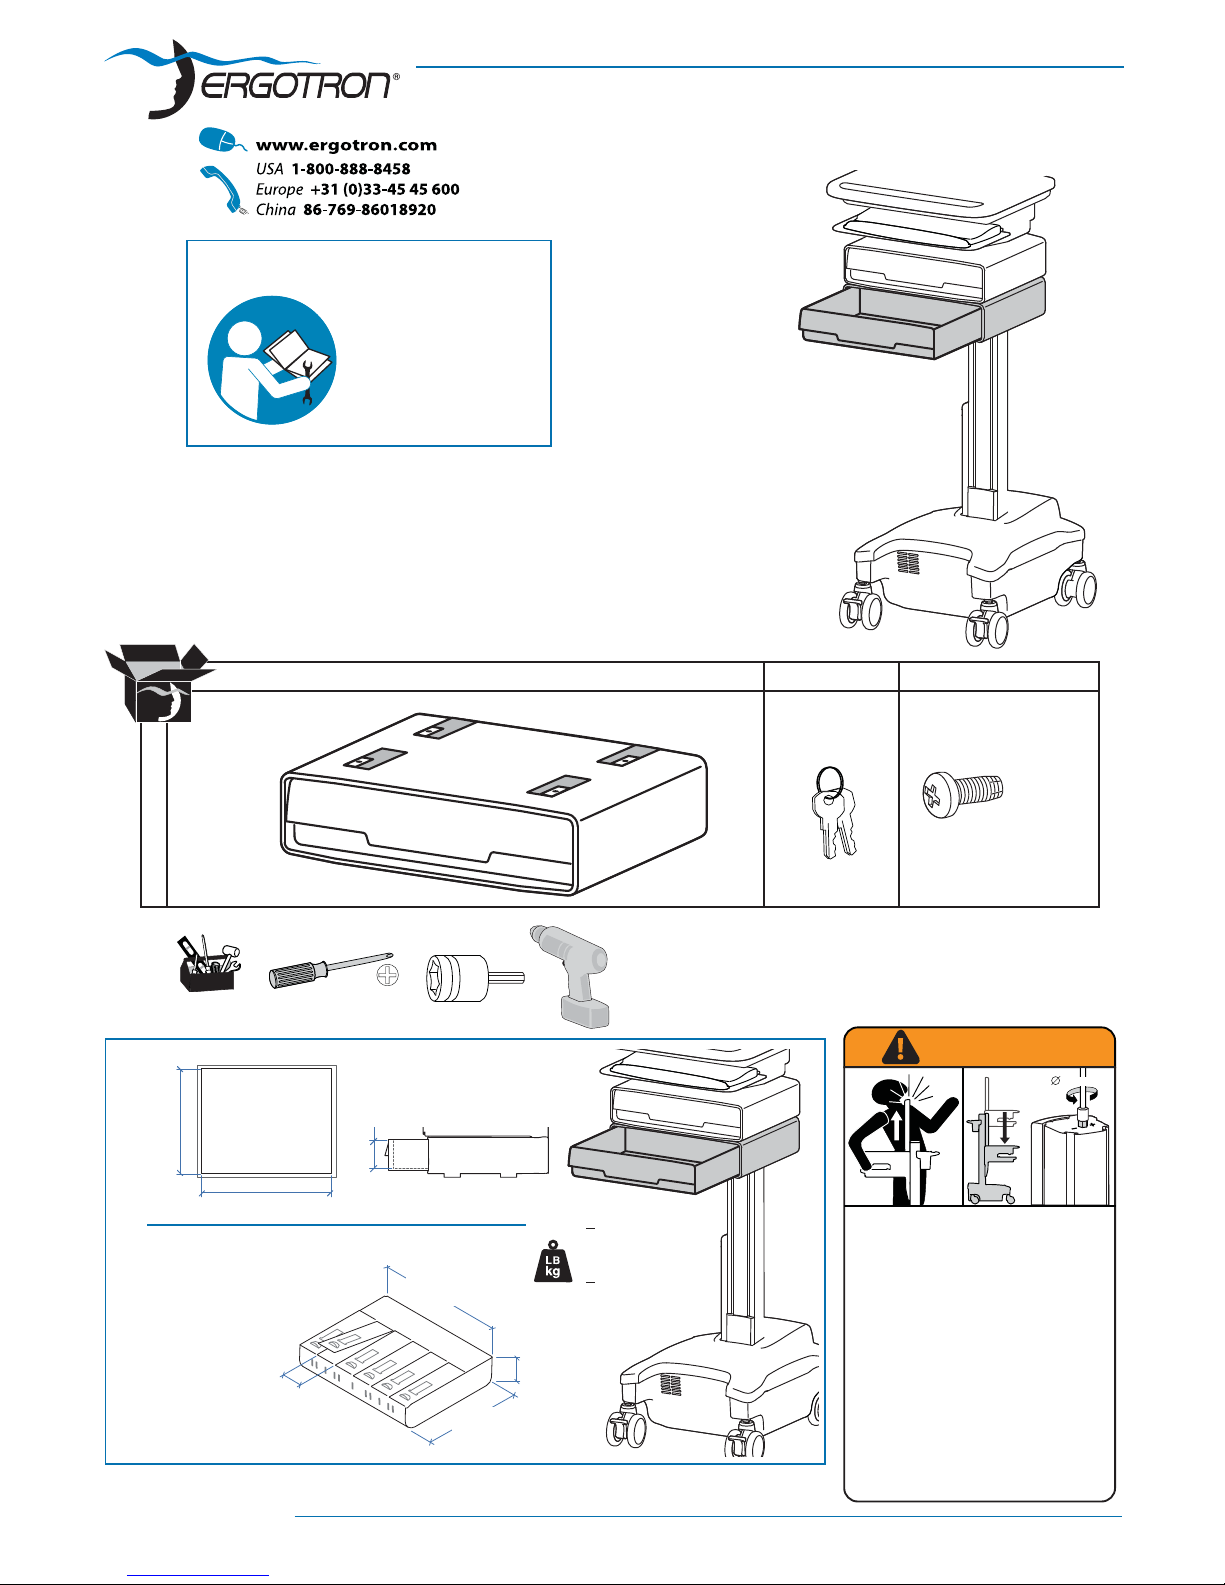
ABC
1
3.4"
(86 mm)
14.6"
(370 mm)
11.8"
(300 mm)
14.4"
(367 mm)
3"
(76 mm)
11.6"
(295 mm)
2.3"
(58 mm)
1x
1x
4x
ST4.2 x 8mm
14mm (9/16")
User's Guide - English
Guía del usuario - Español
Manuel de l’utilisateur - Français
Gebruikersgids - Nederlands
Benutzerhandbuch - Deutsch
Guida per l’utente - Italiano
࡙ࠩࠟࠗ࠼ : ᣣᧄ⺆
用户指南 : 汉语
사용자 안내서 : 대한민국
www.ergotron.com
User Guide
StyleView® SV32 AutoLock Drawer
<4 lbs (1.8 kg)
(without insert)
<2 lbs (.8 kg)
(with insert)
Drawer Insert
Weight = 2 lbs (.8 kg)
EN
WARNING
IMPACT HAZARD!
MOVING PARTS CAN CRUSH AND CUT.
Minimize Lift Tension BEFORE:
· Removing Mounted Equipment.
· Shipping Cart
· Storing Cart
To Minimize Lift Tension
1. Lower worksurface to lowest position.
2. Turn adjustment nut at top of riser
counterclockwise until it stops
(Adjustment may require 40-60 revolutions).
Failure to heed this warning may result in
serious personal injury or property damage!
For More information and instructions refer to product
guide at http://4support.ergotron.com or contact
Ergotron Customer Care at 1-800-888-8458.
822-052
14mm (9/16”)
Page 2
888-97-045-G-00 rev. C • 09/09
2/6
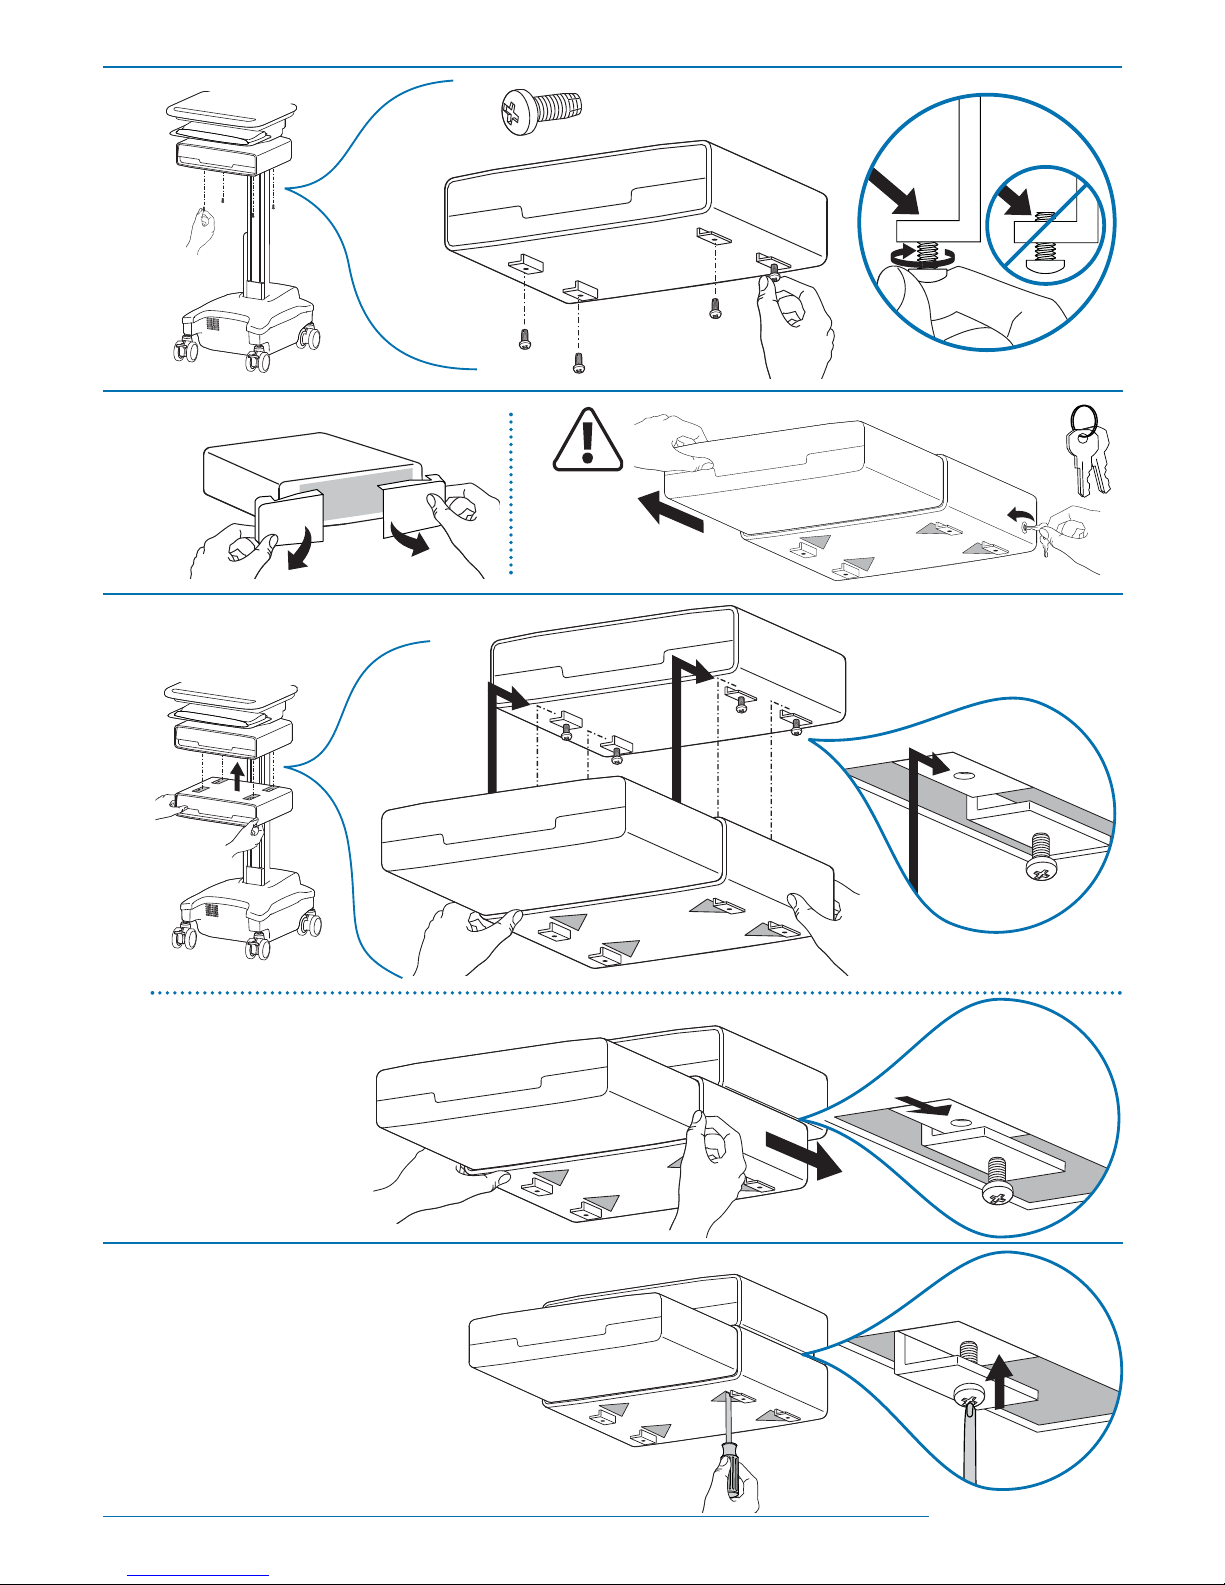
a b
b
a
1
2
3
4
4x
ST4.2 x 8mm
1x
Page 3

888-97-045-G-00 rev. C • 09/09
3/6
a
c
b
d
e
5
Drawer 1
(factory connected)
Auto Lock Drawer Keypad
(factory connected)
Connect the cable from the newly
attached AutoLock Drawer here.
Power to AutoLock Drawer to be
connected by User
Page 4

888-97-045-G-00 rev. C • 09/09
4/6
bca
6
7
a
b
14mm (9/16")
Follow these instructions
to tighten or loosen
tension.
Release brake to move riser.
Ensure that the main power system batteries are installed and functioning.
The power does not need to be turned on at the power system user interface.
It is important that you adjust this product according to the weight of the mounted equipment as described in the following steps. Any time equipment
is added or removed from this product, resulting in a change in the weight of the mounted load, you should repeat these adjustment steps to ensure
safe and optimum operation.
Adjustments should move smoothly and easily through the full range of motion and stay where you set it. If adjustments are di cult and do not stay in
the desired position, follow the instructions to loosen or tighten the tension to create a smooth, easy adjustment motion. Depending on your product
and the adjustment, it may take several turns to notice a di erence.
NOTE: Adjustment may require 40 - 60
revolutions.
Programming New Codes (Default Master Code: 12345)
1
2
3
4
5
6
7
8
Enter Master Code on Keypad.
Numbers 3 and 5 on the Keypad will start ashing, indicating the Master Code has been accepted.
Simultaneously press 3 and 5 while they are ashing.
All the numbers will light (you have 3 seconds to enter a code).
Enter a new code—any sequence of 5 numbers. (The rst code programmed is the new Master Code.)
When the code is accepted, all of the LEDs will ash once in acknowledgement (you have 3 seconds to enter the next code).
You can then proceed to program up to 10 personal codes by repeating steps 5 and 6.
When nished entering new codes, system will exit program mode after 3 seconds with a series of LED ashes.
Page 5

888-97-045-G-00 rev. C • 09/09
5/6
8
Drawer Troubleshooting
• Key pad numbers are dark
-Touch anywhere on number pad to activate back-light, (drawer remains locked until you enter valid code)
-Check to make sure DC cable is connected
• Code is accepted but drawer does not open
-For dual drawer systems, make sure other drawer is fully closed and lock engaged
-For single drawer systems, make sure drawer is fully closed before entering code
• Drawer won’t open when Personal Code is entered
-Test system by entering Master Code. If drawer doesn’t unlock, follow "Lost Master Code" instructions.
Lock Drawer (2 methods):
• Wait 4 seconds for drawer to lock automatically
• Press 1 and 2 on number pad simultaneously
Unlock Drawer* (3 methods):
• Enter Master Code, then press 1 to open drawer 1, or 2 to open drawer 2.
• Enter Personal Code, then press 1 to open drawer 1, or 2 to open drawer 2.
• Key - turn counter clockwise 1/8 turn
*The system is set up to allow only one drawer to be open at a time.
Meaning
Drawer is open
Waiting for drawer selection (see Unlock Drawer)
Unit is ready to program master or user codes (see Programming New Codes)
Drawer is unlocked
New code accepted
Flashing LED
1
1 & 2
3 & 5
5
All
Test key pad function:
Ensure that the main power system batteries are installed and functioning. The power does not need to be turned on
at the power system interface.
Lost Master Code
Contact Ergotron Customer Care for instructions.
The procedure to open the drawers is the same as for the single drawer version, with the exception that once the Master or Personal code is entered,
1 and 2 will illuminate, allowing the user to select which drawer to open (1 is the top drawer, 2 is the bottom).
Page 6

888-97-045-G-00 rev. C • 09/09
6/6
 Loading...