

Page 1
888-24-143-W-02 rev.G • 03/15
1 of 14
User's Guide - English
Guía del usuario - Español
Manuel de l’utilisateur - Français
Gebruikersgids - Deutsch
Benutzerhandbuch - Nederlands
Guida per l’utente - Italiano
Användarhandbok - svenska
ユ ー ザ ー ガ イド : 日本語
用户指南 : 汉语
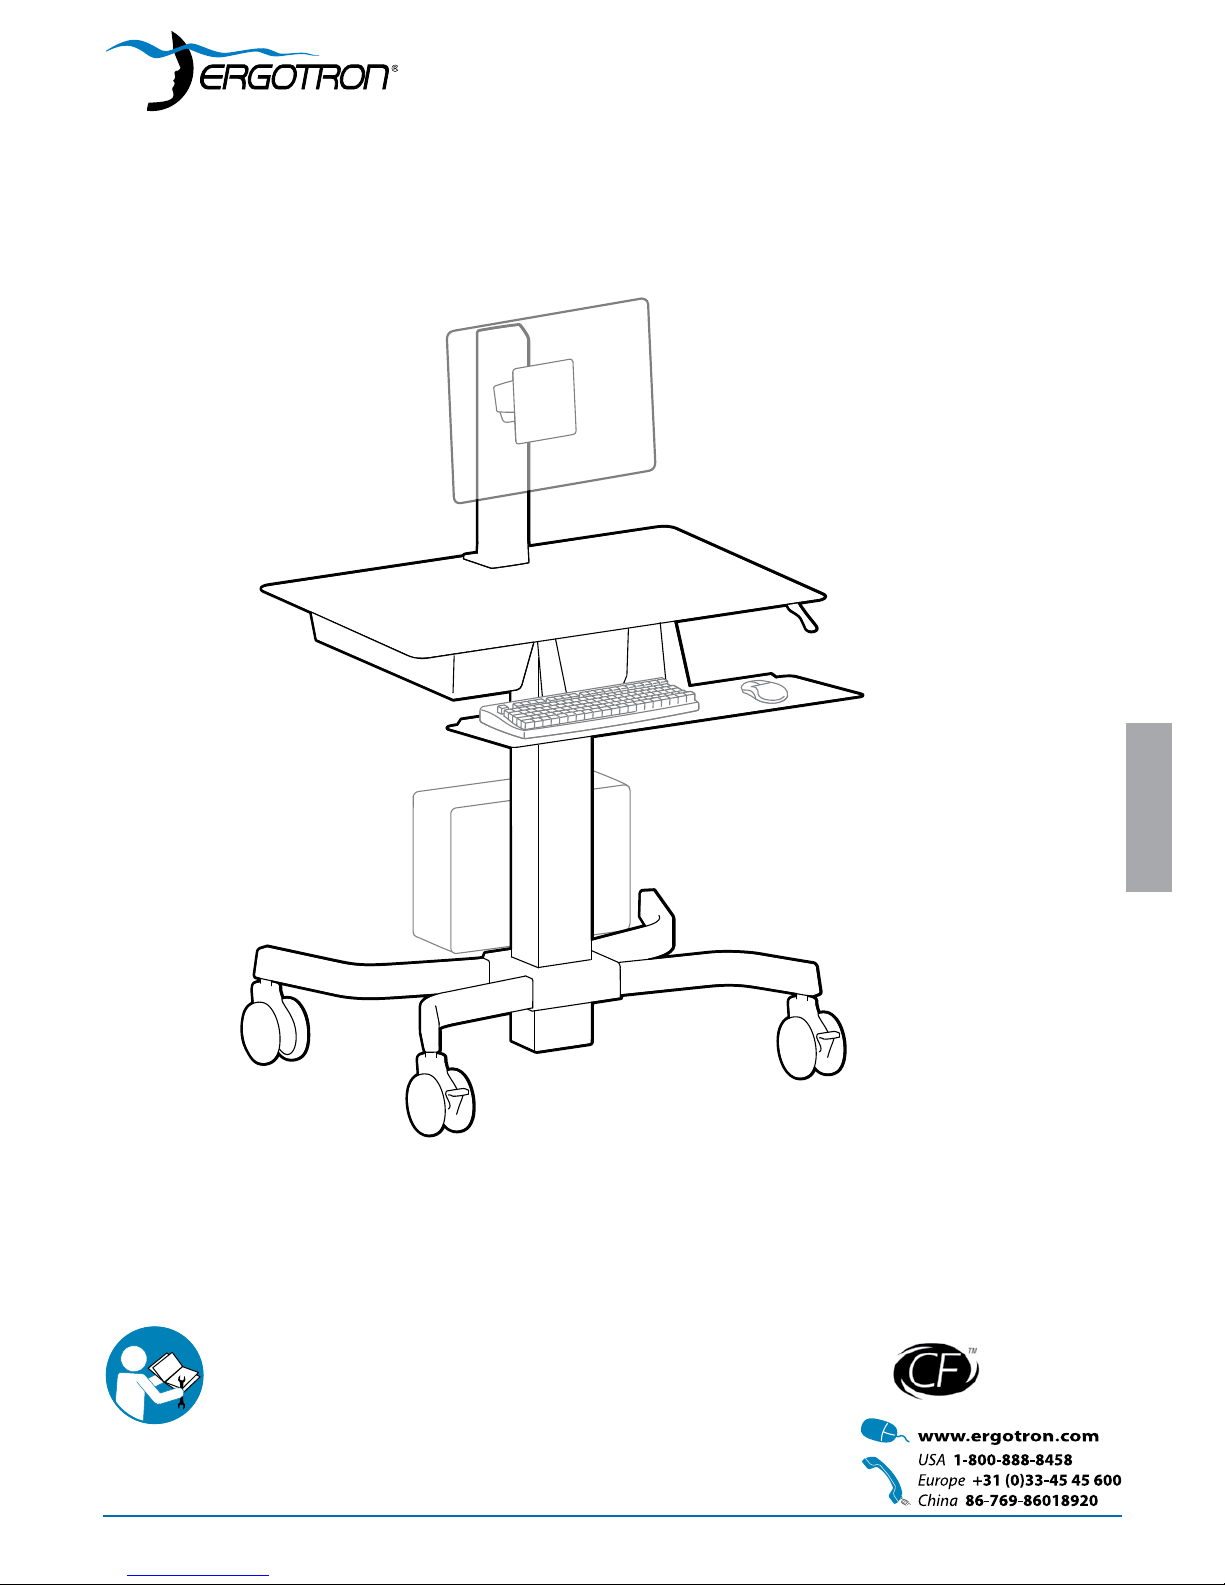
WorkFit-C, Single LCD Mount, LD
Includes
Constant Force™
Technology
ENGLISH
For the latest User Installation Guide please visit: www.ergotron.com
User's Guide
Page 2

888-24-143-W-02 rev.G • 03/15
2 of 14
Moving Parts Can Crush & Cut
ENGLISH
These symbols alert users of a safety condition that demands attention. All users should
be able to recognize and understand the
signicance of the following Safety Hazards
if encountered on the product or within the
documentation. Children who are not able
to recognize and respond appropriately to
Safety Alerts should not use this product without adult supervision!
Hazard Symbols
Review
Symbol Signal Word Level of Hazard
NOTE
A NOTE indicates important information that helps you
make better use of this product.
CAUTION
A CAUTION indicates either potential damage to
hardware or loss of data and tells you how to avoid the
problem.
WARNING
A WARNING indicates either potential for property damage, personal injury, or death.
Risk of Electric Shock
DANGER!
ELECTRICAL
An Electrical indicates an impending electrical hazard
which, if not avoided, may result in personal injury, re
and/or death.
Safety
Important! You will need to adjust this product after installation is complete. Make sure all your equipment
is properly installed on the product before attempting adjustments. This product should move smoothly
and easily through the full range of motion and stay where you set it. If movements are too easy or
difcult or if product does not stay in desired positions, follow the adjustment instructions to create
smooth and easy movements. Depending on your product and the adjustment, it may take many turns to
notice a difference. Any time equipment is added or removed from this product, resulting in a change in
the weight of the mounted load, you should repeat these adjustment steps to ensure safe and optimum
operation.
Page 3
888-24-143-W-02 rev.G • 03/15
3 of 14
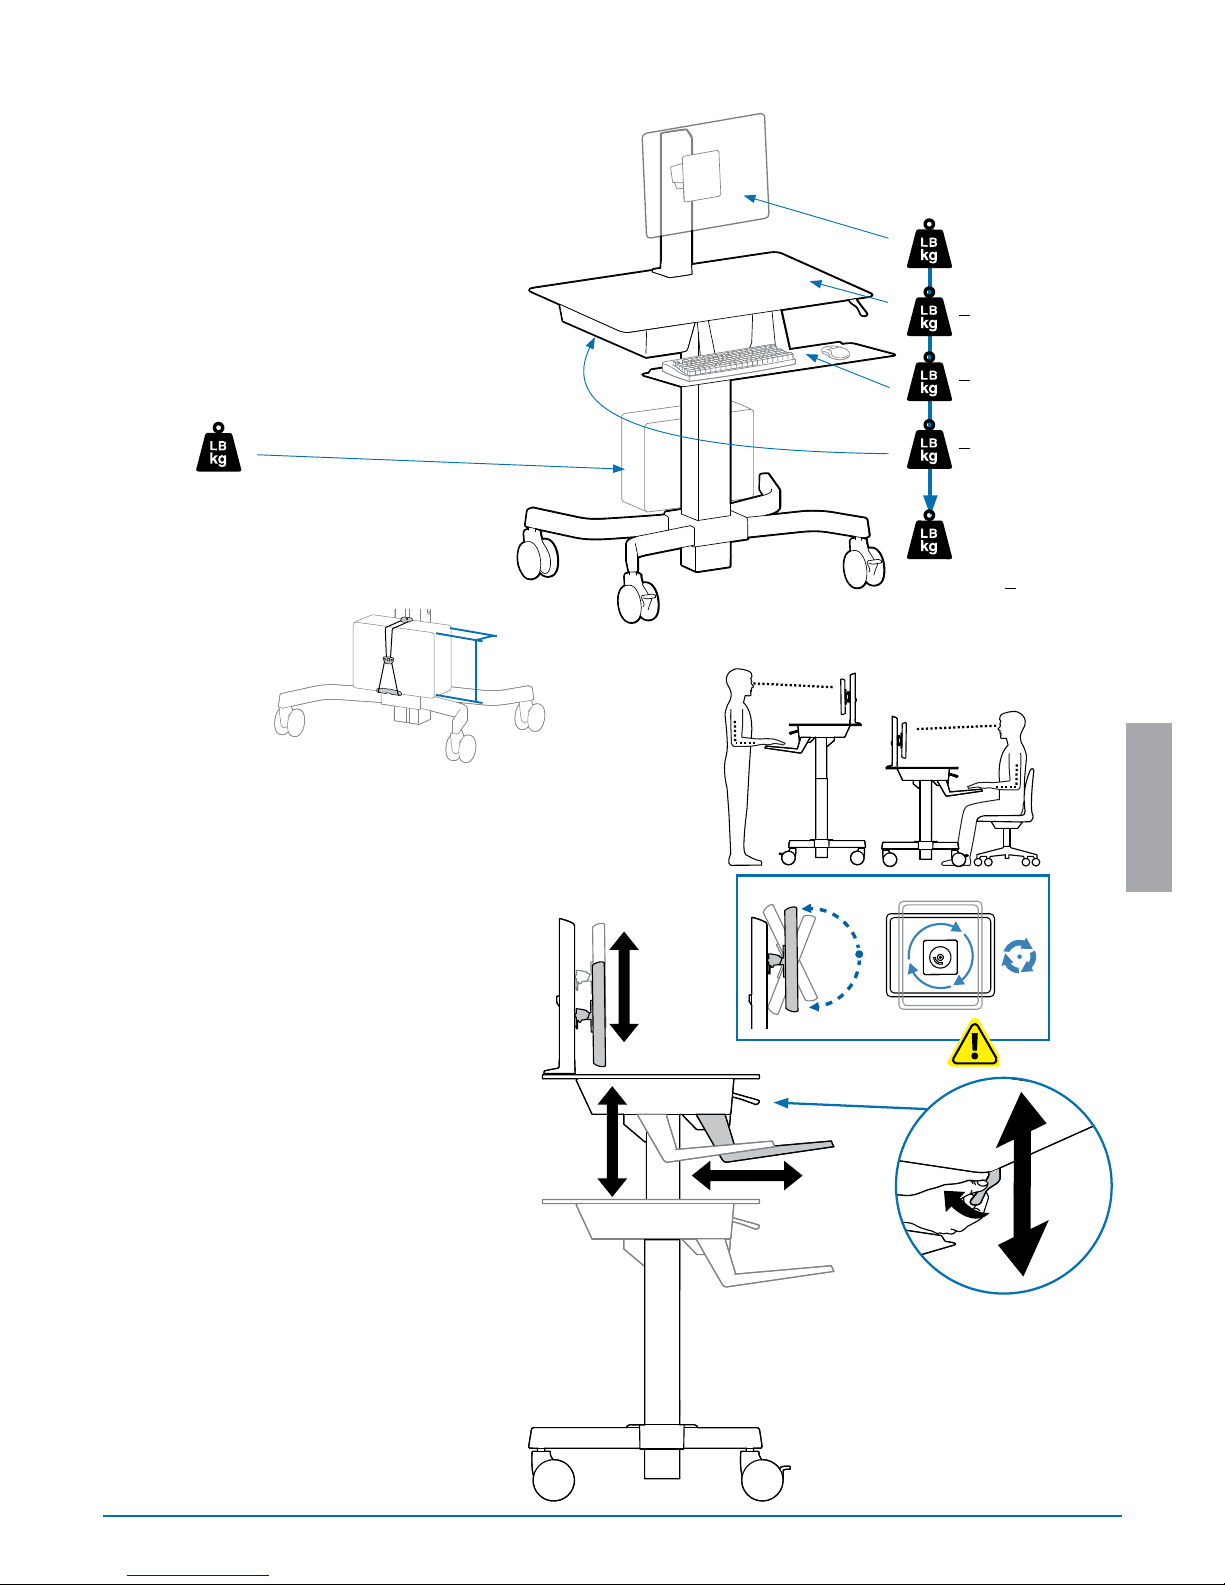
6 - 16 lbs
(2.7-7.3 kg)
< 5 lbs
(2.25 kg)
< 2 lbs
(0.9 kg)
< 1.5 lbs
(0.68 kg)
A
B
C
D
A+B+C+D
< 31 lbs (14 kg)
5"
(127 mm)
20˚
10˚
Release Brake to move riser.
Suelte el freno para mover el elevador.
Relâcher le frein pour déplacer la colonne montante.
Lösen Sie die Bremse, um eine Höhenverstellung vorzunehmen.
Zet de rem los om de staander te verplaatsen.
Rilasciare il freno per sollevare o abbassare il sostegno.
ライザーを動かすには、ストッパーを解除します。
释放锁定装置移动升降杆。
Weight Capacity: 40 lbs. (18 kg)
Capacidad de soporte de peso: 40 lbs. (18 kg)
Capacité de poids: 40 lbs. (18 kg)
Tragkraft: 40 lbs. (18 kg)
Gewichtscapaciteit: 40 lbs. (18 kg)
Capacità di peso: 40 lbs. (18 kg)
許容重量: 40 lbs. (18 kg)
承重: 40 lbs. (18 kg)
허용 중량: 40 lbs. (18 kg)
2.6"- 8.5 (66 - 216 mm)
9.4" - 15.75" (239 - 400 mm)
ENGLISH
Page 4
888-24-143-W-02 rev.G • 03/15
4 of 14
A B C D
1
2
3
A B C D
1
2
3
4
14mm
1x
1x
2x
2x
1x
M3 x 6mm
2x
M6 x 22mm
2x
M6 x 16mm
M4 x 10mm
4x
M4 x 10mm
4x
1x
M5 x 8mm
1x
M5 x 22mm
1x
1x 2x
1x
2x
4x
M5 x 8mm
4x
4x
1x
5-sided Security Wrench
Llave de seguridad pentagonal
Clef Allen de sécurité
Fünfkant-Inbusschlüssel
5-kantige veiligheidssleutel
Chiave pentagonale di sicurezza
5角固定用レンチ
5角安全扳手
5면 Security Wrench(안전 렌치)
5mm
1x
1x
6x
ENGLISH
Page 5
888-24-143-W-02 rev.G • 03/15
5 of 14
1
3
2
2x
1x
2x
M6 x 16mm
2x
M6 x 22mm
4mm
ENGLISH
Page 6

888-24-143-W-02 rev.G • 03/15
6 of 14
4
5
6
7
0°
M3 x 6mm
1x
1x
M5 x 8mm
3mm
M4 x 10mm
M4 x 10mm
4x
4x
Release Brake to move riser.
Suelte el freno para mover el elevador.
Relâcher le frein pour déplacer la colonne montante.
Lösen Sie die Bremse, um eine Höhenverstellung vorzunehmen.
Zet de rem los om de staander te verplaatsen.
Rilasciare il freno per sollevare o abbassare il sostegno.
ライザーを動かすには、ストッパーを解除します。
释放锁定装置移动升降杆。
ENGLISH
Page 7

888-24-143-W-02 rev.G • 03/15
7 of 14
3mm
8
a
e
b
c
2x
4x
9
a
b c d
d
5-sided wrench
llave pentagonal
Clef Allen
Inbusschlüssel
5-kantige sleutel
Chiave a 5 lati
5 角レンチ
5角扳手
5면 렌치
5mm
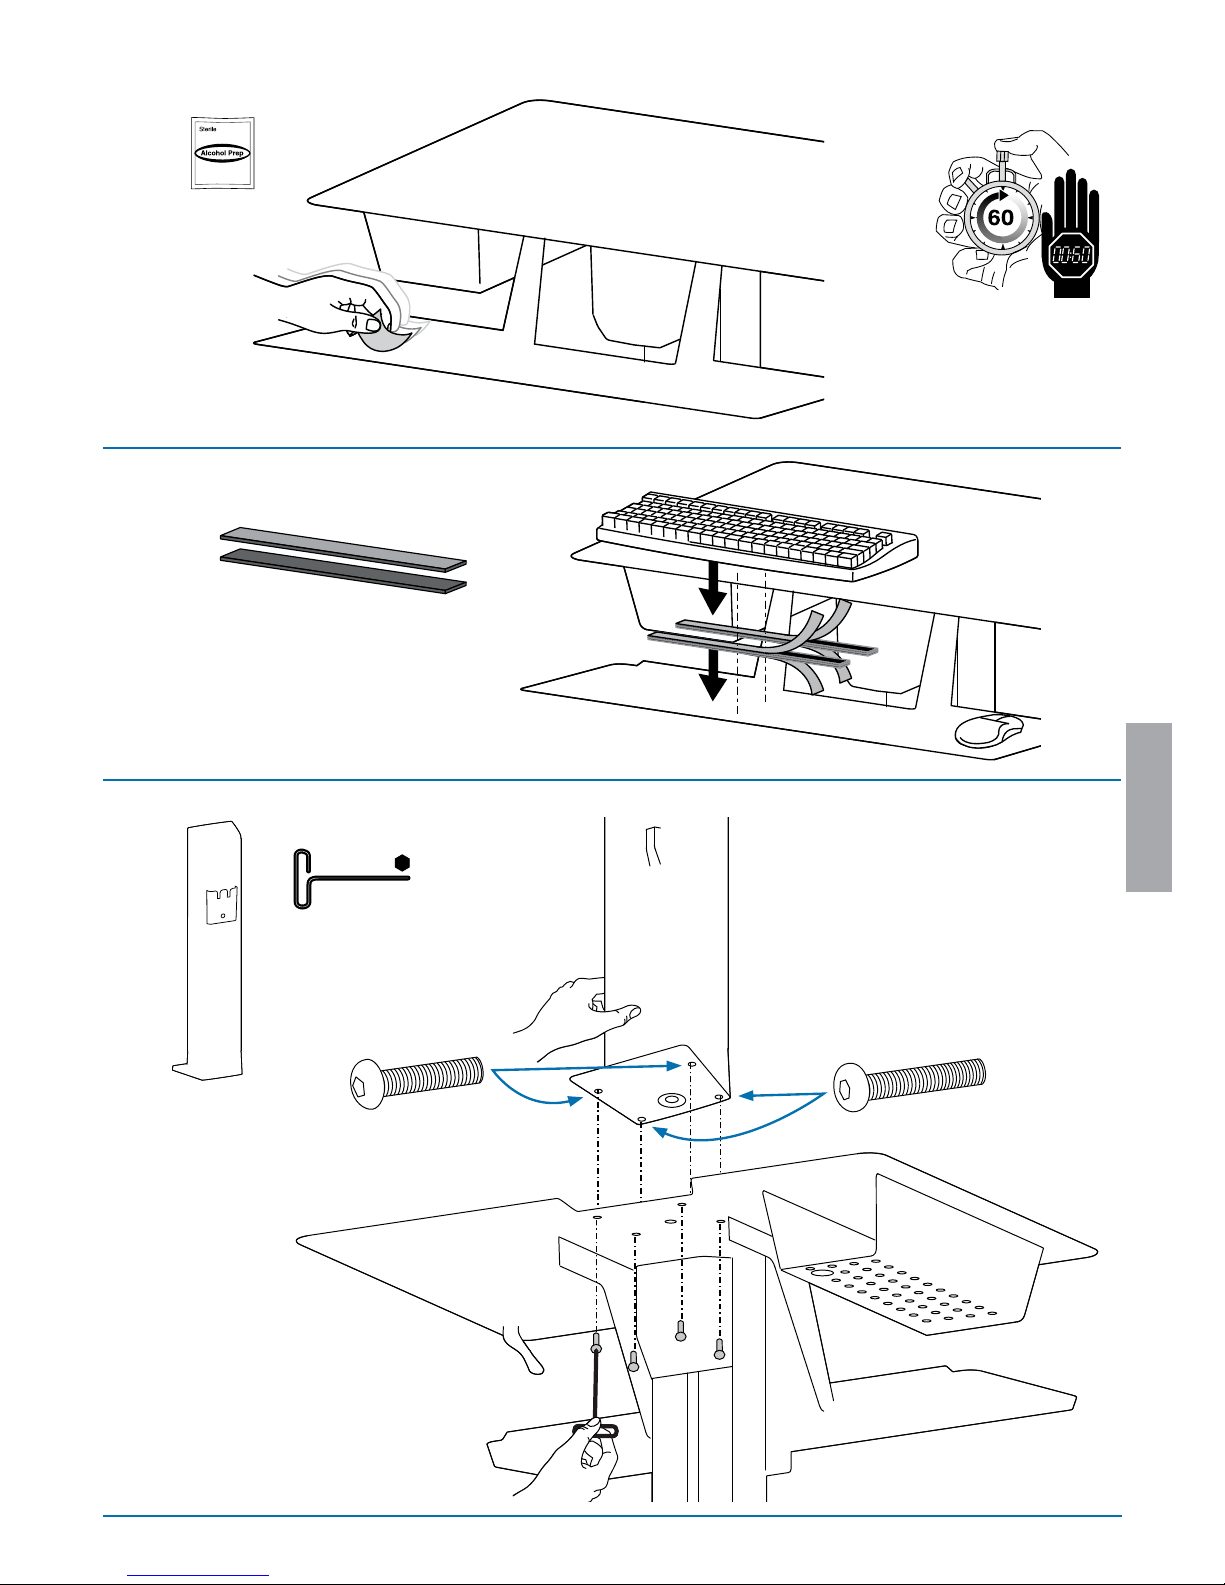
NOTE: Center on bottom
NOTA: Centre por la parte inferior
REMARQUE: centrer la partie inférieure
HINWEIS: Richten Sie die Geräte mittig aus.
OPMERKING: Centreren op onderkant
NOTA. Centrare nella parte inferiore.
OBS: Mitten på underdelen
注:下部の中央
注意:底部居中
ENGLISH
Page 8

888-24-143-W-02 rev.G • 03/15
8 of 14
10
a
c
b
3mm
11
5-sided wrench
llave pentagonal
Clef Allen
Inbusschlüssel
5-kantige sleutel
Chiave a 5 lati
5 角レンチ
5角扳手
5면 렌치
5mm
ENGLISH
CAUTION:Do Not over tighten fasteners. Over-tightening
may cause damage to fasteners.
Page 9

888-24-143-W-02 rev.G • 03/15
9 of 14
12
a b c
2x
M5 x 8mm
5-sided wrench
llave pentagonal
Clef Allen
Inbusschlüssel
5-kantige sleutel
Chiave a 5 lati
5 角レンチ
5角扳手
5면 렌치
13
2x
M5 x 8mm
a
b
5-sided wrench
llave pentagonal
Clef Allen
Inbusschlüssel
5-kantige sleutel
Chiave a 5 lati
5 角レンチ
5角扳手
5면 렌치
5mm
5mm
ENGLISH
Page 10

888-24-143-W-02 rev.G • 03/15
10 of 14
14
1x
M5 x 22mm
a
b
5-sided wrench
llave pentagonal
Clef Allen
Inbusschlüssel
5-kantige sleutel
Chiave a 5 lati
5 角レンチ
5角扳手
5면 렌치
5mm
ENGLISH
Page 11

888-24-143-W-02 rev.G • 03/15
11 of 14
15
6x
1x
2x
ENGLISH
NOTE: Leave enough slack in cable to allow full range of motion.
Caution: To avoid the potential to pinch cables it is important to follow the cable routing
instructions in this manual. Failure to follow these instructions may result in equipment
damage or personal injury.
Page 12

888-24-143-W-02 rev.G • 03/15
12 of 14
16
1
2
14mm
1
2
a
ENGLISH
Adjustment Step
Increase Lift Strength
If the mounted weight is too heavy or
this product does not stay up when
raised, then you'll need to increase
Lift Strength:
Decrease Lift Strength
If the mounted weight is too light or
this product does not stay down when
lowered, then you'll need to decrease
Lift Strength:
Important! You will need to adjust this product after installation is complete. Make sure all your equipment is
properly installed on the product before attempting adjustments. This product should move smoothly and easily
through the full range of motion and stay where you set it. If movements are too easy or difcult or if product
does not stay in desired positions, follow the adjustment instructions to create smooth and easy movements.
Depending on your product and the adjustment, it may take many turns to notice a difference. Any time
equipment is added or removed from this product, resulting in a change in the weight of the mounted load, you
should repeat these adjustment steps to ensure safe and optimum operation.
Page 13

888-24-143-W-02 rev.G • 03/15
13 of 14
c
b
4mm
ENGLISH
Increase Lift Strength
If the mounted weight is too heavy or
this product does not stay up when
raised, then you'll need to increase
Lift Strength:
Decrease Lift Strength
If the mounted weight is too light or
this product does not stay down when
lowered, then you'll need to decrease
Lift Strength:
Increase Friction
If this product moves too easily, then
you'll need to increase friction:
Decrease Friction
If this product is too difcult to move,
then you'll need to decrease friction:
Page 14

888-24-143-W-02 rev.G • 03/15
14 of 14
ENGLISH
For local customer care phone numbers visit: http://contact.ergotron.com
Learn more about ergonomic computer use at:
www.computingcomfort.org
Set Your Workstation to Work For YOU!
Height Position top of screen slightly below eye level.
Position keyboard at about elbow height with wrists at.
Distance Position screen an arm's length from face—at least 20” (508mm).
Position keyboard close enough to create a 90˚ angle in elbow.
Angle Tilt screen to eliminate glare.
Tilt the keyboard back 10° so that your wrists remain at.
To Reduce Fatigue
Breathe - Breathe deeply through your nose.
Blink - Blink often to avoid dry eyes.
Break • 2 to 3 minutes every 20 minutes
• 15 to 20 minutes every 2 hours.
© 2015 Ergotron, Inc.
 Loading...