

Equator q series, q10, q12, q15 User Manual
www.equatoraudio.com
Important Important
Safety InstructionsSafety Instructions
1. Read these instructions.
2. Keep these instructions.
3. Heed all warnings.
4. Follow all instructions.
5. Do not use this apparatus near water.
6. Clean only with dry cloth.
7. Do not block any ventilation openings. Install in accordance
with manufacturerʼs instructions.
8. Do not install near any heat sources such as radiators, heat
registers, stoves, or other apparatus (including amplifiers) that
produce heat.
9. Do not defeat the safety purpose of the polarized or grounding
type plug. A polarized plug has two blades with one wider
than the other. A grounding type plug has two blades and a
third grounding prong. The wide blade or the third prong are
provided for your safety. If the provided plug does not fit into
your outlet, consult an electrician for replacement of the
obsolete outlet.
10. Protect the power cord from being walked on or pinched
particularly at plugs, convenience receptacles, and the point
where they exit from the apparatus.
11. Only use attachments/accessories provided by the
manufacturer.
12. Use only with the cart, stand, tripod, bracket, or table specified
by the manufacturer, or sold with the apparatus. When a cart
is used, use caution when moving the cart/apparatus
combination to avoid injury from tip-over.
13. Unplug this apparatus during lightning storms or when unused
for long periods of time.
14. Refer all servicing to qualified personnel. Servicing is required
when the apparatus has been damaged in any way, such as
power-supply cord or plug is damaged, liquid has been spilled
or objects have fallen into the apparatus, the apparatus has been
exposed to rain or moisture, does not operate normally, or has
been dropped.
19. No naked flame sources should be used in moderate
climate.
20. The apparatus shall not be exposed to dripping or
splashing and that no objects filled with liquids, such
as vases, shall be placed on the apparatus.
21. Due to the mains switch being located on the rear
panel, the apparatus must be located in the open area
with no obstructions to access the mains switch.
22. The apparatus shall be connected to the mains socket
with a protective earthing connection.
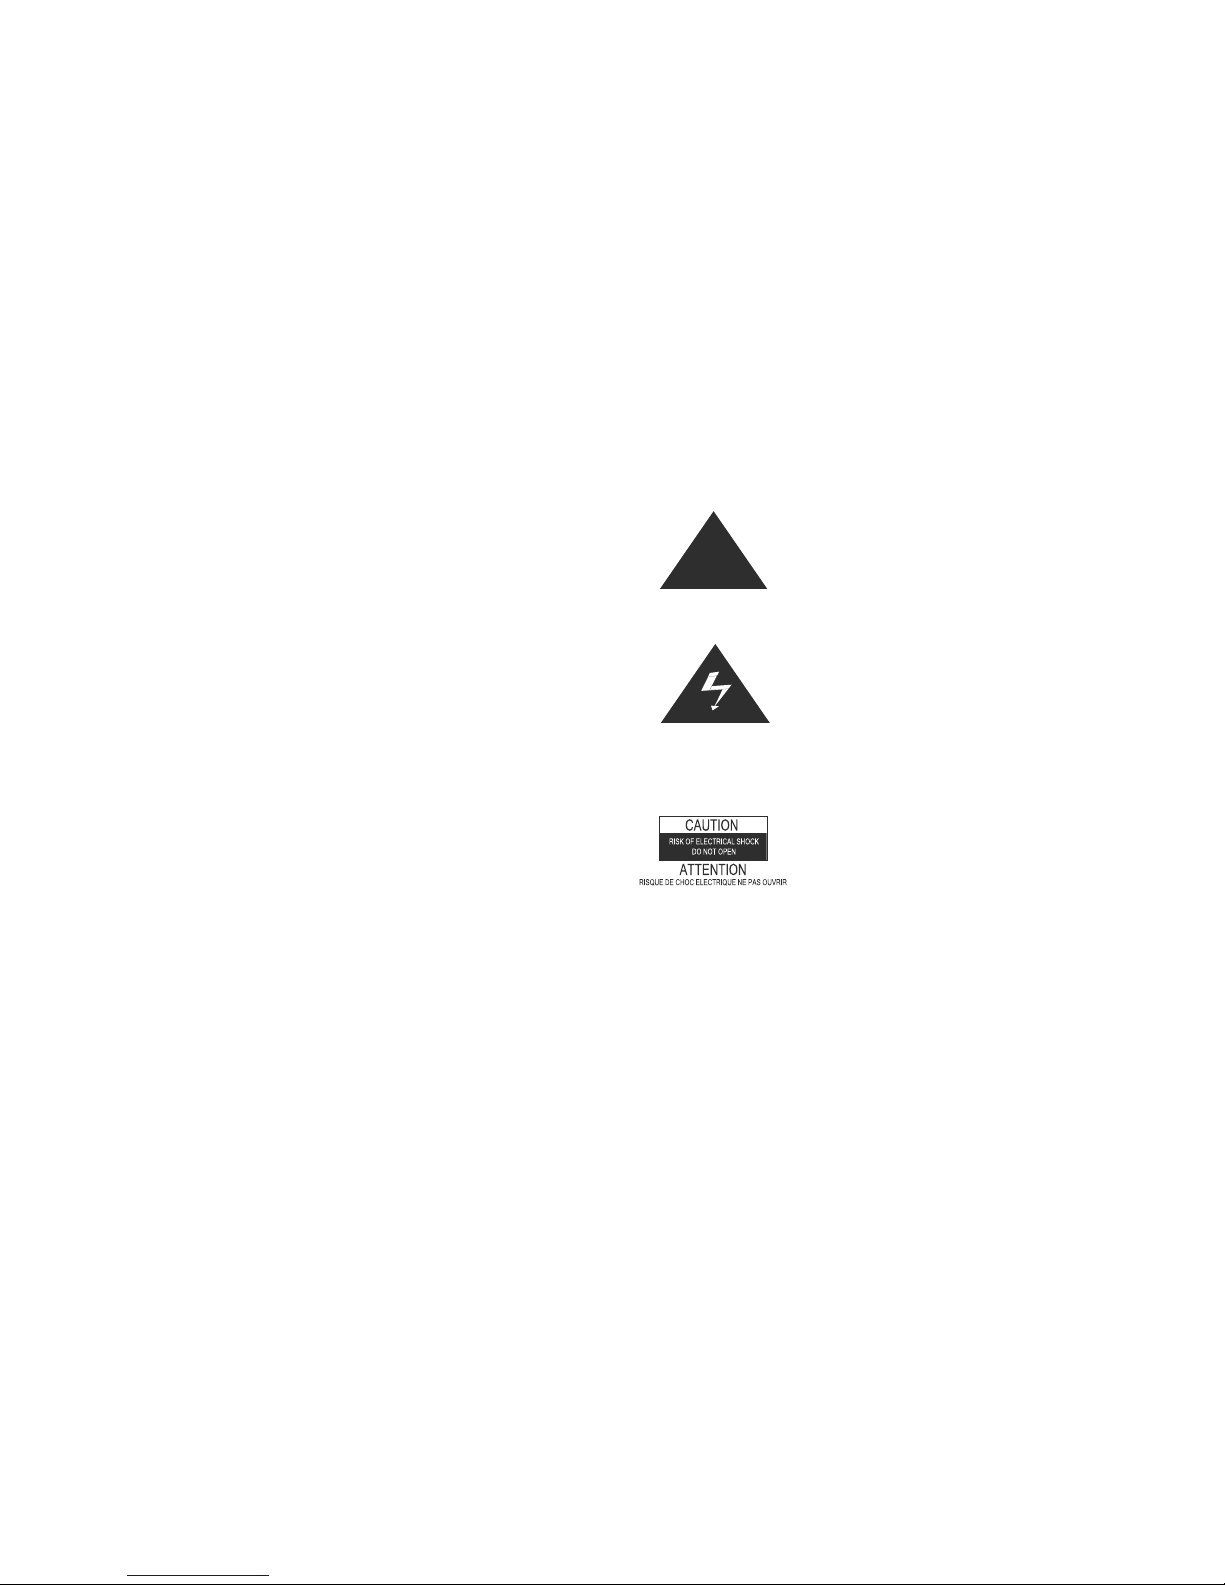
Explaination of Graphic Symbols
The exclaimation point within an
equilateral triangle is intended to
alert the users of the presence of
important operating and maintain ence (servicing) instructions in the
literature accompanying the product.
The lightning flash with the arrow head symbol, within an equilateral
triangle, is to alert the user to the
presence of insulated “dangerous
voltage” within the products enclo sure that may be of sufficienct
magnitude to constitute a risk of
electric shock to humans.
CAUTION: TO REDUCE THE RISK OF
ELECTRIC SHOCK - DO NOT REMOVE
COVER, NO USER SERVICEABLE PARTS
INSIDE. REFER SERVICING TO QUALI FIED PERSONNEL. DO NOT EXPOSE
THIS APPARATUS TO RAIN OR MOIS TURE.
!
!
15. To reduce the rick of fire or electric shock, do not expose this
apparatus to rain or moisture.
16. Where the mains plug or an appliance coupler is used as the
disconnect device, the disconnect device shall remain readily
operable.
17. These servicing instructions are for use by qualified personnel
only. To reduce the risk of electric shock, do not perform any
servicing other than that contained in the operating instructions
unless you are qualified to do so.
18. Do not install this equipment in a confined space such
as a book case or similar unit. Maintain minimum 10
cm free space around the apparatus for sufficient venti lation. The ventilation should not be impeded by cover ing the ventilation openings with items, such as news papers, table-cloths, curtains, etc.
1.

Equator Audio Research, LLC. Warranty InformationEquator Audio Research, LLC. Warranty Information
Equator Audio Research, LLC. Limited Warranty
Equator Audio Research, LLC. warrants this product to be free of defects in material and workmanship for
a period of 1 year from the date of original retail purchase. This warranty is enforceable only by the
original retail purchaser.
To be protected by this warranty, the purchaser must complete the online warranty form at
http://www.equatoraudio.com/register.html or by calling customer service at 1-888-772-0087.
During the warranty period, Equator Audio Research, LLC. shall, at its sole and absolute option, either
repair or replace free of charge any product that proves to be defective on inspection by Equator Audio
Research, LLC or its authorized service representative.
To obtain warranty service, the purchaser must first call Equator Audio Research, LLC. at 1-888-772-0087
or by emailing info@equatoraudio.com to obtain a Return Authorization Number and instructions
concerning where to return the unit for service. All inquiries must be accompanied by a description of
the problem. All authorized returns must be sent to Equator Audio Research, LLC. or an authorized
Equator Audio Research, LLC. repair facility postage prepaid, insured, and properly packaged. Proof of
purchase must be presented in the form of a bill of sale, canceled check or some other positive proof
that the product is within the warranty period. Equator Audio Research, LLC. reserves the right to
change or improve the design of the product at any time without prior notice.
This warranty does not cover claims for damage due to abuse, neglect, alternation or attempted repair by
unauthorized personnel, and is limited to failures arising during ormal use that are due to defects in
material or workmanship in the product.
ANY IMPLIED WARRANTIES, INCLUDING IMPLIED WARRANTIES OF MERCHANTABILITY AND FITNESS FOR A
PARTICULAR PURPOSE, ARE LIMITED IN DURATION TO THE LENGTH OF THIS LIMITED WARRANTY. Some
states do not allow limitations on how long an implied warranty lasts, so the limitation above may not
apply to you.
Equator Audio Research, LLC. WILL NOT BE LIABLE FOR INCIDENTAL, CONSEQUENTIAL OR OTHER
DAMAGES RESULTING FROM THE BREACH OF ANY EXPRESSED OR IMPLIED WARRANTY, INCLUDING,
AMONG OTHER THINGS, DAMAGE TO PROPERTY, DAMAGE BASED ON INCONVENIENCE OR ON LOSS OF
USE OF THE PRODUCT, AND, TO THE EXTENT PERMITTED BY LAW, DAMAGES FOR PERSONAL INJURY.
Some states do not allow the exclusion or limitation of incidental or consequential damages, so the
above limitation or exclusion may not apply to you.
This warranty gives you specific legal rights, and you may also have other rights, which vary, from state
to state. This warranty only applies to products sold and used in the United States of America.
For warranty information in all other countries please refer to your local distributor.
Your warranty will be in effect when you our online warranty registration form.
Equator Audio Research, LLC. © 2007
25.

IntroductionIntroduction
Thank you for purchasing an Equator Audio Research Q Series monitor. Please take the time to read
this user manual to familiarize yourself with the products features, setup and use.
A Moment of Clarity
Back in the 80s I had a moment of clarity—the good fortune of hearing, Peter Gabrielʼs So CD at a
great studio. The control room was fabulous—beautifully constructed and perfectly tuned, with
powerful soffit-mounted 813A monitors.
When Kate Bushʼs voice came over the speakers on “Donʼt Give Up,” the hair on the back of my neck
jumped like it never had done before. The audio completely filled that room. It was inescapable
and undeniable. No sound was overlooked, no emotion missed. It was total, unobstructed sonic
involvement.
Iʼve been chasing that experience ever since.
Searching for Clarity
Throughout my audio career—from studio owner to years at Alesis to co-founder and president of
Event Electronics—I learned that even the best near field monitors couldnʼt deliver my So experience.
Why not? Because even a decent room is subject to problems that canʼt be overcome simply by working
in the near field. Standing waves, asymetric and secondary reflections, poor low frequency diffusion,
and the like are all still present in the listening environment. And all affect monitoring accuracy.
I started Equator Audio Research with the intent of delivering a speaker that would overcome these
obstacles once and for all, and not only recreate, but surpass all of my previous listening experiences.
I knew I wanted a coaxial design—one that would combine “shock and awe” sound with precision
zero-point focus and imaging. But it had to be cutting-edge, and that meant taking a new design
approach, using all new materials, and tying everything together with wicked-smart DSP.
After intense R & D, we had a technoligical breakthrough: Digitally-Controlled Transducers™. This
amazing innovation allows Equator engineers to adjust the transducers to exacting specifications, to
create fully-digital custom crossovers, and to calibrate every finished unit to match all others in a
system, ensuring virtually perfect imaging in configurations from stereo to 8.2.
Clarity
Presenting the Q Series Digitally Controlled Biamplified Reference Monitors—custom coaxial designs that
deliver true Zero-Point Reference™ monitoring. That means clear, unobstructed detail and imaging in
both on- and off-axis listening postions. It means standing waves, comb filtering, uneven volume and
frequency response are problems of the past. It means accurate, all-encompassing, loud playback—
whether youʼre in a perfectly tuned control room, or a not-so perfect home studio.
Add our proprietary Secondary Reflection Correction™ package, and you can fully automate all room
analysis and compensation functions at the touch of a button.
Getting inspired and producing good music is a lot easier when you can hear everything unobstructed.
Q Series monitors let you hear your music without the audio obstacles. So when the song and
performance rise to the occasion, the hair on the back of your neck just might rise to the occasion as
well.
Ted Keffalo, president
Equator Audio Research, LLC.
2.

FeaturesFeatures
Digitally-Controlled Transducers™
An on-board CPU digitally adjusts the driver components to exacting specifications. Other benefits
include a continuously adjustable crossover (no preset filter slope) and the ability to perfectly
match every transducer in the system from stereo, 2.1, 5.1, 6.1, 7.1, to 8.2 configurations.
Zere-Point Reference™ Coaxial Design
Two drivers, one sonic point-source, allowing for perfect audio alignment betwen the low and high
frequency transducers on the X, Y, and Z axes. The result: Superb imaging, enhanced off-axis
response, and exceptional midrange clarity.
High Definition Titanium Compression Horn Driver
The custom titanium compression driver delivers exceptionally precise, detailed, and accurate high
frequency response. The hornʼs uniquely-designed throat section creates an extended horizontal
high frequency dispersion pattern, and provides superior off-axis response in both the vertical and
horizontal planes.
Fiberglass-Impregnated Low Frequency Driver
Fashioned from a blended fiberglass/pulp mixture, the woofer cone material was chosen for its strenth
and damping characteristics.
Multi-Function Status Display
The multi-segment LED allows you to monitor power protection, network communication, volume, and
compression/limiting.
Cast Aluminum CAD Coaxial Driver Basket
A performance-enhancing top plate for the wooferʼs magnet assembly cools the voice coil and provides
a significant increase in midrange performance. The driver basket also serves as a heat sink, allowing
the speaker to run cooler at high power levels.
13-Ply Baltic Birch Resonant Damping Cabinet
The enclosure sides and backs are constructed from 13-layer Baltic birch; the sculptured front baffle
is 1” HDF. Together they provide the optimum combination of acoustic damping and enclosure
strenth. All are equipped with rubber pads and OmniMount™ compatible mounting holes. The Q12
and Q15 are equipped with side mounted handles for easy transportation.
Continuous-Flow Low Turbulence Bass Ports
Two large, long, low air-restriction bass ports provide turbulence-free, quiet operation—giving the
Q Series the dramatic low end punch of a virtually uncompressed tuned bass-reflex system.
Their Look is as Refined as Their Performance
Serious attention was spent developing not only the sound of the Q Series monitors, but their look
and feel as well. Their perfect cube shape and symmetry deliver the biggest possible sound in the
smallest possible footprint. As unique on the outside as they are inside, the Qʼs size, shape and
rich durable finish make them the perfect complement to any studio environment.
3.

Features ContinuedFeatures Continued
Manual RRC (Room Response Compensation) Software
The Q Series built-in DSP gives you extraordinary control over the speakersʼ accuracy and
response in your mixing environment. Enter your roomʻs dimensions into the included software,
and the monitors digitally compensate for three standing waves (front to back wall, left to right
wall, and floor to ceiling). Enter each speakerʼs position in the room, and the software digitally
compensates for boundary and placement anomalies.
Automated/Secondary Reflection Correction™ Package (Optional)
Add the optional Automated/Secondary Reflection Correction package, and fully automated control is
at your fingertips. Featuring a series of proprietary algorithms for the analysis and compensation of
room response characteristics, the SRC software—in combination with a specialized calibrated microphone
(included with the SRC package)—measures each speaker and makes adjustments to optimize the
speakerʼs response for specified listening positions in the room. Stereo, 2.1, 5.1 , 6.1 , 7.1 and 8.2
monitoring configurations can be quickly and easilty optimized and saved. You can even create
multi-position configurations, so the engineer can monitor properly at the mix position, and the band
can listen accurately and comfortably from the control room couch.
But thatʼs just the start.
Reflected waves bouncing off a console or a video monitor plague just about every recording engineer
on the planet. These secondary reflections can cause frequency dips and comb filtering in the
critical 800Hz-3kHz range, giving you a skewed tonal picture and wreaking serious havoc with your
stereo imaging. Theyʼre one of the main reasons that mixes leave studios with buried vocals, harsh
guitars, and other sonic unpleasantries.
The Secondary Reflection Correction software identifies, then digitally corrects for these undesirable
reflections. So when you listen to your mix on a Q monitor, youʼre hearing pure, uncolored, and
totally unobstructed sound.
Equator Control Software Interface
4.
SetupSetup
Unpack Your New Monitor(s)Unpack Your New Monitor(s)
Your new monitor(s) shipping carton was designed to protect the monitor during transport—
do not discard these materials.
Unpack your monitor(s) and inspect carefully. If there is any damage, report the damage to the
dealer that you purchased the monitor(s) from immediately or contact us directly at
info@equatoraudio.com or by calling 1-888-772-0087 x702.
Each Q Series monitor comes with the following:
• Q Monitor
• AC Power Cord
• CDROM (Instruction Manual/Manual RRC Room Response Compensation Software Installation)
The optional Automated/Secondary Reflection Correction™ package comes with the following:
• Calibration Microphone
• Microphone Clip
• Secondary Reflection Correction™ Software Installation USB Drive
• Carrying Case
Stereo SetupStereo Setup
Position the monitors on speaker stands or on top of your mixing console. It does not matter which
speaker is positioned left or right as each unit is physically identical. The Q Series monitors are
also equipped with the ability to mount them via OmniMount™ hardware. The screw threading is 5/16”.
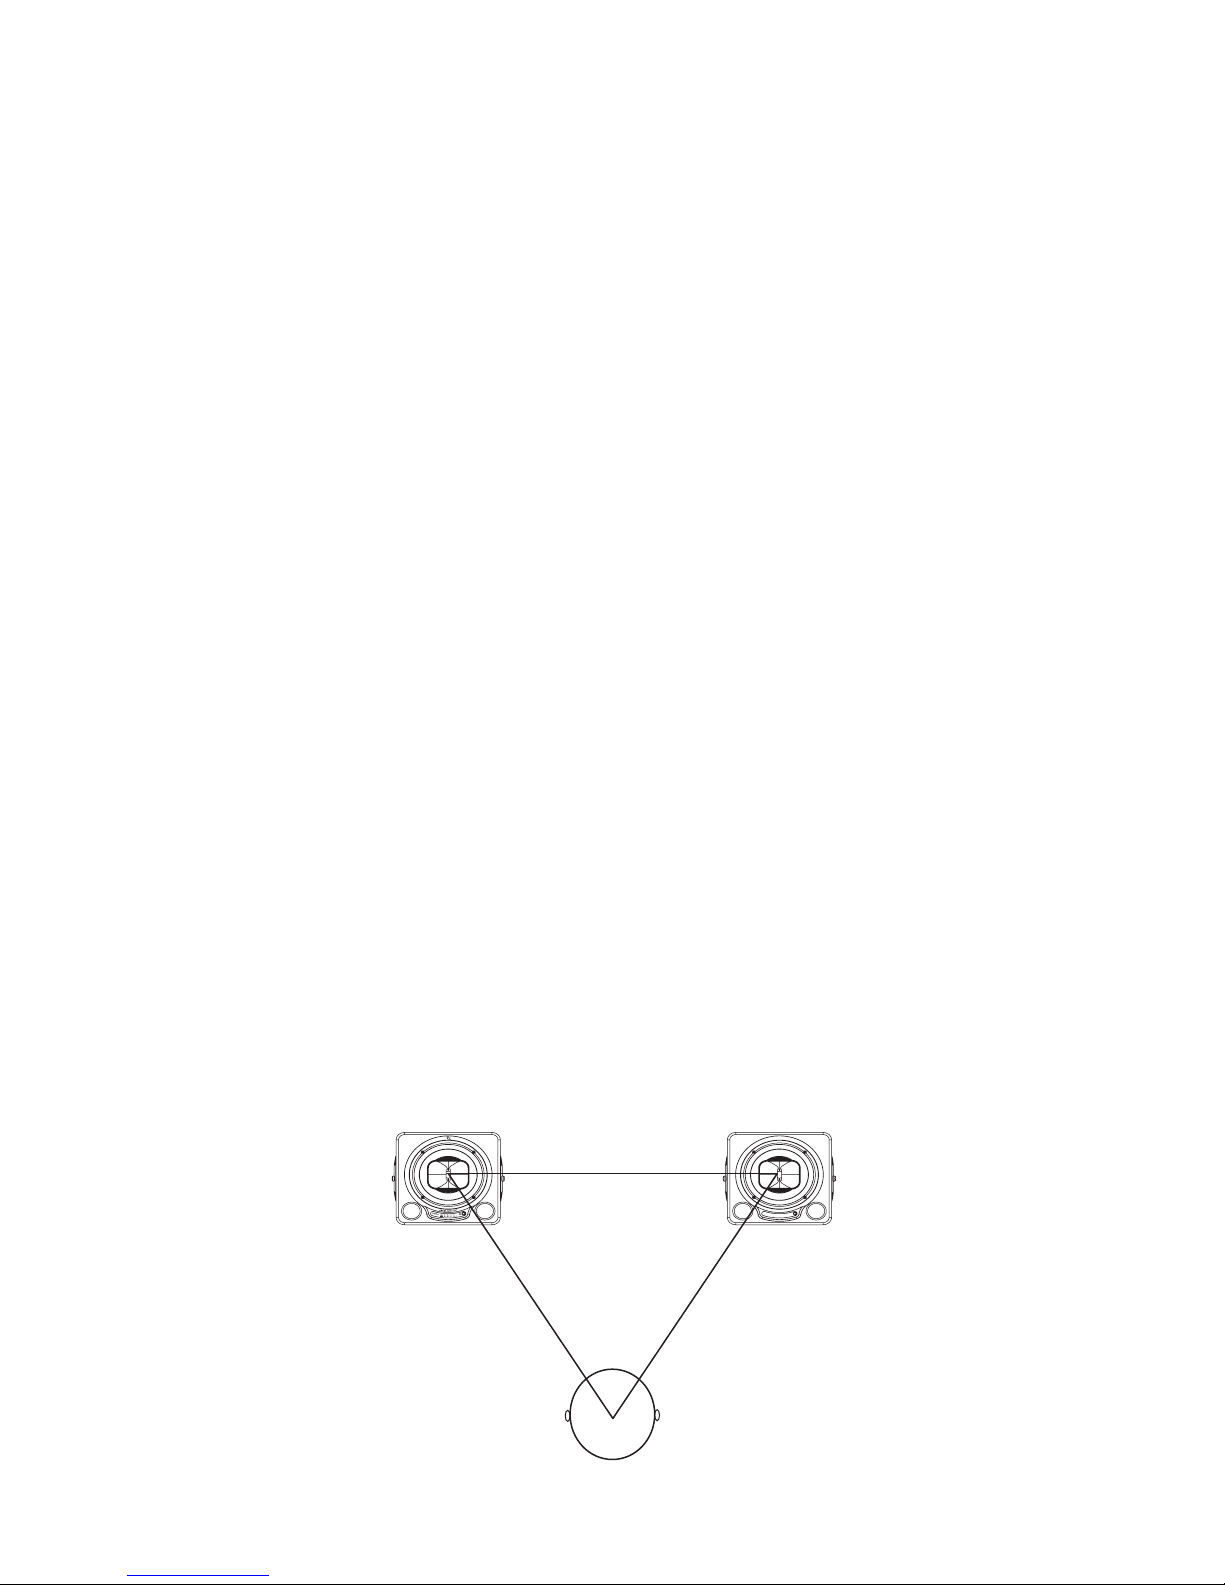
Following the equilateral triangle rule, position the monitors so that each monitor and you the listener,
form a perfect equilateral triangle. You also want to angle them inward so that they are facing your ears
while seated in the mixing position. They should be positioned at a height so that the center of the
monitors are at the same height as the ears of the user.
Optimum Stereo Speaker Positioning
5.
Setup ContinuedSetup Continued
!
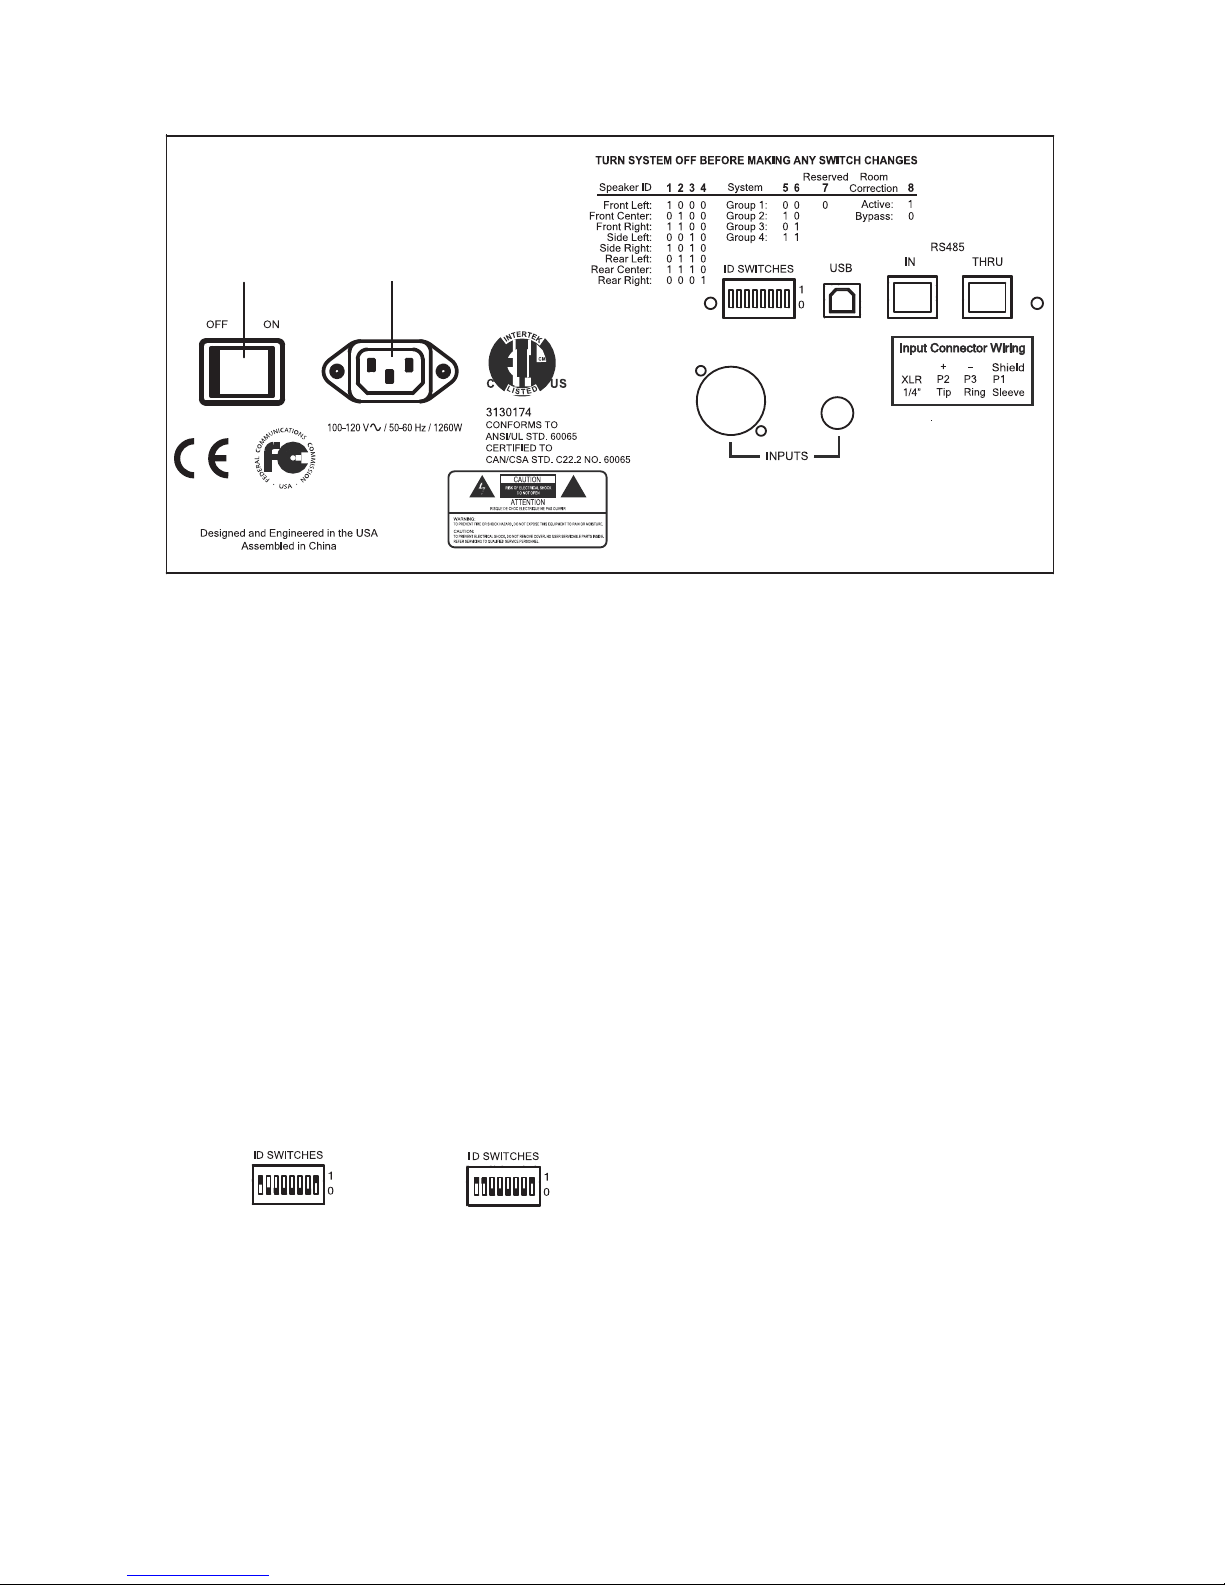
Power Switch
AC Connector
Analog Audio Inputs
Q Series Back PanelQ Series Back Panel
Connect AC Power CablesConnect AC Power Cables
Connect each monitor to a power source using the supplied AC power cables. DO NOT POWER ON DO NOT POWER ON
YOUR MONITORS YET. YOUR MONITORS YET.
The Q10 monitors have a universal power transformer which allows them to be used at either 100-120V
or 200-240V. The Q12 and Q15 monitors are set internally at either 100-120V or 200-240V.
Depending on the country that you purchased your Q12 or Q15 in, they are set at the factory for use
with 100-120V or 200-240V. Do not attempt to change these settings inside of the cabinet or you
will void your warranty.
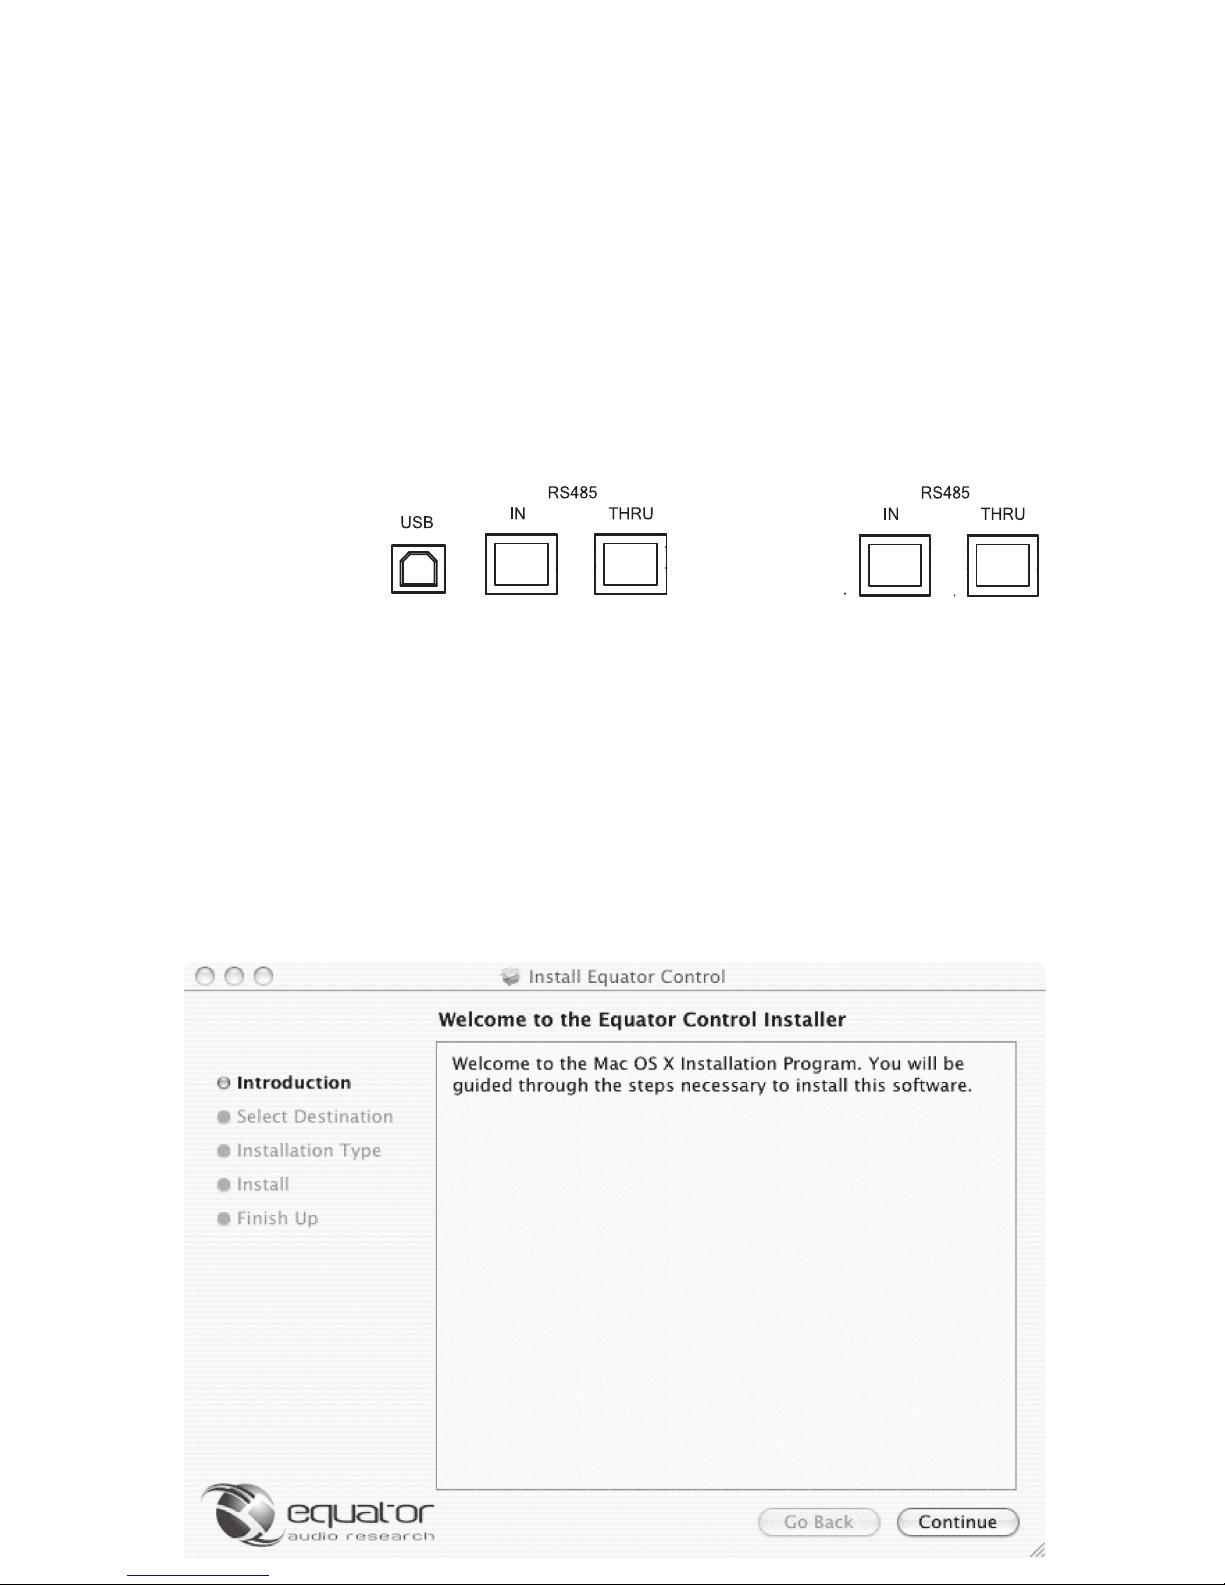
Connect USB CableConnect USB Cable
Plug a USB cable into an available USB port on your computer and plug the other end of the USB cable
to the IN port on the back panel of any Q monitor. Please note, Mac OS X 10.4 or Windows XP is required
for use with the Equator Control software interface. DO NOT POWER ON YOUR MONITORS YET. DO NOT POWER ON YOUR MONITORS YET.
Set Speaker ID SwitchesSet Speaker ID Switches
Set the Speaker ID Switches on the back panel of each monitor (the first four of the eight ID Switches)
so that the ID corresponds to the appropriate position the monitor is placed within your room. Use the
Speaker ID legend on the back panel of your monitor to determine ID switch positions. In a stereo setup,
the Front Left Speaker ID Switch (No. 1) is set to ON (the up position) and the RIGHT Speaker ID Switches
(Both 1 & 2) are set to ON (the up positions). DO NOT POWER ON YOUR MONITORS YET. DO NOT POWER ON YOUR MONITORS YET.
Left
Speaker
Set Group ID SwitchesSet Group ID Switches
The Q Series line of monitors allows you to setup and save different group settings within a room. For
example, you might have a stereo setup as Group 1 and a 5.1 setup as Group 2. Leave these ID switches
set to the factory default (Group 1) until you install the Equator Control software and only if you intend to
setup up multiple speaker groups within your room. In a one Speaker Group setup, Group 1 is set to 0 0
(System Switches 5 & 6). DO NOT POWER ON YOUR MONITORS YET. DO NOT POWER ON YOUR MONITORS YET.
Right
Speaker
6.
Setup ContinuedSetup Continued
If you have used the software interface to tune the speakers to a specific room, but take the speakers
to another location, you can use the bypass setting (switch 8 down) to get the speakers back to the
default factory-flat settings.
Connect Network CableConnect Network Cable
Connect the monitors together using CAT5 networking cable. Plug a CAT5 network cable into the
THRU port on the monitor that is connected to your computer via USB and the other end into the
IN port on the next monitor within your system. If you have multiple Q monitors within your setup,
“Daisy-Chain” from monitor to monitor from THRU to IN.
Connect Audio CablesConnect Audio Cables
Connect the outputs of your playback device or mixing console to the appropriate analog audio
input on the back of each monitor. The Q Series monitors can accomodate both XLR and 1/4”
cables that are wired for either balanced or unbalanced operation. For balanced operation, consult
the Input Connector WiringInput Connector Wiring diagram on the back panel of a Q monitor. DO NOT POWER UP YOUR DO NOT POWER UP YOUR
MONITORS YET.MONITORS YET.
Install Manual Control Software (RRC-Room Response Compensation)Install Manual Control Software (RRC-Room Response Compensation)
Macintosh OS X 10.4 Software InstallationMacintosh OS X 10.4 Software Installation
Browse to the Equator Control Installer file on the included CDROM. Run both the Equator Control Installer
and the SLAB_USB to UART Installer. Double-click the file to initialize the installation process. Follow the
on-screen instructions to complete the installation.
Set Room Correction Active/Bypass Switch(s)Set Room Correction Active/Bypass Switch(s)
The Equator Control software interface allows you to manually adjust for room anomolies and tonal
characteristics among other adjustments that can be saved and recalled for each speaker within your
system. Room Compensation ID switch number eight needs to be set to active in order for this to work.
From Computer →
x
x
x
From THRU →
7.
 Loading...