

Page 1
PMA Preview Edition
for EPSON Scanners and Printers
Color Managed Workflow
Page 2

PMA Preview Edition
for EPSON®Scanners and Printers
Color Managed Workflow
Page 3

Copyright © 2003 by Epson America, Inc. All rights reserved. No part of this publication may be reproduced, stored
in a retrieval system, or transmitted in any form or by any means, electronic, mechanical, photocopying, recording, or
otherwise, without the prior written permission of Epson America, Inc.
Limit of Liability/Disclaimer of Warranty
While Epson America, Inc. has strived to be accurate in preparing this book, it makes no representations or warranties
with respect to the accuracy or completeness of the contents of this book and specifically disclaims any implied
warranties of merchantability or fitness for a particular purpose. The information and opinions stated herein are not
guaranteed to produce any particular results, and the advice and strategies contained herein may not be suitable for
every individual. In no event shall EPSON be liable for any loss, inconvenience, or damage, including but not limited
to direct, special, incidental, consequential, or other damages resulting from the use of the information contained in
this booklet.
Trademarks
EPSON and EPSON Stylus are registered trademarks of SEIKO EPSON CORPORATION.
EPSON Perfection is a registered trademark of Epson America, Inc.
General Notice: Other product names used herein are for identification purposes only and may be trademarks
of their respective owners. EPSON disclaims any and all rights in those marks.
Printed on recycled paper 2/03
All photographs © 2000 by Stephen Wilkes CPD-16082
Page 4

Contents
The Art and Science of Color . . . . . . . . . . . . . . . . . . . . . . . . . . . . . . . . . . . . . . . . . . . . . . . . . . . . . . . . . . . . . . . . . . 1
Profiling Your Scanner and Printer . . . . . . . . . . . . . . . . . . . . . . . . . . . . . . . . . . . . . . . . . . . . . . . . . . . . . . . . . . . . 1
Printing the Printer Profiling Target . . . . . . . . . . . . . . . . . . . . . . . . . . . . . . . . . . . . . . . . . . . . . . . . . . . . . . . . . . . . . 2
Preparing the Printer and Scanner Targets . . . . . . . . . . . . . . . . . . . . . . . . . . . . . . . . . . . . . . . . . . . . . . . . . . . . . . . 4
Scanning the Targets with SilverFast . . . . . . . . . . . . . . . . . . . . . . . . . . . . . . . . . . . . . . . . . . . . . . . . . . . . . . . . . . . 5
Building the Scanner and Printer Profiles . . . . . . . . . . . . . . . . . . . . . . . . . . . . . . . . . . . . . . . . . . . . . . . . . . . . . . . . 7
Building Additional Printer Profiles . . . . . . . . . . . . . . . . . . . . . . . . . . . . . . . . . . . . . . . . . . . . . . . . . . . . . . . . . . . 9
Printing the Printer Target from Adobe Photoshop Elements 2.0 . . . . . . . . . . . . . . . . . . . . . . . . . . . . . . . . . . . . . 10
Printing the Printer Target from Adobe Photoshop 7.0.1 . . . . . . . . . . . . . . . . . . . . . . . . . . . . . . . . . . . . . . . . . . . 12
Preparing the Targets . . . . . . . . . . . . . . . . . . . . . . . . . . . . . . . . . . . . . . . . . . . . . . . . . . . . . . . . . . . . . . . . . . . . . . . 13
Building a Scanner Profile for Transparencies . . . . . . . . . . . . . . . . . . . . . . . . . . . . . . . . . . . . . . . . . . . . . . . 14
Scanning the Transparency Target . . . . . . . . . . . . . . . . . . . . . . . . . . . . . . . . . . . . . . . . . . . . . . . . . . . . . . . . . . . . . 14
Building the Scanner Transparency Profile in MonacoEZcolor . . . . . . . . . . . . . . . . . . . . . . . . . . . . . . . . . . . . . . . 17
Building a Display Profile . . . . . . . . . . . . . . . . . . . . . . . . . . . . . . . . . . . . . . . . . . . . . . . . . . . . . . . . . . . . . . . . . . . . 19
Configuring Color Management in Your Host Application . . . . . . . . . . . . . . . . . . . . . . . . . . . . . . . . . . . . 22
Configuring Adobe Photoshop Elements 2.0 . . . . . . . . . . . . . . . . . . . . . . . . . . . . . . . . . . . . . . . . . . . . . . . . . . . . . 22
Configuring Adobe Photoshop 7.0.1 . . . . . . . . . . . . . . . . . . . . . . . . . . . . . . . . . . . . . . . . . . . . . . . . . . . . . . . . . . . . 23
Scanning with LaserSoft SilverFast . . . . . . . . . . . . . . . . . . . . . . . . . . . . . . . . . . . . . . . . . . . . . . . . . . . . . . . . . . 23
Reflective Scanning with SilverFast . . . . . . . . . . . . . . . . . . . . . . . . . . . . . . . . . . . . . . . . . . . . . . . . . . . . . . . . . . . 23
Transparency Scanning with SilverFast . . . . . . . . . . . . . . . . . . . . . . . . . . . . . . . . . . . . . . . . . . . . . . . . . . . . . . . . . 25
Using Color Management with Your EPSON Printer . . . . . . . . . . . . . . . . . . . . . . . . . . . . . . . . . . . . . . . . . . 27
Using the Workflow . . . . . . . . . . . . . . . . . . . . . . . . . . . . . . . . . . . . . . . . . . . . . . . . . . . . . . . . . . . . . . . . . . . . . . . . . . 29
Page 5

T
he EPSON Perfection®3200 scanner and
your EPSON
®
photo printer form an ideal
system for reproducing photography and fine art.
With these outstanding tools, you expect the
highest quality color output. That’s why we’ve
created this booklet. It gives you all the tips and
techniques you need to optimize color on your
EPSON system.
Monitors, scanners, and printers each use different
technologies to reproduce color. Different color
technologies mean that the devices have different
color ranges or gamuts. Each one can produce
certain colors that the others can’t.
The good news is that a color-managed workflow
can help you match colors as closely as possible.
By following the instructions in this booklet, you
can achieve effective color reproduction using
your EPSON Perfection 3200 scanner and
EPSON photo printer.
The Art and Science of Color
Each device in your computer system has a
different color “language.” Color management
translates these languages into a universal form
of communication, or device-independent color
model. By using a common language, a colormanaged workflow lets you convert an image
from one color model to another.
Profiles describe the color gamut of various
devices and the color space of individual images.
With the information in profiles, color management
tools determine the best method for “mapping”
out-of-gamut colors. The result is that you get
consistent, predictable color reproduction.
This booklet provides you with the step-by step
instructions you need to create accurate profiles
for your scanner, monitor, and printer.
All the components you need to build a colormanaged workflow are included in the EPSON
Perfection 3200 Pro software bundle:
MonacoEZcolor offers an easy, effective
means of building profiles for your scanner,
printer, and monitor.
LaserSoft
®
SilverFast®provides powerful tools
to deliver great scans that need little or no
correction after scanning.
Adobe
®
Photoshop®Elements 2.0 lets you
manipulate your images until they’re just
right, then hand off the color correctly to
your EPSON printer.
In this booklet, we’ll walk you through the
process of building the profiles you need,
configuring SilverFast to pass the color along
to Adobe Photoshop Elements, and applying
the profiles to ensure that your prints contain
the color you expect.
Profiling Your Scanner and Printer
The starting point in building the workflow is
to create profiles for your scanner and printer.
MonacoEZcolor lets you build a scanner and
printer profile in a single session. The first step
is to print the printer profiling target from
MonacoEZcolor.
Note: You need to create a separate profile
for each combination of ink, paper, and
printer settings. When you use the profile to
make a print, you need to ensure that you’re
printing on the same paper, with the same
inks, using the same printer settings you
used to print the target.
1
Page 6
Printing the Printer Profiling Target
1 Launch MonacoEZcolor. The welcome
screen appears:
2 Click Create Printer Profile.
MonacoEZcolor provides you with some
general guidelines to observe during the
profile creation process. If you aren’t sure
how to follow these guidelines, don’t
worry—just follow the steps provided here.
3 Click the right arrow at the lower-right of
the MonacoEZcolor screen to proceed.
The following screen appears:
4 For any EPSON printer, click RGB Printer.
From the Printer Model/Technology pop-up
menu, choose Other for any EPSON printer,
or choose EPSON Stylus Photo 2000P if
this is the printer you’re using.
5 Click the right arrow to proceed. The Print
Target screen appears:
6 Make sure your EPSON printer is selected
as the current printer, and the paper you
want to profile is loaded. Then click Print.
Tip: If you plan on profiling multiple papers,
or the same paper at multiple resolutions,
click Save TIFF to save the target as a file
named “RGB Print Patches.tif”. Printing the
target is always the first step in building a
printer profile. If you have the target saved as
a TIFF, you can print it without having to go
through the introductory screens in
MonacoEZcolor.
2
Click here to proceed
Page 7
MonacoEZcolor advises you to record the
settings you’ll make in the printer driver, so
you can apply them when you use the
profile. When you click OK, the print
window appears:
7 Choose Print Settings from the options
pop-up menu. The print settings appear:
8 Choose the paper type you want to profile
from the Media Type list—for example,
Enhanced Matte Paper. Then click
Advanced Settings and choose your desired
print settings. Most of the time, the default
settings work well.
9 Once you’ve made your selections, choose
Color Management from the Options
menu. The color management settings
appear:
10 Click No Color Adjustment to ensure that
the driver doesn’t alter the colors in the
profiling target. Then click Print.
Once you’ve printed the target, you’re ready
to proceed to the next part of the process:
using SilverFast to scan both the scanner and
printer targets.
Tip: For an accurate printer profile, make sure
you let the printer target dry for at least an
hour to reach its final, stable color. Some
paper-and-ink combinations take longer to
dry than others. If you wait until the next day,
you can be sure the target has reached its
final color.
3
Page 8
Preparing the Printer and Scanner Targets
The next step is to scan the printer and scanner
targets in a single image. MonacoEZcolor will use
this scan to build the profiles.
1 In MonacoEZcolor, click the right arrow.
The following screen appears:
2 Follow the on-screen instructions to attach
the reflective IT8 target included in the
MonacoEZcolor package to the target
you printed.
Note: If you use tape to attach the target,
make sure the tape doesn’t cover any of the
color patches on the IT8.
3 Click the right arrow to proceed.
Follow the on-screen instructions to place
the printer and scanner targets on the scanner.
4 Click the right arrow to proceed. The
following screen appears:
Caution: On some operating systems,
MonacoEZcolor lets you scan directly into the
application using the EPSON scanner plug-in.
Do not use this feature. To create a profile
that LaserSoft SilverFast can use correctly,
you must scan the scanner and printer
targets using SilverFast, as described in the
following section.
4
Page 9

Scanning the Targets with SilverFast
To build profiles, you must use special settings in
SilverFast that are quite different from the ones
used in normal scanning. You must scan the
profiling target with all color management and
color correction features turned off, following the
instructions in this section.
1 Launch the standalone SilverFast
application. You’ll be prompted to import
the SilverFast (Epson) plug-in, as shown.
You can find the plug-in inside the
SilverFast application folder.
Note: Your scanner must be connected to
your computer and turned on before you can
successfully import the scanner plug-in.
Next, you’ll be prompted to enter your
name, company, and serial number
information. You’ll find the SilverFast serial
number on the back of the SilverFast
package. Once you enter this information
and click OK, SilverFast opens.
Before you scan the target, you need to
make sure that SilverFast is configured
correctly for the profile scan.
2 On the main SilverFast screen, click the
General tab, and make sure the Scan Mode
is set to Normal (File), Original is set to
Reflective, and Pos./Neg. is set to Positive,
as shown:
3 Once you’ve confirmed the settings, click
the Options button. The SilverFast Defaults
screen appears:
4 For Gamma-Gradation, enter 1.80. Check
for HDR output, then click the CMS tab.
5
Page 10
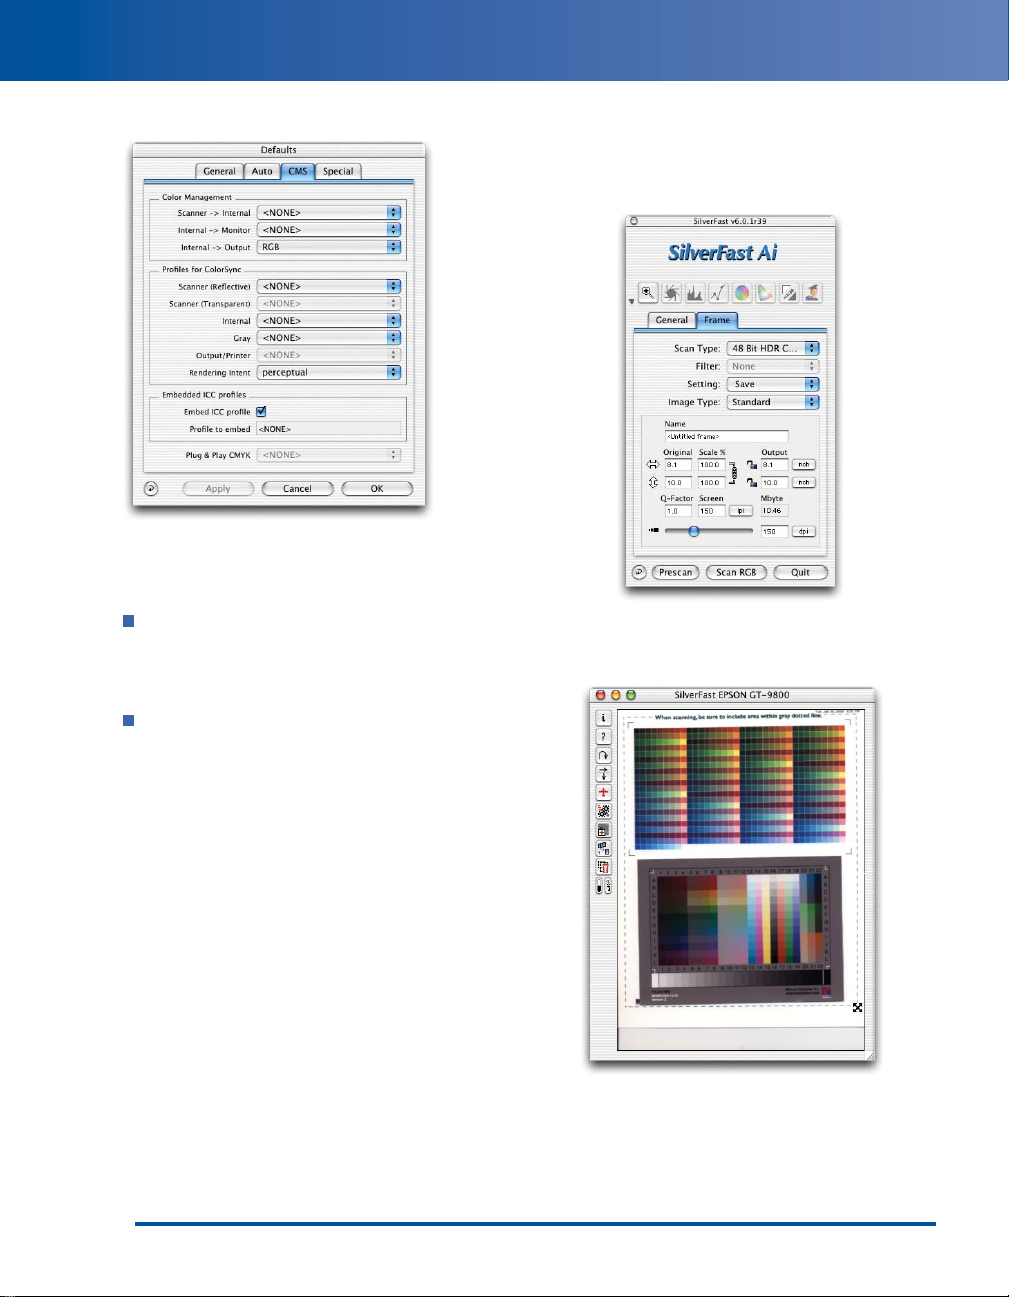
The CMS Defaults screen appears:
5 Turn off all the color management options
for the target scan. You need to do this
whenever you scan a profiling target.
In the Color Management section, set
Scanner->Internal and Internal->Monitor
to <NONE>, and set Internal->Output
to RGB.
In the Profiles for ColorSync section, set
all profiles to <NONE>. You can leave
the other settings at their defaults.
6 When you’ve completed all the settings,
click OK.
7 On the main SilverFast screen, click the
Frame tab. Set the Scan Type to 48-bit
HDR Color, and set the resolution slider to
150 dpi, as shown:
8 Once you’ve made your settings, click
Prescan. The prescan image appears in
SilverFast’s scanner window:
6
Page 11
9 Crop the prescan, using the dotted line
surrounding the target as a rough guide.
Don’t worry if the scan is slightly skewed.
But if the scan is more than 10 degrees or so
from square, reposition the target and redo
the prescan.
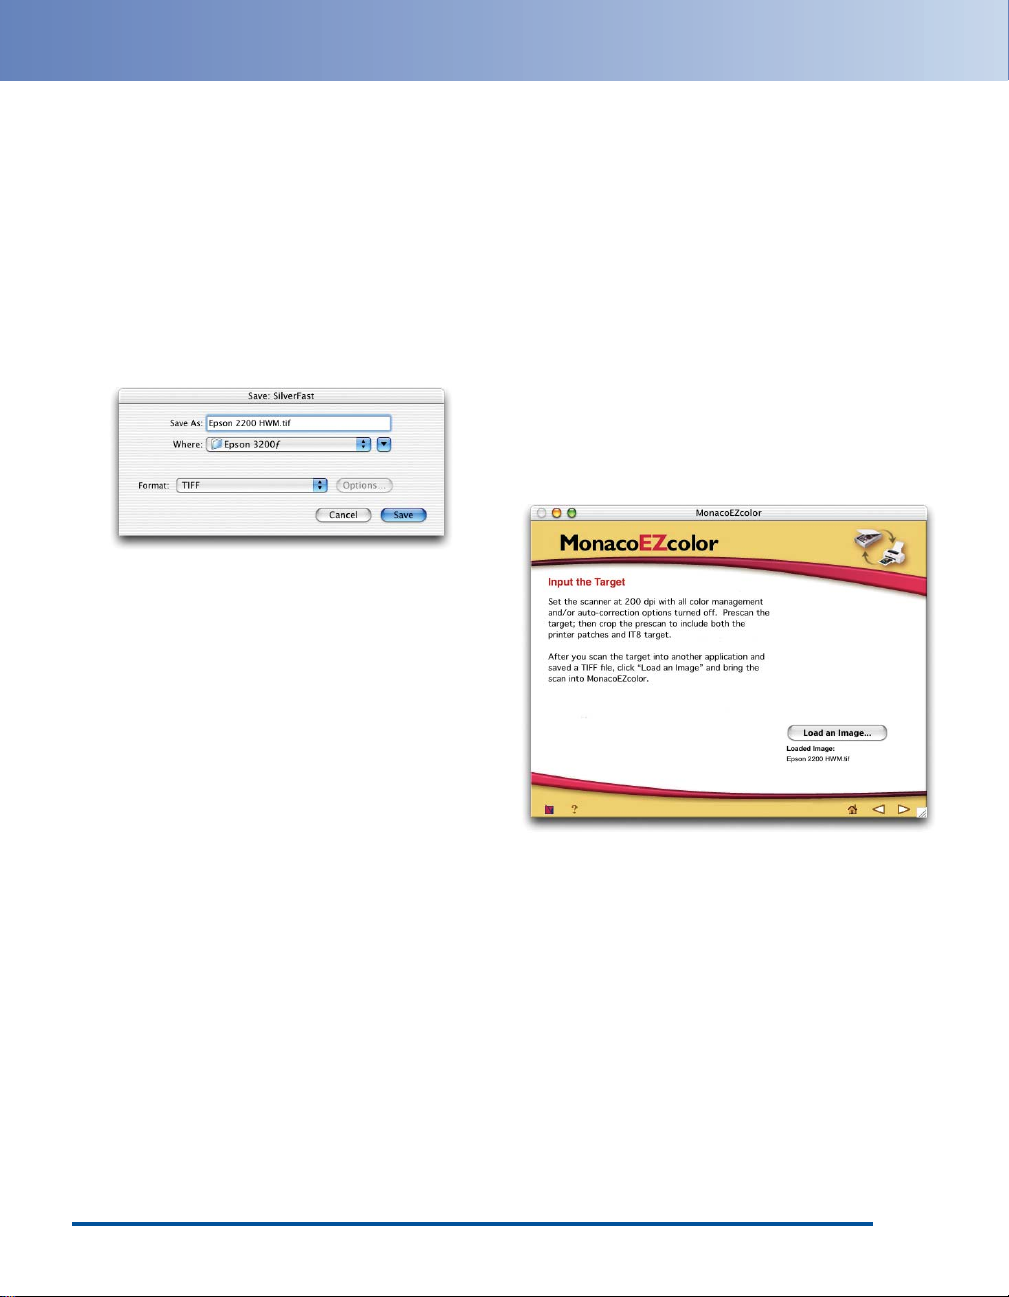
10 Click Scan RGB to make the final target
scan. SilverFast prompts you to choose a
location, file format, and file name for the
scan, as shown:
11 Save the scan in TIFF format.
We recommend that you include the printer
and paper type in the file name. If you
profile multiple printers, or multiple papers
on the same printer, you’ll end up with many
scans that look very similar. Including this
information in the file name makes it easy to
identify which scan belongs to which paper
and printer combination.
Once you’ve entered the information, click
Save to start the scan. SilverFast scans the
target and saves it in the specified location.
You’ve completed the scanning process.
Now you can return to MonacoEZcolor and
build the profiles for your scanner and
printer.
Building the Scanner and Printer Profiles
The final part of the profile-building process is
loading the target scan into MonacoEZcolor, then
naming, building, and saving the profiles.
1 Return to MonacoEZcolor. If necessary, use
the navigation arrows at the lower-right of
the MonacoEZcolor screen to navigate to the
screen shown below. Then click Load an
Image, and load the target scan you created
in the previous section.
The target’s file name is displayed below the
button, as shown:
2 Click the right arrow at the lower-right
to proceed.
7
Page 12

The following screen appears:
3 After verifying that you’ve scanned the target
correctly, click the right arrow to proceed.
The following screen appears:
This screen lets you specify the reference
file, which contains color measurements of
the IT8 scanner target that MonacoEZcolor
uses in calculating the profile.
4 Click Select Reference and load the
reference file corresponding to the reference
number on your IT8 target. (It’s the number
in white type at the lower left of the target.)
For example, the reference file for the target
labeled “MONR2002:12-02” is named
“MONR2002.12.02.mrf.”
Once you’ve loaded the reference file, its
name appears below the button.
5 Verify that the reference file name matches
the reference number on the target, then
click the right arrow to proceed. The
following screen appears:
6 Click the Name button in the Printer Profile
area, and enter a name for your printer
profile. Then check Scanner Profile, click
the Name button in the Scanner Profile area,
and enter a name for your scanner profile.
Tip: Use descriptive profile names rather
than the default names suggested by
MonacoEZcolor. For example, you might
name the profile for an EPSON Stylus®Photo
2200 using Enhanced Matte Paper “SP2200
EM.”
Once you’ve entered names for the profiles,
they appear under the respective Name
buttons.
8
Page 13

7 Click the right arrow to proceed.
MonacoEZcolor displays a progress bar
as it builds the scanner profile, then the
printer profile.
Once the profiles are built, MonacoEZcolor
displays the Finished screen, as shown:
You’ve now successfully built profiles for both
your scanner (for reflective copy) and your printer
(for the paper you used to print the target). Later
in this booklet we’ll show you how to use these
profiles with SilverFast and Adobe Photoshop
Elements 2.0 or Adobe Photoshop 7.0.1.
If you want to start using your profiles
immediately, you can skip to “Scanning with
LaserSoft SilverFast” on page 23. In the next
sections, we show you how to build additional
printer profiles for different papers, how to build a
scanner profile for transparency scanning, and
how to calibrate and profile your monitor.
Building Additional Printer Profiles
Remember that printer profiles are paper-specific,
so you may need to build additional profiles for
different paper stocks. You can follow the
previously described procedure to build additional
printer profiles. The only difference is that you
don’t need to check Scanner Profile in the Name
and Save Profile screen (shown on page 8).
However, if you’ve already saved the printer target
from MonacoEZcolor as a TIFF file, you can
streamline the process slightly. First, you print the
target from Adobe Photoshop Elements 2.0 or
Adobe Photoshop 7.0.1. Next, you scan the printer
and scanner targets in a single image using
SilverFast. Then you use MonacoEZcolor to build
the printer profile.
When printing profiling targets, make sure the
color management features in both the host
application and printer driver do not alter the color
values in the target. The following sections offer
step-by-step instructions for printing the target
from Adobe Photoshop Elements 2.0 or Adobe
Photoshop 7.0.1.
9
Page 14

Printing the Printer Target from Adobe Photoshop Elements 2.0
1 Launch Adobe Photoshop Elements 2.0.
2 Choose Color Settings from the Edit menu
(Mac OS 9, Windows) or the Photoshop
Elements menu (Mac OS X). The Color
Settings dialog box appears:
3 Choose Full color management —
optimized for Print, then click OK.
4 Choose Open from the File menu, browse
to the RGB Print Patches.tif file you saved
from MonacoEZcolor, and open it. The file
appears on the screen:
5 Choose Print Preview from the File menu.
The Print Preview dialog box appears:
6 If necessary, click Page Setup to change the
paper size and orientation. Make sure Show
More Options is checked, then choose
Color Management from the pop-down
menu. In the Print Space section, choose
Same As Source from the Profile menu,
then click Print. The print window appears:
7 Choose Print Settings from the options
pop-up menu.
10
Page 15

The print settings appear:
8 Choose the paper type you want to profile
from the Media Type list—for example,
Enhanced Matte Paper. Then click
Advanced Settings and choose your desired
print settings. Most of the time, the default
settings work well.
9 Once you’ve made your selections, choose
Color Management from the Options
menu. The Color Management settings
appear:
10 Click No Color Adjustment to ensure that
the driver doesn’t alter the colors in the
profiling target. Then click Print.
If you see a warning that some PostScriptspecific settings will be ignored, click OK.
11 Quit Adobe Photoshop Elements. When
prompted to save changes to the RGB Print
Patches.tif file, click Don’t Save.
Once you’ve printed the target, you’re ready
to proceed to the next part of the process:
using SilverFast to scan both the scanner and
printer targets. See pages 4 to 9 for step-bystep instructions.
Tip: For an accurate printer profile, make
sure you let the printer target dry for at least
an hour to reach its final, stable color. Some
paper-and-ink combinations take longer to
dry than others. If you wait until the next day,
you can be sure the target has reached its
final color.
11
Page 16

Printing the Printer Target from Adobe Photoshop 7.0.1
1 Launch Adobe Photoshop 7.0.1.
2 Choose Color Settings from the Edit menu
(Mac OS 9, Windows) or the Photoshop
menu (Mac OS X). The Color Settings
dialog box appears:
3 For Settings, choose U.S. Prepress
Defaults, then click OK.
4 Choose Open from the File menu, browse to
the RGB Print Patches.tif file you saved
from MonacoEZcolor, and open it. The
Missing Profile warning appears:
5 Choose Leave as is (don’t color manage),
then click OK. The RGB Print Patches.tif
file appears.
6 Choose Print with Preview from the File
menu. The Print Preview dialog box appears:
7 If necessary, click Page Setup to change the
paper size and orientation. Make sure Show
More Options is checked, then choose
Color Management from the pop-down
menu. In the Print Space section, choose
Same As Source from the Profile menu,
then click Print. The Print window appears:
8 Choose Print Settings from the options
pop-up menu.
12
Page 17

The Print Settings appear:
9 Choose the paper type you want to profile
from the Media Type list—for example,
Enhanced Matte Paper. Then click
Advanced Settings and choose your desired
print settings. Most of the time, the default
settings work well.
10 Once you’ve made your selections, choose
Color Management from the Options
menu. The Color Management settings
appear:
11 Click No Color Adjustment to ensure that
the driver doesn’t alter the colors in the
profiling target. Then click Print.
If you see a warning that some PostScriptspecific settings will be ignored, click OK.
12 Quit Adobe Photoshop. When prompted to
save changes to the RGB Print Patches.tif
file, click Don’t Save.
Once you’ve printed the target, you’re ready
to proceed to the next part of the process:
using SilverFast to scan both the scanner and
printer targets.
Tip: For an accurate printer profile, make sure
you let the printer target dry for at least an
hour to reach its final, stable color. Some
paper-and-ink combinations take longer to
dry than others. If you wait until the next day,
you can be sure the target has reached its
final color.
Preparing the Targets
To build a printer profile, MonacoEZcolor needs a
single scanned image containing both the printer
profiling target and the scanner IT8 profiling
target. So whenever you build a printer profile,
you must attach the scanner IT8 target to the
printer target in the location marked on the
printer target.
If you use tape to attach the target, make sure that
it never touches the color patches, and avoid
touching the color patches when you handle
the target.
Once you’ve prepared the targets, you’re ready to
scan them with SilverFast and use MonacoEZcolor
to build your profiles. Follow the instructions on
pages 4 to 9.
13
Page 18

Building a Scanner Profile for Transparencies
To scan transparencies, you need to use a different
profile from the one you use for reflective copy
such as photographic prints. This section provides
step-by-step instructions for building a scanner
transparency profile.
First, you’ll scan the transparency target included
with MonacoEZcolor using SilverFast, then you’ll
load the scan into MonacoEZcolor and build the
profile.
Locate the 4x5 transparency IT8.7/1 target
included in the MonacoEZcolor package, and load
it in your scanner’s 4x5 film holder. The target
must be loaded face-down in the holder (“wrongreading” or mirror-image as viewed from above).
Handle the target carefully by its edges to avoid
getting fingerprints or smudges on the color
patches.
Then place the holder on the scanner glass, with
the large arrow on the holder pointing to the right
rear of the scanner glass. Then close the lid.
Scanning the Transparency Target
To build a transparency profile, you must use
special settings in SilverFast, similar to those used
in building the reflective profile. You must scan
the profiling target with all color management and
color correction features turned off, following the
instructions in this section.
1 Launch the standalone SilverFast
application. You’ll be prompted to import
the SilverFast (Epson) plug-in, as shown.
You can find the plug-in inside the
SilverFast application folder.
Note: Your scanner must be connected to
your computer and turned on before you can
successfully import the scanner plug-in.
Before you scan the target, you need to
make sure that SilverFast is configured
correctly for the profile scan.
2 On the main SilverFast screen, click the
General tab, and make sure the Scan Mode
is set to Normal (File), Original is set to
Transparency, and Pos./Neg. is set to
Positive, as shown:
14
Page 19

3 Once you’ve confirmed the settings, click
the Options button. The SilverFast Defaults
screen appears:
4 For Gamma-Gradation, enter 2.20. Check
for HDR output, then click the CMS tab.
The CMS Defaults screen appears:
5 Turn off all the color management options
for the target scan. You need to do this
whenever you scan a profiling target.
In the Color Management section, set
Scanner->Internal and Internal->Monitor
to <NONE>, and set Internal->Output to
RGB.
In the Profiles for ColorSync section, set
all profiles to <NONE>. You can leave
the other settings at their defaults.
6 When you’ve completed all the settings,
click OK.
7 On the main SilverFast screen, click the
Frame tab. Set the Scan Type to 48-bit
HDR Color, and set the resolution slider to
300 dpi, as shown:
15
Page 20
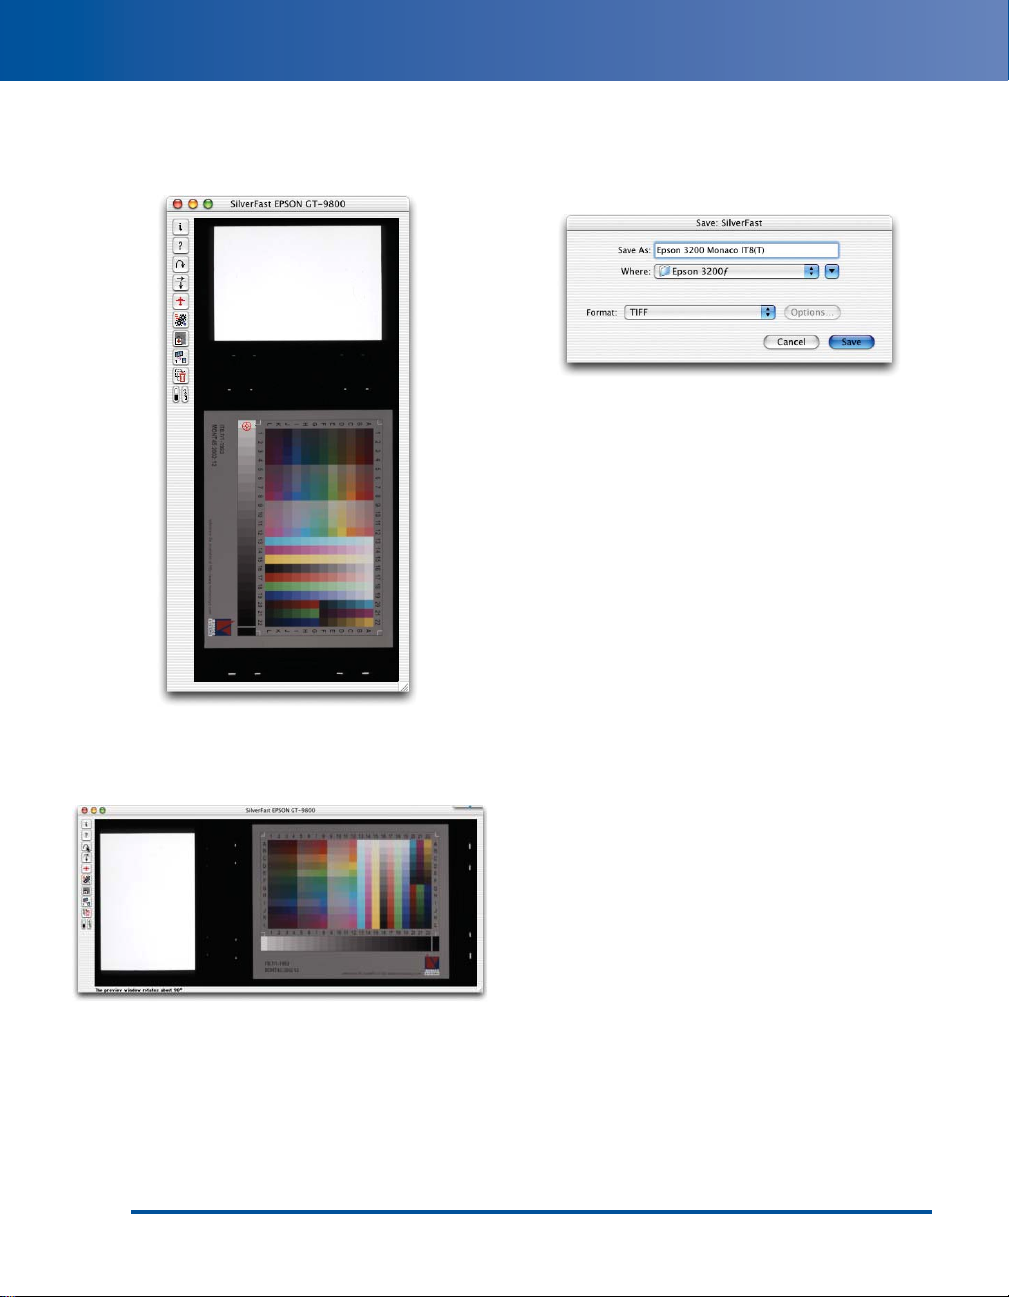
8 Once you’ve made your settings, click
Prescan. The prescan appears in SilverFast’s
scanner window:
9 Crop the prescan to include only the target,
then click the Rotate tool to rotate the image
to the correct orientation, as shown:
10 Click Scan RGB to make the final target
scan. SilverFast prompts you to choose a
location, file format, and file name for the
scan, as shown:
11 Save the scan in TIFF format. We
recommend that you include the scanner
and film type in the file name.
Once you’ve entered the information, click Save
to start the scan. SilverFast scans the target and
saves it in the specified location.
16
Page 21

Building the Scanner Transparency Profile in MonacoEZcolor
Once you’ve scanned the target, you have
everything you need to build the scanner profile in
MonacoEZcolor, as described in this section.
1 Launch MonacoEZcolor. The Welcome
screen appears:
2 Click Create Input Profile, then click the
right arrow to proceed. The intermediate
screen contains hints about scanning the
target, which you’ve already done, so you
can skip it. The following screen appears:
3 Choose 4x5 Transparency. Then click the
right arrow twice to proceed to Input the
Target, as shown. (The intermediate screen
covers steps that you’ve already performed,
so you can skip them.)
4 Click Load Image, and load the target scan
you created in the previous section. The
target’s file name is displayed below the
Load Image button, as shown:
17
Page 22

5 Click the right arrow to proceed. The
following screen appears:
6 After verifying that you’ve scanned the
target correctly, click the right arrow to
proceed. The following screen appears:
This screen lets you specify the reference
file, which contains color measurements of
the IT8 scanner target that MonacoEZcolor
uses in calculating the profile.
7 Click Select Reference and load the
reference file corresponding to the reference
number on your IT8 target. (It’s the number
in black type at the lower left of the target.)
For example, the reference file for the target
labeled “MONT45:2002:12-02” is named
“MONT45.2002.12.02.mrf.”
Once you’ve loaded the reference file, its
file name appears below the button.
8 Verify that the reference file name matches
the reference number on the target, then
click the right arrow to proceed. The Name
and Save Profile screen appears:
9 Click Save Profile, then enter a name for
your scanner profile. You’ve already built a
scanner profile, so you can leave the
Scanner Profile box unchecked.
Tip: Use descriptive profile names rather than
the default name suggested by MonacoEZcolor.
For example, you might name the profile for
scanning transparencies on the EPSON
Perfection 3200 “Epson 3200 (T).”
18
Page 23

MonacoEZcolor displays a progress bar as it
builds the scanner profile. Once the profile
is built, MonacoEZcolor displays the
Finished screen, as shown:
You’ve now successfully built a profile for
scanning transparencies. In the next section,
we provide instructions for building a
display profile to provide accurate color on
your monitor. If you want to start using your
profiles right away, you can skip to
“Scanning with LaserSoft SilverFast” on
page 23.
Building a Display Profile
A profile that accurately describes the behavior of
your monitor is essential to making color
management work. If you have a third-party
calibrator that uses a measuring device, or you’ve
purchased the MonacoOPTIX sensor for use with
MonacoEZcolor, we recommend that you use
these tools instead of the visual calibration
described in this section.
1 Launch MonacoEZcolor.
2 Click Create Monitor Profile.
MonacoEZcolor checks for the presence of
the MonacoOPTIX colorimeter, and presents
you with a screen containing ordering
information.
3 Click the right arrow to proceed with the
visual calibration.
4 Read the general instructions on display
warmup time, room lighting, and display
controls. Then select your monitor type, and
click the right arrow to proceed.
19
Page 24

The Set Monitor White Point screen appears:
5 Choose 6500K as the Desired White Point.
If your monitor has adjustable white point
settings, adjust them to 6500K, then
choose 6500K in the Hardware Setting
area.
If your monitor does not offer adjustable
white point settings, then choose I Don’t
Know in the Hardware Setting area.
6 Click the right arrow to proceed.
If you chose CRT as your monitor type,
the following screen appears.
If you chose LCD as your monitor type,
skip to step 8 on page 21.
7 Click on the darkest square that lets you
identify the letter clearly. The following
screen appears:
20
Page 25

8 Use your monitor’s Brightness control to
lower the brightness just to the point where
you can no longer distinguish the letter from
the background.
Once you’ve made the adjustments to your
satisfaction, click the right arrow to proceed.
The following screen appears:
9 Adjust the sliders until the letters blend with
the background squares.
Tip: The blue slider is often difficult to adjust
because it’s much more difficult to see subtle
changes in blue than in red or green. If you
set your desktop pattern to a neutral gray
(which is a good idea anyway for color work),
you can see the effects of the blue slider
more clearly on the gray desktop than you
can on the blue square in the target. It makes
the gray appear more yellow or more blue as
you move it. Move the slider until the gray
desktop appears neutral.
When you’ve adjusted the color to your
satisfaction, click the right arrow to proceed.
The following screen appears:
10 Select the desired gamma. Typically,
Macintosh users should select 1.8, and
Windows users should select 2.2. Then click
Save Profile.
MonacoEZcolor prompts you to name
your profile. Once you’ve done so,
MonacoEZcolor builds the profile and
registers it with the operating system as
your display profile. When this process is
complete, the Finished screen appears:
21
Page 26

You’ve now successfully built a profile for your
monitor. In the following sections, we’ll show you
how to load the profiles you’ve created into your
scanning applications—and use them to
communicate color accurately from scan to print.
Configuring Color Management in Your Host Application
In these sections, we’ll show you how to use the
profiles you built in the previous sections to
ensure accurate, predictable color.
First, we’ll explain how to configure color
management in your host application. Next, we’ll
explain how to load profiles into SilverFast to
ensure that it communicates color correctly to the
host application. Finally, we’ll explain how to use
profiles to get great prints from your EPSON printer.
Configuring Adobe Photoshop Elements 2.0
Adobe Photoshop Elements offers simple but
effective color management. To configure Adobe
Photoshop Elements for the EPSON scan-to-print
workflow, follow these simple steps:
1 Choose Color Settings from the Edit menu
(Mac OS 9, Windows), or the Photoshop
Elements menu (Mac OS X).
The Color Settings window appears:
2 Choose Full color management —
optimized for Print, then click OK.
Choosing this option sets Photoshop
Elements to use the Adobe RGB (1998)
color space for all your work. Adobe RGB
(1998) is large enough to hold all the colors
you can print on your EPSON printer. The
other two options offered by Photoshop
Elements, sRGB (Web graphics) and
monitor RGB (No color management), are
smaller color spaces that can clip some
printable colors.
That’s all you need to do to configure
Photoshop Elements for the workflow. If
you plan to use both Photoshop Elements
and Photoshop, read the following section.
Otherwise, you can skip ahead to “Scanning
with LaserSoft SilverFast” on page 23.
22
Page 27

Configuring Adobe Photoshop 7.0.1
Adobe Photoshop offers powerful but sometimes
complicated color management features. To
configure Adobe Photoshop for the EPSON Scanto-Print workflow, follow these simple steps.
1 Choose Color Settings from the Edit menu
(Mac OS 9, Windows), or the Photoshop
Elements menu (Mac OS X).
The Color Settings window appears:
2 For Settings, choose U.S. Prepress
Defaults, then click OK.
Choosing this option sets Photoshop to use
the Adobe RGB (1998) color space for all
your RGB work. Adobe RGB (1998) is large
enough to hold all the colors you can print
on your EPSON printer.
That’s all you need to do to configure
Photoshop for the workflow.
Scanning with LaserSoft SilverFast
The instructions given for configuring SilverFast
apply whether you’re using the standalone
SilverFast application or the SilverFast Import
plug-in. The procedure is identical for both.
However, the settings for scanning reflective copy
are slightly different from those for scanning
transparencies.
Reflective Scanning with SilverFast
1 Launch the SilverFast application, or open
the File menu and choose Import>
SilverFast (Epson) in Photoshop or
Photoshop Elements. SilverFast appears:
2 On the main SilverFast screen, click the
General Tab. Make sure that Original is set
to Reflective and Pos./Neg. is set to
Positive, then click the Options button.
23
Page 28

The SilverFast Defaults screen appears:
3 Make sure Gamma-Gradation is set to 1.80,
then click the CMS tab. The CMS Defaults
screen appears:
4 Make the following settings so that
SilverFast can communicate color correctly
to your host application.
In the Color Management Section, set
Scanner->Internal to ColorSync, set
Internal->Monitor to Automatic, and set
Internal->Output to RGB.
When you see the following warning,
click OK. The next settings you make will
change the SilverFast Internal profile to
Adobe RGB (1998) to match the host
application.
In the Profiles for ColorSync section, set
the Scanner (Reflective) Profile to the
profile you created for reflective scanning
with MonacoEZcolor. For the Internal
profile, choose Adobe RGB (1998).
If you see the warning again, click OK.
You can leave the other settings at their
defaults.
5 When you’ve completed all the settings,
click OK.
24
Page 29

6 On the main SilverFast screen, click the
Frame tab. Set the Scan Type to 48->24-bit
Color, as shown:
You’re ready to scan!
7 Click the Prescan button to initiate a
prescan.
Once the Prescan is done, you can set the
crop and resolution as needed, and use
SilverFast’s powerful color-correction tools
to make any desired enhancements to your
image. For details on using SilverFast’s
image-correction features, see the SilverFast
manual.
Once you’ve configured SilverFast, you
won’t need to change these options.
In the next section, we’ll show you how to
configure SilverFast for transparency scanning.
Transparency Scanning with SilverFast
1
Launch the SilverFast application, or
open the File menu and choose
Import>SilverFast (Epson) in Photoshop
or Photoshop Elements. SilverFast appears:
2 On the main SilverFast screen, click the
General Tab and set Original to
Transparency. To scan positive
transparencies, set Pos./Neg. to Positive.
To scan negatives, set it to Negative.
3 When you’ve made your settings, click the
Options button.
25
Page 30

The SilverFast Defaults screen appears:
4 Verify that the Gamma-Gradation value is
set to 2.20. (If you set it while building a
transparency profile, SilverFast remembers
the setting.) Then click the CMS tab.
The CMS Defaults screen appears:
5 If you’ve already configured SilverFast for
reflective scanning, the only change you
need to make is to enter the profile you
created for transparency scanning under
Scanner (Transparent).
Otherwise, make sure that the other settings
are as shown. If necessary, refer to
“Reflective Scanning with SilverFast” on
page 23.
6 When you’ve completed all the settings,
click OK.
7 On the main SilverFast screen, click the
Frame tab. Set the Scan Type to 48->24-bit
Color, as shown:
You’re ready to scan!
8 Click the Prescan button.
Once the Prescan is done, you can set the crop
and resolution as needed, and use SilverFast’s
powerful color-correction tools to make any
desired enhancements to your image. For
details on using SilverFast’s image-correction
features, see the SilverFast manual.
Once you’ve configured SilverFast, you won’t
need to change these options. SilverFast
automatically remembers the required
Gamma-Gradation settings for reflective and
transparency, and automatically uses the
correct profile for each.
In the next section, we’ll show you how to print
your images, using the printer profiles you created
with MonacoEZcolor.
26
Page 31

Using Color Management with Your EPSON Printer
Once you have a scanned and corrected image
ready to print, you’ll configure your host
application to translate the color to your printer
profile. Then you’ll turn off the color management
features in the printer driver to prevent a second,
unnecessary conversion from happening.
1 In Photoshop or Photoshop Elements, open
the File menu and choose Print with
Preview.
The Print with Preview dialog box appears,
as shown. (The dialog boxes look slightly
different in Photoshop and Photoshop
Elements, but they offer identical
functionality.)
2 If necessary, click the Page Setup button to
change the page size or orientation. Click
More Options, then choose Color
Management. Additional options appear:
3 In the Print Space section, choose the
printer profile you created for your printer
and paper. Then choose an Intent and a
Black Point Compensation setting.
For most images, we recommend either
Perceptual or Relative Colorimetric intent,
with Use Black Point Compensation
checked, as shown:
Loading the printer profile in Print Space
tells Photoshop to convert the data sent to
the printer from the document source profile
to your printer profile.
27
Page 32

The conversion is applied only to the print
stream, leaving the source document
untouched. One advantage of this approach
is that you can easily print the same
document to many different outputs by
simply changing the profile in the print
space.
4 Once you’ve made your settings, click the
Print button. The Print window appears:
5 Choose Print Settings from the Options
pop-up menu. The Print settings appear:
6 Make sure the settings for Media Type and
Print Quality are the same as the ones you
used for the target when you built your
printer profile. Remember, profiles are
specific to a paper type and resolution.
7 When you’ve made your settings, choose
Color Management. The Color
Management settings appear:
8 Click No Color Adjustment. (If you don’t
do this, the printer driver will perform an
additional correction to the image data,
usually with disappointing results.) Then
click Print.
Your EPSON printer produces a colormanaged print that matches your image as
closely as is physically possible.
28
Page 33

Using the Workflow
Once you’ve configured the various components
in the workflow, you won’t need to change most
of the settings. SilverFast will automatically use
the correct profiles for transparency and reflective
scanning and will automatically deliver the color
in Adobe RGB (1998).
The only profile setting you need to change
regularly is the printer profile. You need to match
the profile to the printer and paper setting you’re
using for the print at hand. If you always use the
same paper, you don’t even need to change that.
Building the workflow demands a significant
initial investment of time and effort. But that
investment will reward you with accurate,
predictable color—for every image you print.
29
Page 34

CPD-16082
Printed in USA
 Loading...