

Page 1
EPSON 7900 & 9900
User Report
by Julian Mussi
© Spectraow, Inc.
415-382-8681
Nov 2008
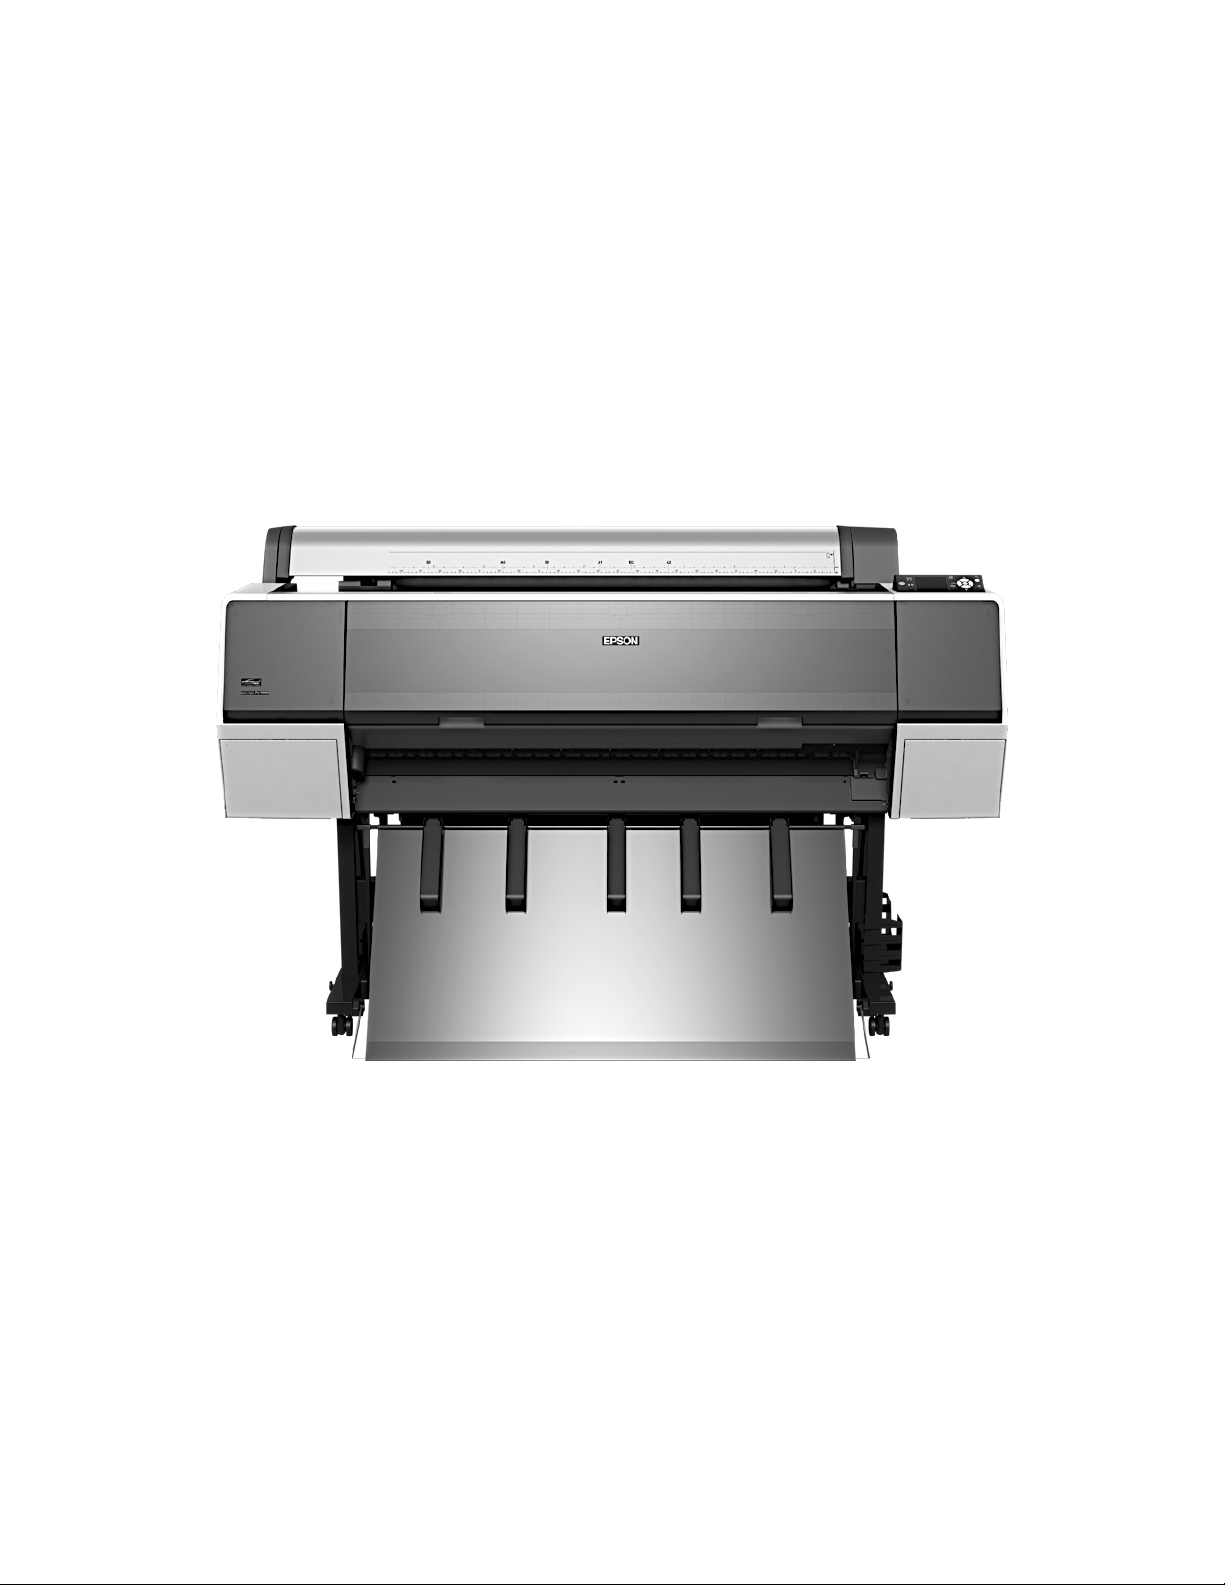
Introducing the Epson Stylus Pro 7900 and 9900
In May Epson announced two new professional inkjet printers, the Stylus Pro 7900 (24”) and Stylus Pro 9900
(44”). Far from a simple update to the existing 7880 and 9880, these printers form a separate product line, with
Epson continuing to produce the x880 series. The new models build upon the existing X880 series while introducing some fairly innovative functionality. Many of the changes are focused on improving speed and reducing
operating costs. At the same time Epson has expanded the color gamut with the new Ultrachrome HDR ink set
featuring an orange and green ink. One very welcome change is that the new printers have been designed to
allow both the Photo and Matte blacks to be loaded in the printer at all times, and switching between blacks is
now a simple and quick process. The paper feed system has also been totally redesigned, including the cutter. Additionally, Epson is also offering an optional spectrophotometer as an accessory for the printer. Overall,
Epson has made some bold moves in the design of this printer without compromising those elements that have
made their professional printers so successful in so many markets.
Page 2
The chart below highlights some of the differences between the X880 and the X900.
Epson 7900/9900 Epson 7880/9880
MSRP $3995/$5995 (without spectro) $2995/$4995
Inks C,lc,M,lm,Y,PK,MK,LK,LLK,O,G C,lc,M,lm,Y,PK,MK,LK,LLK
Inkset Epson Ultrachrome HDR Epson Ultrachrome K3 vivid
magenta
Auto cleaning and nozzle verication
Print Head Nozzles 360 180
Max Ink Cartridge size 700 220
Auto Black Switching Yes No
Dimension & Weight
Print time 16x20 @ 720 dpi
Yes No
53.4/73.4 X 26.3 X 48 186lbs/255lbs 53/67 X 30 X 46 131lbs/198lbs
3:47 min 6:41 min
Printer Hardware
The 900 series have a distinctive look that announces their break from the 880 series printers. The x900 is
much more rectangular and considerably more bulky, giving it a more industrial feel. The visual change also
results in some basic functional changes. Gone is the ubiquitous paper release lever, and the ink compartment drawers are also now locked, and must be released from the control panel. Connectivity is identical to
the x880, featuring a USB 2.0 port as well as a 10/100 BaseT ethernet port. A second USB port located on
the back of the printer provides a dedicated connection to the optional SpectroProofer. One thing that hasn’t
changed is that like the X880 series printers the X900 ships with 110ml cartridges, even though the smallest
cartridge size sold fr the X900 is 150ml. The stand and paper try have also received a minor makeover. It is
worth noting that Epson has not announced a 17” model of the x900 series, so the 4880 will remain the top of
the line 17” product for the time being.
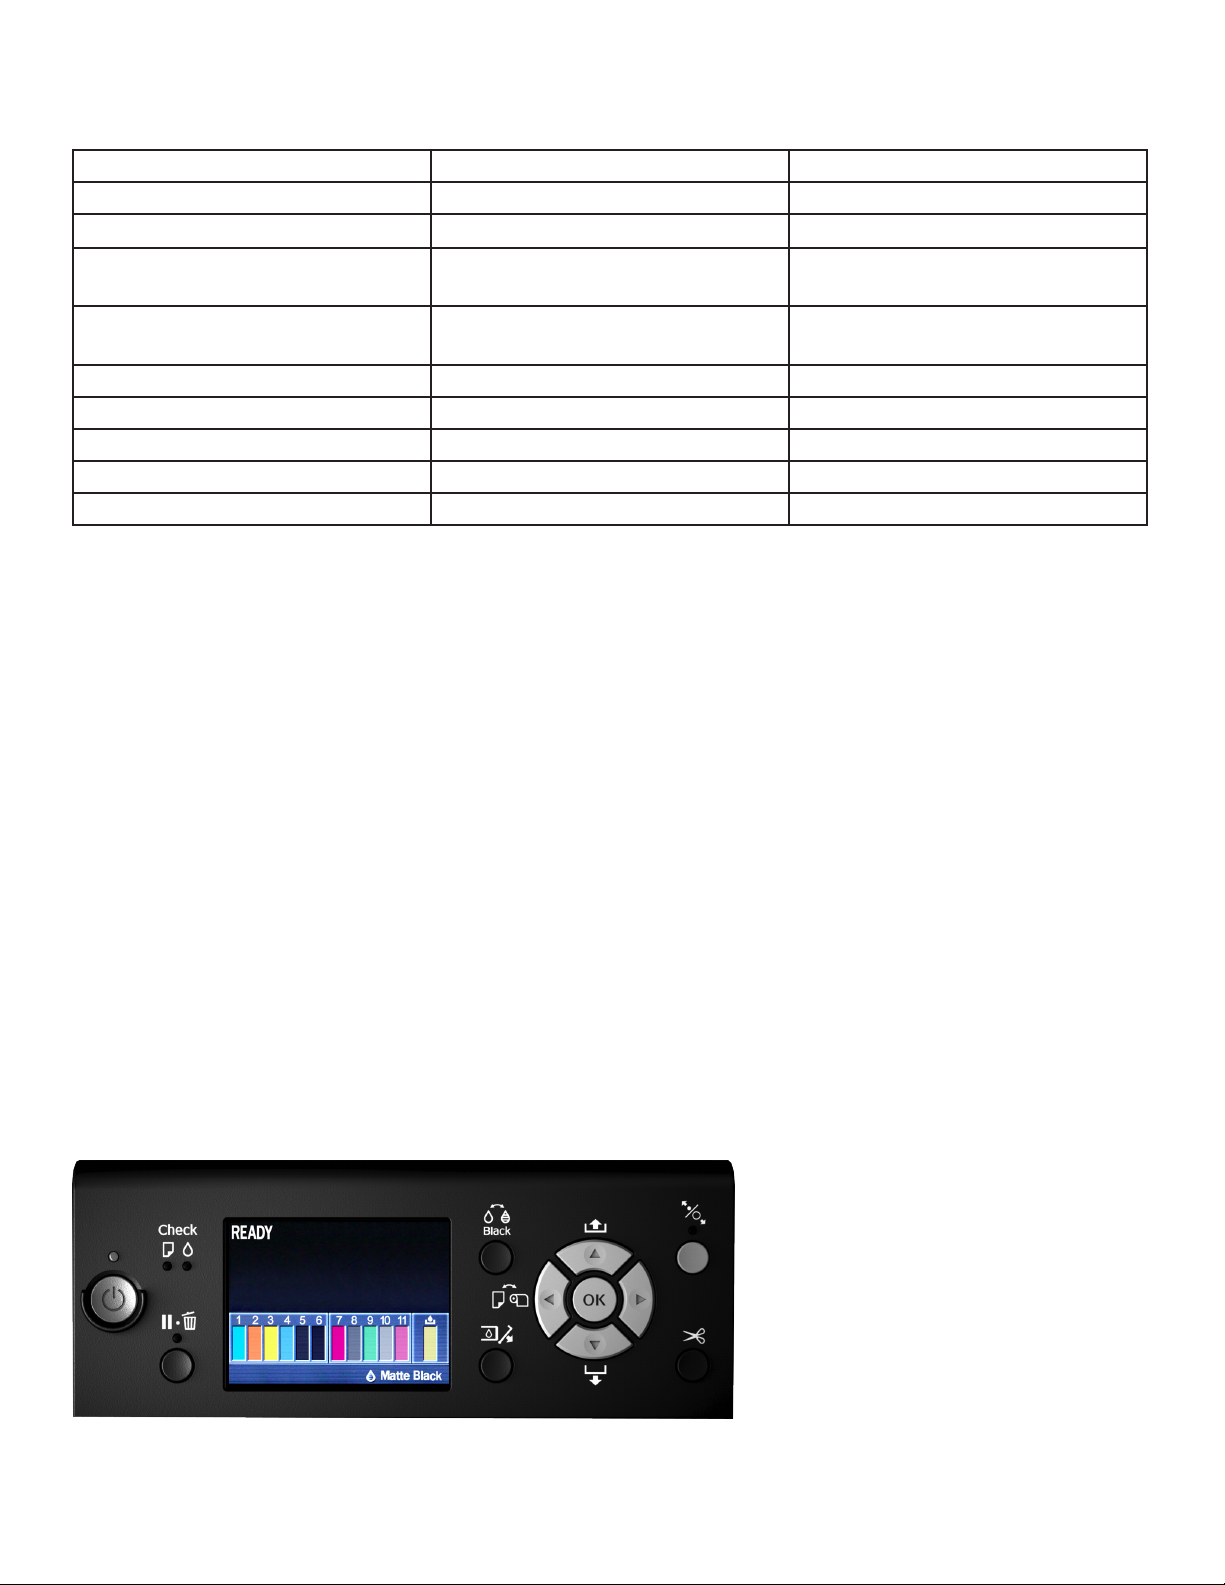
Control panel
While I don’t generally consider the printer control panel of vital importance, it has been signicantly upgraded
on the X900. Perhaps most striking is the change to a full color display. I’m not really sure how useful this is,
but it certainly looks great, and it makes
identifying which inks are low much
simpler. Compared to the X880 the menu
options are quite similar, making it familiar territory for current Epson users. The
paper selection portion of the menu is
the notable change. Like HP and Canon,
the X900 printers require that the paper
being loaded be selected from a list on
the printer. This list includes all standard
Epson papers as well as options for
“custom” papers. I found it quick and simple to select paper type from the list. This information is communicated to the driver and helps to ensure that the correct ink and platen settings are used when printing. Navigation
Page 3

in general was simple and the inclusion of animations on the screen aids users in performing simple tasks such
as loading the paper or changing inks.
Paper feed system
Epson’s media handling system has always been very
straightforward and has seen little change over the last
10 years. The simplicity of the system was its strength,
and while I’m not generally a fan of xing things that aren’t
broken, the new media handling system on the 900 series
is really nice.
My favorite change is the lack of a paper spindle. Instead,
the roll adapters are placed in the end of the paper roll
and locked in place with a lever. Once secured, the roll is
placed directly in the printer’s roll holder. To accommodate
different paper sizes the left roll holder moves on a track.
On the 9880 the 44” spindle has, upon occasion, had “issues” with overhead lights, so this is a welcomed improvement. After using it for a few hours I kept thinking
“why didn’t someone think of this earlier!”
The new system also utilizes an automatic paper feed system. All that is required to load a roll is to feed a
small amount of media into the printer, and then with the push of a button the printer automatically advances
the paper. The system can correct for small amounts of skew, and I found it to be fairly forgiving and easy to
load. The system also automatically winds the slack out of the roll and provides back tension. The 9900 also
has an optional take up reel for heavy production environments.
Another new feature on the X900 is end of roll encoding, a system that keeps track of roll length and paper
type. It does this by printing a bar code-like strip on the end of a roll before it is removed from the printer. The
next time the roll is loaded the printer will automatically retrieve the paper type and remaining length of the roll.
This is very handy when printing on multiple paper types, but can also be disabled if not required.
In my opinion the media handling on the 900 series is second to none. It’s also good to note that the printer still
accepts media up to 1.5 mm thick.
Cutter
This is an feature that at rst seems so minor as to barely merit mention, yet in reality is a signicant improvement. The paper cutter in the X900 has switched from a blade, to a self sharpening rotary cutter, giving it a
number of distinct advantages over the previous system. First, it allows the printer to make lightning fast cuts in
a single pass. The second improvement is that it can now cut through heavy ne art papers and even canvas.
For ne art printers this is a big time savings! No more sloppy hand cuts resulting in expensive media waste.
You can now send 4 canvas prints to the printer, go to lunch, and when you return have four cut sheets in the
paper bin. Lastly, by placing the cutter in a different section of the printer than the print head, the paper dust
from the cuts are less likely to attach to the print head and cause nozzle clogs - a potentially big deal!
Noise
This is another advertised feature I didn’t give much attention, but I’ve grown to appreciate this change. The
rst time I made a print on the 7900 I had to walk over to the printer to make sure that it was actually printing.
Like the X880 series, the suction is louder when the printer rst begins to print but is then reduced. On the
Page 4

X900 after several seconds the printer is almost silent. The fan can just barely be heard and the print head is
virtually silent. Even the cutter is quieter. Not a major issue for most, but a nice change regardless.
Print head
The print head in the X900 is a slightly modied version of the one in the 11880. Compared to the x880, this
head features a higher nozzle density, which as well as other less obvious internal changes designed to increase print efciency and make the head less prone to clogs. The minimum drop size is still an astoundingly
small 3.5 picoliters.
Speed
One of the most appreciable benets from the changes to the print head is that the X900 is nearly twice as
fast as the 7880 and 9880, even beating out the 64” 11880. It is also much faster than the Z3200 at comparable quality settings. The enhanced screening allows the printer to produce exceptionally high quality results
at 720 dpi. The improved clog detection and simpler method of aligning the print heads should allow for use of
the high speed setting without introducing horizontal banding. All of these improvements allow for a very fast
printer.
I think Epson is somewhat unique in creating such an un-compromised mix of speed and quality. This versatility should help to insure that these printers nd acceptance in a wide range of markets.
Spectroproofer
The SpectroProofer is an accessory unit from Epson that adds an automated X-Rite spectrophotometer to
the printer. HP shook up the industry by integrating a spectrophotometer on all of their Z-series printers. This
allowed for automated linearization, and automated prole creation on most models. While Epson is obviously
responding to this, they have taken a different path by selling the unit as an accessory and pricing it the way
they have.
At the heart of the SpectroProofer is the ILS20 spectrophotometer. Using a tungsten light source, the unit is
available in either UV or non UV-ltered models. There is also a user swap-able black or white backing plate.
While the ANSI standard is a black backing, most people perform measurements for calibration and prole
building with a white backing.
Measuring a single line of patches the Epson’s solution is much faster than the HP version. The SpectroProofer can read 15 patches per second, per line. The calibration patches are much smaller than those produced on
the HP Z-series, and therefore both print faster and use much less paper. Unfortunately, these speed advantages are reduced since the SpectroProofer locks a retractable guide over the paper before each measurement pass. The need to raise the guide, advance the paper and then lower the guide for each pass results
slows the measurement process. The actual measurement times for reading a standard proling chart were
similar to that of the Z3200. The total time print and measure the chart, however, was much less on the X900
because of the smaller patch size and better speed on the X900.
The software that accompanies the SpectroProofer has limited functionality and is denitely targeted towards
the proong and production markets. In fact, the SpectroProofer can only linearize the printer and measure
charts out of the box, ICC prole creation is not and option.
Page 5

Linearization
The linearization option is specic to media and resolution, although the user is given the option of linearizing
all resolutions in a row. To linearize, 720, 1440, and 2880 takes about 45 minutes. A single resolution takes
about 15 minutes, which is similar to the time it takes the HP to perform the same function. I like printers that
are able to re-linearize, it ensures that printer drift is held in check and provides piece of mind for high end
users. It is worth noting, however, that on their web site Epson is promoting improvements in their manufacturing process that have “eliminated the need for internal calibration devices.” This is intended to ensure that all
professional printers, within a given model, closely match one another. We have generally found this to be the
case, which calls into question the usefulness of linearizing using the Spectroproofer.
Chart Measurement and job verication
The Spectroproofer applications are all wizard driven and nicely organized. For measurement jobs the software
presents several standard proling chart options, as well as allowing custom charts to be select. Once the
chart is selected and printed, it is automatically measured and saved as a CGATS compatible measurement
le. What should be clearly stated here is that while the measurement le contains all the information needed
to create an ICC prole, the proling software required to process that le is not included. The assumption
behind this is that most people purchasing the SpectroProofer will already own a 3rd party proling package or
have a RIP with prole creation options. I’m not totally on board with this reasoning. While most RIP’s provide
the option of building proles it is often an additional feature that can easily cost over a $1000.
The SpectroProofer also has a nice system for job verication, and will be useful for the proong market. The
wizard driven process is simple, allowing a selected chart to be measured in conjunction with a proong job.
When printed, the bar is then measured by the SpectroProofer. The measured results are then compared to
the target values and the Delta-E is calculated. Tolerances can be set inside the software and a Pass or No
Pass is then printed below the color bar.
The Spectroproofer is also designed to integrate with 3rd party RIP solutions. In this capacity it can perform the
measurements needed to perform printer linearizations, and with the proper support, ICC prole creation. Most
of the RIP vendors I talked to were planning on supporting the Spectroproofer.
For the most part I like the SpectroProofer. It appears well-built and integrates nicely into the printer. In addition
to its measurement functions, it also includes a fan to speed up the drying time of prints, as well as temperature monitor. It does have limitations that may limit its appeal in some markets. For one it’s not cheap. At $1500
for the 24” model it’s around the same price as an Eye-One Photo package. However the 44” is an additional
$1000, creating a $2500 accessory, which is almost half the cost of the printer. And for $2500 bucks I would
expect the unit to ship with proling software, even something basic. The fact that measurements are done inline is nice, but the speed of the unit is somewhat slow. The linearization option seems logical but if the printer
is so stable, do I really need to linearize? In conclusion, I don’t think it is a great t for the photo market, and to
be fair it hasn’t been marked towards this group. Where the SpectroProofer will likely nd acceptance is in the
high-end proong market.
Operating Cost
Ink Wastage/Nozzle Clogs
I know that ink costs get the most attention when factoring the cost per print, but there are other factors that
should also be considered. In the past Epson printers have been fairly loose about ink wastage. The main reason
behind this was the reliance on aggressive ink purges to maintain the print heads. This was especially true in the
early generation of printers, where nozzle clogs happened often. The X900 benets from numerous improvements to the print heads that help to reduce, although not completely eliminate clogged nozzles.
Page 6

The X900 also incorporates an automated clog detection systems, a paperless method that uses light to detect
clogged nozzles. If clogged nozzles are detected the printer will automatically run a head cleaning cycle, and
then verify that the clogs were removed. This system is more elegant than reading printed patches to detect
clogged nozzles, and should further reduce wasted paper and ink.
Auto Switching Blacks
One of my only long standing complaints with Epson printers has been the requirement that users manually
swap black inks in order to get maximum quality on both matte and photo papers. The time required to complete
this switch was a hassle and could easily take 20 minutes, requiring levers be raised and lowered and a set of
drainage tanks be inserted and removed. Then there was the cost associated with the ink wastage, around $50,
making the whole process simply impractical for most users. I am very pleased to report that Epson has nally
done away with this.
The solution is essentially the same as employed with the Epson Stylus Pro 3800. While the black inks still share
a single print head, both blacks are now simultaneously loaded in the printer. The switch between inks still uses
a small amount of ink, but this has been reduced to less than 3ml of ink and takes only a few minutes. The whole
process can be initiated from a button on the control panel or the printer will prompt you to change black if a paper is loaded that calls for a different ink than is selected. This new system is very nice, and will make the printers
even more welcome in the ne art market.
Ink Tank Options
Typically the larger the ink tanks, the cheaper the ink, and this is denitely the case with the optional 700 ml tanks
on the X900. Running about $0.10 cheaper per ml than the Z3200 and 7880, that translates to roughly 20% lower
ink costs. I also like that there are 3 different tank sizes, and the printer allows mixed sizes to be loaded. Users
concerned that the 700ml tanks will expire before being used completely might consider using the larger sized
tanks only with the light colors. Even the 350 ml tanks represent a signicant cost savings compared to the 150
ml tanks, which are not a great deal at $0.59 a ml.
Below is a chart comparing ink cost using MSRP.
HP DESIGNJET Z3200 Epson 7/9880 Epson 7/9900
Number of installed
inks
Ink cartridge size 130 ml 110/220 ml 150/350/700 ml
MSRP cost per cart $83 single / $62 GE
Total volume of ink in
printer
Cost per replacement
set
Cost per mil of ink $.62 for single
11 colors
1 gloss enhancer (GE)
$132 double/$99 GE
($66 each)/($49.5 GE)
1560 ml 880 (110 ml carts)
$975 single
$1551 double
$.49 for double
8 colors 11 colors
$70 for 110 ml
$112 for 220 ml
1760 (220 ml carts)
$560 for 110 ml
$896 for 220 ml
$.63 for 110 ml
$.51 for 220 ml
$89.95 for 150 ml
$159.95 for 350 ml
$279.95 for 700 ml
3850 ml (350 ml carts)
7700 ml (700 ml carts)
$1759 for 350 ml tanks
$3079 for 700 ml tanks
$.46 for 350 ml
$.40 for 700 ml
Page 7

Ultrachrome HDR
In the beginning there was Ultrachrome. Ultrachrome K3 added the light light black, and K3 with Vivid Magenta saw a reformulation of the magenta and light magenta inks. The Espon X900 showcases the latest
Ultrachrome variant, dubbed Ultrachrome HDR (High Dynamic Range). This new version adds an orange and
green ink to the mix. At the same time the ink set features an improved pigment encapsulation that is supposed to eliminate bronzing and gloss differential. Gloss differential seems virtually nonexistent. Bronzing is
still present, although it is fairly minimal. While the HP Z3200 manages to eliminate bronzing using a clear
gloss enhancer, this increases the total amount of ink used considerably. Epson has struck a different balance
by signicantly reduced bronzing, without the need for any sort of coating.
Epson 7900 Prem Luster - Color Wire Frame
Orange and Green
The added inks are designed to expand the gamut, and this is fully
examined below. However, the added inks have other advantages.
They help to reduce ink costs since the printer can now produce
green using a single drop of green, rather than mixing yellow and
cyan. They are also help produce more uniform solid colors and
improve tints and transitions. Epson’s screening on the X880
series printers was exceptional and I’m happy to report that it as
good if not better on the x900. The improved screening means that
these printers can produce very high quality results at 720x720dpi
and benet from the speed afforded by this resolution.
HP Z3200 Pro Satin - Solid White
Top view
Gamut Comparisons
While they don’t tell the whole story, I’ve included several gamut
plots in this review. The plots are useful in showing the general
shape and size of the printer’s gamut. Compared to the Epson
X880, the X900 shows a dramatic expansion in gamut in the
orange and green regions, exactly what you would expect from
the added orange and green inks. This advantage is most evident
Epson 7900 Prem Luster- Color Wire Frame
HP Z3200 Pro Satin - Solid White
Lower view
in the midtones and 3/4 tones. When compared to the Z3200 it’s
much harder to draw any meaningful conclusions from the threedimensional plots. The X900 and Z3200 excel in different areas,
and overall the differences are fairly small, although the total
gamut volume of the x900 is larger than the Z3200.
To fully evaluate the output produced by the 7900, I made a number of prints which were then printed on the Z3200 and Epson
7880. The test prints were made on both photo and matte papers
using both custom and canned proles and different rendering
intents. The images featured both photographic imagery and test
imagery such as color ramps and rainbows. After carefully digesting all of the results, I came to the profound conclusion that all of
the printers tested produced excellent results. That’s not intended
as a cop out, but rather the endorsement of a belief that the aqueous inkjet printer has reached a level of maturity. That said, I don’t
want to imply that there aren’t differences between printers or objective improvements, simply that in regards
to color gamut the benets will not be appreciated by every user. The subtle difference in the test prints were
almost completely invisible unless the images were in the ProPhoto RGB color space.
Page 8

Looking at a large collection of prints it would be difcult to say that any printer consistently produced the best
prints. The greens were more saturated on the 7900 and Z3200 than those produced on the 7880. The 7900
hold more saturation in the shadows, while the Z3200 produced marginally punchier bright greens. In a few
specic cases, the Z3200 produced a red that was perceived as more saturated than the Epson’s. Interestingly,
the blue on the 7880 produced consistently good results, while the
Epson 7900 Prem Luster - Color Wire frame
Z3200 had a tendency to produce slightly purple blues.
Epson 7880 Prem Luster - Solid Magenta
Top view
For the proong market the gamut improvements translate into
more spot colors that can be reproduced. For packaging, exo
proong and textile design the expanded gamut is welcome. Standard SWOP/GRACoL proofs for press proong are achievable on
the X880 series printers as well as the 7900.
While not a specic attribute of the HRD ink set, the Epson pigment
is generally very compatible with third party media.
Overall I would say that the for the photographer the expanded
gamut offered by the x900 is not reason enough to justify upgrading
from a 7880. Nor would I suggest that gamut should be a signicant
factor in choosing between an Epson 7900 and a Z3200.
Epson 7900 Prem Luster - Color Wire frame
Epson 7880 Prem Luster - Solid Magenta
Lower view
Print Permanence
Wilhelm Imaging Research is one of leading resources on print
permanence. They regularly evaluate the professional printers and
publish the results on their website, http://www.wilhelm-research.
com. These results often form the basis for the permanence claims
by the manufactures, including Epson.
As of November, 2008, Wilhelm has not publicly released a complete set of results for the x900, but initial ndings show the printer
to be essentially the same as the x880. Listed below are the gures
for the 9880, which should be a good indication of the X900 prints.
One thing to note is that often times only the framed UV ratings are
given. As you can see the from the chart below the unframed prints
can have a signicantly shorter lifespan, as will prints not protected
under UV ltered glass. Black and white prints on this series of
printers should be extremely stable regardless of the display conditions. Even unframed color prints are comparably quite archival, in
many cases lasting twice as long as comparable traditional silver
halide prints.
unframed framed under glass framed under uv glass
Prm Glossy 260 60 85 98
Prm Glossy 260(B/W) 100 200 250
Prm Luster 260 45 85 200
Prm Luster 260(B/W) 315 315 315
UltraSmooth FA 57 108 175
UltraSmooth FA(B/W) 140 205 395
Page 9

Printer Drivers and MyEpson.com
The Drivers found on the x900 are very similar to those for the x880 printers. One nice change is that the
driver will now intelligently sync with Photoshop CS3/CS4. If color management is set to “Photoshop Manages
Colors” in Photoshop the driver will automatically disable printer color management, avoiding color manage-
ment conicts. The Mac driver now also supports 16
bit input when printing from OS X 10.5. This option
does give the driver more data from which to create
the screening; however, any real world advantage is
likely to be quite minimal.
From the printer utility you can also manually initiate
nozzle checks, head cleaning and alignment. A new
option now also allows users to create, manage, and
sync custom paper types with the printer.
The Epson driver is also where the Advance Black
and White mode is controlled. Because the Epson
black is not perceptually neutral it must be combined
with other inks to produce a neutral tone black and
white. The advance Black and White mode combines special screening and a carefully controlled
mix of color inks to produce very good looking black
and white prints. There is also the option of custom
toning the prints to give them a warm or cool tone.
My EpsonPrinter.com (coming soon)
MyEpsonPrinter.com is a web-based service for
managing Epson printers. We’ve had a chance to
test the beta of this service and it looks like it holds a
lot of promise. The service allows for basic tasks such as checking the ink levels of a remote printer as well as
tracking jobs and print costs.
While some of the functionality may be overkill for
small businesses with a single printer, it provides
administrators a number of tools to track and manage
a eet of widely distributed printers across an entire
organization. Since the service is hosted web based,
there is some question about how it will work with corporate intranets with tight security policies. MyEpsonprinter.com is under free public beta until March 2009.
It supports both the x880 and x900 series.
Page 10

Summary
Until recently Epson has really only had one professional printer, with 17”, 24”, and 44” variations. I think it’s
testament to the success of their design that they were able to dominate the ne art markets and large portions
of the proong market. Over the last ten years they have continued to rene the pro line to the current X880
series. Starting this year epson has begun to expand from their single printer line, rst with the eco solvent
GS6000 and now with the 900 series printers.
This new model line inherits many traits from the X880, and while it includes numerous advantages, still manages to feel distinctly Epson. For this I’m glad. They managed to take fairly signicant evolutionary step without completely starting from scratch. The black swapping has been successfully resolved to make using both
blacks practical for the rst time since the Stylus Pro 4000. I like the paper feed system immensely, and the
heavy duty paper cutter is a real time saver as well.
Almost all of the modications on this printer have been done with an eye to improving the efciency, speed
and operating costs, so it was surprising to see the new ink set incorporated into the printer as well. The result
is arguably Epson’s best photo printer. I think it’s equally appropriate to categorize the X900 as an extremely
fast photo printer, or an extremely high quality production printer.
That said, the Epson x880 is still an excellent product, and the X900 is clearly going to be competing with the
lower cost model. In this case, the X900 will be the clear choice for any high volume production environment.
The ability to use the larger sized 700 ml cartridges is a clear advantage, as is the printer’s improved speed.
The fact that the benets of speed are accompanied by easy switching between blacks and an improved cutter
make them well-suited for high end photographers and ne art printers. Coupled with the SpectroProofer the
printers should also be ideal proong printers, especially where Pantone and spot colors are often used. I have
mixed feelings about the SpectroProofer specically. It seems to be a well-designed device that, when coupled
with a supported RIP, should suit it’s target market. That said the cost of the unit is somewhat steep and it’s
limited software package makes it impractical for photographers and ne art printers.
I really like the X900 series, and I’m at a bit of a loss to nd any profound weaknesses with the printer. Compared to the HP Z3200 with it’s gloss enhancer, the X900 still has some lingering issues with bronzing. Also,
while the X900 has a larger color gamut overall, the HP Z3200 is still stronger in some regions. In terms of
color gamut the two printers are so capable as to make general gamut comparisons somewhat academic.
What really makes the Epson X900 printers stand out is that they are able to blend speed and quality without
compromising in either aspect.
Strengths
Lowered Ink Waste - No need to manually swap black cartridges.
Color Gamut - About as good as it gets for pigment inks.
Black and White Print Quality - Very good using advanced black and white mode.
Print Quality - Very deep blacks, works well with 3rd party papers.
RIP Support - Epson printers are supported by virtually every RIP vendor.
Speed - Very fast printer while still producing photo quality.
Ink Tank Size - 150ml, 350ml, 700ml tank sizes provide options and help reduce cost.
Paper Feed System - Best roll handling system I’ve worked with, roll length tracking works well.
Cutter - Cuts through just about everything!
Weaknesses
Maintenance - Printer still has a few head clogs and wastes small amounts of ink when swapping blacks.
SpectroProofer - Device works well but limited software package and price reduces value.
No 17” version - As of this time there is no indication that a 17” model will be released.
Bronzing - Minor but still present.
 Loading...