


Administrator’s Guide
M00133100EN

All rights reserved. No part of this publication may be reproduced, stored in a retrieval system, or transmitted in any
form or by any means, electronic, mechanical, photocopying, recording, or otherwise, without the prior written
permission of Seiko Epson Corporation. No patent liability is assumed with respect to the use of the information
contained herein. While every precaution has been taken in the preparation of this manual, Seiko Epson Corporation
assumes no responsibility for errors or omissions. Neither is any liability assumed for damages resulting from the use of
the information contained herein.
Neither Seiko Epson Corporation nor its affiliates shall be liable to the purchaser of this product or third parties for
damages, losses, costs, or expenses incurred by purchaser or third parties as a result of: accident, misuse, or abuse of
this product or unauthorized modifications, repairs, or alterations to this product, or (excluding the U. S.) failure to
strictly comply with Seiko Epson Corporation’s operating and maintenance instructions.
Seiko Epson Corporation shall not be liable against any damages or problems arising from the use of any options or any
consumable products other than those designated as Original Epson Products or Epson Approved Products by Seiko
Epson Corporation.
NOTICE: The contents of this manual are subject to change without notice.
©Seiko Epson Corporation 2020. All rights reserved.
Tradem arks
• Microsoft, Windows, Windows Server, and Internet Explorer are registered trademarks of Microsoft Corporation
in the United States and/or other countries.
• EPSON is a registered trademark of Seiko Epson Corporation.
• Exceed Your Vision is a registered trademark or trademark of Seiko Epson Corporation.
All other trademarks are the property of their respective owners and used for identification purpose only.
Marks used in this guide
The following marks are used in this guide to indicate important information.
Indicates information with which you must comply when using this product. Ignoring this
information and mishandling the product may cause it to fail or malfunction.
Indicates an additional explanation or information we want you to know.
Screens and Procedures in This Guide
Depending on your environment, the screen shots used in this guide may differ from the actual screens displayed.
However, you can still use the same procedures described in this guide.
2

Organization of this manual
The following instruction guides are included with this product.
PP-100NII Setup Guide Briefly describes how to set up this product with illustrations. See the
PP-100NII Administrator’s Guide for more information.
PP-100NII User’s Guide (PDF) Presents detailed information users need to know such as how to install the
software, the product functions and operations, as well as maintenance
information. It is included on the Discproducer Utility & Documents Disc.
PP-100NII Administrator’s
Guide (PDF)
Presents detailed information necessary for setting up, operating, and
managing this product. It also describes how to troubleshoot various
problems.
3

Table of Contents
Trademarks.....................................................................2
Marks used in this guide...............................................2
Screens and Procedures in This Guide.......................2
Organization of this manual ........................................3
Before Using This Product........ 6
■ For safe use ............................................................ 6
Cautions for the power source..................................... 8
Cautions for using ......................................................... 9
■ Cautions for CD/DVD/BD discs ...................... 11
■ Uses of this product............................................ 11
■ Incidental loss arising from the use of this
product................................................................. 11
■ Restriction of Use ............................................... 11
■ Continuous operation of this product ............. 11
■ Open source software license............................ 11
■ Setting the language............................................42
Administration and Management
................................................ 43
■ Managing jobs .....................................................43
Checking job information.......................................... 43
Checking the job processing status........................... 44
Pausing jobs ................................................................. 45
Resuming jobs .............................................................46
Canceling jobs .............................................................47
Priority Publishing...................................................... 48
Deleting jobs................................................................ 49
■ Managing users....................................................51
Checking user information........................................ 51
Registering users .........................................................52
Changing user information ....................................... 55
Deleting user information..........................................57
Changing password.....................................................58
Preparation ............................ 12
■ Installation...........................................................12
Installation location requirements ............................13
Installation space .........................................................13
■ Setup procedure..................................................14
■ Connecting the Ethernet cable ......................... 15
■ Connecting the power cord............................... 15
■ Installing the ink cartridges............................... 16
■ Setting the security lock switch......................... 19
■ Setting the Publish Mode................................... 20
Types of Publish Modes..............................................20
Installing the stackers..................................................23
Setting procedure.........................................................25
■ Network settings ................................................. 26
■ Registering an administrator.............................31
■ System settings.................................................... 33
Output device settings ................................................33
Notification email transmission settings..................36
Setting the date and time............................................40
■ Changing the Publish Mode ..............................60
Maintaining Your Product...... 62
■ Backing up and restoring data...........................62
Backing up data........................................................... 62
Restoring data.............................................................. 64
■ Restoring to initial state .....................................65
■ Checking maintenance information.................68
Checking device information.................................... 68
Downloading operation log....................................... 69
Troubleshooting..................... 70
■ Error messages and remedies ............................70
■ Problems and their remedies.............................76
Power/Control Panel problems................................. 76
Disc writing problems................................................ 78
Label printing problems............................................. 79
Password problems ..................................................... 81
Other problems ...........................................................81
4

■ Checking with EPSON Total Disc Monitor .... 83
■ When discs cannot be published ...................... 85
■ Disc does not come out...................................... 87
Drive tray does not come out.....................................87
Printer tray does not come out ..................................88
■ Disc recording surface is stained with ink ......91
Appendix ................................ 94
■ Where to get help................................................94
Before Contacting Epson............................................94
Help for Users in the United States and Canada .....94
Help for Users in the Europe (EMEA)......................94
Help for Users in Australia .........................................95
Help for Users in Southeast Asia ...............................95
■ Product specifications........................................ 97
Basic specifications......................................................97
■ Ink and Disc ......................................................102
Ink cartridges .............................................................102
Discs ............................................................................102
5
Before Using This Product
Before Using This Product
For safe use
• To use this product safely, be sure to read this guide as well as the other instruction guides included with this
product before using it.
• Keep this guide at hand so that you can resolve any questions you have about this product.
To prevent harm to customers and other people or damage to property, this guide contains the following symbols and
warning displays for operations and use that may be dangerous. Please read the guide after thoroughly understanding
this information.
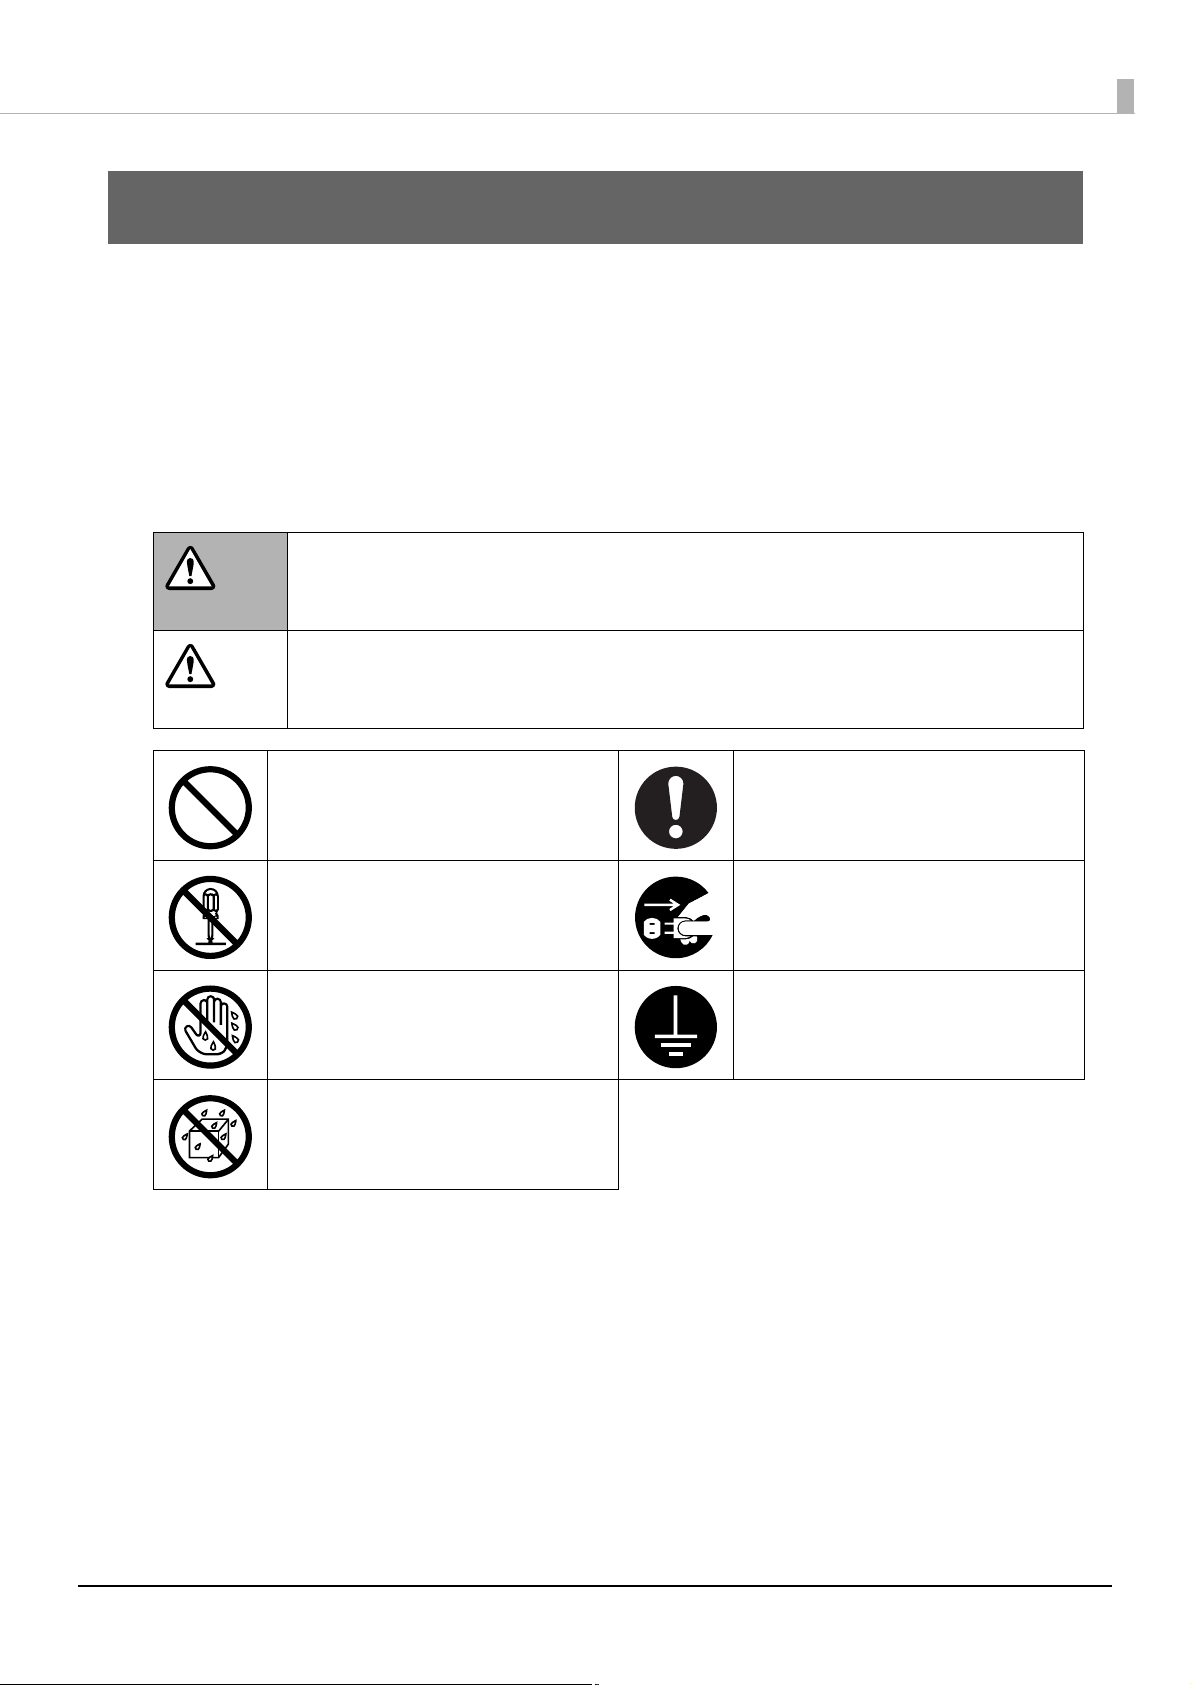
If this display is ignored and the product is mishandled, it may result in death or serious injury.
WARNING
If this display is ignored and the product is mishandled, it may result in bodily harm or
CAUTION
physical damage.
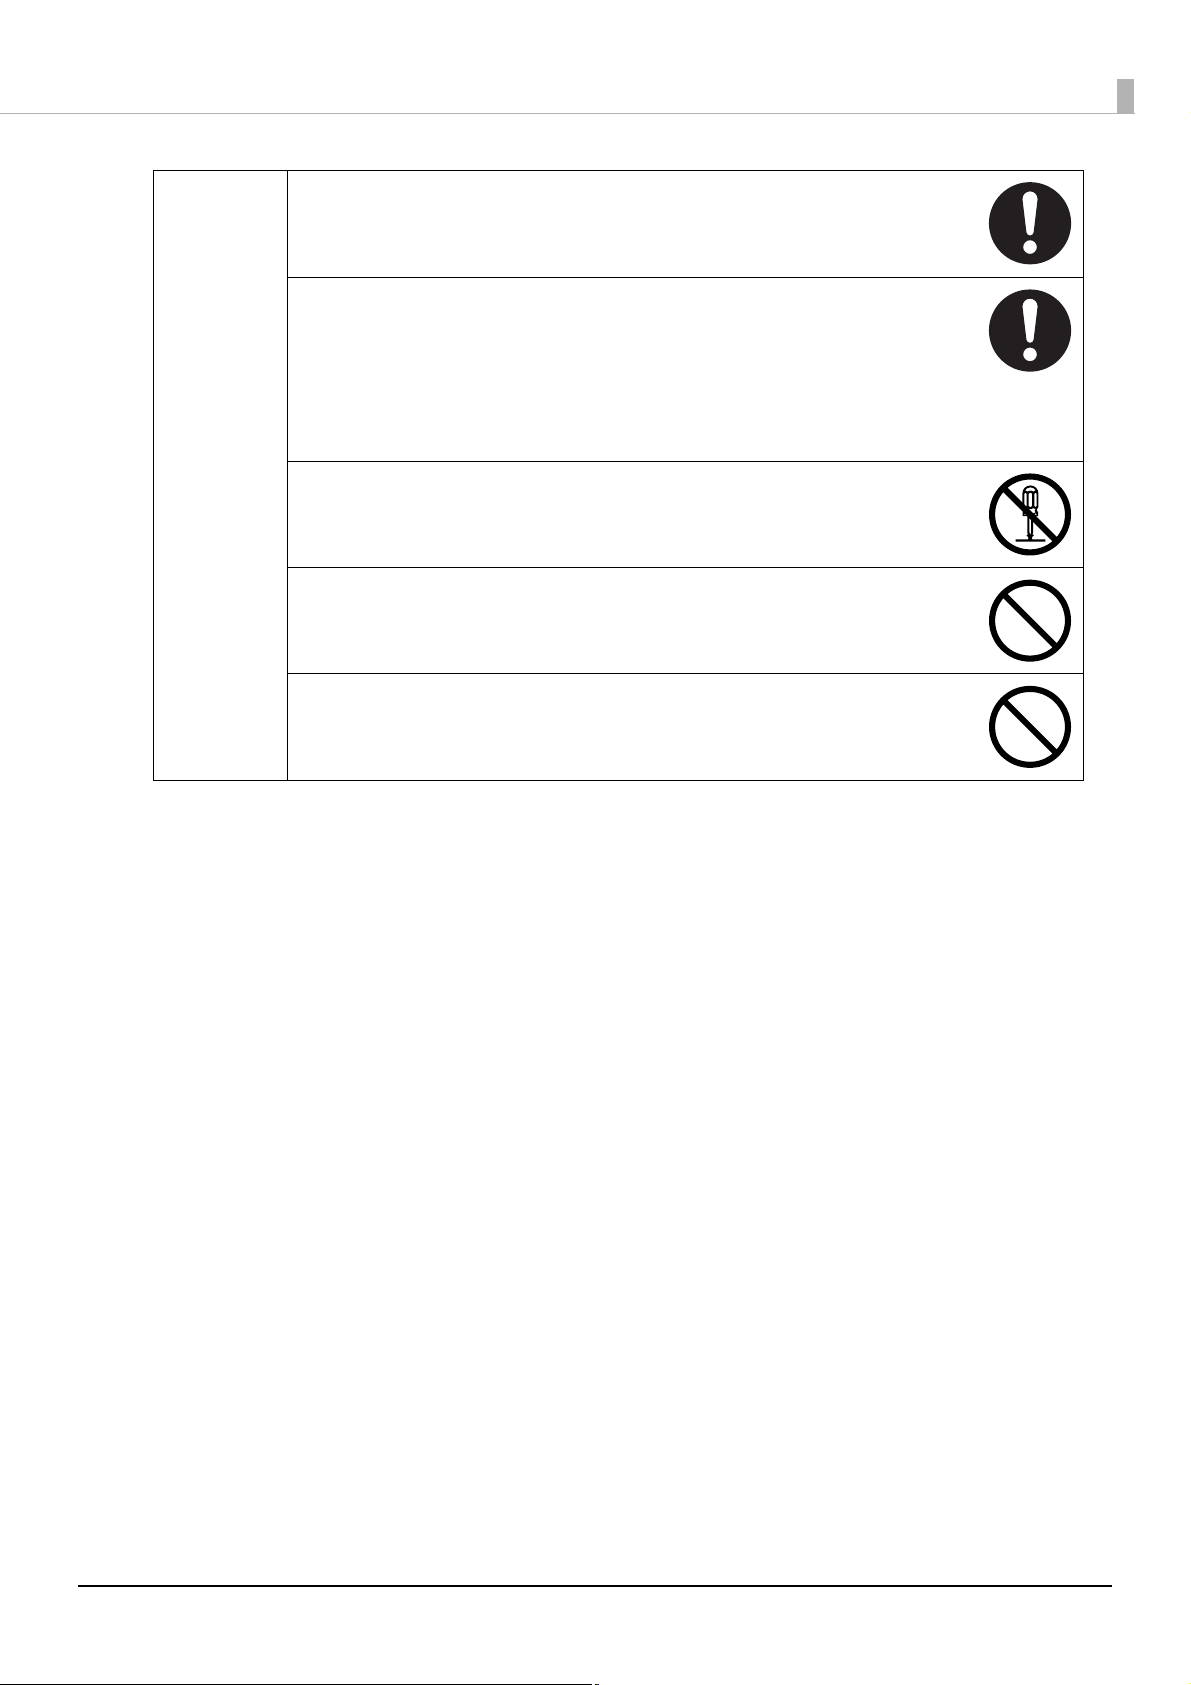
Indicates action that should not
be performed (prohibited).
Indicates that disassembly is
prohibited.
Indicates that touching the
product with wet hands is
prohibited.
Indicates that the product must
not come in contact with water.
Indicates items (instruction,
action) that must be performed.
Indicates that the plug should be
disconnected from the outlet.
Indicates that the product must
be used with the power cord
grounded.
6
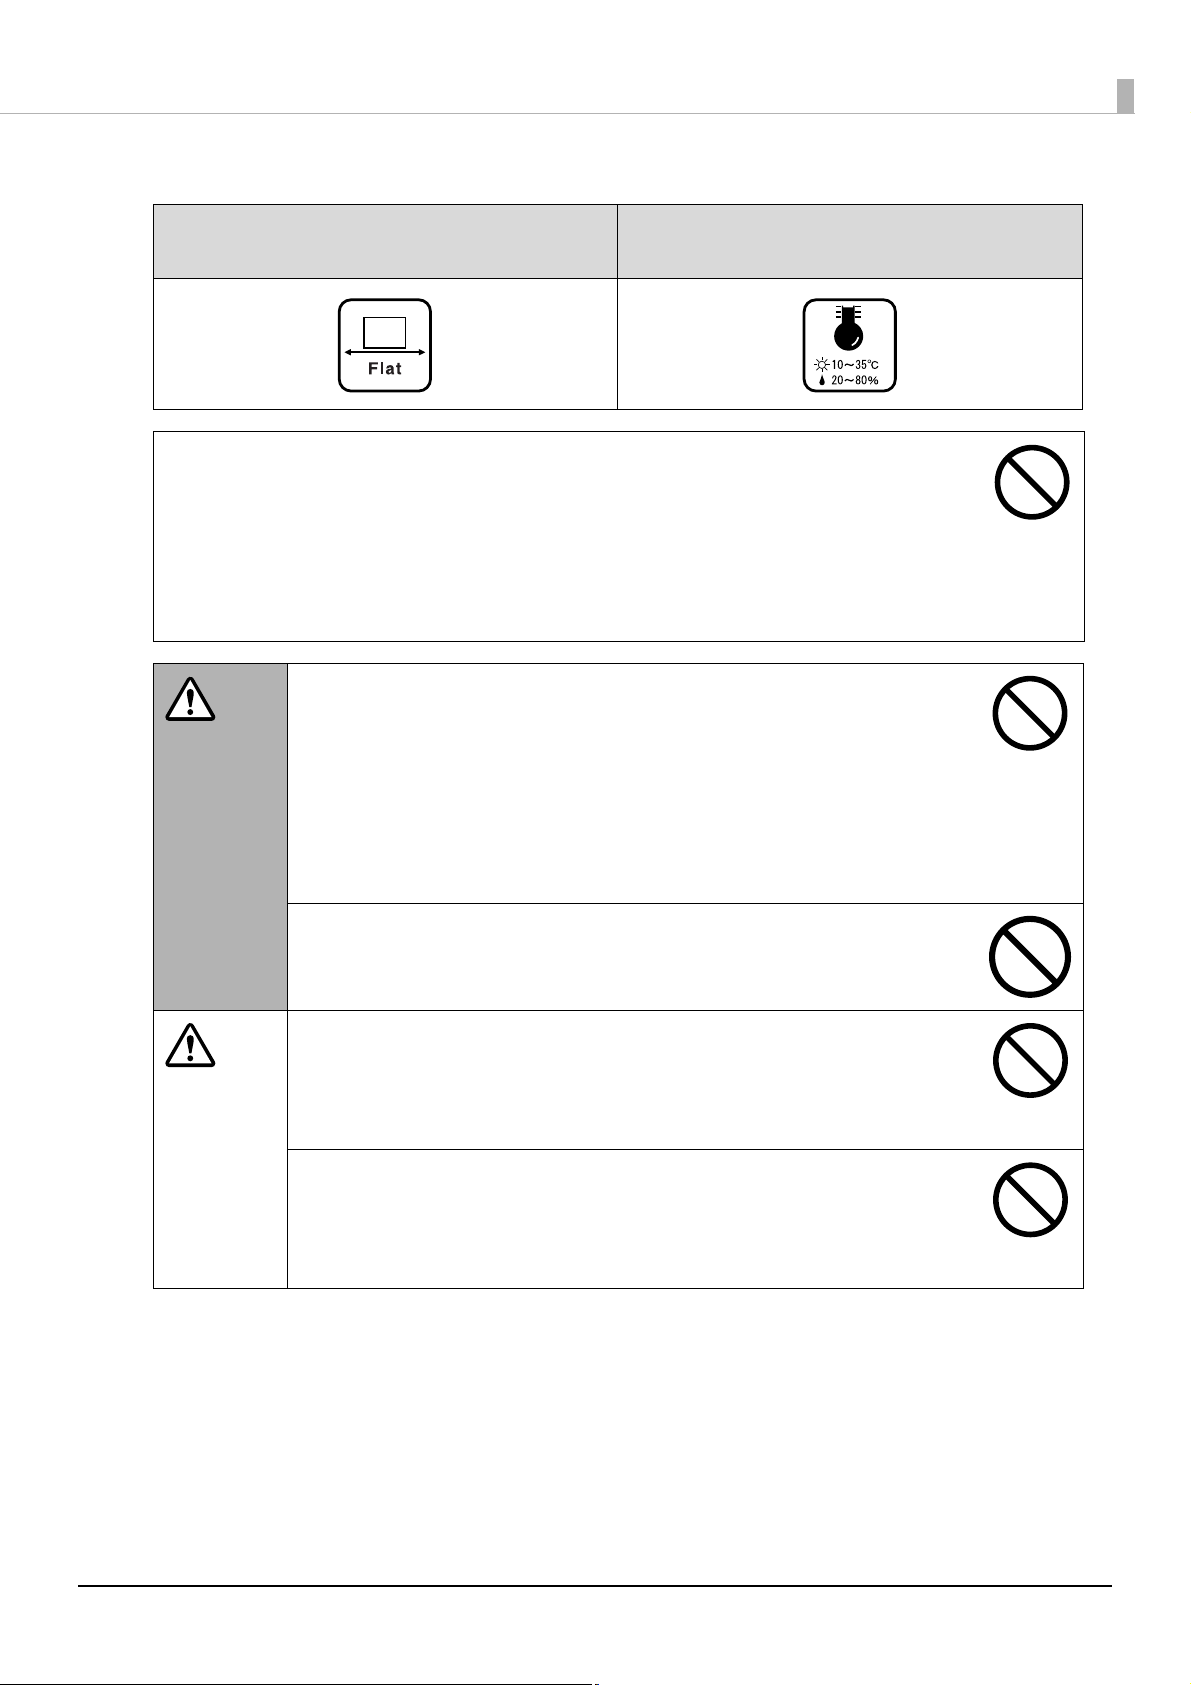
Install this product in the following type of place.
Before Using This Product
Place that is flat and stable
• When using this product in a place where static electricity is easily generated, use an
antistatic mat or other product to prevent static electricity.
• Do not install on a surface that is smaller than the base of the product.
If the rubber bases on the bottom of the product extend beyond this surface, it places stress on
the internal mechanisms, which negatively affects disc writing, printing and transporting. Be
sure to install on a flat surface that is wider than the product so that all of the feet on the base of
the product rest firmly on it.
Do not block the air vents on this product.
Blocking the air vents may result in internal heat build-up and fire.
WARNING
Do not install in the following types of places.
• Tight spaces where ventilation is poor, such as in a closet or on a bookshelf
• On a rug or bed
If you place the product by a wall, leave more than 10 cm between the back of the
product and the wall. It is also necessary to leave enough space in front of the
product to open and close the disc cover.
Place with the following temperature and
humidity range
CAUTION
Do not install in a place where volatile substances, such as alcohol or paint
thinner, are present or in a place where there is fire.
This may result in electric shock or fire.
Do not install or store in an unstable place (such as on a wobbly or tilted
surface), in reach of children, or in a place subject to vibration from other
machines.
There is a risk that it could drop or fall over, resulting in injury.
Do not install in places where there is excessive moisture or dust, risk of
getting wet, direct sunlight, severe changes in temperature and humidity, or
close to heating and cooling devices.
There is a risk of electric shock, fire, and malfunction or failure of this product.
7
Cautions for the power source
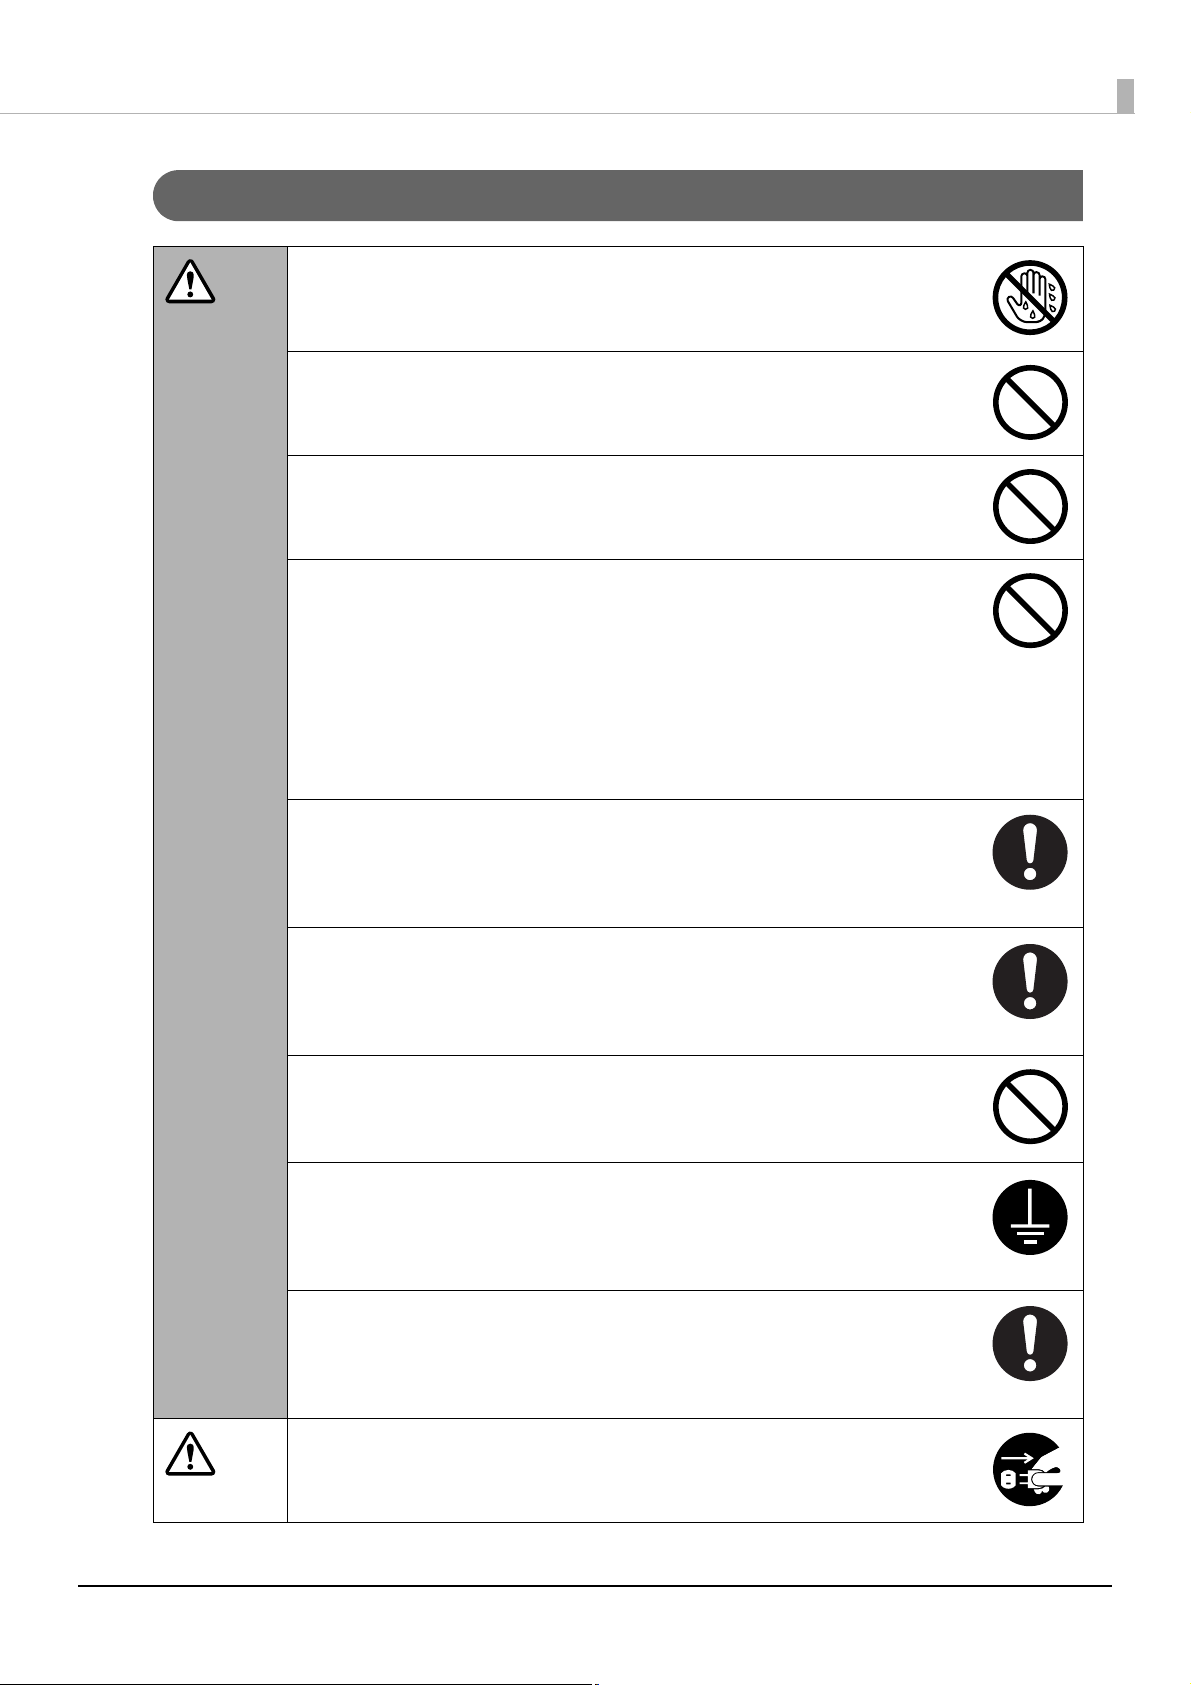
Do not connect or disconnect the power plug with wet hands.
This may result in electric shock.
WARNING
Use only the type of power source indicated on the product’s label.
Use of the wrong type of power source may result in electric shock or fire.
Do not plug the power cord into an outlet with many other cords connected
to it.
This may result in heat build-up and fire.
Do not use a damaged power cord.
This may result in electric shock or fire.
If the power cord is damaged, consult your dealer for repairs.
Observe the following when handling the power cord.
• Do not modify the power cord
• Do not place heavy objects on the power cord
• Do not bend, twist or pull the power cord by force
• Do not wire heating appliances nearby
Before Using This Product
Be careful when handling the power plug.
Mishandling may result in fire.
• Do not leave plugged into a power source having foreign matter such as dust
• Firmly insert the prongs of the power plug all the way
When you disconnect the power plug from the outlet, be sure to turn off the
power and hold the plug as you pull.
If you stretch the power cord, it may become damaged, which could result in
electric shock or fire.
Be sure your AC power cord meets the relevant local safety standard. Also, do
not use the power cord included with this product with any other devices.
This may result in electric shock or fire.
For safety reasons, be sure to ground the power cord.
The power code included with the product is a 3-pin cable with a power system
grounding (PE) terminal, so connect it to an outlet with a grounding electrode and
ground it securely.
Regularly disconnect the power plug from the outlet and clean the base of
the prongs and between the prongs.
If you leave the power plug connected to an outlet for a long time, the base of the
power plug prongs may become dusty, which may result in short circuit and fire.
CAUTION
For safety, be sure to disconnect the power plug from the outlet when you
will not be using the product for a long time.
8
Cautions for using
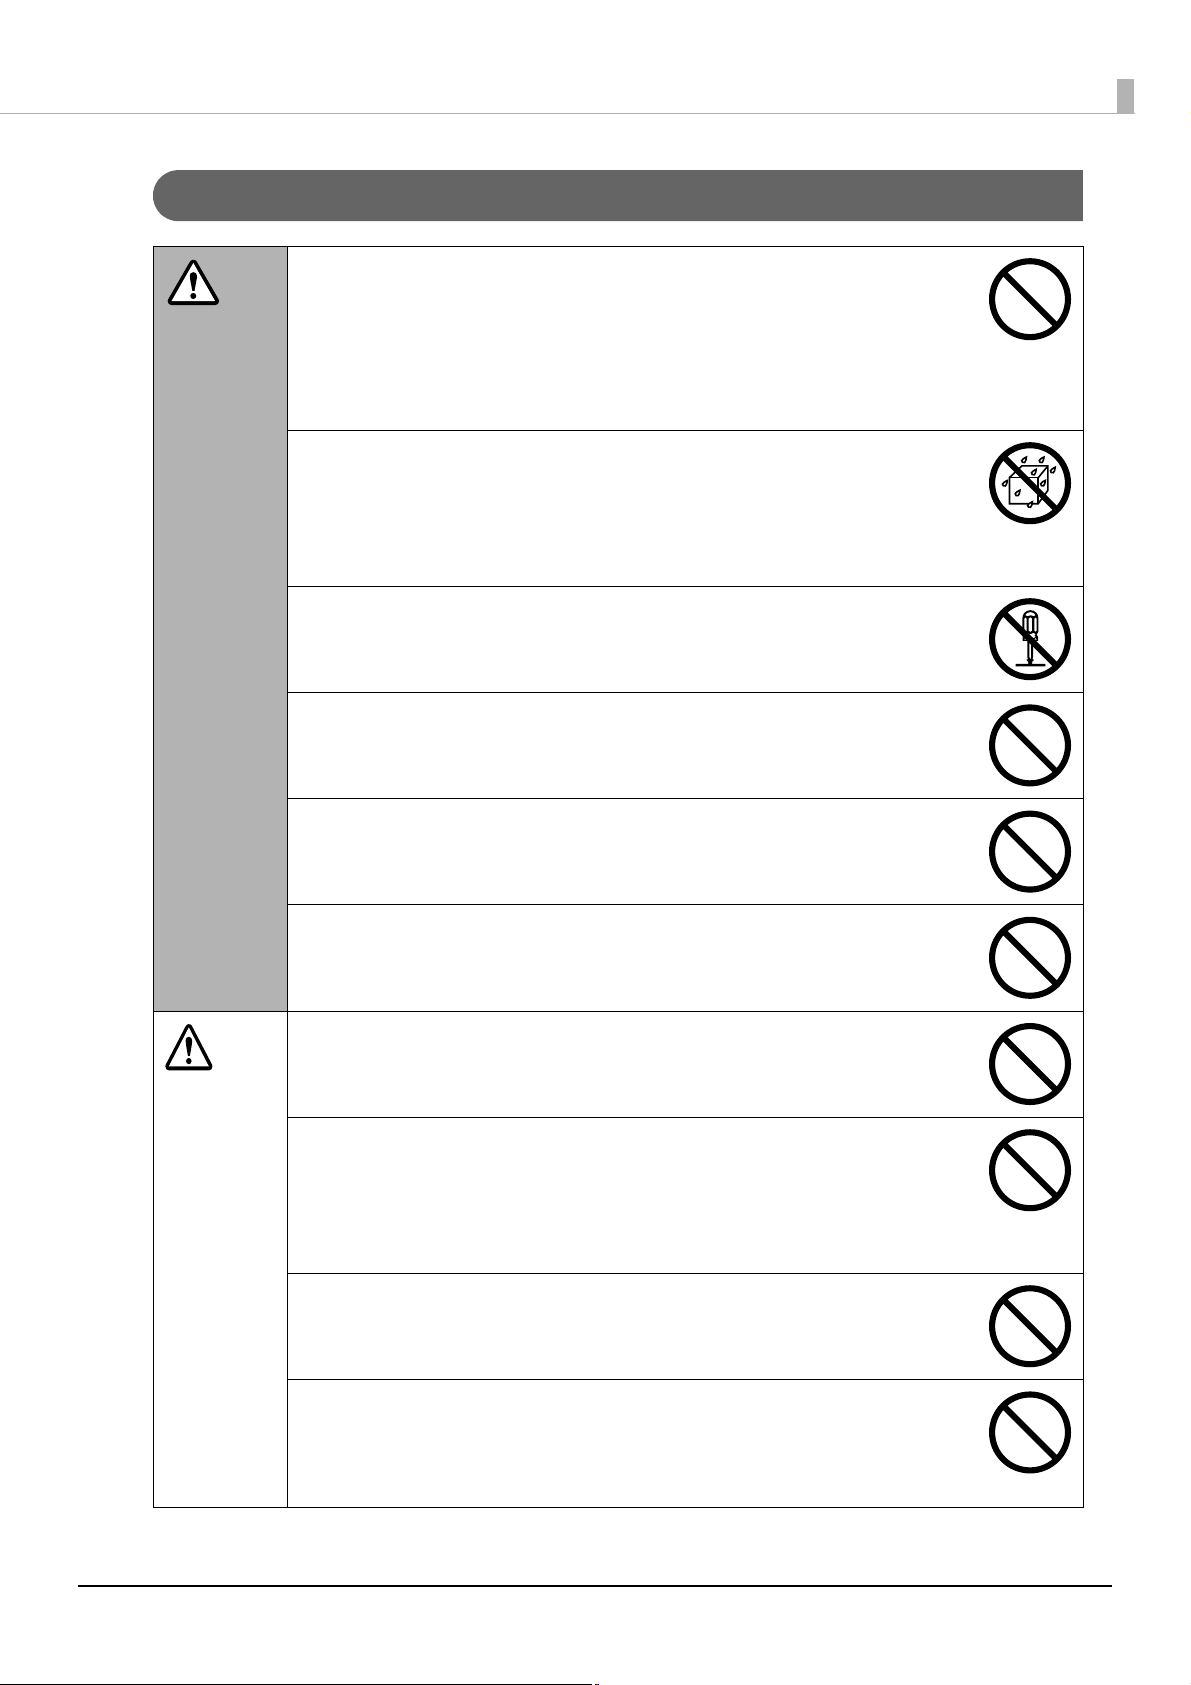
Do not continue to use under abnormal conditions such as smoke, unusual
odors or sounds.
WARNING
This may result in electric shock or fire.
Immediately turn off the power, disconnect the power plug from the outlet, and
contact your dealer or the Epson Repair Center about repairs. Servicing the
product yourself is dangerous, so never attempt it.
If a foreign object, water or other liquid enters the product, do not continue
to use it.
This may result in electric shock or fire.
Immediately turn off the power, disconnect the power plug from the outlet, and
contact your dealer or the Epson Repair Center about repairs.
Do not attempt to service the product yourself.
This may result in injury, electric shock, fire or malfunction.
Before Using This Product
CAUTION
Do not use flammable gas sprays inside or around this product.
There is a risk that gas will build up and a spark may cause a fire.
Do not connect the cables (cords) to the product in a way other than that
specified in the instruction guide.
This may result in fire. Also, the connected devices may be damaged.
Do not insert or drop metal or flammable objects into the air vents or other
openings.
This may result in electric shock or fire.
Do not step or place heavy objects on top of the product.
Be especially careful in households with small children. There is a risk that it could
fall over or break, resulting in injury.
When connecting this product to a computer (or other devices) using a cable,
be careful to orient the connector the right way.
The connectors on the cables have a specific orientation. If you connect
incorrectly oriented connectors to both this product and the computer (or other
devices), this may result in the malfunction of both connected devices.
Do not connect a telephone line to the Ethernet interface connector.
This may result in damage to the telephone line or this product.
When storing or transporting this product, do not tilt it, stand it on end, or
turn it upside down.
When transporting the product, be sure to package it in the original box to
protect it from any impact.
9
Before Using This Product
For safety reasons, if you move this product, first check that the power is off,
the power plug is disconnected from the outlet, and all of the wires are
disconnected.
When replacing the ink cartridges, be careful that the ink does not contact
your eyes or skin.
If ink gets into your eyes, immediately flush them with water, and if it gets onto
your skin, immediately wash the area with soap and water. Otherwise you may
have bloodshot eyes or a mild inflammation. In the rare event that there is a
problem, immediately consult a physician.
Do not disassemble the ink cartridges to replenish or refill the ink.
Do not shake the ink cartridge too hard.
The ink cartridge may leak if you shake it too much.
Store ink cartridges out of the reach of children. Also, do not ingest the ink.
10

Before Using This Product
Cautions for CD/DVD/BD discs
Before using this product, run an operation check to make sure it is functioning normally. Also, back up the data on
CD/DVD/BD discs onto separate media as necessary. Data may be damaged or lost at the following times:
• When there is static electricity or electrical noise
• During improper use
• During a malfunction or repair
• When there is damage due to a natural disaster
Even if the product is still under warranty, Epson accepts no responsibility for data that is lost or damaged due to
causes not limited to those listed above.
Uses of this product
This product is for business use and not for household use.
Incidental loss arising from the use of this product
Should you not obtain the results you expect from this product, including the bundled software, we cannot provide
compensation for incidental loss arising from that fact, such as expenses required for the use of this product and lost
earnings that would have been gained through the use of this product.
Restriction of Use
When this product is used for applications requiring high reliability / safety, such as transportation devices related to
aviation, rail, marine, automotive, etc.; disaster prevention devices; various safety devices, etc.; or functional /
precision devices, etc., you should use this product only after giving consideration to including fail-safes and
redundancies into your design to maintain safety and total system reliability. Because this product was not intended
for use in applications requiring extremely high reliability / safety, such as aerospace equipment, main
communication equipment, nuclear power control equipment, or medical equipment related to direct medical care,
etc., please make your own judgment on this product’s suitability after a full evaluation.
Continuous operation of this product
The hardware of the product is designed to be capable of being operated 24 hours a day, however, to keep the system
condition stable, roughly once a month, turn the product off and perform the periodic cleaning.
See “Periodic cleaning” in the PP-100NII User’s Guide.
Open source software license
This product uses open source software in addition to Epson proprietary software. For a list of the open source
software used in this product as well as license terms for this software, see Open Source Software License Agreement
on the Discproducer Utility & Documents Disc included with the product.
11
Preparation
Installation
Install this product in a suitable location with adequate space.
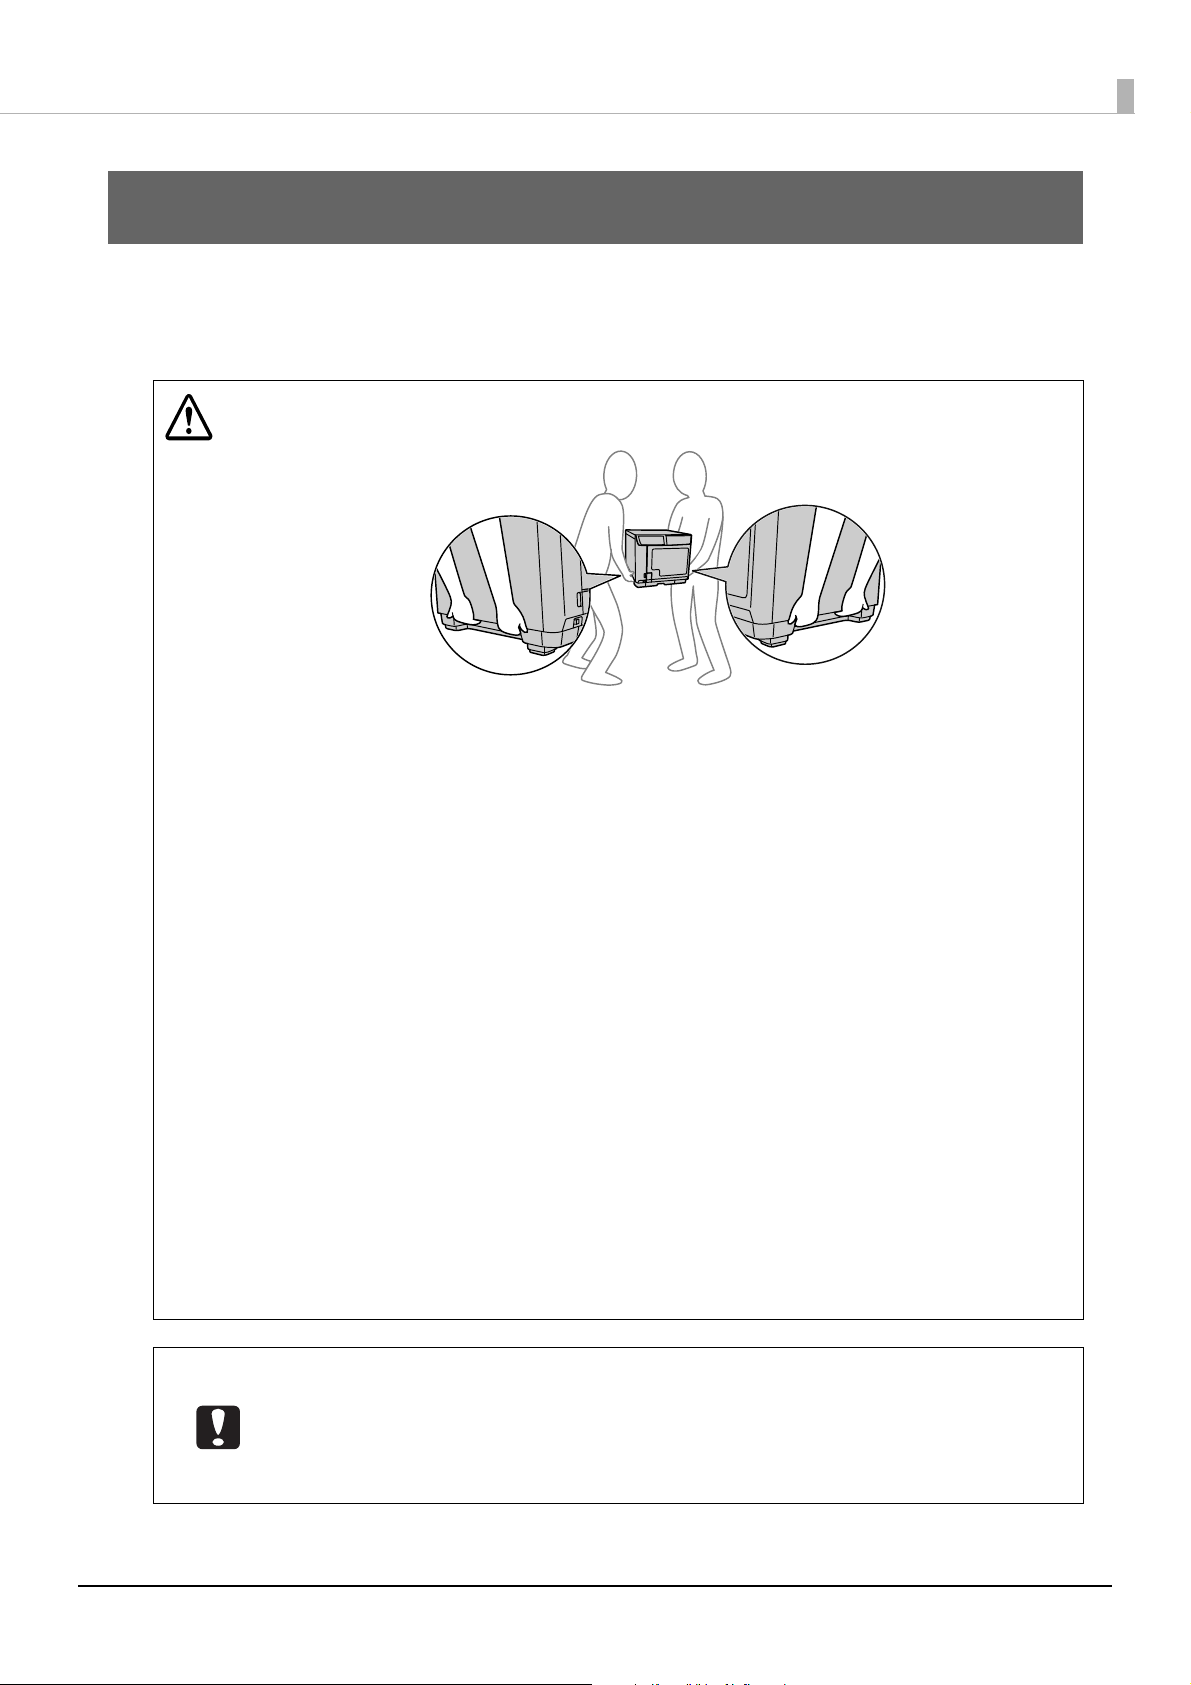
• Make sure that the product is lifted by two people.
CAUTION
Preparation
• The weight of this product is approximately 26 kg. When this product is lifted, it should be
lifted on both sides by two people holding the recesses on the sides as shown in the
illustration on the left. Holding any part other than the ones indicated in the illustration on
the left when carrying the product may result in damage to the product. In particular,
carrying the product while the disc cover, ink cartridge cover, or Stacker 4 is open may
result in the product being dropped, or deformed and damaged.
Furthermore, when putting down this product, take care not to trap a finger between the
product and installation surface.
• When lifting this product, make sure that, for example, you sufficiently bend your
knees and your posture is such that excessive stress is not placed on your body.
An unnatural posture when lifting the product may result in an injury, or the product being
damaged.
• When moving the product, do not tilt it 10 or more degrees in a forward or backward
direction, or sideways direction.
The dropping or other mishandling of the product may result in an accident.
• Do not place a heavy object on the top of the product.
Subjecting this product to excessive force may result in a malfunction.
However, it is possible to place one unit of this product on top of another. In such a case,
make sure the tops and bottoms are oriented the same, and the exterior of the units are
aligned.
Take sufficient care to prevent a unit from dropping or falling. Also, do not place more
than one unit on top of another.
• In a location where static electricity is easily generated, use an antistatic mat and other
product to prevent static electricity.
• Do not install this product in locations with large amounts of dust, dirt, or cigarette smoke.
• Do not use or store in high-temperature, high-humidity environments. This can cause the
label surfaces to blur and stick together.
12
Preparation
Installation location requirements
Install this product in the following type of location.
• Flat, stable location that can fully support the product weight (approx. 26 kg)
• Location that is wide enough to fully hold the product base
• Location where the air vents on the product are not blocked
• Location where the product is not subjected to vibrations or jolts
• Location where the product has access to its own dedicated power outlet
• Location that allows disc loading and unloading
• Location with sufficient space for attaching accessories, replacing consumables, and enabling regular maintenance
and care
• Location that satisfies the following requirements
Temperature Operation: 10 to 35°C, Storage: -20 to 40°C (Less than one month if at 40°C)
Humidity Operation: 20 to 80% RH, Storage: 5 to 85% RH (no condensation)
Installation space
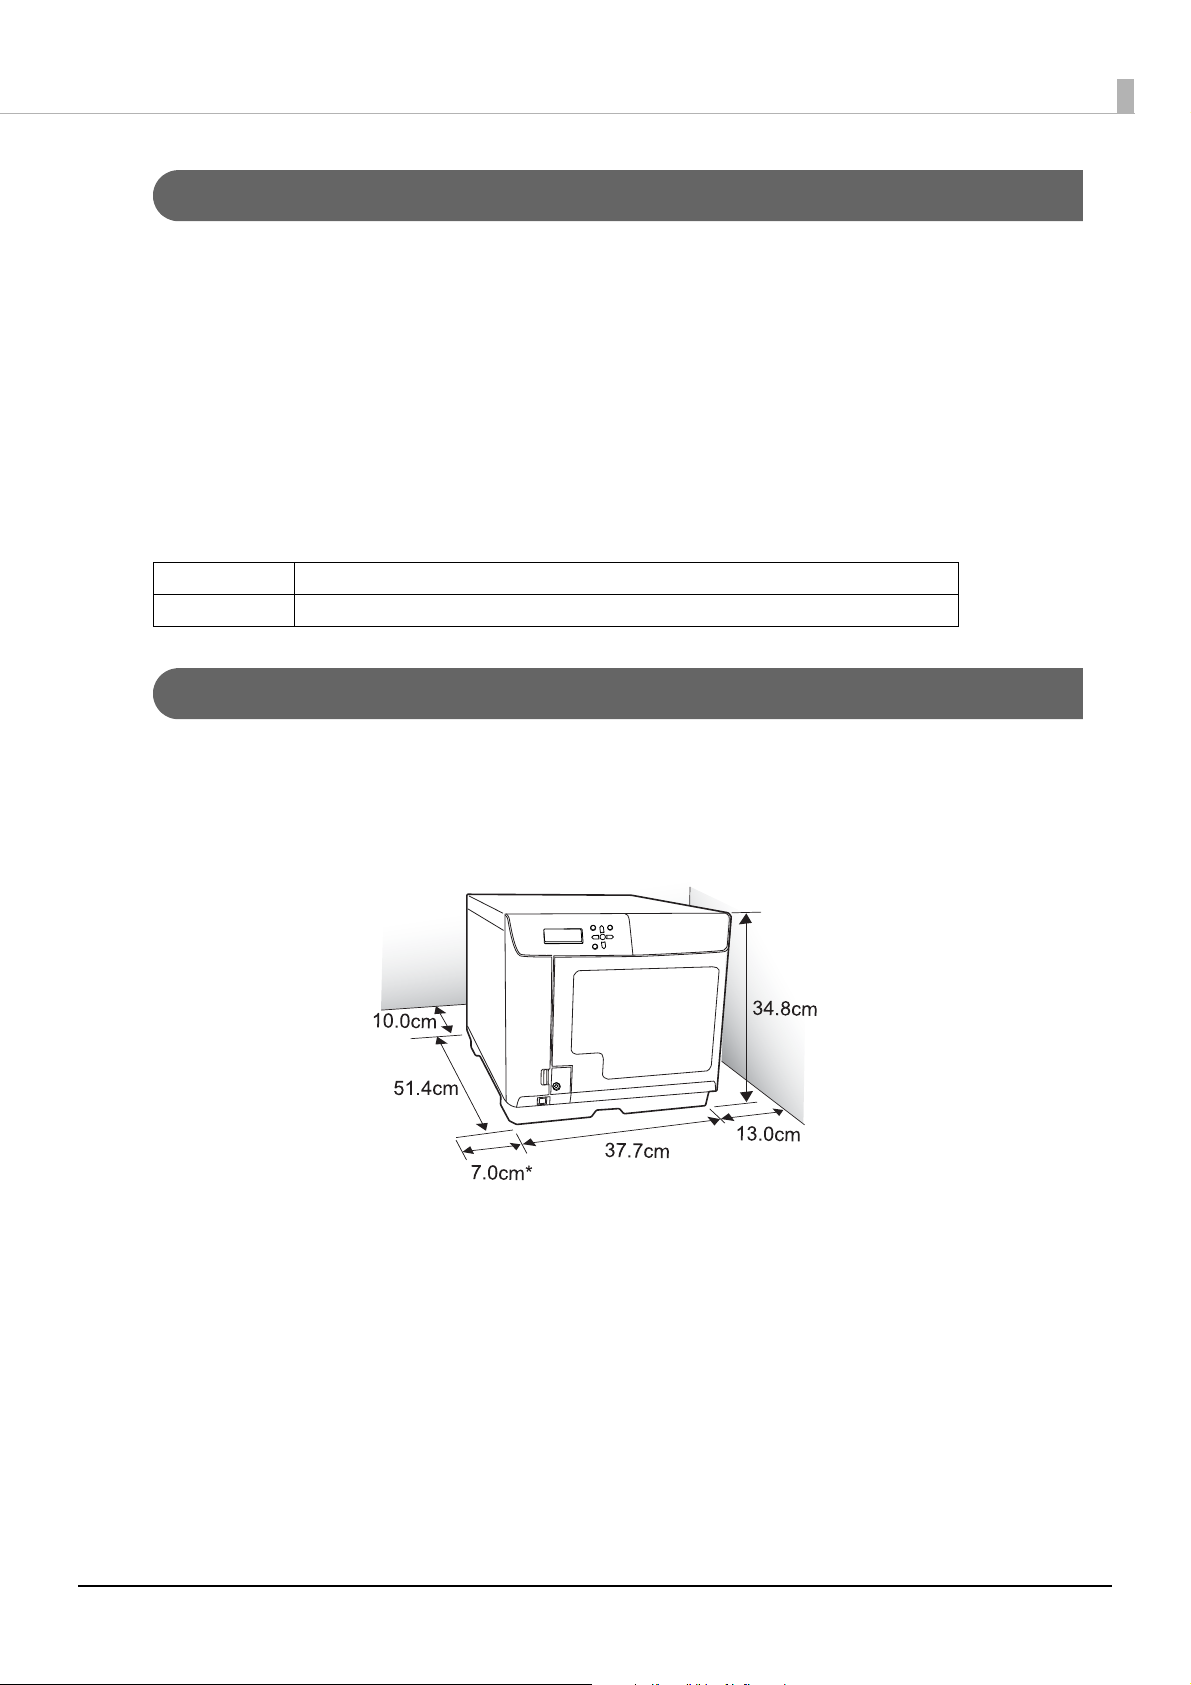
Provide enough installation space for facilitating the installation work. If you place the product by the wall, leave
more than 10 cm between the back of the product and the wall. It is also necessary to leave enough space in front of
the product to open and close the disc cover.
* Be sure to leave at least 7 cm on the product left side for opening the ink cartridge cover.
13
Setup procedure
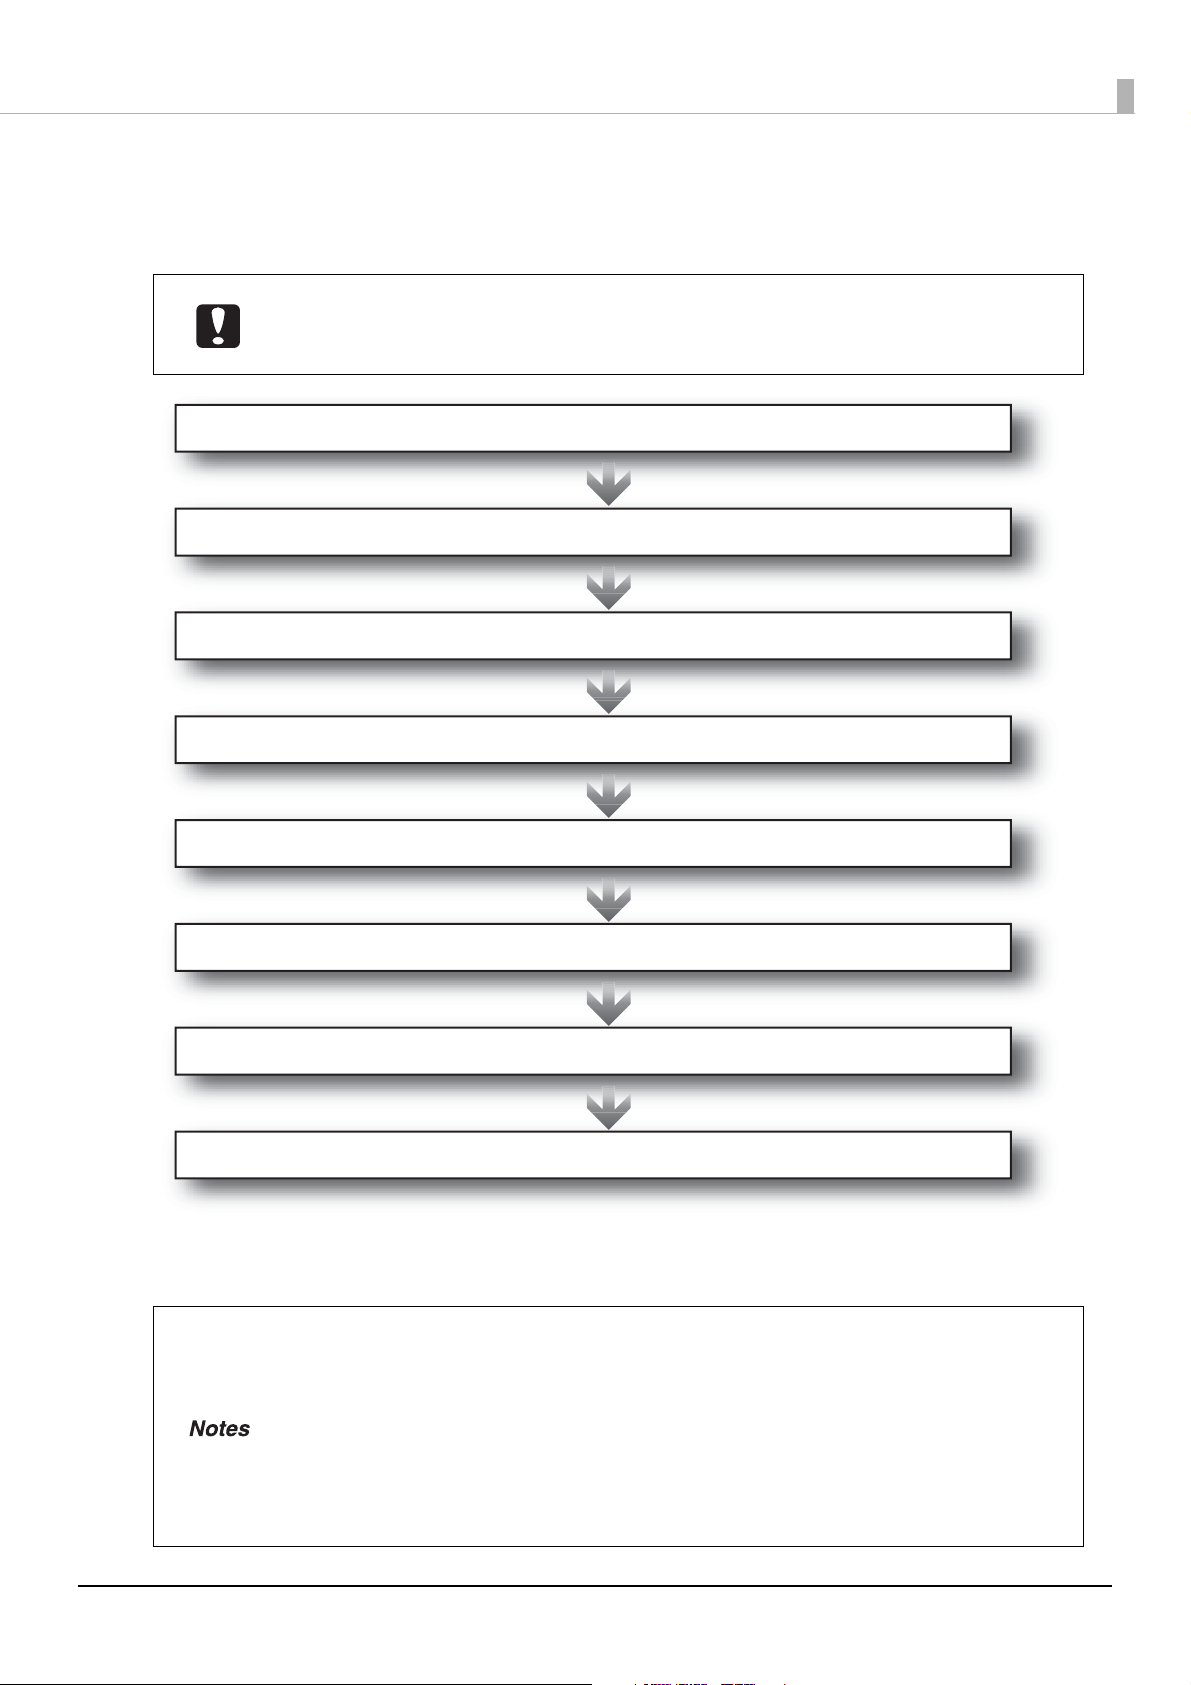
1. Connecting the Ethernet cable on page 15 in this guide
5. Setting the Publish Mode on page 20 in this guide
4. Setting the security lock switch on page 19 in this guide
3. Installing the ink cartridges on page 16 in this guide
6. Network settings on page 26 in this guide
2. Connecting the power cord on page 15 in this guide
7. Registering an administrator on page 31 in this guide
8. System settings on page 33 in this guide
This section describes the setup procedure for this product (PP-100NII).
Before starting setup, check that all protective tape and protective materials attached to this
product have been removed. See PP-100NII Setup Guide for the procedure to remove the
protective materials.
Preparation
After setup of this product is complete, install the software required for using this product to the client computer. See
the PP-100NII User’s Guide for details on the installation procedure.
If you are using more than one unit of this product in the same environment and back up the
first unit and then restore the backup data on the second and subsequent units, the
configuration information of the first unit is saved, so you do not need to perform the
following work. See “Backing up and restoring data” on page 62 in this guide for details on the
backup and restoration procedure.
• “Output device settings” on page 33 in this guide
• “Notification email transmission settings” on page 36 in this guide
• “Registering users” on page 52 in this guide
14
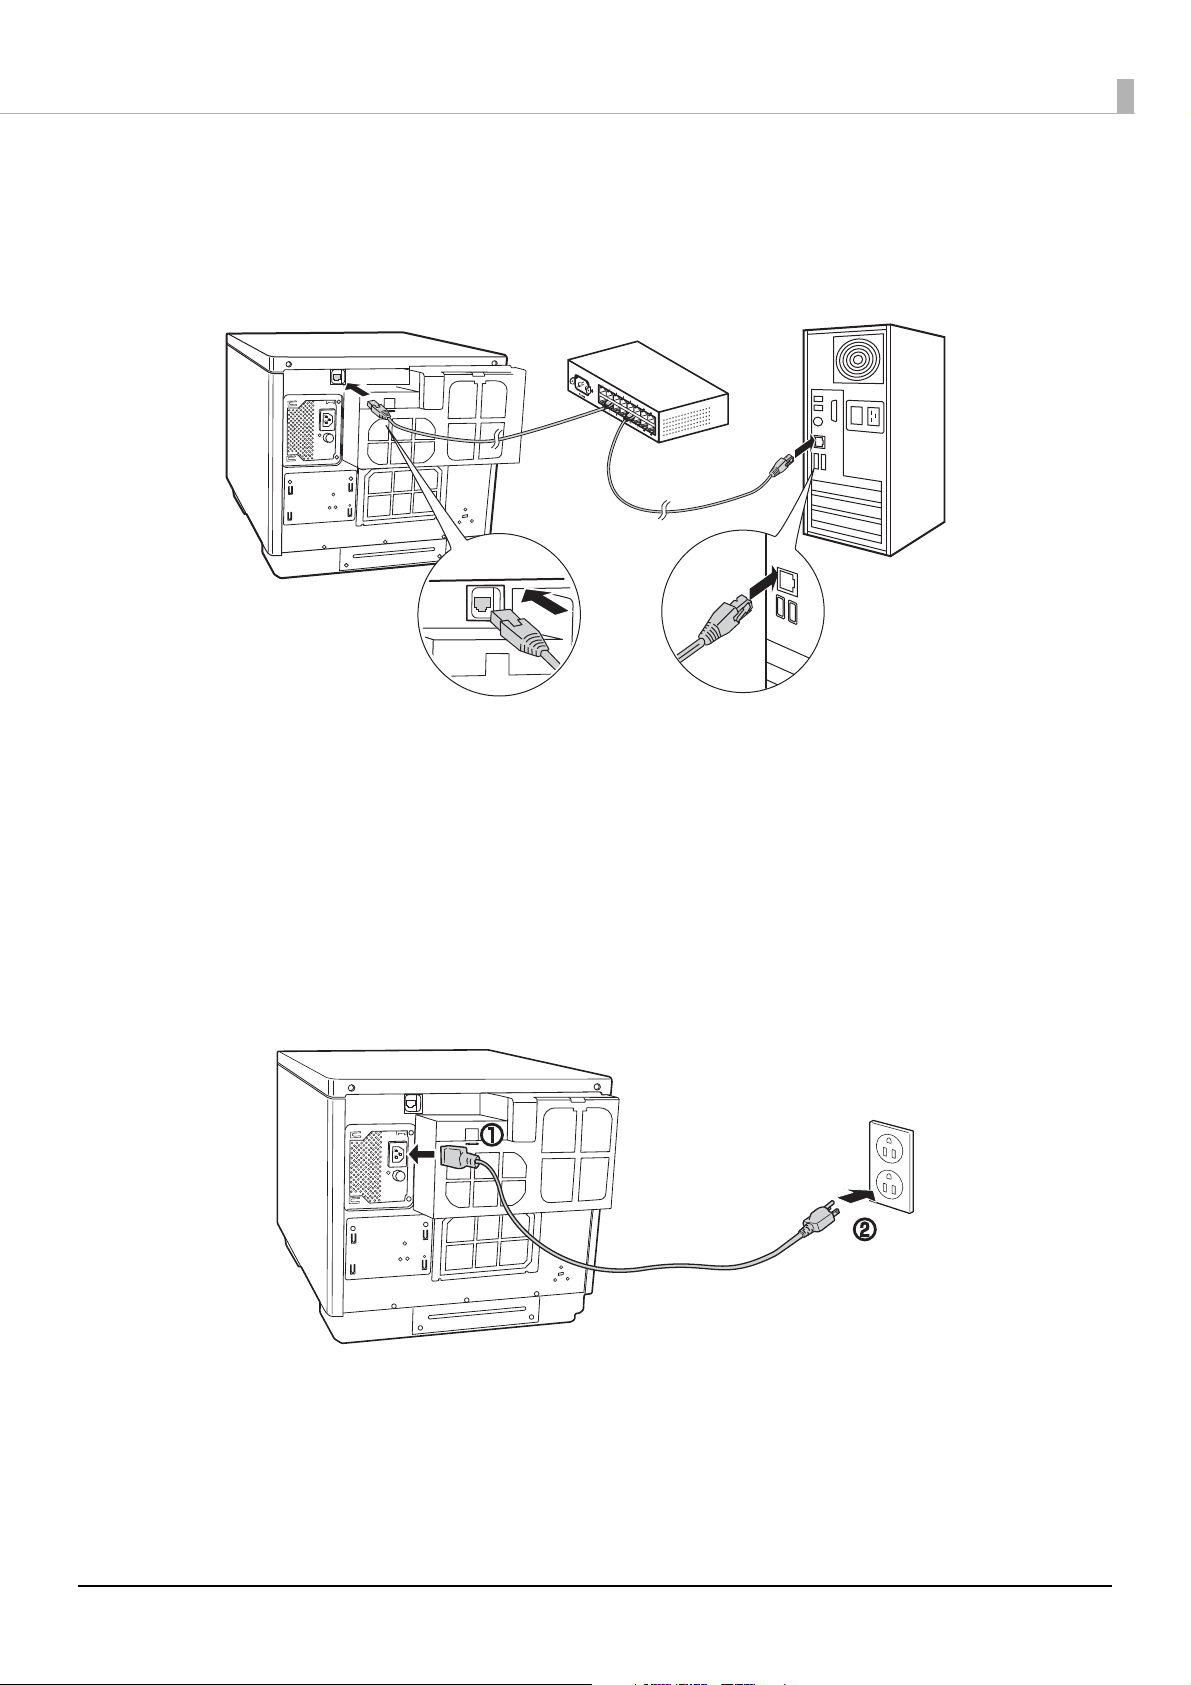
Connecting the Ethernet cable
Connect the Ethernet cable to the Ethernet interface connector on the rear side.
Preparation
Connecting the power cord
Connect the power cord connector to the AC inlet on the product rear side. (See (1) in the
1
figure below.)
Insert the power plug into the outlet. (See (2) in the figure below.)
2
15
Installing the ink cartridges
This section describes the procedure for installing the ink cartridges for the first time.
See “Changing the ink cartridge” in the PP-100NII User’s Guide for the procedure to change the ink cartridge in daily
operation.
• Use of Epson brand ink cartridges is recommended. Use of non-Epson brand ink cartridges
can result in problems that will not be covered by the warranty.
• Epson cannot guarantee the quality and reliability of non-Epson brand products. Repairs
for any damage or breakdown of this product due to the use of non-Epson brand products
will not be free of charge even if the warranty period is still valid.
• This product performs color adjustment based on use of Epson brand ink cartridges. Use of
non-Epson brand ink products can adversely affect the printing quality and prevent the
product from realizing its maximum performance.
• Do not store ink cartridges in environments exposed to high temperatures, freezing
temperatures, or to direct sunlight.
• Even when Black is selected in the printer driver, all the ink colors are used in an operation
designed to maintain the printing and print head quality.
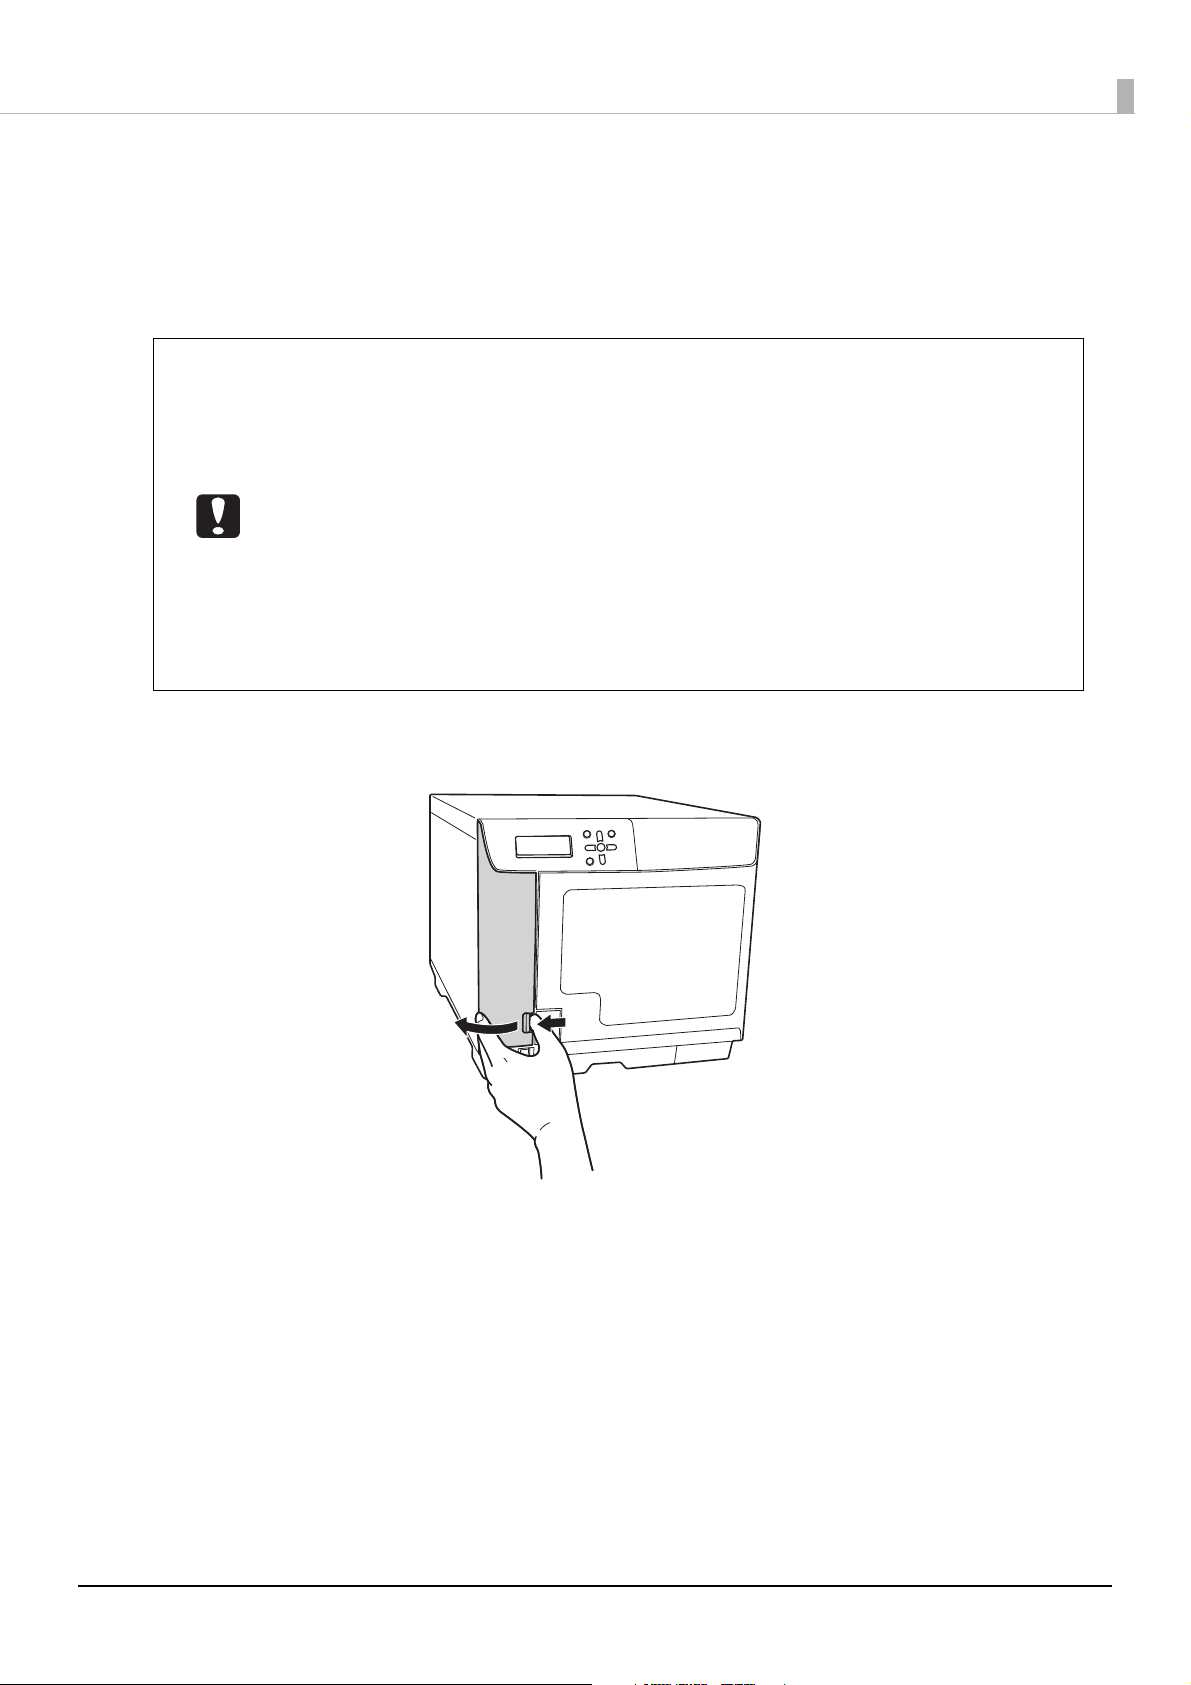
Preparation
Open the ink cartridge cover by pressing the knob at the bottom right of the cover.
1
16
Remove the ink cartridge from its package.
Do not touch the
chip section.
Click
2
• The first time you install ink cartridges, use the ink cartridges supplied with the product or
use ink cartridges in which there is a sufficient amount of ink remaining.
• For optimum printing quality, do not open the transparent plastic package until
immediately before installation. Also, after opening the package, try to use it up within six
months. Using an ink cartridge that has been left opened for an extended period of time
can result in poor printing quality.
• When opening the plastic package, be careful that the ink cartridge does not drop. This
could cause the ink to leak.
• Do not place the ink cartridge with the ink supply holes facing downward. This could cause
stains on a desk or other surface. Also, dust and other substances can adhere to the ink
cartridge so that it does not function properly.
• Do not shake the ink cartridges too hard. The ink cartridges may leak if you shake them
around too much.
• Do not touch the green chip section attached to the ink cartridge. Also, never peel off the
labels and film affixed to the ink cartridge. This could prevent proper installation, operation,
or printing with the ink cartridge, and cause a leak.
Preparation
• Use up the ink cartridge before the expiration date labeled on the inkcartridge.
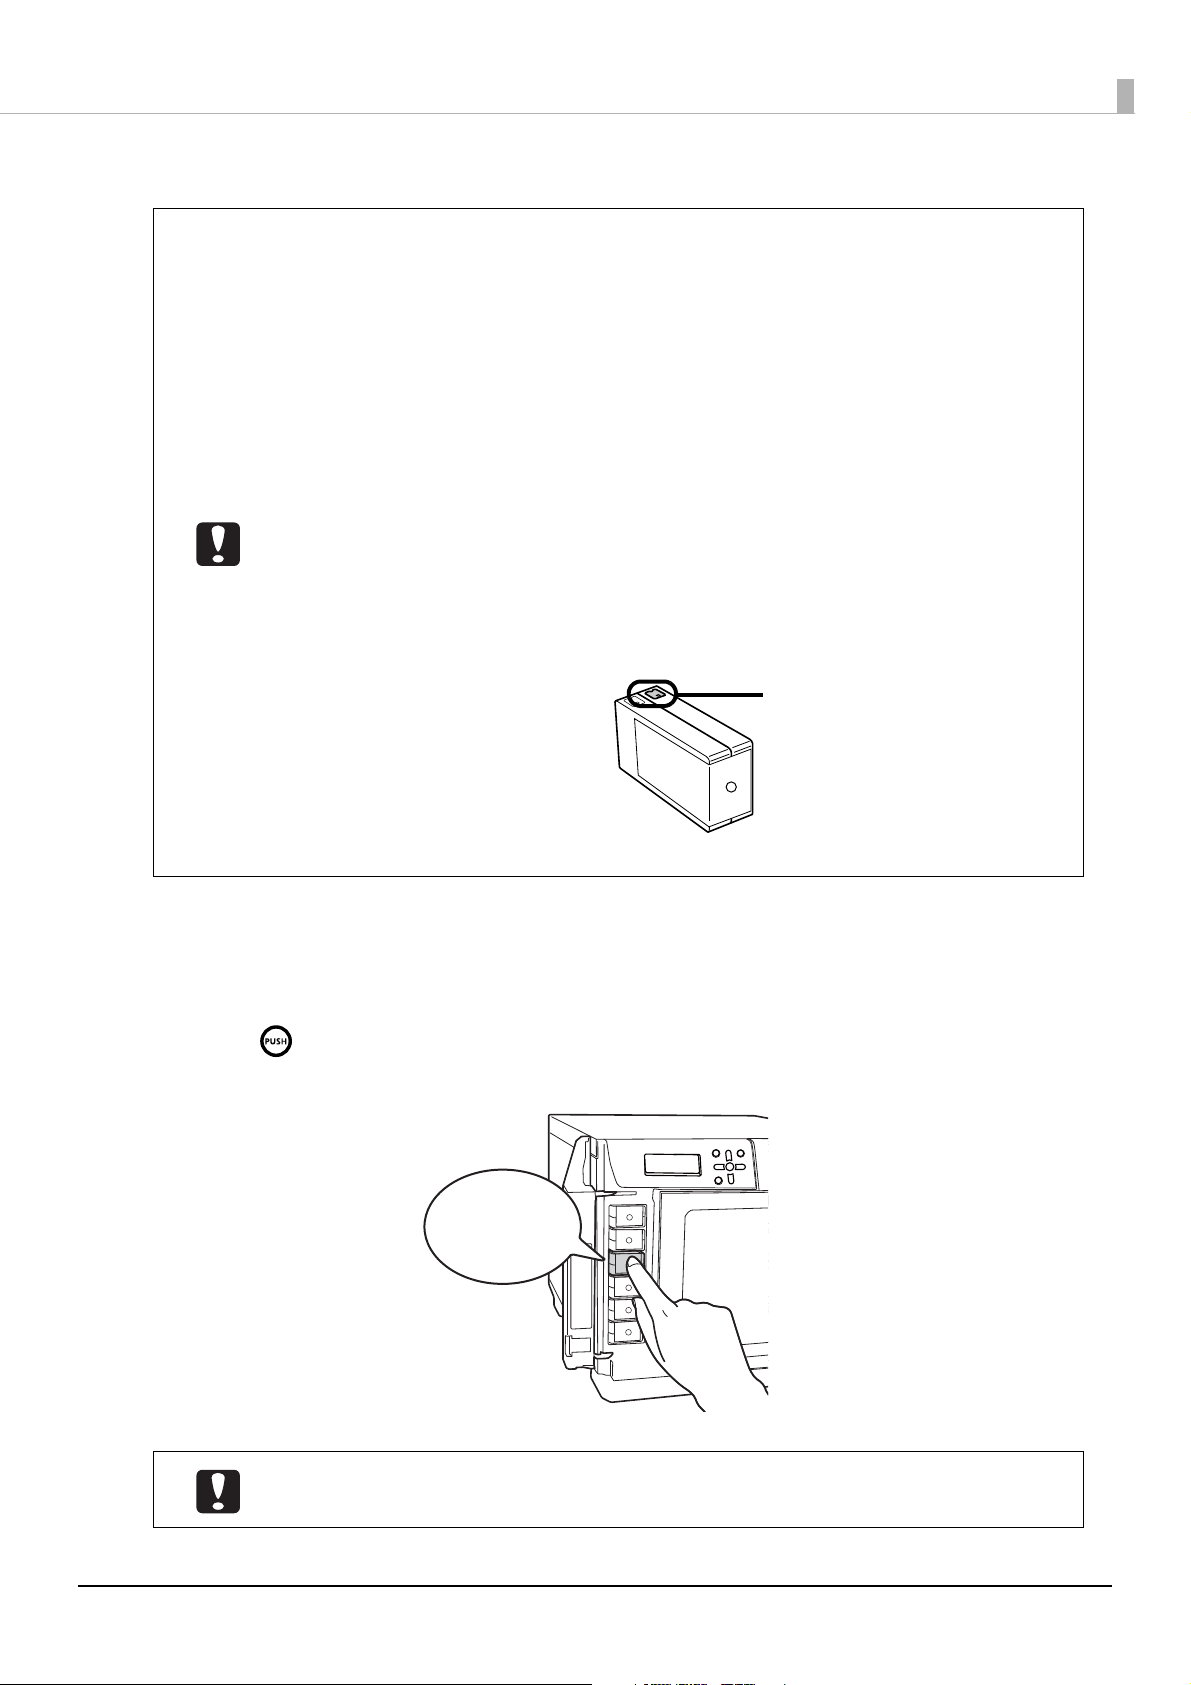
Insert all six color ink cartridges into the ink cartridge holders by gently pressing them in
3
until they click into place.
Check the label color of the ink cartridge and the label color of the ink cartridge holder, and install the ink
cartridge in the same color position.
Press section of the ink cartridge, and push straight in firmly.
Install all six ink cartridges. If any of the colors is not installed, disc publishing (writing/
printing) cannot be performed.
17
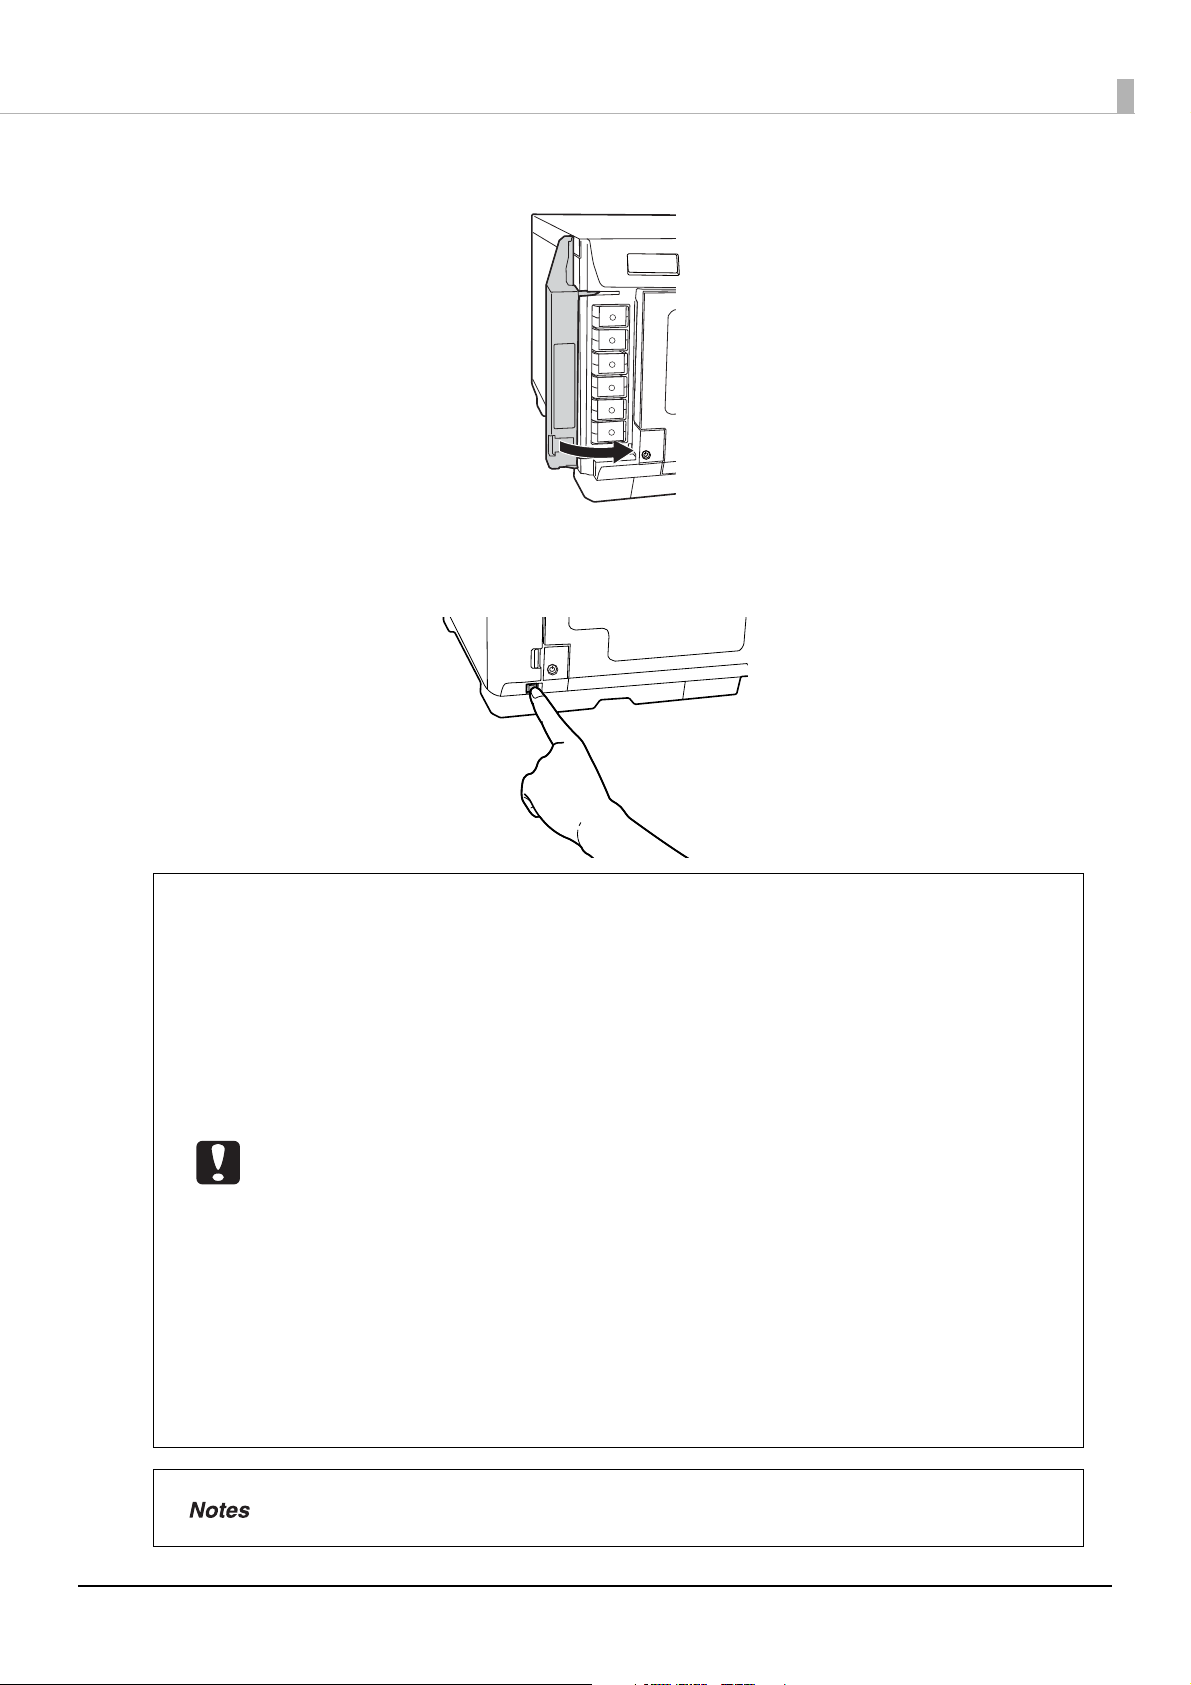
Close the ink cartridge cover.
4
Press the power button to turn on the power.
5
The Power LED flashes, and ink filling (loading ink) is started.
Preparation
• When using for the first time, the product operates to prepare the internal components of
the product (loading ink).
• While ink is being loaded (approximately 5 minutes), do not turn off the power or open the
ink cartridge cover. These actions would make it necessary to perform the loading ink
operation again, resulting in the consumption of a substantial amount of ink. Also, printing
may be unable to be performed properly.
• If the ink cartridges are not recognized even though they are installed correctly, dust or
another object may be adhering to the green chip surface. Use a soft cloth to wipe off the
object, and then reinstall the cartridge.
• If printing cannot be performed properly even though the ink cartridges are installed,
perform head cleaning. See “Head cleaning” in the PP-100NII User’s Guide for details on the
head cleaning procedure.
• When the power is turned off using the power button on the main unit, the print head is
automatically capped to prevent drying of the ink. After the ink cartridge is installed, be
sure to use the power button on the main unit to turn off the power whenever the product
is not used. Do not disconnect the power plug or shut off the circuit breaker while the
power is still on.
• If moving or transporting the product after the ink cartridges are installed, leave them
installed during the moving or transporting process.
• The ink cartridges should only be removed when replacing them.
When the ink cartridges are installed for the first time (during setup), ink is consumed for
filling (loading ink), and so the ink cartridge will need to be replaced earlier than normal.
18
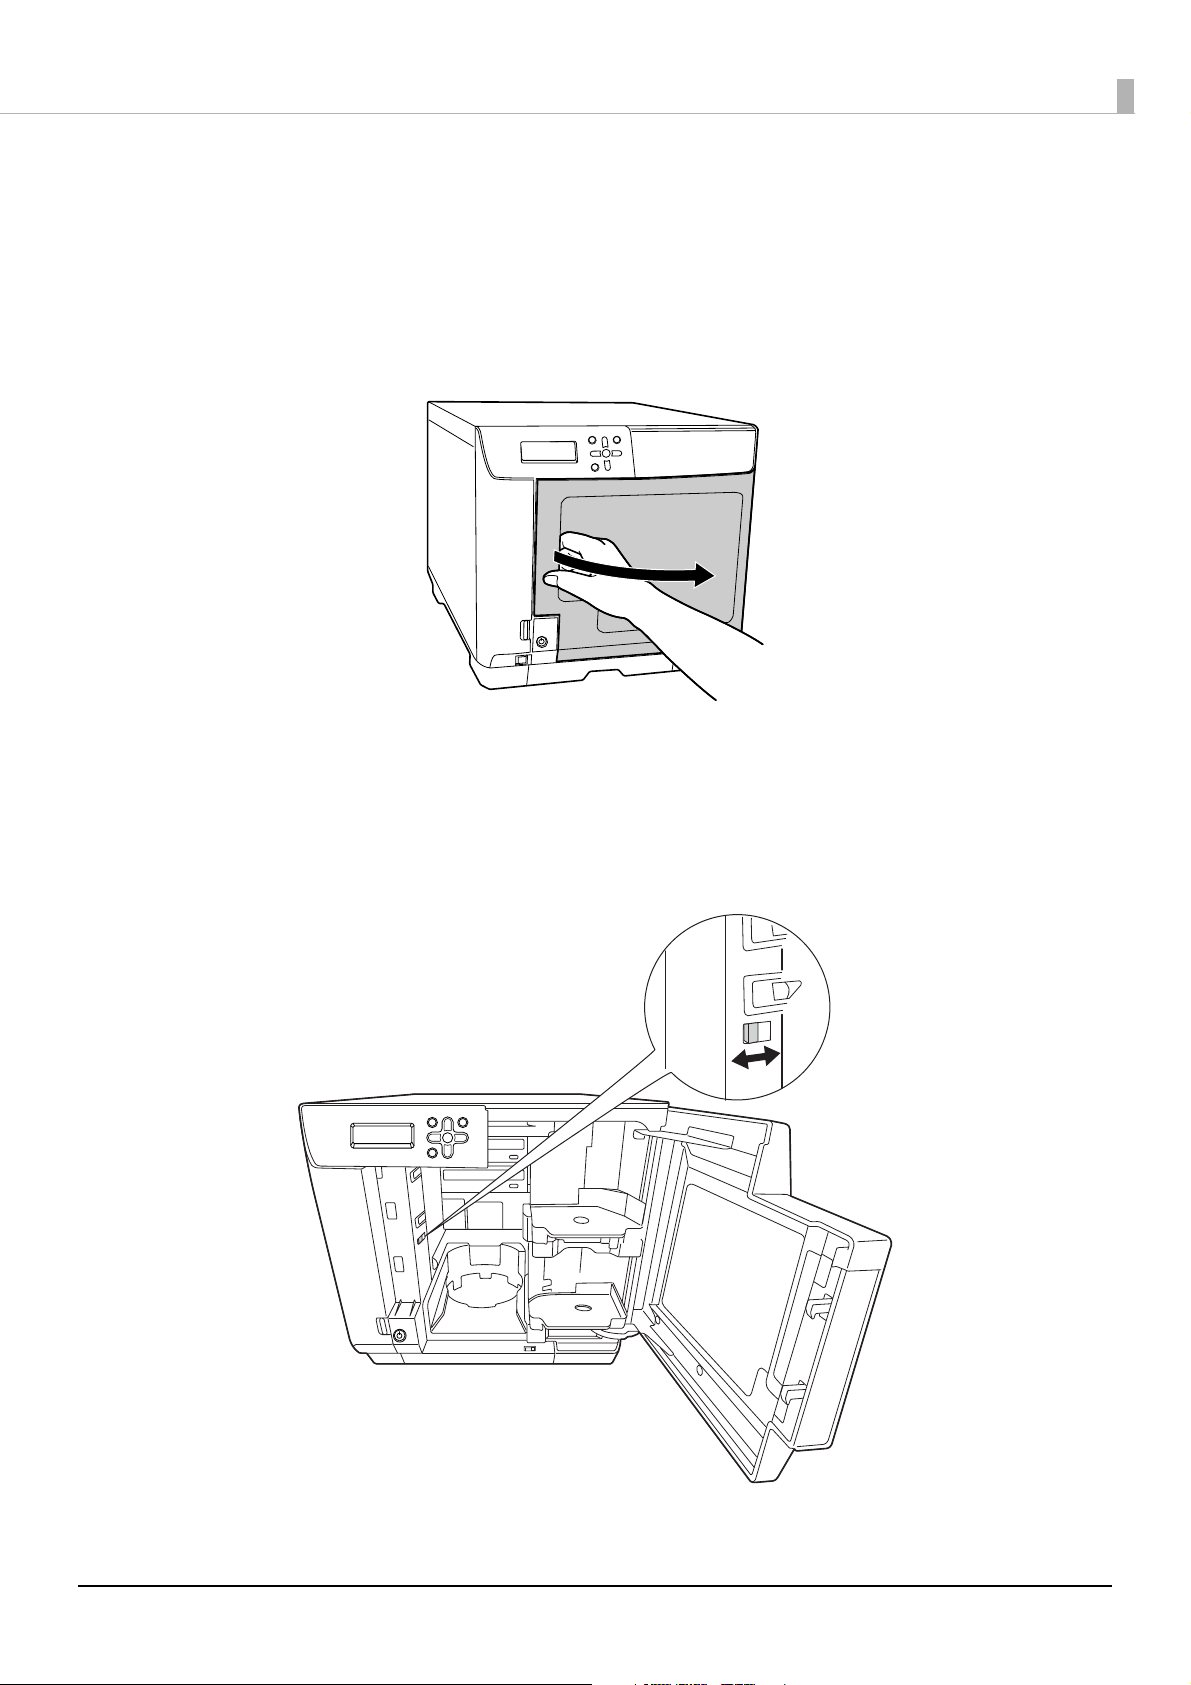
Setting the security lock switch
ON
OFF
Set the security lock switch for automatically locking the disc cover. In the initial state, the security lock switch is set
to off.
Open the disc cover.
1
Preparation
Set the security lock switch to ON or OFF.
2
When set to ON: The disc cover is locked automatically each time it is closed. To unlock the lock, use
the disc cover key.
When set to OFF: The disc cover is always unlocked.
19
Setting the Publish Mode
Blank discs
Published discs
Published discs
Blank discs
Blank discs
This product has the following Publish Modes: Standard Mode, External Output Mode, and Batch Mode. Select the
mode that is used based on the disc publishing quantity and application. Mount the stackers based on the selected
mode, and set the Publish Mode.
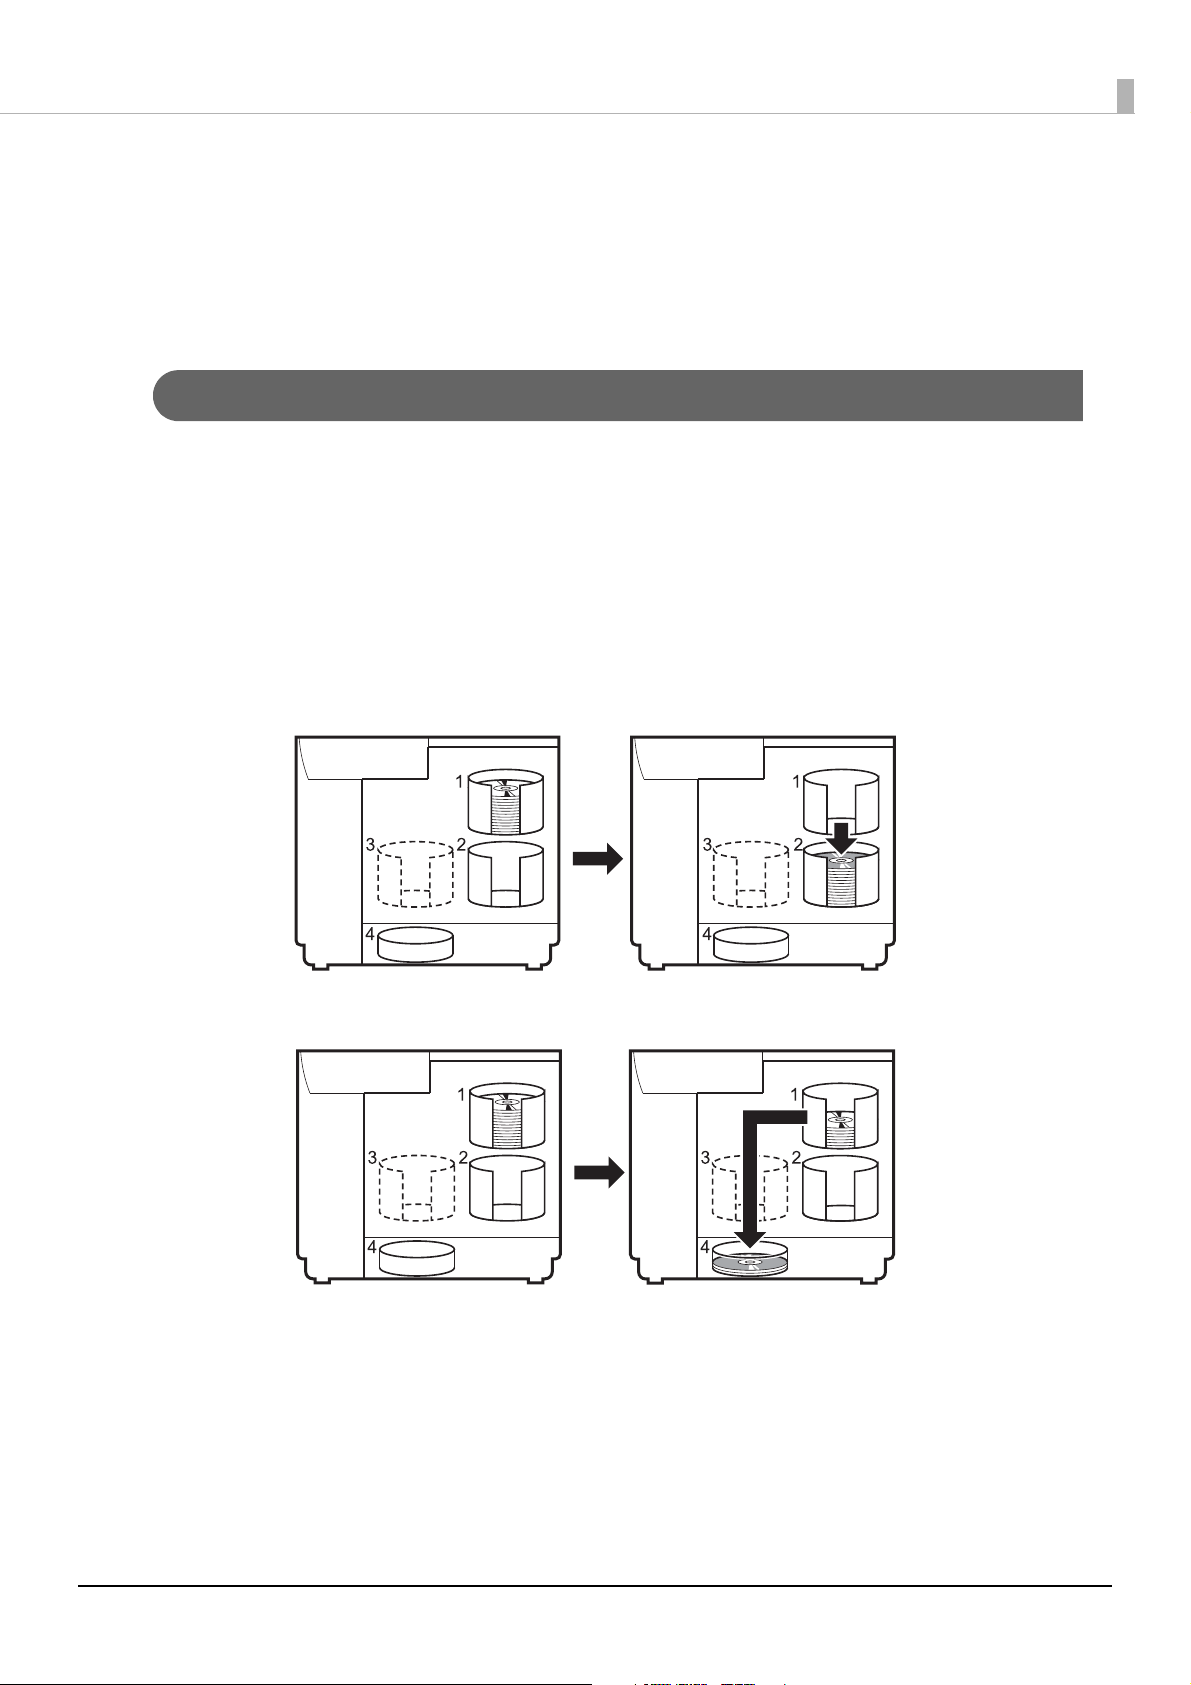
Types of Publish Modes
Standard Mode
This mode uses Stacker 1 as the input stacker for discs. You can select Stacker 2 or Stacker 4 as the output stacker.
If you select Stacker 2 as the output stacker, you can publish up to 50 discs without having to replenish the discs or
take out published discs.
If you select Stacker 4 as the output stacker, you can easily take out published discs without even having to pause a job
during publishing.
Repeatedly replenishing and removing discs allows for the continuous publishing of up to 1,000 discs.
Preparation
20
Preparation
Blank discs
Published discs
Blank discs
Published discs
Published discs
Published discs
Blank discs
Blank discs
Blank discs
Blank discs
Blank discs
Blank discs
Blank discs
Blank discs
Blank discs
Blank discs
Published discs
Blank discs
Published discs
Blank discs
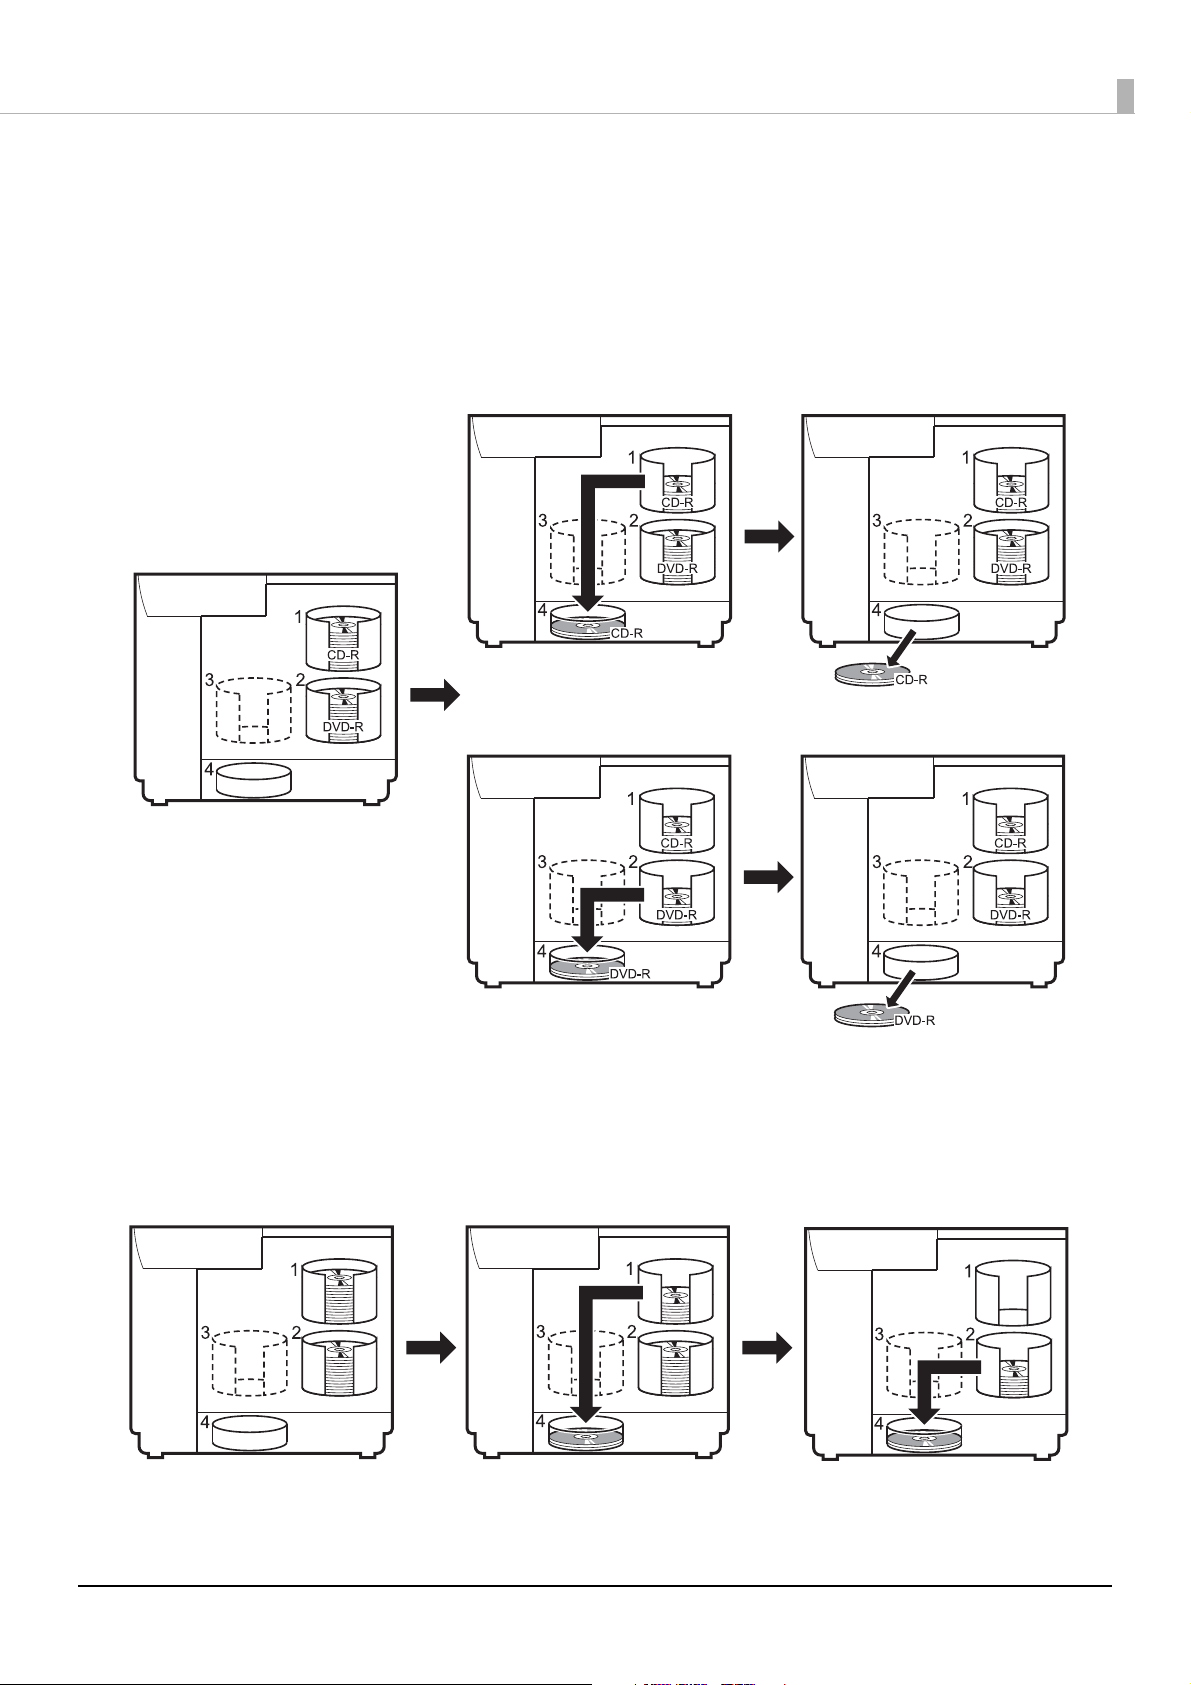
External Output Mode
You can select Stacker 3 or Stacker 4 as the output stacker. If you select Stacker 4 as the output stacker, you can easily
take out published discs without even having to pause a job during publishing. The External Output Mode allows you
to use the product in the following ways according to the application.
• Loading a different type of disc into each stacker
If, for example, CD-Rs are loaded in Stacker 1 and DVD-Rs are loaded in Stacker 2, a publisher can just select a
stacker as necessary to publish the required discs without having to change the discs.
• Continuous publishing of the same type of disc
If the same type of discs are loaded in Stacker 1 and Stacker 2 and [Auto] is selected for the input stacker setting, up to
100 CDs/DVDs can be continuously published by taking out published discs without replenishing discs. Up to 1000
CDs/DVDs can be continuously published in a single job by replenishing discs and taking out published discs.
21
Preparation
Blank discs
Blank discs
Blank discs
Published discs
Published discs
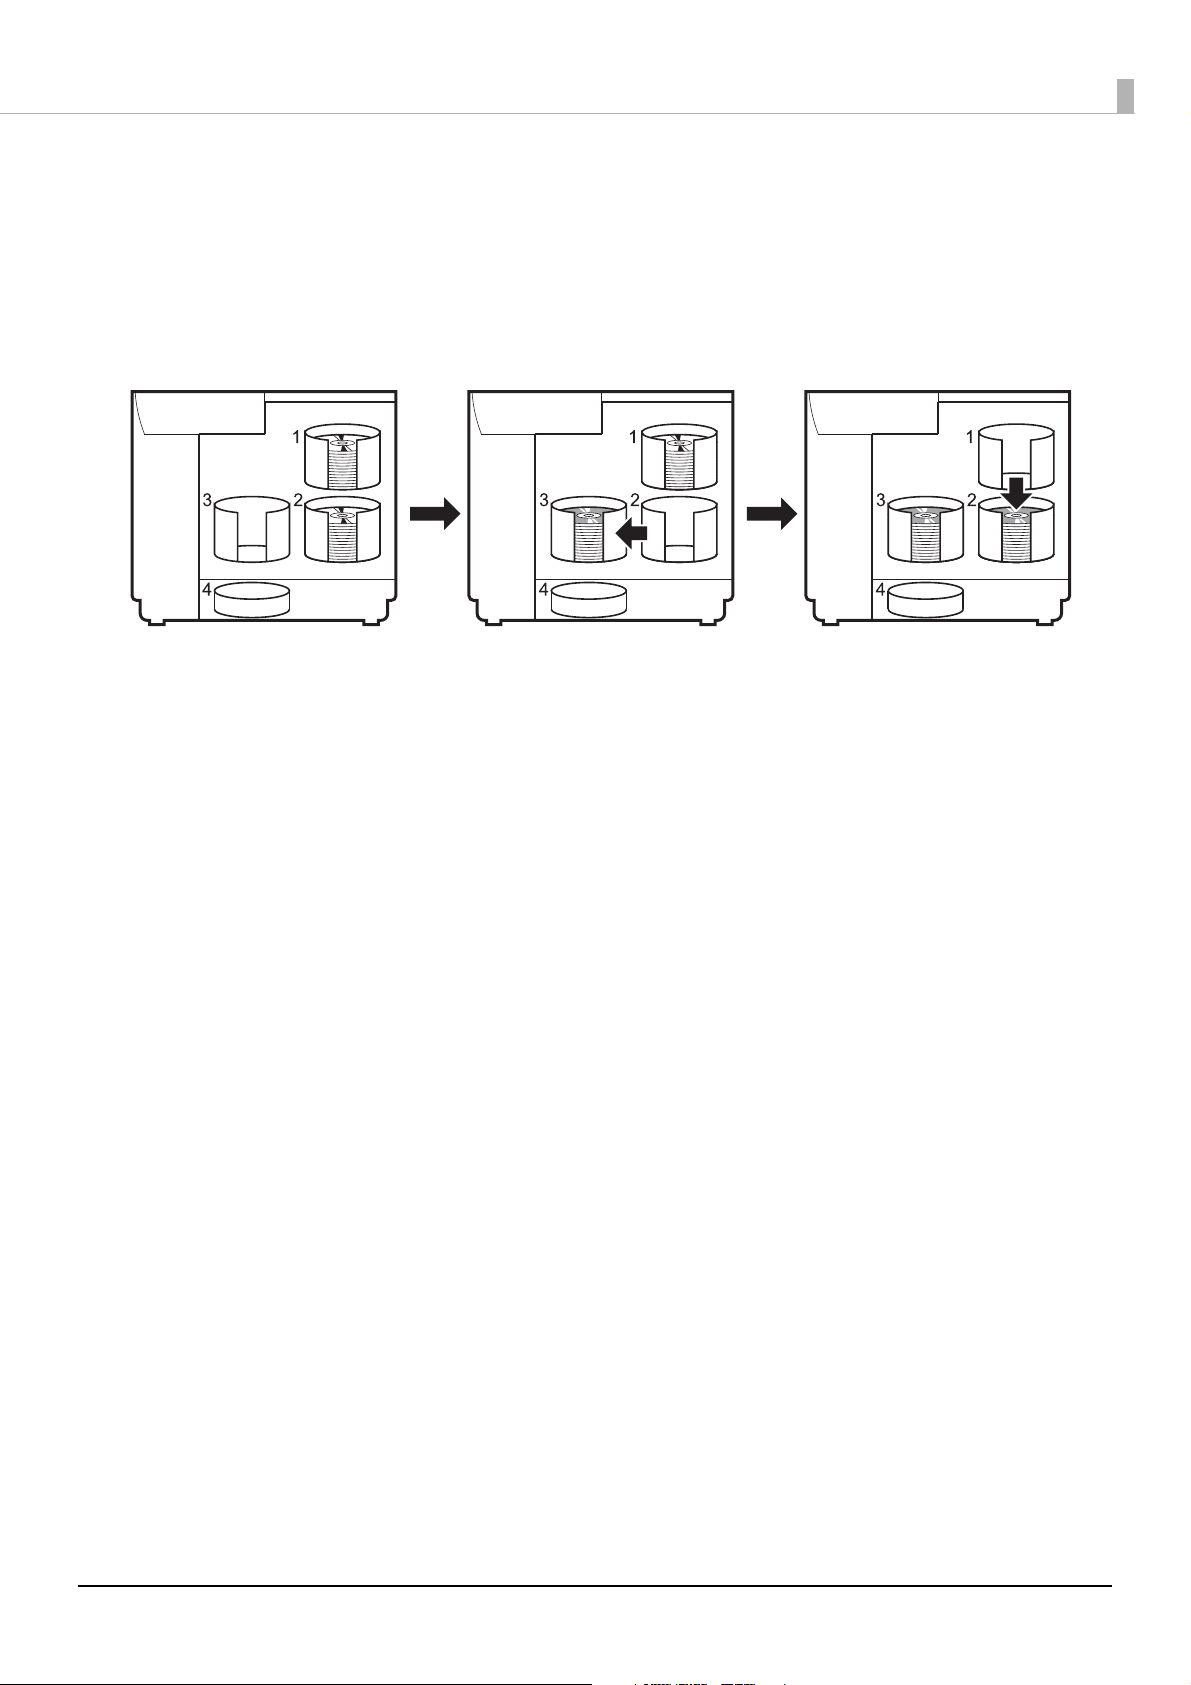
Batch Mode
This mode uses Stacker 1 and Stacker 2 as the input stackers for discs, and Stacker 2 and Stacker 3 as the output
stackers.
Loading 50 discs in each of Stacker 1 and Stacker 2 allows for the continuous publishing of 100 copies of the same disc
without having to replenish the discs or take out published discs. Repeatedly replenishing and taking out discs allows
for the continuous publishing of up to 1,000 discs. If you use this mode, be sure to insert Stacker 3.
22
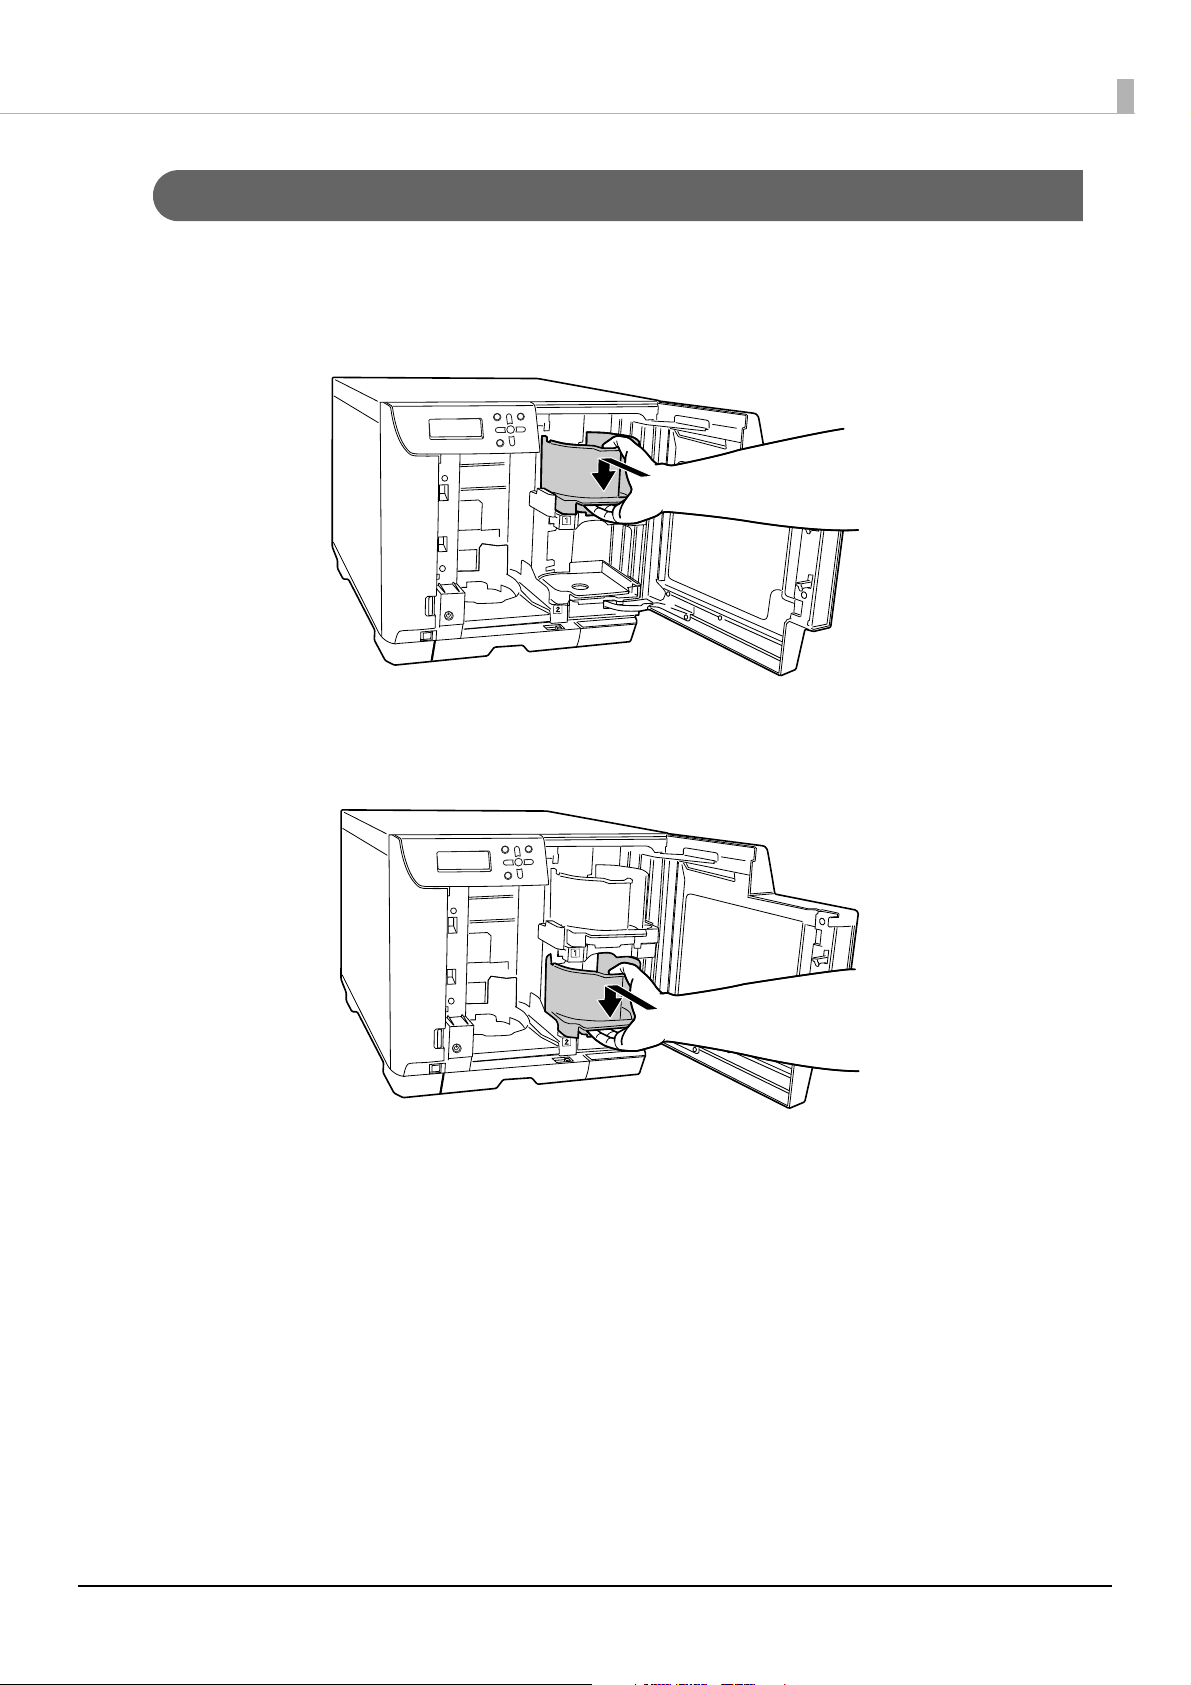
Installing the stackers
After the Publish Mode is determined, use the procedure below to install the stackers for the selected mode.
Insert Stacker 1 by aligning with the recesses.
1
Preparation
Insert Stacker 2 by aligning with the recesses.
2
23
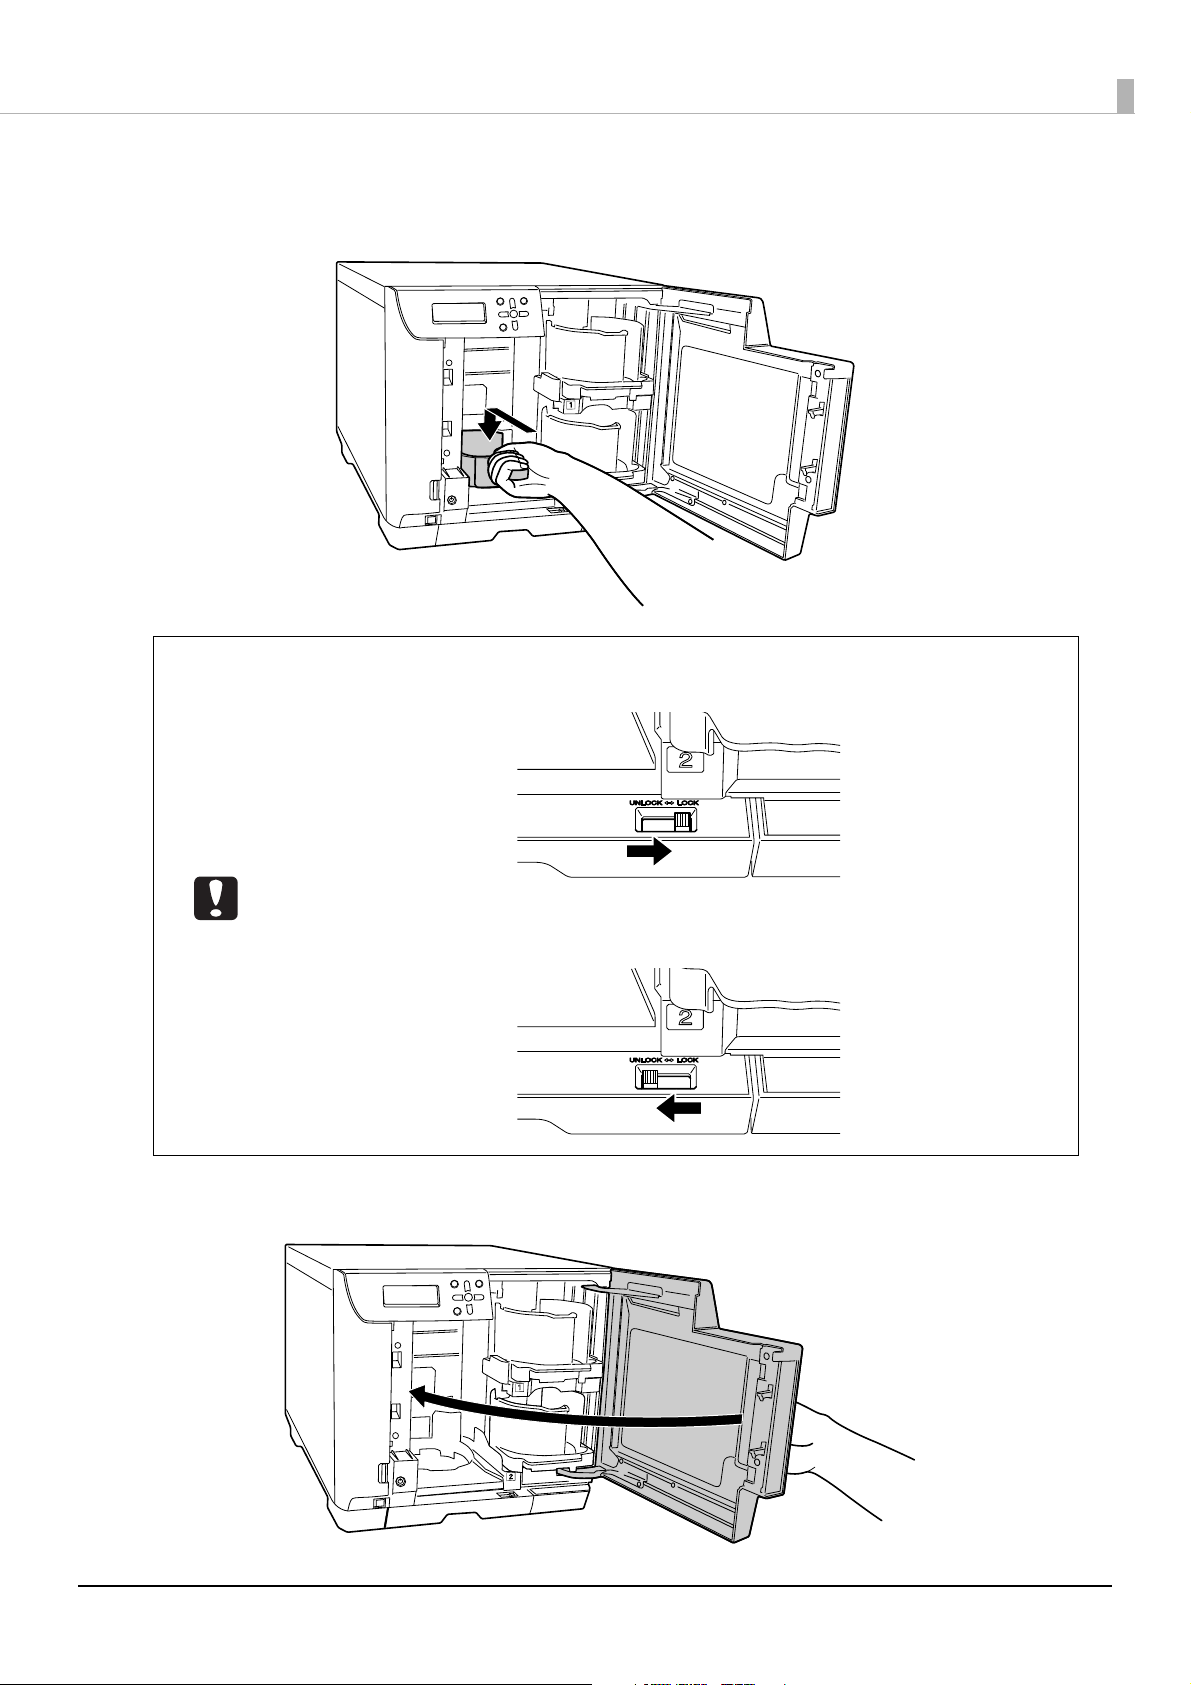
If using Batch Mode, or when Stacker 3 is set as the output stacker in External Output
3
Mode, grasp the handle of Stacker 3, and insert by aligning with the recesses.
• When using Stacker 3, set the lock lever to the [LOCK] position, and do not pull out Stacker
4.
Preparation
Close the disc cover.
4
• Stacker 3 is not used in Standard Mode and when Stacker 4 is set as the output stacker in
External Output Mode. Set the lock lever to the [UNLOCK] position.
24
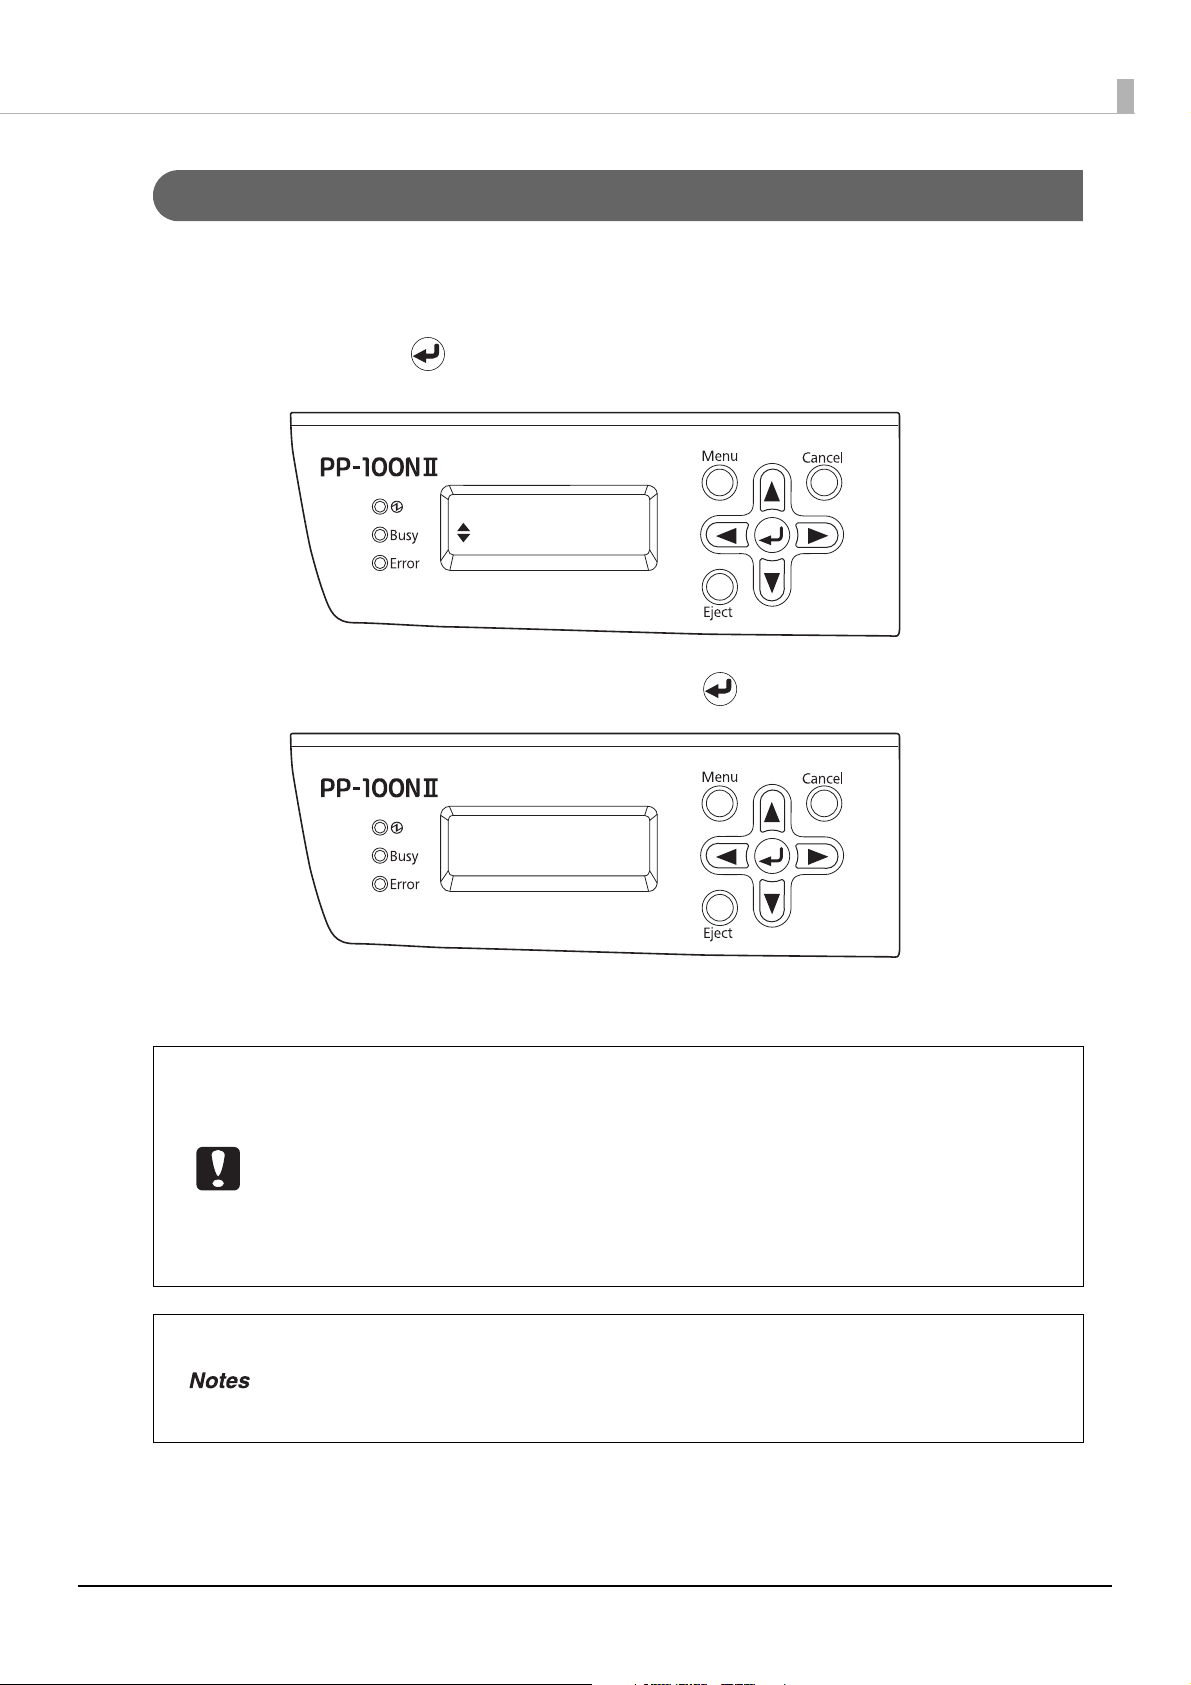
Setting procedure
Mode selection
Standard
Set to
Standard Mode?
After installing the stackers, use the procedure below to set the Publish Mode.
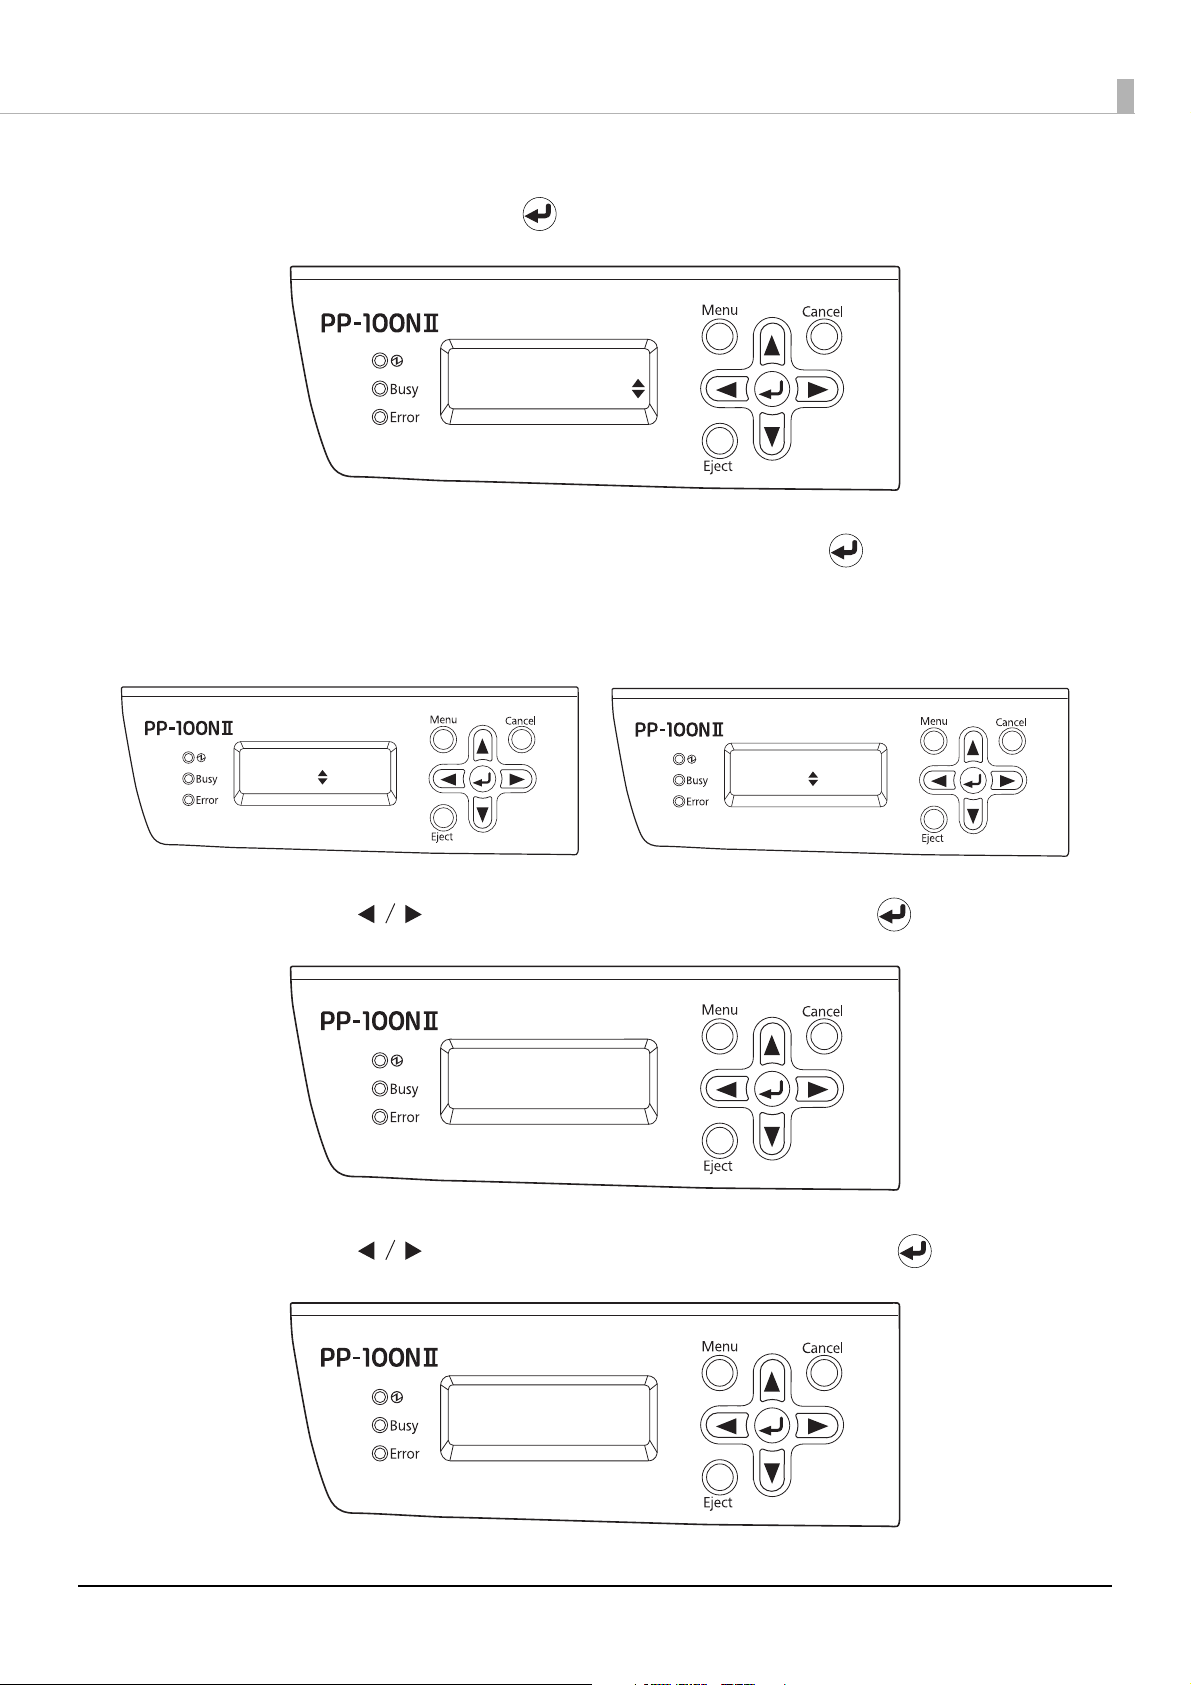
In the mode selection screen displayed on the LCD, use ▲/▼ to display the Publish Mode
1
to use, and press the button.
Preparation
When the confirmation message appears, press the button.
2
The initialization operation begins. Initialization takes two to three minutes.
When initialization is finished, [Please register an administrator] appears on the LCD.
• Never turn the power off during initialization.
• An administrator needs to be registered to use this product. After you finish configuring the
network settings (see page 26 in this guide), be sure to register an administrator. See
“Registering an administrator” on page 31 in this guide for the procedure for registering an
administrator.
• The operation of this product differs depending on the Publish Mode setting. To prevent
the occurrence of an unexpected warning or error, check that the correct Publish Mode has
been set after you set or change the Publish Mode.
After you set the Publish Mode, you can change the language setting for messages displayed
on the LCD of this product from English to Spanish, French, Italian, Dutch, Portuguese,
Japanese, or German. See “Setting the language” on page 42 in this guide if you want to
change the language setting.
25
Network settings
Top menu
Network
Network
Change settings
The network can be set in the following two ways.
• Performing an operation from a PC
• Performing an operation with the product’s control panel
When performing the setup for the first time, carry out the network setup using the control panel.
The network settings cannot be made using a computer until an administrator is registered.
See page 31 in this guide for the procedure to register the administrator.
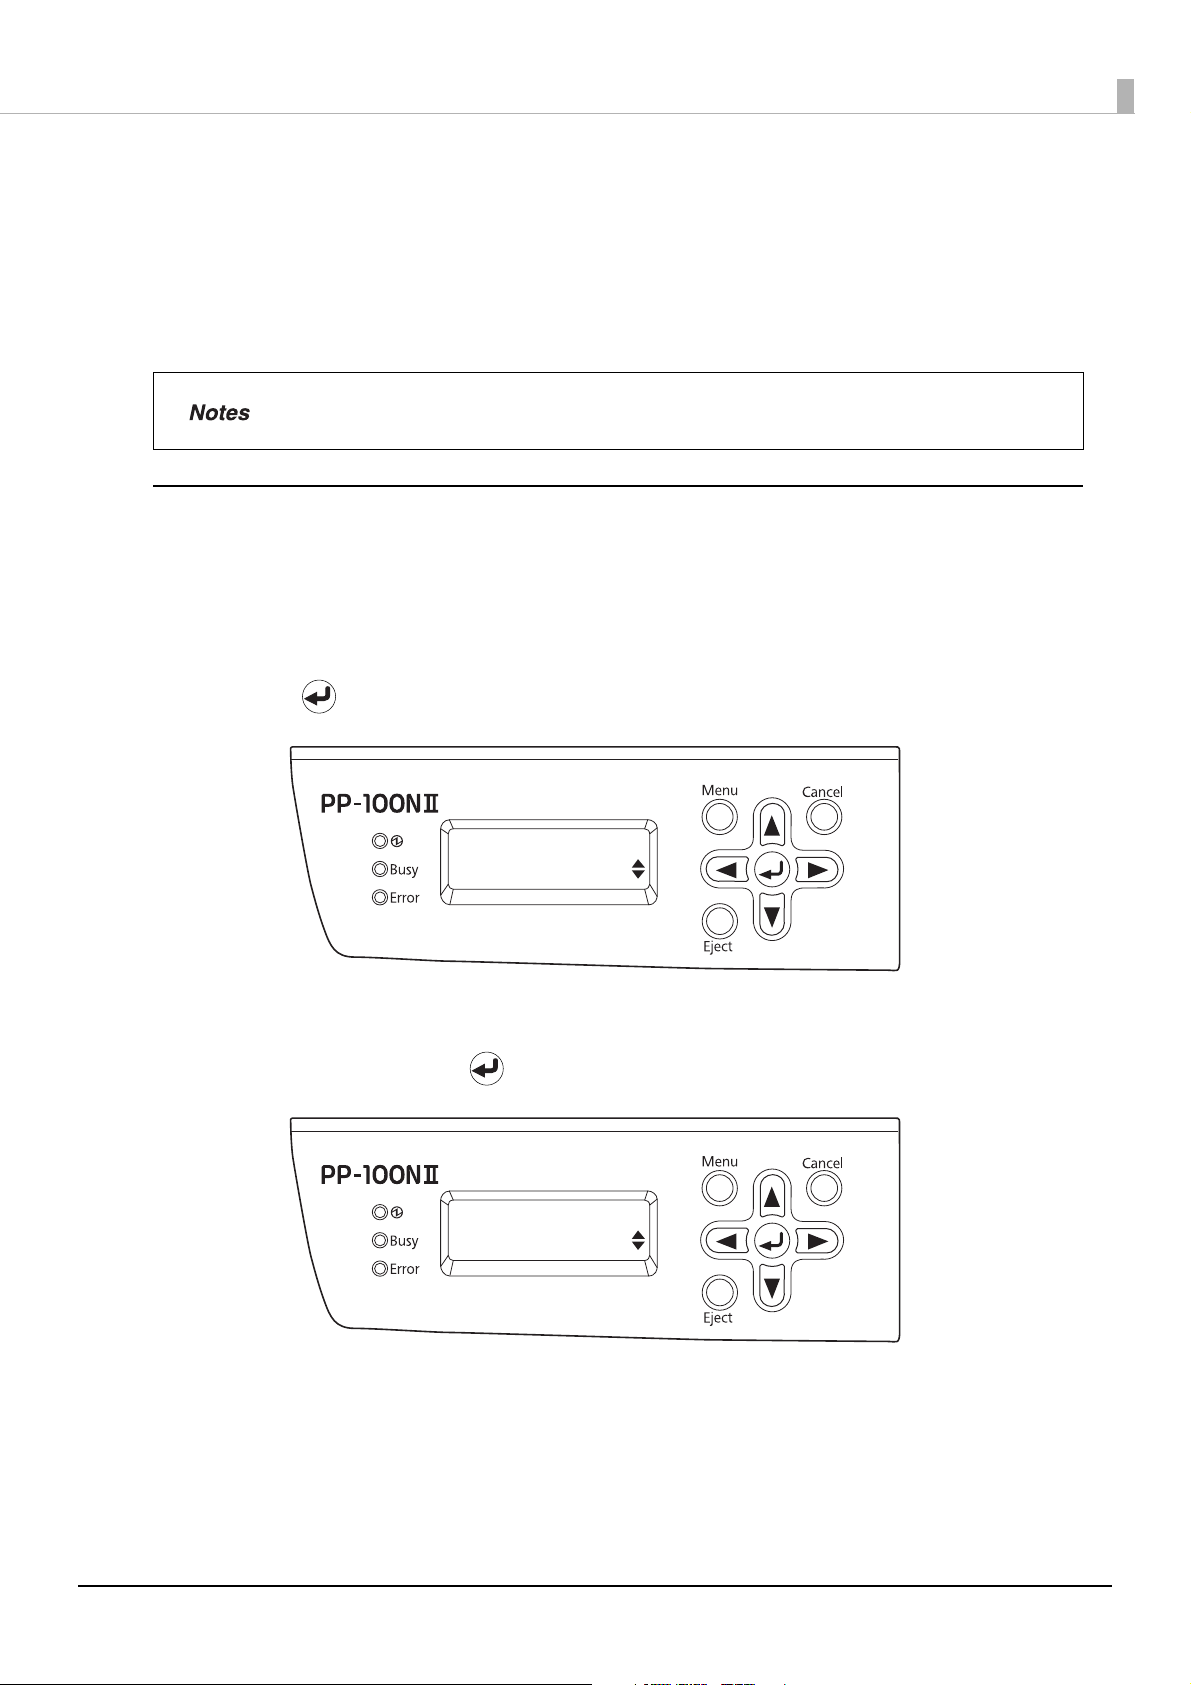
Performing an operation with the product’s control panel
Press the MENU button.
1
The top menu appears.
Use the ▲/▼ buttons to display the Network settings (“Top menu Network”) screen, and
2
press the button.
Preparation
Use the ▲/▼ buttons to display the change settings (“Network Change settings”) screen for
3
the network, and press the button.
26
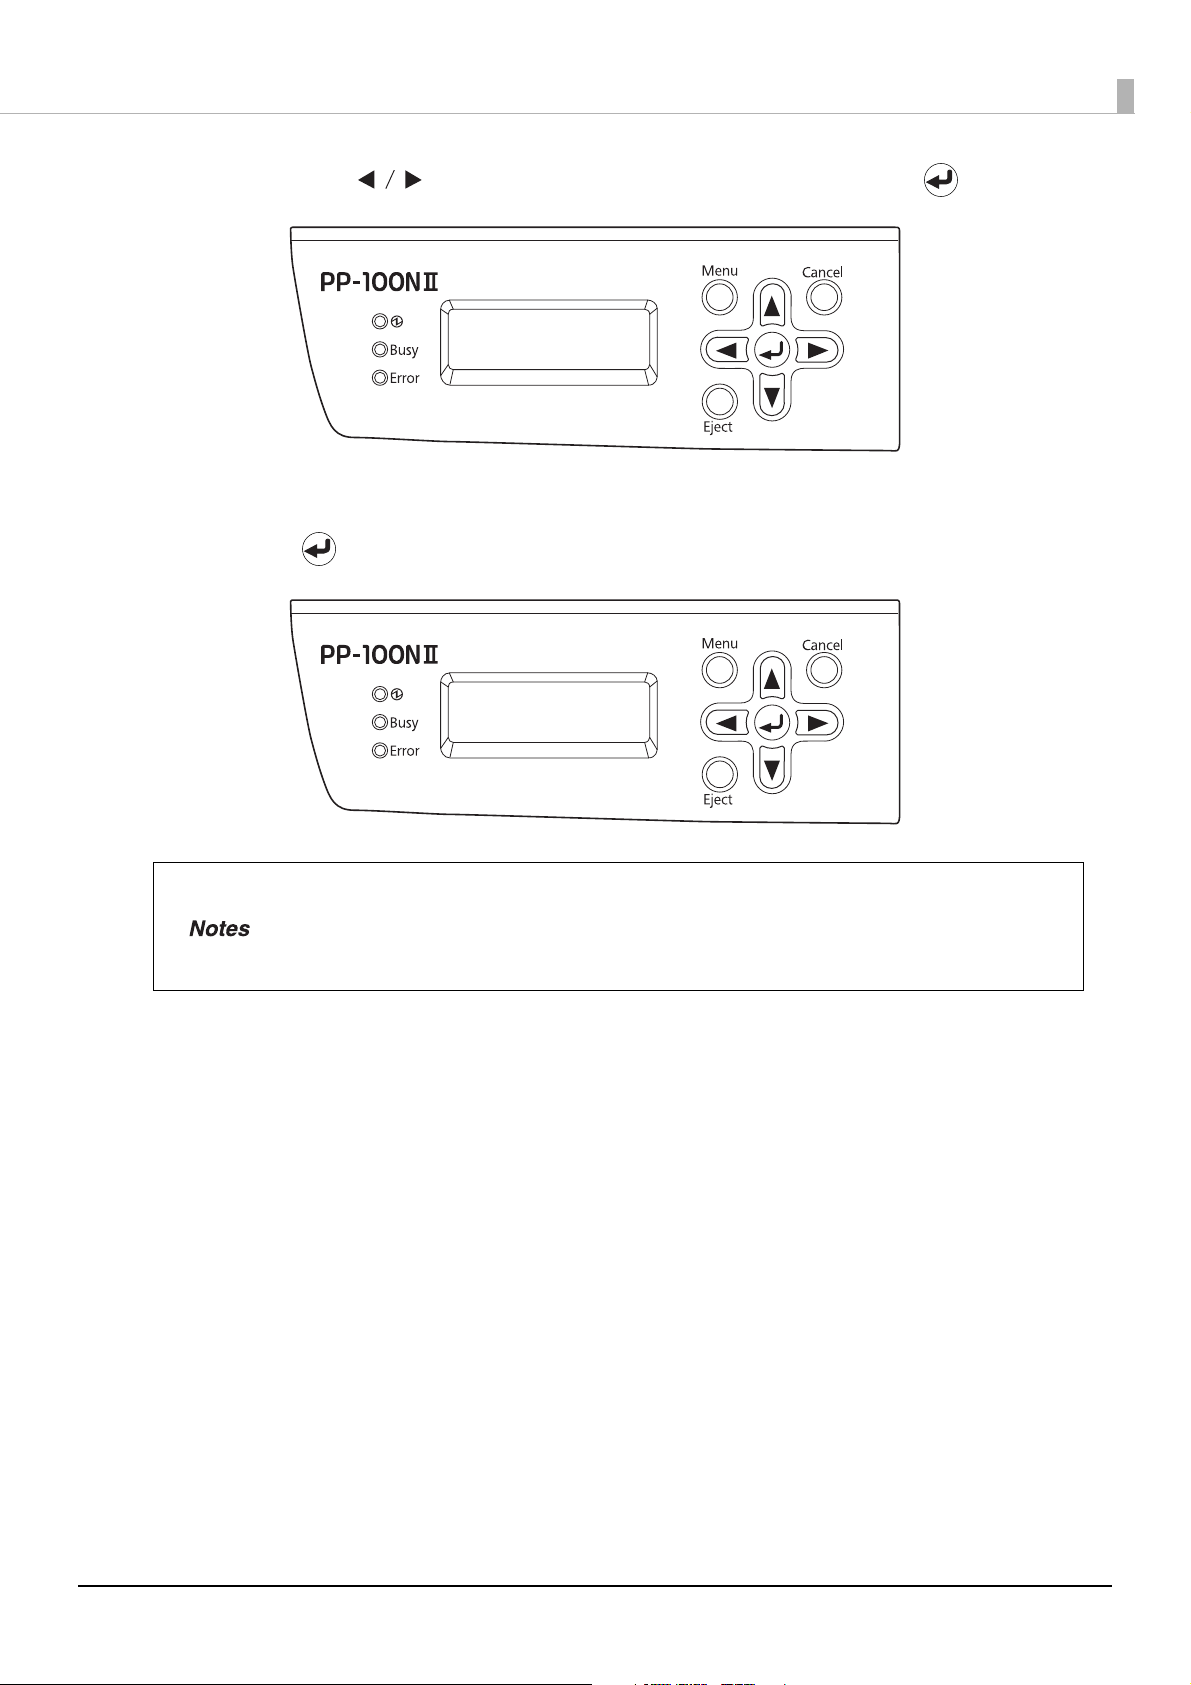
Use the ▲/▼ buttons to display the change settings (“Change settings IP address”) screen
Change settings
IP address
When “Manual” is selected
When “Auto” is selected
IP address
Manual
IP address
Auto
IP address
XXX. XXX. XXX. XXX
Subnet mask
XXX. XXX. XXX. XXX
4
for the IP address, and press the button.
Use the ▲/▼ buttons to select the setting method, and press the button.
5
When “Manual” is selected: The settings are made manually. Proceed to step 6.
When “Auto” is selected: The network settings are made automatically by DHCP. Proceed to step 9.
Preparation
Use the ▲/▼/ buttons to enter the IP address, and press the button.
6
Use the ▲/▼/ buttons to enter the subnet mask, and press the button.
7
27
Use the ▲/▼/ buttons to enter the default gateway, and press the button.
Default gateway
XXX. XXX. XXX. XXX
Change network
settings?
8
When the change setting confirmation message (“Change network settings?”) appears,
9
press the button.
Preparation
• If necessary, set the Jumbo Frame. (“Top menu” - “Network” - “Change Settings” - “JUMBO
FRAME”) In the initial state, Jumbo Frame is set to off.
• If [Receiving job Cannot proceed] appears on the LCD, wait until job processing is finished
and then try again.
28

Performing an operation from a PC
• The network settings first become able to be set using a PC when an administrator is
registered after the network settings have been set using the control panel. See page 31 in
this guide for the procedure for registering an administrator.
• The link speed and Jumbo Frame cannot be set using a PC. Use this product’s control panel
(“Top menu” – “Network” – “Change settings” – “Link speed/JUMBO FRAME”).
Log in to EPSON Total Disc Net Administrator.
1
See “Logging in to EPSON Total Disc Net Administrator” in the PP-100NII User’s Guide for the login
procedure.
Click the [Network] tab in the [System settings] screen.
2
Preparation
Either manually enter the IP address, DNS server setup method, and host and domain name
3
setup method, or set them to [Auto], and click [Save].
29

4
Preparation
Click [OK].
30
 Loading...