

Epson PowerLite 1715c, PowerLite 1815p, PowerLite 6100i, PowerLite 755c, PowerLite 765c User Guide
...Page 1

Epson Projector Control
User’s Guide
The Epson® Projector Control software lets you control the projector over a
wired or wireless network from a computer running Windows® 2000 SP4,
XP SP2 32-bit, or Windows Vista™ 32-bit. It enables you to perform
operations, such as turning the projector on/off and switching sources,
from your computer without using the projector’s remote control.
Note: Macintosh® systems are not supported.
To install the Projector Control software, double-click the installer icon and
follow the on-screen instructions.
Make sure the following requirements are met before starting the Projector
Control software:
■ The Projector Control software is installed on your computer
■ Your computer and the projector are connected to the same network
and you can access the projector
■ The Network setting in the projector’s menu is set to On
Connecting to the Projector
1. In Windows, click Start > Programs > EPSON Projector >
Projector Control. You see a window like this:
Page 2
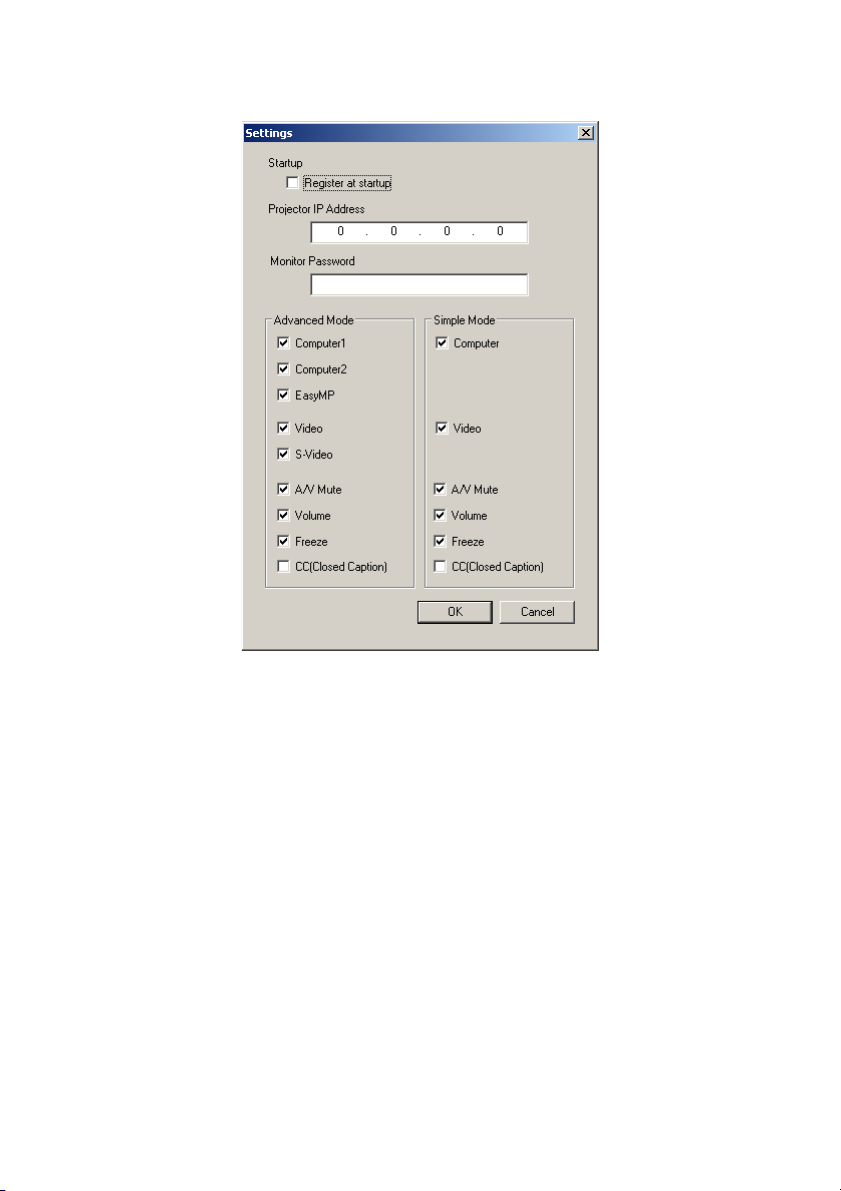
2. Select Settings from the Tool menu. You see a window like this:
3. Select Register at startup if you want the Projector Control software to
start automatically when your computer starts up.
4. Enter the IP address for the projector in the Projector IP Address field.
You cannot connect to the projector without entering a Projector IP
Address. See your projector’s documentation for information on
obtaining your projector’s IP address.
5. Enter the Web Control password or the password that was set using the
Epson EMP Monitor Utility in the Monitor Password field. If you
didn’t set a password, don’t enter anything.
6. Uncheck the boxes for the buttons that you do not want to display in
Advanced and Simple Mode.
7. Click OK to save and close the settings window or Cancel to discard
your changes and close the settings window.
Connecting to the Projector 2
Page 3

Using Epson Projector Control
There are two modes for the main screen, Advanced Mode and Simple
Mode. Choose Simple Mode to minimize the number of button options.
Advanced Mode
Simple Mode
See the tables below for a list of button functions.
Advanced Button Functions
Button Function
Power Turns the projector’s power on/off.
Computer1 Switches to the Computer1 input source.
Computer2 Switches to the Computer2 input source.
EasyMP Switches to the EasyMP network input source.
Video Switches to the Video input source.
S-Video Switches to the S-Video input source.
A/V Mute Turns A/V Mute on/off on the projector.
Using Epson Projector Control 3
Page 4

Advanced Button Functions (continued)
Button Function
Freeze Turns the Freeze function on/off on the projector.
CC Displays the selection menu for Closed Caption.
Select one of the following: “OFF,” “CC1,” or “CC2.”
This function may not be available depending on the
projector model.
Volume – Turns the volume down on the projector.
Volume + Turns the volume up on the projector.
r Switches between Advanced Mode and Simple Mode.
Simple Mode Button Functions
Button Function
Power Turns the projector’s power on/off.
Computer Switches between the Computer, Computer1,
Computer2, and EasyMP network input sources.
Video Switches between the Video and S-Video input sources.
A/V Mute Turns A/V Mute on/off on the projector.
Freeze Turns the Freeze function on/off on the projector.
Volume – Turns the volume down on the projector.
Volume + Turns the volume up on the projector.
r Switches between Advanced Mode and Simple Mode.
Using Epson Projector Control 4
Page 5

Solving Connection Problems
If you can’t connect to the projector, check the following:
■ Make sure that the network cable is correctly connected to your
computer and projector.
■ Check the network settings on the projector.
■ Make sure that you entered the correct IP address for the projector
you’re trying to connect to. See your projector’s documentation for
information on obtaining the projector’s IP address.
■ Make sure that you entered the correct Monitor Password or Web
Control Password for the projector that you’re connecting to. If you
didn’t set a password, don’t enter anything.
Epson is a registered trademark of Seiko Epson Corporation.
General Notice: Other product names used herein are for identification purposes only and may be
trademarks of their respective owners. Epson disclaims any and all rights in those marks.
© 2007 Epson America, Inc.
 Loading...