

Page 1
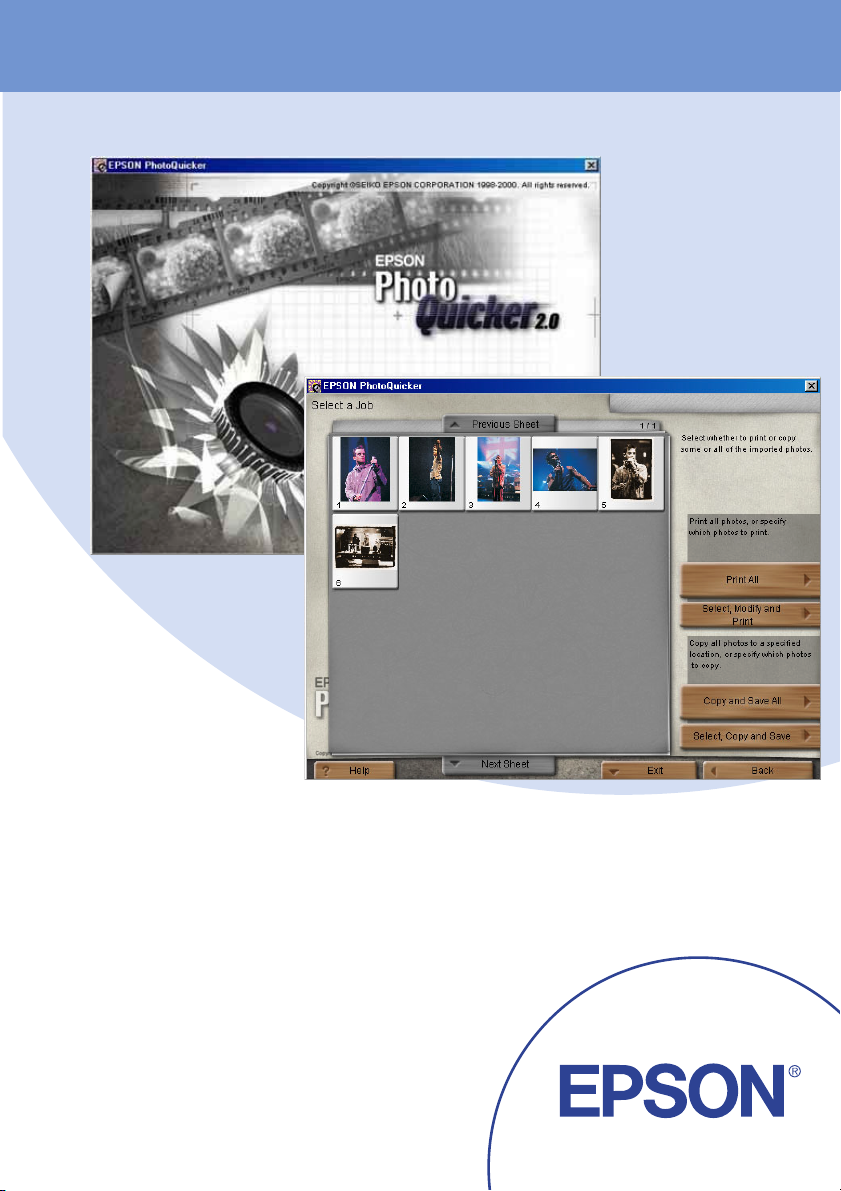
EPSON PhotoQuicker 2.0
User's Guide
Copyright © 2000 by SEIKO EPSON CORPORATION
Nagano, Japan
25.05.2001
EUL
Page 2

How to use this guide
This guide provides basic information about EPSON
PhotoQuicker. To print your photo data, launch EPSON
PhotoQuicker as instructed on page 7 in this guide, then follow
the instructions below to print. For detailed information about the
software, click the Help button to open online help.
Start EPSON PhotoQuicker
d
If you have started EPSON PhotoQuicker, load the photos:
from a folder
from TWAIN
d
Select the task you would like to perform from the following list:
print all photos
select, modify and print photos
copy and save all photos
select, copy and save photos
d
Select the photos.
d
Select print layout and paper size.
d
Make the printing settings.
d
Print your photos.
2
Page 3

Please Note
Depending on your printer model:
❏ Some features may not be available.
❏ Paper sizes and types may vary.
❏ Some troubleshooting information contained in this
manual may not be applicable.
3
Page 4

Contents
Introduction to EPSON PhotoQuicker. . . . . . . . . . . . . . . . . . . . . . 5
Paper. . . . . . . . . . . . . . . . . . . . . . . . . . . . . . . . . . . . . . . . . . . . . . 6
Printing with EPSON PhotoQuicker . . . . . . . . . . . . . . . . . . . . . . .7
Launching EPSON PhotoQuicker . . . . . . . . . . . . . . . . . . . . .7
Loading photo data . . . . . . . . . . . . . . . . . . . . . . . . . . . . . . . . .8
Troubleshooting. . . . . . . . . . . . . . . . . . . . . . . . . . . . . . . . . . . . . . . . . 12
Error messages . . . . . . . . . . . . . . . . . . . . . . . . . . . . . . . . . . . . . 12
Problems loading photo data . . . . . . . . . . . . . . . . . . . . . . . . . 13
Problems when Print All is selected . . . . . . . . . . . . . . . . . . . 14
Problems during filter processing . . . . . . . . . . . . . . . . . . . . . 14
Problems printing. . . . . . . . . . . . . . . . . . . . . . . . . . . . . . . . . . . 16
System requirements. . . . . . . . . . . . . . . . . . . . . . . . . . . . . . . . . . . . . 19
Flowchart . . . . . . . . . . . . . . . . . . . . . . . . . . . . . . . . . . . . . . . . . . . . . .20
4
Page 5

Introduction to EPSON PhotoQuicker
EPSON PhotoQuicker lets you print digital photos using a variety
of layouts. Photo sizes can be adjusted or rotated with a single
mouse click. Add titles or messages to your photos to customize
them. The following is a list of the customizing features that are
available. This utility also allows you to print using the
information saved in a DPOF file.
❏ Paper sizes and types
A wide variety of paper sizes and types can be used for
printing. By printing on different kinds of paper, you can
create professional looking photographs and albums.
❏ Layouts
A variety of layouts are available, including index prints.
Using layouts is simple—just select from the layout images
displayed on screen.
❏ Photo rotation
Photos can be rotated with a single mouse-click so that they
are oriented correctly. This can be useful when you have a
number of pictures with different orientations.
❏ Titles
Words and phrases, or the date and time that your photo was
taken, can be added to your photos. Add messages to photos
intended as gifts to personalize them.
❏ Photo enhancement
The image quality of photos can be improved by enhancing
the color level, contrast, and color balance. The Automatic
Enhancement feature lets you enhance photos without
requiring any technical knowledge of image processing. Or,
a variety of simple buttons let you adjust the color level and
brightness manually.
5
Page 6

❏ Effects
A variety of interesting effects can be applied to photos, and
then saved with the photo. This feature is useful when
designing projects that use photos.
Paper
Various paper sizes and types can be used. Check the
documentation that came with your printer for details.
Caution:
c
Do not touch the printing surface of the paper. Water or grease
from your fingers may affect the quality of the print-out.
6
Page 7

Printing with EPSON PhotoQuicker
This section describes how to print with EPSON PhotoQuicker.
Launching EPSON PhotoQuicker
Caution
c
For Windows
1. Click the Start button, point to Programs and then EPSON
2. On the Start screen, click Start. A dialog box will open where
When loading photo data that is stored on floppy or magnetooptical (MO) disks, do not remove the disk from the drive until
all tasks have been completed, including printing and copying.
PhotoQuicker 2.0, then click EPSON PhotoQuicker 2.0,
or double-click the EPSON PhotoQuicker 2.0 icon on the
desktop. The application will open and display the Start
screen.
you can specify the location of the data you wish to use.
7
Page 8

For Macintosh
1. Double-click the Macintosh HD icon, then double-click the
folder in which EPSON PhotoQuicker 2.0 has been installed.
Double-click the EPSON PhotoQuicker 2.0 icon, or double-
click the EPSON PhotoQuicker 2.0 icon on the desktop. The
application will open and display the Start screen.
2. Click Start. A dialog box will open where you can specify the
location of the data you wish to use.
Loading photo data
Once EPSON PhotoQuicker has been launched, you can access
photo data in the application using any of the following methods.
See the appropriate page for instructions.
❏ Page page 9 for loading data stored on disk
❏ Page page 10 for loading data from TWAIN-compliant
equipment
Note:
Depending on your printer model, the Memory card for EPSON
printer button may not be available.
8
Page 9

Loading data stored on disk
To access photo data stored on your hard drive or on disk, follow
the steps below.
1. Launch EPSON PhotoQuicker. The Select Photo Source
dialog box appears. Then click Folder.
Click here
2. The Select a folder dialog box appears. In the left-hand
window, specify the folder that contains the photo data. The
files contained in the specified folder are displayed in the
right-hand window. Click the button which displays the
folder name, as shown below.
Click here
9
Page 10

3. The photo data will load in EPSON PhotoQuicker. A dialog
box appears where you can specify which task is to be
performed.
Caution:
c
When loading photo data that is stored on floppy or magnetooptical (MO) disks, do not remove the disk from the drive
until all tasks have been completed, including printing and
copying.
4. To print your photos, click Help to refer to the online help for
instructions.
Loading data from TWAIN-compliant equipment
To access photo data from equipment that complies with TWAIN
standards such as scanners and digital cameras, follow the steps
below.
1. Make sure that the TWAIN device is connected to the
computer and, if necessary, ensure that the photo to be
scanned is placed correctly.
10
Page 11

2. Launch EPSON PhotoQuicker. The Select Photo Source
dialog box appears.
3. Click TWAIN. A description of TWAIN and various
precautions will be displayed.
4. After reading the description, click OK. The connected
TWAIN device will be displayed in the dialog box.
Note:
To cancel loading, click Cancel.
11
Page 12

5. Click the TWAIN device from which the photo data will be
obtained, and then click Select. The TWAIN driver appears.
Note:
The dialog box which is displayed will vary depending on which
TWAIN driver is installed.
6. Follow the on-screen instructions, and then click Load. The
photo data will load.
7. To print your photos, click Help to refer to the online help for
instructions.
Troubleshooting
Refer to the appropriate section if you encounter any problems
using EPSON PhotoQuicker.
Error messages
If error messages are displayed during operation, follow the onscreen instructions to correct the problem.
12
Page 13

Problems loading photo data
Cannot load photo data.
Cause Solution
The photo data does not exist in
the specified location.
Insufficient space on the
computer’s hard disk or
insufficient memory.
The number of pixels contained
by the photo being loaded is too
small or too large.
Make sure that the format of the
file in the specified location is
supported by EPSON
PhotoQuicker.
Free up sufficient space for
EPSON PhotoQuicker to operate,
or install more RAM.
EPSON PhotoQuicker supports
pixel counts between 321 × 321
and 2,048 × 1,536. Photos with a
pixel count of less than 321 × 321
cannot be loaded. When loading
images with a pixel count of
2,048 × 1,536 on a Macintosh, it is
necessary to increase the amount
of memory allocated to EPSON
PhotoQuicker.
Cannot load photo data from a scanner or digital camera.
Cause Solution
The photo data is not 24-bit color,
8-bit gray or 1-bit monochrome
image.
Change the color setting to 24-bit
color, 8-bit gray or 1-bit
monochrome, then reload the
data.
The photo data does not exist in
the specified location.
Make sure that the scanner or
camera complies with TWAIN
standards. For more details, see
your scanner or camera manual.
13
Page 14

Problems when Print All is selected
The number of copies to be printed cannot be specified.
Cause Solution
Print All is selected in the Select a
Job dialog box. The number of
copies to be printed cannot be
specified when Print All is
selected.
Change the setting to Select,
Modify and Print and try again.
The filter processing menu cannot be displayed on-screen.
Cause Solution
Print All is selected in the Select a
Job dialog box.
(filter setup) is not possible when
Print All has been selected.
P
hoto processing
Change the setting to Select,
Modify and Print and try again.
Problems during filter processing
The specified filter was not applied to the image.
Cause Solution
Incorrect filter settings were
made.
Make sure the filter settings are
correct, and then click the Select
a filter to be applied to this
photo button or the Select a
filter to be applied to all of the
photos button.
14
Page 15

The effect of a filter differs between photos.
Cause Solution
EPSON PhotoQuicker performs
optimum processing on each
individual photo in accordance
with pixel counts and print sizes.
Automatic adjustment and
recorded color enhancement are
performed automatically, using
the optimum settings for each
individual photo.
Manually fine-adjust the filter for
each photo while observing the
effect.
Manually fine-adjust the filter for
each photo while observing the
effect.
The effect of a filter differs from what was specified on the filter setup screen.
Cause Solution
Automatic Adjustment has been
selected in the Easy Print setting
dialog box.
The actual printout may differ
from the image displayed on
screen owing to a different
display resolution for the filter
sharpness, paint and texture
functions.
Clear the Automatic
Adjustment check box.
Manually adjust the filter for the
photo while observing the effect.
15
Page 16

Problems printing
Cannot select Photo Quality Glossy Film as the paper type.
Cause Solution
No Margins is selected as the
layout.
You may be using a printer that
does not support this paper type.
Select a layout without No
Margins.
Select a different paper type.
It is not possible to print a filter-processed photo.
Cause Solution
The processed photo has not been
set up to print.
Click the Number of Prints tab on
the Select Photos screen, and then
click the photo to be printed.
The orientation of photos is not uniform.
Cause Solution
The orientation of the digital
camera was different when the
photos were taken.
On the Optional Settings menu,
click the Rotate tab, then click the
photo to be rotated.
The size of the printed image exceeds the size of the paper, and
some portions of the image have been lost.
Cause Solution
Oversize Print is selected as the
Print Size Adjustment setting.
Click Trimming Guide Settings
on the Optional Settings menu
and select Exact Size Print or Fit to
Print as the Print Size Adjustment
setting.
16
Page 17

A white border exists at the top and bottom, or left and right sides, of the photo.
Cause Solution
Resize Photos to Fit the Print Size
is selected as the Photo Trimming
Method setting.
Click Trimming Guide Settings
on the Optional Settings menu
and select Standard Trimming as
the Photo Trimming Method
setting.
A white border exists around the edges of the postcard after printing.
Cause Solution
Undersize Print is selected as the
Print Size Adjustment setting on
the Trimming Guide Settings
menu.
Cut around the edge after
printing, or click Trimming Guide
Settings on the Optional Settings
menu and select Oversize Print as
the Print Size Adjustment setting.
The Easy Print settings are not available.
Cause Solution
The default printer is not
compatible with Easy Print.
If you have a printer that is
compatible with Easy Print, select
it in the select a printer dialog box
(for Windows) or in the Chooser,
then click the Change button in
the select a printer dialog box (for
Macintosh).
17
Page 18

Some Print Size Adjustment and Photo Cutting Guide settings
cannot be made on the Trimming Guide Settings menu.
Cause Solution
Depending on the paper size and
print layout settings made on the
Select a Layout menu, certain
Trimming Guide settings may be
unavailable.
Change the paper size and print
layout settings.
The photo information cannot be displayed or printed.
Cause Solution
The photo data has been loaded
from a TWAIN device.
The photo information was not
registered in the photo file when
the photo was taken.
It is not possible to display or print
photo information in this
situation.
It is not possible to display or print
photo information in this
situation.
The page information cannot be printed.
Cause Solution
When using roll paper, a selection
other than Index has been
specified as the print layout
setting on the Select a Layout
menu.
Index must be selected as the
print layout setting in order to
print the page information when
printing with roll paper.
Note:
Depending on your printer, roll paper may not be available.
18
Page 19

System requirements
Item Windows Macintosh
®
Operating system Microsoft Windows
Millennium Edition, 98,
95, 2000, or NT4.0
Mac OS 8.X/9.X (except
8.0)
Hardware model DOS/V system
equipped with a
standard USB interface
or parallel interface.
A Sound Blaster or
compatible sound card
is required to reproduce
sound.
CPU Pentium 166 MHz or
higher (Pentium II 266
MHz or higher
recommended)
Memory 64 MB or higher when
handling images of
three million pixels or
more (128 MB or higher
recommended)
Display SVGA (800 × 600) 16-bit
color or higher
Hard disk Installation: 70 MB or
more free space
Operation: 220 MB or
more free space when
handling images of
three million pixels
CD-ROM Drive Required Required
PowerPC equipp ed with
a standard USB
interface (PowerPC G3
266 MHz or higher
recommended)
42 MB or higher when
handing images of three
million pixels or more
(128 MB or higher
recommended)
SVGA (800 × 600) 32,000
colors or higher
Installation: 70 MB or
more free space
Operation: 220 MB or
more free space when
handling images of
three million pixels
19
Page 20

Flowchart
Select Photo
Source
Folder Brightness
TWAIN Auto Adjust Contrast
d
Print All
Select,modify
and Print
Copy and
Save All
Select,Copy
and Save
Select a Job
Distinct,
Vivid
Number of
Prints
Modify
Adjustments
Effects Presettings Paint
Advanced Texture
Sepia
Monochrome
Low contrast
silver
Vivid
Color
Balance
Sharpness
Monotone
Memory Col or
Correction
Note:
Paper sizes and types may vary, depending on your printer. Function
contents may vary depending on geographical region.
20
Page 21

d
Select a
layout
Print
d
d
Print
Settings
Select the
d
operation
next
Select
Printer
Optional
Settings
Select the
paper type
A4 Rotate Exit
A6 Blank
100mm ×
150mm
Photo
Stickers
*A3
*A3+
Title
Trimming
Guide
Settings
Page
Information
Settings
Photo
Information
Settings
Roll paper
Start Over
Continue
21
Page 22

 Loading...