

Epson Perfection V200 PHOTO Quick Start Guide
Connect and turn on
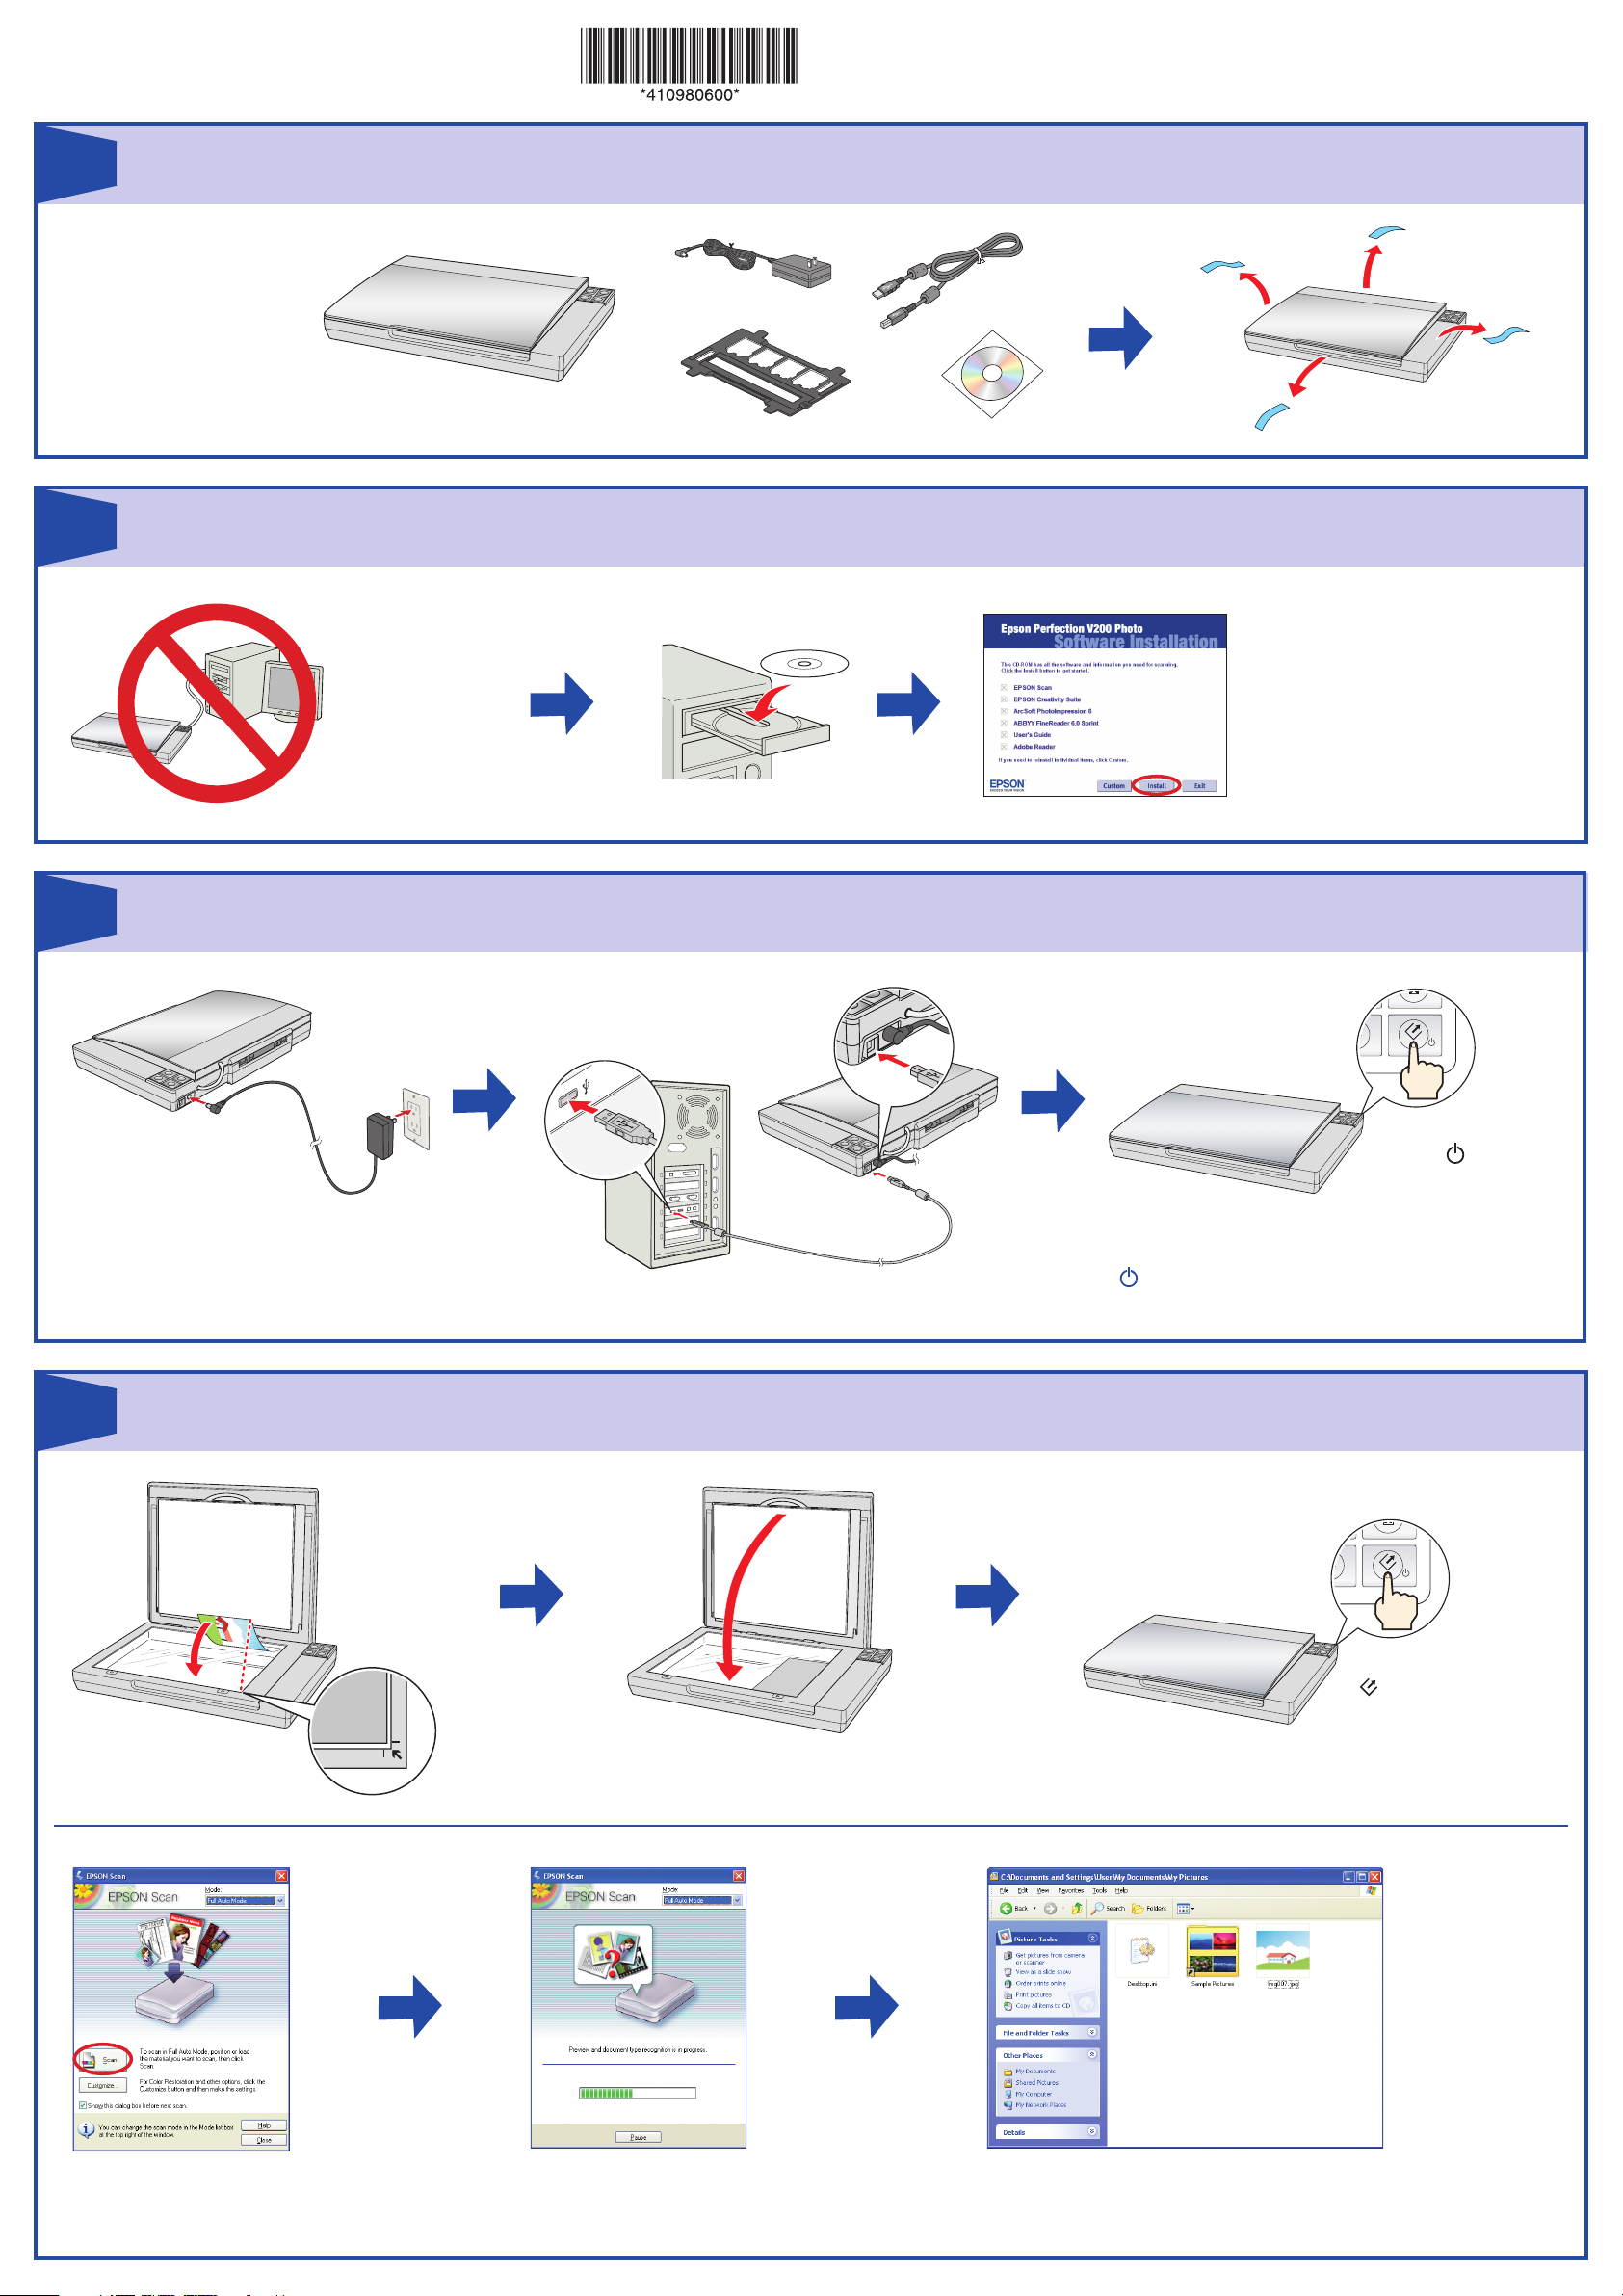
Unpack
Install software
Do not connect the
USB cable yet.
Plug the AC adapter
into an electrical outlet.
Press the
Power
button. Do not press any
buttons while the status
light is flashing.
Scan a photo
Press the
Start button.
Click Scan.
1
2
4
3
1
2
3
4
Click Install and follow the
on-screen instructions.
Windows Vista
TM
: Click Run
Epsetup.exe when prompted.
Note: To turn off the scanner press and hold
the
Power button for 3 seconds.
Start Here
Epson Perfection® V200 Photo
Epson Scan scans your photo in Full Auto
Mode. Wait for your scan to finish.
View your photo in Pictures or My Pictures.
Unpack and remove protective
tape.
Help
Scanner Software Help
Click the Help button on your scanner software screen.
User’s Guide
Double-click the Perfection V200P User’s Guide icon on your desktop.
Epson Technical Support
Internet Support
Visit Epson’s support website at epson.com/support and select your product for
solutions to common problems for the Perfection V200 Photo. You can download
drivers and documentation, get FAQs and troubleshooting advice, or e-mail Epson
with your questions.
Speak to a Support Representative
U.S.: (562) 276-4382, 6 AM to 6 PM, Pacific Time, Monday through Friday
Canada: (905) 709-3839, 6
AM to 6 PM, Monday through Friday
Toll or long distance charges may apply.
Software Technical Support
ArcSoft PhotoImpression
®
: Phone (510) 440-9901, Fax (510) 440-1270,
www.arcsoft.com, support@arcsoft.com
ABBYY
®
FineReader®: (510) 226-6717, www.abbyyusa.com, support@abbyyusa.com
Do more
Epson is a registered trademark and Exceed Your Vision is a trademark of Seiko Epson Corporation. Perfection is a registered trademark of Epson America, Inc.
General Notice: Other product names used herein are for identification purposes only and may be trademarks of their respective owners. Epson disclaims any and all rights in those marks.
© 2007 Epson America Inc. 3/07 CPD-23664
Printed in : XXXXXX XX.XX-XX XXX
?
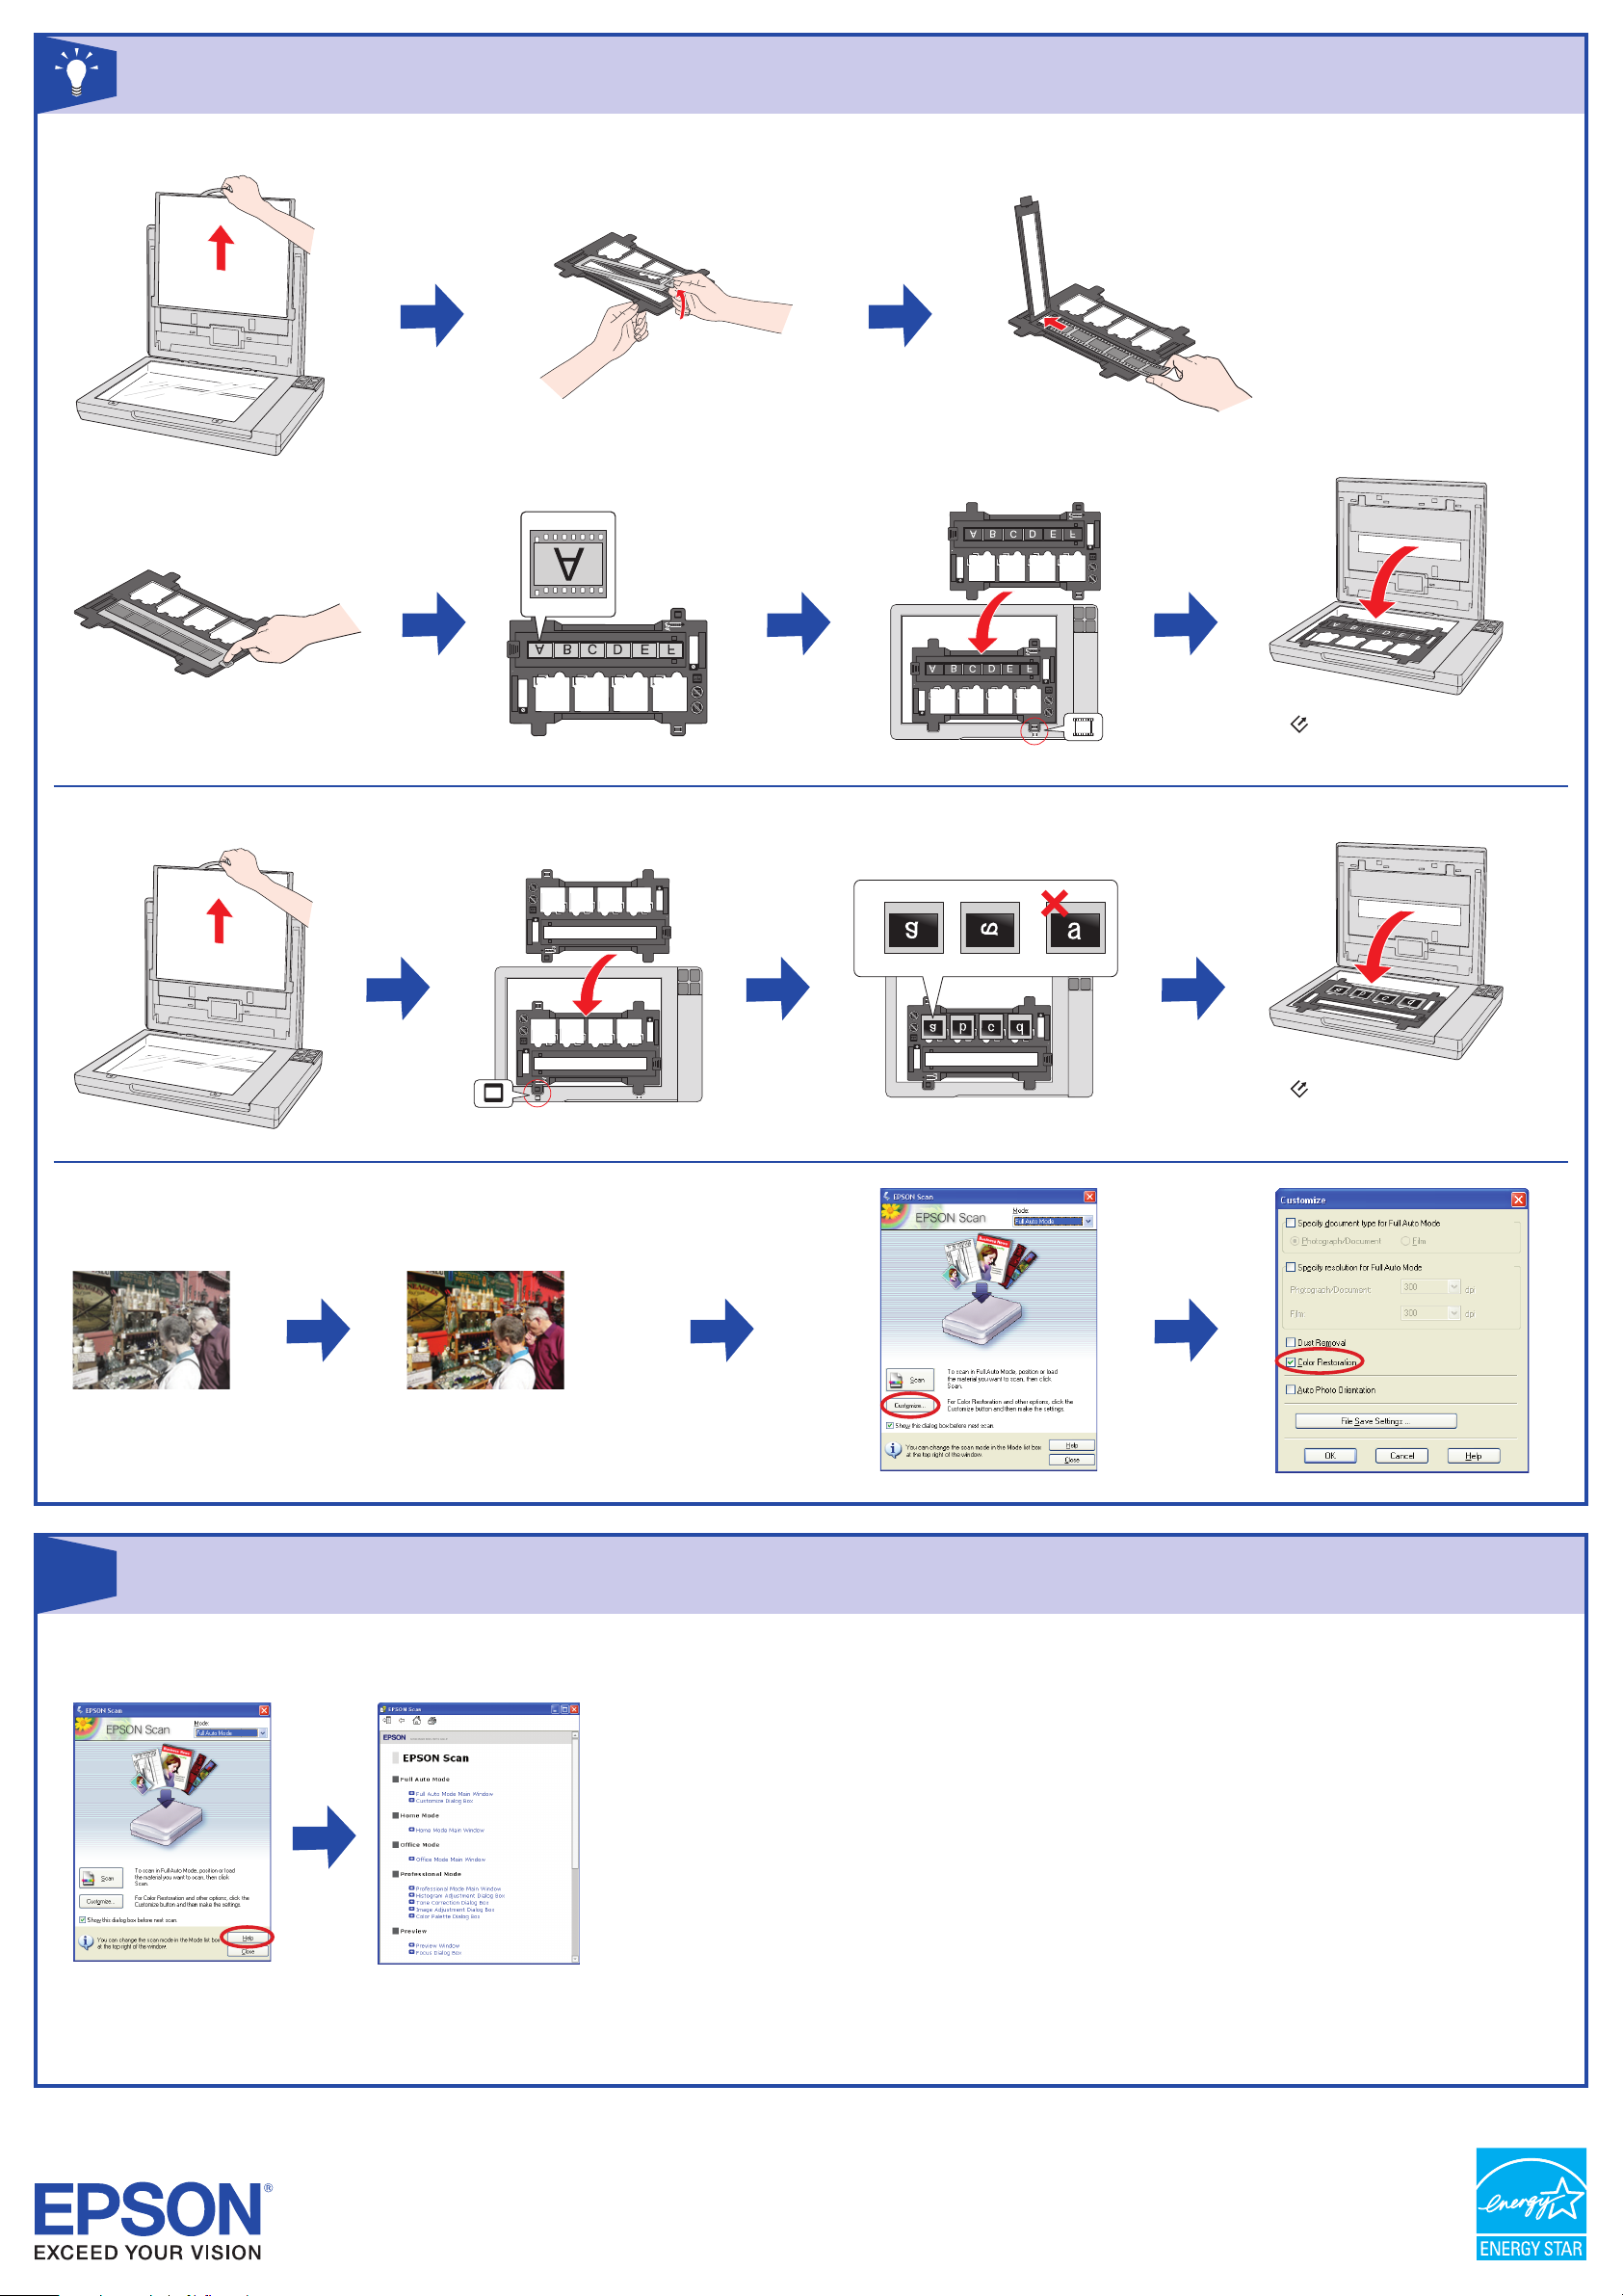
Scan film
Press the Start button and follow the
rest of the steps in section 4 “Scan a Photo.”
Insert negatives with the
shiny side facing down.
Scan slides
Press the Start button and follow the
rest of the steps in section 4 “Scan a Photo.”
2
Restore color
1
You can also optimize your scans with the Enhanced Backlight Correction and
Digital Dust Removal features. See your on-screen User’s Guide for details.
 Loading...