

Page 1
IMPORTANT
Windows® 98
Scanner Software Installation
After you set up and connect your scanner as described in the Scanner
Basics book, follow the steps in this booklet to install the scanner
software and creative software on a Windows 98 system. Do not
follow the steps in the book.
If You’re Running Windows 98 . . .
Depending on how your computer system was originally set up, you
may be asked to insert your Windows 98 operating system CD-ROM
during scanner installation. Please have your Windows CD-ROM
handy in case you need it.
Note: If the Startup window opens at any time while you’re following
these steps, click the close box in the upper right corner to close it.
1. Turn on your scanner first; then turn on your computer. A screen
appears saying that your system has detected new hardware. The
software for the SCSI board (SCSI controller) is automatically
installed. Then you must install the scanner software.
Note: If your system doesn’t automatically detect the SCSI board,
see page 68 of the Scanner Basics book for troubleshooting help.
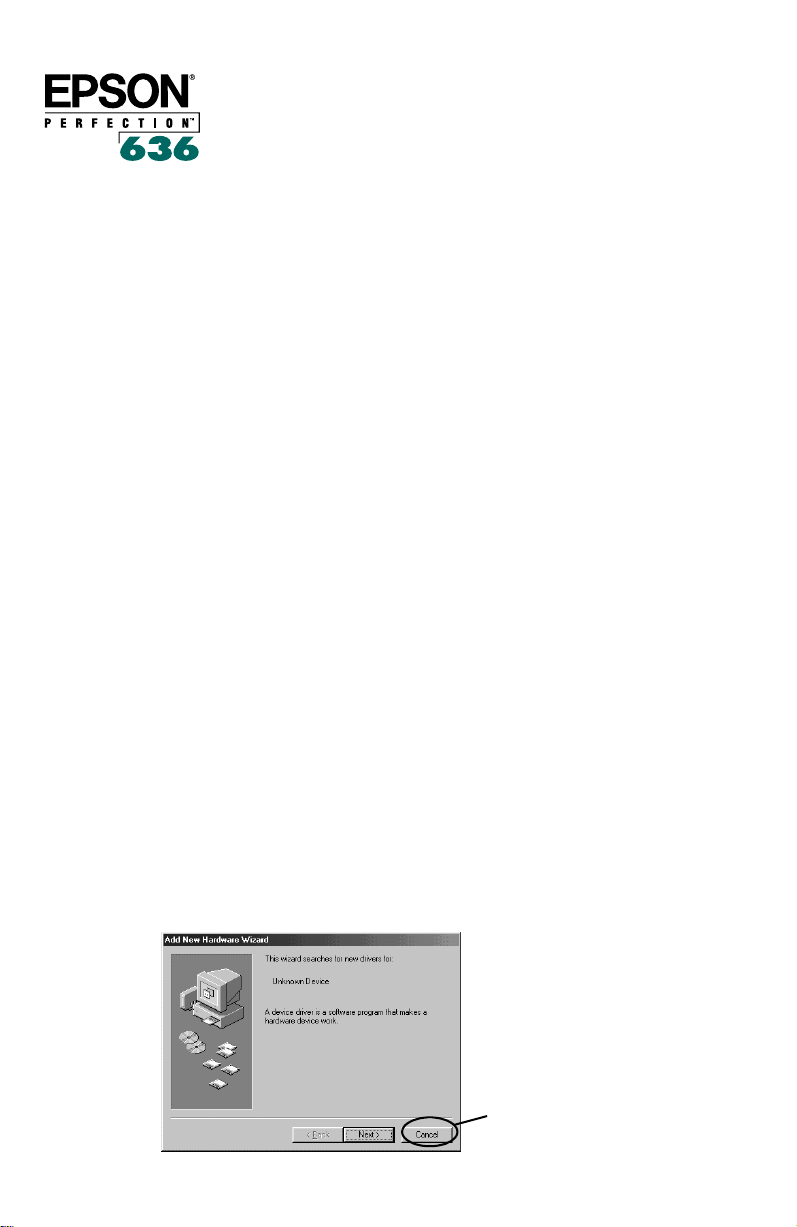
If the following dialog box appears, click
with step 2.
1
Cancel
Click Cancel
and continue
Page 2
Note: If you press Next by mistake, click Back, then click
Cancel. If you have any other problems, see page 68 of your
Scanner Basics book for troubleshooting solutions.
2. Insert the scanner CD-ROM in the CD-ROM drive. The
EPSON screen appears, followed by the License Agreement. Read
the agreement, then click
AGREE to continue.
Note: If the CD-ROM doesn’t start automatically, click
Run, and type D:\EPSON (where
letter). Then click
OK.
D
is your CD-ROM drive
Start,
3. When the Setup reminder screen appears, verify you’ve installed
the hardware correctly, then click
Yes.
4. When the Scanner Software Installation screen appears, click
Install. The LaserSoft Scan Software for EPSON Perfection 636
is installed first. Follow the instructions on screen to install the
software. When that installation is complete, EPSON TWAIN is
installed (you won’t see any activity on screen).
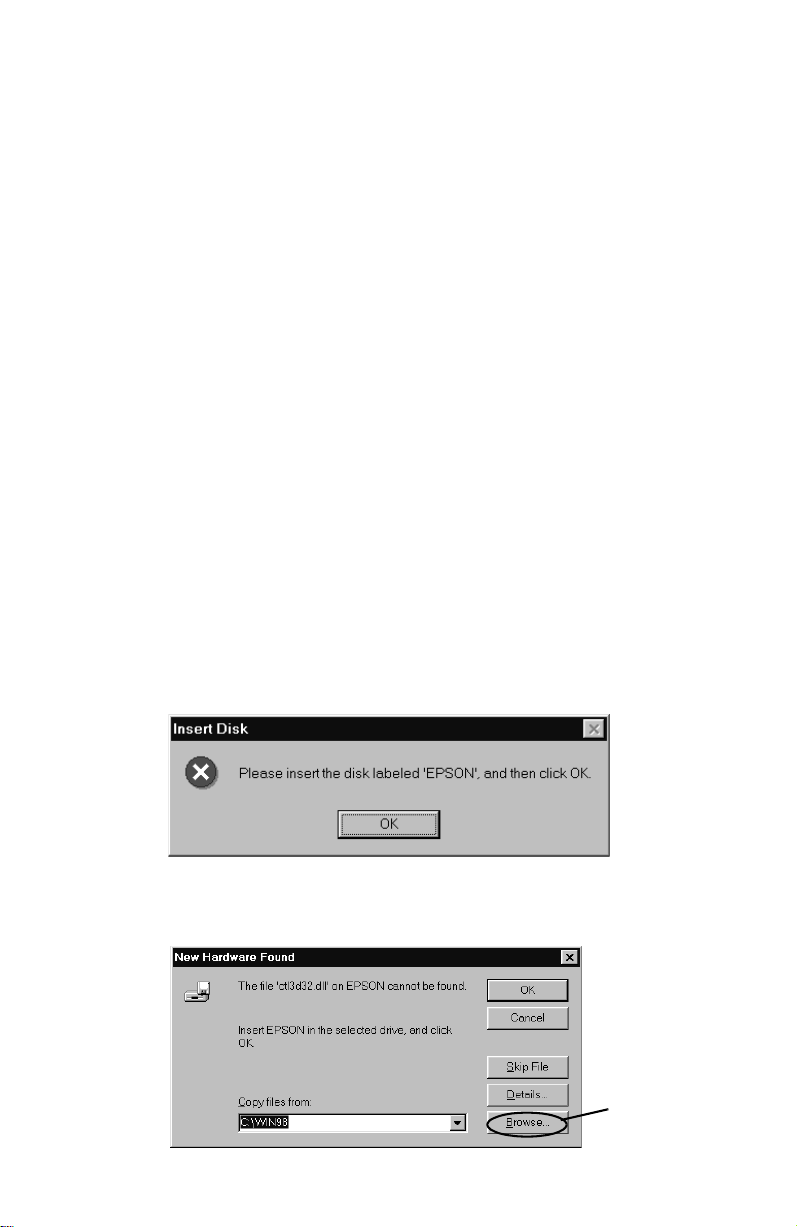
5. After the software is installed, you must restart your computer
when prompted. Be sure to leave the CD-ROM in the drive. After
OK
you restart, you see this prompt. Click
.
6. You see this dialog box asking you to provide the location of the
EPSON TWAIN files on your CD-ROM. Click
Browse.
Click
Browse
2
Page 3

7. You see the Open dialog box. Select your CD-ROM drive letter in
the Drives pull-down list. In the Folders box, click the
folder and then click the
When the folder path reads
CD-ROM drive letter), click
win98 folder.
d
:\twain\win98
OK
.
(where d is your
twain
Select the
twain\win98
folder
Select your
CD-ROM
drive letter
8. You see the New Hardware Found dialog box asking for the
location of an .inf file. Make sure the Copy files from box shows
d
:\twain\win98
OK
click
.
(where d is your CD-ROM drive letter). Then
9. You see the EPSON TWAIN 3 Setup window.
Note: If you don’t see the EPSON TWAIN 3 Setup window, it
may be behind the Main Menu screen. Hold down the
and press
Make sure that
Perfection 636
Tab to move the window to the front.
SCSI
is selected in the Interface pull-down list and
appears in the Port Id list. (If not, see page 68 of
Alt key
the Scanner Basics book for troubleshooting instructions.)
10. Place a document face down on the scanner’s document table
glass.
Test
11. Click
to check the connection. The scanner scans the
document and if everything is properly installed and connected,
an image appears in the window.
3
Page 4

12. Click OK to close the EPSON TWAIN 3 Setup window.
The Screen Calibration window appears. You must calibrate your
screen and scanner to reproduce images closely matching the
originals.
13. Move the slider in the Screen Calibration window to the right or
left until the shades of the horizontal gray stripes appear similar.
View the screen from a short distance. The gray stripes will not
perfectly blend together; however, try to make the two tones
match as closely as possible.
14. Click
OK to register the calibration setting.
Installing the Creative Software with Windows 98
1. To install the creative software that came on your scanner
CD-ROM, click
D
(where
is your CD-ROM drive letter) and click OK.
2. After a moment, you see the EPSON installer Main Menu. Click
Creative Software
Install
click
3. Follow the instructions on screen and in “Install the Creative
Software” beginning on page 28 of your Scanner Basics book.
Note: Some of the creative software installers require you to restart
your system. To return to the EPSON installer, repeat the steps above.
Start and Run. At the prompt, type D:\EPSON
, select the software you want to install, and
.
EPSON is a registered trademark of SEIKO EPSON CORPORATION. Perfection is a
trademark of Epson America, Inc.
General Notice: Other product names used herein are for identification purposes only and
may be trademarks of their respective companies.
Copyright © 1998 by Epson America, Inc. CPD 7661
Torrance, California, USA 10/98
4
 Loading...