

Page 1
EpsonNet 802.11g Wireless Ext. Print Server
Setup
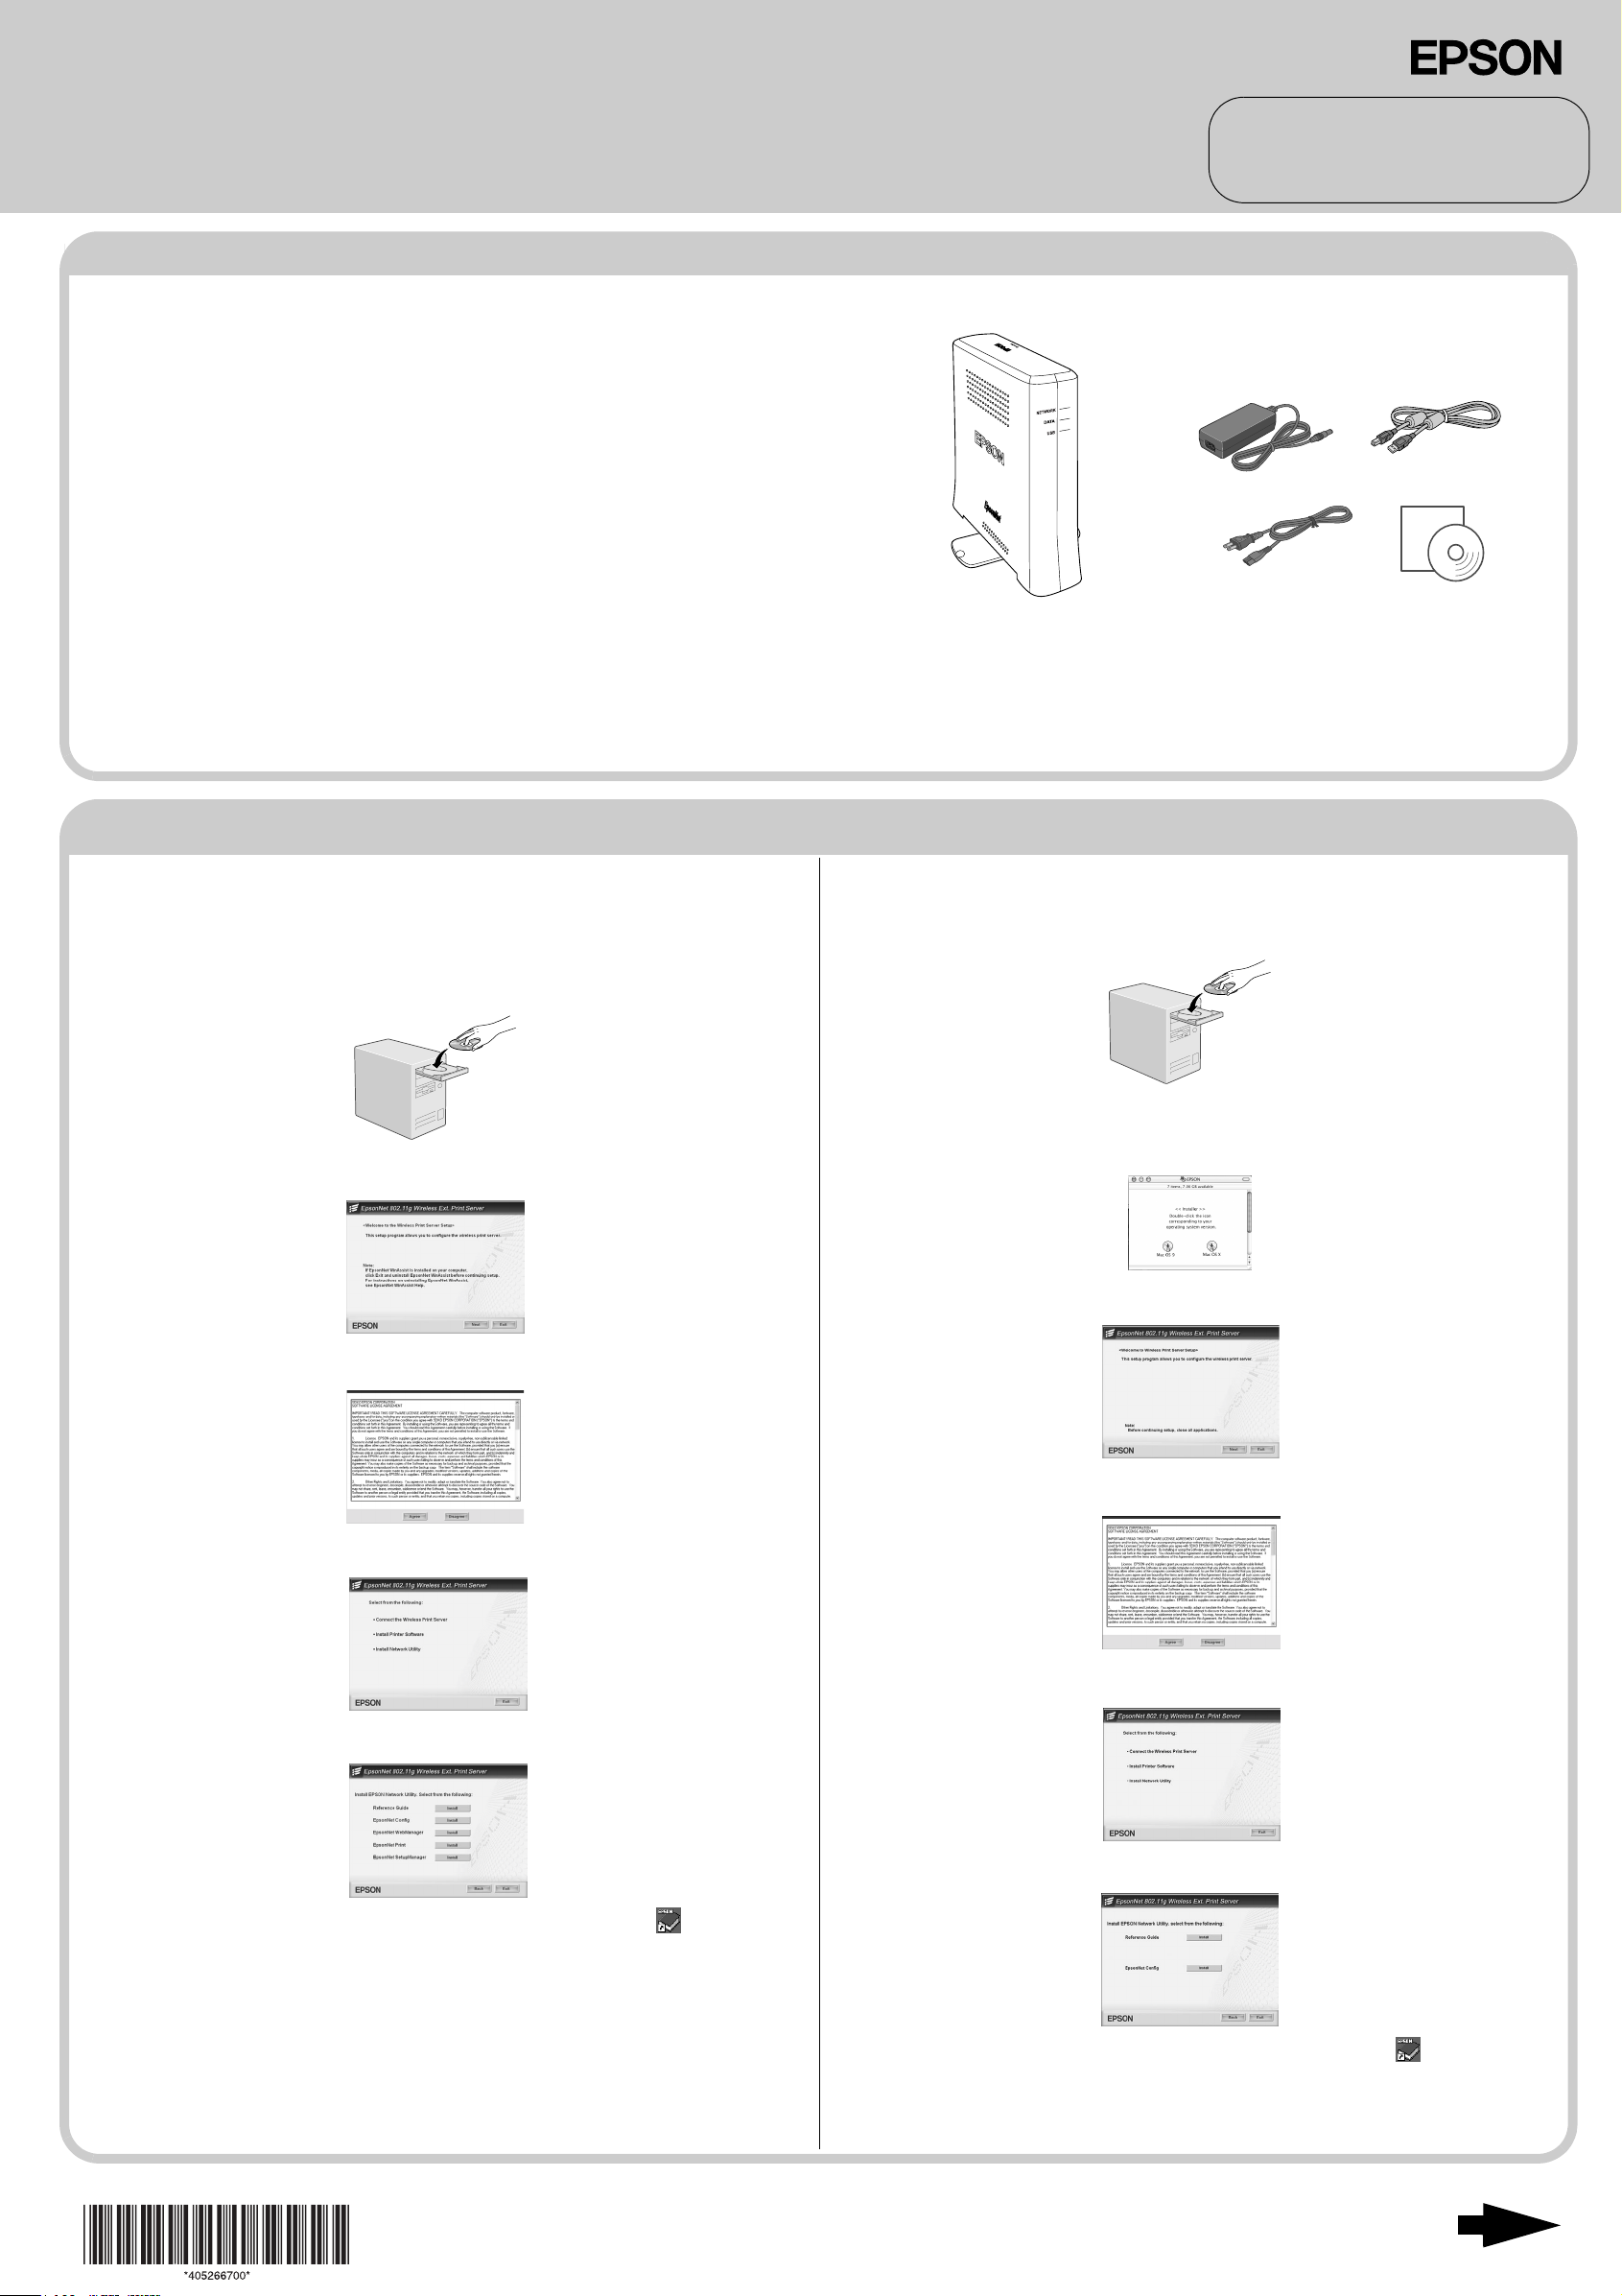
Package Contents
Your network interface package includes the following items:
❏ Wireless network interface
❏ AC adapter (A261H) and power cord
❏ USB cable
❏ Software CD-ROM
You need to prepare the following items:
❏ Epson device (such as printer or all-in-one) with USB port. (See the
Reference Guide for information on the supported devices.)
❏ Access point (required for Infrastructure mode only)
❏ Computer with USB port
Note:
❏ To get to the access point via a wireless network, you need to install an 802.11b/g WLAN compliant network interface card on your
computer.
❏ The term “network interface” refers to the EpsonNet 802.11g Wireless Ext. Print Server in this guide.
❏ The network interface supports the following operating systems: Windows XP/Me/98 SE/2003/2000 and Mac OS X 10.2 or later/9.1 or later.
❏ See the manual shipped with your printer or all-in-one for the supported operating system of your printer or all-in-one.
English
4052667-00
xxx
Notes
Notes contain important information and
useful tips on the operation of your product.
For Windows
If you are going to use the network interface with all-in-one, see
the back side of this sheet.
Otherwise, follow the steps below to install the Reference Guide
on your computer to see the setup instructions.
1. Insert the Software CD-ROM in the CD-ROM drive.
2. From the Welcome screen, click Next.
3. Read the license agreement, and then click Agree.
For Macintosh
Follow the steps below to install the Reference Guide on your
computer to see the setup instructions.
1. Insert the Software CD-ROM in the CD-ROM drive.
2. Double-click the EPSON CD-ROM icon.
3. Double-click the appropriate OS icon in the EPSON folder.
4. From the Welcome screen, click Next.
4. Select Install Network Utility.
5. Click the Install button located next to Reference Guide.
6. To view the Reference Guide, double-click the EpsonNet
Reference Guide icon on the desktop. See “How To” in the
Reference Guide for detailed information.
You can also access the Reference Guide via the Start
menu. To do so, click Start, point to All Programs (Windows
XP/Server 2003) or Programs (Windows Me/98/2000), and
then select EPSON. Click EpsonNet Reference Guide.
5. Read the license agreement, and then click Agree.
6. Select Install Network Utility.
7. Click the Install button located next to Reference Guide.
8. To view the Reference Guide, double-click the EpsonNet
Reference Guide icon on the desktop.
See “How To” in the Reference Guide for detailed
information.
Continue to the next page...
Page 2

For EPSON STYLUS PHOTO RX500/600 and EPSON STYLUS CX4600/ 6400/6600 Users (Windows Users Only)
Follow the steps below to set up the all-in-one for use on a
wireless network.
Make sure the all-in-one is set up and the software for the all-inone is installed on your computer before taking the steps below.
See the manual shipped with the all-in-one for detailed
instructions.
Note:
❏ If EpsonNet WinAssist is installed on your computer, uninstall it
before following the steps below.
❏ It is a good idea to write down the SSID and WEP Key or WPA
Personal password before taking the steps below.
❏ Windows Server 2003 is not supported.
1. Insert the Software CD-ROM in the CD-ROM drive.
2. From the Welcome screen, click Next.
3. Read the license agreement, and then click Agree.
4. Select Connect the Wireless Print Server.
8. The “Found New Hardware Wizard” appears to prompt you
to install the USB driver. Select the Install from a list or specific
location radio button and then click Next.
Note for Windows XP Service Pack 2 Users:
If the following screen appears, select the No, not this time radio
button, and then click Next.
Select the Search for the best driver in these locations radio button
and then select the Search removable media check box. Finally,
click Next.
When the operation is completed, click Finish.
Note:
These screens may be different depending on the operating
system.
5. Connect the network interface and the all-in-one with a USB
cable. Finally, turn on the all-in-one.
Note:
Be sure to use the USB cable that comes with the network
interface. If the all-in-one has a built-in USB cable, use it to connect
to the network interface.
6. Connect the square connector on the USB cable to the USB
upstream connector on the network interface, and then
connect the other end to the USB port on the computer.
9. Click Next.
10. Select the model of the all-in-one.
11. Click Install. Follow the on-screen instructions to make the
wireless settings and TCP/IP settings and install the drivers.
Note for Windows XP Service Pack 2 users:
If the following screens appear, click the Unblock button.
7. Connect the power cord to the AC adapter, and then plug
the AC adapter into the network interface's DC-IN
connector. Finally, plug the power cord into a properly
grounded wall outlet.
12. Pull out the USB cable from your computer and the network
interface.
13. Now you can use the all-in-one on the wireless network.
Copyright© 2004 by Seiko Epson Corporation, Nagano, Japan.
Printed in XXXXXX XX.XX-XX
 Loading...