

Page 1
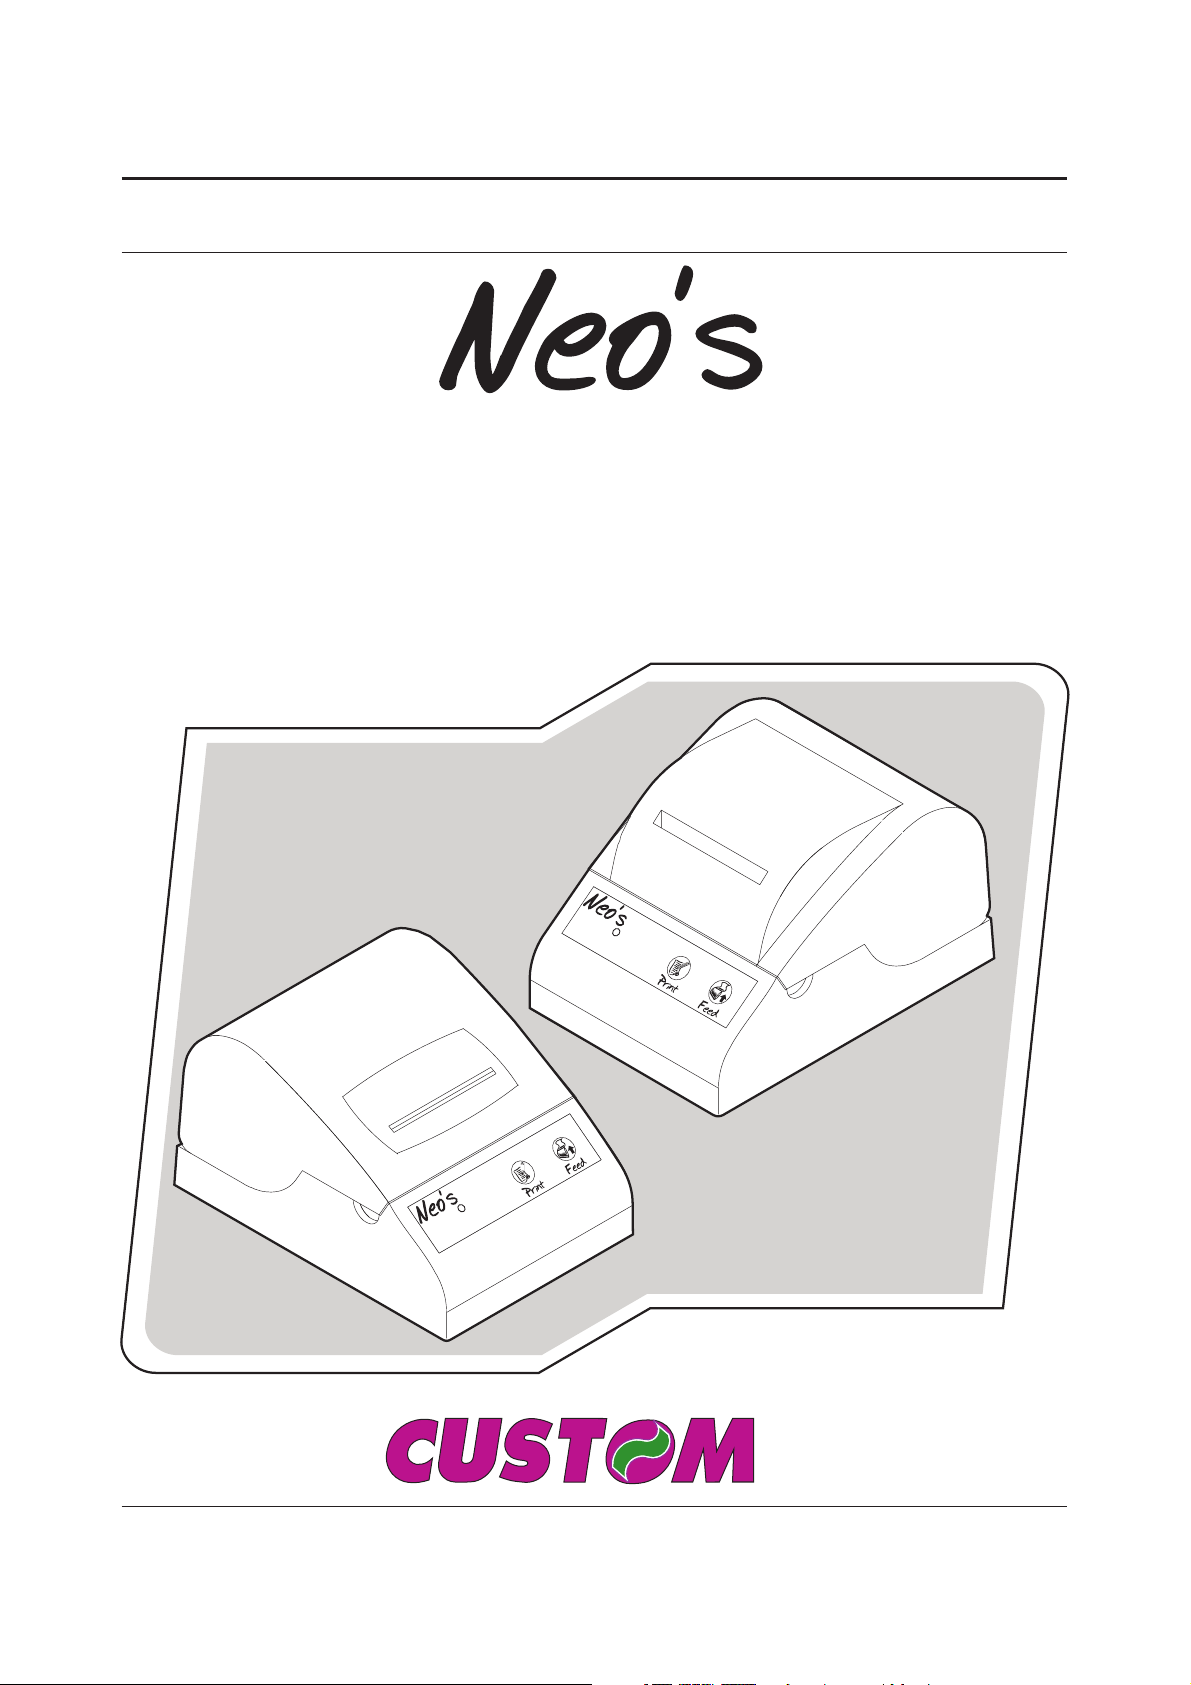
PRINTER
USER'S GUIDE
GUIDA OPERATIVA
GUIDE D'UTILISATION
BEDIENUNGSANLEITUNG
GUIA OPERATIVA
®
Page 2
alcohol, solvent
GB
I
F
D
E
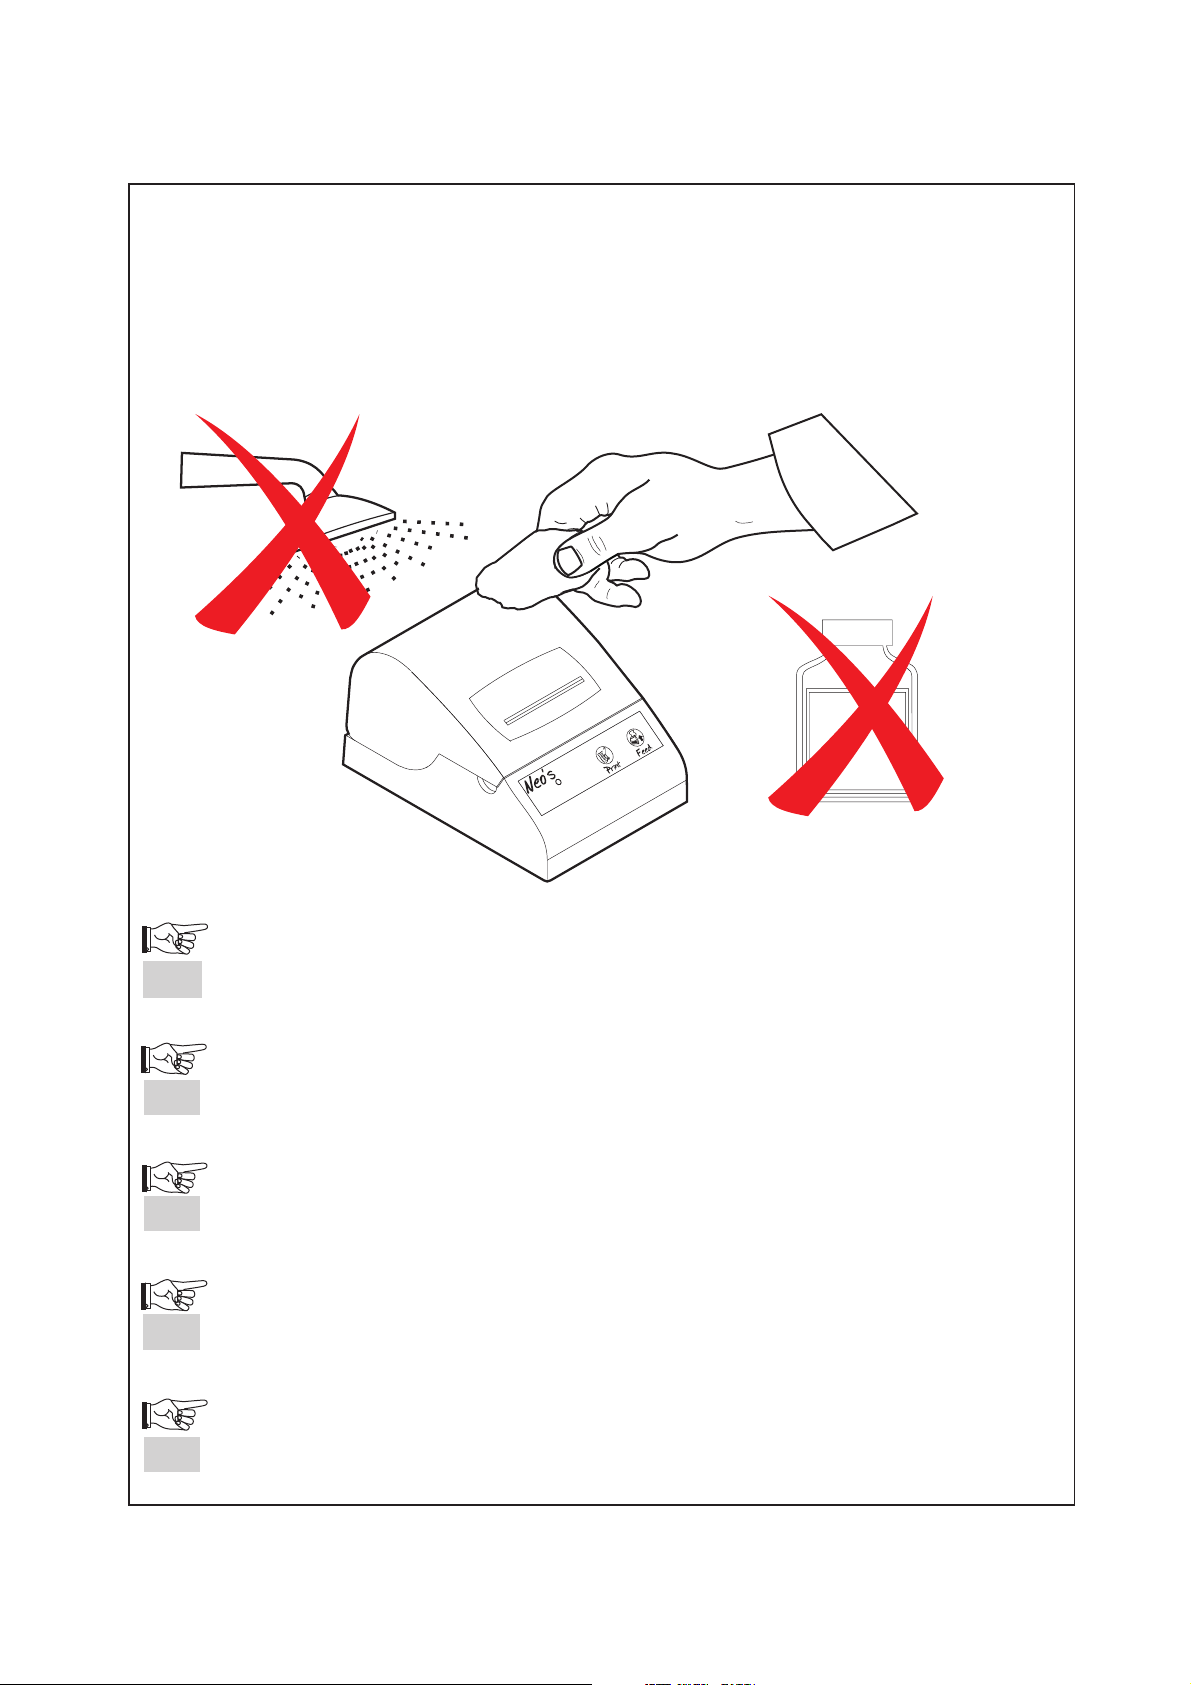
To clean the machine
First remove the mains plug from the wall socket.
Do not use alcohol, solvents, or hard brushes.
Do not let water or other liquids get inside the machine.
Per pulire la macchina, utilizzare aria compressa o un panno morbido.
Prima di ogni operazione, scollegare il cavo di alimentazione elettrica dalla presa di rete.
Non utilizzare alcol, solventi o spazzole dure.
Assicurarsi che acqua o altri liquidi non penetrino all'interno della stampante.
Pour nettoyer la machine, utiliser un système pneumatique ou un chiffon souple
Avant d'effectuer toute opération, débrancher la câble de l'alimentation électrique de la prise de réseau.
Ne pas utiliser de l'alcool, des solvants, ni des brosses dures.
Vous assurer que ni l'eau ni aucun autre liquide ne pénètrent dans l'imprimante
Zum Reinigen der Maschine einen Pressluft oder einen weichen Lappen benutzen
Zuersten den Hauptstecker aus der Netzsteckdose ziehen.
Keinen Alkohol, Lösungsmittel oder harte Bürsten verwenden
Darauf achten, dass kein Wasser oder andere Flüssigkeiten in die Maschine eindringen
Para limpiar la máquina, utilíce una neumatica o un paño suave
Antes de cualquier operación, desconécta el cable de alimentación eléctrica de la toma de red.
No utilíce alcohol, solventes o cepillos duros.
Asegúrese de que agua u otros líquidos no penetren dentro de la impresora
, use a pneumatics air or soft cloth.
.
.
.
.
.
.
.
.
.
.
Page 3
The and , marks affixed to the product certifythat the product satisfies the
GB
basic quality requirements.
S
PRODUCTSERVICE
Production monitored
Safety tested
I requisiti qualitativi di questo prodotto sono attestati dall'apposizione della
I
marcatura e sul prodotto.
Les qualités requises pour ce produit sont garanties par le label et
F
appliqué sur le produit même.
Die Qualitätsanforderungen dieses Produkts werden durch die und
D
E
GB
-Kennzeichnung bescheinigt,die am Produkt angebracht ist.
Los requisitos de calidad de este producto son atestiguados mediante la aplicación
de la Marca y en el producto.
Your attention is drawn to the following actions that could compromise the characteristics of the product:
incorrect electrical supply;
!
incorrect installation; incorrect or improper use, or, in any case, not in accordance with the warnings given in the User Guide supplied
!
with the product;
!
replacement of original components or accessories with others of a type not approved by the manufacturer, or carried out by
unauthorized personnel.
S
PRODUCTSERVICE
Production monitored
Safety tested
S
PRODUCTSERVICE
Production monitored
Safety tested
S
PRODUCTSERVICE
Production monitored
Safety tested
S
PRODUCTSERVICE
Production monitored
Safety tested
Si richiama l'attenzione sulle seguenti azioni che possono compromettere la conformità sopra attestata, oltre, naturalmente, le
I
caratteristiche del prodotto:
errata alimentazione elettrica;
!
errata installazione o uso errato o improprio o comunque difforme dalle avvertenze riportate sul manuale d'uso fornito col prodotto;
!
sostituzione di componenti o accessori originali con altri di tipo non approvato dal costruttore, o effettuata da personale non autorizzato.
!
Nous attirons l'attention sur certaines opérations qui pourraient compromettre la conformité attestée ci-dessus et le caractéristiques du
F
produit même:
Alimentation électrique erronée;
!
Installation ou utilisation incorrecte, non appropriée ou ne respectant pas les indications reportées dans le manuel d'utilisation fourni
!
avec le produit;
Remplacement des consommables ou des accessoires originaux par d'autres types non approuvés par le constructeur ou effectué par
!
du personnel non autorisé.
Wir möchten Sie darauf hinweisen, daß folgende Aktionen die oben bescheinigte Konformität und die Eigenschaften des Produkts
D
beeinträchtigen können:
Falsche Stromversorgung;
!
Installations- oder Bedienungsfehler bzw. Nichtbeachtung der Hinweise in der Bedienungsanleitung, die mit dem Produkt geliefert
!
wurde;
Das Auswechseln von Bauteilen oder Originalzubehör durch Unbefugte oder das Ersetzen durch Teile, die nicht vom Hersteller
!
anerkannt werden.
Le rogamos que preste mucha atención a las siguientes acciones que pueden comprometer la conformidad arriba certificada, y
E
obviamente las caraterísticas del producto:
Alimentación eléctrica errónea;
!
Instalación o uso erróneos, impropios o no conformes a las advertencias detalladas en el manual de utilización suministrado con el
!
producto;
Sustitución de componentes o accesorios originales con otros no aprobados por el fabricante, o bien efectuada por parte de personal
!
no autorizado.
Page 4

Blank Page
Page 5
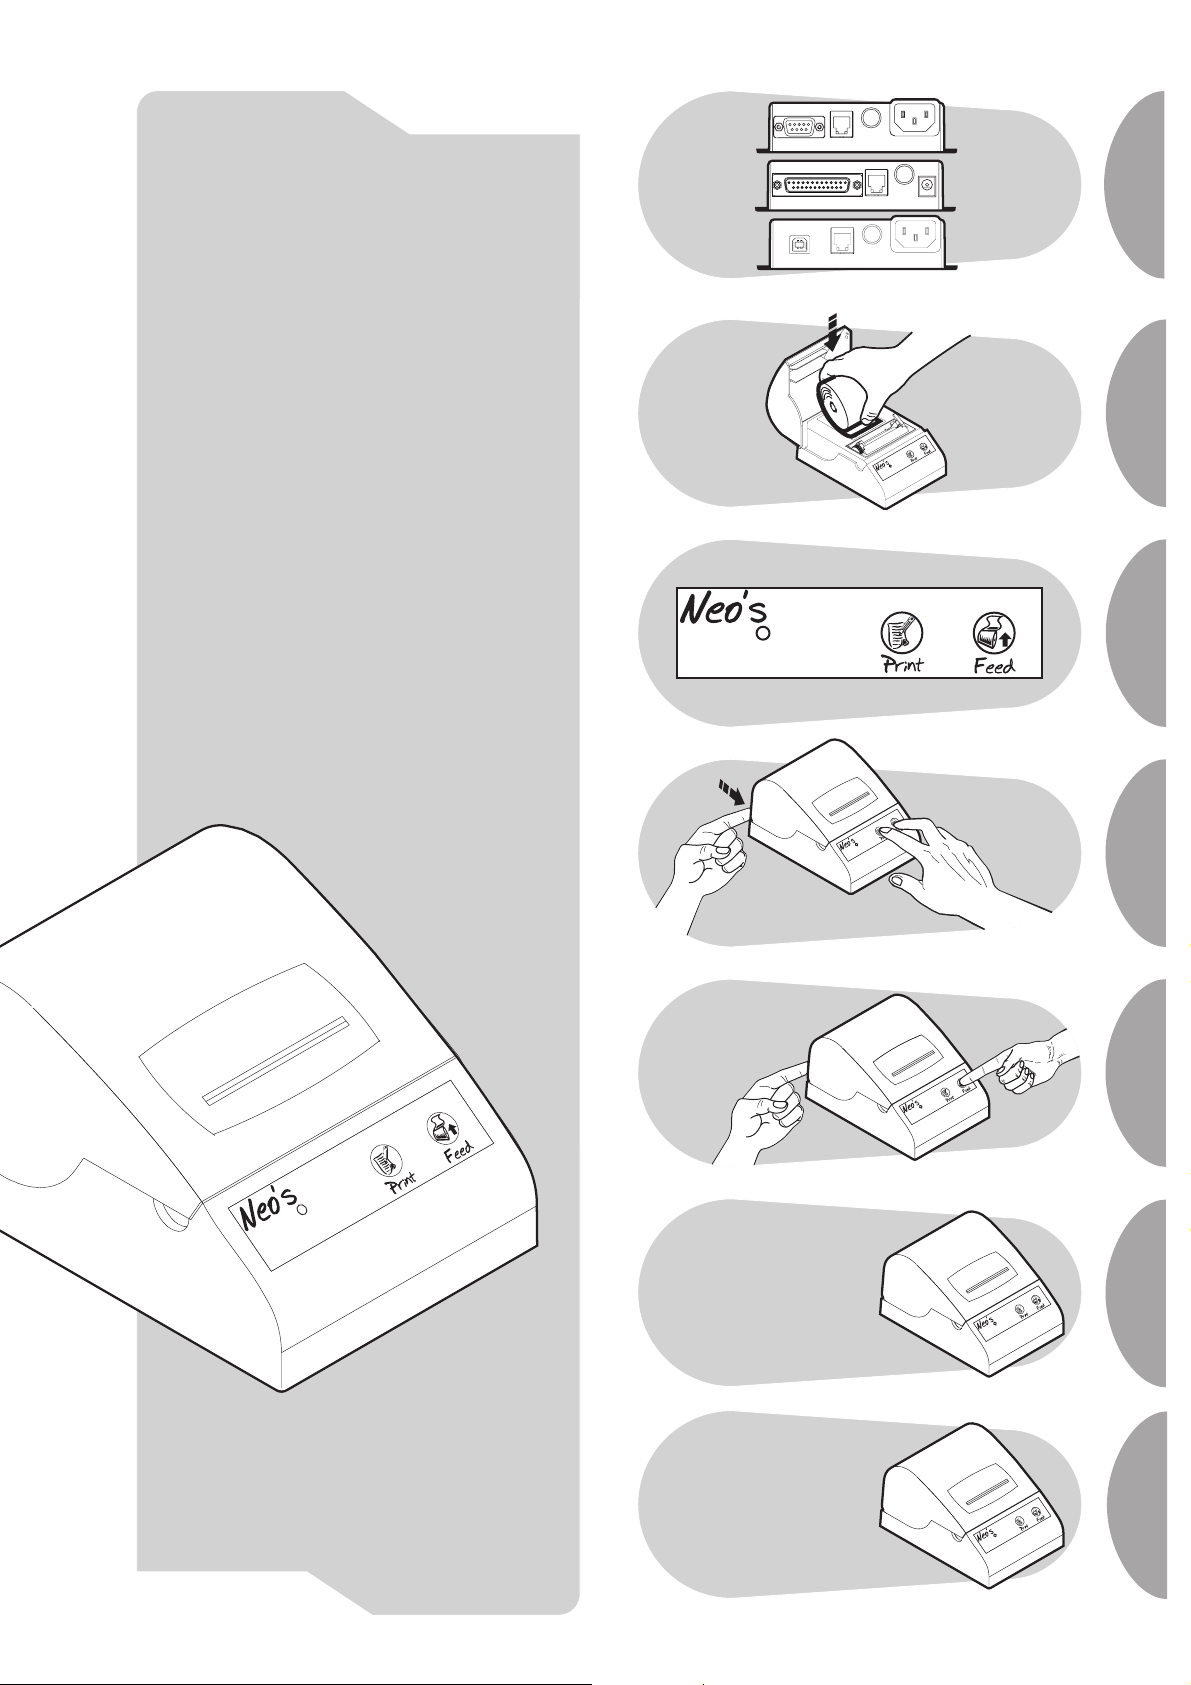
Table of contents
Indice
Table des matières
Inhaltsverzeichnics
Indice
AUTOTEST
Installation for
drivers
Windows 95/98
Windows ME
Windows NT/2000
SETUP
Appendix:
- A1 Tecnical
specification
- A2 Accesories and
spare parts
..
Page 6

Blank Page
Page 7
GB
UNPACKING THE PRINTER
1. External carton
2. Internal packing
3. Power supply cable (for Neo’s-S; Neo’s- USB) or Power
supply (for Neo’s-P)
User manual (and/or CD-ROM, and/or data sheet )
4.
5. Printer
6. Paper roll (inside the printer)
I
DISIMBALLO DELLA STAMPANTE
1. Bauletto esterno
2. Imballo interno
3. Cavo di alimentazione (per Neo’s-S; Neo’s-USB) o
Alimentatore (per Neo’s-P)
4. Manuale utente (e/o CD-ROM, e/o foglio informativo)
5. Stampante
6. Rotolo di carta (all’interno della
stampante)
Neo’s-S; Neo’s-Usb (220V)
6
4
2
5
Neo’s-SP ( 24V )
6
5
4
2
1
3
3
1
1
Page 8

Blank Page
Page 9
= off - spento - éteint - aus - apagado
= lit - acceso - allumé - ein - encendido
= flashing - lampeggiante - clignotant -
blinkt - parpadeante
= slow flashing - lampeggio lento -
c
lignotement lent - langsames Blinken -
c
entelleo lento
= fast flashing - lampeggio veloce -
c
lignotement rapide - schnelles Blinken -
centelleo veloz
·
Insert serial connector
·
Inserire il connettore seriale
·
Introduire le connecteur sériel
·
Den seriellen Verbinder in die Buchse stecken
·
Introducir el conectador serial
·
Insert drawer connector (optional)
·
Inserire il connettore del cassetto (opzione)
·
Introduire le connecteur dans le tiroir (en option)
·
Den Verbinder des Kastens in die Buchse stecken (Optional)
·
Introducir el conectador en la gaveta (opcional)
· Neo’s - S 220V
·
Insert feed cable
·
Inserire il cavo di alimentazione
·
Brancher le câble d'alimentation
·
Das Speisekabel in die Buchse stecken
·
Introducir el cable de alimentación
2
Page 10

·
Switch printer on
·
Accendere la stampante
·
Brancher l'imprimante
·
Den Drucker einschalten
·
Conectar la impresora
·
ON
·
ACCESO
·
ALLUMÉ
·
EINGESCHALTET
·
CONECTADO
·
OFF
·
SPENTO
·
ÉTEINT
·
AUSGESCHALTET
·
APAGADO
3
Page 11

= off - spento - éteint - aus - apagado
= lit - acceso - allumé - ein - encendido
= flashing - lampeggiante - clignotant -
blinkt - parpadeante
= slow flashing - lampeggio lento -
c
lignotement lent - langsames Blinken -
c
entelleo lento
= fast flashing - lampeggio veloce -
c
lignotement rapide - schnelles Blinken -
centelleo veloz
·
Insert serial or parallel interface connector
·
Inserire il connettore di interfaccia seriale o parallela
·
Introduire le connecteur
·
Den seriellen oder Verbinder in die Buchse stecken
·
Introducir
·
·
·
·
·
el conector de interfaz serial o paralelo
Insert drawer connector (optional)
Inserire il connettore del cassetto (opzione)
Introduire le connecteur dans le tiroir (en option)
Den Verbinder des Kastens in die Buchse stecken (Optional)
Introducir el conectador en la gaveta (opcional)
d'interface en série ou parallèle
parallelen
parallela
· Neo’s - S/P 24V
·
Insert the correct feeder cable
·
Inserire il cavo dell’apposito alimentatore
·
Introduire le câble de l'alimentateur adéquat
·
Das Kabel in das spezielle Speisegerät stecken
·
Conectar el cable del alimentador
4
Page 12
·
Switch printer on
·
Accendere la stampante
·
Brancher l'imprimante
·
Den Drucker einschalten
·
Conectar la impresora
·
ON
·
ACCESO
·
ALLUMÉ
·
EINGESCHALTET
·
CONECTADO
5
·
OFF
·
SPENTO
·
ÉTEINT
·
AUSGESCHALTET
·
APAGADO
Page 13

= off - spento - éteint - aus - apagado
= lit - acceso - allumé - ein - encendido
= flashing - lampeggiante - clignotant -
blinkt - parpadeante
= slow flashing - lampeggio lento -
c
lignotement lent - langsames Blinken -
c
entelleo lento
= fast flashing - lampeggio veloce -
c
lignotement rapide - schnelles Blinken -
centelleo veloz
·
Insert USB connector
·
Inserire il connettore USB
·
Introduire le connecteur USB
·
Den USB Verbinder in die Buchse stecken
·
Introducir el conectador USB
·
Insert drawer connector (optional)
·
Inserire il connettore del cassetto (opzione)
·
Introduire le connecteur dans le tiroir (en option)
·
Den Verbinder des Kastens in die Buchse stecken (Optional)
·
Introducir el conectador en la gaveta (opcional)
· Neo’s - USB 220V
·
Insert feed cable
·
Inserire il cavo di alimentazione
·
Brancher le câble d'alimentation
·
Das Speisekabel in die Buchse stecken
·
Introducir el cable de alimentación
6
Page 14
·
Switch printer on
·
Accendere la stampante
·
Brancher l'imprimante
·
Den Drucker einschalten
·
Conectar la impresora
·
ON
·
ACCESO
·
ALLUMÉ
·
EINGESCHALTET
·
CONECTADO
7
·
OFF
·
SPENTO
·
ÉTEINT
·
AUSGESCHALTET
·
APAGADO
Page 15

!
Paper roll insertion
!
Inserimento del rotolo carta
!
Introduire le rouleau de papier
!
Einsetzen der Papierrolle
!
Introducir el rollo de papel
N
O
8
Page 16

9
Page 17

!
Paper jam
!
Inceppamento carta
!
Bourrage papier
!
Papierstau
!
Atasco del papel
GB
I
F
D
E
Lift the lever to allow the paper to move freely. If the
paper comes out at the front in the print area,
carefully tear off and remove the part of the paper
which is jammed; alternatively, remove the paper
from the print mechanism by pulling it upwards.
Alzate la levetta, rimuovete la carta dal meccanismo
di stampa tirandola verso l'alto. Se la carta fuoriesce
davanti nella zona di stampa, occorre
strappare e rimuovere con cura questa parte di carta
inceppata.
Relever le levier pour permettre le passage du
papier. Si le papier sort par l'avant dans la zone
d'impression, l'arracher et retirer avec soin les
parties du papier restées coincées. Dans le cas
contraire, retirer le papier du système d'impression
en le tirant vers le haut.
Den Hebel anheben, um den Papierdurchlauf
freizugeben. Wenn das Papier vor dem
Druckbereich austritt, ist dieses verklemmte Papier
abzureißen und sorgfältig zu entfernen. Andernfalls
wird das Papier aus dem Druckmechanismus
entfernt, indem es nach oben herausgezogen wird.
Levantar la palanca para permitir que el papel pase
libremente. Si el papel se sale adelante en la zona
de impresión, arrancarlo y eliminar con mucho
cuidado el pedazo de papel atascado, o sacar el
papel del mecanismo de impresión halándolo hacia
arriba.
prima
10
Page 18

Printer with cutter
Stampante con taglierina
!
Cutter jam
!
Inceppamento taglierina
Massicot bloqué
!
!
Schneidblech verklemmt
!
Guillotina atascada
GB
I
F
D
E
Carefully
zone. If you have difficulty in doing so, use
tweezers. insert any kind of object inside
the cutter.
Rimuovete ogni frammento di carta
dalla zona della taglierina. In caso di difficolta’
utilizzare delicatamente delle pinzette.
introducete alcun oggetto all’interno della taglierina.
Oter les morceaux de papier dans la
zone du massicot. En cas de difficulté, employer de
petites pinces. introduire objet à l'intérieur
du massicot.
Vorsichtig
Schneidblechbereich entfernen. Eventuell eine
Pinzette verwenden. unter
das Schneidblech einführen.
Remover todos los fragmentos de
papel que se encuentran en la zona de la guillotina.
Si al efectuar dicha operación surgieran dificultades,
utilizar unas pinzas pequeñas. introducir
NINGÚN
remove all scraps of paper from the cutter
DO NOT
delicatamente
NON
délicatement
N' AUCUN
alle Papierrückstände aus dem
KEINEN GEGENSTAND
cuidadosamente
No
tipo de objeto dentro de la guillotina.
11
Page 19

GB
I
F
D
E
Contact Customer Service.
Chiamate l'Assistenza tecnica.
Contacter le Service après-vente.
Den Kundendienst kontaktieren.
Llamar al Servicio de Asistencia Técnica.
HOT LINE
+0039-0521680163
Monday-Friday at 9-12 and 14-17
e-mail: support@custom.it
12
Page 20

Blank Page
13
Page 21

GB
1. Go into SETUP mode by pressing Key
FEED and Key PRINT and turn power on at
the same time.
2. The printer should print all list of the
parameters:
SETUP
Printer emulation:
- ESC/POS *
TM
,CUSTOM
DPT24, CUSTOM DPT42 or CBM
iDP560RS
Protocol :
- No Addressable* or Addressable
Baud Rate :
- 57600, 38400,19200 *,9600,
4800, 2400, 1200.
Data length : .
- 7, 8 bits/chr *
Parity :
- 7, 8 bits/chr *.
Handshaking :
- XON/XOFF* or Hardware.
- CR disabled* or CR enabled
Autofeed:
- Enabled* or disabled.
Panel keys:
- Normal* or Reverse.
Print mode:
With “ESC/POS “ :
.
(1)
(1)
(1)
(1)
(1)
Chars / line:
ä
A=32 / B=42 col. * or
A=42 / B=56 col.
With CBM iDP560RS :
““
Font dimens :
18x24* 24 col. o 11x24
40 col.
With CUSTOM DPTxx :
““
Font type :
Speed:
- Normal* or Low.
Offline :
- Disabled* or enabled
Print density:
- Normal*, Dark, Light.
(1)(2)
Font A* o Font B.
Notes: The parameters indicated with a *
symbol are the default values.
(1)
NOTE:
(2)
NOTE:
Parameter valid only on serial printer.
Using this parameter, it is possible to
select whether the Busy signal is activated
when the printer is both in Off Line status
and the buffer is full, or only if the reception
buffer is full.
14
Page 22

Blank Page
15
Page 23

AUTOTEST
GB
1 Go into by pressing
Feed key and turn power on at the same
time.
2 The printer should print the logo and all
list of the fonts.
AUTOTEST mode
Font test printout
Stampa test caratteri
I
F
D
Modalità AUTOTEST:
- tenere premuto il tasto FEED ed
accendere contemporaneamente la
stampante per ottenere la stampa della
lista di tutti i fonts;
- tenere premuto il tasto PRINT ed
accendere contemporaneamente la
stampante per ottenere la stampa del
test grafico.
Aller dans le en
1
appuyant sur la touche d'Alimentation et
en allumant l'appareil simultanément.
L'imprimante doit imprimer le logo ainsi
2
que la liste de toutes les polices
d'imprimante.
Den Drucker in den
1
versetzen, indem die Speise- und ONTaste gleichzeitig gedrückt werden.
Der Drucker druckt das Logo und das
2
Font-Verzeichnis aus
mode AUTOTEST
Modus AUTOTEST
.
Graphic test printout
Stampa test grafico
E
16
modo AUTOTEST
Ir al presionando el
1
botón Feed y encendiendo el aparato al
mismo tiempo
La impresora deberá imprimir el logo
2
y la lista completa de los fonts
.
.
Page 24

Blank Page
17
Page 25

GB
1 Download the SW from the web
site at the Support/Download/Drivers section.
2 Use the following procedure to install the printer
driver software:
a) WINDOWS 95/98/ME/NT/2000
From the menu, press and key-in
the path where the SW was saved on your PC,
then click OK.
!
Follow the instructions that appear on the screen
to extract the printer driver.
!
Follow the instructions that appear on the screen
to install the driver.
To install the driver correctly following the
!
procedure that is described into
USB_Printer_Installation.pdf document.
START Enter!
“www.custom.it”
Installation for
drivers
Win95
Neo’s SP
Neo’sUSB
Win98/
Win ME
WinNT4 Win2000
1 Prelevare il SW dal sito Internet
I
alla sezione Support/Download/Drivers.
2 Installare il driver della stampante come indicato
nella seguente procedura :
a) WINDOWS 95/98/ME/NT/2000
!
Nel menù selezionate e digitate il percorso
del SW, precedentemente salvato sul vostro PC, fate click
su OK.
!
Lasciatevi poi guidare dalle istruzioni che compaiono sullo
schermo per scompattare il driver della stampante.
!
Lasciatevi poi guidare dalle istruzioni che compaiono sullo
schermo per installare il driver.
!
Per una corretta installazione del driver seguire la
procedura descritta nel documento
USB_Printer_Installation.pdf.
1 Télécharger le logiciel à partir du site Internet
F
D
E
“”.
www.custom.it
2 Installer le logiciel de l'imprimante selon la
procédure suivante :
a) WINDOWS 95/98/ME/NT/2000
Dans le menu , sélectionner et
!
taper le parcours du logiciel, précédemment
sauvegardé sur votre PC, puis cliquer sur OK.
Laissez-vous ensuite guider par les instructions qui
!
apparaissent sur l'écran afin d'installer le driver.
Laissez-vous ensuite guider par les instructions qui
!
apparaissent sur l'écran afin d'installer le driver.
Pour une parfaite installation du driver suivez-vous la
!
procédure décrite sur le document
USB_Printer_Installation.pdf.
1 Die SW von der Internet-Seite
www.custom.it
“ ” downloaden.
2 Die Drucker-Software wie nach dem folgenden
Verfahren installieren :
a) WINDOWS 95/98/ME/NT/2000
Im -Menü anklicken und den
!
Verlauf der SW eingeben, die zuvor in Ihrem PC
gespeichert wurde. OK anklicken.
Nun die auf dem Monitor angezeigten Anleitungen
!
befolgen, um den Driver zu installieren.
!
Nun die auf dem Monitor angezeigten Anleitungen
befolgen, um den Driver zu installieren.
Für ein korrekt installation den Driver verfarenbescrheiben
!
anklicken, um den dokument
USB_Printer_Installation.pdf.
1 Descargar el SW del sito Internet
“www.custom.it”
2 Instalar el software de la impresora siguiendo
las indicaciones a continuación explicadas :
a) WINDOWS 95/98/ME/NT/2000
En el menù seleccionar y digitar el
!
recorrido del SW, precedentemente almacenado en
vuestro PC, hacer clic en OK.
Seguir las instrucciones que aparecen en pantalla
!
para instalar el driver.
!
Seguir las instrucciones que aparecen en pantalla
para instalar el driver.
Para una corecta instalación del driver seguir el
!
procedimiento descripto en el docúmento
USB_Printer_Installation.pdf.
Avvio Esegui
Démarrer Effectuer
START Ausführen
.
Start Enter
“www.custom.it”
18
Page 26

Blank Page
19
Page 27

A1 TECNICAL SPECIFICATIONA1 TECHNICAL SPECIFICATION
TECHNICAL SPECIFICATIONS
Neo's-S Neo's-P Neo's-U
Standard interfaces
Baud rate
Resolution
Paper specifications
Type of paper
Recommended types of paper KF50 (55g/m 2 ± 5gm 2) KANZAN or Equivalent
Paper thickness 0,063 ± 0,005 mm (KF50)
Paper roll size 60 mm ± 0,5 mm
External roll diameter max. 65 mm
Paper end Not attached to roll core
Internal roll core diameter 12 mm (+1mm)
Core thickness 2 mm (+1mm)
Core type Cardboard or plastic
Sensors
Print method
Print direction
Print format
Character fonts
Reception buffer
Flash memory
Graphic memory
Printing speed
Cutter specification
Paper cutting Full and partial (mod. with cutter)
Cutting width 63 mm
Life > 300000 cut
Power supply 24 VDC
Absorption 1.2 A max
Reliability
Mechanism reliability > 10
Print head reliability > 50 Km
Electric specifications
Power supply (Neo's -S; Neo'sUSB)
Frequency 50-60Hz
Nominal current 0.5 A
Power supply (Neo's -SP) 24Vdc ± 10%
Electrical input
Average
Peak
Stand-by 80 mA
Environmentals conditions
Operating temperature 0°C - 50°C
Operating humidity 10% - 80% (no condensing)
Storage temperature / humidity -20°C - +70°C / 10% - 90%
Compliance standard
Electric safety EN 60950
Electromagnetic compatibility
RS232 serial CENTRONICS USB
From 1200 to
57600 bps
Paper out, head open, head temperature,near paper end
Normal, double and quadruple height and width, expanded,
ASCII standard, EPSON
Low
Normal
Low
Normal
None None
204 DPI (8 dot/mm)
Heat-sensitive side on outside of roll
Thernal fixed head (8 dot/mm)
140 mm/sec. (Speed=normal)
Thermal rolls
Normal, 180°
negative, underlined, script.
8 Kbyte
256 Kbyte
Three 32-Kbyte logos
110 mm/sec. (Speed=Low)
100-240Vdc ± 10%
EN55022 CLASS B
EN55024
6
lines
â
, International.
1A
1A
1.8 A
2A
Page 28

Mechanical
specifications
Dimensions
Weight
length mm 170 170 170 170 170 170
width mm 120 120 120 120 120 120
height mm 100 110 100 110 100 110
without
paper roll gr.
with paper
roll gr.
Neo's-S no
cutter
645 806 580 740 645 806
785 946 720 880 785 946
Neo's-S
with cutter
Neo's-P no
cutter
Neo's-P
with cutter
Neo's-U no
cutter
Neo's-U
with cutter
ESC/POSTMEMULATION
Number of columns 24 32 42 56
Printing speed
Characters / sec 720 960 1260 1680
Lines / sec 30 30 30 30
Character (LxHmm)
Normal 2x3 1,7x3 1,2x3 1x3
Double height 4 x 3 3,4 x 3 2,4 x 3 2 x 3
Double width 2 x 6 1,7 x 6 1,2 x 6 1 x 6
Double height and width 4 x 6 3,4 x 6 2,4 x 6 2 x 6
Quadruple height 8 x 3 6,8 x 3 4,8 x 3 4 x 3
Quadruple width 2 x 12 1,7 x 12 1,7 x 12 1 x 12
Quadruple height and width 8 x 12 6,8 x 12 4,8 x 12 4 x 12
Print direction
Character set
Normal e Reverse
3
CUSTOM 24/42 EMULATION
Number of columns
24 42
Printing speed
Characters/sec 520 910
Lines/sec 21,6 21,6
Character (LxHmm)
Normal 2 x 3 1.2 x 3
Double height 4 x 3 2.4 x 3
Double width 2 x 6 1.2 x 6
Double height and width 4 x 6 2.4 x 6
Quadruple height 8 x 3 4.8 x 3
Quadruple width 2 x 12 1.7 x 12
Quadruple height and width 8 x 12 4.8 x 12
Print direction
Character set
Normal and Reverse
4
CITIZEN EMULATION
Number of columns 24 40
Printing speed
Characters/sec 520 867
Lines / sec 21.6 21.6
Character (LxHmm)
Normal 2 x 3 1.2 x 3
Double height 4 x 3 2.4 x 3
Double width 2 x 6 1.2 x 6
Double height and width 4 x 6
Quadruple height 8 x 3
2.4 x 6
4.8 x 3
Quadruple width 2 x 12 1.7 x 12
Quadruple height and width 8 x 12 4.8 x 12
Print direction
Character set
Normal and Reverse
2
Page 29

A2 ACCESSORIES AND
SPARE PARTS
A.2.1 Power supply for NEO’S 24V
The following figure shows the power supply, that can be used to operate the
printer.
PPPW060-24V-DPT Power Supply
Input specifications
Input voltage 90 Vac to 264 Vac
Input frequency 47 Hz to 63 Hz
Output specifications
Output voltage 24 V
Output current 2.5 A
Power specifications
Maximum power 60 W
Page 30

A.2.2 PANEL SUPPORT ACCESSORIES
PCDPMURO Kit Stirrup
Assembly instructions
1) Fit the pins in the printer by removing the front fastening screws
from the body
2) Makes two holes 6 mm distant between us 80 mm
3) Secure the bracket using the two 6 mm screw anchors
4) Fit the printer on the bracket.
A.2.3 SPARE PARTS
RCT60X55 Thermal paper roll
Page 31

Blank Page
Page 32

Publication issued by:
CUSTOM ENGINEERING S.p.A.
Via Berettine 2 - 43010 Fontevivo (PARMA) - Italy
All rights reserved
Part Number : DOMM-NEOS
Rev. 1.00
®
 Loading...