

Page 1
Epson Expression 10000XL
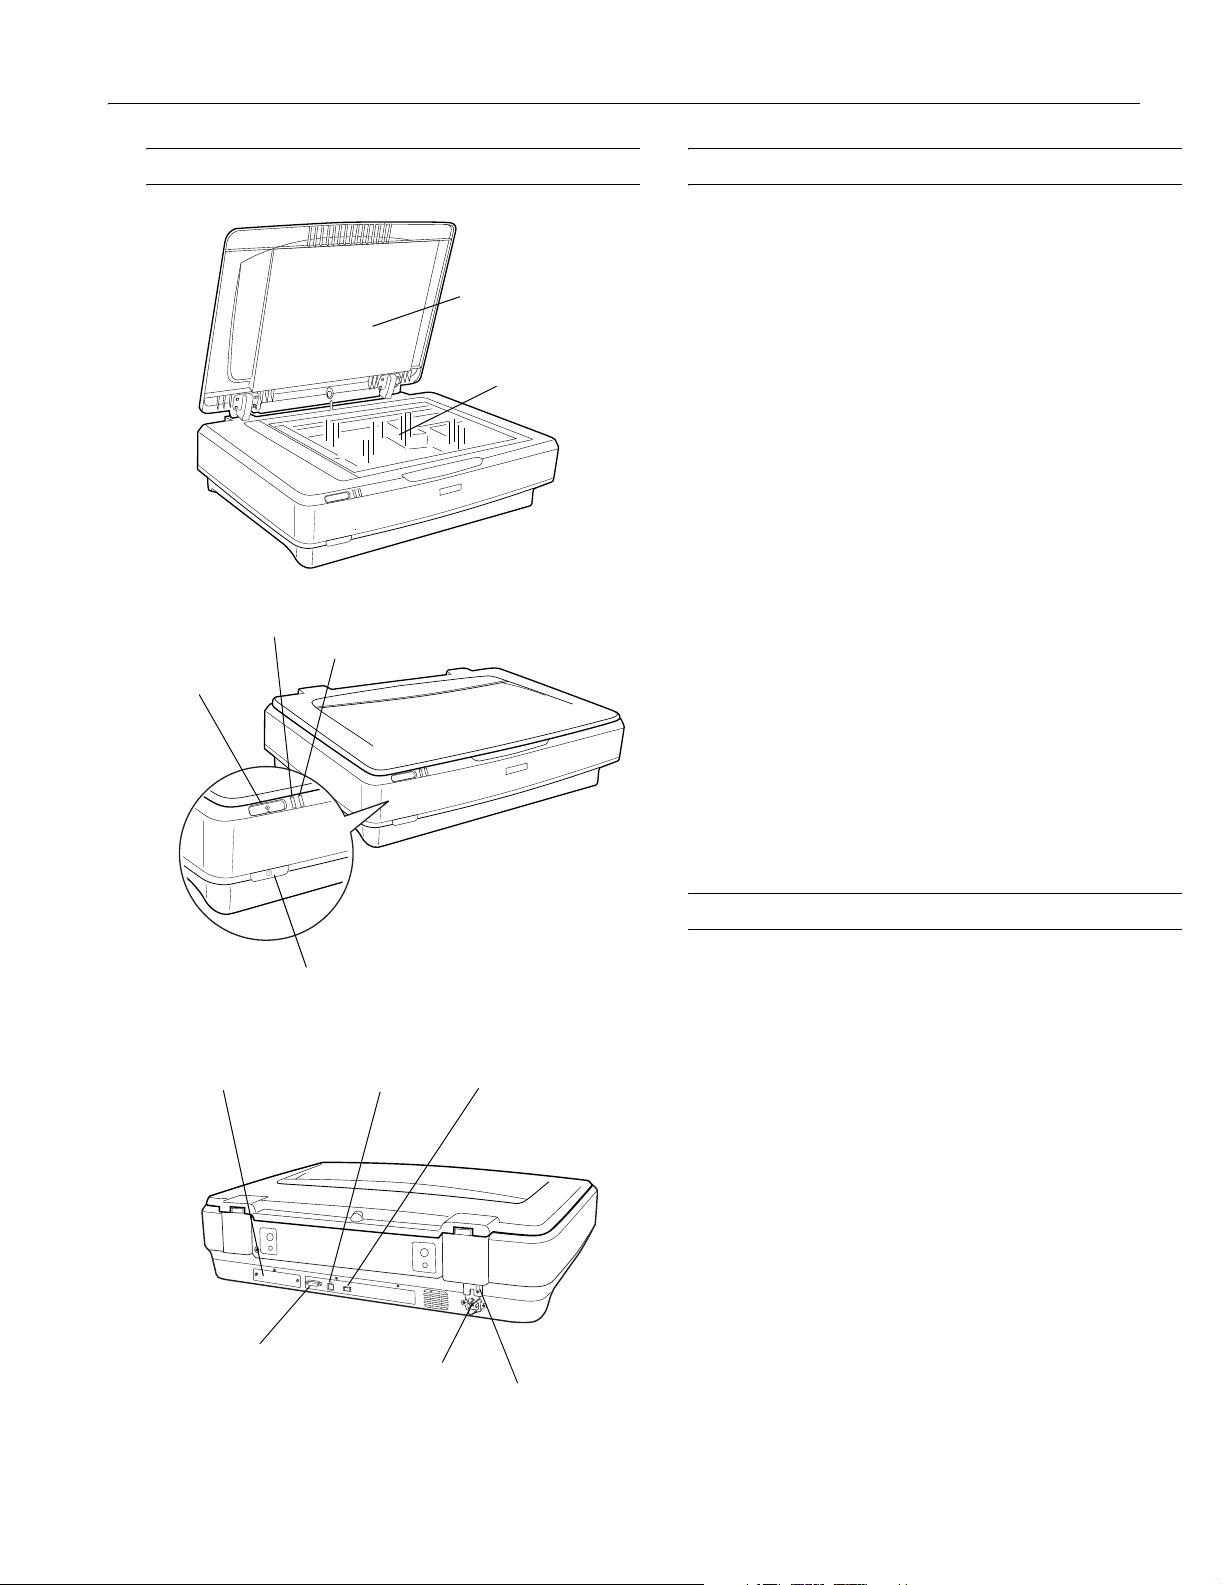
Scanner Parts Software and Accessories
The scanner is sold in two versions: GA (Graphic Arts) and
Ready light
Start button
Error light
Document cover
Document table
Photo. The Photo version includes the transparency unit
(TPU) and LaserSoft Imaging
Included Software
The following software is included with the scanner:
❏ EPSON Scan
❏ ABBYY
❏ Adobe
❏ Monaco Systems
®
FineReader® Sprint
®
Photoshop® Elements 2.0
®
MonacoEZColor
❏ LaserSoft Imaging SilverFast (Photo version of scanner
only)
Optional Accessories
These optional accessories are available:
❏ Transparency unit (B12B813362)
❏ Automatic document feeder (B813212)
❏ Network Image Express interface card (B12B808393)
™
SilverFast.
®
®
Optional network
card slot
OPTION port
(for ADF and TPU)
Power button
USB port
AC inlet
FireWire port
Transportation lock
You can purchase supplies and accessories from the
Epson Store
™
by calling (800) 873-7766 or online at
www.epsonstore.com (U.S. sales only). In Canada, please call
(800) 463-7766 for dealer referral.
Specifications
General
Scanner type Flatbed, color
Photoelectric
device Color CCD line sensor
Effective pixels 29280 × 41280 pixels (at 2400 dpi)
Color depth 48-bit internal/48-bit external
Grayscale depth 16-bit internal/16-bit external
Maximum
document size 12.2 × 17.2 inches (310 × 437 mm)
Resolution 2400 dpi (optical)
Maximum hardware resolution 2400 dpi (main scan); 4800 dpi with
Micro Step Drive
Output resolution 50 to 12800 dpi
™
(sub scan)
5/04 Epson Expression 10000XL - 1
Page 2

Epson Expression 10000XL
Maximum interpolated resolution 12800 dpi
Speed* Color: 8.0 ms/line
Grayscale: 2.7 ms/line
Line Art: 2.7 ms/line
* 1200 dpi, reflective documents
Color separation RGB color filters
Reading sequence Monochrome: One-pass scanning
Color byte sequence: One-pass scanning
(R, G, B)
Color line sequence: One-pass scanning
(R, G, B)
Zoom 50 to 200% in 1% increments
Command level ESC/I-B8
FS
Pixel depth 16 bits per pixel input, 1 to 16 bits per
pixel output
Brightness 7 levels
Line art settings Fixed threshold
TET (Text Enhancement Technology,
enable/disable selectable)
Digital halftoning AAS (Auto Area Segmentation,
enable/disable selectable)
3 error diffusion modes (A, B, and C)
4 dither patterns (A, B, C, and D) for
bi-level and quad-level data
(2 downloadable dither patterns)
Gamma
correction 2 types for CRT display
3 types for printer
1 type user-defined
Color correction 1 type for CRT display
3 types for printer (available in color
byte sequence mode and color line sequence
mode)
1 type user-defined
Interfaces USB 2.0 (Type B connector)
IEEE 1394 (FireWire
10Base-T/100Base-TX, optional
Light source Xenon gas cold cathode fluorescent lamp
Reliability 100,000 cycles of carriage movement
(MCBF)
Dimensions Width: 25.8 inches (656 mm)
Depth: 18.0 inches (458 mm)
Height: 6.2 inches (158 mm)
Weight Approximately 31.9 lb (14.5 kg)
®
)
Electrical
Input voltage 90 to 132 VAC
Rated frequency 50 to 60 Hz
Rated current 1.2 A
Power
consumption Operating: approximately 45 W
(55 W with ADF or TPU)
Standby: approximately 6 W
(without ADF or TPU)
Environmental
Temperature Operating: 41 to 95 °F (5 to 35 °C)
Storage: –13 to 140 °F (–25 to 60 °C)
Humidity Operating: 10 to 80%
Storage: 10 to 85%
No condensation
Operating
conditions Ordinary office or home conditions. Avoid
dust, direct sunlight, and strong lighting.
Safety Approvals
Safety UL 60950 (2000)
CSA C22.2 No. 60950 (2000)
EMC FCC part 15 subpart B class B
CSA C108.8 class B
USB Interface
Interface type Universal Serial Bus Specification, Rev. 2.0
Electrical standard Full speed mode (12Mb) and High speed
mode (480 Mbps) of Universal Serial Bus
SpecificationRevision 2.0
Connector type One receptacle (Type B)
IEEE 1394 (FireWire) Interface
Interface type IEEE 1394-1995 compatible
Data transfer Half-duplex Data/Strobe differential serial
Synchronization Clock synchronization with DS-Link
Encoding/
decoding DS-Link
Logic level 3.3 V
Connectors IEEE 1394-1995 compatible
Power class Power class code 100
No power supply from external sources
Repeat function with bus power
2 - Epson Expression 10000XL 5/04
Page 3
Epson Expression 10000XL
Transparency Unit (B12B813362)
Film types 35 mm strips or slides
Medium format (120/220) 6 × 18 cm
4 × 5 inch film
transparencies up to 12.2 × 16.5 inch
Maximum
scan area 12.2 × 16.5 inches (309 × 420 mm)
Dimensions Width: 25.8 inches (656 mm)
Depth: 18.1 inches (460 mm)
Height: 1.6 inches (40 mm)
Weight: 11 lbs (6 kg)
Electrical 24 VDC, 1.3 A
5 VDC, 0.3 A
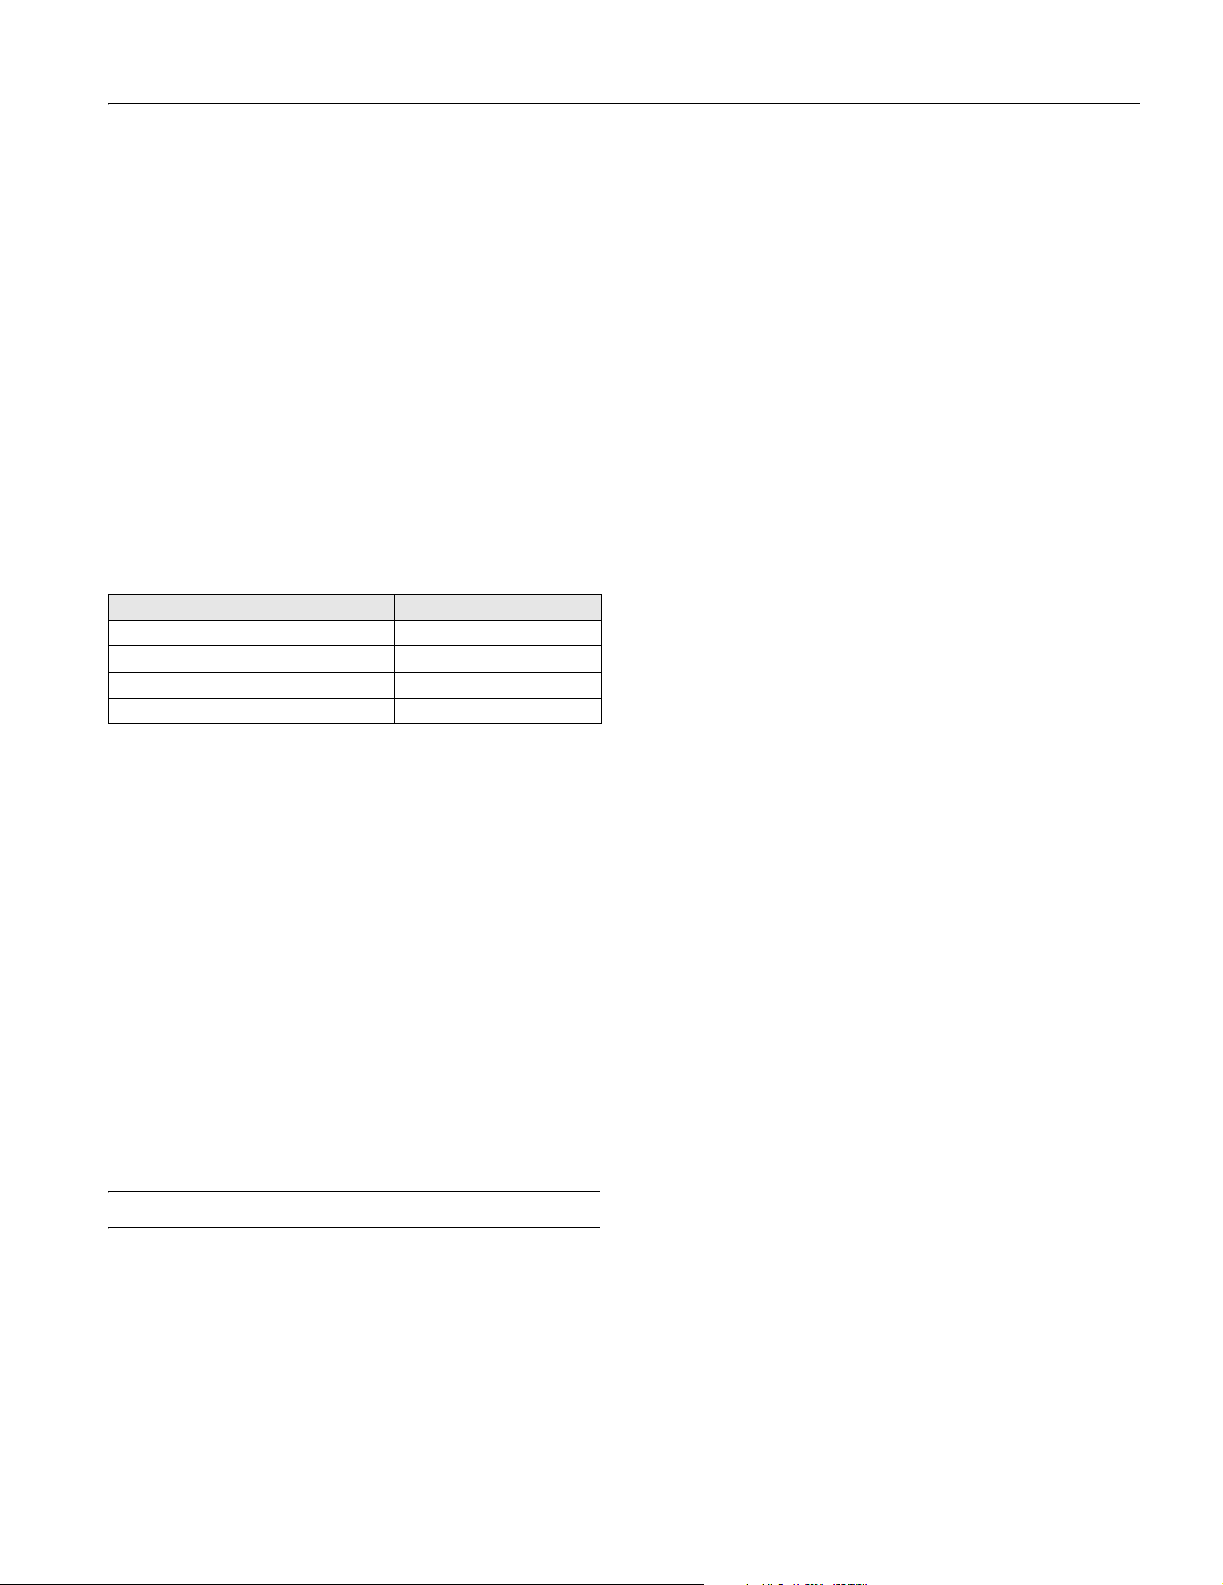
The TPU comes with two film holders of each type. Each film
holder can hold the following number of images:
Film type Quantity per holder
35 mm slides 15
35 mm strips 24
Medium format (6 × 18 cm) 3
4 × 5 inch film 4
Windows
❏ Microsoft Windows®-compatible Pentium-II processor, 266
MHz or faster
❏ Preinstalled Windows 98SE, Me, 2000, or XP
❏ USB (1.1 or 2.0) or IEEE 1394 (FireWire) port. To use the
scanner’s optional network card, your computer must be
connected to an existing network using TCP/IP.
USB 1.1 and 2.0 require a preinstalled Windows operating
system; USB 2.0 works with Windows XP and 2000 only
IEEE 1394 requires Windows Me, 2000, or XP; card must
be IEEE1394a-2000 compatible and OHCI compliant
❏ 128MB RAM (512MB RAM recommended)
❏ 300MB available hard disk space
❏ CD-ROM drive
❏ VGA color monitor with 800 × 600 resolution (1024 × 768
or higher recommended)
❏ 16-bit, 65K-color display adapter card (24-bit display
adapter card with millions of colors recommended)
Macintosh
Automatic Document Feeder (B813212)
Paper input/
output Load face-up; eject face-down
Paper quantity 100 pages (55 g/m
2
paper, max. total
thickness under 0.48 inches [12 mm])
100,000 sheets (load/eject MCBF)
Speed 10 ppm (monochrome, draft mode at
200 dpi)
Dimensions Width: 23.8 inches (606 mm)
Depth: 19.2 inches (488 mm)
Height: 5.3 inches (134 mm)
Weight Approximately 28.7 lb (13 kg)
Electrical 24 VDC, 1.5 A
5 VDC, 0.4 A
System Requirements
This section lists minimum system requirements. For
optimum performance, a faster processor and more memory
are recommended. When scanning high resolution images,
you need more than the minimum available hard disk space.
❏ Macintosh® PowerPC G3; Power Mac® G5 with 500 MHz
or faster processor recommended
❏ OS 9.1 to 9.2 or OS X 10.2.x to 10.3.x
Note: Check the Apple web site for any updates to your
operating system. Fast User Switching is not supported for
Mac OS X 10.3 users.
❏ USB (1.1 or 2.0) or IEEE 1394 (FireWire) port. To use the
scanner’s optional network card, your computer must be
connected to an existing network using TCP/IP.
USB 2.0 requires Mac OS X 10.2.7 or later
IEEE 1394 requires IEEE1394a-2000 compatible and
OHCI-compliant interface card; make sure FireWire 2.1 or
later is installed on your computer
❏ 128MB RAM (512MB RAM recommended)
❏ 300MB available hard disk space
❏ CD-ROM drive
❏ VGA color monitor with 800 × 600 resolution (1024 × 768
or higher recommended)
❏ 16-bit 65K-color display adapter card (24-bit display
adapter card with millions of colors recommended)
Note: Color and tone reproduction are subject to the display
capability of your computer system, including the video card, monitor,
and software. See the documentation for these products for details.
5/04 Epson Expression 10000XL - 3
Page 4

Epson Expression 10000XL
Transporting the Scanner and TPU
Lock the scanner’s transportation lock before transporting it or
storing it for an extended time.
1. Turn on the scanner and wait about 30 seconds for it to
initialize. When the
on, turn the scanner off.
2. Unplug the AC power cord, and then push down the
transportation lock on the back of the scanner to the
position.
3. Place the scanner in its original box, or use equivalent
packing materials.
Transporting the TPU
Before shipping or storing the transparency unit (TPU), follow
these steps:
Ready light stops blinking and remains
Lock
Cleaning the Scanner
Follow these steps to clean the scanner.
1. Press the . power button to turn the scanner off, and
unplug the power cord.
Caution: Always unplug the scanner before cleaning.
2. Use a soft, damp cloth and mild detergent to clean the outer
case.
Caution: Be careful not to spill liquid or let water get into the
scanner mechanism or electronic components. This could
permanently damage them.
Never use alcohol, thinner, or corrosive solvent to clean the
scanner. These chemicals can damage the scanner
components as well as the case.
3. Clean dust and smudges from the document table glass with
a soft, dry cloth (a microfiber glass cleaning cloth is
recommended). You can also use compressed air spray
cleaner.
To remove grease, use pretreated lens or scanner wipes, or a
small amount of glass cleaner on a soft cloth. Dry the
document table glass afterwards.
Caution: Never spray glass cleaner directly on the document
table. Always spray it on a cloth first and then wipe the
glass.
1. Use a coin to turn the transportation lock to the
Lock
position.
2. Disconnect the TPU cable from the
OPTION port on the
back of the scanner.
3. Remove the TPU from the scanner and place it in its
original box, or use equivalent packing materials.
Never use a harsh or abrasive brush or cleaning product to
clean the document table. A damaged glass surface can
decrease the scanning quality.
Avoid leaving photos on the scanner glass for an extended
period of time, or residue from the photos may adhere to the
glass.
4 - Epson Expression 10000XL 5/04
Page 5

Epson Expression 10000XL
Scanner Lights
You can diagnose some problems by checking the scanner’s
lights.
Error light
Ready light
a Start button
. Power button
Light Scanner Status
Ready light is on
or flashing.
Error and Ready
lights are both
off.
Error and Ready
lights are both
on.
Error and Ready
lights are both
flashing.
The green Ready light is on when the scanner is
ready to scan. It flashes when scanning is in
progress.
Make sure your scanner is connected to a working
outlet, then press the . power button.
The scanner has received an incorrect command
from your scanner software. Try scanning again. If
the problem persists, try reinstalling your scanner
software.
If you’re using the automatic document feeder,
there may be a paper jam. Clear any jammed paper,
then close any open covers.
If this doesn’t solve the issue, there may be a
problem with the fluorescent lamp, or another
problem. Contact Epson as described in the User’s
Guide.
Scanning with EPSON Scan
The EPSON Scan software offers three scanning modes:
❏ Home Mode makes scanning quick and easy, and provides
excellent results for all types of documents. Use when
advanced control over image quality settings is not required.
❏ Office Mode is ideal for scanning business documents
containing text or graphics, with or without color. Choose
this mode to scan multi-page documents on the optional
automatic document feeder, or when scanning for OCR
(optical character recognition) to create editable text.
❏ Professional Mode gives you the greatest control over image
color and quality. Lets you manually adjust any setting,
including the histogram setting, tone, color depth, balance,
saturation, brightness, and contrast.
You can open EPSON Scan from any TWAIN-compliant
imaging application, such as Photoshop Elements (included
with the scanner); this lets you scan images into the
application. Or you can use EPSON Scan in “standalone”
mode to scan directly to a file on your computer’s hard drive.
Placing the Original Document
Follow these steps to position a photo or single-page document
for scanning. (If you want to scan several photos at a time, a
multi-page document, or film or slides, see the User’s Guide.)
1. Raise the scanner cover and place the document face down
on the document table. Place it in the upper-left corner,
aligning it with the edges of the glass.
2. Close the cover, being careful not to move the document.
Tip: If the edges of the document don’t scan, move it in
about 1/16 of an inch (1.5 mm) from the edges of the glass.
You can raise or remove the document cover if you need to
scan a thick item—such as a photo in an album—that
doesn’t fit under the cover. Simply lift the back of the cover
straight up. When you reattach the cover, line up the hinge
pins with the positioning holes and lower the cover into
place.
5/04 Epson Expression 10000XL - 5
Page 6

Epson Expression 10000XL
Scanning an Image
First, place your document on the scanner as described on
page 5. Then follow these steps to start EPSON Scan and scan
an image into an application:
1. Turn on the scanner, and wait about 30 seconds for it to
initialize. The green
2. Open your imaging application, then choose the
Acquire) option in the application and select Epson
Expression 10000XL
Note: If you are using Windows XP and choose WIAEPSON Expression 10000XL, certain features won’t be
available.
The EPSON Scan dialog box opens.
Ready light stops flashing and stays on.
Import (or
.
Choose a mode
5. Click the
Note: The Thumbnail preview screen is shown above.
Depending on your selected mode, you may see the Normal
preview screen instead. To switch between preview
screens, click the arrow next to the Preview button and
choose
In Home Mode, you can click the
make the preview screen open automatically whenever you
launch EPSON Scan.
Preview button to see a preview of your scan.
Thumbnail or Normal.
Auto preview checkbox to
3. Choose a mode from the Mode list at the top of the
EPSON Scan screen. (See page 5 for a description of the
modes.)
4. Adjust any settings in EPSON Scan, as needed. For
example, if you’re using Home Mode, select the
Type
, Image Type, and Destination settings that are
Document
appropriate for your image and how you want to use it.
6. Click and drag within the preview image to select the area
you want to scan.
Note: Image quality adjustments are automatically applied
to the selected area, unless you’ve turned off the
Continuous auto exposure setting (click the
button, then click the
best results, select only the part of the image you want to
scan.
Color tab to access this setting). For
Configuration
7. If you’re previewing your image as a thumbnail (as shown
above), click the button to rotate the image, if needed.
Click the button to mirror the image.
8. Click
9. When scanning completes, click
Scan.
Close to exit EPSON Scan
and view the scanned image in your imaging application.
6 - Epson Expression 10000XL 5/04
Page 7

Epson Expression 10000XL
Scanning to a File
You can use EPSON Scan in “standalone” mode to scan
directly to a file on your computer’s hard drive. First, place
your document or photo on the scanner. Then follow these
steps:
1. Start EPSON Scan:
❏ Windows: Click
the
EPSON Scan folder, and then click EPSON Scan.
❏ Macintosh OS X: Open the
then click
❏ Macintosh OS 9: Open the Apple menu, then select
EPSON Scan.
Note: If you have multiple scanners installed, you are
prompted to choose your scanner. Click
10000XL and click OK.
2. Choose a mode from the Mode list
at the top of the EPSON Scan
screen.
3. Make any appropriate settings for the document you are
scanning.
4. Click
Scan. You see this screen:
Start, open the Programs folder, open
Applications folder, and
EPSON Scan.
EPSON Expression
Scanning With the a Start Button
You can press the a Start button to open EPSON Scan—or
if you’re running Windows, you can set the button to open
another application of your choice.
a Start
button
Note: You cannot assign a different application to the a Start button
on Macintosh systems.
Assigning an Application to the a Start
Button in Windows
Follow the steps in the section for your operating system to
assign an application to the a Start button.
Note: If you set the a Start button to open Photoshop Elements,
EPSON Scan launches automatically after Photoshop opens. If you
choose another program, wait for it to open, then start EPSON Scan
manually.
5. Type a name for your file in the Prefix field, then choose an
image type and click
Note: If you’re saving the file in JPEG format, be sure to
select an appropriate compression ratio for your image. For
details on file format settings, click the
OK.
Help button.
You can assign multiple applications to the a Start button, but you’ll
have to decide which program to launch after pressing it. To avoid
doing this, do not assign more than one application to the a Start
button.
Windows XP
Follow these steps to set up the a Start button in Windows
XP:
1. Click the Windows
Computer
.
2. Right-click the
Properties.
Start button, then click My
Expression 10000XL icon, and then click
5/04 Epson Expression 10000XL - 7
Page 8

Epson Expression 10000XL
3. Click the
4. Make sure the
Events tab. You see this window.
Start Button is selected in the Select an event
box.
5. Click
Start this program, select a program from the list,
and then click
Note: If the program you want to use is not listed, open it
and then follow these steps again. If it is still not listed, it
cannot be opened using the
You can disable the
action checkbox on the Events tab.
OK.
a Start button.
a Start button by clicking the Take no
3. Click the
4. Make sure
Events tab. You see this window.
Start Button appears in the Scanner events box,
then deselect any applications you don’t want to use in the
Send to this application list. Leave checked only the
application(s) you want to assign to the a Start button.
5. Click
Apply, then click OK to close the Epson Expression
10000XL Properties window, then click
OK again to close
the Scanners and Cameras Properties window.
Note: You can disable the a Start button by clicking the Disable
device events checkbox on the Events tab.
Windows Me, Windows 2000, and Windows 98
For all Windows users except XP, follow these steps to set up
the a Start button:
1. Double-click the
Scanners and Cameras icon in the
Windows Control Panel.
2. Select
Epson
Expression
10000XL
and
click the
Properties
button.
Related Documentation
CPD-18060 Epson Expression 10000XL Start Here
sheet
CPD-18061 Epson Expression 10000XL User’s Guide
CPD-18062 Scanner Software CD-ROM (includes
HTML Reference Guide)
8 - Epson Expression 10000XL 5/04
 Loading...