

Page 1
User's Guide
Page 2

Contents
2
Notations Used in This Guide 8
Using the Manual to Search for Information.....................................9
Searching b
Jumping Directly from Bookmarks.....................................................................9
Printing Only the Pages You Need......................................................................9
y Keyword......................................................................................9
Getting the Latest Version of the Documents.................................10
List of Functions 11
Introduction to Your Projector 15
Projector Features............................................................................. 16
Quick and Easy Setup
4K Enhancement Technology to Project Even More Information Crisply and Cleanly
......................................................................................................................16
Quick and Easy Multi-projection Setup.............................................................16
Install in a Variety of Environments...................................................................16
Easy Wireless Projection..................................................................................16
Environmentally-Friendly................................................................................17
Projector Parts and Functions.......................................................... 18
Projector Parts - Front/Top...............................................................................18
Projector Parts - Rear.......................................................................................19
Projector Parts - Base...................................................................................... 20
Projector Parts - Interface Ports........................................................................20
Projector Parts - Control Panel......................................................................... 22
Projector Parts - Remote Control......................................................................23
......................................................................................16
Precautions on Installation...........................................................................28
Projection Distance.........................................................................................30
Installing the Safety Wire..................................................................31
When Using the Ceiling Mount ELPMB22..........................................................31
When Using the Ceiling Mount ELPMB30..........................................................32
Projector Connections.......................................................................34
Connecting to a Computer..............................................................................34
Connecting to a Computer for HDMI Video and Audio....................................34
Connecting to Video Sources...........................................................................34
Connecting to an HDMI Video Source............................................................35
Connecting to External USB Devices.................................................................35
USB Device Projection..................................................................................35
Connecting to a USB Device......................................................................... 36
Disconnecting a USB Device.........................................................................36
Connecting to a Document Camera................................................................. 36
Connecting to an HDBaseT Transmitter ............................................................36
Connecting to the Base Unit ........................................................................... 37
Connecting to External Devices....................................................................... 38
Connecting to an External HDMI Monitor...................................................... 38
Connecting to External Speakers.................................................................. 38
Connecting Multiple Projectors of the Same Model.......................40
Projecting the Same Image in a Daisy-Chain Connection................................... 40
Attaching and Removing the Cable Cover.......................................42
Installing Batteries in the Remote Control...................................... 43
Remote Control Operation.............................................................................. 44
Using Basic Projector Features 45
Setting Up the Projector 25
Projector Placement..........................................................................26
Notes on Tr
Projector Setup and Installation Options.......................................................... 28
ansporting.................................................................................... 28
Turning On the Projector.................................................................. 46
Home Screen
..................................................................................................47
Turning O the Projector.................................................................. 49
Setting the Date and Time................................................................ 50
Page 3

Contents
3
Selecting the Language for the Projector Menus........................... 52
Projec
tion Modes...............................................................................53
Changing the Projection Mode Using the Remote Control................................. 53
Changing the Projection Mode Using the Menus...............................................53
Setting the Screen Type.................................................................... 55
Adjusting the Image Position Using Screen Position..........................................55
Changing the Horizontal Position of the Image Using Screen Shift......................56
Adjusting the Image Position Using Lens Shift............................... 58
Displaying a Test Pattern.................................................................. 59
Adjusting the Image Height..............................................................60
Image Shape.......................................................................................61
Correcting Image Shape with H/V Keystone......................................................61
Correcting the Image Shape with Quick Corner.................................................62
Correcting Image Shape with Curved Surface Mode..........................................65
Correcting Image Shape with Corner Wall Mode ...............................................67
Correcting Image Shape with Point Correction Mode........................................ 70
Loading Image Shape Setting from Memory.....................................................73
Resizing the Image with the Zoom Ring.......................................... 74
Focusing the Image Using the Focus Ring....................................... 75
Focusing the Image Using the Focus Ring (Center/Corner)............76
Selecting an Image Source................................................................77
Image Aspect Ratio............................................................................79
Changing the Image Aspect Ratio....................................................................79
Available Image Aspect Ratios.........................................................................80
Adjusting Image Quality (Color Mode)............................................ 81
Changing the Color Mode............................................................................... 81
Available Color Modes.................................................................................... 81
Turning On Automatic Luminance Adjustment.............................. 82
Adjusting the Image Color................................................................83
Adjusting the Hue, Saturation, and Brightness.................................................. 83
Adjusting the Gamma.....................................................................................84
Adjusting the Image Resolution.......................................................86
Adjusting the Brightness.................................................................. 88
Light Source Operation Time...........................................................................89
Controlling the Volume with the Volume Buttons..........................91
Adjusting Projector Features 92
Projecting Two Images Simultaneously...........................................93
Input Sour
Split Screen Projection Restrictions.................................................................. 95
Projecting a PC Free Presentation....................................................96
Supported PC Free File Types...........................................................................96
Precautions on PC Free Projection....................................................................96
Starting a PC Free Slide Show.......................................................................... 97
Starting a PC Free Movie Presentation..............................................................98
PC Free Display Options..................................................................................99
Projecting in Content Playback Mode........................................... 101
Supported Content Playback Mode File Types.................................................101
Switching to Content Playback Mode.............................................................101
Projecting Your Playlists................................................................................ 102
Creating Playlists Using Epson Web Control................................................. 103
Adding Eects to Your Projected Image..........................................................105
Content Playback Mode Restrictions.............................................................. 106
Shutting O the Image and Sound Temporarily........................... 107
Stopping Video Action Temporarily...............................................108
Turning O the Sound Temporarily (Mute)................................... 109
Zooming Images (E-Zoom)............................................................. 110
Saving a User's Logo Image............................................................ 111
ces for Split Screen Projection.......................................................... 94
Page 4

Contents
4
Saving Settings to Memory and Using Saved Settings ............... 113
Using Adv
Adjusting the Color Tone (Color Uniformity)....................................................114
Running Light Source Calibration...................................................................115
anced Image Adjustment Features............................... 114
Multi-Projection Features...............................................................117
Conditions for the Camera Correction Function...............................................117
Procedure Overview......................................................................................117
Preparing for Multi-Projection........................................................................118
Connecting Projectors................................................................................118
Initializing Projectors..................................................................................118
Assigning a Primary Projector..................................................................... 118
Calibrating Projectors.................................................................................119
Installing Projectors................................................................................... 119
Performing Rough Image Adjustments........................................................119
Connecting Projectors to a Network............................................................119
Image Composition...................................................................................... 120
Blending Using the Epson Projector Professional Tool Software and the Optional
Camera.....................................................................................................120
Tiling Using the Projector's Menu................................................................121
Simple Blending Using the Projector's Menu and the Optional External Camera
.................................................................................................................125
Stacking Using the Epson Projector Professional Tool Software and the Optional
Camera .................................................................................................... 126
Stacking Using the Projector's Menu (Simple Stacking)................................. 126
Stacking & Blending Using the Epson Projector Professional Tool Software.....127
Adjusting Colors...........................................................................................127
External Camera Usage................................................................... 128
Connecting to an Optional Camera................................................................ 128
Projector Security Features............................................................ 130
Password Security Types................................................................................130
Setting a Password.....................................................................................130
Selecting Password Security Types..............................................................131
Entering a Password to Use the Projector.....................................................132
Locking the Projector's Buttons......................................................................132
Unlocking the Projector's Buttons............................................................... 133
Locking the Remote Control Buttons..............................................................133
Installing a Security Cable..............................................................................134
Using the Projector on a Network 135
Wired Network Projection.............................................................. 136
Connecting t
Selecting Wired Network Settings..................................................................136
Wireless Network Projection.......................................................... 140
Safety Instructions for Built-in Wireless LAN Module........................................ 140
Installing the Wireless LAN Module................................................................ 140
Connection Methods for Wireless Network Projection......................................141
Selecting Wireless Network Settings Manually.................................................142
Selecting Wireless Network Settings in Windows..........................................145
Selecting Wireless Network Settings in Mac................................................. 145
Setting Up Wireless Network Security (When Simple AP is Enabled)..................145
Setting Up Wireless Network Security (When Simple AP is Disabled)................. 146
Supported Client and CA Certicates...........................................................147
Using a QR Code to Connect a Mobile Device..................................................148
Using a USB Key to Connect a Windows Computer..........................................149
Wireless Network Projection from a Mobile Device (Miracast)....150
Selecting Miracast Settings............................................................................150
Connecting with the Miracast Function.......................................................... 151
Connecting Using Miracast in Windows 10......................................................152
Connecting Using Miracast in Windows 11......................................................153
Secure HTTP..................................................................................... 154
Importing a Web Server Certicate Using the Menus....................................... 154
Supported Web Server Certicates..............................................................155
Screen Sharing.................................................................................156
Sharing the Screen........................................................................................156
Finishing the Screen Sharing.......................................................................157
Receiving Shared Screen Images....................................................................158
o a Wired Network.....................................................................136
Page 5

Contents
5
Monitoring and Controlling the Projector 159
Epson Projector Management Connected/Epson Projector
Management....................................................................................
160
Controlling a Networked Projector Using a Web Browser........... 161
Web Control Options.....................................................................................163
Registering Digital Certicates from a Web Browser................... 170
Setting Up Projector Network E-Mail Alerts..................................172
Network Projector E-mail Alert Messages........................................................172
Setting Up Monitoring Using SNMP...............................................173
Using ESC/VP21 Commands .......................................................... 175
ESC/VP21 Command List...............................................................................175
Cable Layouts...............................................................................................175
PJLink Support................................................................................. 176
Crestron Connected Support..........................................................177
Setting Up Crestron Connected Support.........................................................177
Operating the Projector Using Web API........................................ 179
Enabling Web API......................................................................................... 179
Setting Projector Event Schedules.................................................180
Adjusting the Menu Settings 183
Multiple Projector Operation Settings - Multi-Projection Menu.193
Projector Display Settings - Display Menu.................................... 195
Projector Feature Settings - Operation Menu...............................197
Functions Available in Standby Mode.............................................................199
Projector Administration Settings - Management Menu.............200
Event ID Code List.........................................................................................201
Projector Network Settings - Network Menu................................ 203
Network Menu - Network Settings Menu........................................................ 204
Network Menu - Wireless LAN Menu............................................................205
Network Menu - Wired LAN Menu...............................................................208
Network Menu - Mail Notication Menu...................................................... 208
Network Menu - Projector Control Menu......................................................209
Network Menu - Network Projection Settings...............................................211
Projector Information Display - Info Menu....................................213
Image Quality Memory Settings - Memory Menu.........................214
Projector Setup Settings - ECO Menu.............................................215
Projector Initial Settings and Reset Options - Initial/All Settings
Menu.................................................................................................216
Copying Menu Settings Between Projectors (Batch Setup).........218
Transferring Settings From a USB Flash Drive...................................................218
Transferring Settings From a Computer.......................................................... 219
Batch Setup Error Notication.....................................................................220
Using the Projector's Menus...........................................................184
Using the Display
Available Text Using the Displayed Keyboard.................................................. 185
ed Keyboard.......................................................185
Image Quality Settings - Image Menu........................................... 186
Input Signal Settings - Signal I/O Menu.........................................189
Projector Installation Settings - Installation Menu...................... 191
Maintaining the Projector 221
Projector Maintenance....................................................................222
Cleaning the Lens............................................................................
Cleaning the Projector Case........................................................... 224
Air Filter and Vent Maintenance.....................................................225
223
Page 6

Contents
6
Cleaning the Air Filters and Intake Vents ........................................................225
Replacing the Air F
ilter..................................................................................227
Updating the Firmware...................................................................229
Updating Firmware Using a USB Storage Device..............................................229
Updating Firmware Using a Computer and USB Cable......................................231
Updating the Firmware over the Network....................................................... 232
Solving Problems 234
Projection Problems........................................................................235
Projec
Viewing the Status Display.............................................................239
Solving Image or Sound Problems.................................................240
tor Indicator Status...............................................................236
Solutions When No Image Appears................................................................ 240
Solutions When "No Signal" Message Appears.................................................240
Displaying From a Windows Laptop............................................................ 241
Displaying From a Mac Laptop....................................................................241
Solutions When "Not Supported" Message Appears.........................................241
Solutions When Only a Partial Image Appears................................................. 242
Solutions When the Image Contains Noise or Static.........................................242
Solutions When the Image is Fuzzy or Blurry................................................... 243
Solutions When the Image is not Rectangular................................................. 243
Solutions When the Image Brightness or Colors are Incorrect...........................243
Solutions When Automatic Adjustments are not Applied Correctly...................244
Solutions When Simple Stacking is not Applied Correctly.................................245
Solutions When Simple Blending is not Applied Correctly................................ 245
Solutions When an Afterimage Remains on the Projected Image...................... 245
Solutions to Sound Problems.........................................................................245
Solutions When Image File Names are not Displayed Correctly in PC Free..........246
Solutions When You Cannot Project Images Using the PC Free Feature..............246
Solution When "The Battery that Saves Your Clock Settings is Running Low"
Message Appears..........................................................................................248
Solving Network Problems............................................................. 249
Solutions When Wireless Authentication Fails..................................................249
Solutions When You Cannot Access the Projector Through the Web..................249
Solutions When Network Alert E-Mails are not Received...................................249
Solutions When the Image Contains Static During Network Projection..............250
Solutions When You Cannot Connect Using Miracast.......................................250
Solutions When the Image or Sound Contains Static During Miracast Connection
....................................................................................................................250
Solutions When You Cannot Receive Shared Images........................................251
Solutions to Problems in Content Playback Mode........................252
Solutions When HDMI Link does not Function............................. 253
Appendix 254
Optional Accessories and Replacement Parts............................... 255
Screens
Mounts........................................................................................................255
For Wireless Connection................................................................................ 255
External Devices........................................................................................... 256
Replacement Parts........................................................................................256
Screen Size and Projection Distance..............................................257
Supported Monitor Display Resolutions....................................... 265
Projector Specications.................................................................. 266
Connector Specications...............................................................................268
External Dimensions....................................................................... 269
Supported Features for Epson Projector Content Manager........ 272
........................................................................................................255
Solving Projector or Remote Control Operation Problems..........247
Solutions to Projector Power or Shut-O Problems..........................................247
Solutions to Problems with the Remote Control..............................................247
Solutions to Password Problems.....................................................................248
List of Safety Symbols and Instructions........................................ 273
Laser Safety Information................................................................ 275
Laser Warning Labels.................................................................................... 275
Page 7

Contents
Notices..............................................................................................277
FCC Complianc
Indication of the manufacturer and the importer in accordance with requirements
of EU directive..............................................................................................278
Restriction of Use..........................................................................................278
Operating System References........................................................................278
Trademarks..................................................................................................278
Copyright Notice.......................................................................................... 279
Copyright Attribution....................................................................................279
e Statement........................................................................... 277
7
Page 8
Notations Used in This Guide
ty Symbols
Safe
e projector and its manuals use graphical symbols and labels to indicate content that tells you how to use the projector safely.
Read and carefully follow the instructions that are marked with these symbols and labels to avoid injury to persons or damage to property.
is symbol indicates information that, if ignored, could possibly result in personal injury or even death.
Warning
Caution
is symbol indicates information that, if ignored, could possibly result in personal injury or physical damage due to incorrect handling.
General Information Notations
Attention
[Bu
tton name] Indicates the name of the buttons on the remote control or the control panel.
Menu/Setting name Indicates projector menu and setting names.
s
Related Links
g
•
•
g the Manual to Search for Information" p.9
"Usin
"Getting the Latest Version of the Documents" p.10
is label indicates procedures that may result in damage or injury if sucient care is not taken.
is label indicates additional information that may be useful to know.
Examp
le: [Esc] button
Example:
Select the Image menu
s Image > Color Mode
is label indicates links to the related pages.
label indicates the projector's current menu level.
is
Page 9
Using the Manual to Search for Information
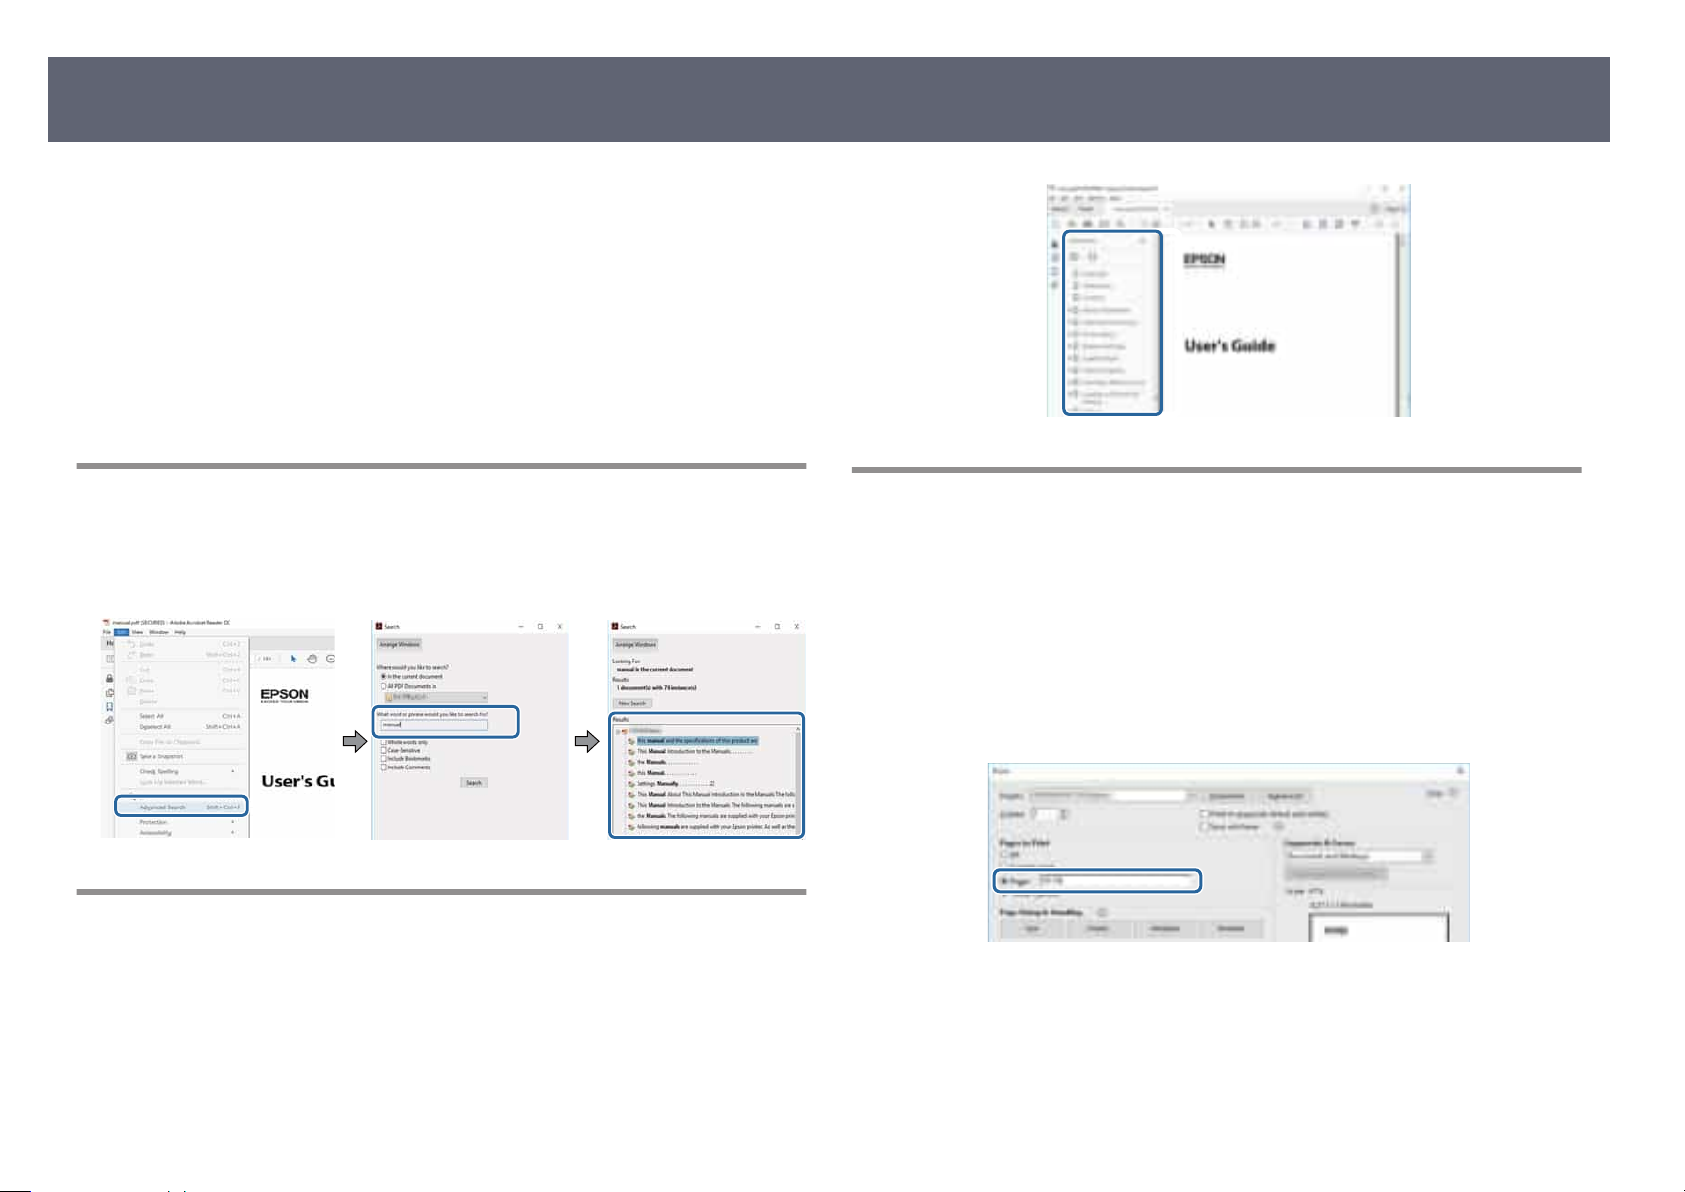
e PDF manual allows you to search for information you are looking for by
yword, or jump directly to specic sections using the bookmarks. You can
ke
also print only the pages you need. is section explains how to use a PDF
manual that has been opened in Adobe Reader X on your computer.
Related Links
g
•
"Searching by Keyword" p.9
•
"Jumping Directly from Bookmarks" p.9
•
"Printing Only the Pages You Need" p.9
9
Searching by Keyword
Click Edit > Advanced Search. Enter the keyword (text) for information you
want to nd in the search window, and then click Search. Hits are displayed as a
list. Click one of the displayed hits to jump to that page.
Jumping Directly from Bookmarks
Click a title to jump to that page. Click + or > to view the lower level titles in
that s
ection. To return to the previous page, perform the following operation on
your keyboard.
•
Windows: Hold down Alt, and then press ←.
•
Mac OS: Hold down the command key, and then press ←.
Printing Only the Pages You Need
You can extract and print only the pages you need. Click Print
and then specify the pages you want to print in Pages in Pages to Print.
•
To specify a series of pages, enter a hyphen between the start page and the
end page.
Example: 20-25
•
To specify pages that are not in series, divide the pages with commas.
Example: 5, 10, 15
in the File menu,
Page 10

Getting the Latest Version of the Documents
10
You can get the latest version of the manuals and spe
Web site.
Visit epson.sn, and enter your model name.
cications on the Epson
Page 11

List of Functions
e fol
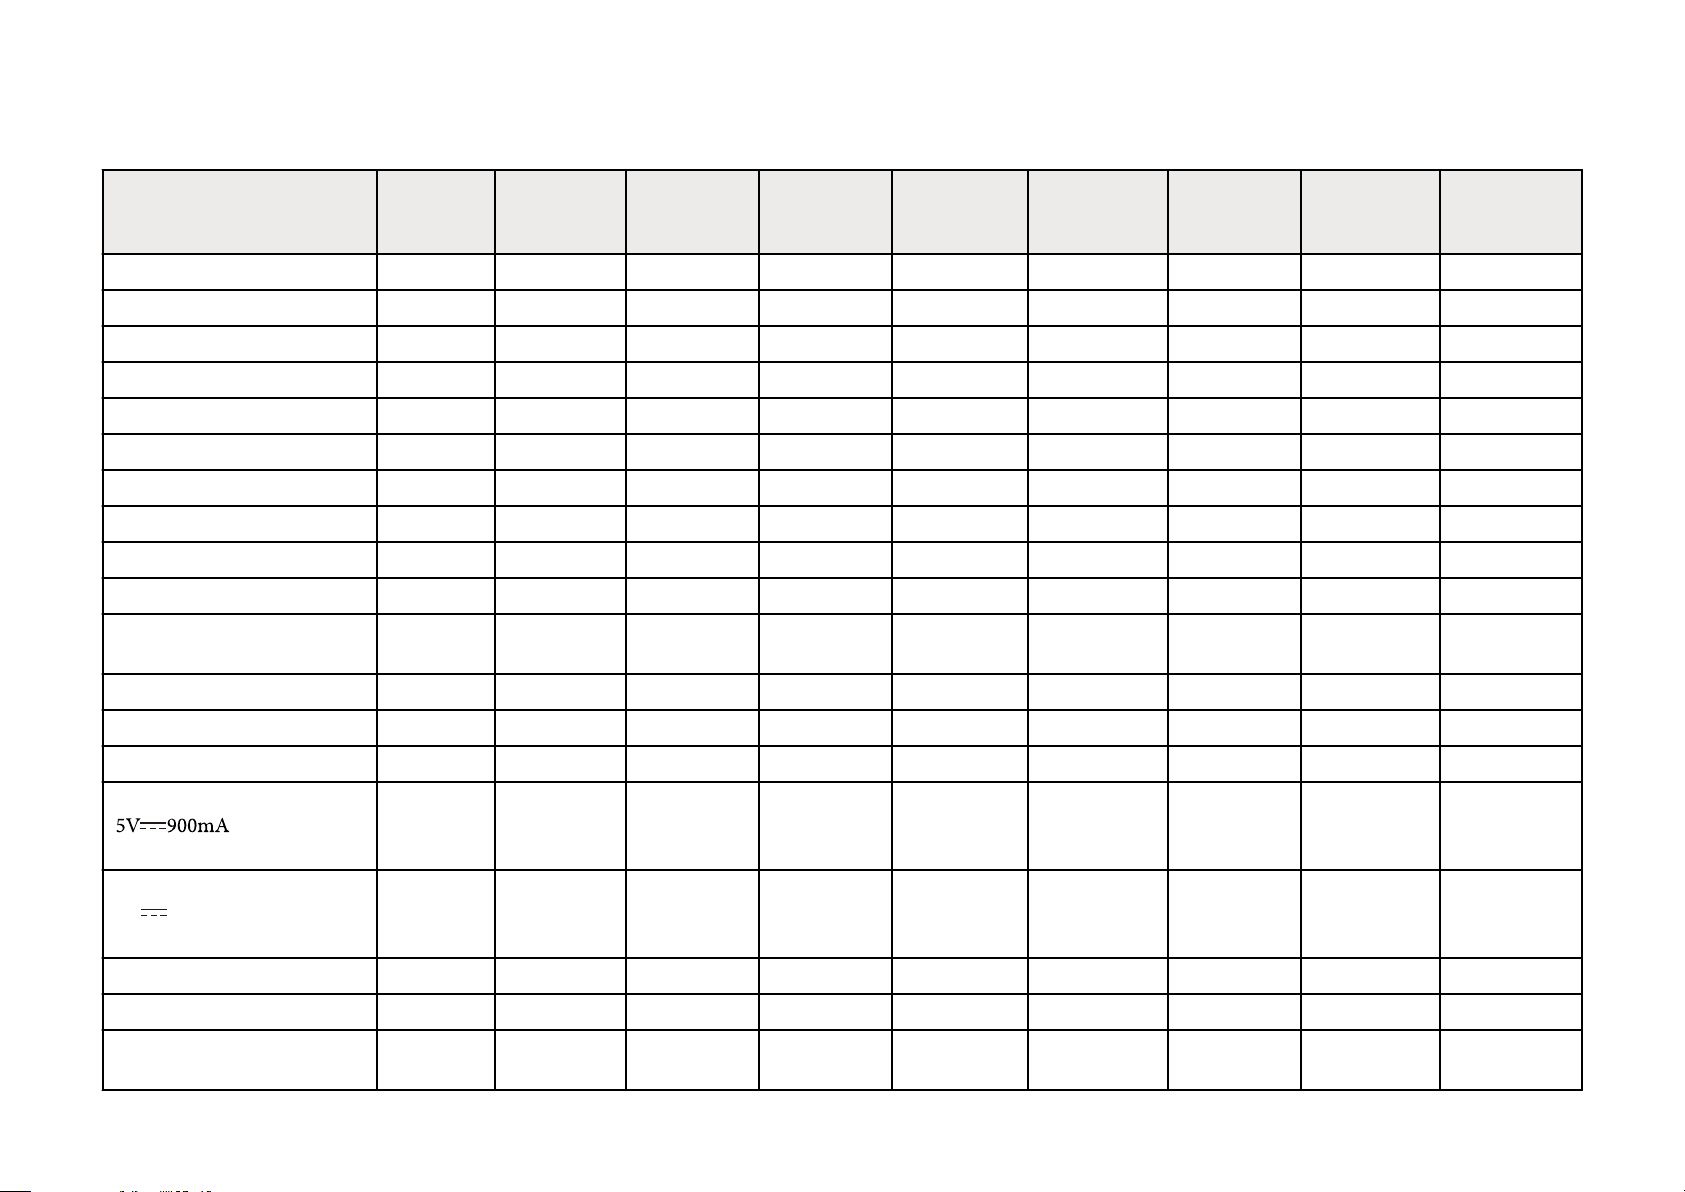
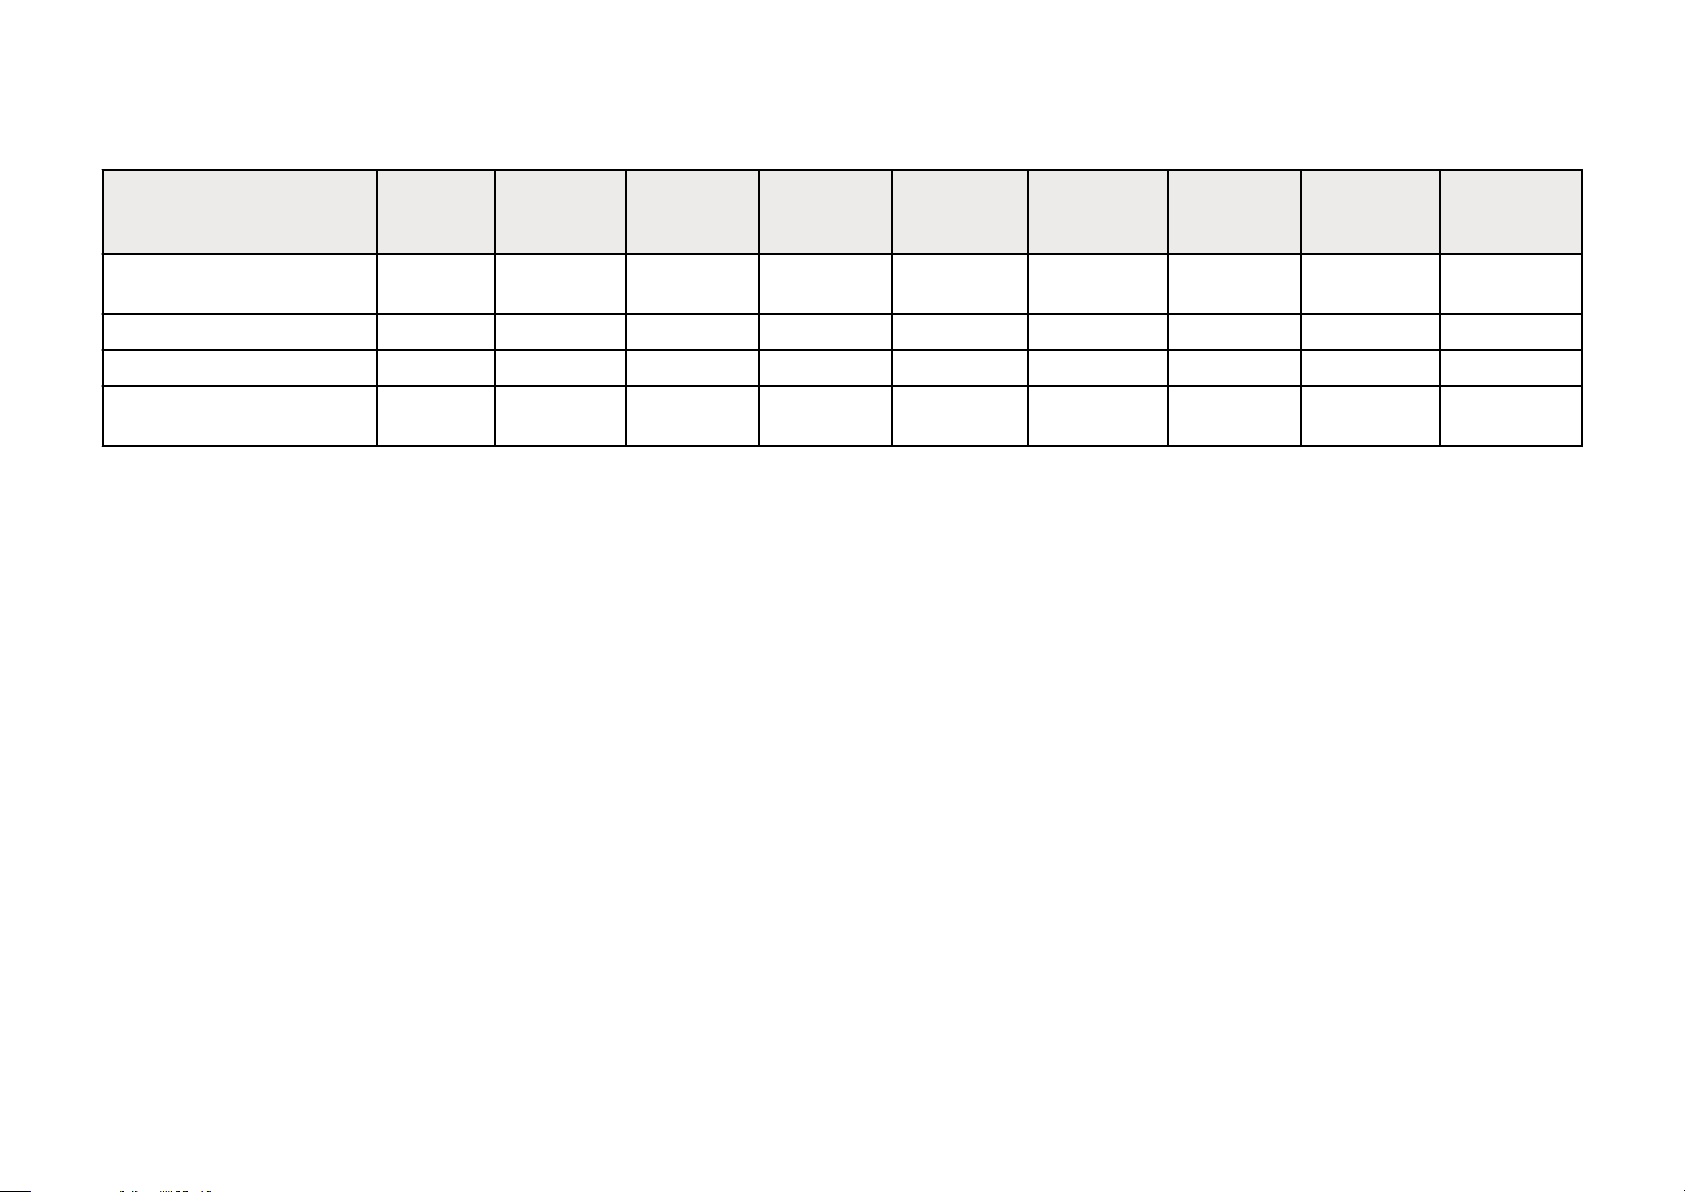
lowing table lists the functions supported by each projector model. Supported functions are indicated by a "✓" mark.
EBL890E/EBL895E
Wired LAN ✓ ✓ ✓ ✓ ✓ ✓ ✓ ✓ ✓
Wireless LAN (built-in) ✓ ✓ - ✓ ✓ ✓ ✓ ✓ ✓
Wireless LAN (optional) - - ✓ - - - - - -
Supported EAP type: PEAP,
EAP
-TLS
pported EAP type: PEAP,
Su
PEAP-TLS, EAP-TLS, EAP-Fast
Miracast ✓ ✓ - ✓ ✓ ✓ ✓ ✓ ✓
HDMI1/HDMI2 ports ✓ ✓ ✓ ✓ ✓ ✓ ✓ ✓ ✓
HDMI Out port ✓ ✓ ✓ ✓ ✓ ✓ ✓ ✓ ✓
HDBaseT port ✓ ✓ ✓ ✓ ✓ ✓ ✓ ✓ ✓
LAN port ✓ ✓ ✓ ✓ ✓ ✓ ✓ ✓ ✓
USB-A ports ✓ ✓ ✓ ✓ ✓ ✓ ✓ ✓ ✓
USB-B port ✓ ✓ ✓ ✓ ✓ ✓ ✓ ✓ ✓
✓ ✓ - ✓ ✓ ✓ ✓ ✓ ✓
- - ✓ - - - - - -
EBL790SE/EBL795SE
EBL690S
L695SE
E/EB-
EB-L690E EB-
L890U/EBL895U
EB-L790U EB-L790SU EB-L690U EB-
L690SU/EBL695SU
Audio Out port ✓ ✓ ✓ ✓ ✓ ✓ ✓ ✓ ✓
RS-232C port ✓ ✓ ✓ ✓ ✓ ✓ ✓ ✓ ✓
Lens cover ✓ ✓ ✓ ✓ ✓ ✓ ✓ ✓ ✓
Speaker ✓ ✓ - ✓ ✓ ✓ ✓ ✓ ✓
Lens s
hi dial (horizontal/
er
tical)
v
Zoom ring ✓ ✓ ✓ ✓ ✓ ✓ ✓ ✓ ✓
✓ ✓ ✓ ✓ ✓ ✓ ✓ ✓ ✓
Page 12

EBL890E/EBL895E
Focus ring ✓ - - ✓ ✓ ✓ - ✓ -
Focus ring (center) - ✓ ✓ - - - ✓ - ✓
Focus ring (corner) - ✓ ✓ - - - ✓ - ✓
Document camera (optional) ✓ ✓ ✓ ✓ ✓ ✓ ✓ ✓ ✓
EBL790SE/EBL795SE
EBL690S
L695SE
E/EB-
EB-L690E EB-
L890U/EBL895U
EB-L790U EB-L790SU EB-L690U EB-
L690SU/EBL695SU
Beep (Power on/Power o
e & Time setting ✓ ✓ ✓ ✓ ✓ ✓ ✓ ✓ ✓
Dat
Schedule Settings ✓ ✓ ✓ ✓ ✓ ✓ ✓ ✓ ✓
PC Free ✓ ✓ ✓ ✓ ✓ ✓ ✓ ✓ ✓
Batch Setup (USB ash dr
Batch Setup (USB cable) ✓ ✓ ✓ ✓ ✓ ✓ ✓ ✓ ✓
User's Logo Protection ✓ ✓ ✓ ✓ ✓ ✓ ✓ ✓ ✓
Network Protection ✓ ✓ ✓ ✓ ✓ ✓ ✓ ✓ ✓
Schedule Protection ✓ ✓ ✓ ✓ ✓ ✓ ✓ ✓ ✓
Epson iProjection ✓ ✓ ✓ ✓ ✓ ✓ ✓ ✓ ✓
Epson Projector Management/
E
n Projector Management
pso
Connected
Epson Projector Professional
Tool
Epson Projector Content
Manag
er
Epson Creative Projection ✓ ✓ ✓ ✓ ✓ ✓ ✓ ✓ ✓
) ✓ ✓ ✓ ✓ ✓ ✓ ✓ ✓ ✓
ive) ✓ ✓ ✓ ✓ ✓ ✓ ✓ ✓ ✓
✓ ✓ ✓ ✓ ✓ ✓ ✓ ✓ ✓
✓ ✓ ✓ ✓ ✓ ✓ ✓ ✓ ✓
✓ ✓ ✓ ✓ ✓ ✓ ✓ ✓ ✓
Epson Projector Cong
Epson Web Control ✓ ✓ ✓ ✓ ✓ ✓ ✓ ✓ ✓
Mail Notication ✓ ✓ ✓ ✓ ✓ ✓ ✓ ✓ ✓
Tool ✓ ✓ ✓ ✓ ✓ ✓ ✓ ✓ ✓
Page 13
EB-
5V 2.0A
L890E/EBL895E
SNMP ✓ ✓ ✓ ✓ ✓ ✓ ✓ ✓ ✓
Secure HTTP (HTTPS) ✓ ✓ ✓ ✓ ✓ ✓ ✓ ✓ ✓
ESC/VP21 Commands ✓ ✓ ✓ ✓ ✓ ✓ ✓ ✓ ✓
ESC/VP.net (Ver. 2.0) ✓ ✓ ✓ ✓ ✓ ✓ ✓ ✓ ✓
Web API ✓ ✓ ✓ ✓ ✓ ✓ ✓ ✓ ✓
PJLink ✓ ✓ ✓ ✓ ✓ ✓ ✓ ✓ ✓
Crestron Integrated Partner ✓ ✓ ✓ ✓ ✓ ✓ ✓ ✓ ✓
Extron IP Link ✓ ✓ ✓ ✓ ✓ ✓ ✓ ✓ ✓
Extron XTP ✓ ✓ ✓ ✓ ✓ ✓ ✓ ✓ ✓
AMX Device Discovery ✓ ✓ ✓ ✓ ✓ ✓ ✓ ✓ ✓
EBL790SE/EBL795SE
EBL690S
L695SE
E/EB-
EB-L690E EB-
L890U/EBL895U
EB-L790U EB-L790SU EB-L690U EB-
L690SU/EBL695SU
Control4 Simple Device
Di
sco
very Protocol
IPv6 ✓ (Wired) ✓ (Wired) ✓ ✓ (Wired) ✓ (Wired) ✓ (Wired) ✓ (Wired) ✓ (Wired) ✓ (Wired)
Crestron Connected ✓ ✓ ✓ ✓ ✓ ✓ ✓ ✓ ✓
4K Enhancement ✓ ✓ ✓ ✓ - - - - -
Firmware update using USB-A
(
ve)
dri
Firmware update using USB-A
(
ve)
dri
Firmware update (USB cable) - - ✓ - - - - - -
Wireless LAN Diagnosis - - ✓ - - - - - -
Wireless LAN system (When
Simp
le AP is set to O)
) port (USB ash
) port (USB ash
✓ ✓ ✓ ✓ ✓ ✓ ✓ ✓ ✓
✓ ✓ ✓ ✓ ✓ ✓ ✓ ✓ ✓
- - ✓ - - - - - -
✓ ✓ - ✓ ✓ ✓ ✓ ✓ ✓
Page 14
EBL890E/EBL895E
EBL790SE/EBL795SE
EBL690S
L695SE
E/EB-
EB-L690E EB-
L890U/EBL895U
EB-L790U EB-L790SU EB-L690U EB-
L690SU/EBL695SU
Wireless LAN system (When
Simp
le AP is set to On)
Auto Conguration - - ✓ - - - - - -
Use Temporary Address - - ✓ - - - - - -
Wireless Presentation system
(ELPWP20)
- - ✓ - - - - - -
✓ ✓ - ✓ ✓ ✓ ✓ ✓ ✓
Page 15

Introduction to Your Projector
o these sections to learn more about your projector's features and part names.
Refer t
Related Links
g
•
"Projector Features" p.16
•
"Projector Parts and Functions" p.18
Page 16
Projector Features
16
is projector comes with these special features. Refer to these sections for more
ls.
detai
Related Links
g
•
"Quick and Easy Setup" p.16
•
"4K Enhancement Technology to Project Even More Information Crisply and
Cleanly" p.16
•
"Quick and Easy Multi-projection Setup" p.16
•
"Install in a Variety of Environments" p.16
•
"Easy Wireless Projection" p.16
•
"Environmentally-Friendly" p.17
Quick and Easy Setup
You can easily make projector settings using NFC technology.
4K Enhancement Technology to Project Even More Information Crisply and Cleanly
•
•
•
n Projector Professional Tool allows you to quickly and easily setup and
Epso
adjust multiple projectors and perform advanced geometric correction.
By allowing daisy-chain connections, you can project simultaneously without
having to use a distributor.
Using the blending function with 4K enhanced image quality, you can realize
a large screen with high image quality.
Install in a Variety of Environments
•
A light
•
A zoom of x1.4 or greater combined with lens shiing capability allows you
to avoid uneven ceilings and lighting when installing. e zoom value varies
depending on your projector model.
•
With a throw ratio of 0.5 or greater, you can install the projector with a short
distance. e throw ratio varies depending on your projector model.
weight and compact housing provides a space-saving installation.
Easy Wireless Projection
•
e hig
more information than when using WUXGA or Full HD.
•
High brightness realizes crisp, clean images even in bright environments.
•
e high color reproducibility of 3LCD technology allows you to experience
images rich with color.
h r
olution of 4K enhancement technology allows you to display
es
Quick and Easy Multi-projection Setup
•
When using multiple projectors, you can attach an optional external camera
to automatically compensate for unevenness in brightness and color that
occur due to installation and the passage of time.
•
•
ect your projector and mobile device wirelessly using Miracast
Conn
technology to project images.
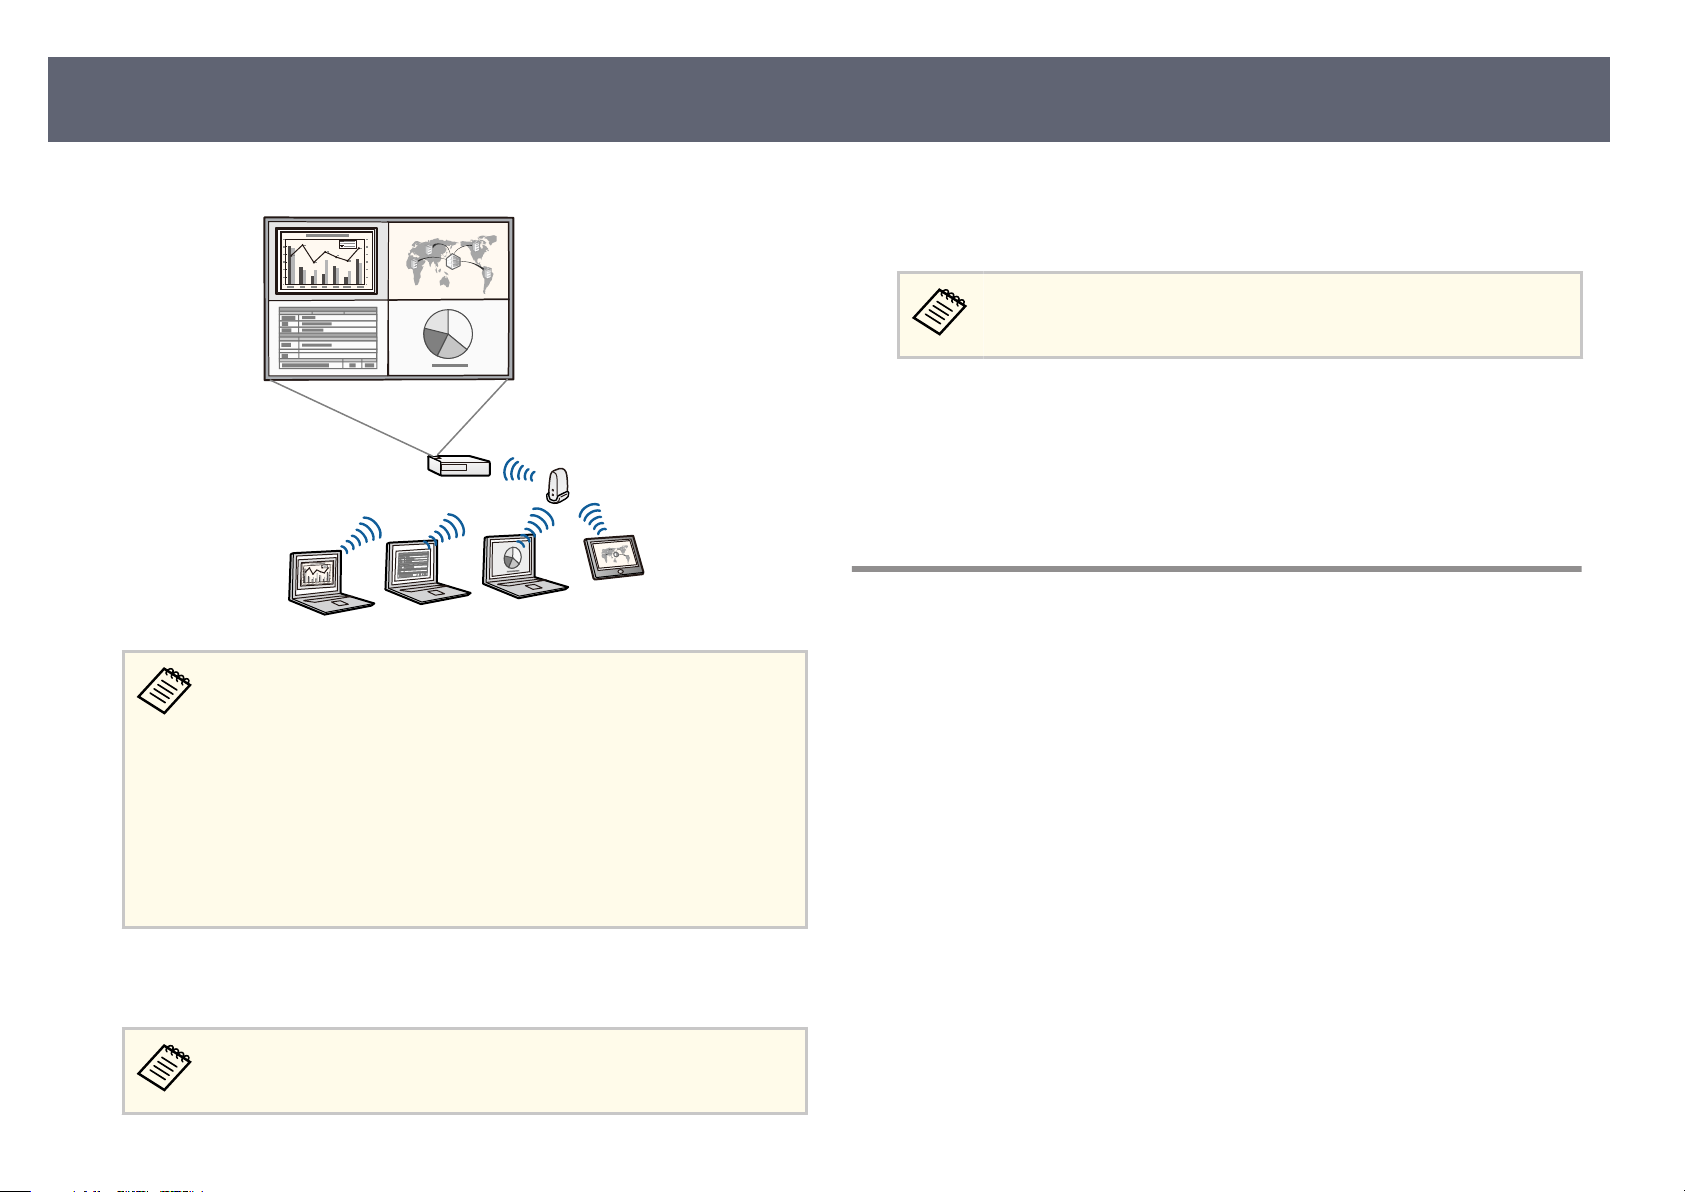
Epso
n iProjection (Windows/Mac) to project up to four images at the same
time by splitting the projected screen. You can project images from computers
on the network, or from smartphones or tablet devices on which Epson
iProjection is installed.
Page 17
Projector Features
17
See the Epson iProjection Operation Guide (Windows/Mac) for details.
•
When projecting images using a wireless LAN, set up your projector
and computer for wireless projection.
Depending on your projector model, you may need to purchase the
optional wireless LAN module. See the Quick Reference for a list of
items supplied with your projector.
•
Some models have built-in wireless LAN modules.
•
You can download the necessary soware and manuals from the
following Web site:
epson.sn
•
n iProjection (Chromebook) to connect your projector and
Epso
Chromebook device wirelessly using the app available on the Chrome Web
Store.
Any fees incurred when communicating with the Chrome Web Store
are th
e responsibility of the customer.
Related Links
g
•
•
•
•
ed Network Projection" p.136
"Wir
"Wireless Network Projection" p.140
"Wireless Network Projection from a Mobile Device (Miracast)" p.150
"List of Functions" p.11
Environmentally-Friendly
•
We have used pulp-molded products for cushioning materials (or cushioning
packaging materials) and recycled plastics for part of the projector body.
•
We aim to reduce the environmental impact through power consumption
reduction functions.
•
Equipped with an air lter that does not require replacement for an extended
period.
•
n iProjection (iOS/Android) to connect your projector and mobile
Epso
device wirelessly using the app available on the App Store or Google Play.
Any fees incurred when communicating with the App Store or Google
Play ar
e the responsibility of the customer.
Page 18
Projector Parts and Functions
e following sections explain the projector parts and their functions.
l of the features in this guide are explained using illustrations of EB-L890E
Al
unless otherwise mentioned.
e shape of the projector part may vary depending on the model of your
projector.
18
Remove the protective lm fro
time.
Related Links
g
•
ojector Parts - Front/Top" p.18
"Pr
•
"Projector Parts - Rear" p.19
•
"Projector Parts - Base" p.20
•
"Projector Parts - Interface Ports" p.20
•
"Projector Parts - Control Panel" p.22
•
"Projector Parts - Remote Control" p.23
m the projector before using for the rst
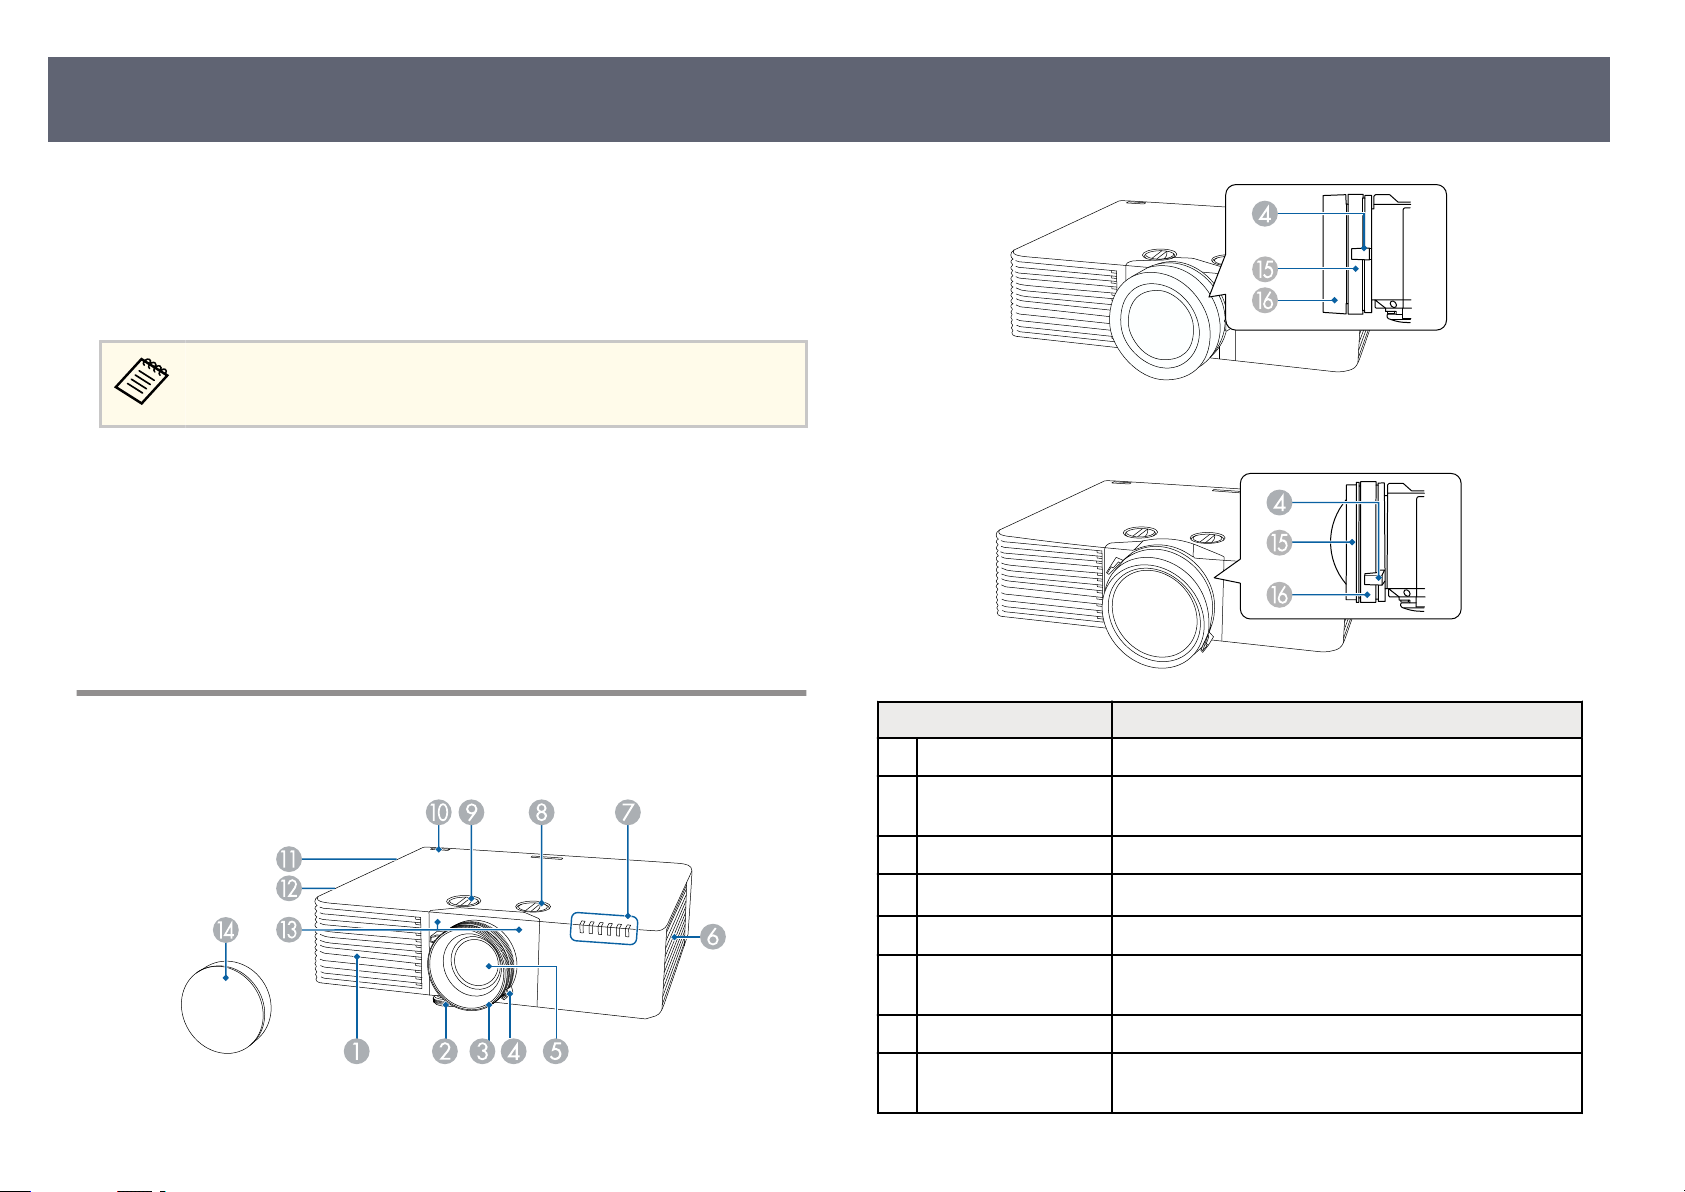
Projector Parts - Front/Top
EB-L890E/EB-L895E/EB-L690E/EB-L890U/EB-L895U/EB-L790U/EB-L690U
EB-L690SE/EB-L695SE
Name Function
Air intake vent Takes in air to cool the projector internally.
A
Front adjustable foot When setup on a surface such as a desk, extend the foot
B
Focus ring Adjusts the image focus.
C
Zoom ring Adjusts the image size.
D
Lens Images are projected from here.
E
to adj
ust the position of the image.
EB-L790SE/EB-L795SE/EB-L790SU/EB-L690SU/EB-L695SU
Air intake vent (air
F
lter)
Indicators Indicates the projector's status.
G
Vertical lens shi di
H
T
akes in air to cool the projector internally.
al Turn the dial to move the position of the projected
image up or down.
Page 19
Projector Parts and Functions
19
Name Function
Horizontal lens shi
I
dial
Remote receiver Receives signals from the remote control.
J
Speaker Outputs audio.
K
Air exhaust vent Exhaust vent for air used to cool the projector internally.
L
Turn the dial to move the position of the projected
image le or right.
Caution
While p
near the air exhaust vent, and do not place
objects that may become warped or damaged
by heat near the vent. Hot air from the air
exhaust vent could cause burns, warping, or
accidents to occur.
Remote receiver Receives signals from the remote control.
M
Lens cover Attach when not using the projector to protect the lens.
N
Focus ring (center) Adjusts the focus of the center of the image.
O
Focus ring (corner) Adjusts the focus of the corner of the image.
P
Related Links
g
•
"Resizing the Image with the Zoom Ring" p.74
•
"Focusing the Image Using the Focus Ring" p.75
•
"Focusing the Image Using the Focus Ring (Center/Corner)" p.76
•
"Attaching and Removing the Cable Cover" p.42
•
"Adjusting the Image Position Using Lens Shi" p.58
•
"Projector Indicator Status" p.236
•
"Remote Control Operation" p.44
•
"Air Filter and Vent Maintenance" p.225
rojecting, do not put your face or hands
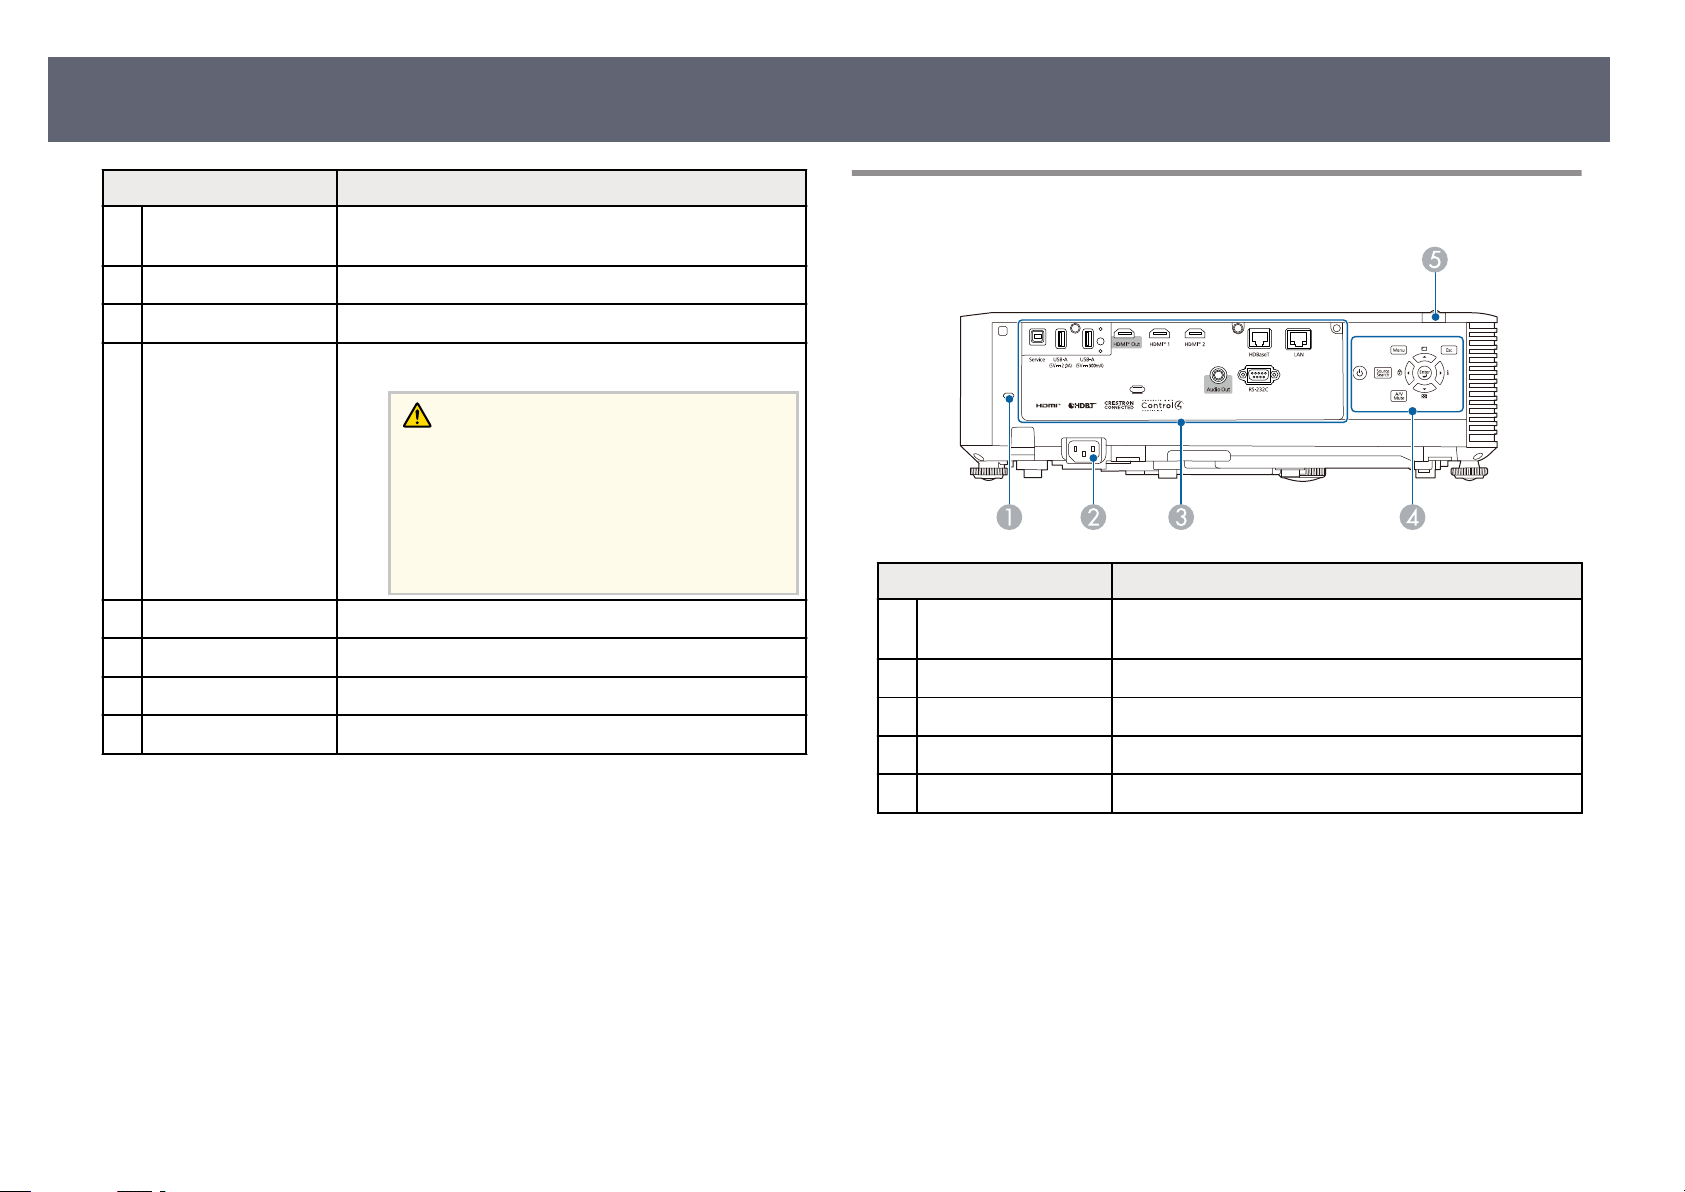
Projector Parts - Rear
Name Function
Security slot e security slot is compatible with the Microsaver
A
Power inlet Connects the power cord to the projector.
B
Interface ports Connects cables for external devices.
C
Control panel Operates the projector.
D
Remote receiver Receives signals from the remote control.
E
Related Links
g
•
ojector Parts - Interface Ports" p.20
"Pr
•
"Installing a Security Cable" p.134
Se
curity System manufactured by Kensington.
Page 20
Projector Parts and Functions
20
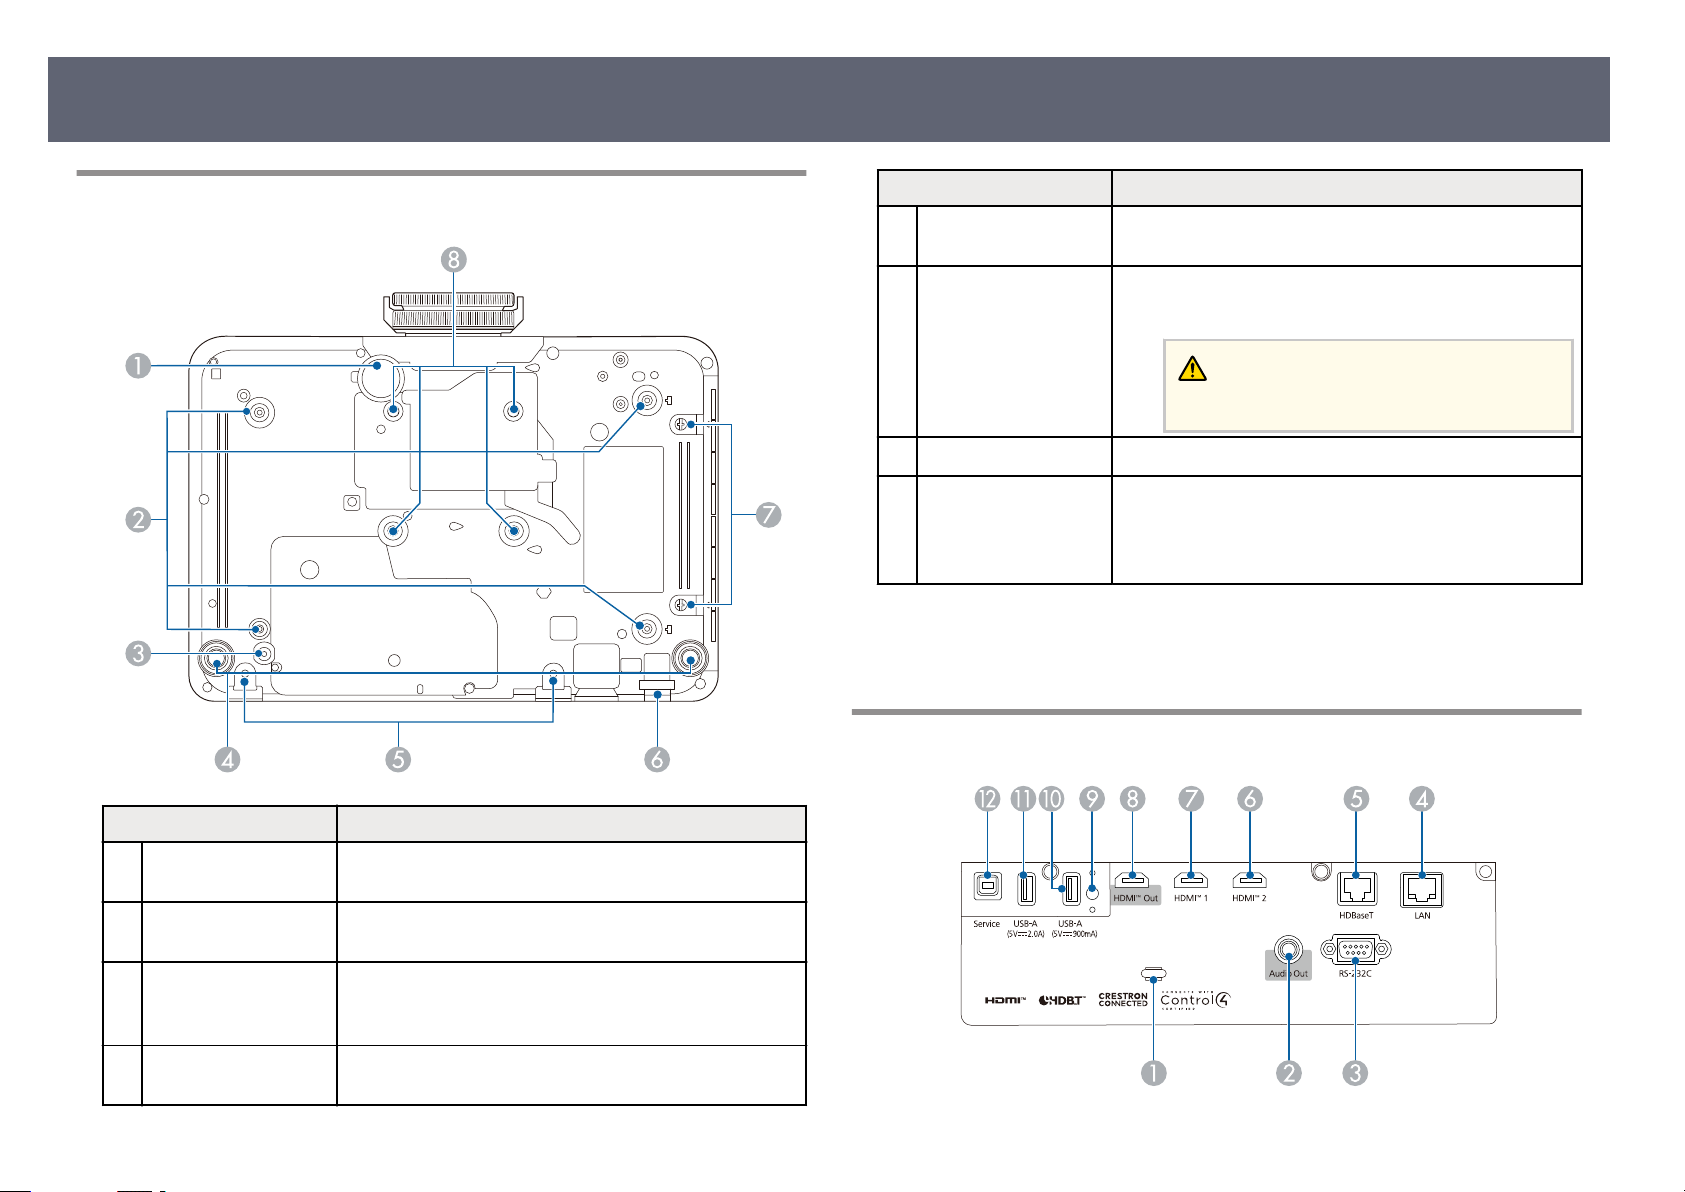
Projector Parts - Base
Name Function
Screw holes for
E
optional cable cover
Security cable
F
attachment point
Screw holes to x the optional cable cover in place.
Pass a commercially available wire lock through here
and lock it in place.
Warning
Do no
t attach the safety wire to this point.
Air lter cover screws Screws to x the air
G
Fixing points (four
H
poin
ts)
Related Links
g
•
"In
stalling a Security Cable" p.134
Use these points to attach a commercially available
mount compatible with the VESA Mounting Interface
Standard (100 × 100 mm) when installing the projector
on a wall, or suspending the projector from a ceiling.
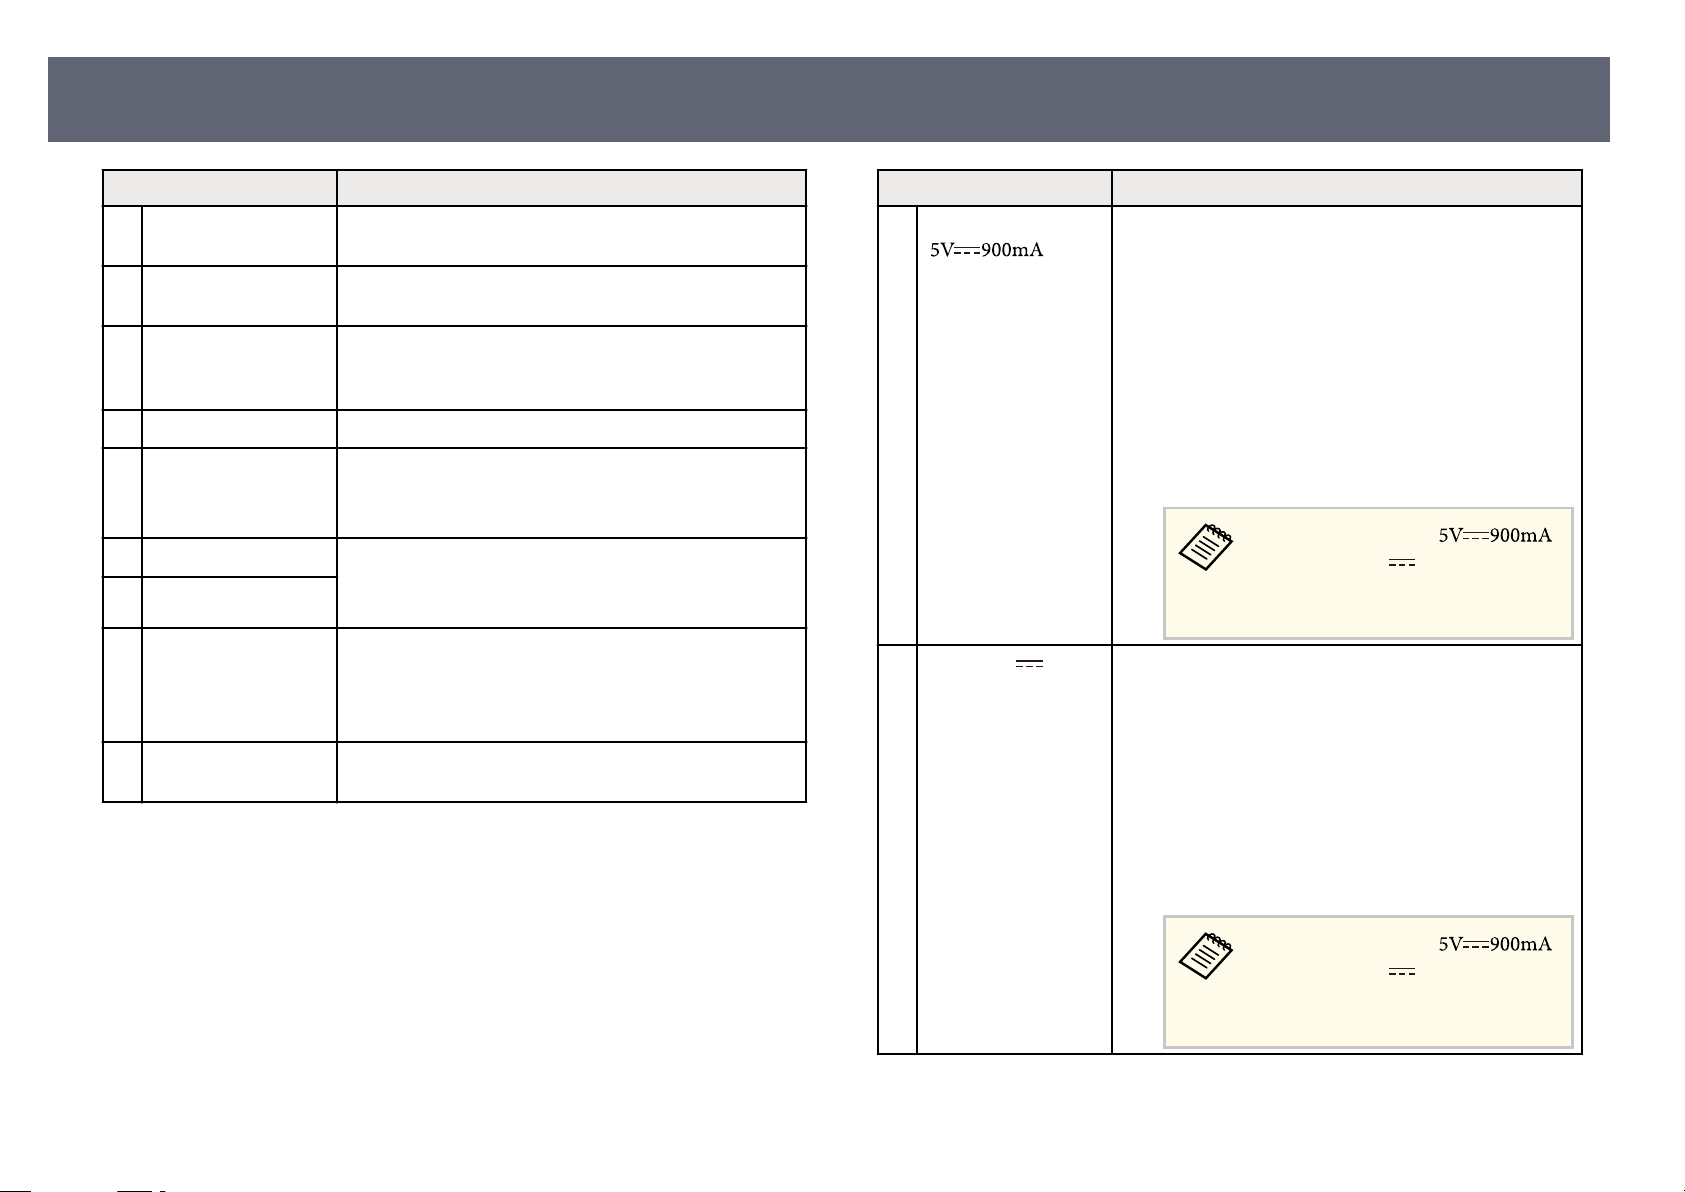
Projector Parts - Interface Ports
lter cover in place.
Name Function
Front adjustable foot When setup on a surface such as a desk, extend the foot
A
Ceiling mount xing
B
points (four points)
Wire clamp xing
C
point
Rear feet When setup on a surface such as a desk, turn to extend
D
t
j
ust the position of the image.
o ad
Attach the optional ceiling mount here when suspending
the projector from a ceiling.
When you use the optional ceiling mount, x the
carabiner here to attach the safety wire and prevent the
projector from falling from the ceiling or wall.
and ret
ract to adjust the horizontal tilt.
Page 21
5V 2.0A
5V 2.0A
5V 2.0A
Projector Parts and Functions
21
Name Function
Cable holder Pass a commercially available cable tie through here to
A
Audio Out port Outputs audio from the current input source to an
B
RS-232C port Connects an RS-232C cable to control the projector
C
LAN port Connects a LAN cable to connect to a network.
D
HDBaseT port Connects a LAN cable to the optional HDBaseT
E
HDMI2 port Inputs video signals from HDMI compatible video
F
HDMI1 port
G
HDMI Out port Connecting an HDMI cables from this port to the
H
Wireless LAN module
I
xing screw
secure cables.
external speaker.
fro
m a computer. (You do not need to use this port
normally.)
Transmi
is port is compatible with HDCP2.3.
equi
is port is compatible with HDCP2.3.
HDMI po
project a single unied image.
is port is compatible with HDCP2.3.
Secures the wireless LAN module cover. (EBL690SE/EB-L695SE)
tter.
pment and computers.
rt of another projectors lets you create and
Name Function
USB-A
J
( ) port
USB-A (
K
por
t
Connects a USB device and projects movies or images.
Use to connect the optional document camera.
Use to connect the wireless LAN module.
Use to connect the external camera.
Use to connect a USB memory device to save error and
operation log les.
It is also used for batch settings and rmware update.
e method for updating the rmware diers depending
on your projector model. For details, see the "List of
Functions" in this manual.
Connects a USB device and projects movies or images.
)
Use to connect the optional document camera.
Use to connect the external camera.
Use to connect a USB memory device to save error and
operation log les.
It is also used for batch settings and rmware update.
e method for updating the rmware diers depending
on your projector model. For details, see the "List of
Functions" in this manual.
In this guide, USB-A ( )
and USB-A (
ctively referred to as the USB-A
colle
port.
) ports are
In this guide, USB-A ( )
and USB-A (
collectively referred to as the USB-A
port.
) ports are
Page 22
Projector Parts and Functions
22
Name Function
Service port is port is used for batch settings and rmware update.
L
Related Links
g
•
"List of Functions" p.11
•
"Copying Menu Settings Between Projectors (Batch Setup)" p.218
•
"Updating the Firmware" p.229
•
"External Camera Usage" p.128
•
"Connecting Multiple Projectors of the Same Model" p.40
•
"Projector Connections" p.34
•
"Wireless Network Projection" p.140
ethod for updating the rmware diers depending
e m
on your projector model. For details, see the "List of
Functions" in this manual.
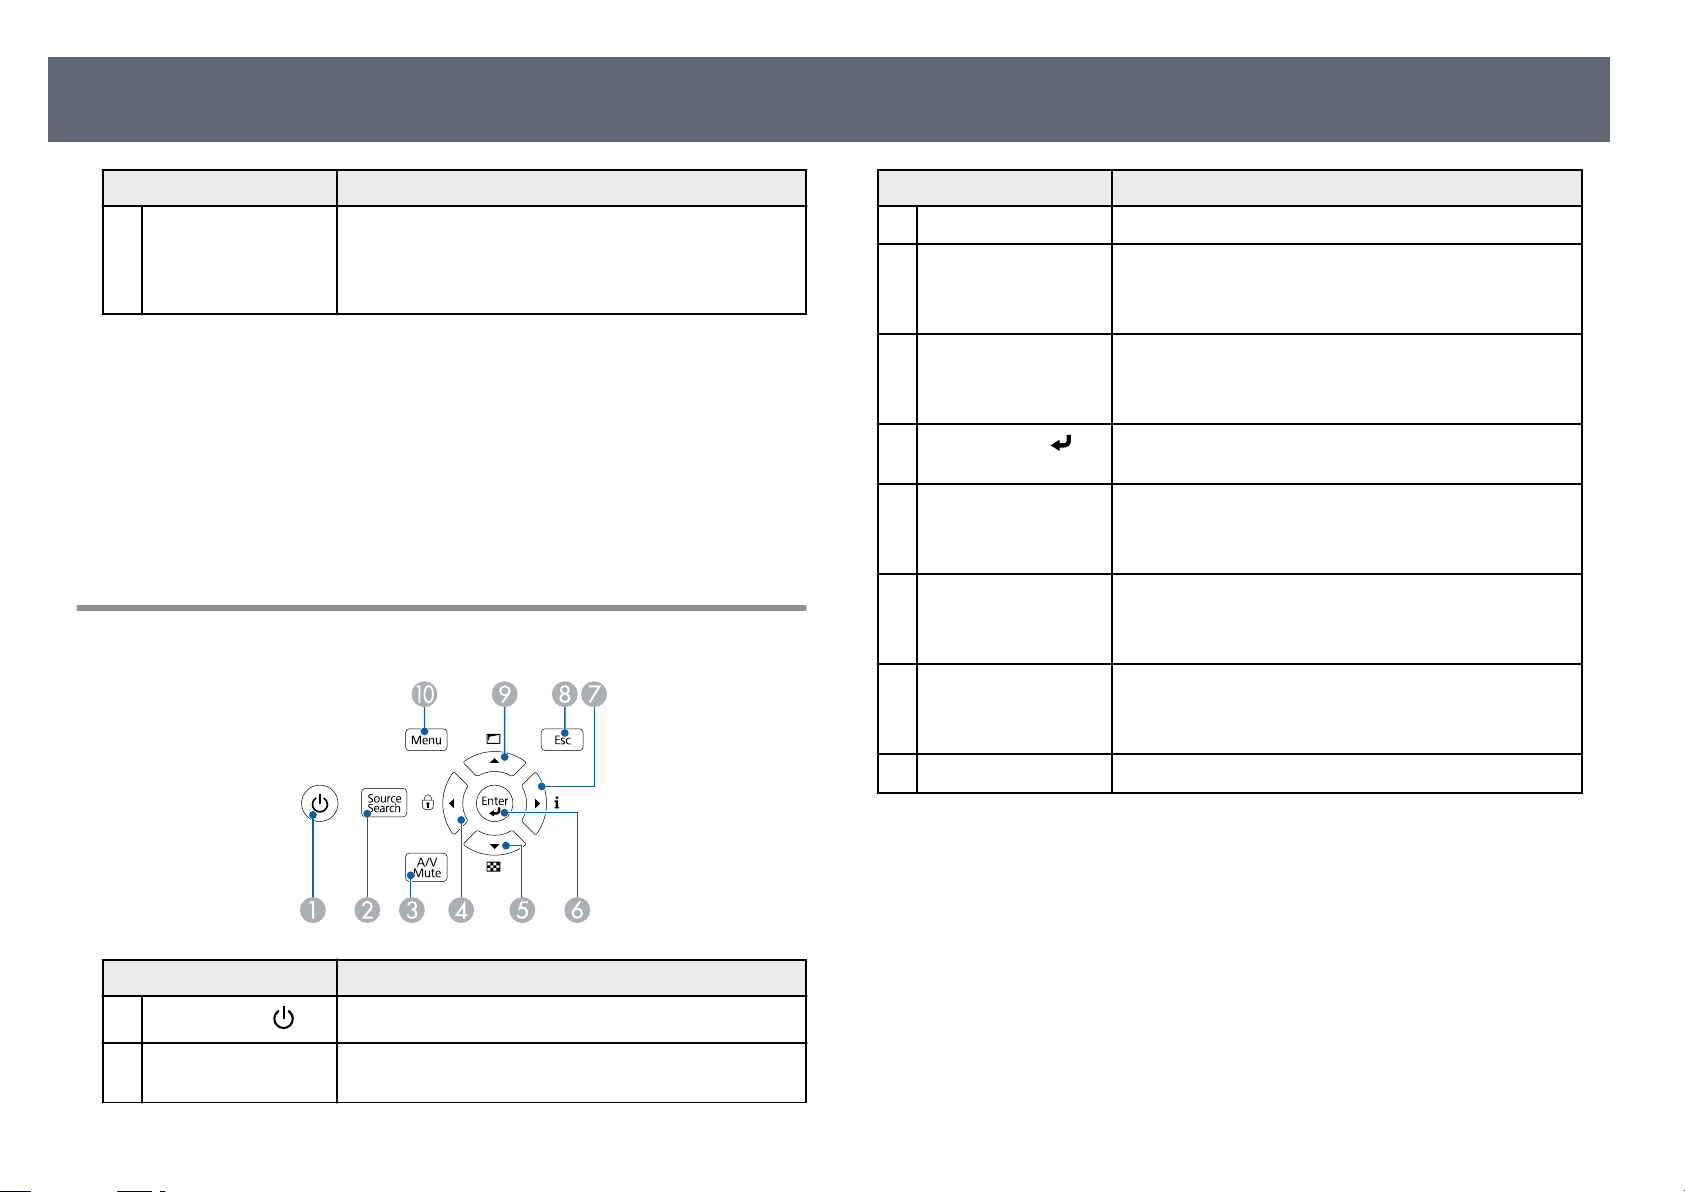
Projector Parts - Control Panel
Name Function
[A/V Mute] button Turns the video and audio on or o t
C
Le arrow button Displays the Control Panel Lock screen.
D
Sele
cts menu items while displaying the projector's
menu.
Down arrow button Displays a test pattern.
E
Sele
cts menu items while displaying the projector's
menu.
Enters the current selection and moves to the next level
[Enter] button (
F
Right arrow button Displays the Info screen.
G
[Esc] button Stops the current function.
H
Up arrow button Displays the Geometry Correction screen.
I
)
while di
Sele
cts menu items while displaying the projector's
menu.
Mov
es back to the previous menu level while displaying
the projector's menu.
Sele
cts menu items while displaying the projector's
menu.
splaying the projector's menu.
emporarily.
Name Function
A
Power button ( )
[So
B
urce Search]
ton
but
Turns the projector on or o.
Changes to the next input source.
[Menu] button Displays and closes the projector's menu.
J
Related Links
g
•
lecting an Image Source" p.77
"Se
•
"Adjusting the Menu Settings" p.183
Page 23
Projector Parts and Functions
23
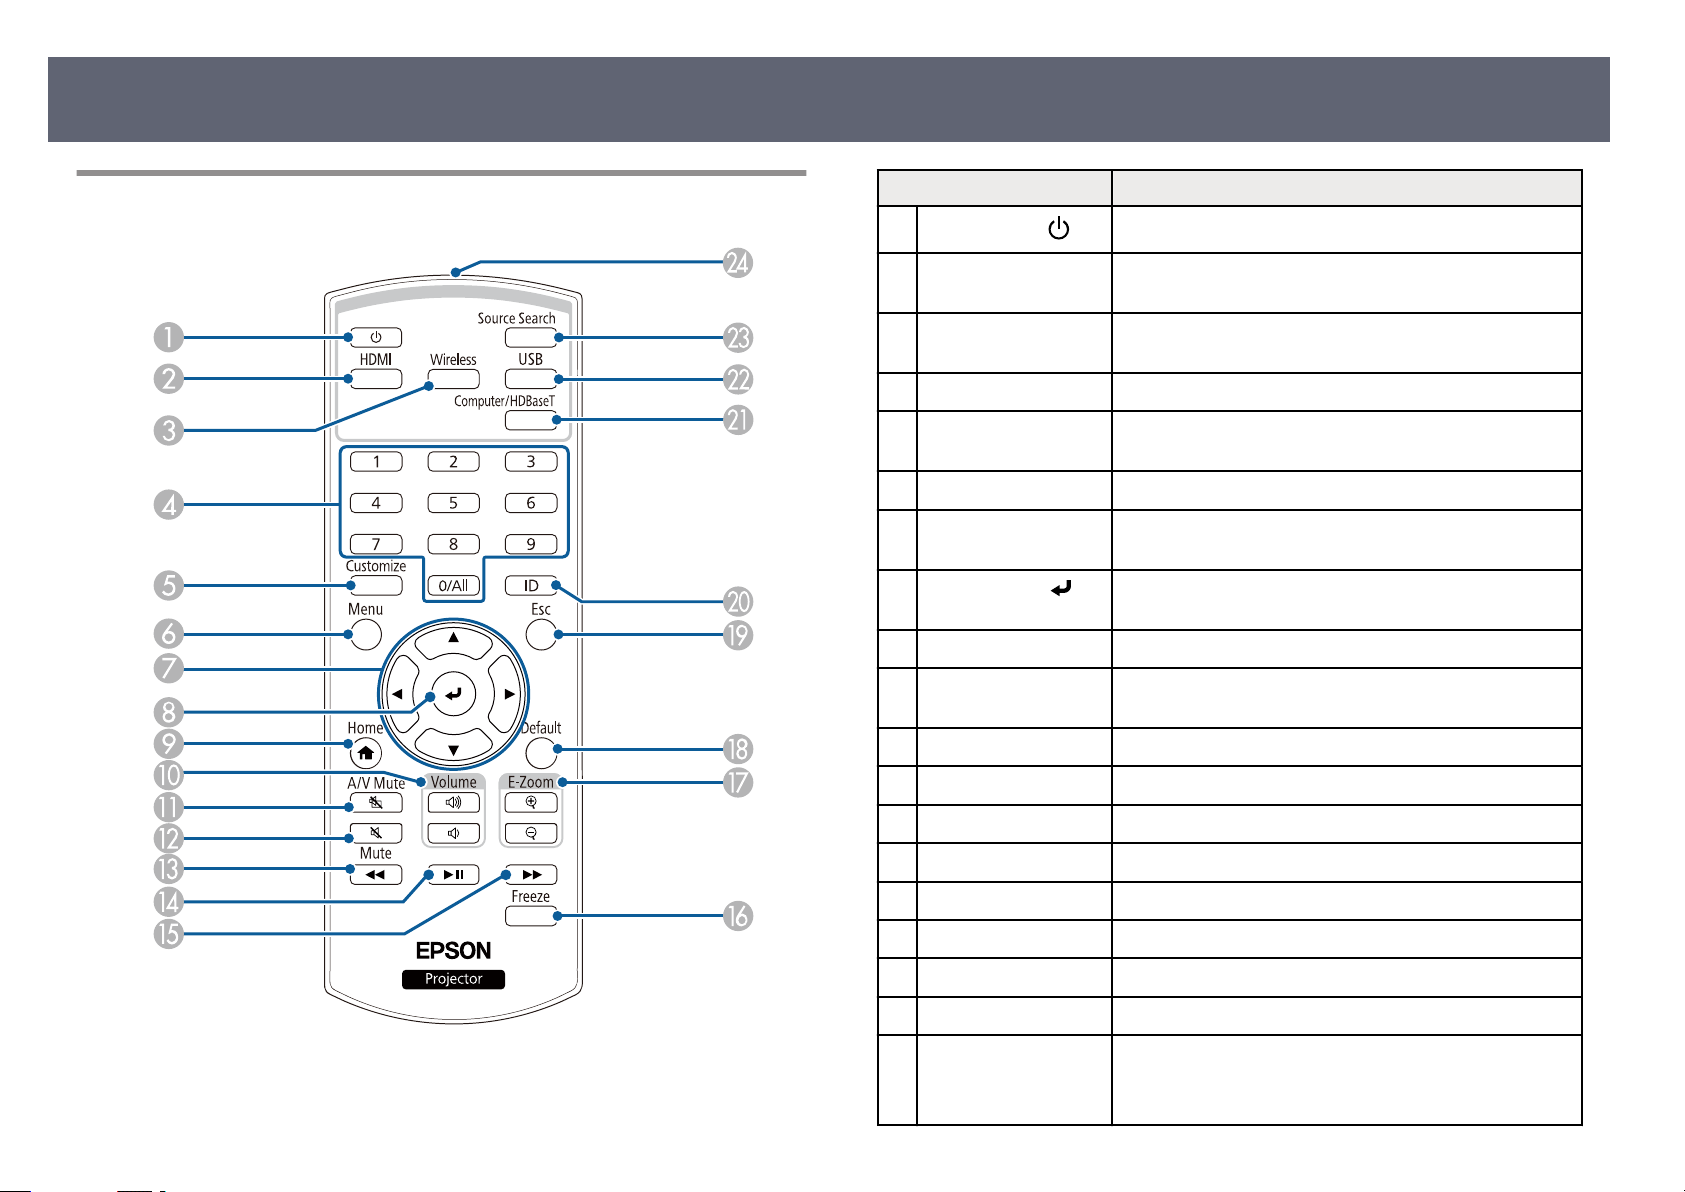
Projector Parts - Remote Control
Name Function
A
Power button (
[HDMI] b
B
[Wireless] button Switches the image source to the network connected
C
Numeric buttons Enters numbers in the projector's menu.
D
[Customize] button Performs settings assigned in the Cust
E
[Menu] button Displays and closes the projector's menu.
F
Arrow buttons Selects menu items while displaying the projector's
G
[Enter] button (
H
[Home] button Displays and closes the Home screen.
I
[Volume] up/down
J
but
[A/V Mute] button Turns the video and audio on or o t
K
utton Switches the image source between the HDMI1 and
tons
Turns the projector on or o
)
HDMI2 po
device
setting in the projector's Management menu.
menu
Enters the current selection and moves to the next level
)
while di
Adjusts the speaker volume.
rts.
.
.
splaying the projector's menu.
.
omize Button
emporarily.
[Mute] button Turns the audio on or o t
L
Rewind button Rewinds the images. (For HDMI CEC)
M
Pause/Play button Pauses or plays the images. (For HDMI CEC)
N
Fast-Forward button Fast-forwards the images. (For HDMI CEC)
O
[Freeze] button Pauses or resumes images.
P
[E-Zoom] +/– buttons Resizes the projected image.
Q
[Default] button Returns the selected setting to its default value.
R
[Esc] button Stops the current function.
S
M
es back to the previous menu level while displaying
ov
the projector's menu.
emporarily.
Page 24
Projector Parts and Functions
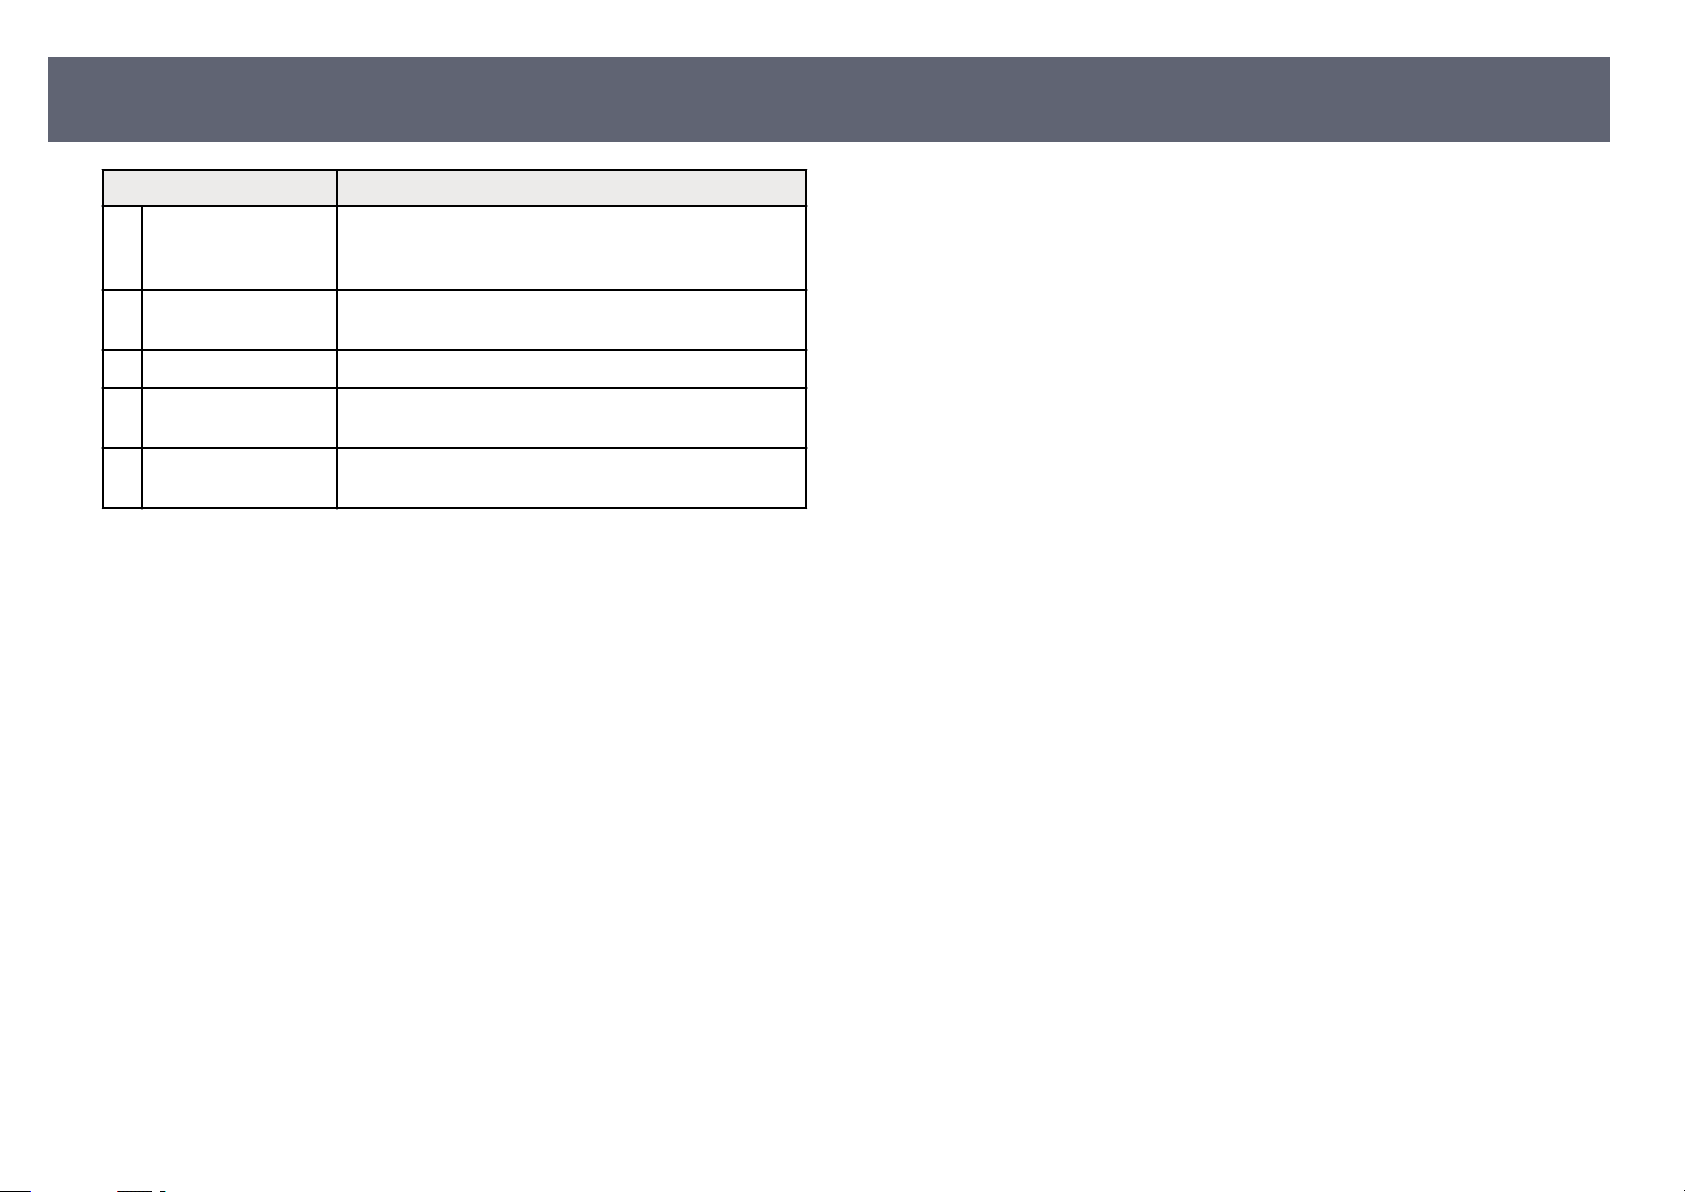
Name Function
[ID] button Hold down this button and press the numeric buttons to
T
ct the ID for the projector you want to operate using
sele
the remote control.
24
[Computer/
U
HDBas
eT] button
[USB] button Selects the USB-A port as the image source.
V
[Source Search]
W
but
ton
Remote control light
X
emitt
ing area
Relat
g
•
•
•
•
•
•
•
•
•
•
•
ed Links
e
lecting an Image Source" p.77
"S
"Projecting in Content Playback Mode" p.101
"Adjusting the Menu Settings" p.183
"Adjusting Image Quality (Color Mode)" p.81
"Image Aspect Ratio" p.79
"Zooming Images (E-Zoom)" p.110
"Shutting O the Image and Sound Temporarily" p.107
"Projecting Two Images Simultaneously" p.93
"Home Screen" p.47
"Stopping Video Action Temporarily" p.108
"Controlling the Volume with the Volume Buttons" p.91
Switches the image source from the HDBaseT input
port.
Switches to the next input source.
Outputs remote control signals.
Page 25

Setting Up the Projector
low the instructions in these sections to set up your projector.
Fol
Related Links
g
•
"Projector Placement" p.26
•
"Installing the Safety Wire" p.31
•
"Projector Connections" p.34
•
"Connecting Multiple Projectors of the Same Model" p.40
•
"Attaching and Removing the Cable Cover" p.42
•
"Installing Batteries in the Remote Control" p.43
Page 26
Projector Placement
26
You can place the projector on almost any at surface t
You can also install the projector in a ceiling mount if you want to use it in
a xed location. An optional ceiling mount is required when suspending the
projector from a ceiling.
You can also use a commercially available mount compatible with the VESA
Mounting Interface Standard (100×100 mm).
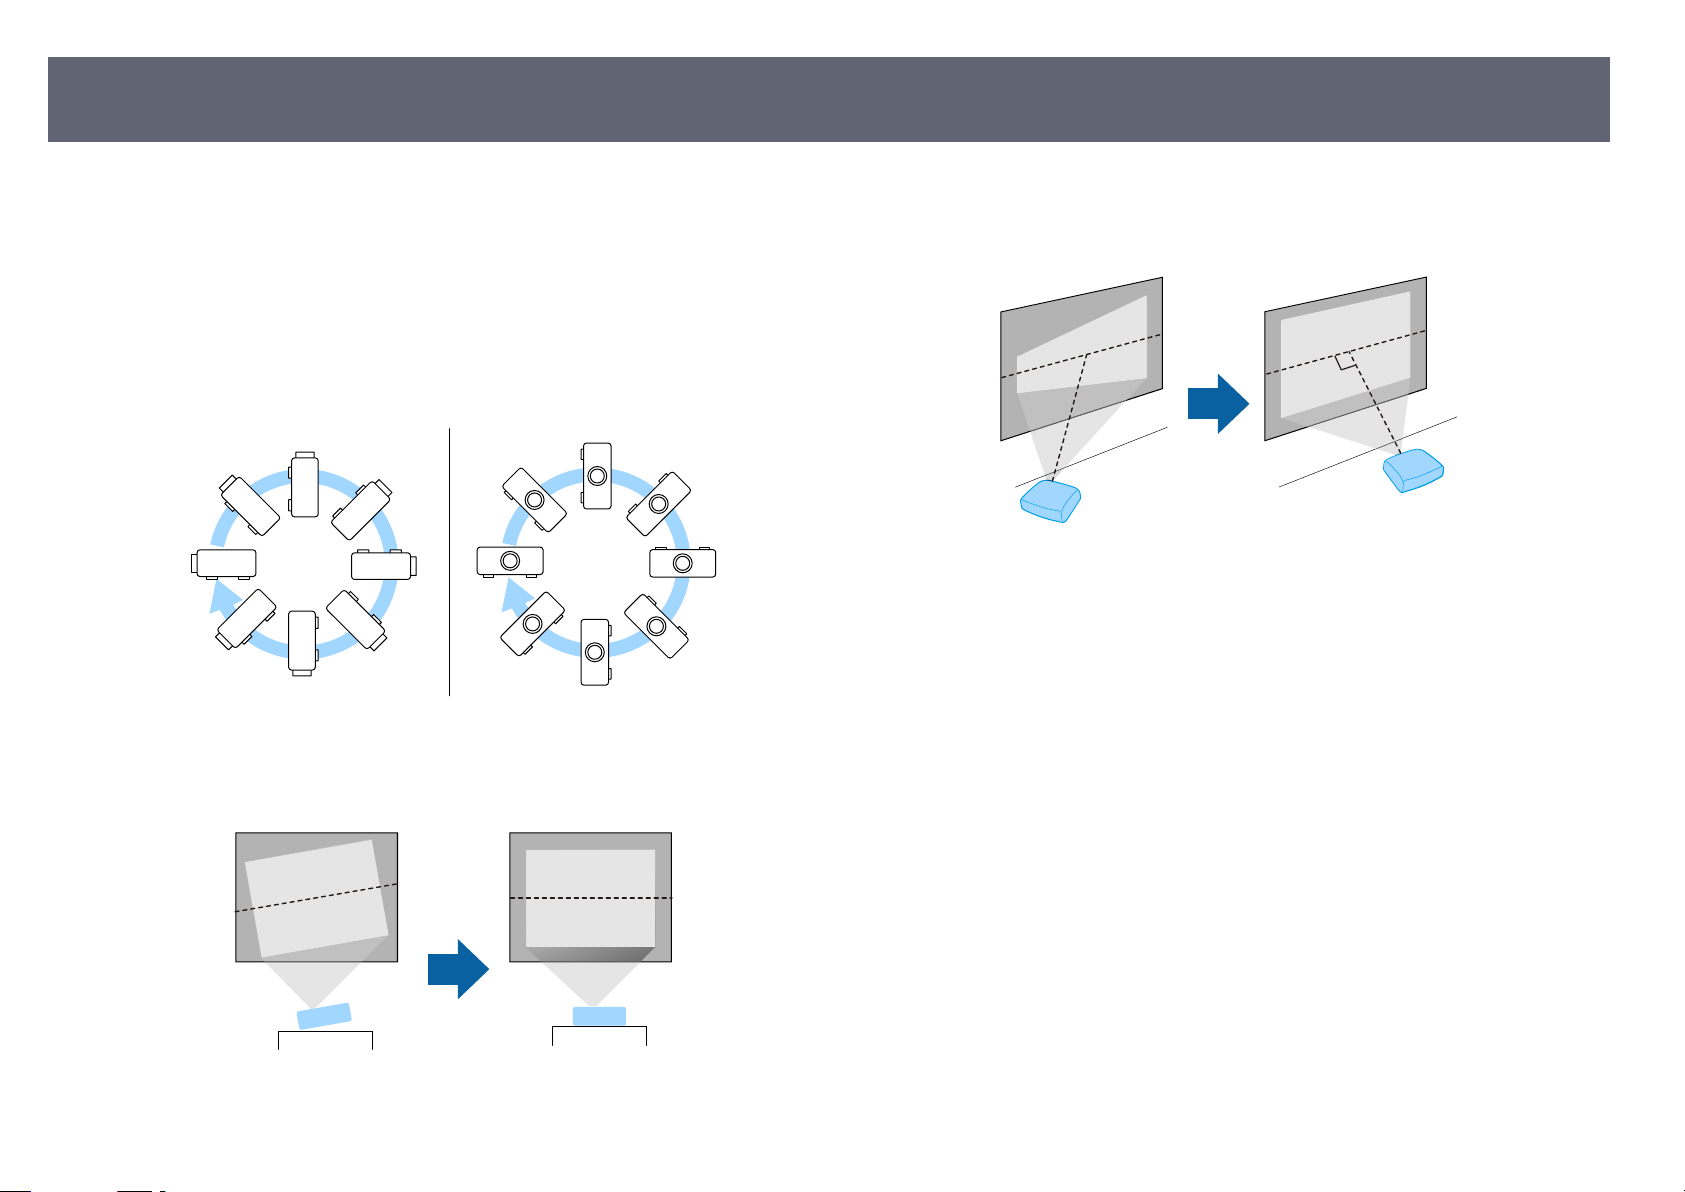
e projector can be installed at various angles. ere is no vertical or
horizontal limit to how the projector can be installed.
Note the following points when selecting a projector location:
•
Place t
he projector on a sturdy, level surface or install it using a compatible
mount.
o project an image.
•
•
e plenty of space around and under the projector for ventilation, and do
Leav
not place it on top of or next to anything that could block the vents.
Place the projector so it squarely faces the screen, not at an angle.
Page 27
Projector Placement
27
Warning
•
You must install a ceiling mount when suspending the projector from a ceiling. If
you do not install the projector correctly, it could fall and cause damage or injury.
•
Do not use adhesives on the ceiling mount xing points to prevent the screws
from loosening, or use lubricants, oils, or similar substances on the projector; the
projector case may crack causing it to fall from its ceiling mount. is could cause
serious injury to anyone under the ceiling mount and could damage the projector.
•
Failure to install the ceiling mount and projector may cause the projector to fall.
Aer installing the specic Epson mount that supports your projector, make sure
you secure the mount to all of the projector's ceiling mount xing points. Also,
secure the projector and the mounts using wire that is strong enough to hold their
weight.
•
Do not install the projector in a location subject to high levels of dust or humidity,
or in a location subject to smoke or steam. Otherwise, it could cause a re
or electric shock to occur. e projector's case could also deteriorate and be
damaged causing the projector to fall from the mount.
Examples of environments that could cause the projector to fall due to case
deterioration
•
Locations subject to excessive smoke or airborne oil particles, such as factories
or kitchens
•
Locations containing volatile solvents or chemicals, such as factories or
laboratories
•
Locations where the projector could be subjected to detergents or chemicals,
such as factories or kitchens
•
Locations in which aroma oils are oen used, such as relaxation rooms
•
Near devices that produce excessive smoke, airborne oil particles, or foam at
events
•
Locations near humidiers
Warning
•
Do not cover the projector's air intake or air exhaust vents. If the vents are
covered, the internal temperature could rise and cause a re.
•
Do not use or store the projector in locations where it will be subject to dust or
dirt. Otherwise, the quality of the projected image may decline. If the lens or air
lter gets dusty, it may result in a malfunction or re.
•
Do not install the projector on an unstable surface or in a location beyond the
weight specications of the projector. Otherwise, it could fall or topple causing an
accident and injury.
•
When installing the projector in a high position, take measures to prevent falling
by using wires to ensure safety in an emergency, such as an earthquake, and to
prevent accidents. If it is not installed correctly, it could fall causing an accident
and injury.
•
Do not install in locations where salt damage could occur, or in locations subject
to corrosive gas such as sulphuric gas from hot springs. Otherwise, corrosion
could cause the projector to fall. It could also cause the projector to malfunction.
Attention
•
If yo
u are using the projector at altitudes above 1,500 m, set the High Altitude
Mode setting to On in the projector's Installation menu to ensure the projector's
internal temperature is regulated properly.
•
Try not to setup the projector in locations subject to high humidity and dust, or in
locations subject to smoke from res or tobacco smoke.
Related Links
g
•
"Notes on Transporting" p.28
•
"Projector Setup and Installation Options" p.28
•
"Projection Distance" p.30
•
"Image Shape" p.61
Page 28
Projector Placement
28
Notes on Transporting
ere are many glass parts and precision components inside the projector. To
pr
event damage due to impacts when transporting, handle the projector as
follows.
•
Remove any equipment connected to the projector.
•
Position the lens near the center of the lens shi adjustment range by turning
the vertical and horizontal lens shi dials.
•
Attach the lens cover that was included with the projector.
•
When transporting the projector a long distance or as checked luggage, pack
it in a rm box with cushioning around it and mark the box "Fragile."
•
When shipping the projector for repairs, place it in its original packing
materials, if possible, or use equivalent materials with cushioning around the
projector. Mark the box "Fragile."
Epson shall not be liable for any damages incurred during transportation.
Front Ceiling/Rear Ceiling
Select the correct Pro
according to the installation method being used. If necessary, turn on the Inv
Direction Button setting in the projector's Installation menu and adjust the
Menu Rotation setting in the projector's Display menu.
Related Links
g
•
"Precautions on Installation" p.28
•
"Projection Modes" p.53
jection option in the projector's Installation menu
Precautions on Installation
Projector Setup and Installation Options
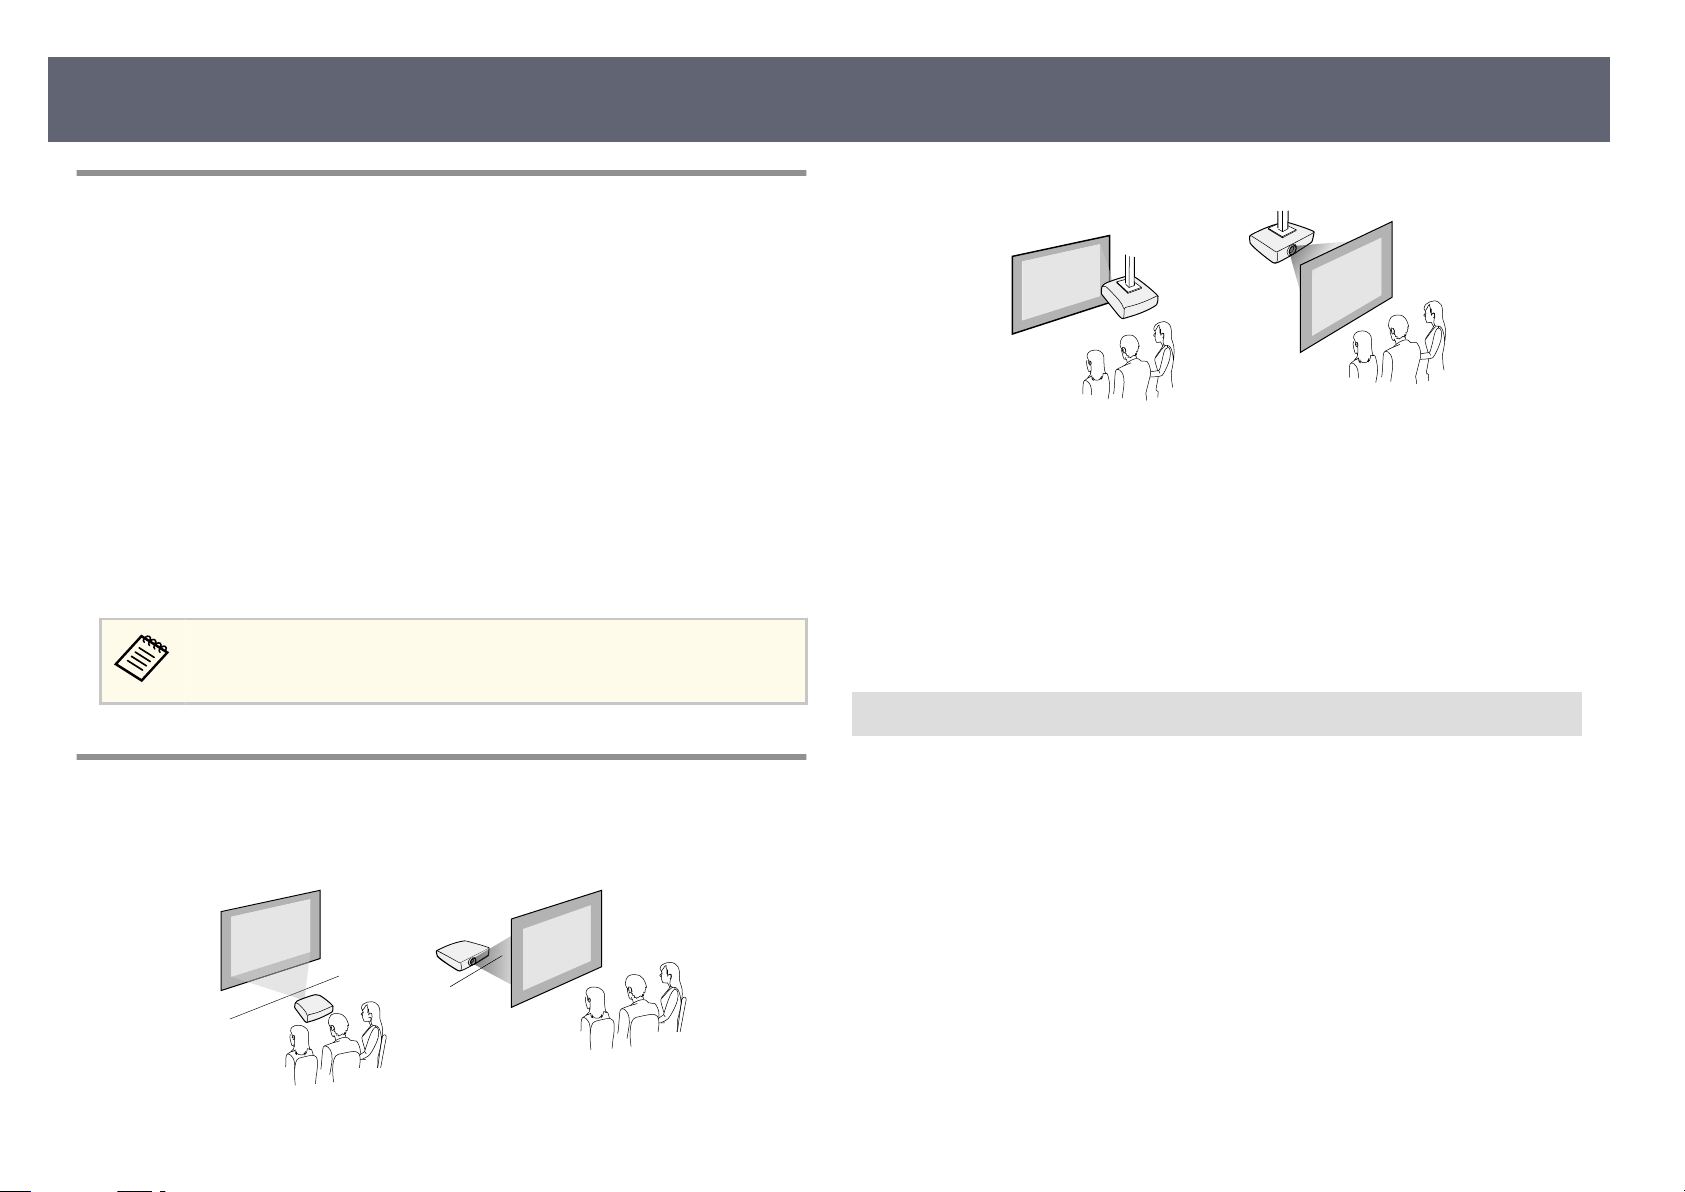
You can set up or install your projector in the following ways:
nt/Rear
Fro
Not
e the following precautions when installing the projector.
Page 29
Projector Placement
29
Attention
•
If th
e projector is installed at an angle, it should be installed by qualied
technicians using mounting hardware designed for use with this projector.
•
Install the projector appropriately to prevent it from falling down.
•
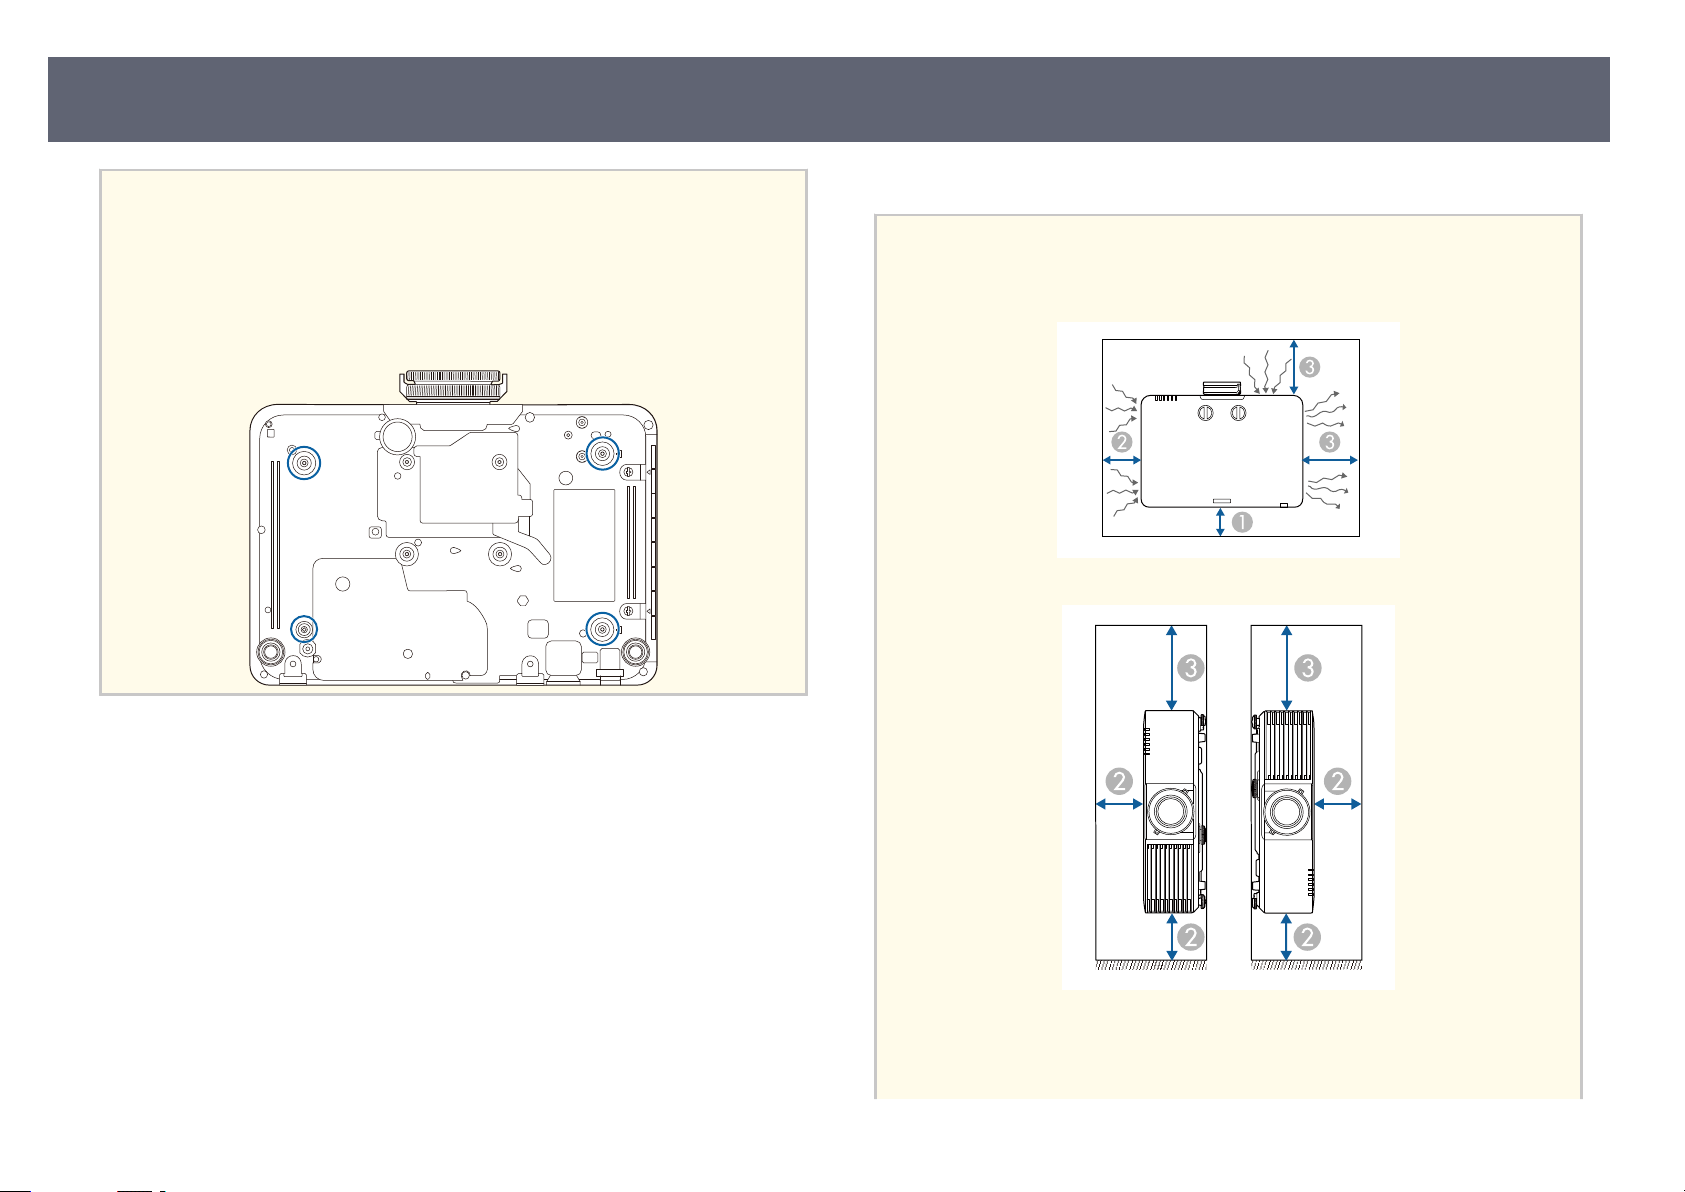
Use M4 screws (up to a depth of 9 mm) to x the projector's ceiling mount xing
points and the mounting hardware at four points.
Installation space
Attention
Be sur
e to leave the following amount of space around the projector so as not to
block the air exhaust and intake vents.
A
B
10 cm
20 cm
Page 30
Projector Placement
30
40 cm
C
Installation space (When installing multiple projectors side by side)
Attention
•
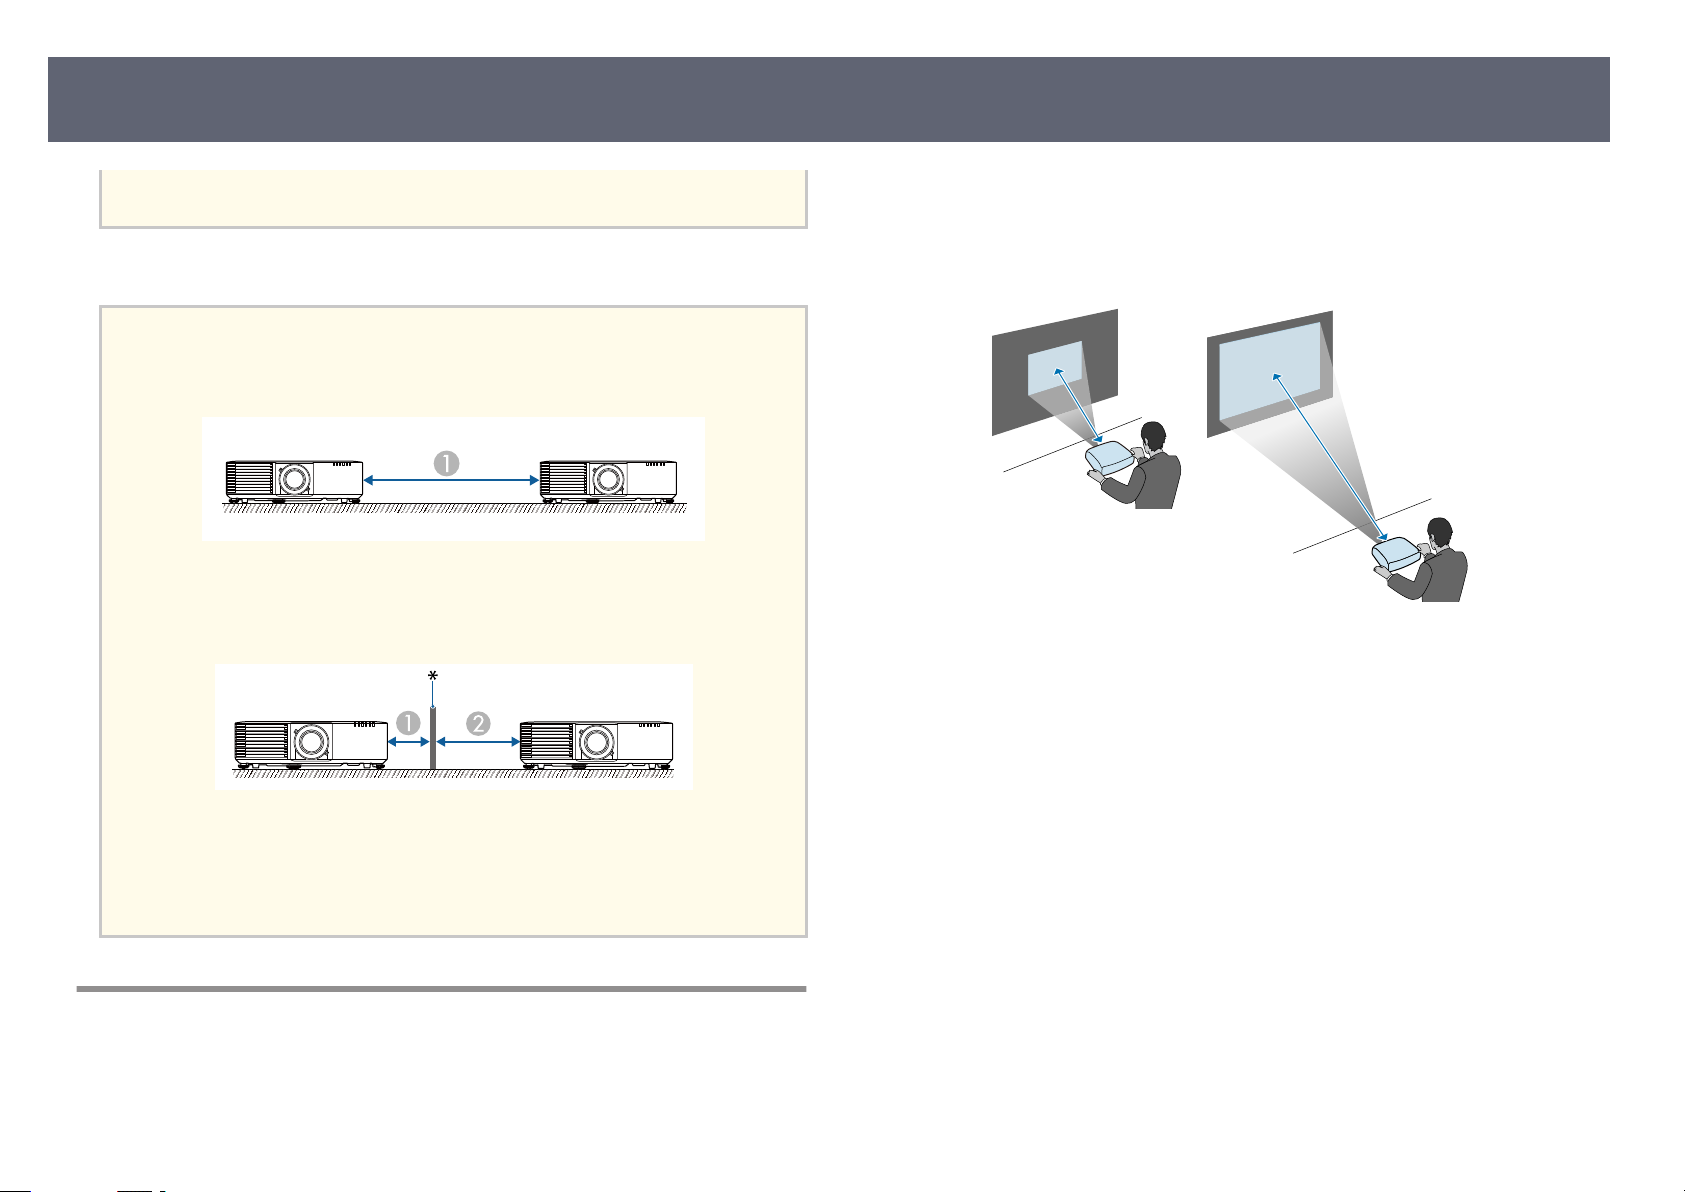
If you are installing multiple projectors next to each other, make sure hot air from
the exhaust vent does not go into the air intake vent of another projector.
150 cm
A
•
If you use a partition, you can narrow the space between the projectors.
is from the screen, but can vary depending on the zoom factor, aspect ratio, and
er settings.
oth
See the Appendix for details about how far to place the projector from the
screen based on the size of the projected image.
Related Links
g
•
"Scr
een Size and Projection Distance" p.257
20 cm
A
40 cm
B
* Partition
Projection Distance
e distance at which you place the projector from the screen determines the
approximate size of the image. e image size increases the farther the projector
Page 31
Installing the Safety Wire
31
You can install the safety wire to prevent the projector from falling from the
.
ceiling
Warning
Be sure to use the safety wire provided with the Epson ceiling mount. e safety wire
is available as an optional Safety Wire Set ELPWR01.
Attention
When p
cushioning material underneath the projector to protect the lens. (EB-L790SE/EBL795SE/EB-L690SE/EB-L695SE/EB-L790SU/EB-L690SU/EB-L695SU)
g
•
•
lacing the projector upside down, make sure to place a cloth or other
Related Links
"Wh
en Using the Ceiling Mount ELPMB22" p.31
"When Using the Ceiling Mount ELPMB30" p.32
When Using the Ceiling Mount ELPMB22
You can attach a safety wire to your projector for increased safety as shown.
Befo
re you start, make sure you have rmly installed the ELPMB22 ceiling
mount on the projector and have the following items that are included in the
safety wire set:
•
Safety wire × 1
•
Carabiner × 2
•
Wire clamp × 1
•
Attaching screw (M4 × 10 mm) × 1
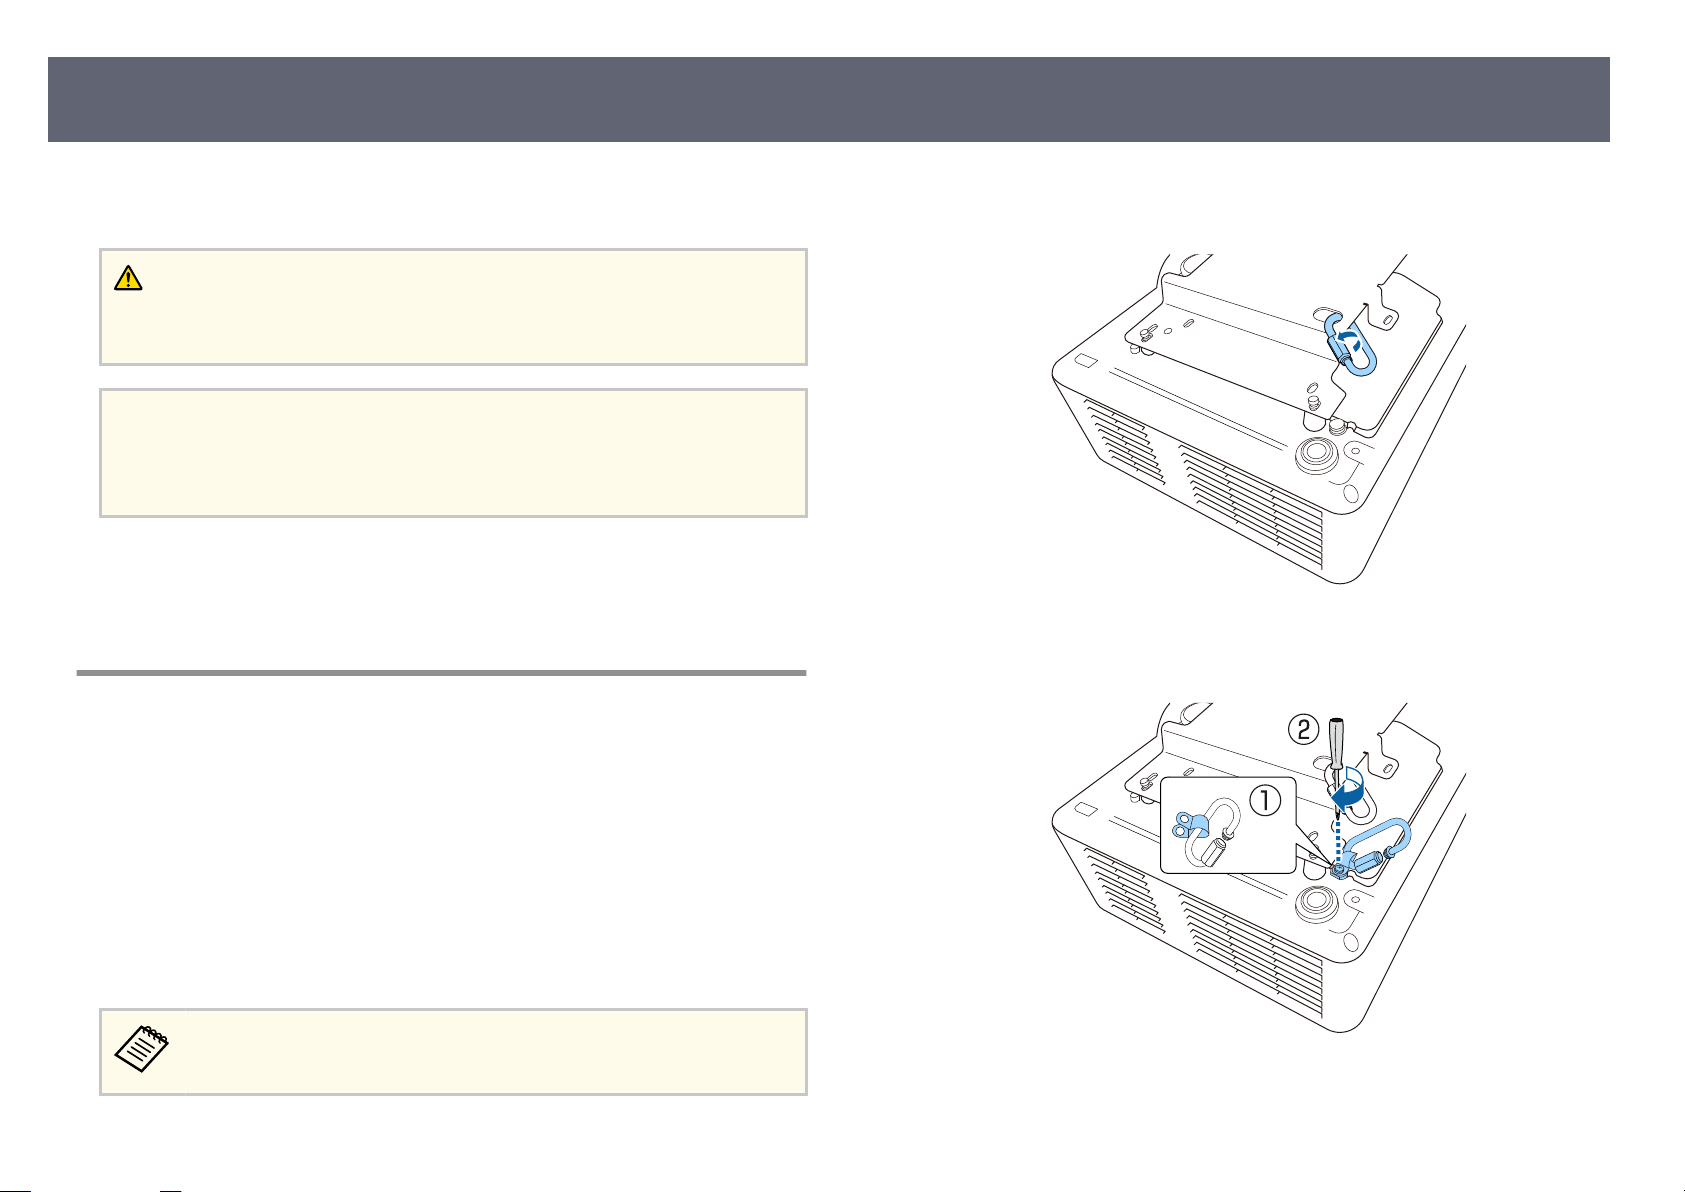
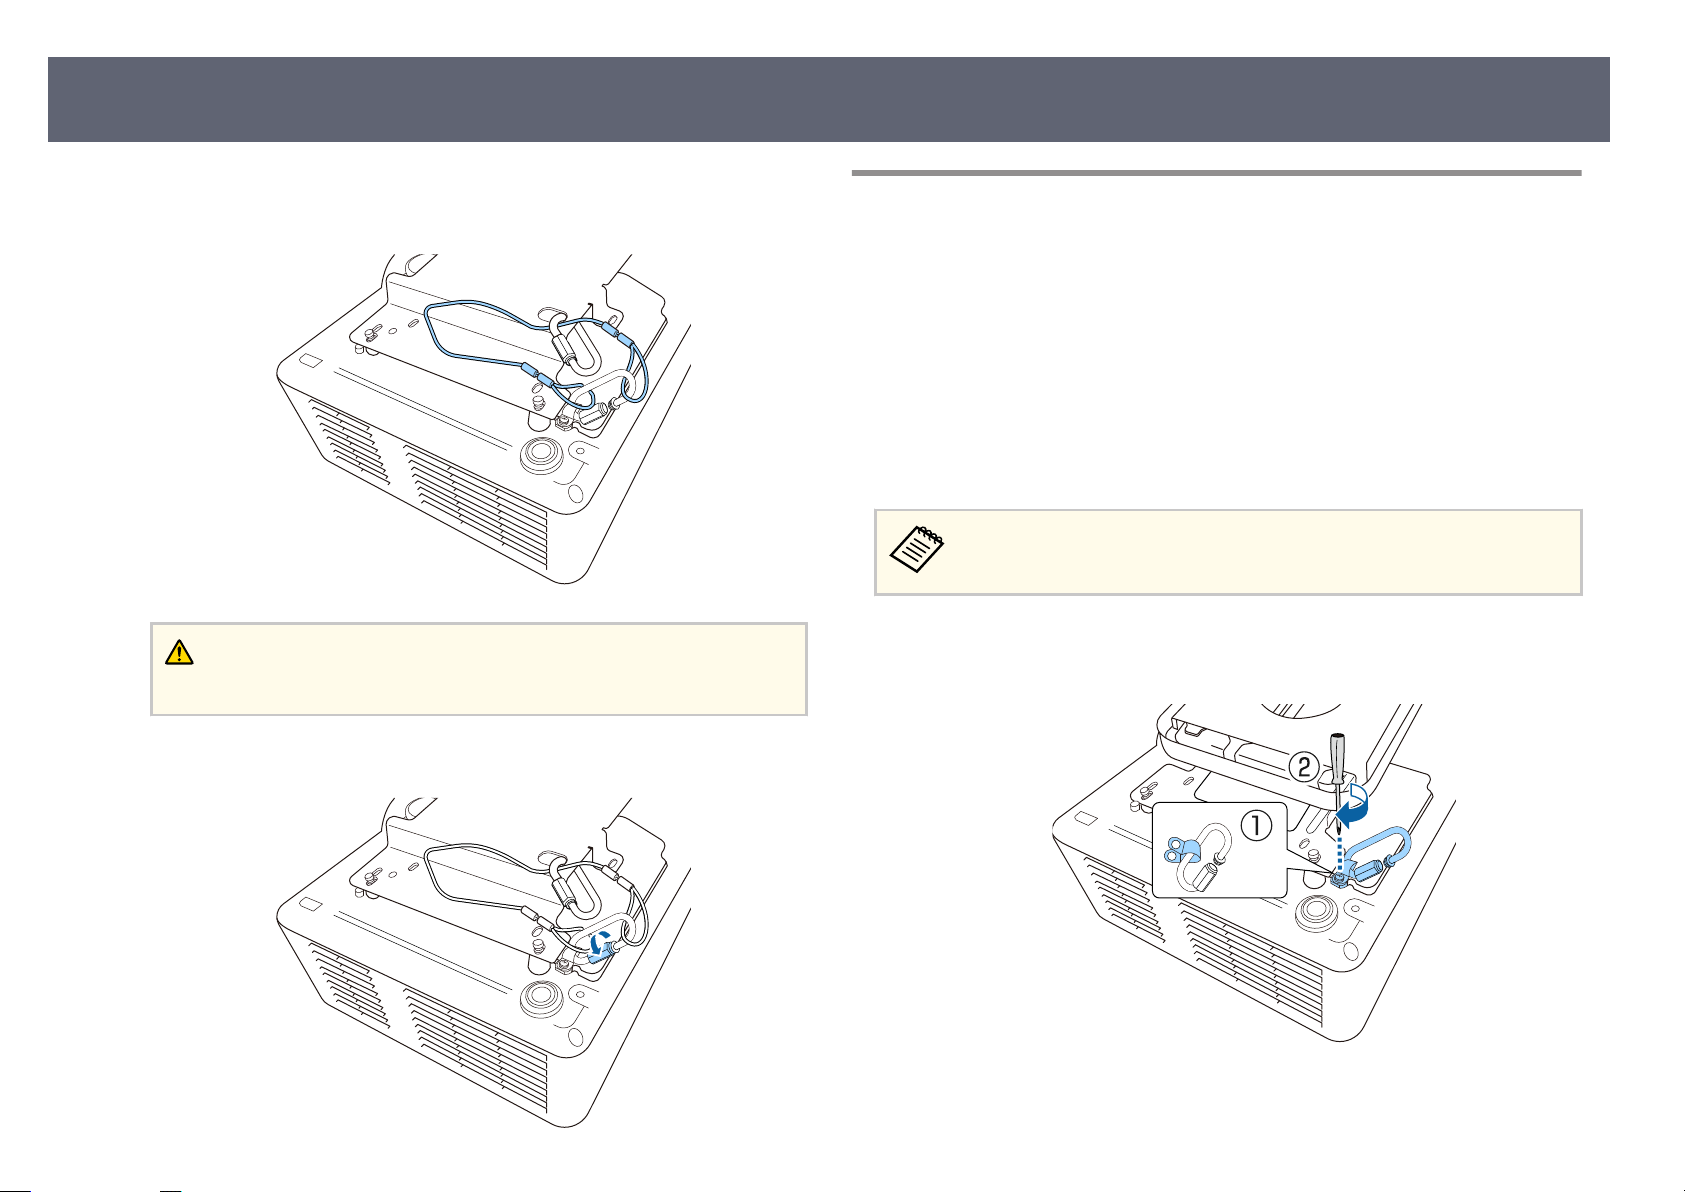
Attach a carabiner to the hole on the ceiling mount, and tighten the
a
carabiner lock.
Attach the wire clamp to another carabiner, and then use the screw to x
b
the w
ire clamp to the wire clamp xing point on the projector.
For details on installing the ELPMB22, see the Ceiling Mount ELPMB22/
ELPMB23 Instruction Manual.
Page 32
Installing the Safety Wire
32
Loop the safety wire through the carabiner on the ceiling mount, and
c
attach both ends to the carabiner on the projector.
Warning
t attach the safety wire to the security cable attachment point.
Do no
Tighten the carabiner lock.
d
When Using the Ceiling Mount ELPMB30
You can attach a safety wire to your projector for increased safety as shown.
Befo
re you start, make sure you have rmly installed the ELPMB30 ceiling
mount on the projector and have the following items that are included in the
safety wire set:
•
Safety wire × 1
•
Carabiner × 2 (Only one carabiner is used for the ELPMB30.)
•
Wire clamp × 1
•
Attaching screw (M4 × 10 mm) × 1
For details on installing the ELPMB30, see the ELPMB30 User's G
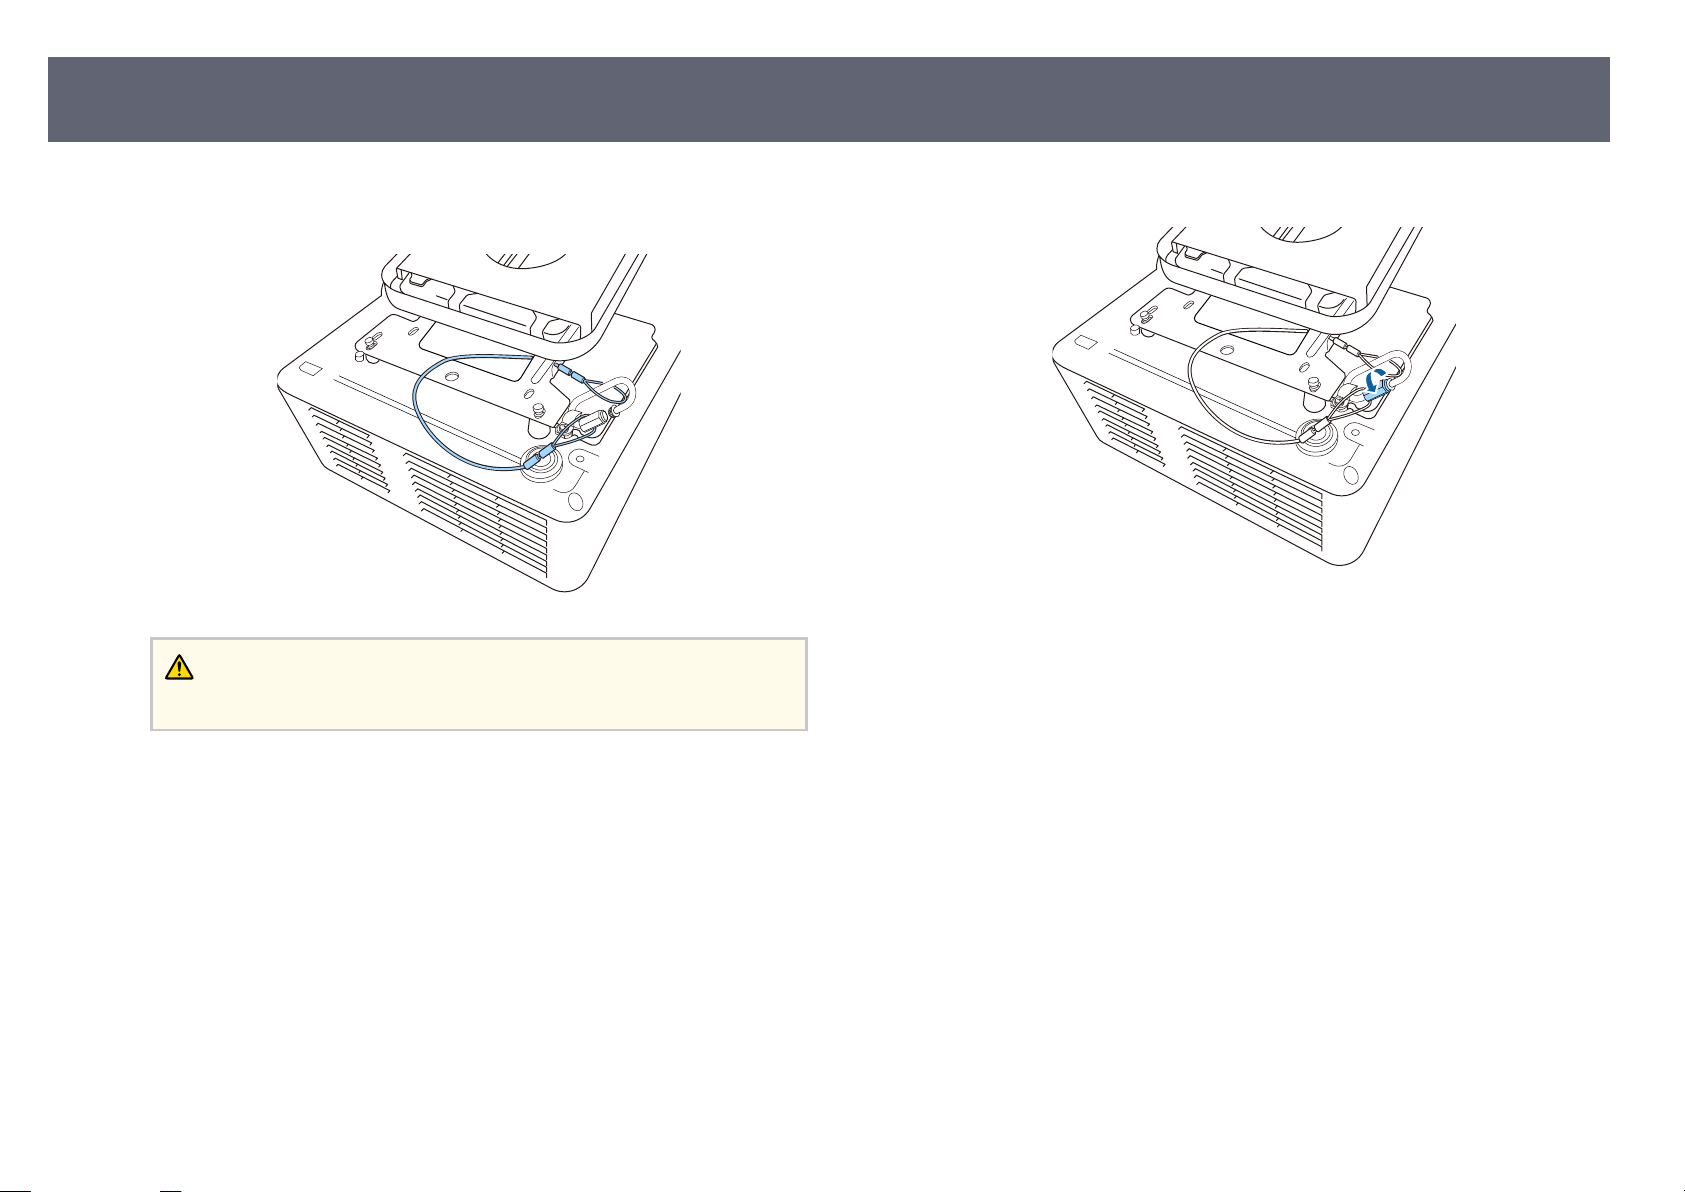
Attach the wire clamp to the carabiner, and then use the screw to x the
a
w
ire clamp to the screw into the wire clamp xing point on the projector.
uide.
Page 33
Installing the Safety Wire
33
Loop the safety wire through the hole in the ceiling mount, and then
b
attach both ends to the carabiner.
Warning
Do no
t attach the safety wire to the security cable attachment point.
Tighten the carabiner lock.
c
Page 34
Projector Connections
34
See these sections to connect the projector to a variety of projection sources.
Attention
•
Che
ck the shape and orientation of the connectors on any cable you plan to
connect. Do not force a connector into a port if it does not t. e device or your
projector could be damaged or could malfunction.
See the Quick Reference for a list of cables supplied with your projector.
hase optional or commercially available cables when necessary.
Purc
Related Links
g
•
"Connecting to a Computer" p.34
•
"Connecting to Video Sources" p.34
•
"Connecting to External USB Devices" p.35
•
"Connecting to a Document Camera" p.36
•
"Connecting to an HDBaseT Transmitter " p.36
•
"Connecting to the Base Unit " p.37
•
"Connecting to External Devices" p.38
Connecting to a Computer
Follow the instructions in these sections to connect a computer to the projector.
Related Links
g
•
"Co
nnecting to a Computer for HDMI Video and Audio" p.34
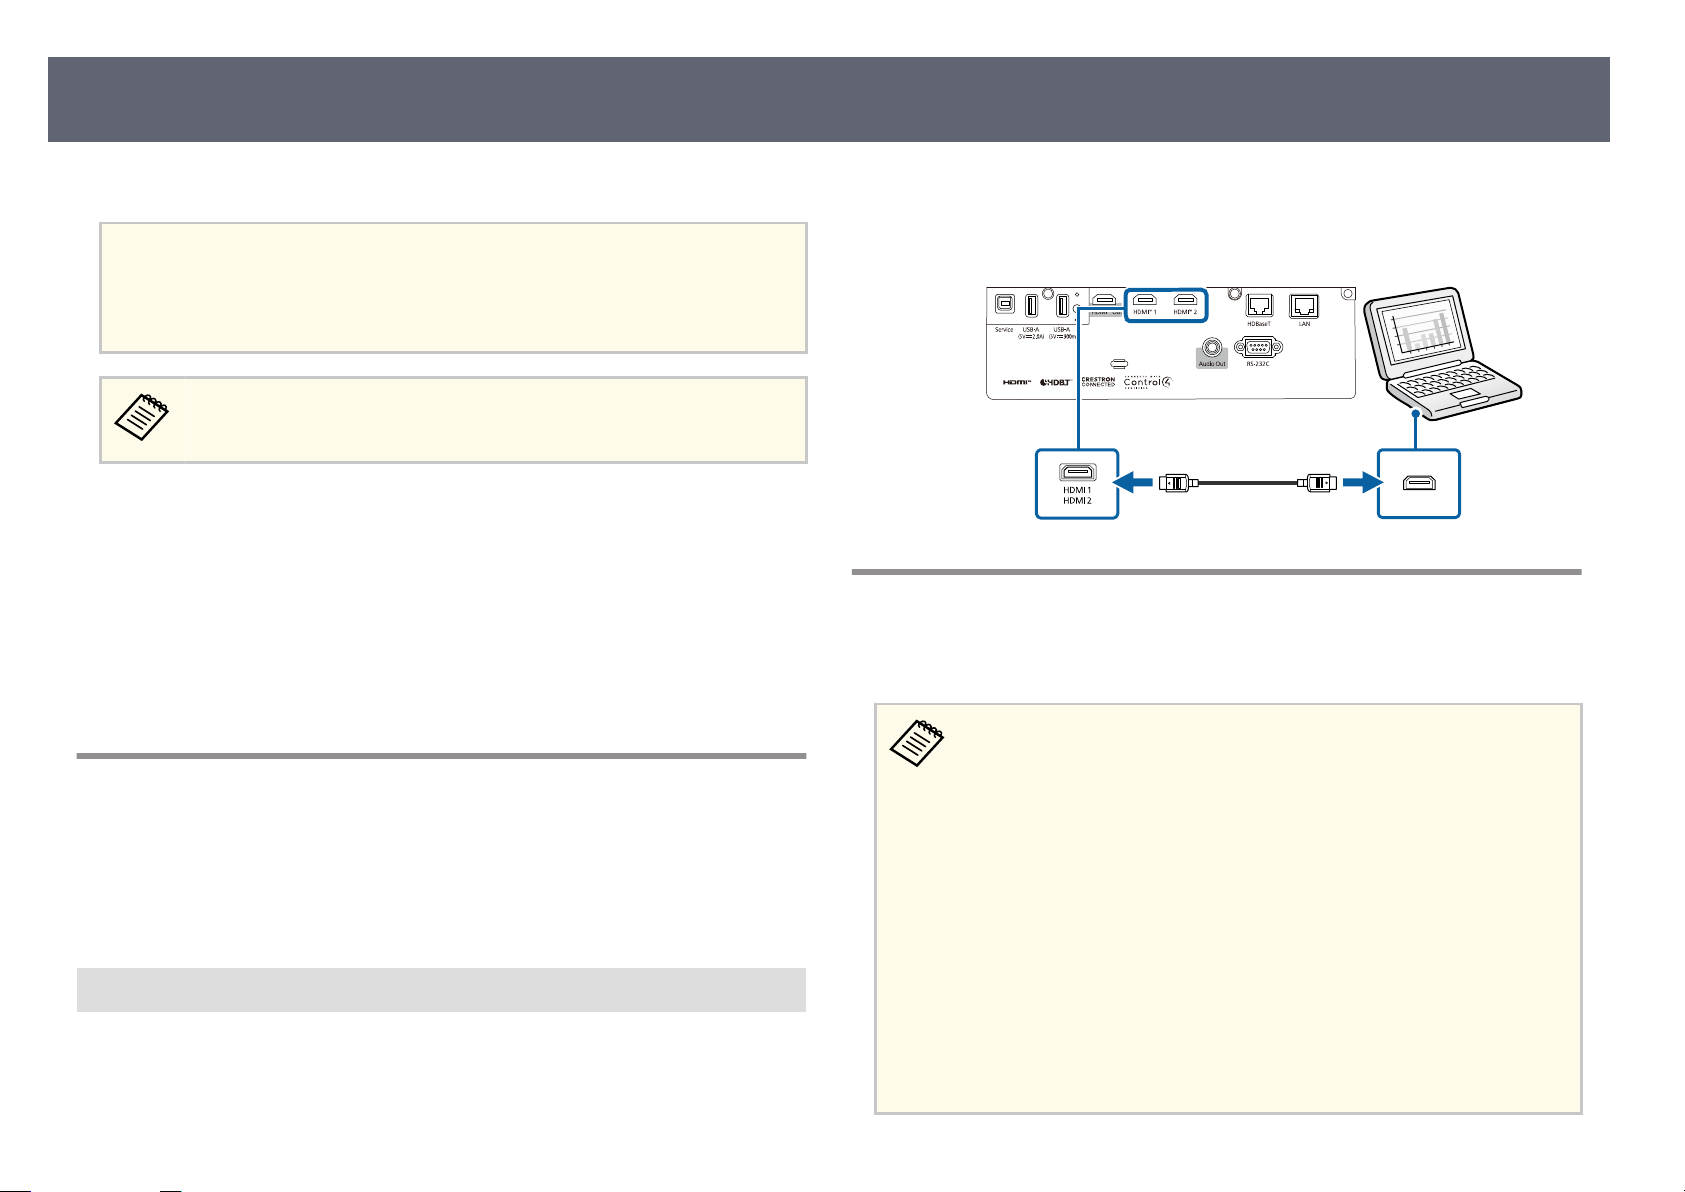
Connecting to a Computer for HDMI Video and Audio
If your computer has an HDMI port, you can connect it to the projector using
an HDMI cable and send the computer's audio with the projected image.
Connect the HDMI cable to your computer's HDMI output port.
a
Connect the other end to the projector's HDMI port.
b
Connecting to Video Sources
Follow the instructions in these sections to connect video devices to the
pro
jector.
•
When sending 18 Gbps images such as 4K 60Hz 4:4:4, use an HDMI
cable (premium-high speed). If you use an incompatible cable, images
may not be displayed correctly.
•
If the port on the device you connect has an unusual shape, use the
cable supplied with the device or an optional cable to connect to the
projector.
•
e cable diers depending on the output signal from the connected
video devices.
•
Some video devices are capable of outputting dierent types of signals.
See your video device manual to conrm what type of signals can be
output.
•
If audio is not output correctly, check the settings in Audio Out
Device.
s Signal I/O > HDMI Link > Audio Out Device
Page 35
Projector Connections
35
Related Links
g
•
nnecting to an HDMI Video Source" p.35
"Co
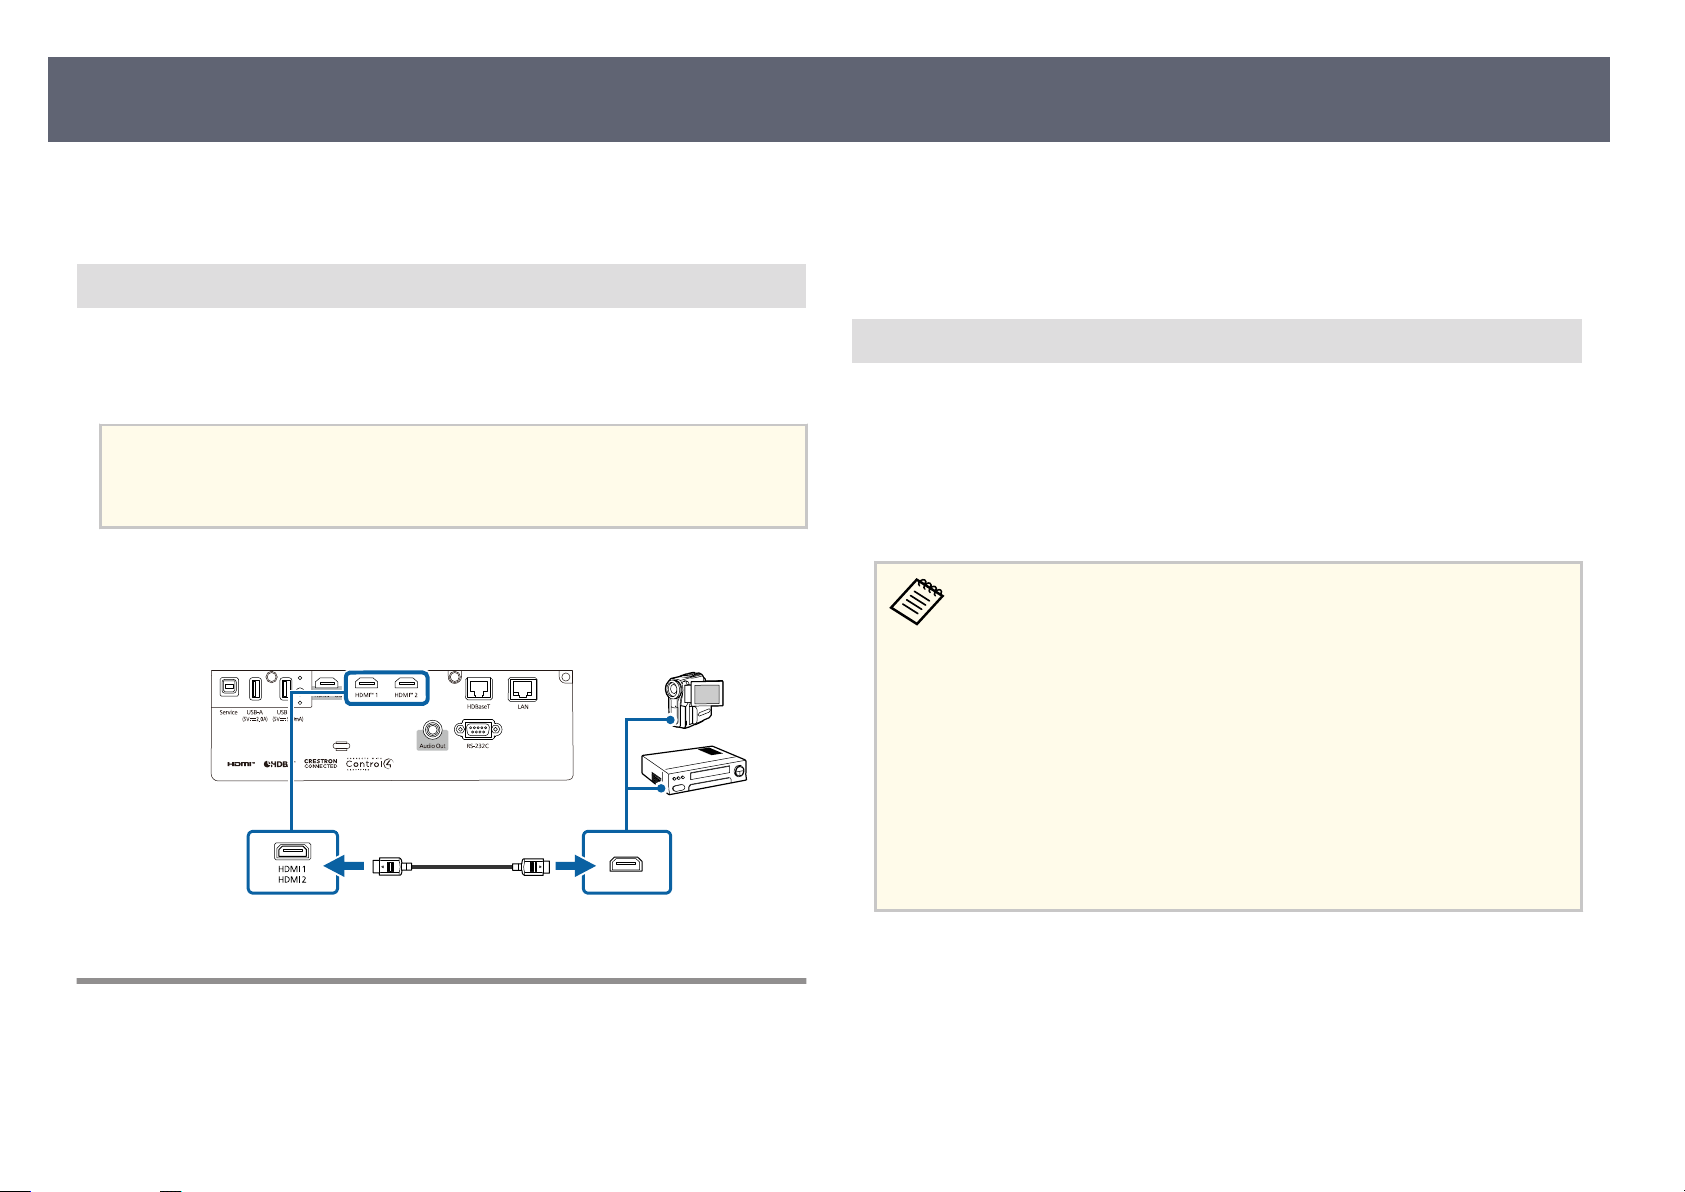
Connecting to an HDMI Video Source
f y
ur video source has an HDMI port, you can connect it to the projector
I
o
using an HDMI cable and send the image source's audio with the projected
image.
Attention
Do no
t turn on the video source before connecting it to the projector. Doing so could
damage the projector.
Connect the HDMI cable to your video source's HDMI output port.
a
Connect the other end to the projector's HDMI port.
b
Related Links
g
•
"USB Device Projection" p.35
•
"Connecting to a USB Device" p.36
•
"Disconnecting a USB Device" p.36
USB Device Projection
an project images and other content without using a computer or video
You c
device by connecting any of these devices to your projector:
•
USB ash drive
•
Digital camera or smartphone
•
USB hard drive
•
Digit
al cameras or smartphones must be USB-mounted devices, not
TWAIN-compliant devices, and must be USB Mass Storage Classcompliant.
•
USB hard drives must meet these requirements:
•
USB Mass Storage Class-compliant (not all USB Mass Storage Class
devices are supported)
•
Formatted in FAT16/32
•
Self-powered by their own AC power supplies (bus-powered hard
drives are not recommended)
•
MBR partition table format
•
Avoid using hard drives with multiple partitions
Connecting to External USB Devices
Follow the instructions in these sections to connect external USB devices to the
jector.
pro
You can also project playlists that contain images and movies saved on a USB
ash drive in Content Playback mode.
Related Links
g
•
"Projecting a PC Free Presentation" p.96
•
"Projecting in Content Playback Mode" p.101
Page 36
Projector Connections
36
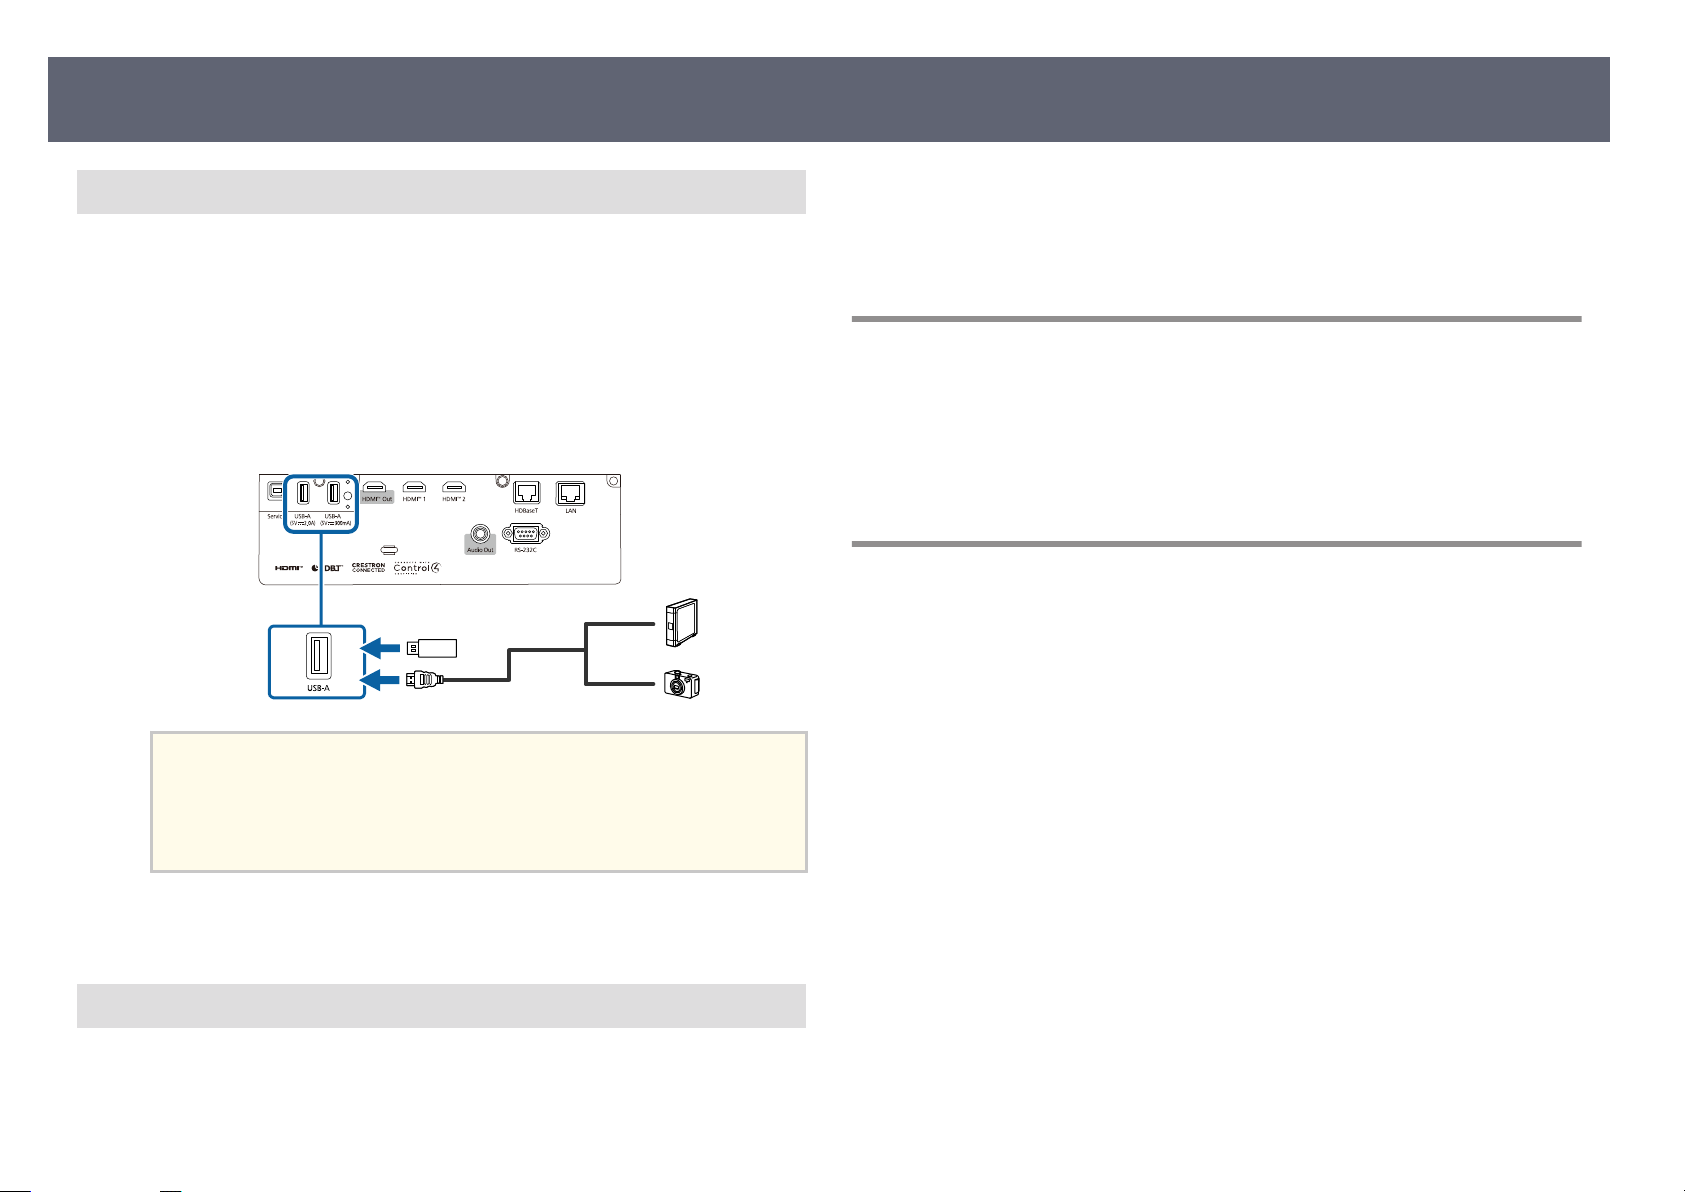
Connecting to a USB Device
an connect your USB device to the projector's USB-A port and use it to
You c
project images and other content.
If your USB device came with a power adapter, plug the device into an
a
elec
trical outlet.
Connect the USB cable or USB ash dr
b
shown.
Attention
•
•
he USB cable supplied with or specie d for use with the device.
Use t
Do not connect a USB hub or a USB cable longer than 3 meters, or the
device may not operate correctly.
ive to the projector's USB-A port as
Turn o
a
Di
b
Connecting t
You can connect a document camera to your projector to project images viewed
by the camera.
e connection method varies depending on your Epson document camera
model. See the document camera manual for details.
and unplug the device, if necessary.
s
connect the USB device from the projector.
o a Document Camera
Connecting to an HDBaseT Transmitter
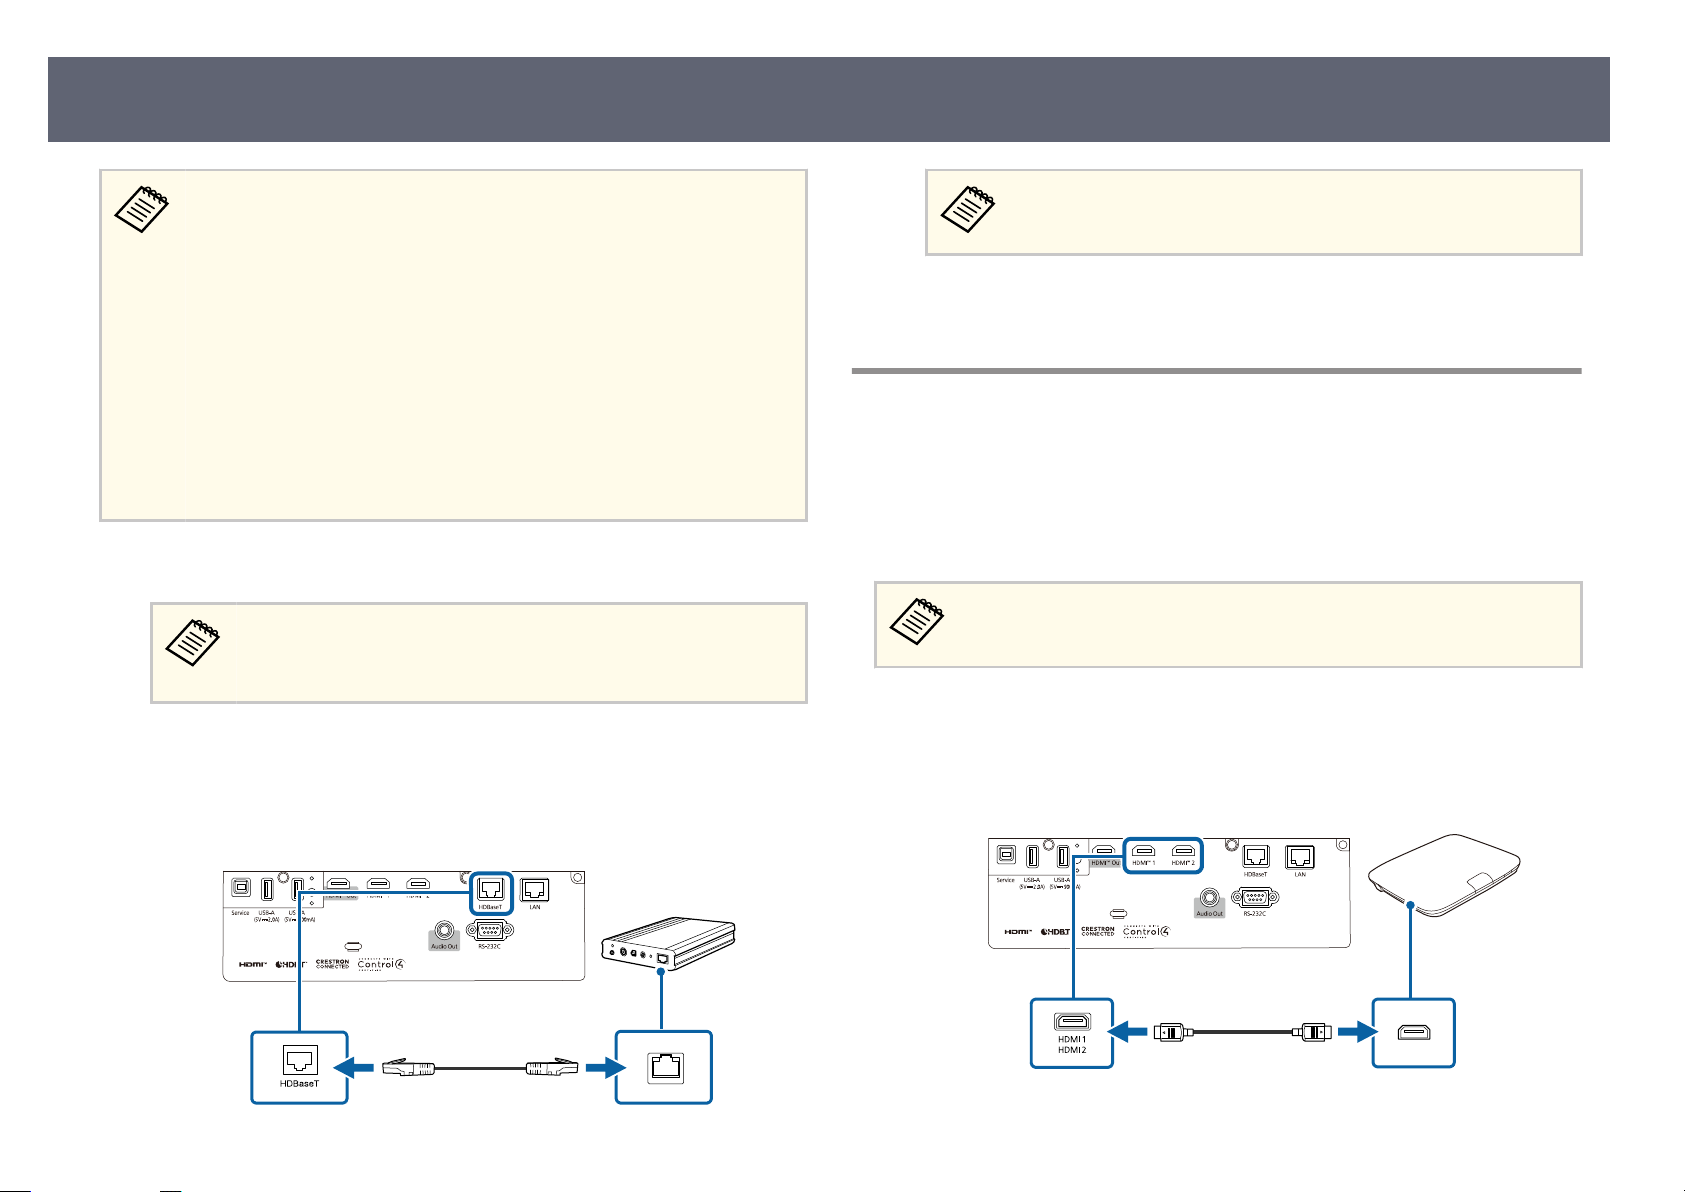
To send an HDMI or RS-232C signal over a long distance, you can connect
the p
rojector to an optional HDBaseT transmitter using a 100Base-TX network
cable. is is useful when you want to send a signal to or control the projector
from a remote location, such as in a hall or event site, since you can use a
network cable up to 100 m in length. To ensure proper data transmission, use
a Category 5e STP cable or better. However, operation is not guaranteed for all
input/output devices and environments.
Connect the other end to your device, if necessary.
c
Disconnecting a USB Device
When y
device from the projector.
ou have nished projecting with a connected USB device, disconnect the
Page 37
Projector Connections
37
•
To enab
transmitter, select On as the Control Communications setting in
the projector's Operation menu. Turning on this setting disables the
projector's LAN and RS-232C ports.
s Operation > HDBaseT > Control Communications
•
If you connected an Extron XTP transmitter or switcher to the
projector's HDBaseT port, select On as the Extron XTP setting in the
projector's Operation menu.
s Operation > HDBaseT > Extron XTP
•
If you want to control the projector when the projector does not project
any images, set the Standby Mode setting to Normal in the projector's
Operation menu.
Turn o
a
Connect one end of the network cable to the HDBaseT port on the
b
transmi
Connect the other end to the projector's HDBaseT port.
c
the projector and HDBaseT transmitter.
tter.
le communication from the Ethernet and serial ports on the
Make sure the projector and HDBaseT transmitter are turned o
when connecting or disconnecting a network cable between the two
devices.
See the documentation that came with the HDBaseT transmitter for
inst
ructions on connecting it to your video device or computer.
Turn on the projector and HDBaseT transmitter.
d
Connecting to the Base Unit
You can use the optional wireless presentation system to project through the
base uni
one base unit (ELPBU01) and two wireless transmitters (ELPWT01). Using the
projector with wireless transmitters allows you to connect to Windows/Mac
computers through the base unit and project your images easily.
a
b
t (receiver). Your wireless presentation system (ELPWP20) includes
See the ELPWP20 Qui
Connect the HDMI cable supplied with your wireless presentation system
t
e HDMI Out port on the base unit.
o th
Connect the other end to the projector's HDMI port.
ck Start Guide for details on installing the base unit.
Page 38
Projector Connections
38
Connect the wireless transmitter to a USB port on your computer. See the
c
Epson Wireless Presentation System User's Guide for details.
Connecting to External Devices
Follow the instructions in these sections to connect external devices to the
jector.
pro
Related Links
g
•
"Connecting to an External HDMI Monitor" p.38
•
"Connecting to External Speakers" p.38
Connecting to an External HDMI Monitor
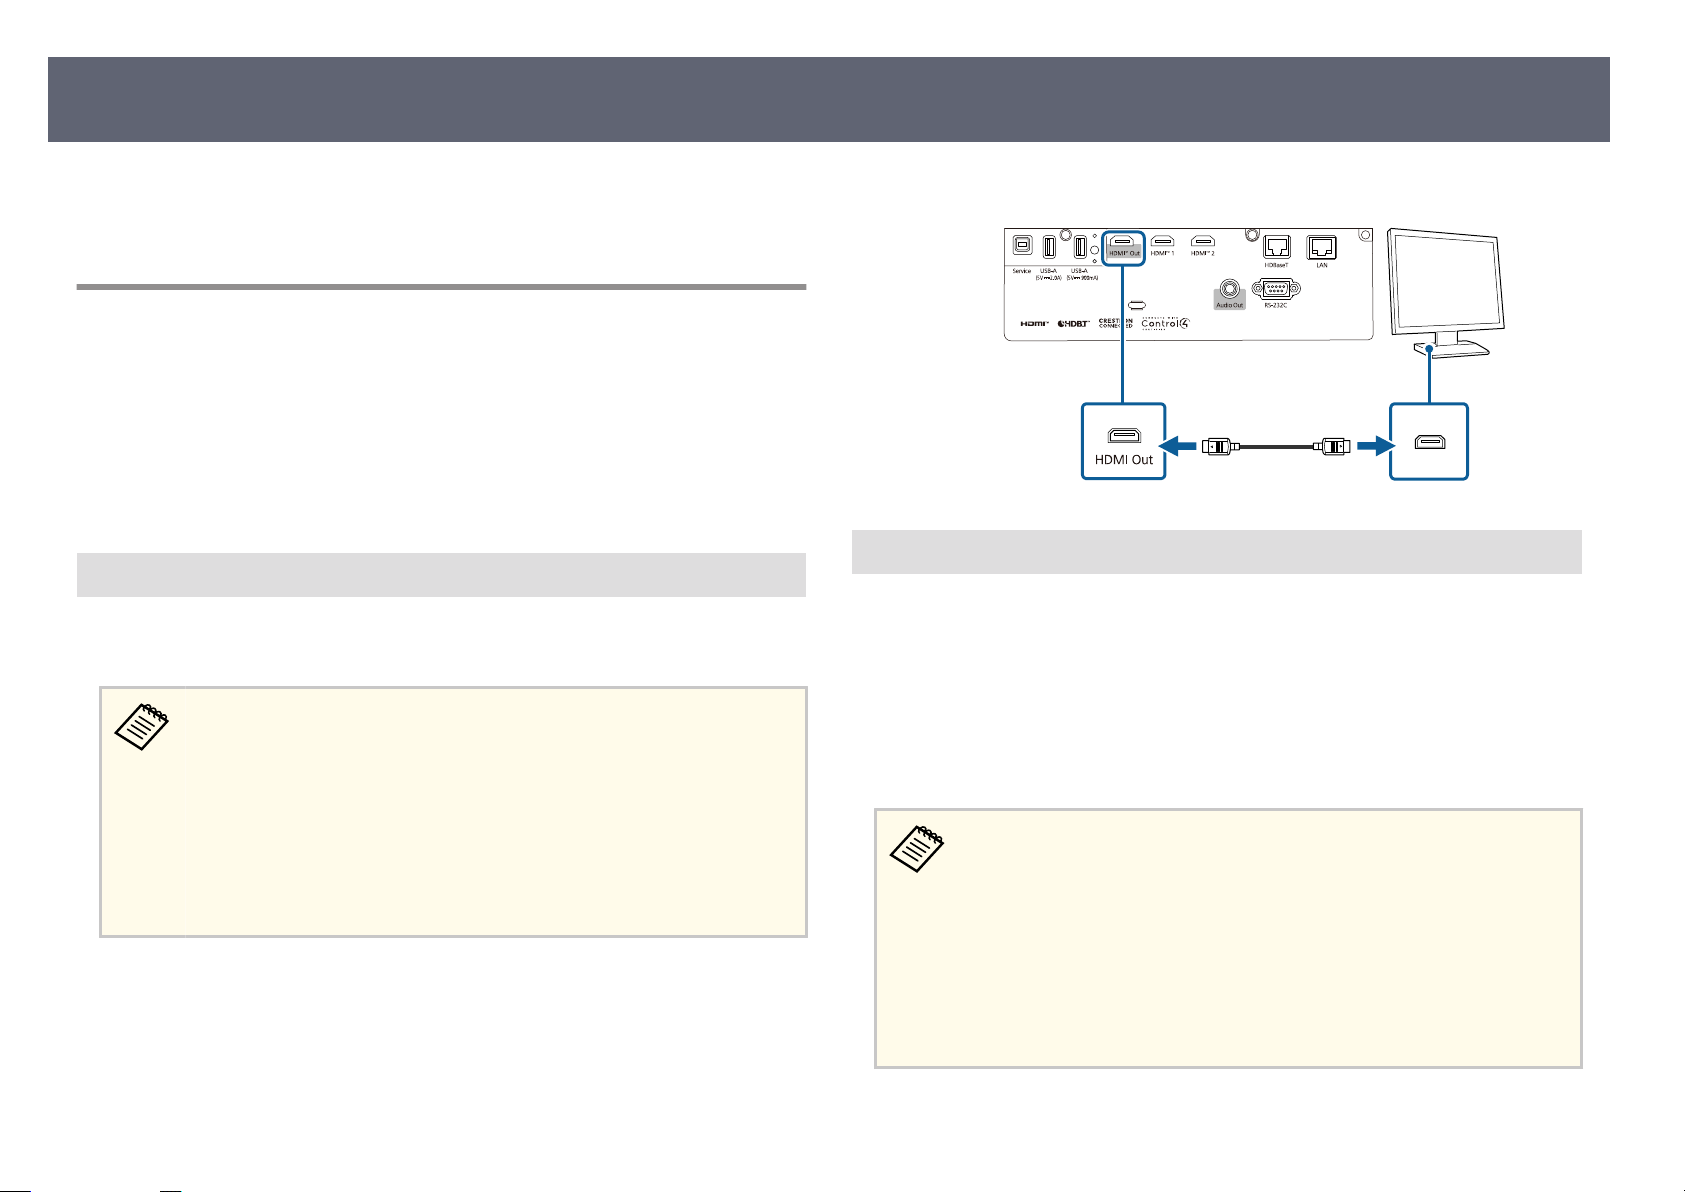
You c
an connect an external HDMI monitor to the projector's HDMI Out port
and use it to display images from the current input source.
•
If the audio from the projector and HDMI monitor is out of sync, mute
the audio on either the projector or the HDMI monitor.
•
If the output image does not appear on the HDMI monitor, change
the EDID settings in the projector's Signal I/O menu to match the
resolution of the HDMI monitor.
•
Use an HDMI monitor that supports HDCP2.3.
•
e HDMI Out port is not guaranteed to operate for all monitor
devices and products.
Connect the HDMI cable to your monitor's HDMI input port.
a
Connect the other end to the projector's HDMI Out port.
b
Connecting to External Speakers
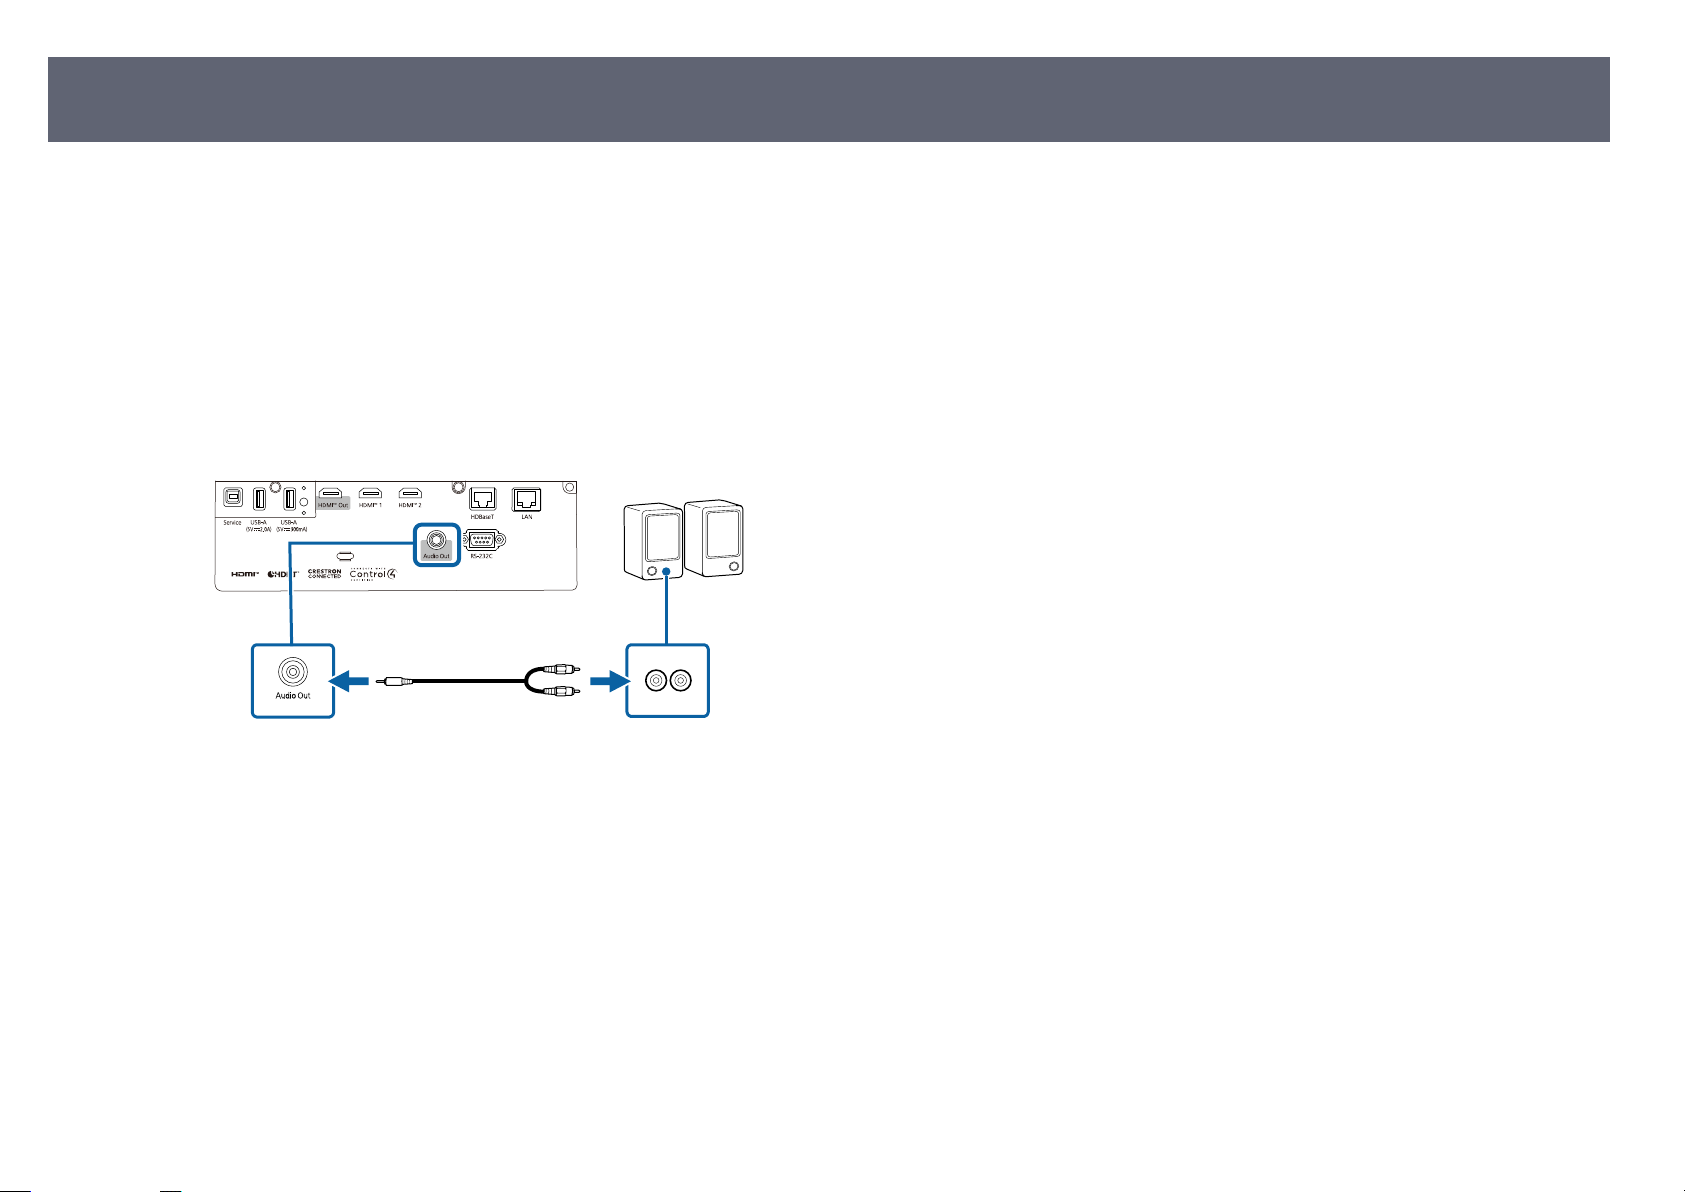
You c
an connect the projector to external self-powered speakers. You can
control the volume using the projector's remote control.
To output audio from external speakers, set the Audio Out Device setting to
Projector in the projector's Signal I/O menu. When an audio/video system is
not connected to the projector, audio is output from the external speakers even
if Audio Out Device is set to AV System.
s Signal I/O > HDMI Link > Audio Out Device
•
If yo
u want to output audio from the external speakers when the
projector is turned o, set the following items in the projector's
Operation menu:
•
Select Normal as the Standby Mode setting
•
Select On as the Standby Audio Output setting
•
You can also connect the projector to an amplier with speakers.
•
e projector's built-in speaker system is disabled when you connect
external speakers.
Page 39
Projector Connections
Make sure your computer or video source is connected to the projector
a
with both audio and video cables as necessary.
Locate the appropriate cable to connect your external speakers, such as a
b
ster
eo mini-jack-to-pin-jack cable, or another type of cable or adapter.
Connect one end of the cable to your external speakers as necessary.
c
Connect the stereo mini-jack end of the cable to your projector's Audio
d
O
ort.
ut p
39
Page 40
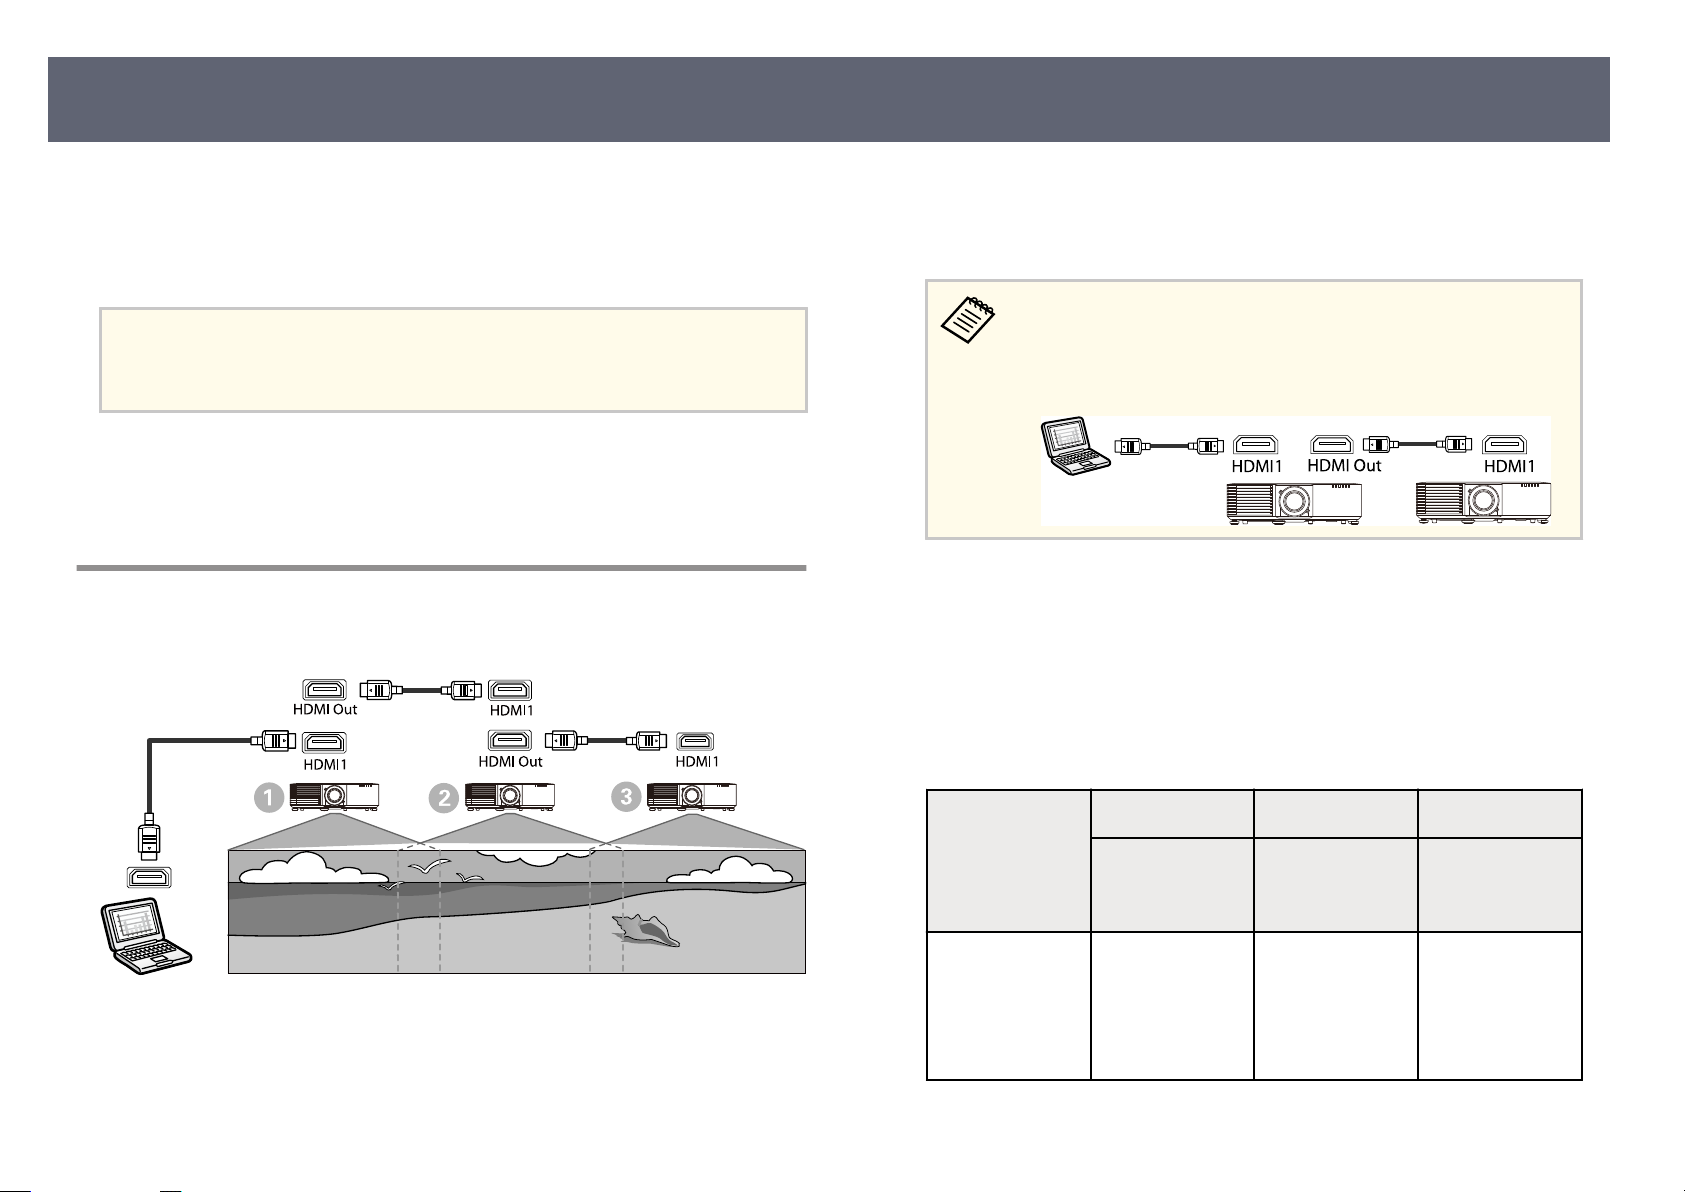
Connecting Multiple Projectors of the Same Model
40
You can project the same image from multiple projectors.
an connect multiple projectors using either of the following methods:
You c
daisy-chain connection or distributor connection. You can connect up to four
projectors in a daisy-chain connection.
Attention
When in
into the air intake vent of another projector.
Related Links
g
•
"Pr
•
"Precautions on Installation" p.28
stalling the projectors, make sure hot air from the exhaust vent does not go
ojecting the Same Image in a Daisy-Chain Connection" p.40
Projecting the Same Image in a Daisy-Chain Connection
Connect the projector to the computer using the HDMI cable, and then
a
connect the HDMI1 port and HDMI Out port of the projectors using the
HDMI cable.
•
e image i
is selected as the image source.
•
If you are connecting three or four projectors in a daisy-chain,
connect the projectors as shown.
Press the [Menu] button on the control panel or remote control.
b
Select the C
c
Image
Select the necessary HDMI Lin
d
menu. See the list of settings for more details.
olor Mode setting to Multi-Projection in the projector's
menu for all of the projectors.
s output from the HDMI Out port only when HDMI1
k setting in the projector's Signal I/O
Setting Item
HDMI Link
Sett
ing
A B C
First projector
to conn
the device
HDMI Out
Power Link: On
HDMI Out
Terminal End:
O
ect to
Projectors in the
middle
HDMI Out
Power Link: On
HDMI Out
Terminal End:
O
Terminal
projector
HDMI Out
Power Link: On
HDMI Out
Terminal End:
On
Page 41
Connecting Multiple Projectors of the Same Model
is may not work if ve or more projectors are connected in a
dai
sy-chain or if the settings are not correct.
Select the necessary settings in the projector's Multi-Projection menu.
e
Press [Menu] or [Esc] to exit the menus.
f
Related Links
g
•
"Mu
lti-Projection Features" p.117
41
Page 42
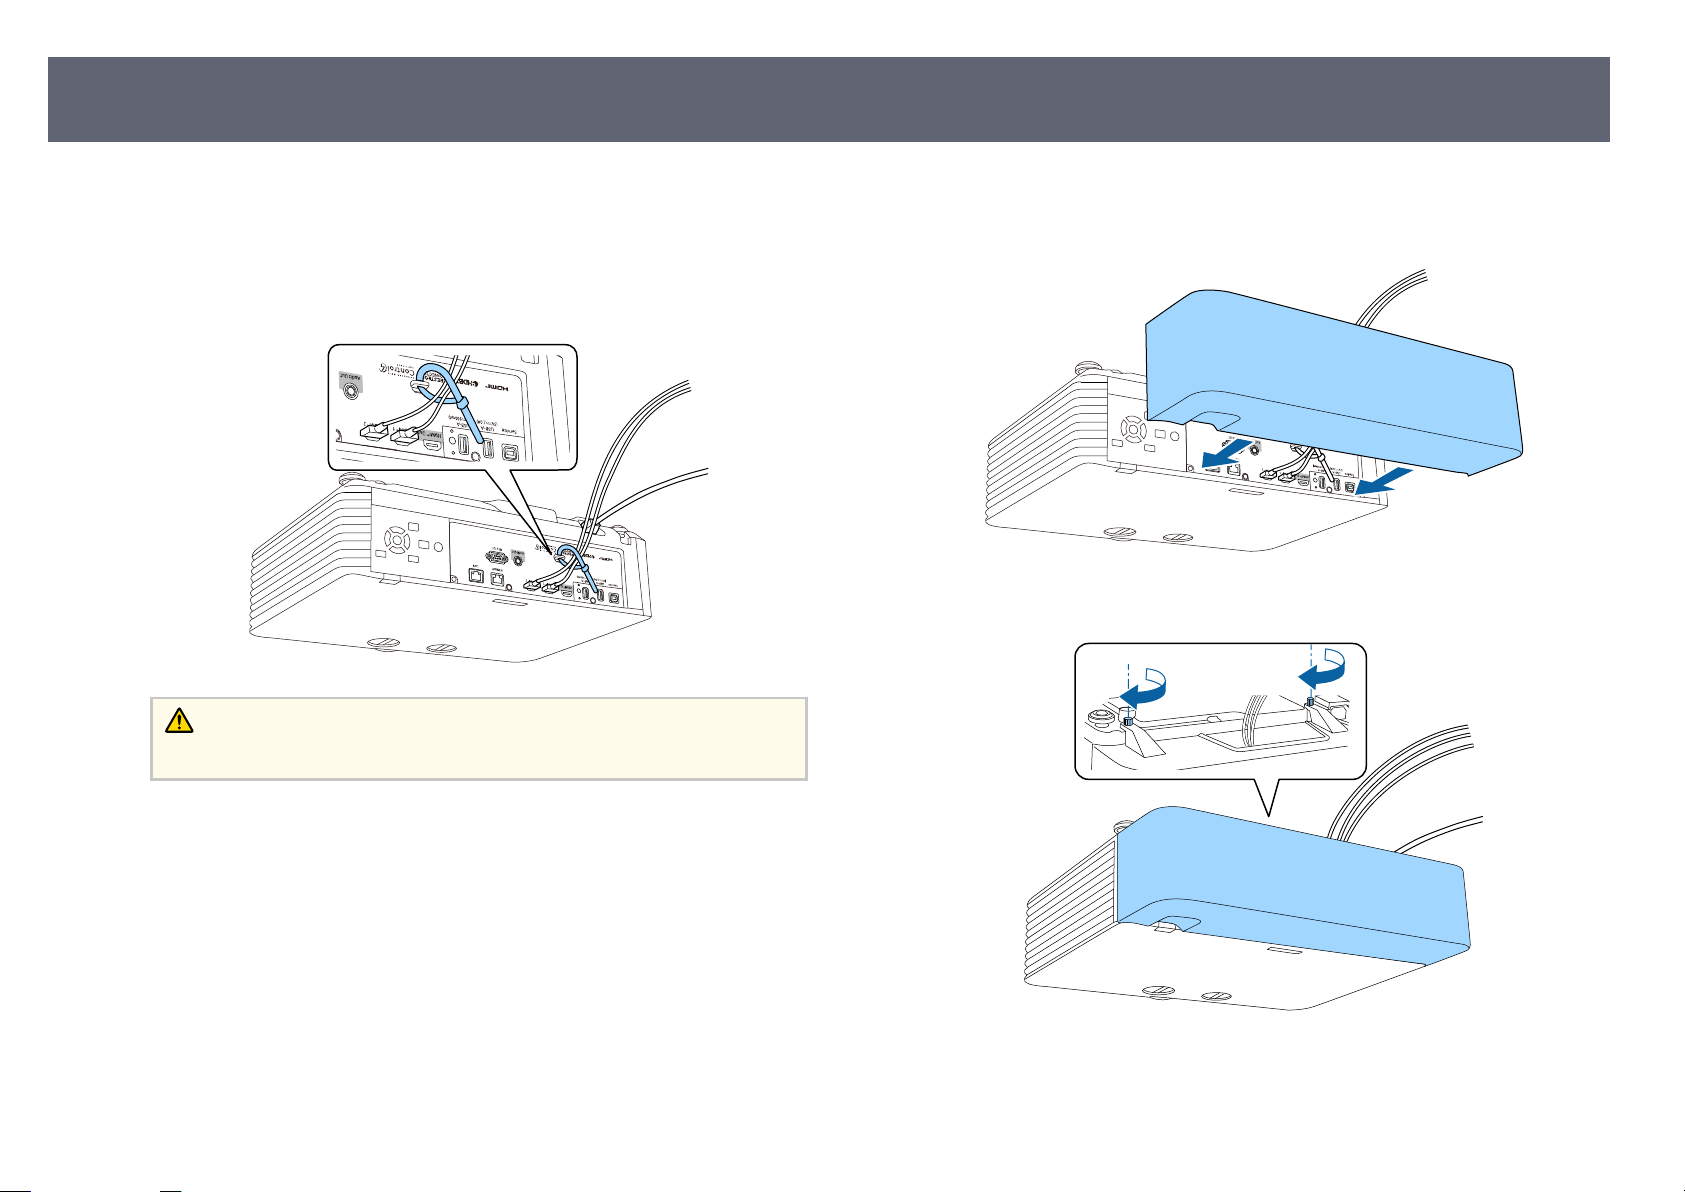
Attaching and Removing the Cable Cover
42
When suspending the projector from a ceiling, you can attach the optional cable
o hide the attached cables from view.
cover t
Pass a commercially available cable tie through the cable holder and tie
a
the c
ables together.
Caution
D
o
t bundle the power cord to the other cables. Otherwise, a re may occur.
o n
Place the cable cover on the projector as shown, guiding the cables
b
thro
ugh the notch on the base of the cable cover.
Tighten the cable cover screws.
c
To remove the cover, loosen the cover screws and pull the cover o of the
projector.
Page 43
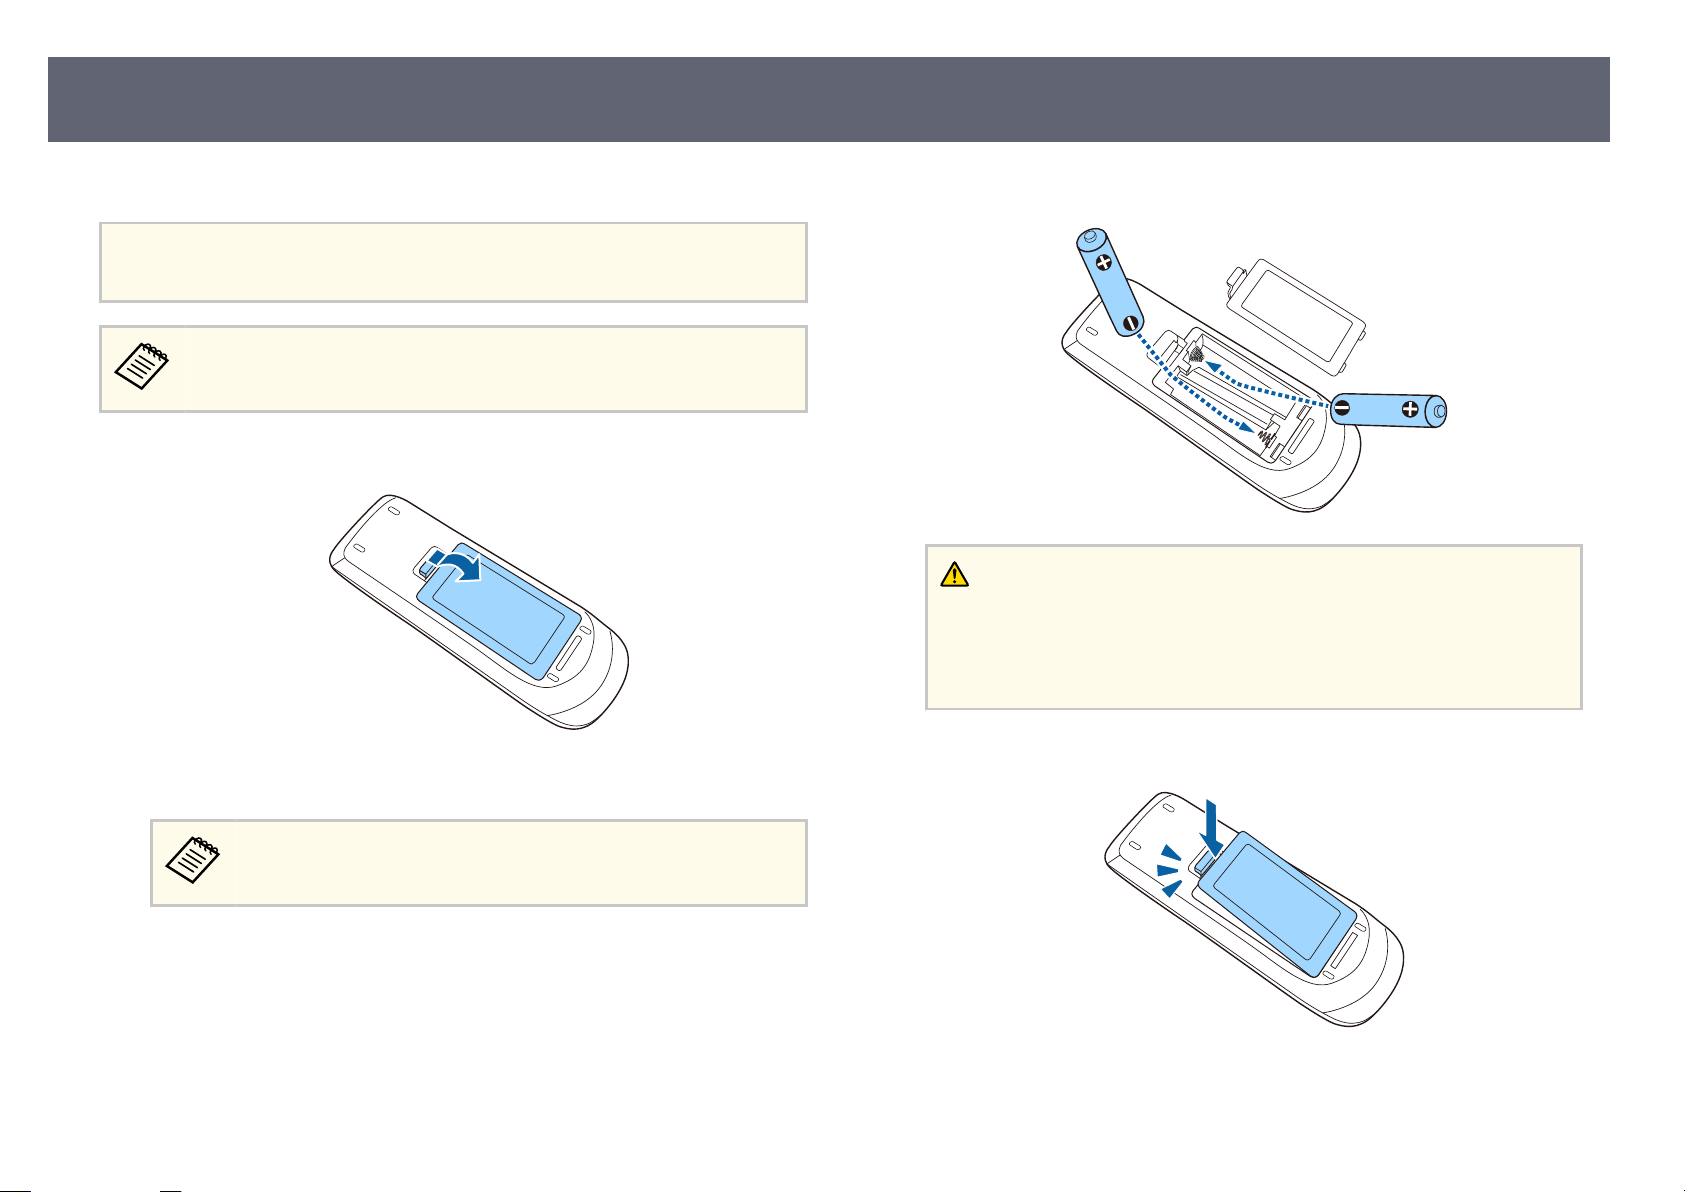
Installing Batteries in the Remote Control
43
e remote control uses the two AA batteries that came with the projector.
Attention
Make s
ure you read the Safety Instructions before handling the batteries.
Replace the batteries as soon as they run out. e remo
AA manganese or alkaline batteries.
Remove the battery cover as shown.
a
Remove the old batteries, if necessary.
b
te control uses two
Insert the batteries with the + and – ends facing as shown.
c
Warning
Check the positions of the (+) and (–) marks inside the battery holder to
ensure the batteries are inserted the correct way. If the batteries are not used
correctly, they could explode or leak causing a re, injury, or damage to the
product.
Replace the battery cover and press it down until it clicks into place.
d
Dispose of used batteries according to local regulations.
Related Links
g
•
"Rem
ote Control Operation" p.44
Page 44
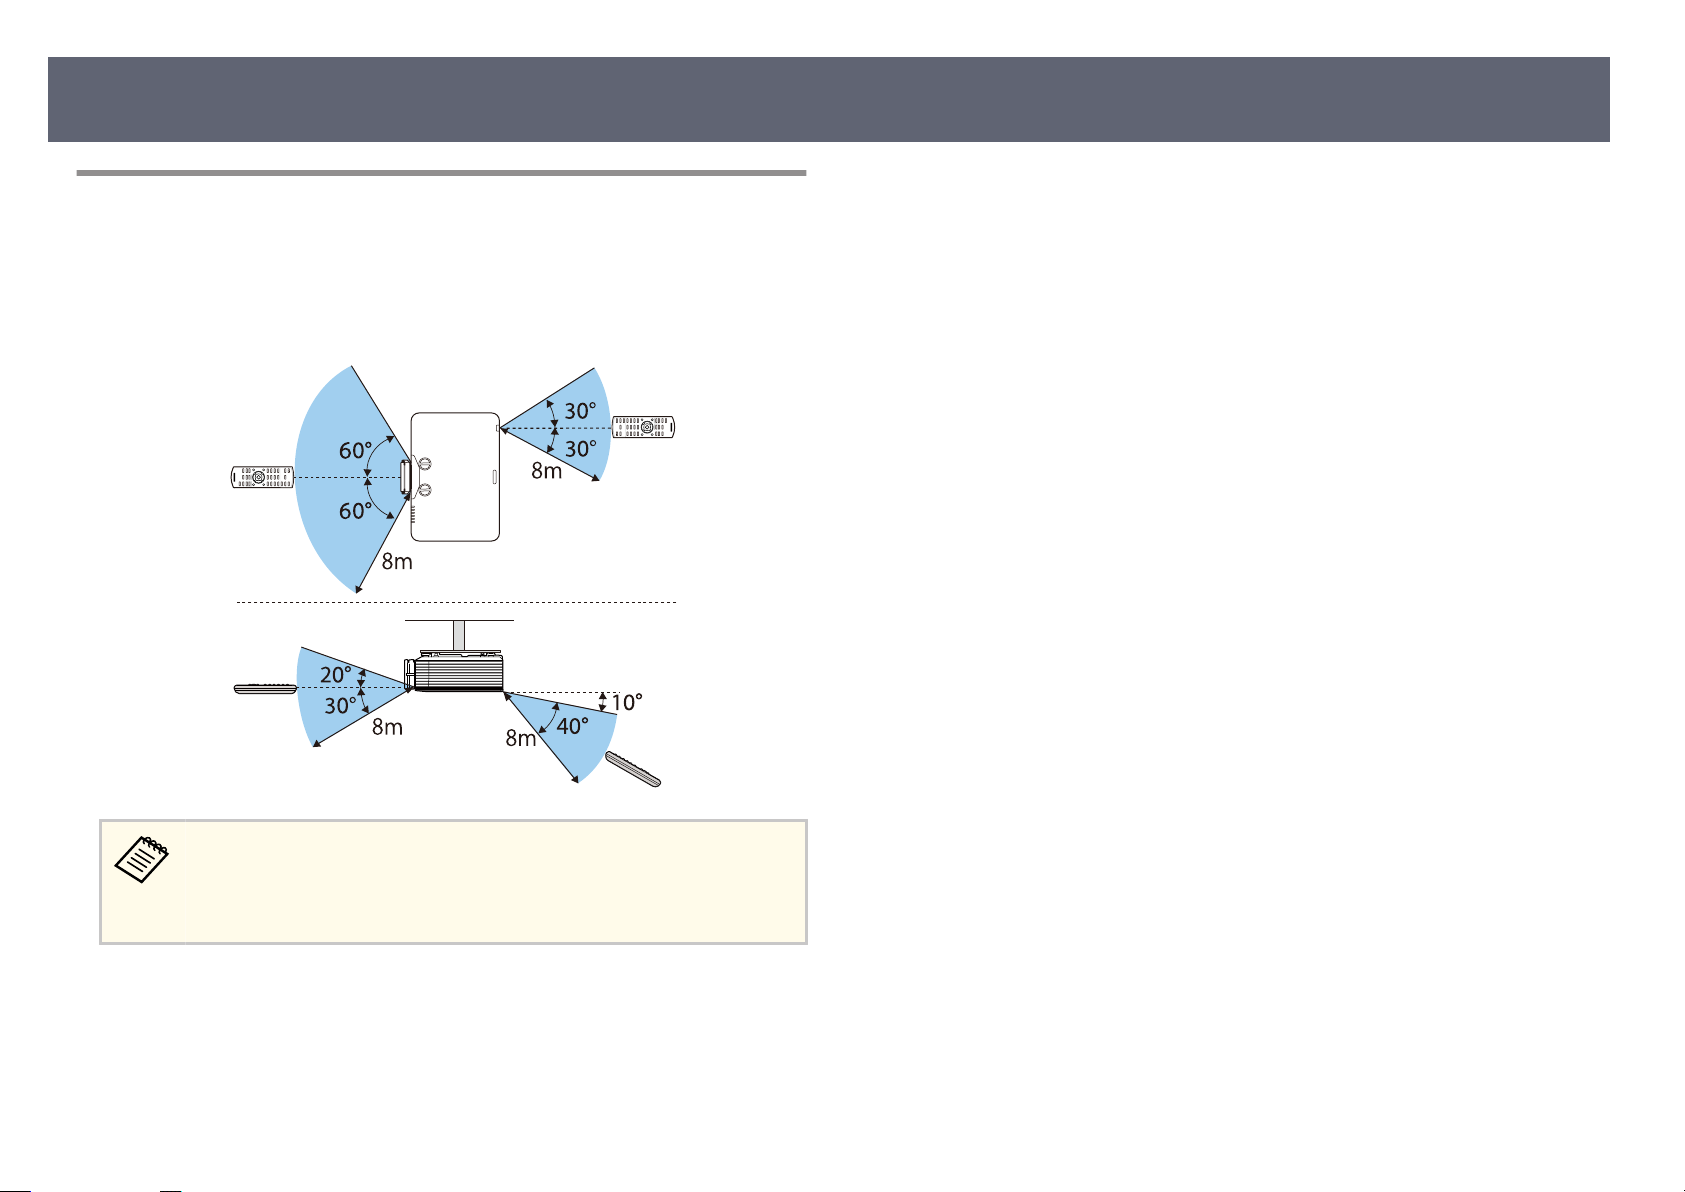
Installing Batteries in the Remote Control
Remote Control Operation
e remote control lets you control the projector from almost anywhere in the
ro
om.
Make sure that you aim the remote control at the projector's receivers within the
distance and angles listed here.
44
Avoid using the remote control in conditions with bright uores
or in direct sunlight, or the projector may not respond to commands. If
you are not going to use the remote control for a long time, remove the
batteries.
cent lights
Page 45

Using Basic Projector Features
low the instructions in these sections to use your projector's basic features.
Fol
Related Links
g
•
"Turning On the Projector" p.46
•
"Turning O the Projector" p.49
•
"Setting the Date and Time" p.50
•
"Selecting the Language for the Projector Menus" p.52
•
"Projection Modes" p.53
•
"Setting the Screen Type" p.55
•
"Adjusting the Image Position Using Lens Shi" p.58
•
"Displaying a Test Pattern" p.59
•
"Adjusting the Image Height" p.60
•
"Image Shape" p.61
•
"Resizing the Image with the Zoom Ring" p.74
•
"Focusing the Image Using the Focus Ring" p.75
•
"Focusing the Image Using the Focus Ring (Center/Corner)" p.76
•
"Selecting an Image Source" p.77
•
"Image Aspect Ratio" p.79
•
"Adjusting Image Quality (Color Mode)" p.81
•
"Turning On Automatic Luminance Adjustment" p.82
•
"Adjusting the Image Color" p.83
•
"Adjusting the Image Resolution" p.86
•
"Adjusting the Brightness" p.88
•
"Controlling the Volume with the Volume Buttons" p.91
Page 46
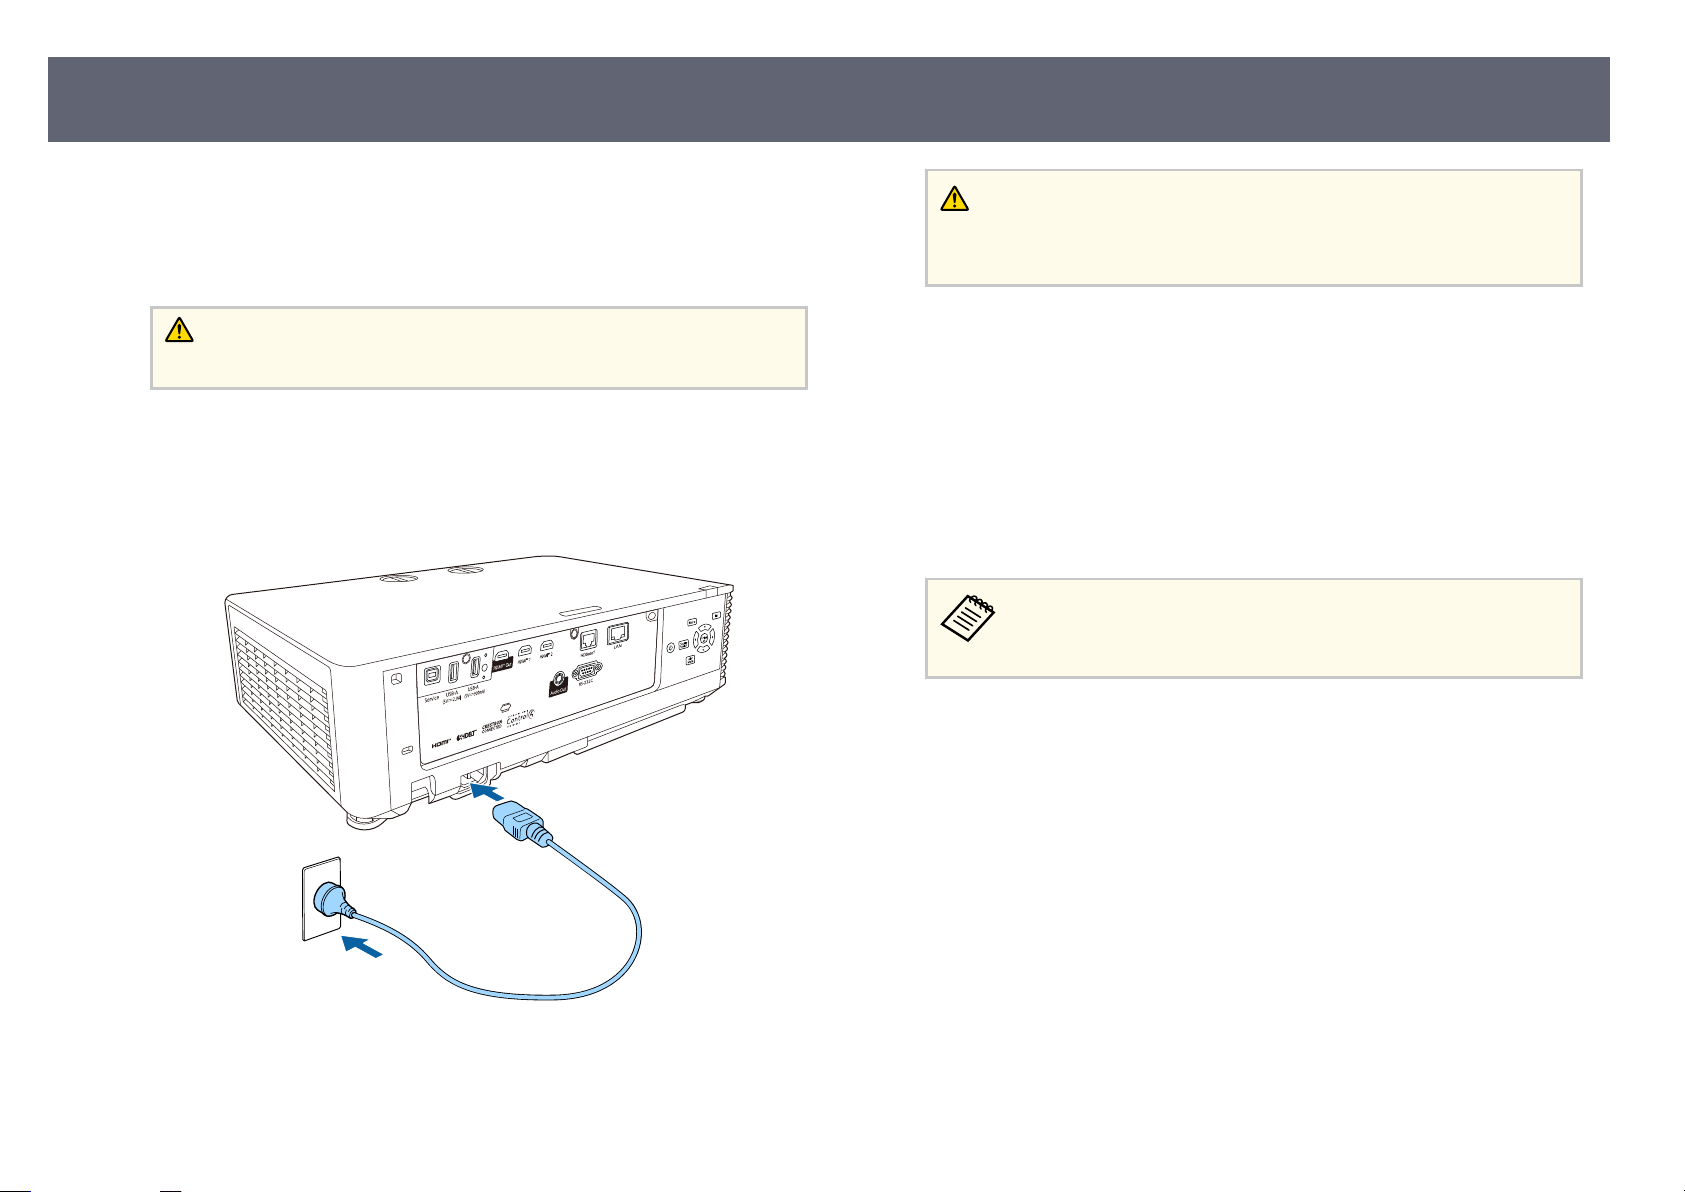
Turning On the Projector
46
Turn on the computer or video equipment you want to use aer you t
projector.
Connect the device to the projector.
a
Caution
A
co
nnecting the device to the projector, connect the power cord.
er
Remove the lens cover.
b
Connect the power cord to the projector's power inlet and plug it into an
c
e
trical outlet.
lec
urn on the
Warning
Be sur
e to connect to ground before plugging in. When you remove the
ground connection, unplug the power cord and disconnect from ground.
e projector's power indicator turns blue. is indicates that the
ojector is receiving power, but is not yet turned on (it is in standby
pr
mode).
Press the power button on the control panel or remote control to turn on
d
the p
rojector.
e projector beeps and the status indicator ashes blue as the projector
warms up. Once the projector is warmed up, the status indicator stops
ashing and turns blue.
When Quick Startup is enabled in the projector's Operation menu,
e projector becomes ready for use in several seconds the next time
th
you press the power button.
Try the following if you do not see a projected image.
•
•
•
•
•
•
n the connected computer or video device.
Turn o
Change the screen output from the computer when using a laptop computer.
Insert a DVD or other video media, and press play (if necessary).
Press the [Source Search] button on the control panel or remote control to
detect the source.
Press the button for the desired video source on the remote control.
If the Home screen is displayed, select the source you want to project.
Page 47
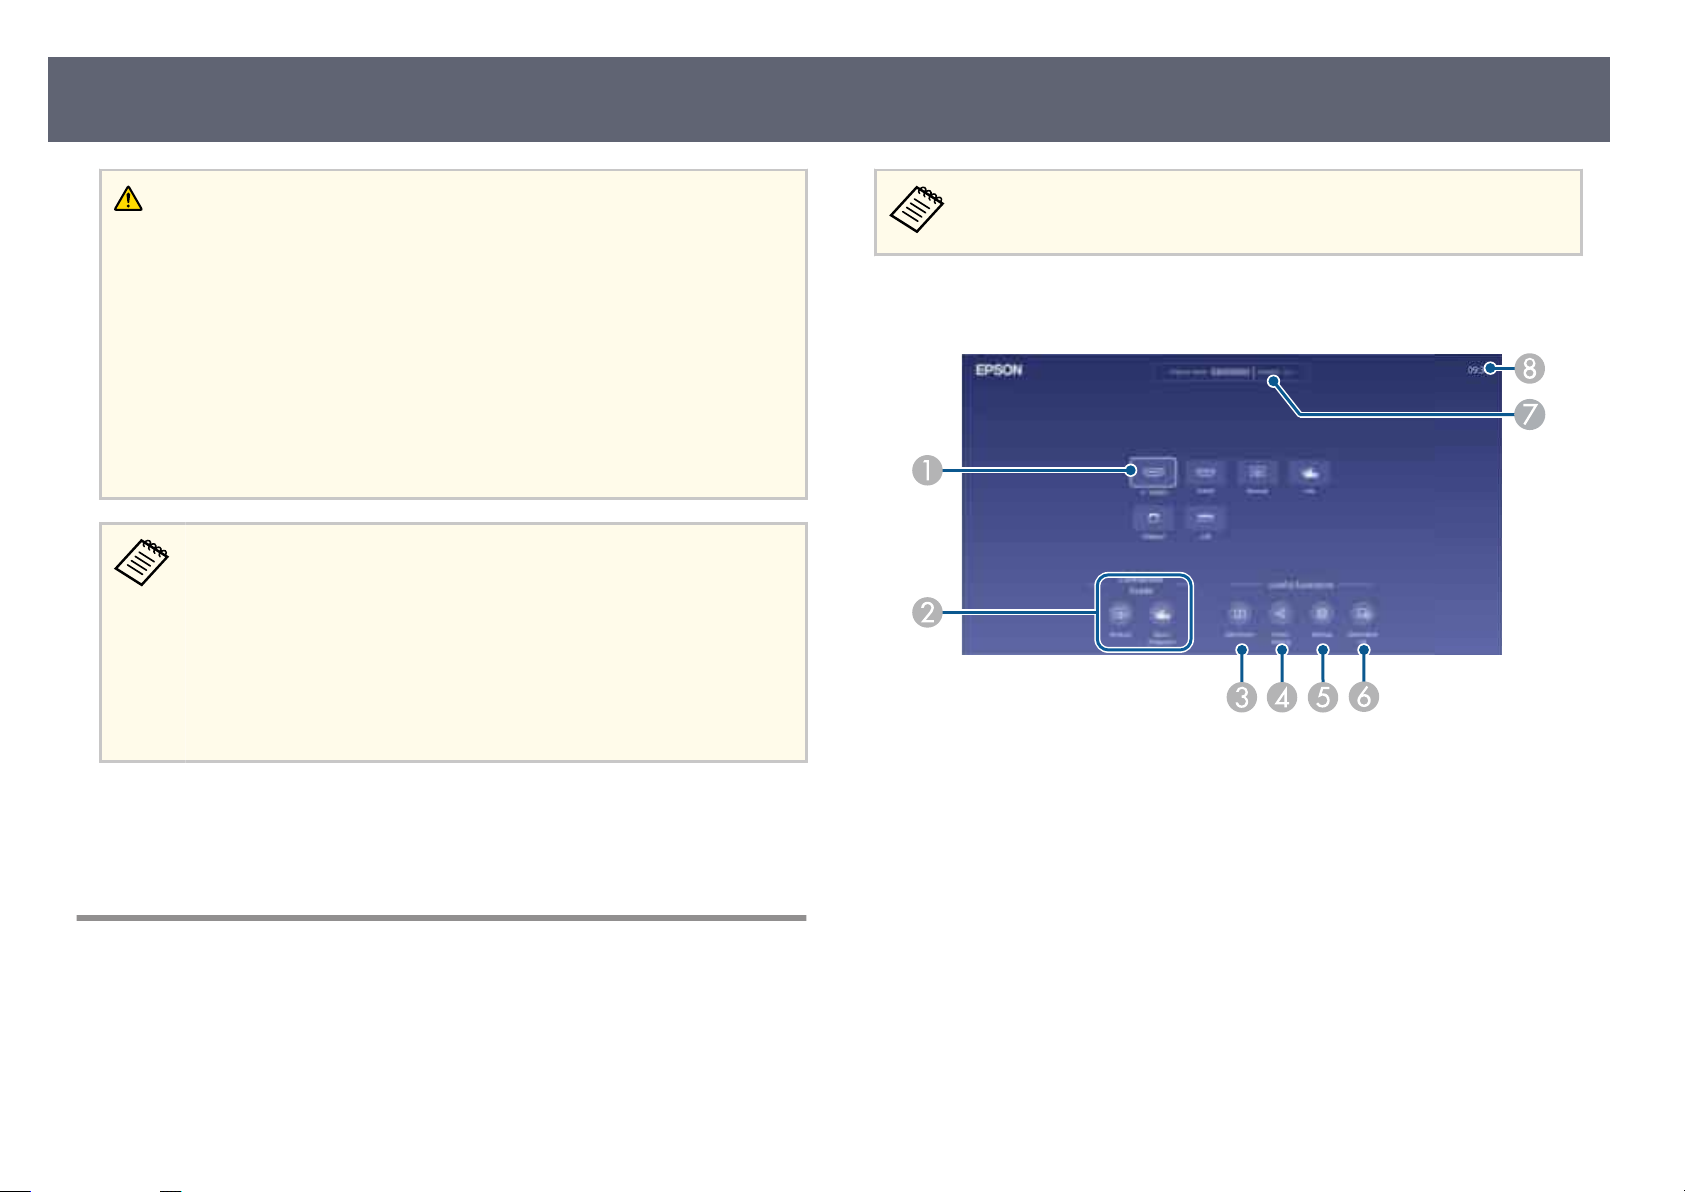
Turning On the Projector
47
Warning
•
Never look into the projector lens when the light source is on. is can damage
your eyes and is especially dangerous for children.
•
When turning on the projector at a distance using the remote control, make sure
there is no one looking into the lens.
•
During projection, do not block the light from the projector with a book or
other objects. If the light from the projector is blocked, the area on which the
light shines becomes hot which could cause it to melt, burn, or start a re. Also,
the lens may get hot due to the reected light which could cause the projector
to malfunction. To stop projection, use the A/V Mute function, or turn o the
projector.
•
When t
he Direct Power On setting is set to On in the projector's
Operation menu, the projector turns on as soon as you plug it in. Note
that the projector also turns on automatically in cases such as recovery
from a power outage.
s Operation > Operation Settings > Direct Power On
•
If you select a specic port as the Auto Power On setting in the
projector's Operation menu, the projector turns on as soon as it detects
a signal or cable connection from that port.
Related Links
g
•
"Home Screen" p.47
•
"Projector Feature Settings - Operation Menu" p.197
Home Screen
e Home screen feature allows you to easily select an image source and access
us
eful functions. You can display the Home screen by pressing the [Home]
button on the remote control.
e Home screen is also displayed when you turn on the projector and no
sign
al is being input.
Press the arrow buttons on the control panel or remote control to select a menu
item, an
A
B
C
D
d then press [Enter].
Selects the source you want to project.
A che
ck mark appears next to the current input source.
You can check a preview of the current input image for most sources as a
thumbnail (other than the USB input source in Content Playback mode).
Displays the connection guide. You can select the wireless connection methods
according to the devices you are using, such as smartphones or computers.
Projects two images from dierent image sources simultaneously by splitting the
projected screen.
Shares your projected screen image with other projectors connected to the same
network.
Page 48
Turning On the Projector
48
Lets you select the following common projector settings (settings may vary
E
dependin
•
•
•
•
•
When Access Control is set to On in the projector's Network Projection menu,
F
yo
tries to connect and you block it from the conrmation screen, it will be added
to a block list. To unblock devices, you can use this icon to cancel blocked
connections.
Displays the projector name and the projector keyword.
G
Displays the current time.
H
g on other selected settings):
Color Mode
Brightness Level
Volume
Geometry Correction (H/V-Keystone and Quick Corner are available.)
Aspect
•
e Geo
Geometry Correction is set to H/V-Keystone or Quick Corner
in the projector's Installation menu.
•
e Aspect setting is only displayed when the current source is
HDMI, HDBaseT, or USB and USB document camera. (Turn o
the Scale setting or set the Scale Mode setting to Full Display
rst in the projector's Image menu.)
u can manage which devices are allowed to connect via Miracast. If a device
metry Correction setting is only displayed when
•
en Sharing" p.156
"Scre
e Home screen disappears aer 10 minutes of inactivity.
Related Links
g
•
"Image Quality Settings - Image Menu" p.186
•
"Projector Installation Settings - Installation Menu" p.191
•
"Image Shape" p.61
•
"Using a QR Code to Connect a Mobile Device" p.148
•
"Using the Projector's Menus" p.184
•
"Projecting Two Images Simultaneously" p.93
Page 49
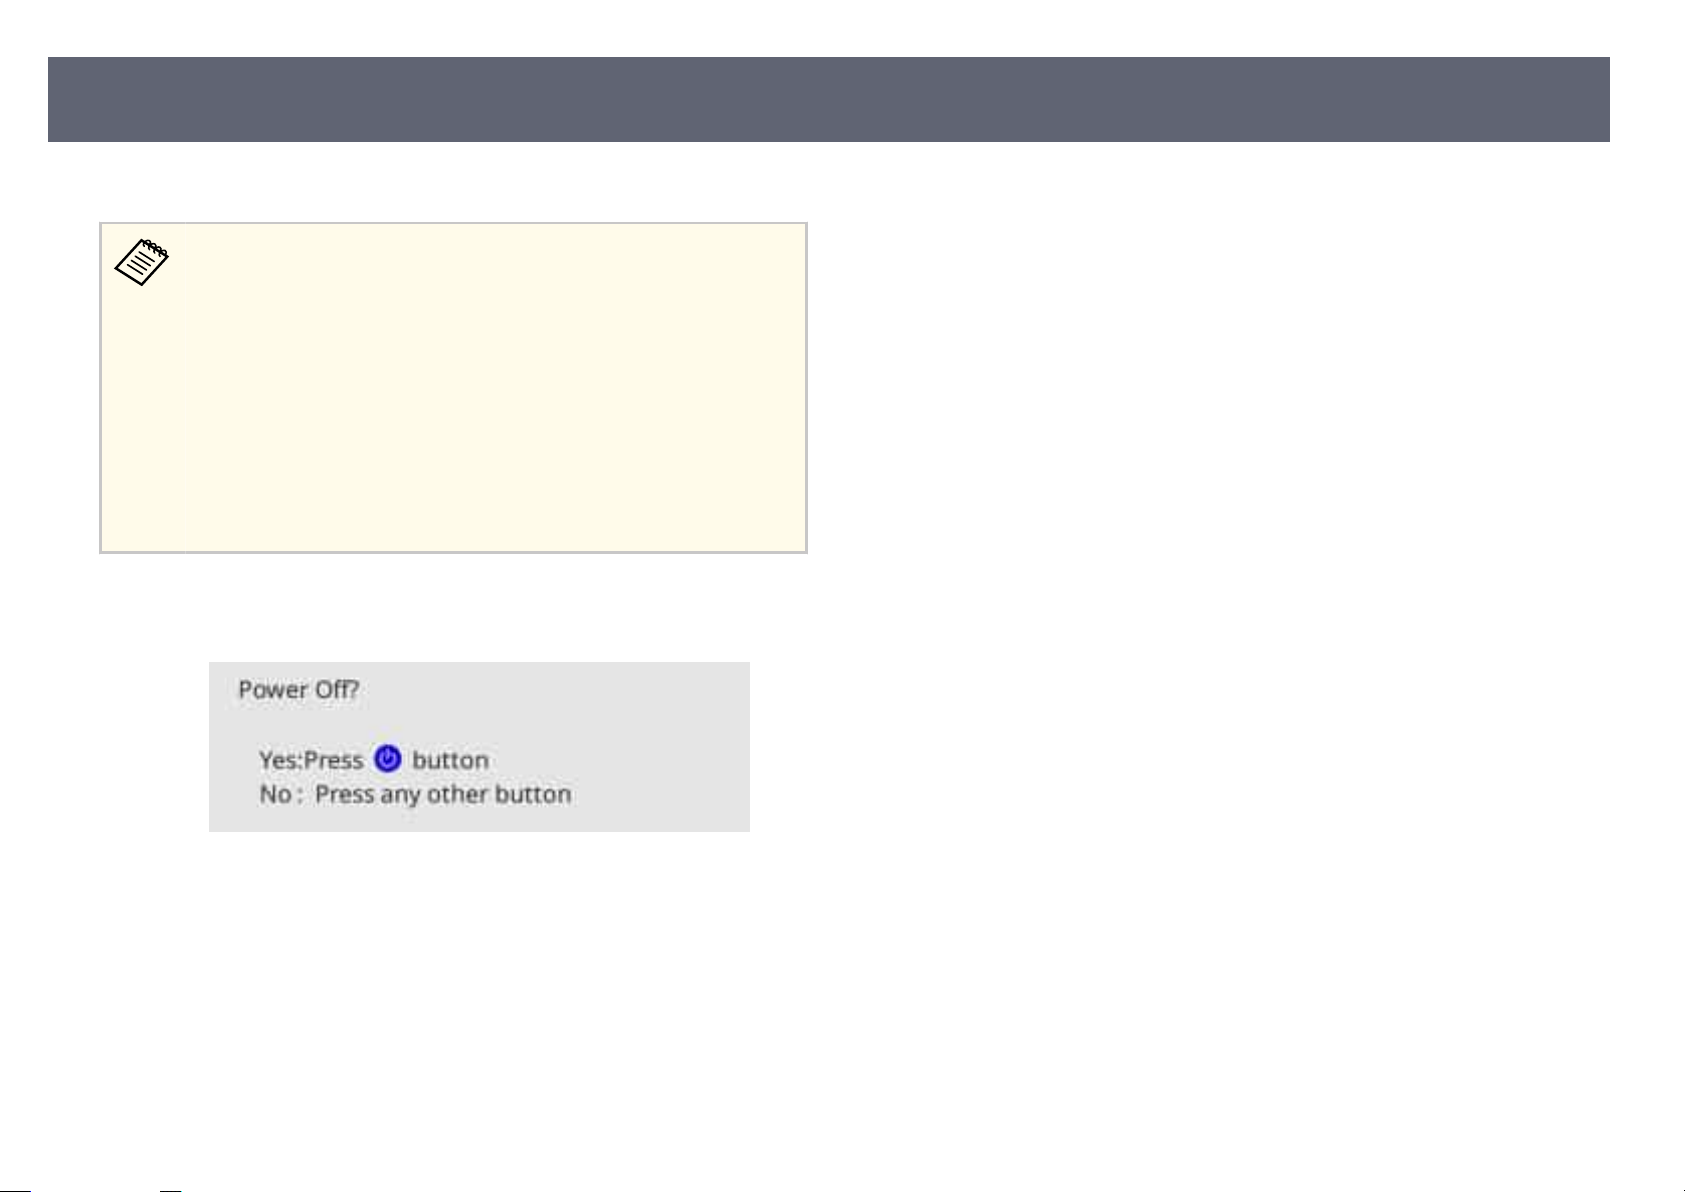
Turning O the Projector
Turn o the projector aer use.
•
Turn
o this product when it is not in use to prolong the life of the
projector. Light source life varies depending on the mode selected,
environmental conditions, and usage. Brightness decreases over time.
•
If the Light Source Calibration setting is set to Run Periodically
in the projector's Management menu, light source calibration starts
automatically if you turn o the projector and the following conditions
are present:
•
100 hours have passed since the last light source calibration
•
You have used the projector continuously for more than 20 minutes
•
Since the projector supports the direct shutdown feature, it can be
turned o directly using the breaker.
Press the power button on the control panel or remote control.
a
e pro
jector displays a shutdown conrmation screen.
49
Press the power button again. (To leave it on, press any other button.)
b
e p
indicator turns o.
To transport or store the projector, make sure the power indicator is blue
c
(but n
cord.
Attach the lens cover.
d
jector beeps twice, the light source turns o, and the status
ro
ot ashing) and the status indicator is o, then unplug the power
Page 50
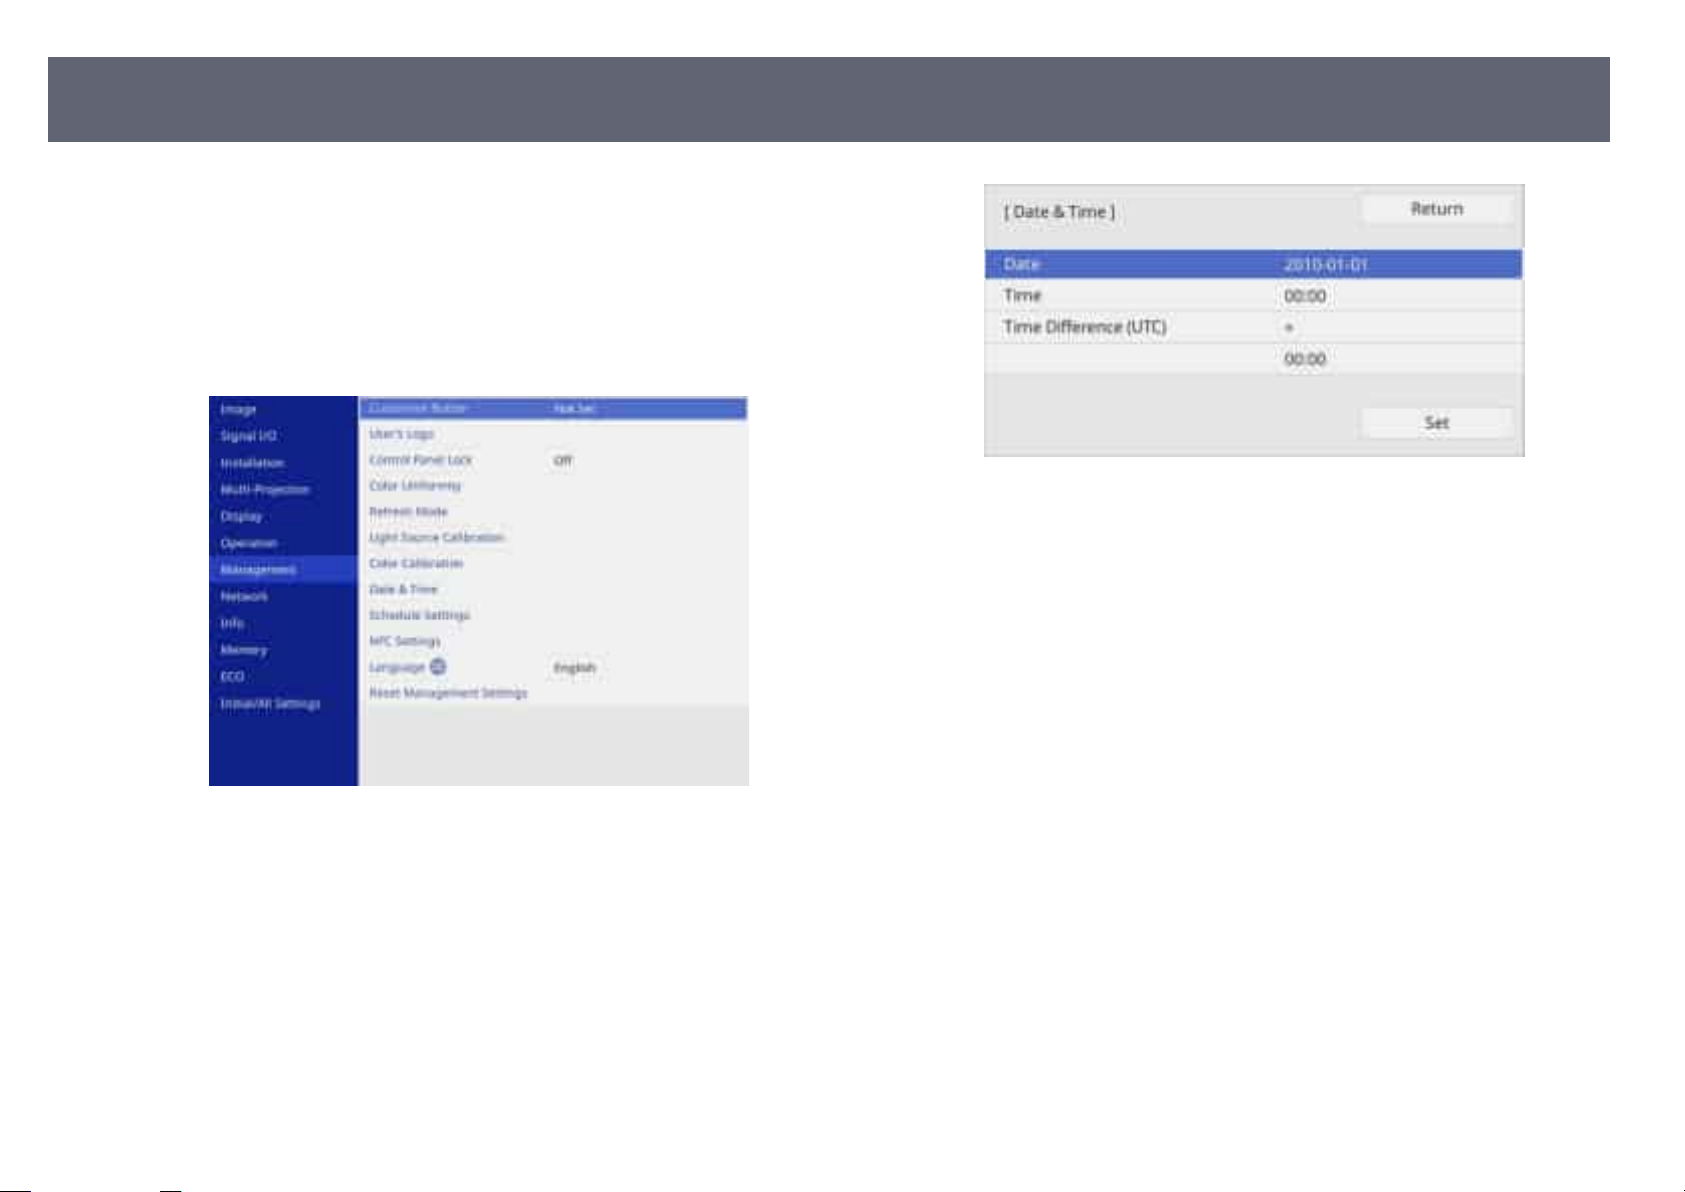
Setting the Date and Time
You can set the date and time for the projector.
Turn on the projector.
a
Press the [Menu] button on the control panel or remote control.
b
50
c
d
e
Select the M
Select the D
lect the Date & Time setting and press [Enter].
Se
Yo
u see this screen:
anagement setting and press [Enter].
ate & Time setting and press [Enter].
Select Date, press [Enter], and use the displayed keyboard to enter today's
f
dat
e.
Select Time, press [Enter], and use the displayed keyboard to enter the
g
cur
rent time.
Select Time Dierence (UTC), press [Enter], and set the time dierence
h
fr
om Coordinated Universal Time.
When you are nish
i
ed, select Set and press [Enter].
Page 51
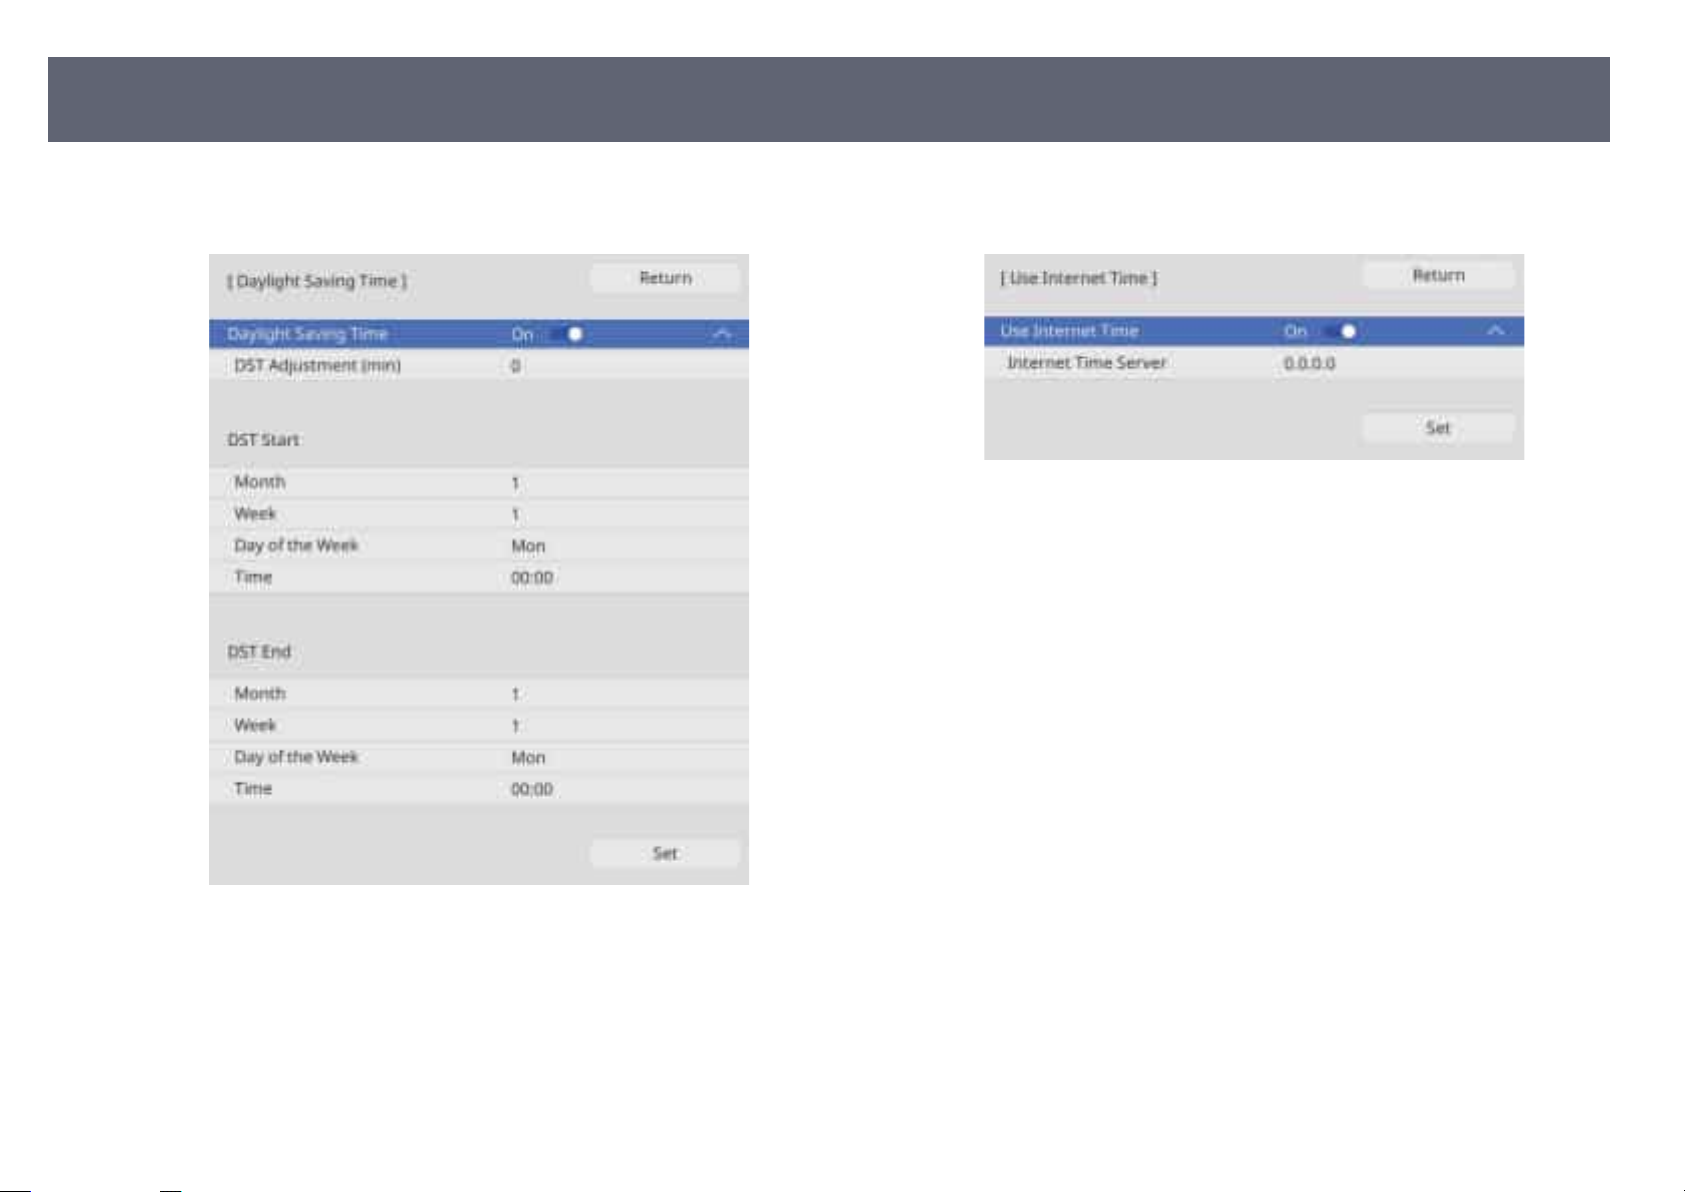
Setting the Date and Time
51
To activate daylight saving time, select the Daylig
j
and set it to On. en select settings.
ht Saving Time setting
To update the time automatically through an Internet time server, select
l
the Internet Time setting and set it to On. en select settings.
When you are ni
m
Press [Menu] or [Esc] to exit the menus.
n
ed, select Set and press [Enter].
sh
When you are nish
k
ed, select Set and press [Enter].
Page 52
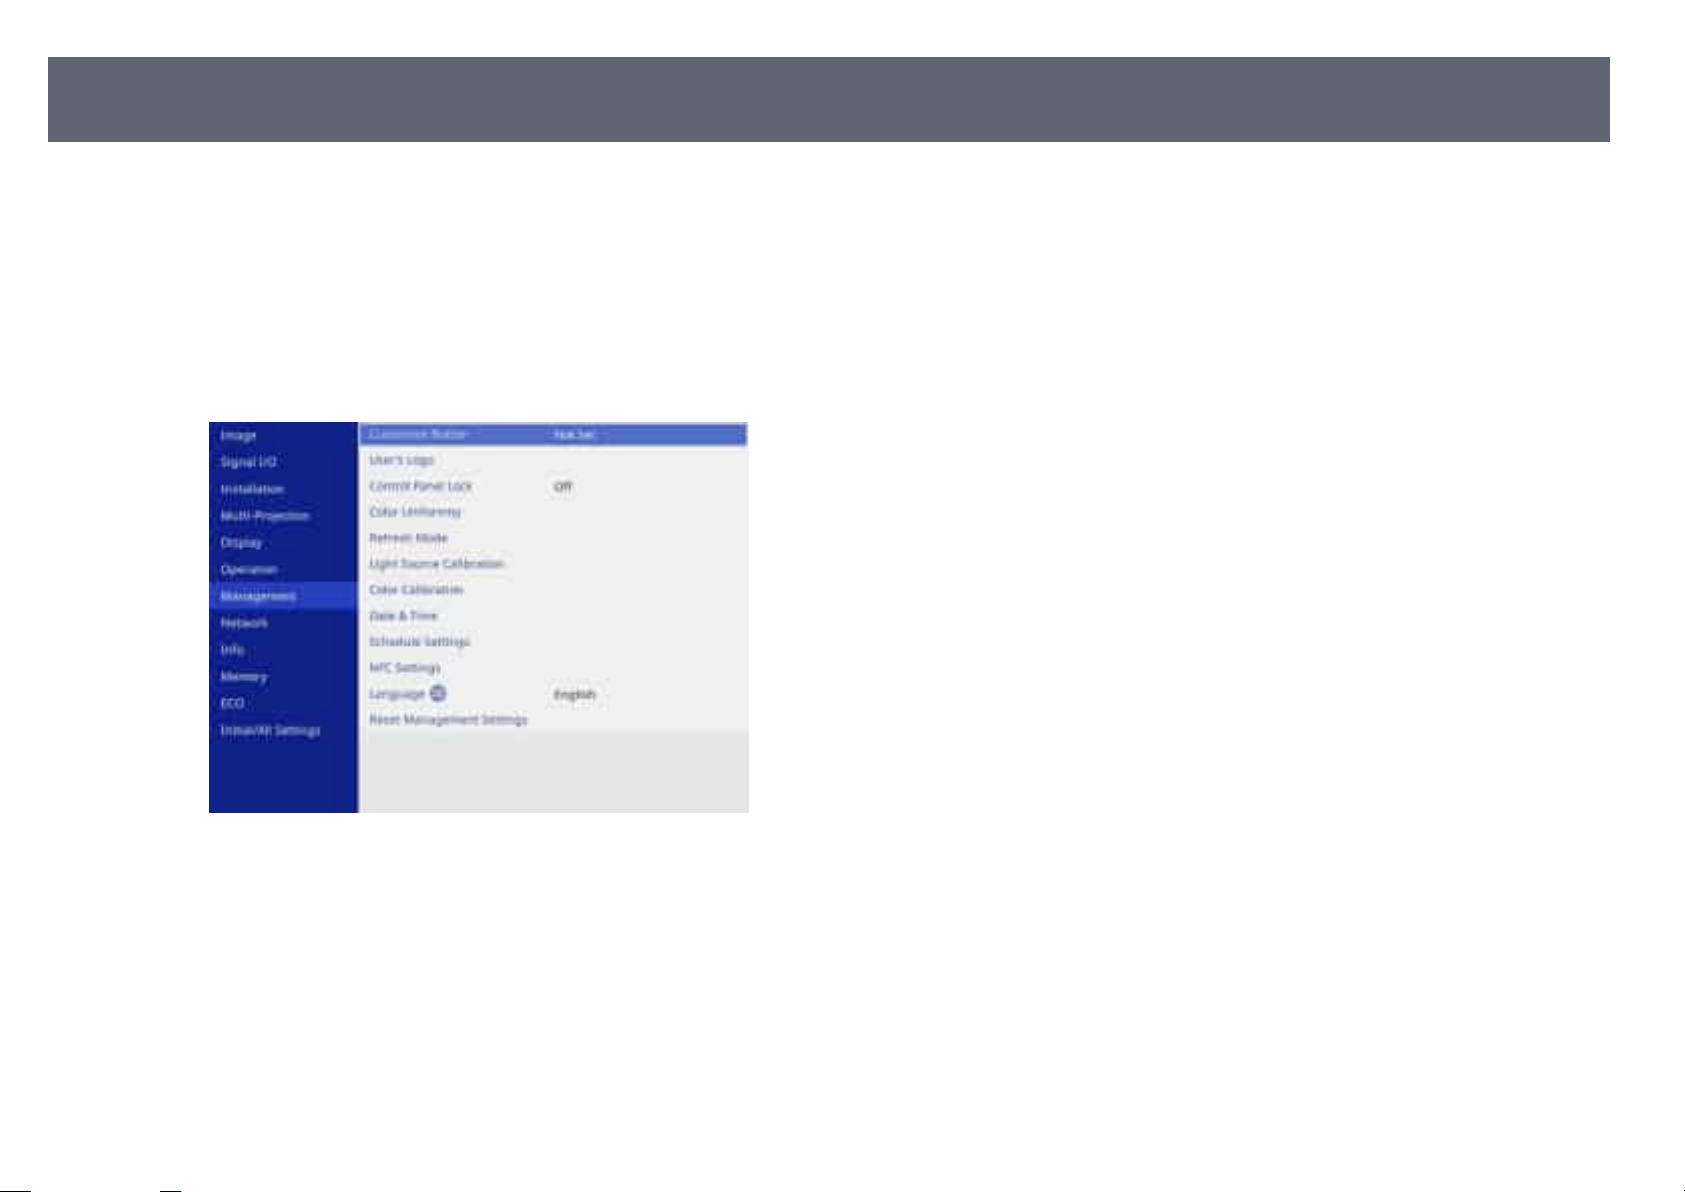
Selecting the Language for the Projector Menus
If you want to view the projector's menus and messages in another language,
an change the Language setting.
you c
Turn on the projector.
a
Press the [Menu] button on the control panel or remote control.
b
52
c
d
e
Select the M
Select the L
lect the language you want to use and press [Enter].
Se
anagement setting and press [Enter].
anguage setting and press [Enter].
Press [Menu] or [Esc] to exit the menus.
f
Page 53
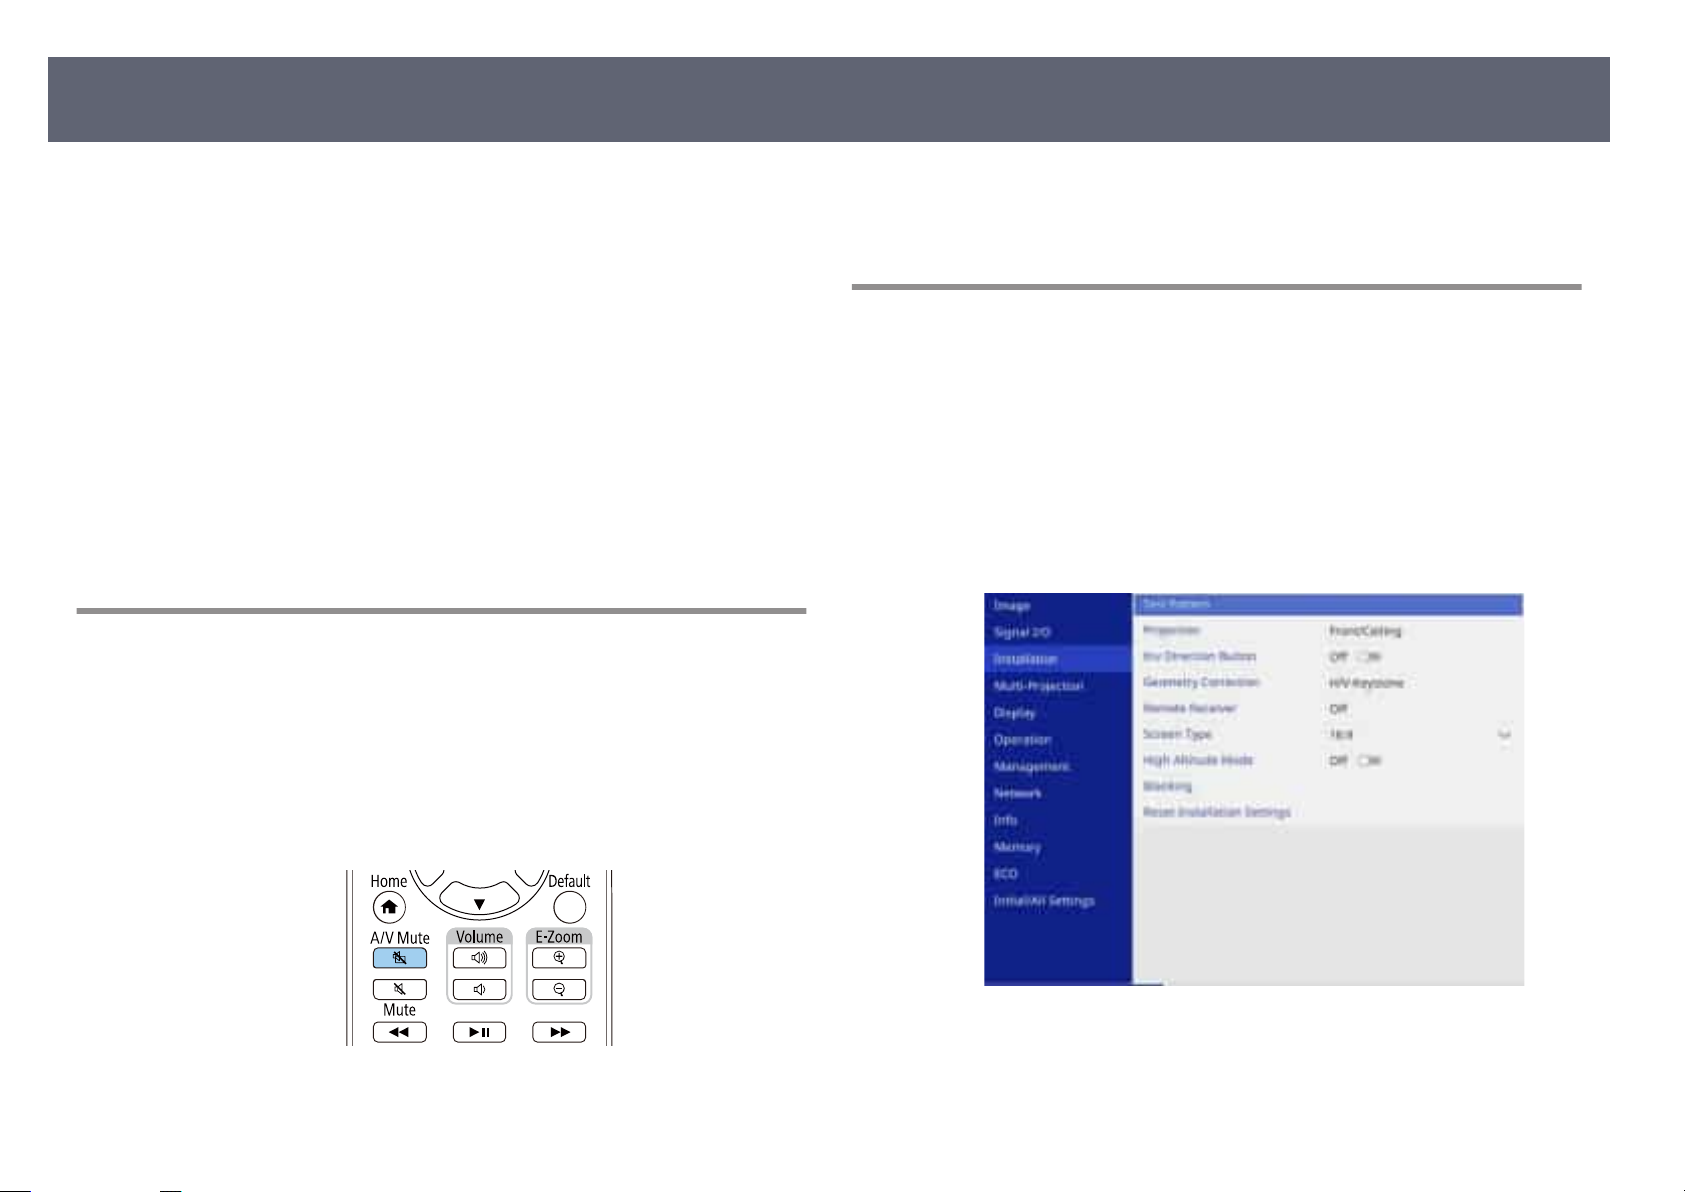
Projection Modes
53
Depending on how you positioned the projector, you may need to change the
jection mode so your images project correctly.
pro
•
Front lets you project from a table in front of the screen.
•
Front/Ceiling ips the image over top-to-bottom to project upside-down
from a ceiling or wall mount.
•
Rear ips the image horizontally to project from behind a translucent screen.
•
Rear/Ceiling ips the image over top-to-bottom and horizontally to project
from a ceiling or wall mount and behind a translucent screen.
Related Links
g
•
"Changing the Projection Mode Using the Remote Control" p.53
•
"Changing the Projection Mode Using the Menus" p.53
•
"Projector Setup and Installation Options" p.28
Changing the Projection Mode Using the Remote Control
You can change the projection mode to ip the image over top-to-bottom.
To c
c
hange projection back to the original mode, hold down the [A/V
e] button for 5 seconds again.
Mut
Changing the Projection Mode Using the Menus
You can change the projection mode to ip t
and/or le-to-right using the projector menus.
Turn on the projector and display an image.
a
Press the [Menu] button on the control panel or remote control.
b
c
Select the I
nstallation menu and press [Enter].
he image over top-to-bottom
Turn on the projector and display an image.
a
Hold down the [A/V Mute] button on the remote control for 5 seconds.
b
e image disappears briey and reappears ipped top-to-bottom.
Select Projection and press [Enter].
d
Page 54
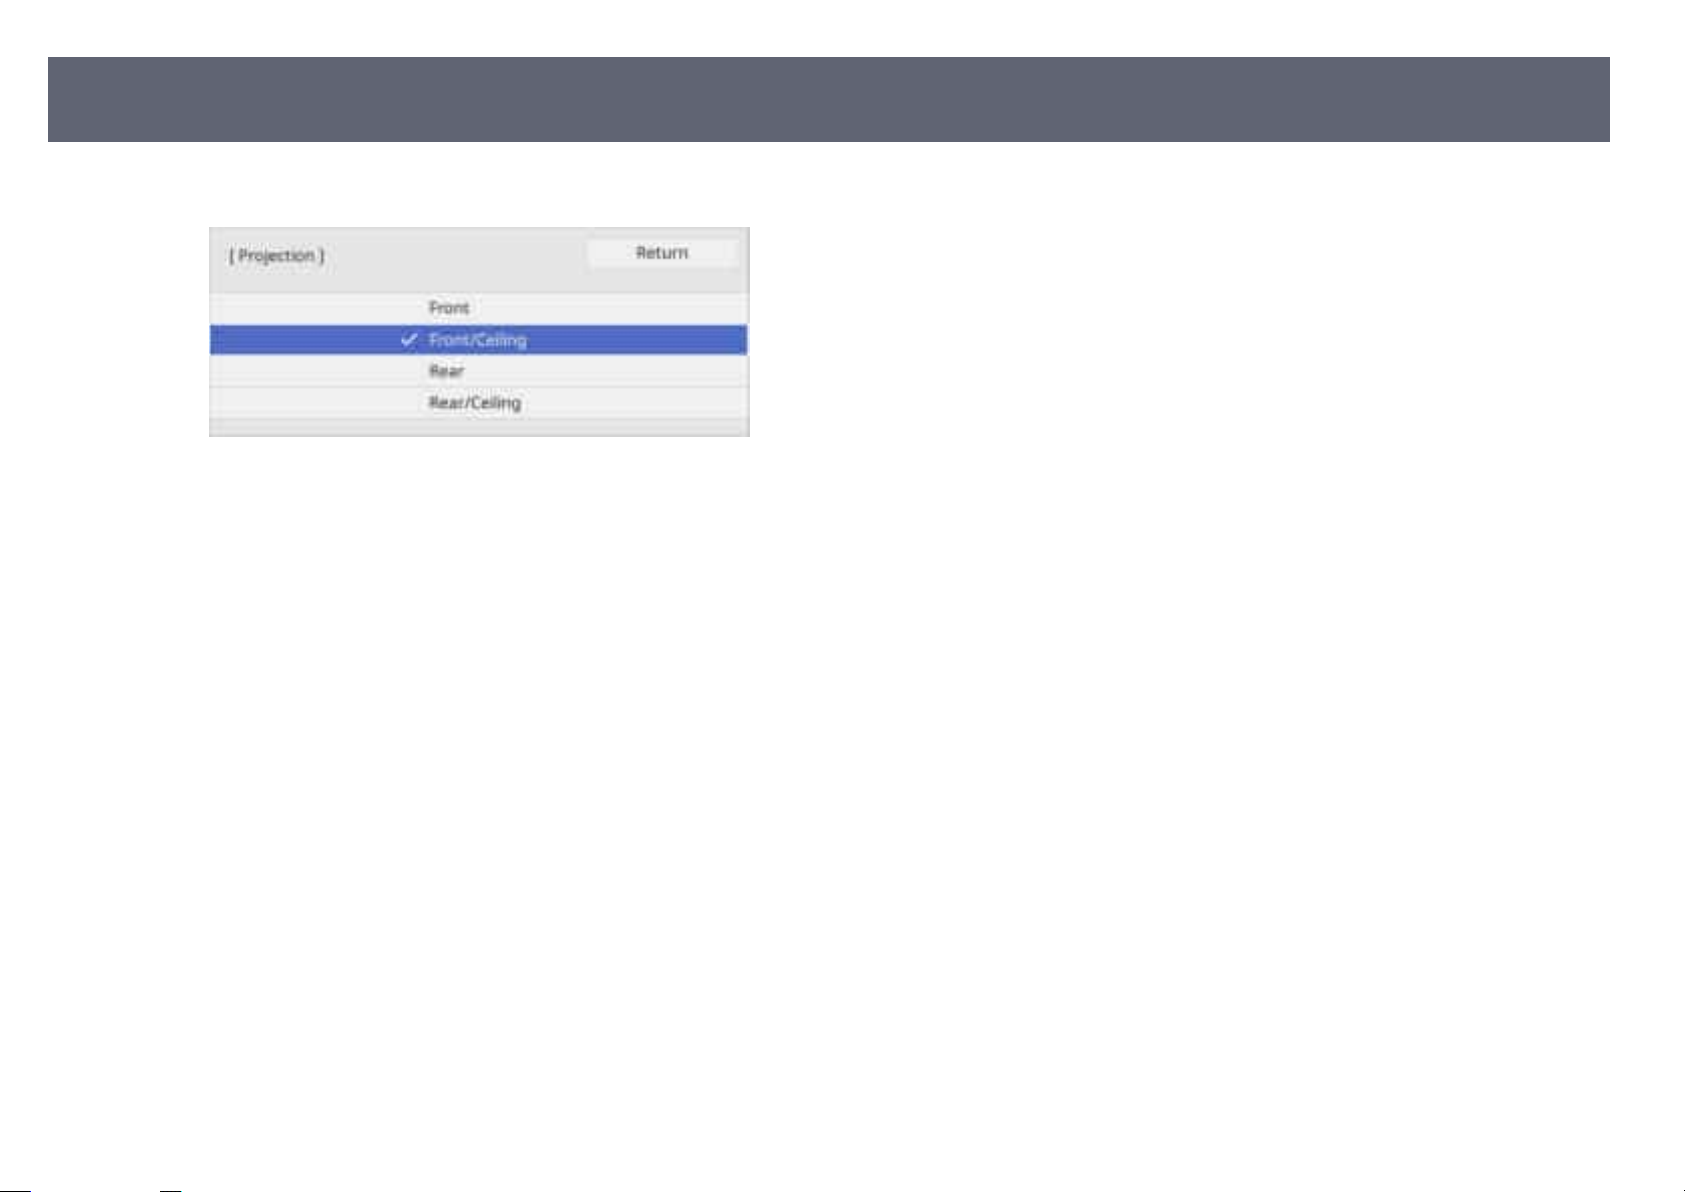
Projection Modes
Select a projection mode and press [Enter].
e
Press [Menu] or [Esc] to exit the menus.
f
54
Page 55
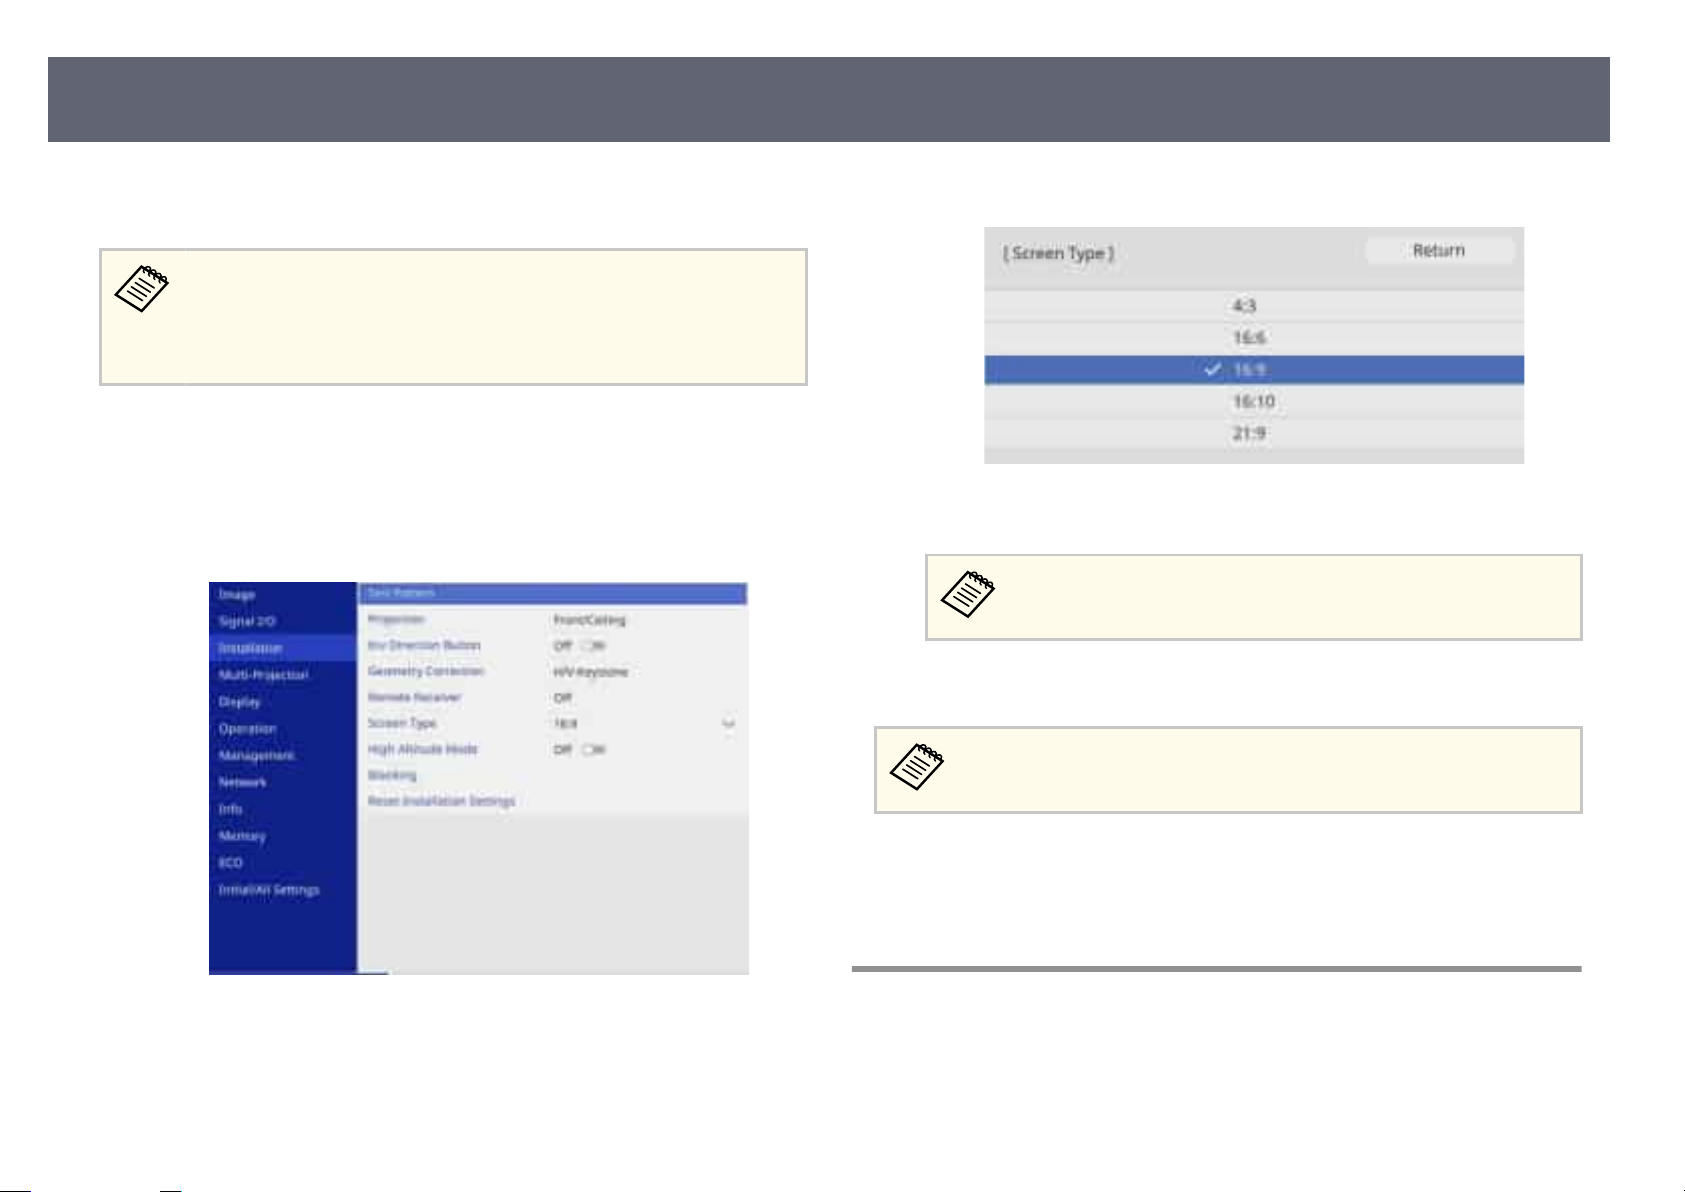
Setting the Screen Type
55
You can use the Scre
image to the screen you are using.
•
You c
Playback setting is set to On in the projector's Operation menu.
•
If you change the Screen Type setting, the Geometry Correction
settings are initialized.
Turn on the projector and display an image.
a
Press the [Menu] button on the control panel or remote control.
b
Select the I
c
en Type setting to match the aspect ratio of the displayed
annot change the Screen Type setting when the Content
nstallation menu and press [Enter].
Se
e
f
g
lect your screen's aspect ratio and press [Enter].
Press [Menu] to exit the menus.
You may need to restart the projector. Follow the on-screen
instructions.
Adjust the aspect ratio for the projected image, if necessary.
When the Screen Type setting changes, the EDID settings are
aut
omatically adjusted.
Select Screen Type and press [Enter].
d
Related Links
g
•
justing the Image Position Using Screen Position" p.55
"Ad
•
"Changing the Horizontal Position of the Image Using Screen Shi" p.56
Adjusting the Image Position Using Screen Position
You can adjust the image position if there are margins between the edge of the
image an
d the projected screen frame.
Page 56
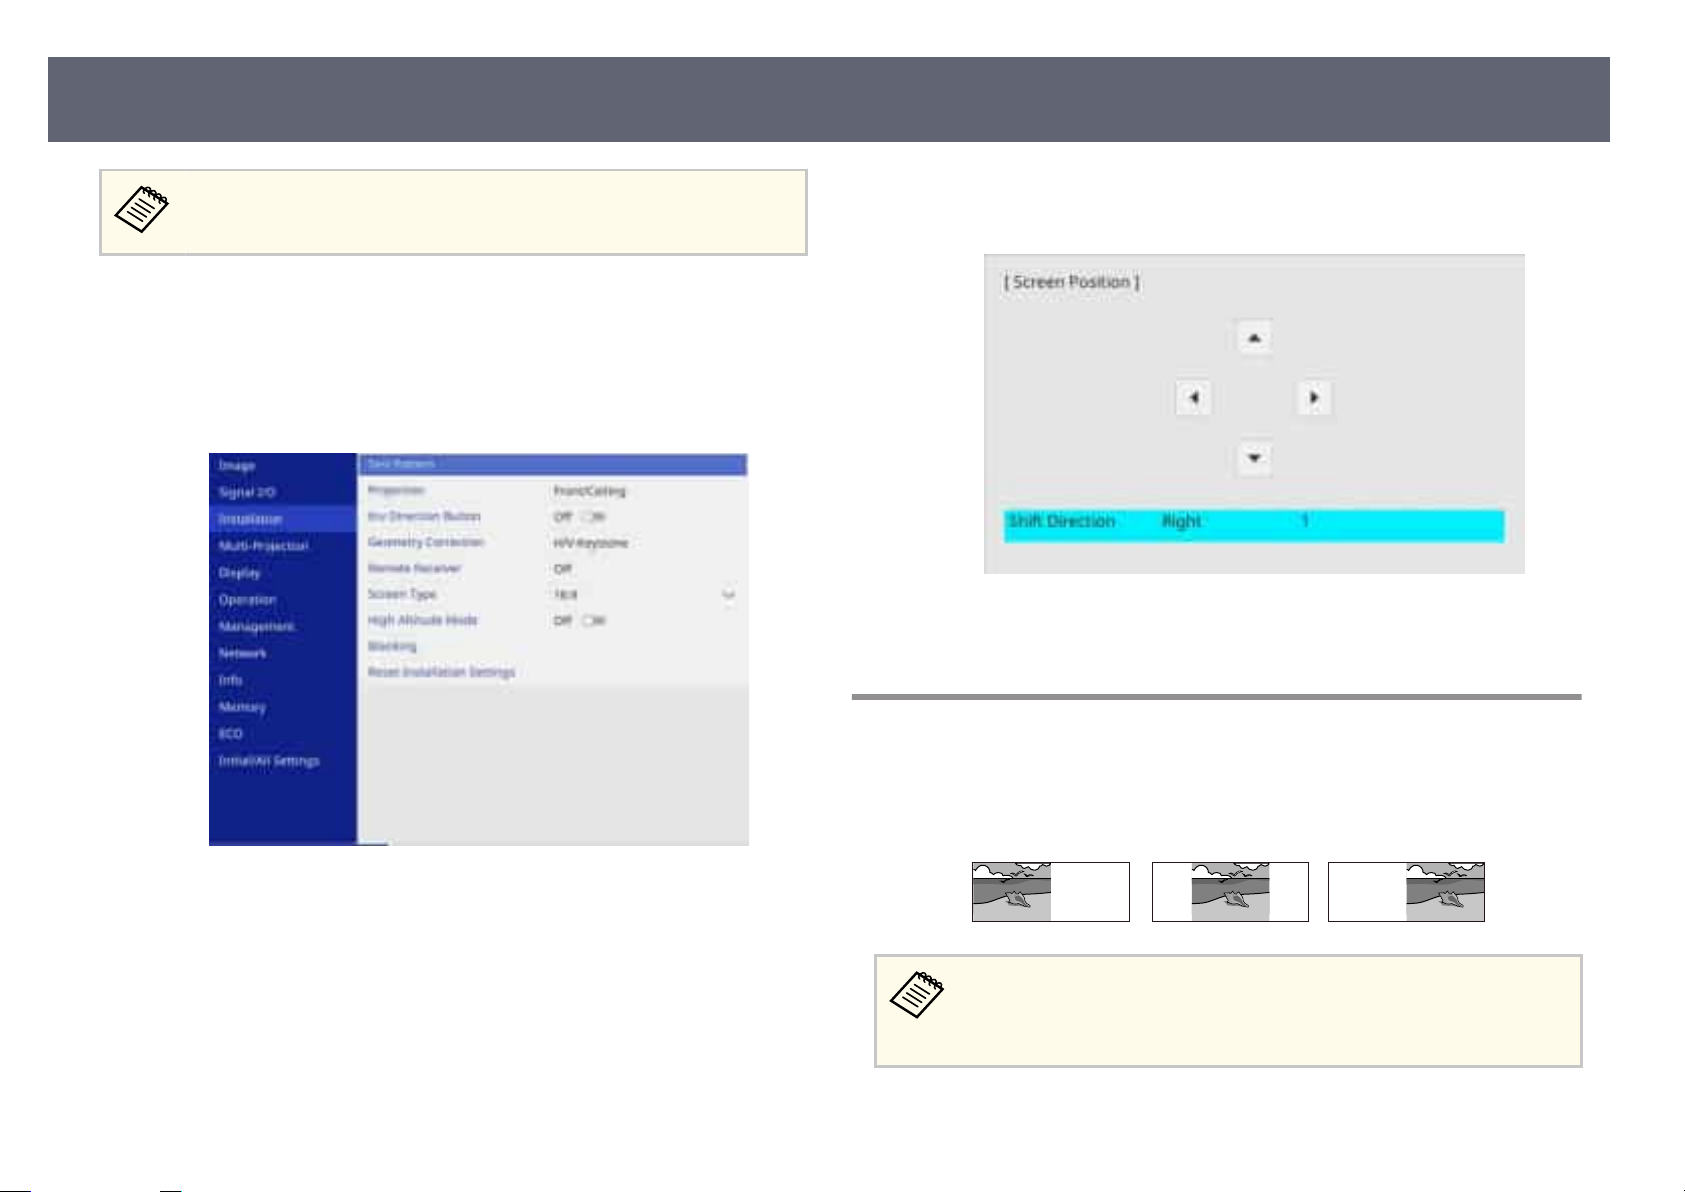
Setting the Screen Type
56
You cannot adjust the screen position if the Scre
16:10.
Turn on the projector and display an image.
a
Press the [Menu] button on the control panel or remote control.
b
c
Select the I
nstallation menu and press [Enter].
en Type setting is set to
Use the arrow buttons on the control panel or remote control to adjust the
e
posit
ion of the image.
When you are nish
f
ed, press [Menu].
Changing the Horizontal Position of the Image Using Screen Shift
d
Select S
creen Position, and press [Enter].
You can specify the horizontal position of the image inside the ultra-wide
display when the Screen Type is set to 16:6.
•
•
Turn on the projector and display an image.
a
able only when Aspect is set to Auto for the HDMI and HDBaseT
Avail
sources in the projector's Image menu.
Unavailable in the split screen projection.
Page 57
Setting the Screen Type
Press the [4], [5], or [6] button on the remote control.
b
Adjust the horizontal position of the projected image by pressing the
c
fol
lowing numeric buttons on the remote control:
•
[4] to project the image in the le position.
•
[5] to project the image in the center.
•
[6] to project the image in the right position.
e setting is saved until the projector is turned o.
57
When you are nish
d
ed, press [Esc].
Page 58
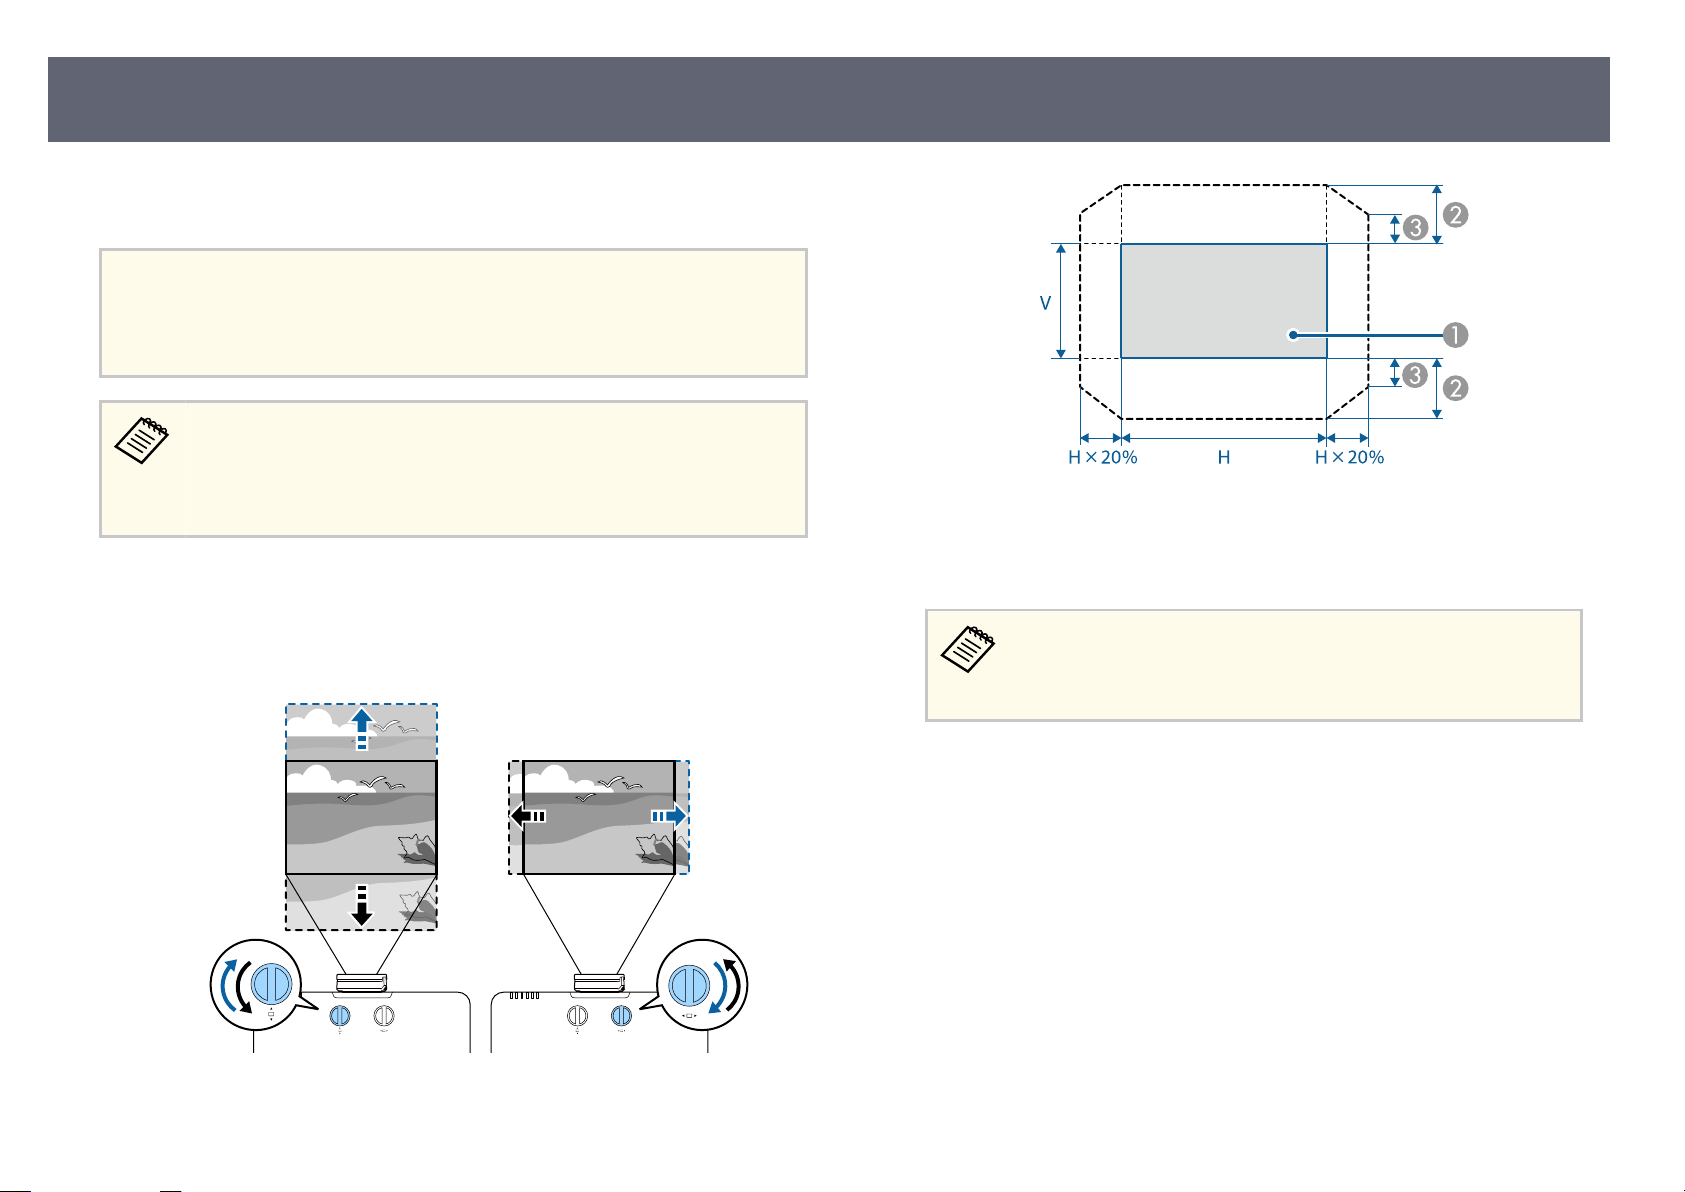
Adjusting the Image Position Using Lens Shift
If you cannot install the projector directly in front of the screen, you can adjust
osition of the projected image using the lens shi feature.
the p
Attention
When ad
the image from the bottom to the top. If you adjust it from the top to the bottom, the
image position may move down slightly aer adjusting.
justing the image position with the vertical lens shi, adjust it by moving
58
•
Wait 30 min
zoom, and lens shi for maximum accuracy.
•
Keep the vertical and horizontal lens shi dials in their center positions
of the lens shi adjustment range for the clearest picture.
Turn on the projector and display an image.
a
Turn the vertical and horizontal lens s
b
the position of the projected image as necessary.
utes aer turning on the projector before setting the focus,
hi di
als on the projector to adjust
Projected image at the center of the lens shi ad
A
Maximum range: V × 50%
B
When the horizontal direction is at the maximum value: V × 12%
C
•
You cannot move the image horizontally when the lens is shied
vertically all the way.
•
e lens shi adjustment range is an approximate value.
justment range
Page 59
Displaying a Test Pattern
59
You can display a test pattern to adjust the projected image without connecting
a comp
a
b
uter or video device.
•
e test p
sure to set the correct screen type before adjusting with the test pattern.
•
To set menu items that cannot be set while the test pattern is being
displayed or to ne-tune the projected image, project an image from
the connected device.
•
If you capture the projected image as a test pattern during Freeze, you
can use the captured image as one of the test patterns. e captured
image is not 4K enhanced image quality.
Turn on the projector.
Press the down arrow button on the control panel.
attern's shape is determined by the Screen Type setting. Be
Adjust the image as necessary.
d
To remove the test pattern, press [Esc].
e
A test pattern is displayed.
You can also display a test pattern from the projector's Instal
menu.
Press the le or rig
c
on the control panel to cycle through the available test patterns.
ht arrow button on the remote control, or press [Enter]
lation
Page 60
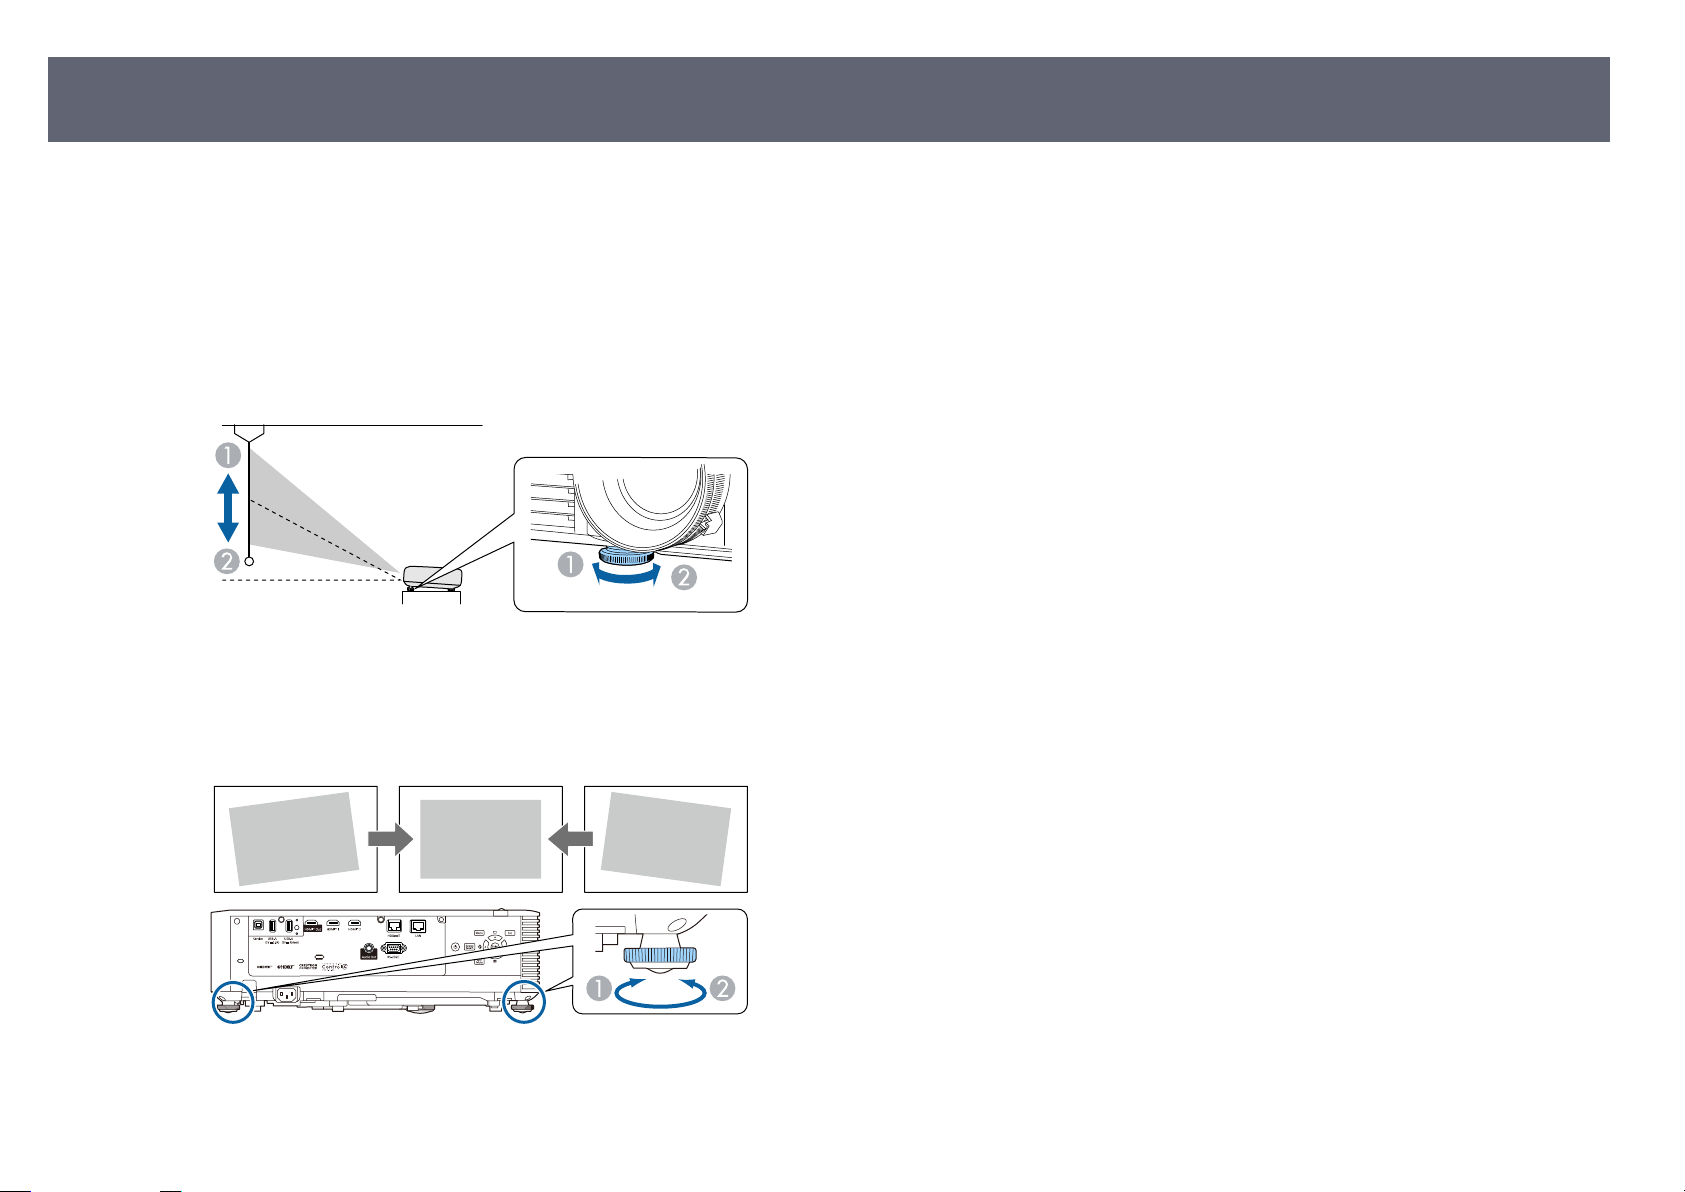
Adjusting the Image Height
If you are projecting from a table or other at surface an
or low, you can adjust the image height using the projector's adjustable feet.
e larger the angle of tilt, the harder it becomes to focus. Locate the projector
so that it only needs to be tilted at a small angle.
Turn on the projector and display an image.
a
To adjust the image height, rotate the front foot to extend or retract it.
b
Extend the front foot
A
Retract the front foot
B
d the image is too high
Retract the rear foot
B
If the projected image is unevenly rectangular, you need to adjust the image
e.
shap
Related Links
g
•
"Image Shape" p.61
60
If the image is tilted, rotate the rear feet to adjust their height.
c
Extend the rear foot
A
Page 61
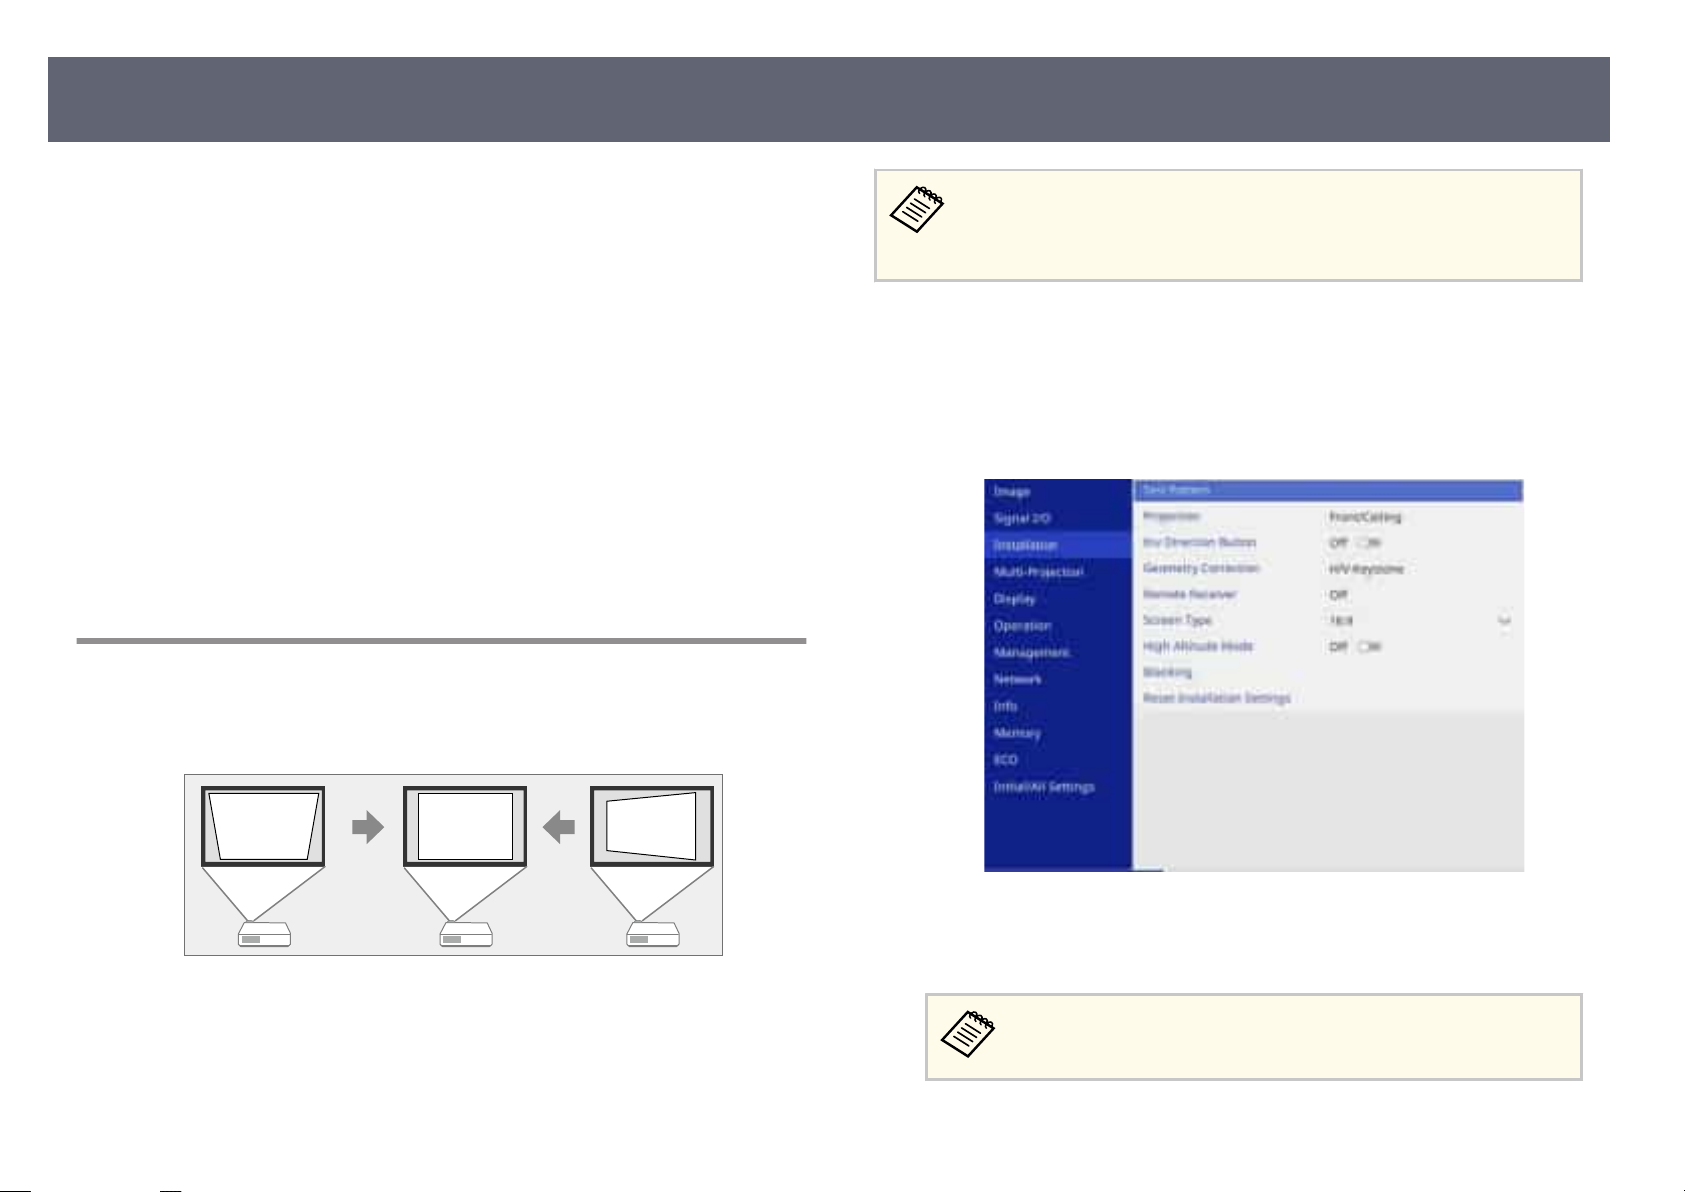
Image Shape
61
You can project an even, rectangular image by placing the projector directly in
nt of the center of the screen and keeping it level. If you place the projector at
fro
an angle to the screen, or tilt it up or down, or o to the side, you may need to
correct the image shape.
Aer correction, your image is slightly smaller.
For the best quality images, we recommend adjusting the installation position of
the projector to achieve the correct image size and shape.
Related Links
g
•
"Correcting Image Shape with H/V Keystone" p.61
•
"Correcting the Image Shape with Quick Corner" p.62
•
"Correcting Image Shape with Curved Surface Mode" p.65
•
" Correcting Image Shape with Corner Wall Mode " p.67
•
"Correcting Image Shape with Point Correction Mode" p.70
•
"Loading Image Shape Setting from Memory" p.73
Correcting Image Shape with H/V Keystone
You can use the projector's H/V-Keystone setting to correct the shape of an
image that is unevenly rectangular on the sides.
•
If yo
u need to change the Screen Type and Screen Position settings,
change them rst.
•
You cannot combine with other correction methods.
Turn on the projector and display an image.
a
Press the [Menu] button on the control panel or remote control.
b
c
Select the I
nstallation menu and press [Enter].
You can correct images up to 30º right, le, up, o
(EB-L890E/EB-L895E/EB-L790SE/EB-L795SE/EB-L695SE/EB-L690E/EBL890U/EB-L895U/EB-L790U/EB-L790SU/EB-L690U/EB-L690SU/EB-L695SU)
You can correct images up to 25° right, le, up, or down. (EB-L690SE)
r down.
Select Geometry Correction and press [Enter].
d
e
Geometry Correction screen is displayed.
You can also access the Geometry Correction screen by pressing
the up arrow button on the control panel.
Page 62
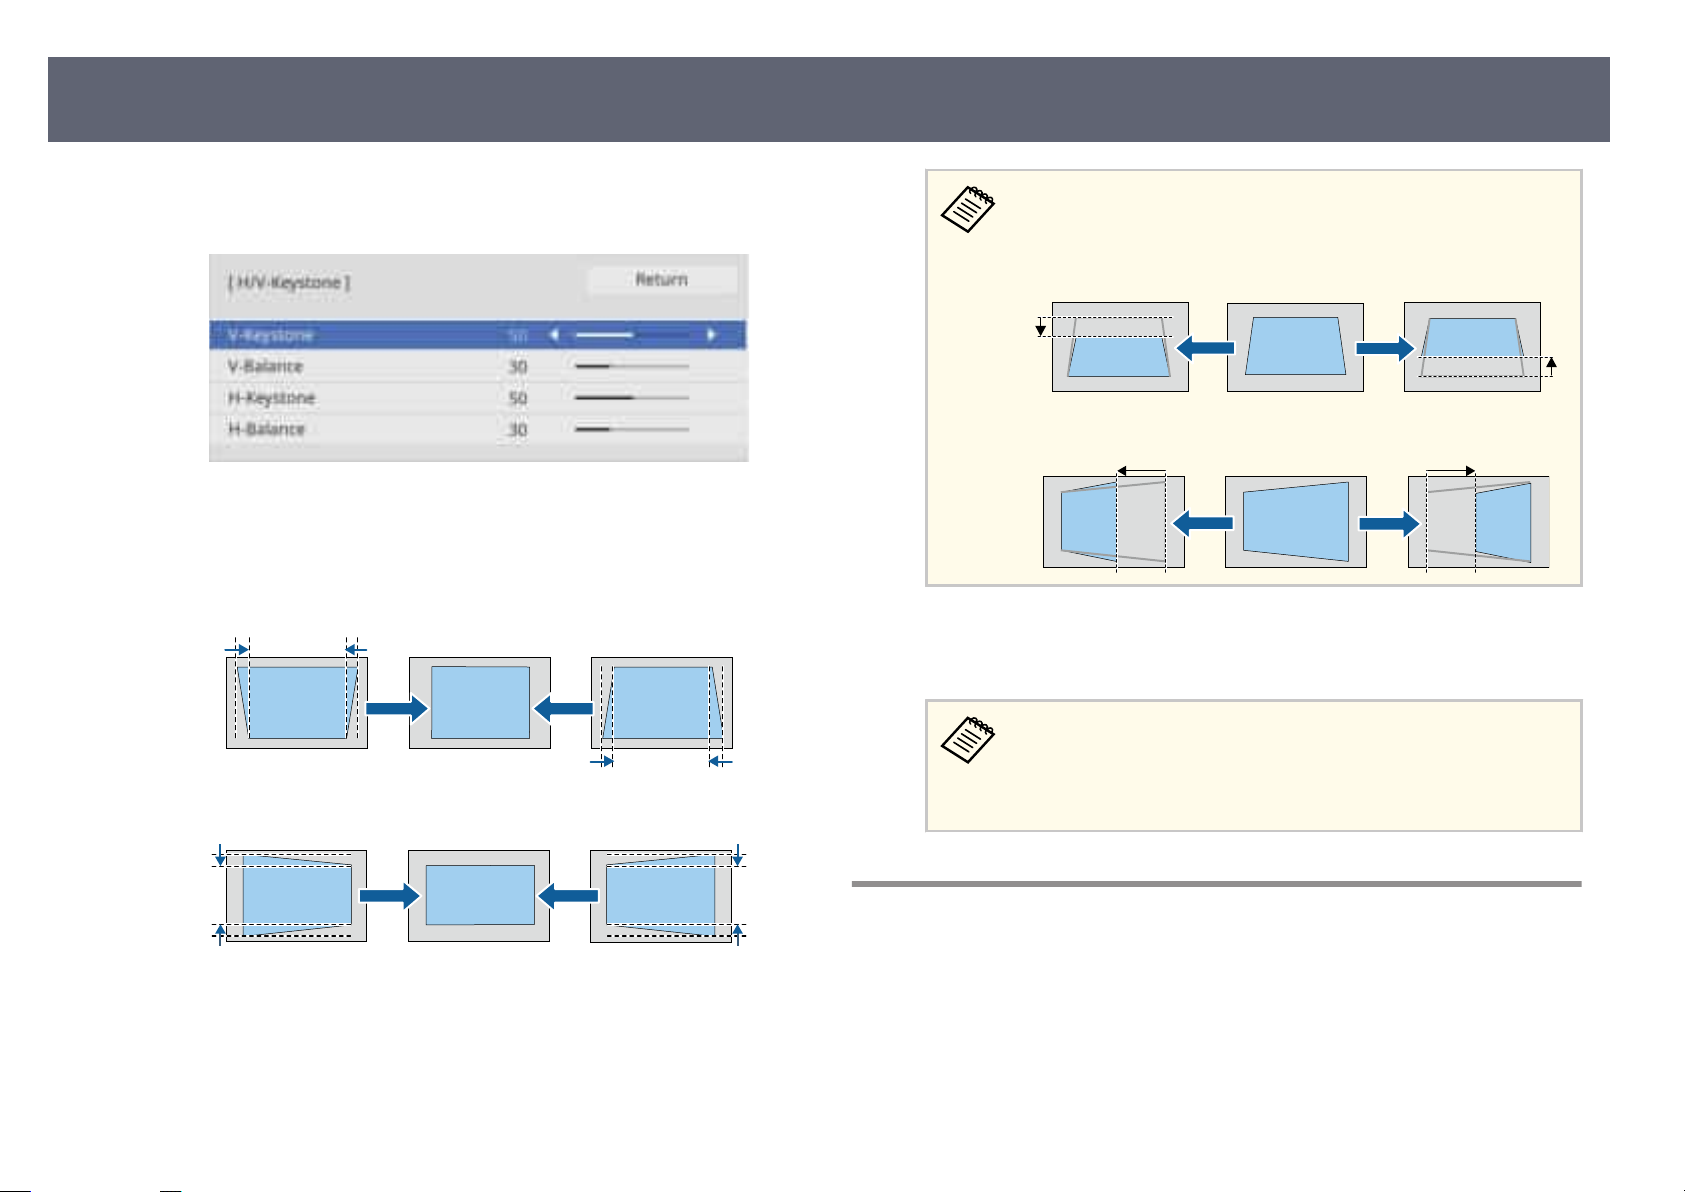
Image Shape
62
Select H/V-Keystone and press [Enter]. Select Yes if necessary.
e
You see the H/V-Keystone adjustment screen:
Use the arrow buttons on the projector or the remote control to select
f
betw
een vertical and horizontal keystone correction and to adjust the
image shape as necessary.
•
V-Keystone
•
H-Key
stone
If you have adjusted the position of the projected image by using the
lens s
hi feature, adjust the V-Balance and H-Balance settings as
necessary.
•
V-Balance
•
H-Balance
When you are nish
g
Aer correction, your image is slightly smaller.
To save the current shape of an image you have adjusted, select Save
emory. You can save up to three image shapes in the memory.
M
s Installation > Geometry Correction > Memory > Save
Memory
ed, press [Esc].
Correcting the Image Shape with Quick Corner
You can use the projector's Quick Corner setting to correct the shape and size
of an image that is unevenly rectangular.
Page 63
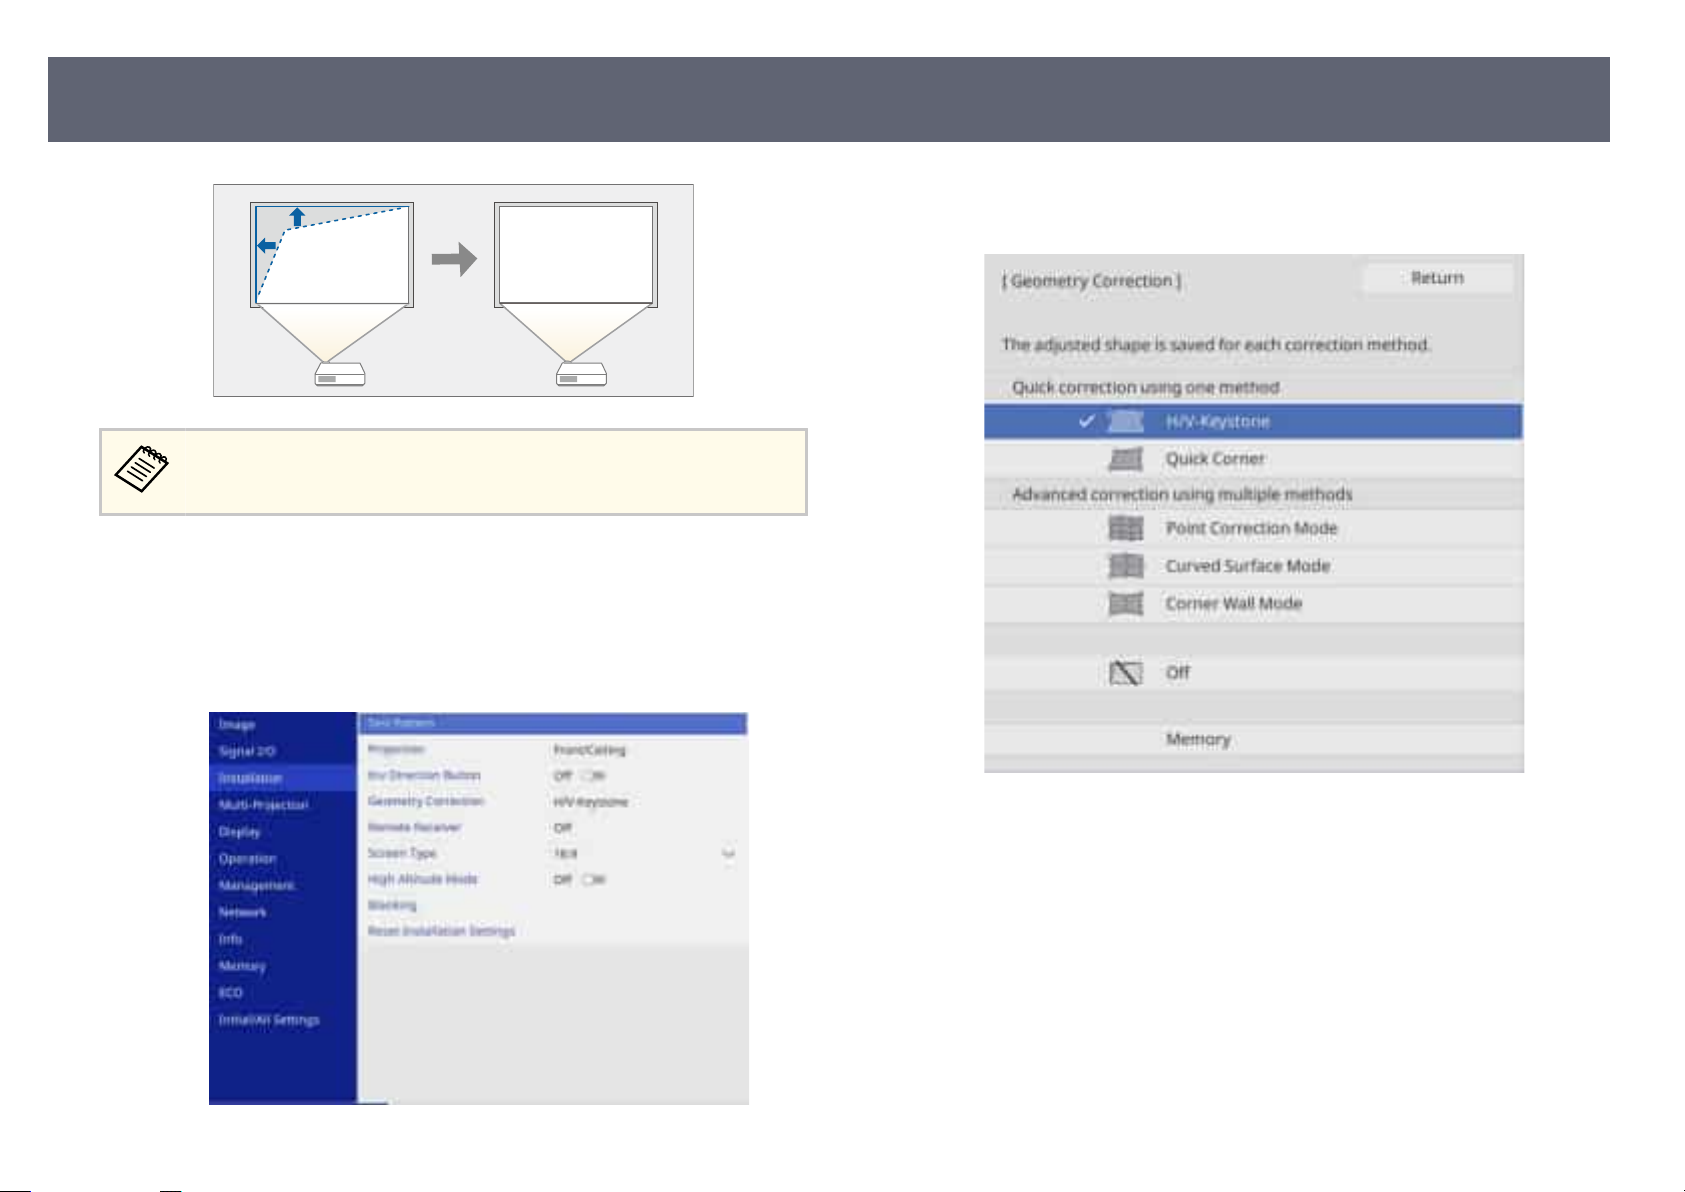
Image Shape
Select Geometry Correction and press [Enter].
d
Yo
u see the Geometry Correction screen.
63
If you change the Scre
adjustments are reset.
Turn on the projector and display an image.
a
Press the [Menu] button on the control panel or remote control.
b
c
Select the I
nstallation menu and press [Enter].
en Type and Screen Position settings, the
Select Quick Corner and press [Enter]. Select Yes if necessary.
e
Yo
u see the area selection screen.
Page 64
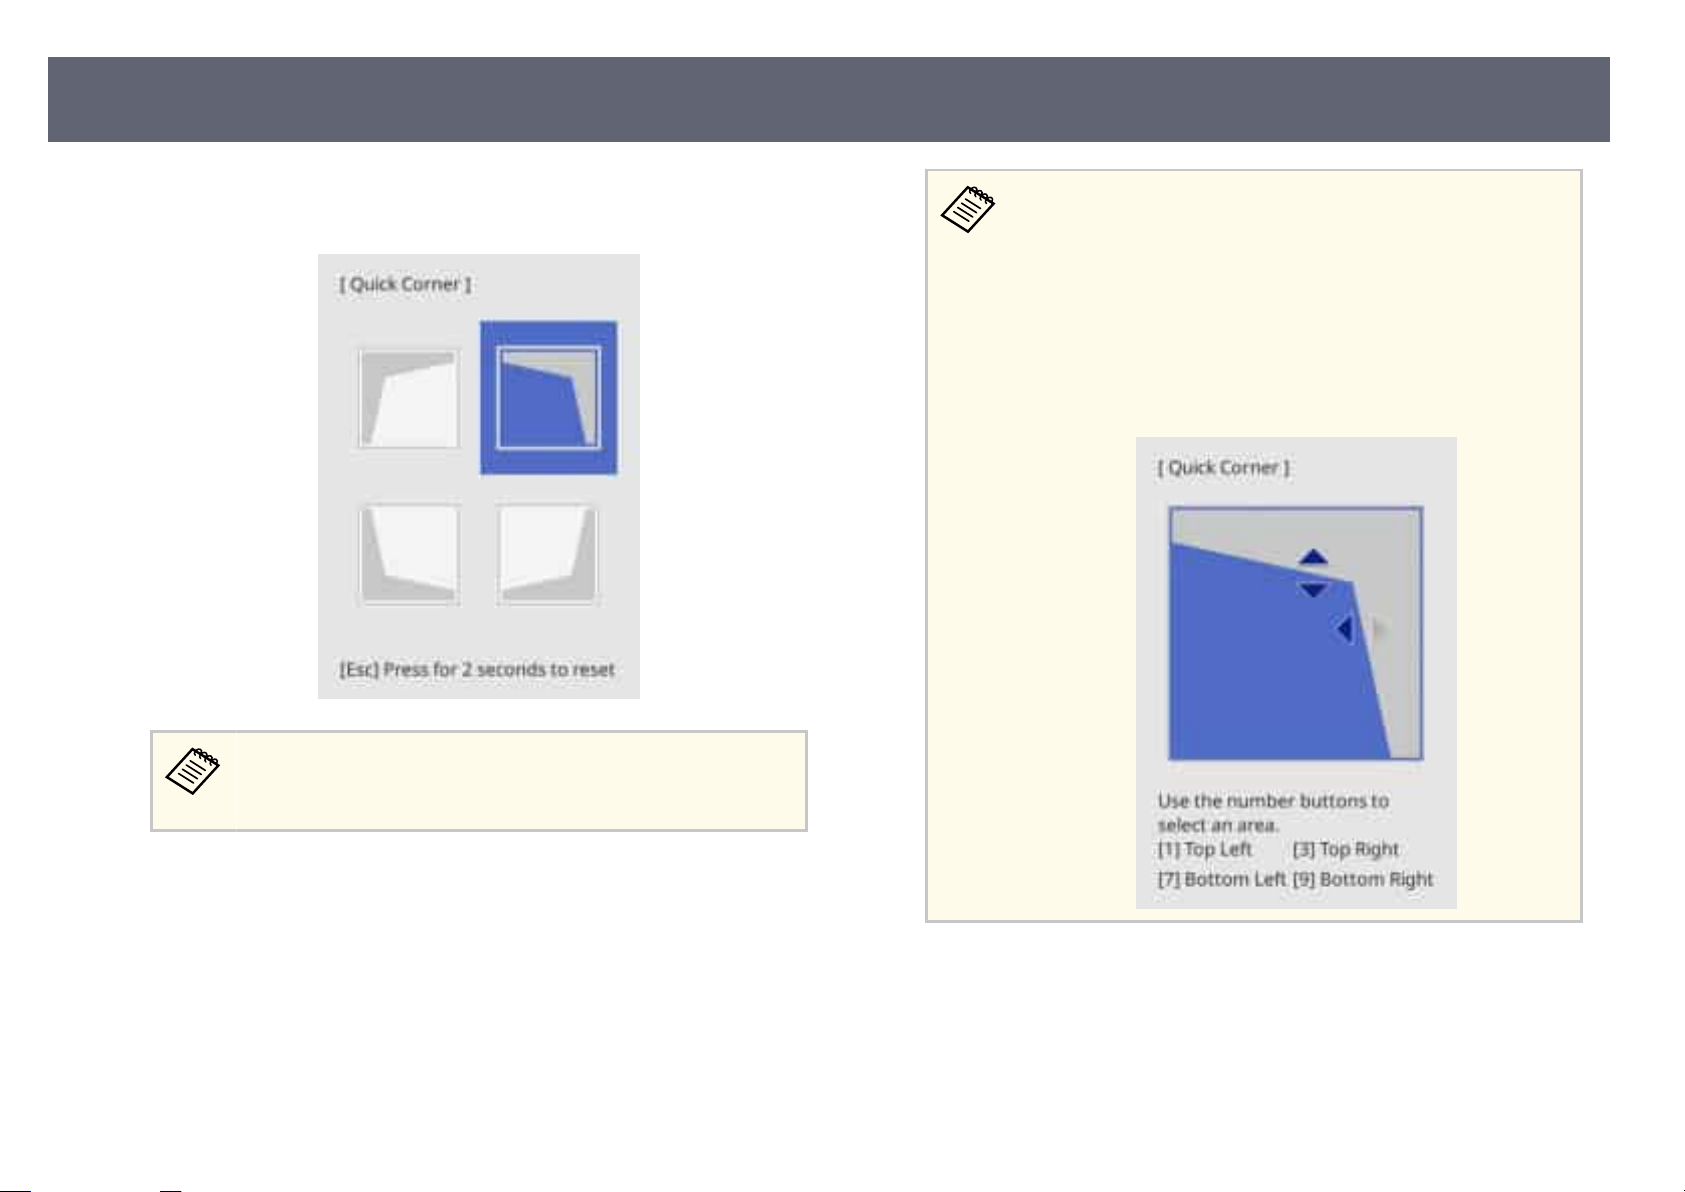
Image Shape
64
Use the arrow buttons to select the area of the image you want to adjust.
f
en press [Enter].
To reset the Quick C
seconds while the area selection screen is displayed, and then select
Yes.
orner corrections, hold down [Esc] for about 2
•
You c
an also select the area by pressing the following numeric
buttons on the remote control:
•
[1] selects the upper le area.
•
[3] selects the upper right area.
•
[7] selects the lower le area.
•
[9] selects the lower right area.
•
If you see this screen, you cannot adjust the shape any further in
the direction indicated by the gray triangle.
Press the arrow buttons to adjust the image shape as necessary.
g
T
urn to the area selection screen, press [Enter].
o ret
Repeat steps 6 and 7 as needed to adjust any remaining corners.
h
When you are ni
i
e Geometry Correction setting is now set to Quick Corner in the projector's
Installation menu.
ed, press [Esc].
sh
Page 65
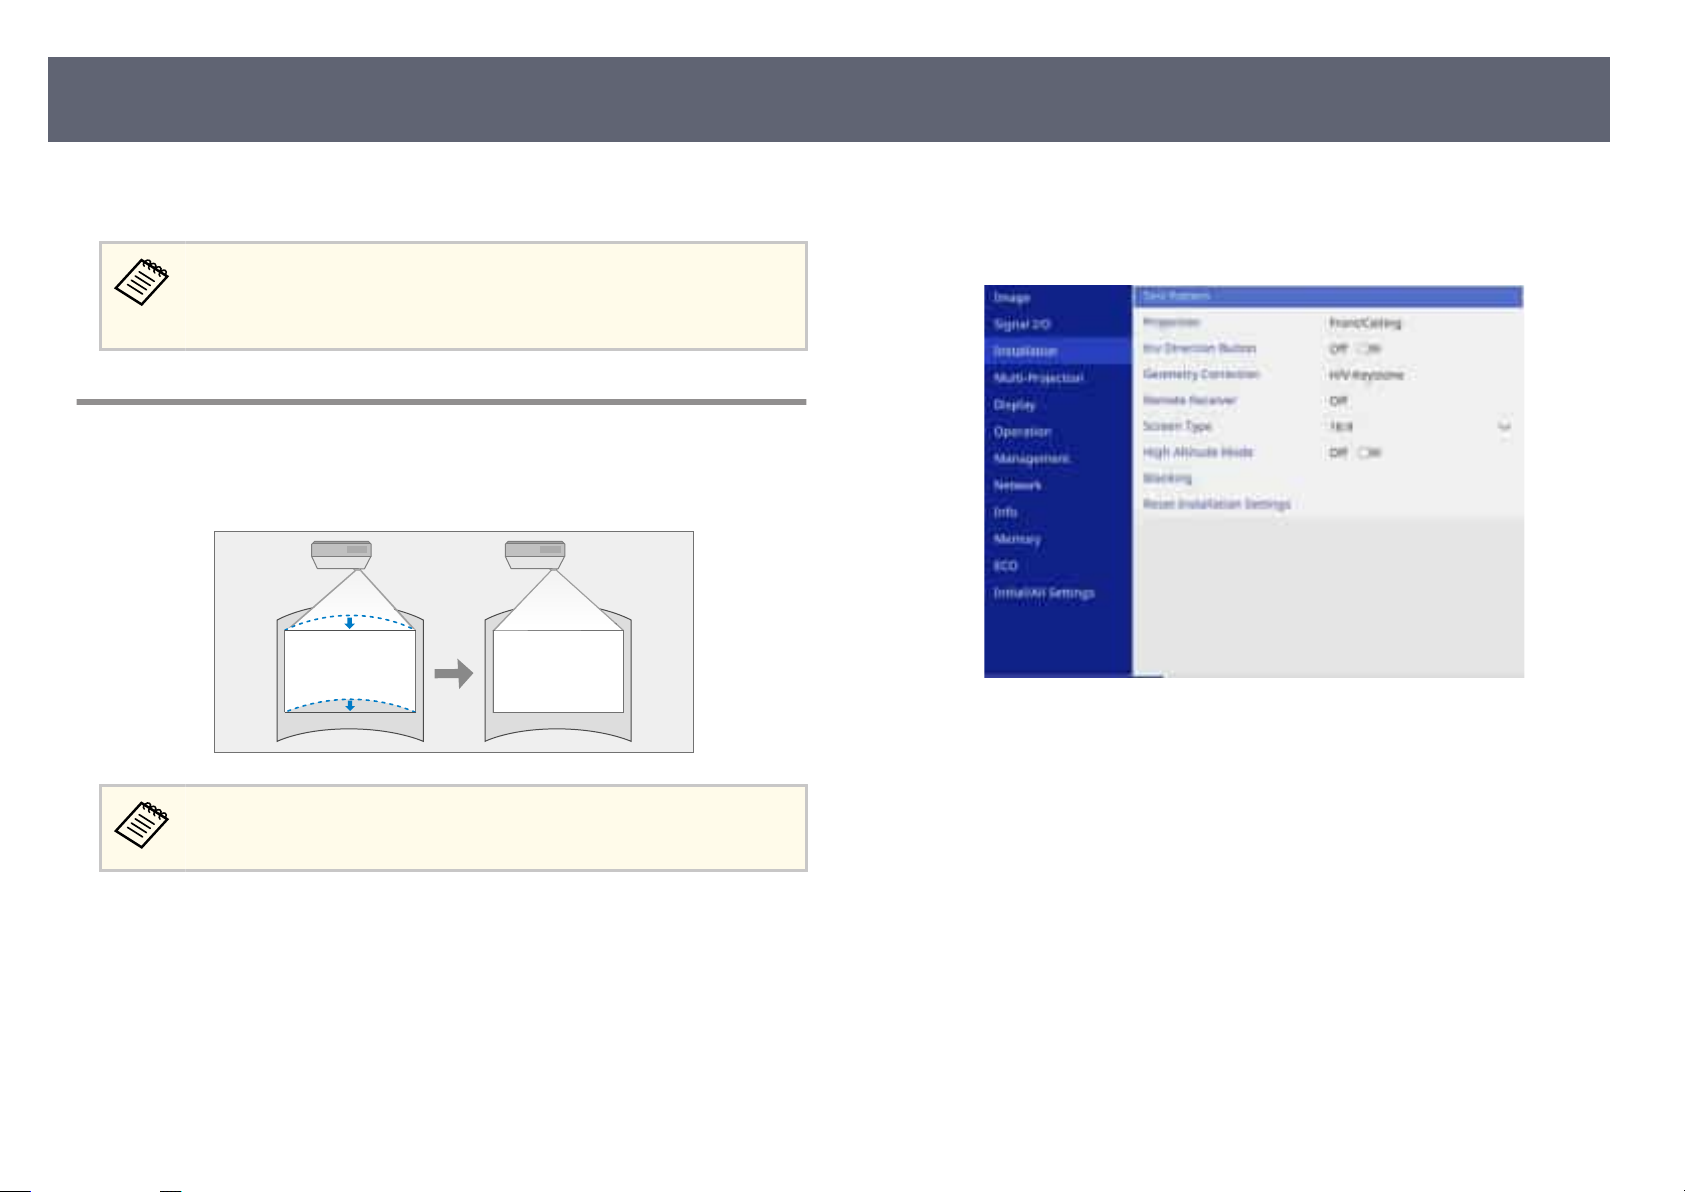
Image Shape
65
e next time you press the up arrow button on the control panel, the area
lection screen is displayed.
se
To save the current shape of an image you have adjusted, select Save
M
emory. You can save up to three image shapes in the memory.
s Installation > Geometry Correction > Memory > Save Memory
Correcting Image Shape with Curved Surface Mode
You can use the projector's Curved Surface setting to adjust the shape of an
image p
rojected on a curved or spherical surface.
Press the [Menu] button on the control panel or remote control.
b
c
d
Select the I
Select G
u see the Geometry Correction screen.
Yo
nstallation menu and press [Enter].
eometry Correction and press [Enter].
If you change the Scre
adjustments are reset.
Turn on the projector and display an image.
a
en Type and Screen Position settings, the
Page 66
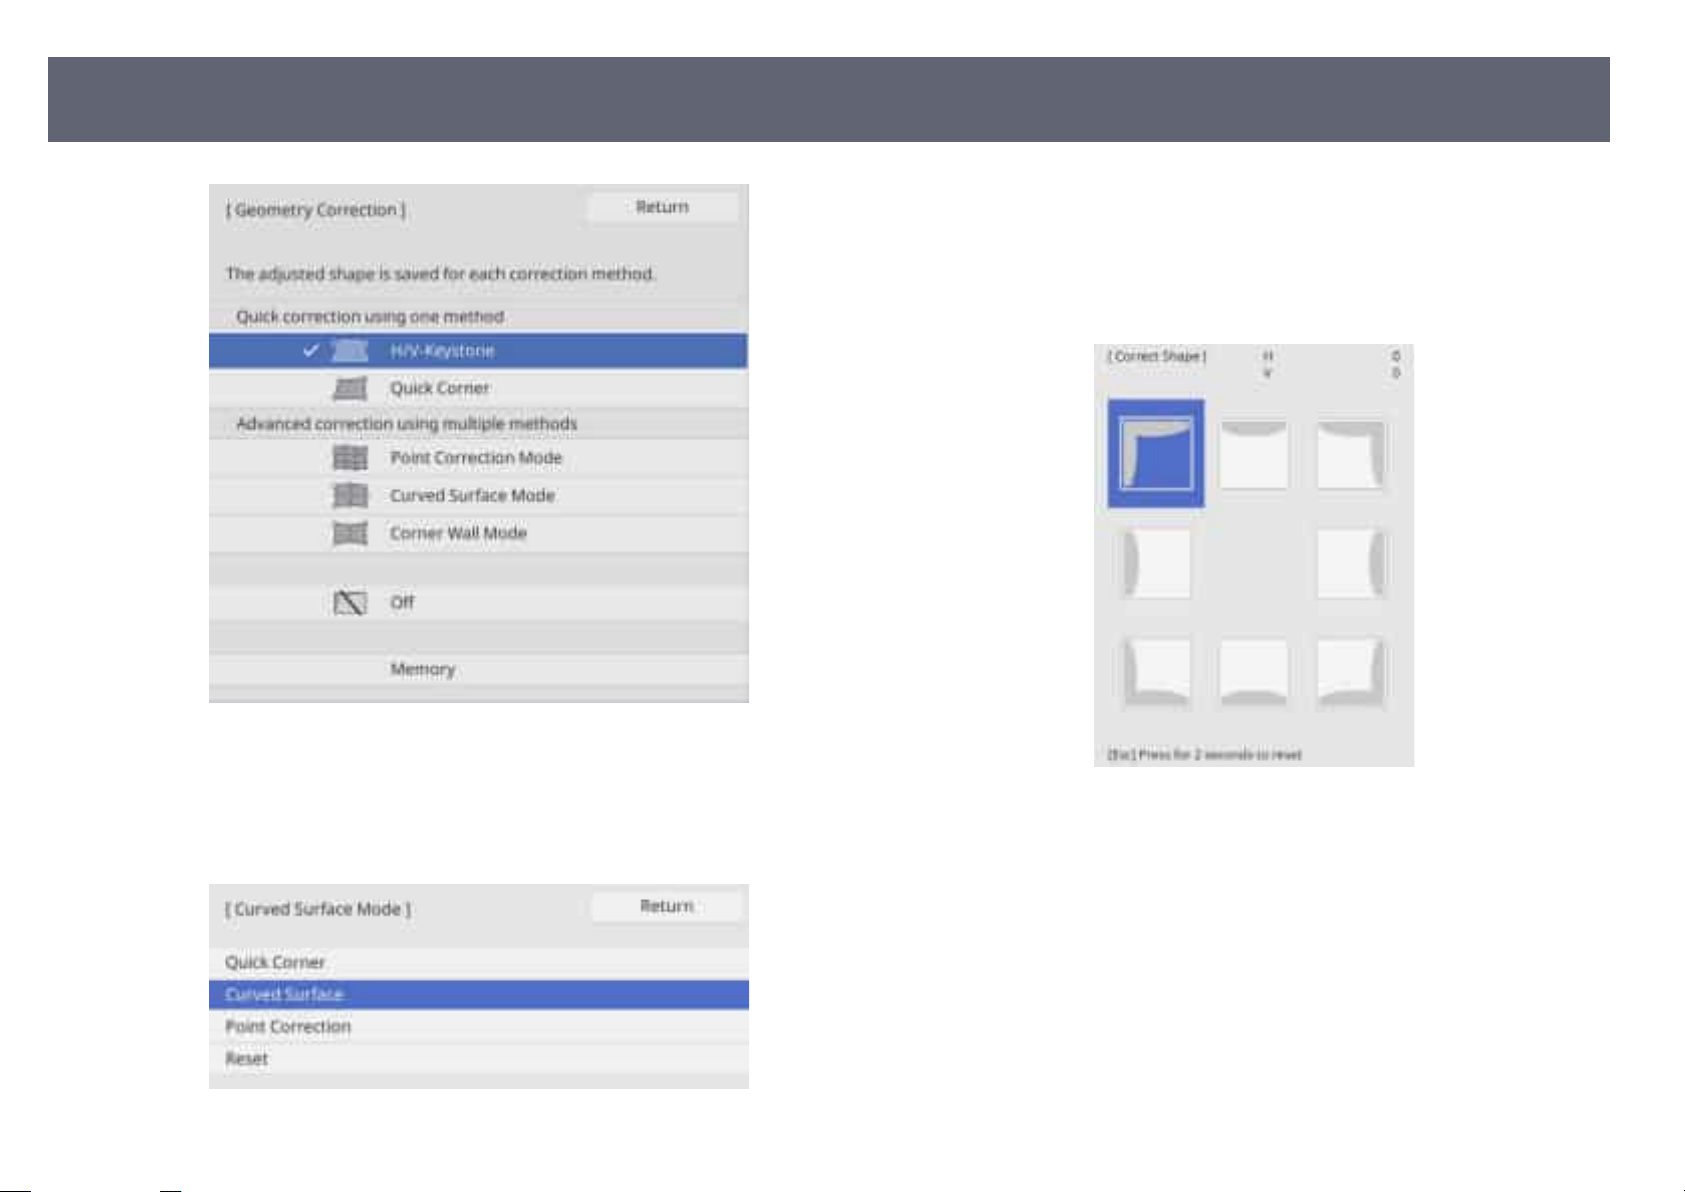
Image Shape
Select Correct Shape and press [Enter].
g
You see the area selection screen.
Use the arrow buttons to select the area of the image you want to adjust,
h
then p
ress [Enter].
66
Select Curved Surface Mode and press [Enter]. Select Yes if necessary.
e
You see the Curved Surface Mode screen.
Select Curved Surface and press [Enter].
f
Press the arrow buttons to adjust the image shape of the selected area as
i
n
sary.
eces
To return to the area selection screen, press [Esc].
Page 67
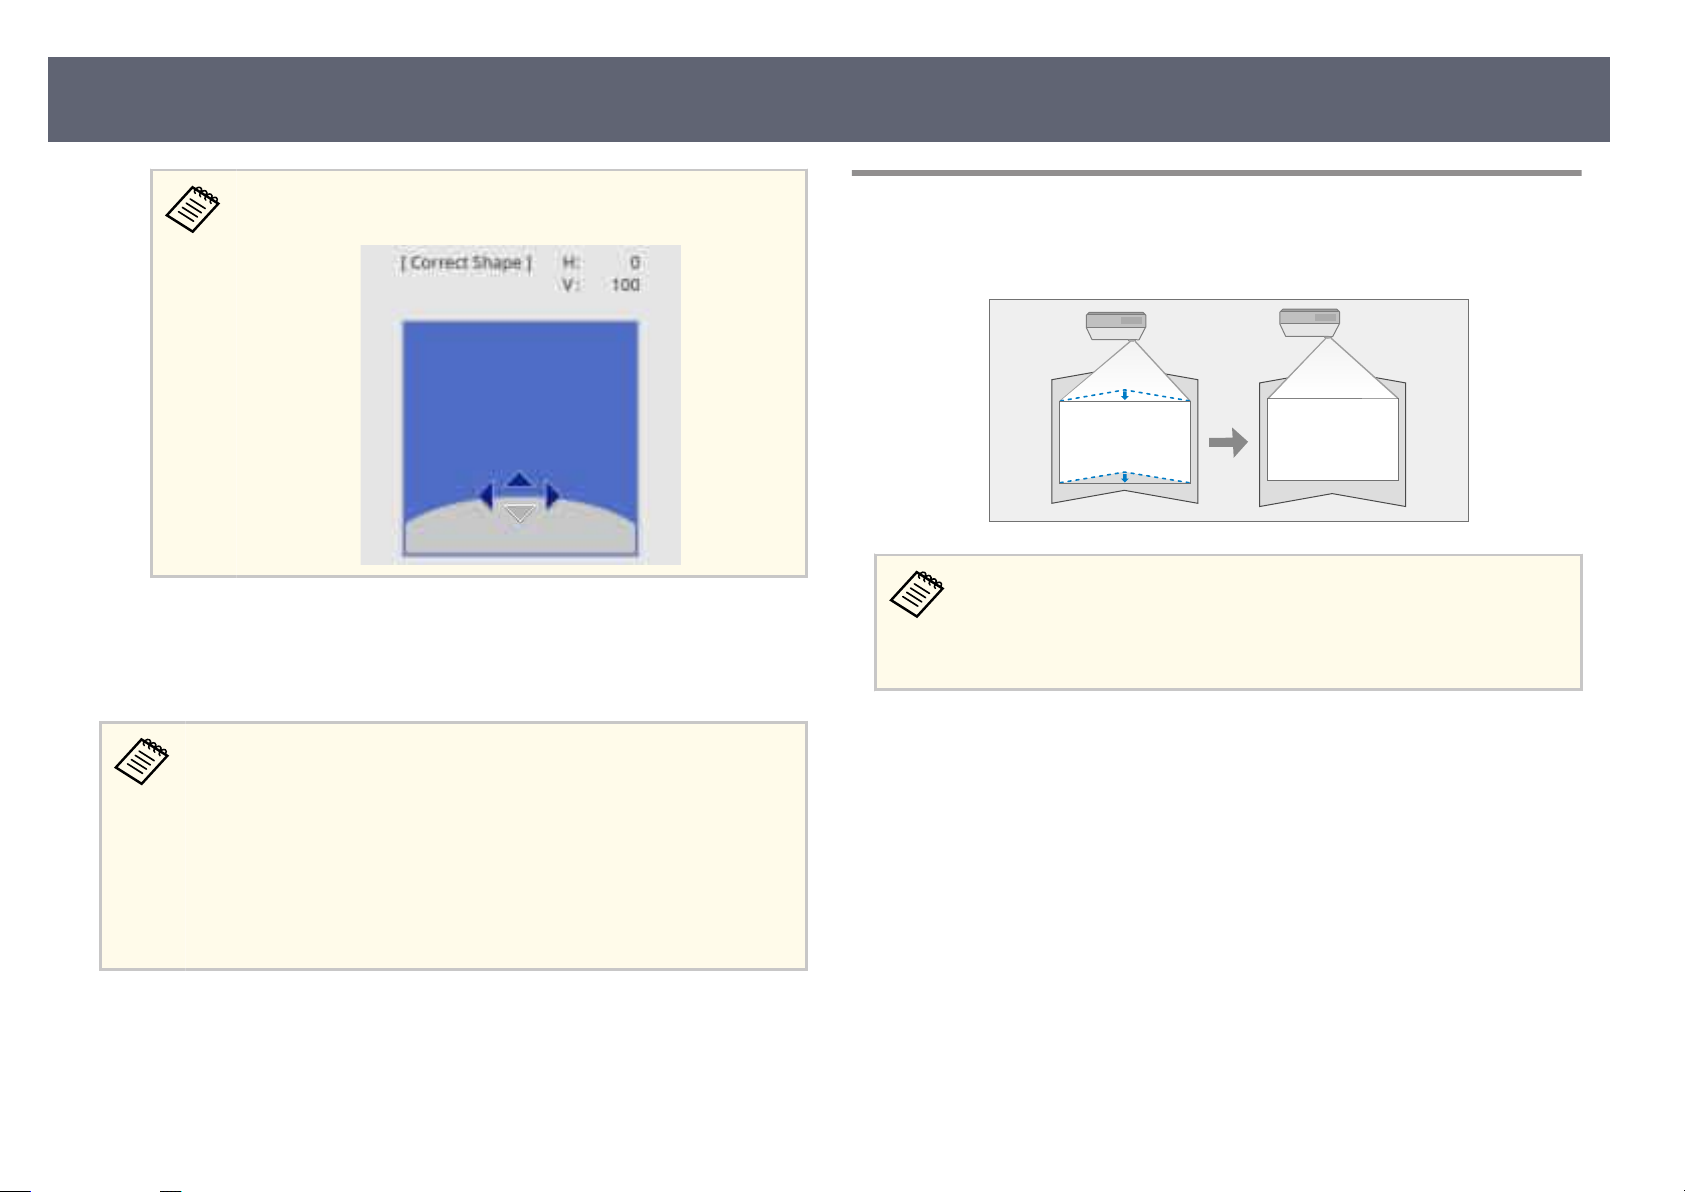
Image Shape
67
If you see this screen, you cannot adjust the shape any further in the
direc
tion indicated by the gray triangle.
Repeat steps 8 and 9 as needed to adjust any remaining corners.
j
When you are nish
k
•
•
•
You can ne tune the corrected results. Use Quick Corner to adjust the
tilt of the image, and then use Point Correction for ne tuning. Select
Quick Corner or Point Correction on the screen in step 6.
To save the current shape of an image you have adjusted, select Save
Memory. You can save up to three image shapes in the memory.
s Installation > Geometry Correction > Memory > Save Memory
To reset the Curved Surface settings, hold down [Esc] for about 2
seconds while the area selection screen is displayed, and then select Yes.
ed, press [Esc].
Correcting Image Shape with Corner Wall Mode
You can use the projector's Corner Wall setting to correct the corners and sides
of an imag
a
e projected on a curved surface with right angles.
•
If yo
u change the Screen Type and Screen Position settings, the
adjustments are reset.
•
We recommend you adjust the image shape based on the point nearest
to the center of the screen.
Turn on the projector and display an image.
Related Links
g
•
rrecting the Image Shape with Quick Corner" p.62
"Co
•
"Correcting Image Shape with Point Correction Mode" p.70
Page 68
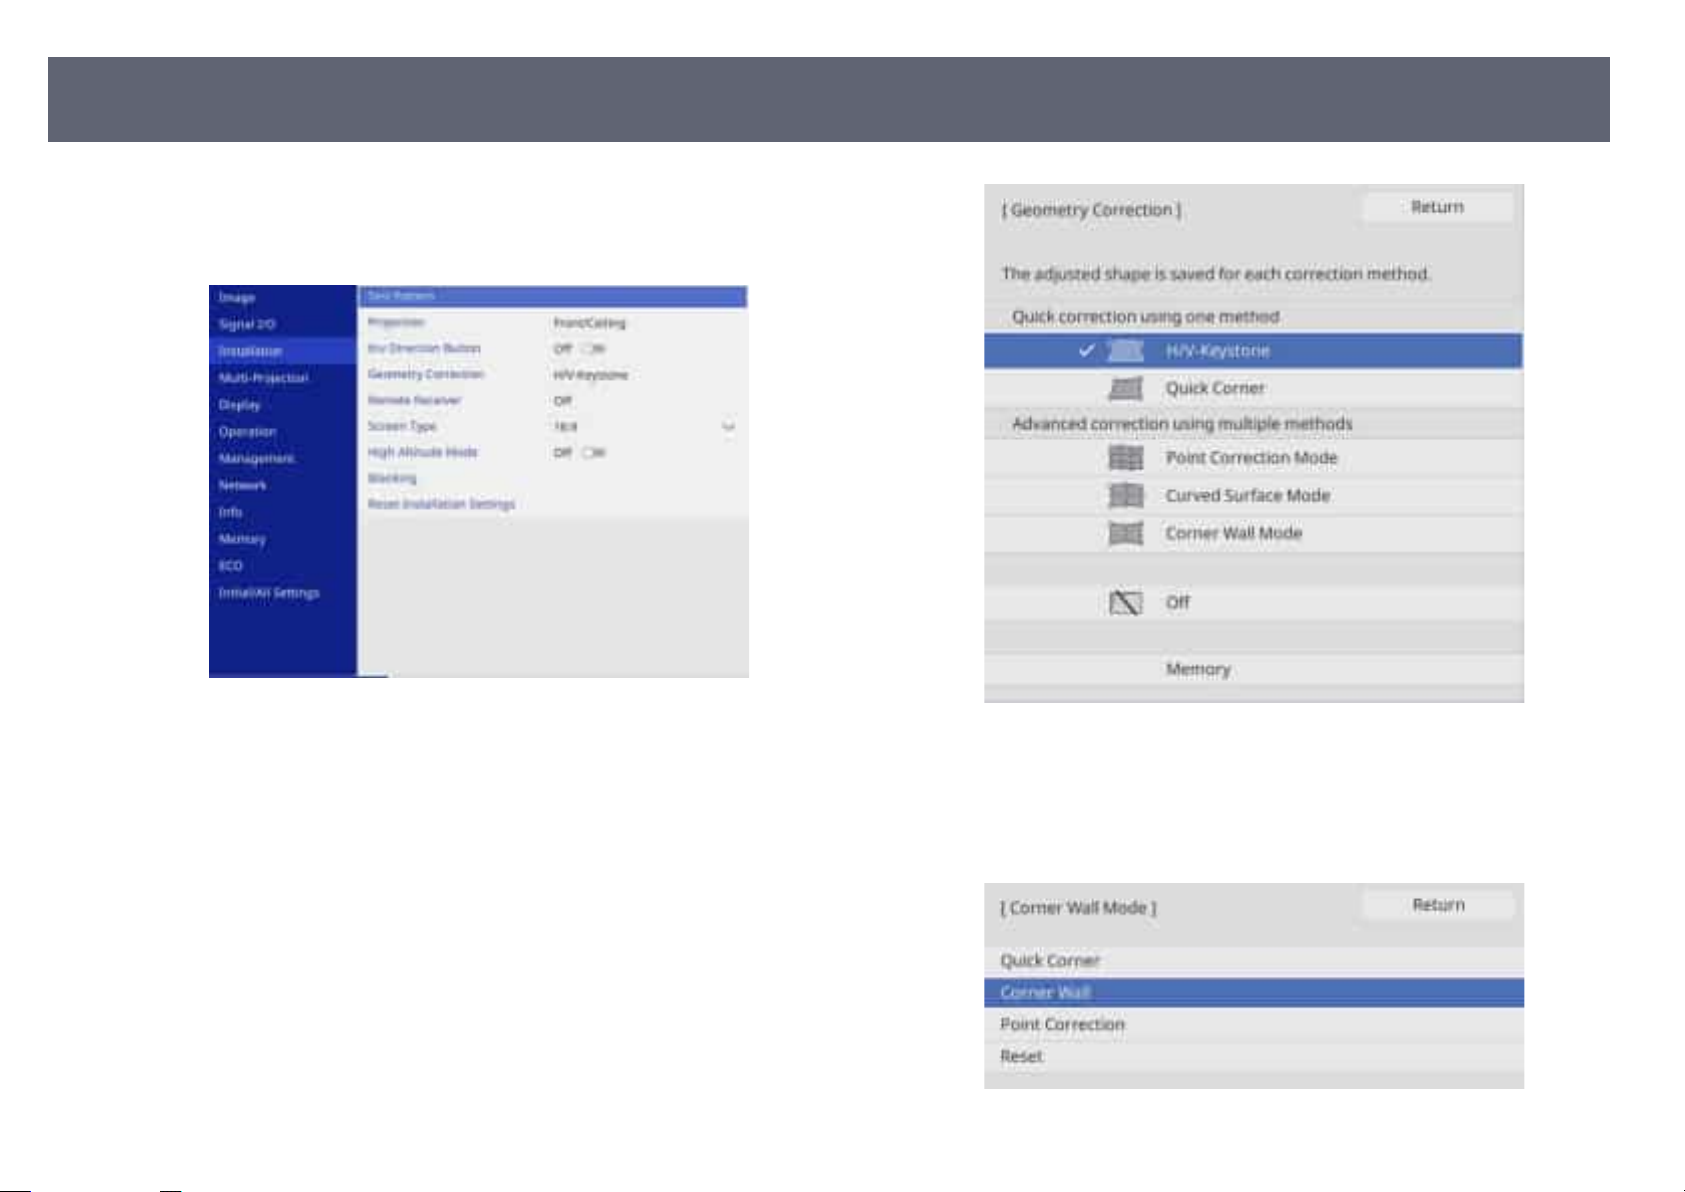
Image Shape
Press the [Menu] button on the control panel or remote control.
b
68
c
d
Select the I
Select G
u see the Geometry Correction screen.
Yo
nstallation menu and press [Enter].
eometry Correction and press [Enter].
Select Corner Wall Mode and press [Enter]. Select Yes if necessary.
e
u see the Corner Wall Mode screen.
Yo
Select Corner Wall and press [Enter].
f
Page 69
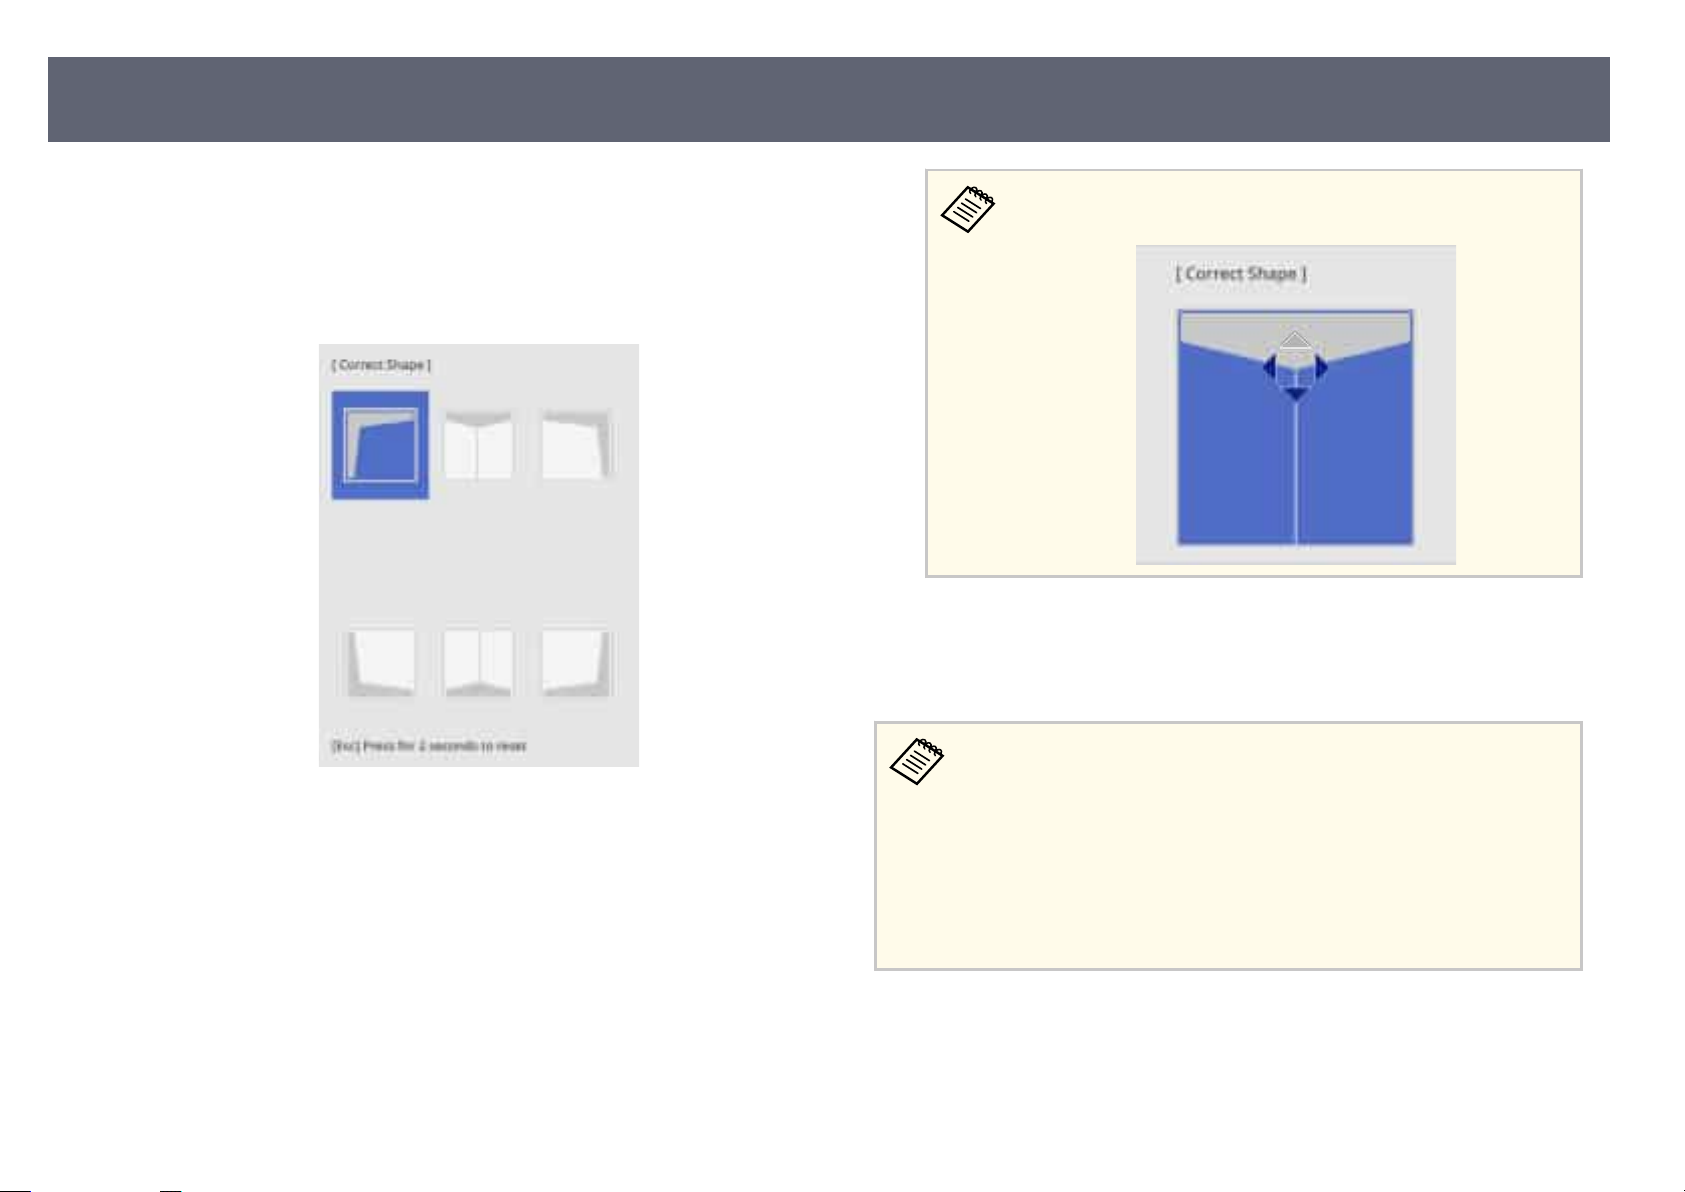
Image Shape
69
Select Correct Shape and press [Enter].
g
You see the area selection screen.
Use the arrow buttons to select the area of the image you want to adjust,
h
then p
ress [Enter].
Press the arrow buttons to adjust the image shape of the selected area as
i
n
sary.
eces
To return to the area selection screen, press [Esc].
If you see this screen, you cannot adjust the shape any further in the
direc
tion indicated by the gray triangle.
Repeat steps 8 and 9 as needed to adjust any remaining corners.
j
When you are nish
k
•
•
•
You can ne tune the corrected results. Use Quick Corner to adjust the
tilt of the image, and then use Point Correction for ne tuning. Select
Quick Corner or Point Correction on the screen in step 6.
To save the current shape of an image you have adjusted, select Save
Memory. You can save up to three image shapes in the memory.
s Installation > Geometry Correction > Memory > Save Memory
To reset the Corner Wall settings, hold down [Esc] for about 2 seconds
while the area selection screen is displayed, and then select Yes.
ed, press [Esc].
Related Links
g
•
rrecting the Image Shape with Quick Corner" p.62
"Co
•
"Correcting Image Shape with Point Correction Mode" p.70
Page 70
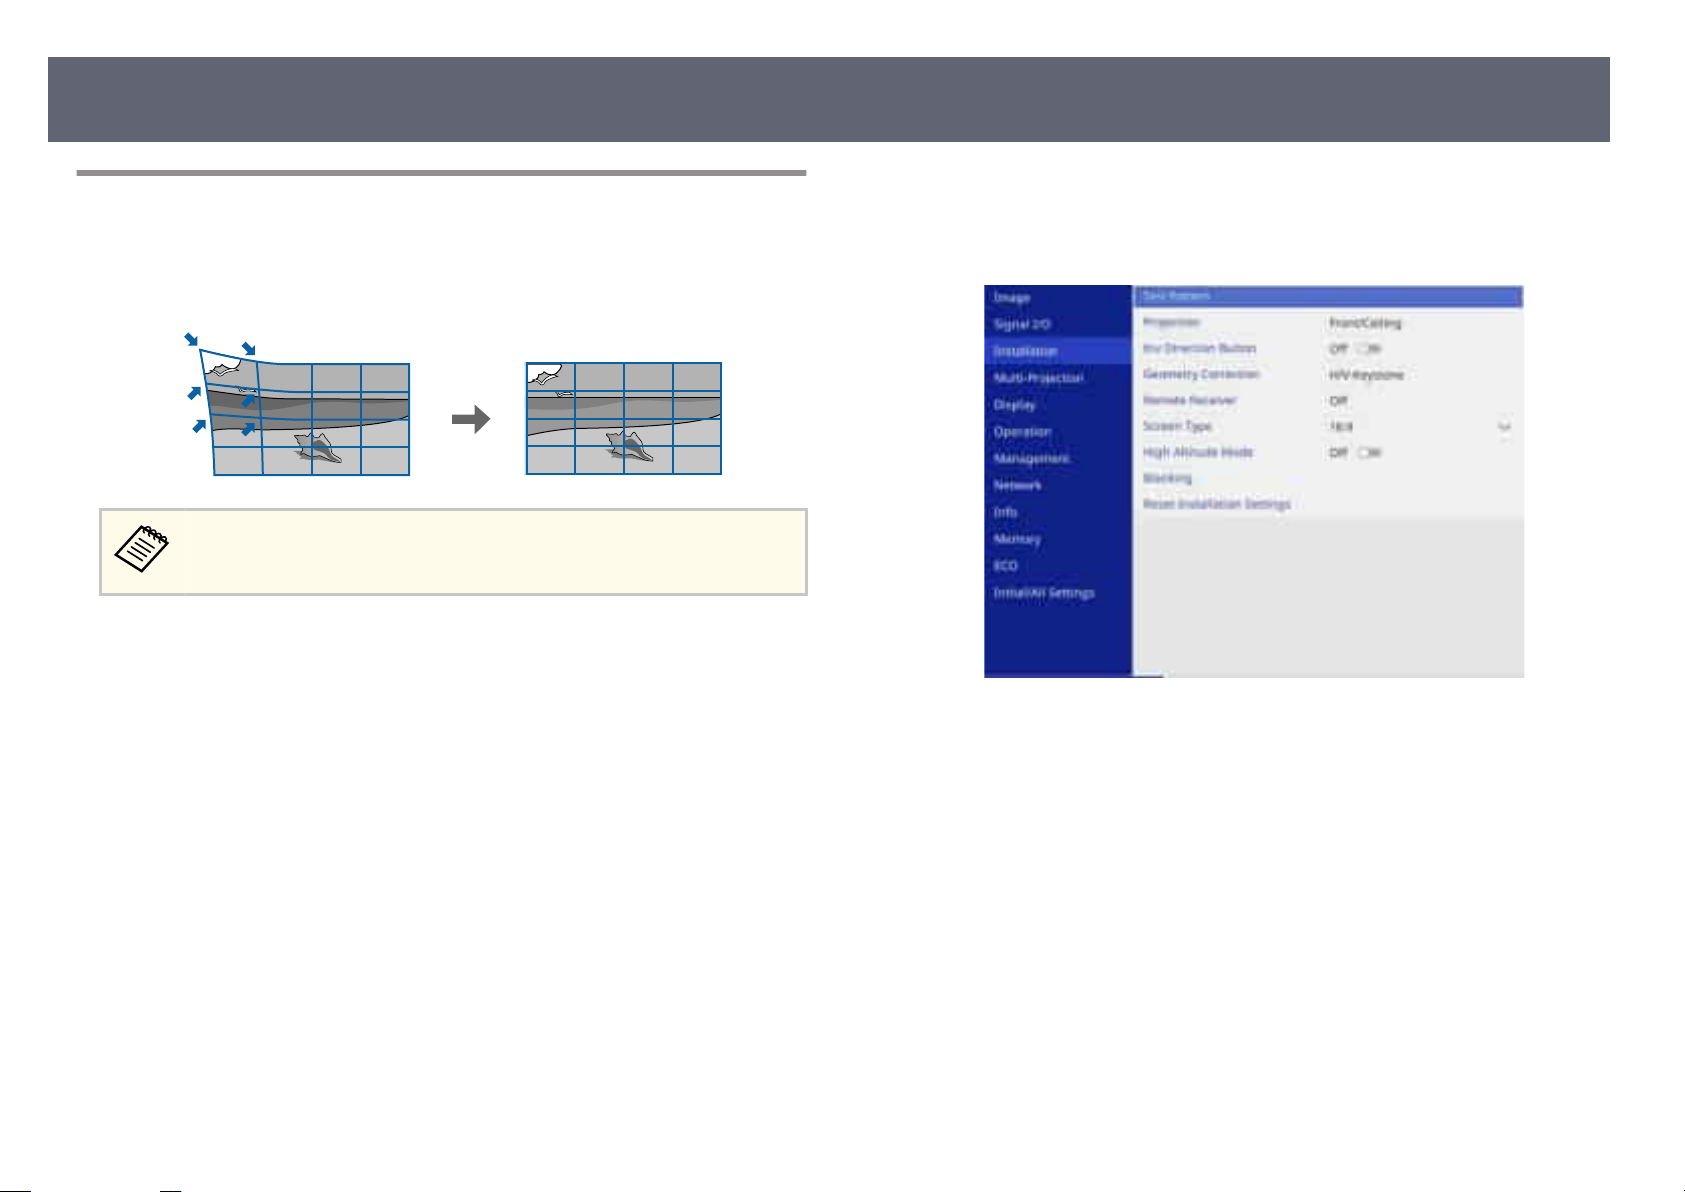
Image Shape
70
Correcting Image Shape with Point Correction Mode
You can use the projector's Poin
shape in portions of an image. e image is divided into a grid which allows you
to move intersection points on the grid as necessary to correct distortion.
If you change the Scre
adjustments are reset.
Turn on the projector and display an image.
a
t Correction setting to ne-tune the image
en Type and Screen Position settings, the
Press the [Menu] button on the control panel or remote control.
b
c
d
Select the I
Select G
u see the Geometry Correction screen.
Yo
nstallation menu and press [Enter].
eometry Correction and press [Enter].
Page 71
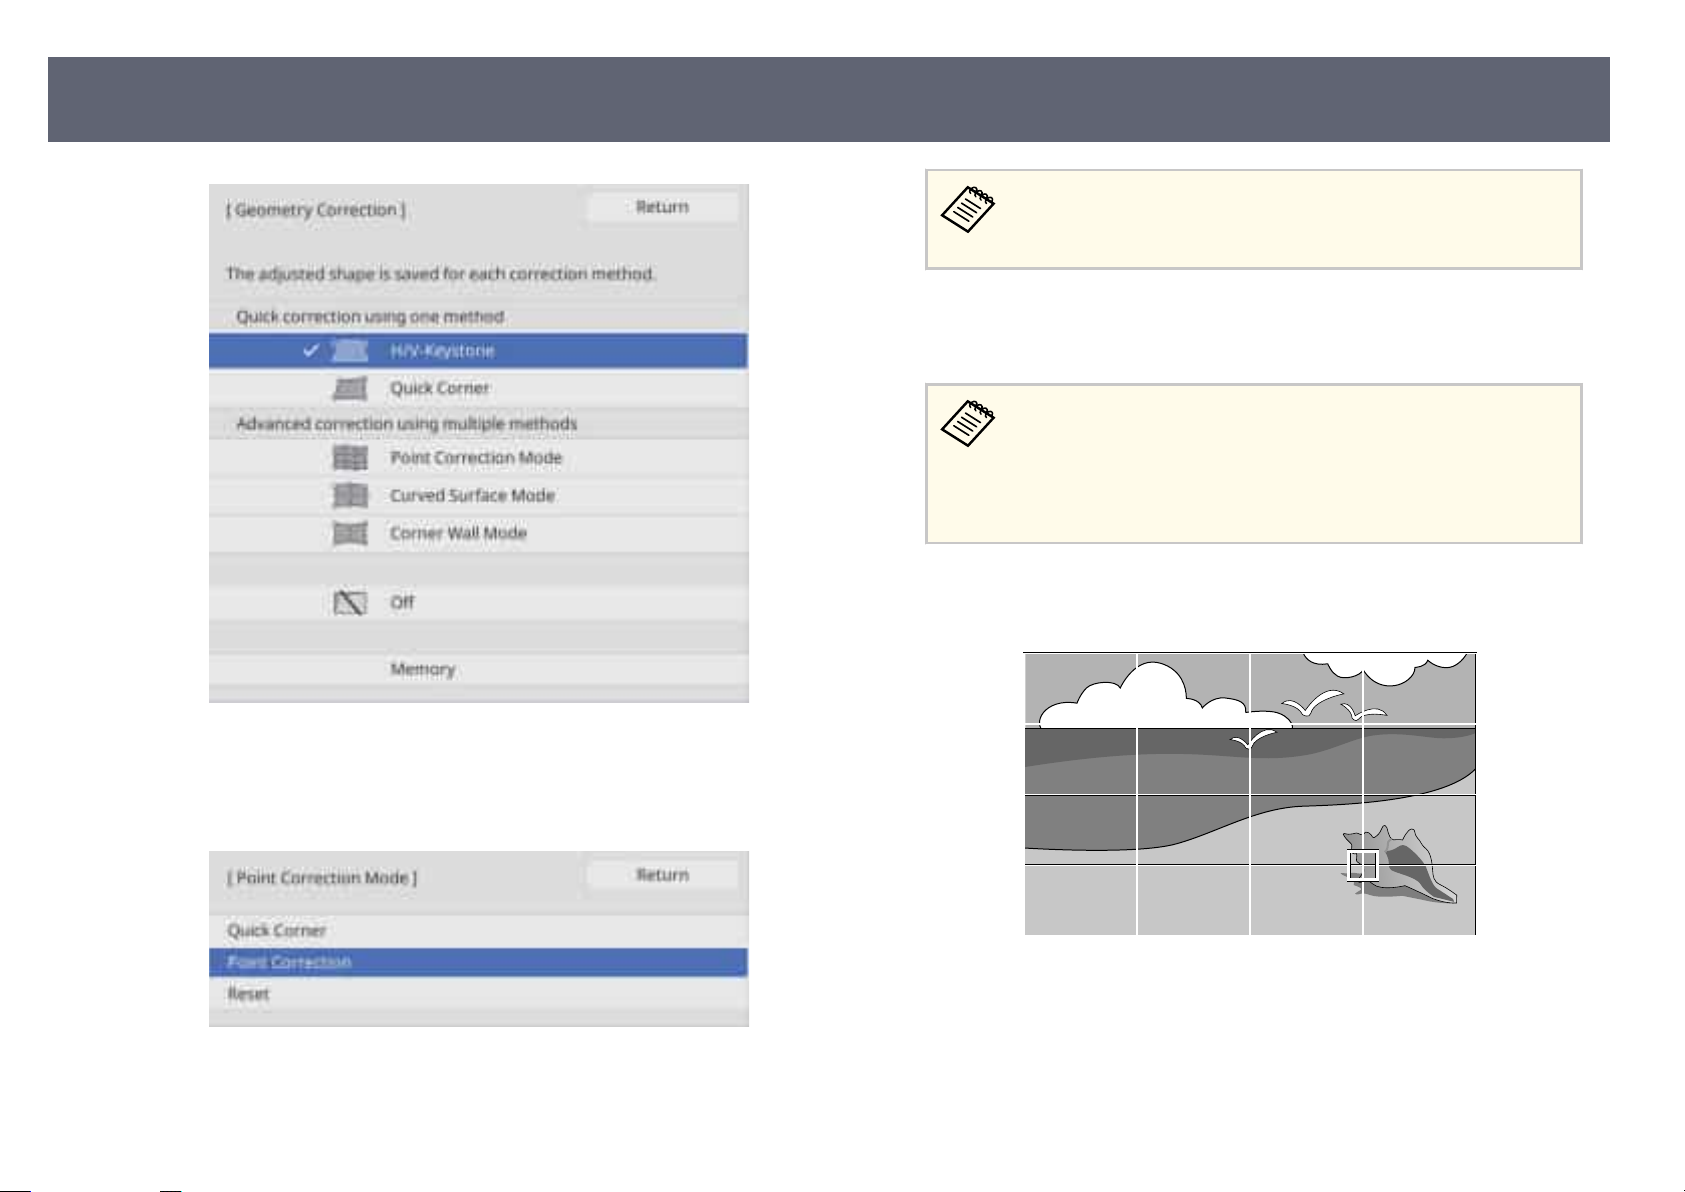
Image Shape
For ne tuning, select Quick Corner to correct the shape and size
of an im
them precisely.
Select Point Correction and press [Enter].
g
Yo
u see the grid on the projected image.
•
•
If you want to correct one point at a time, use the arrow buttons to move
h
to th
e point you want to correct, then press [Enter].
age roughly, and then select Point Correction to adjust
If you want to change the point number, press [Esc], then select a
dierent Grid Size setting in the Point Correction menu.
If you want to change the grid color for visibility, press [Esc],
then select a dierent Pattern Color setting in the Point
Correction menu.
71
Select Point Correction Mode and press [Enter]. Select Yes if necessary.
e
Select Point Correction and press [Enter].
f
Page 72
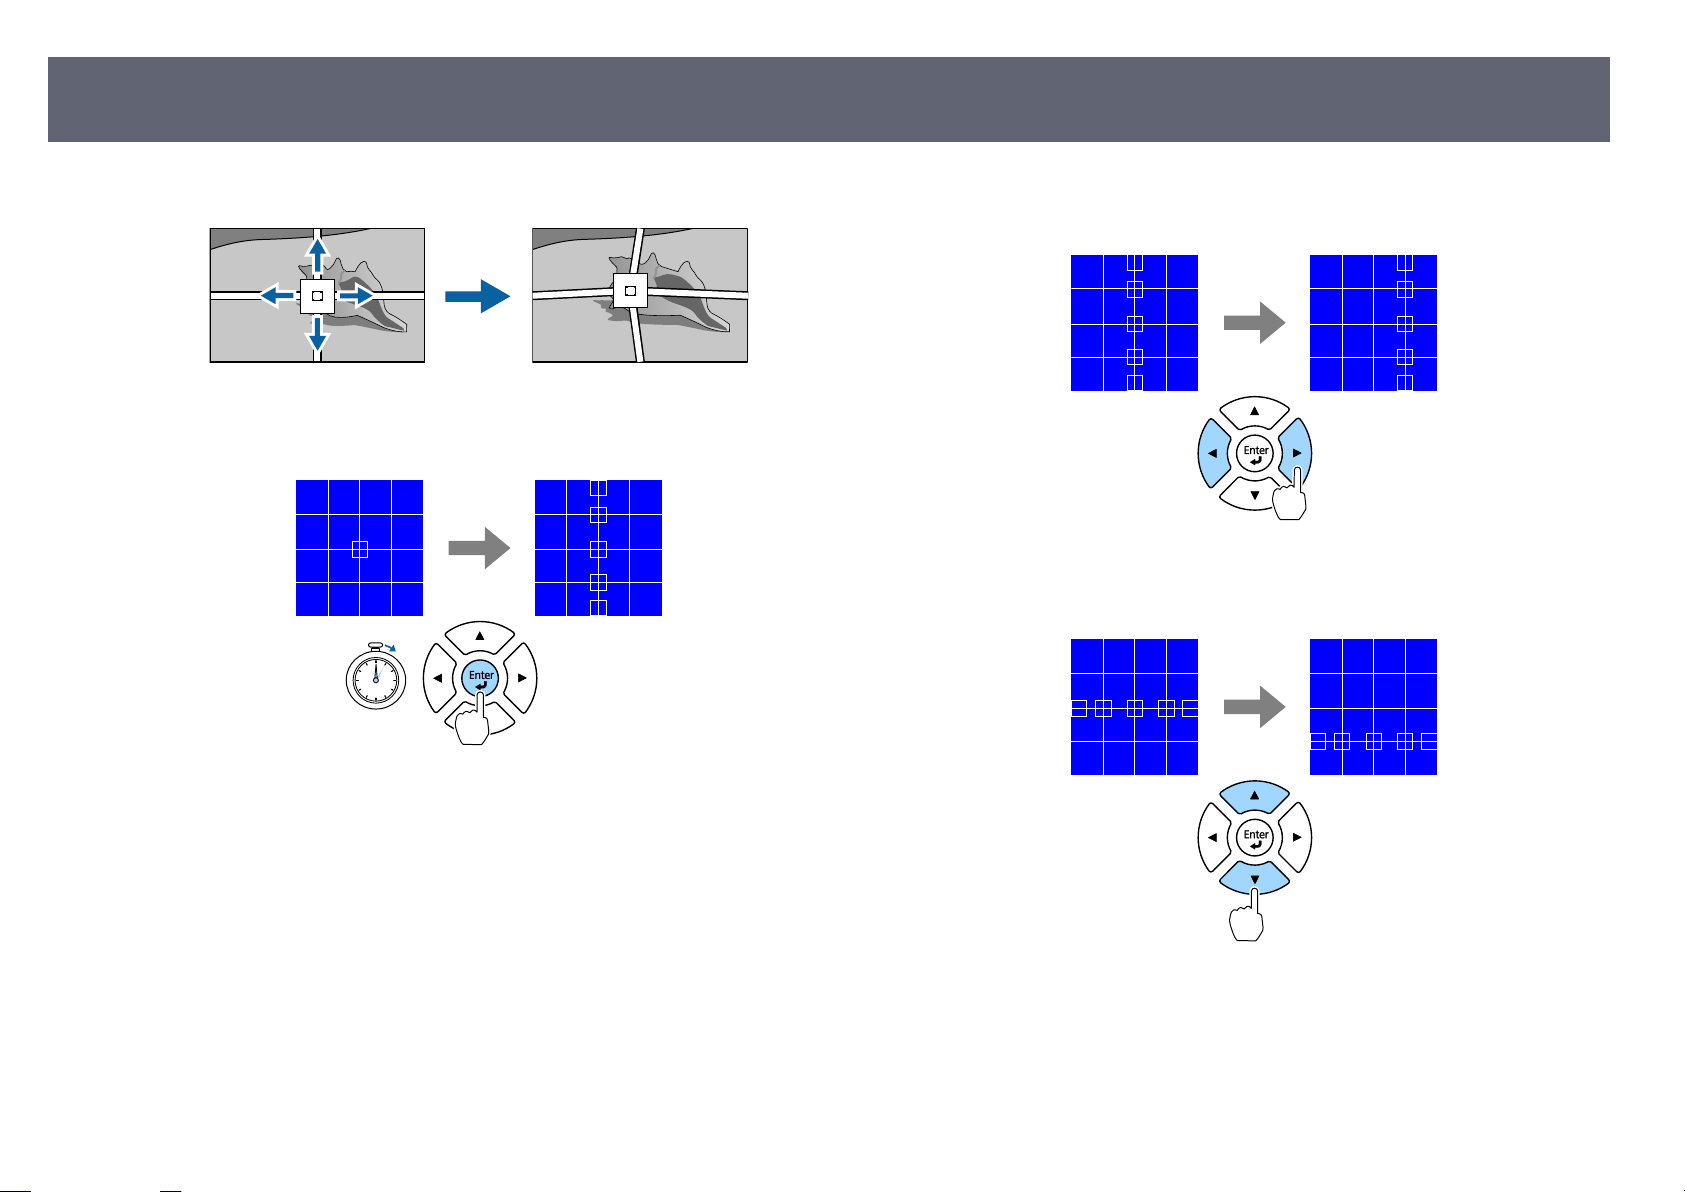
Image Shape
72
Use the arrow buttons to correct distortion as necessary.
i
If you want to correct all points in a specied vertical column or
j
horizontal row at once, hold down the [Enter] button for two seconds.
Use the le and right arrow buttons to select the column you want to
k
adjust, and then press [Enter].
Use the up and down arrow buttons to select the row you want to adjust,
l
an
h
en press [Enter].
d t
To correct any remaining points, press [Esc] to return to the previous
m
screen, then repeat steps 8 to 12.
When you are nish
n
ed, press [Esc].
Page 73
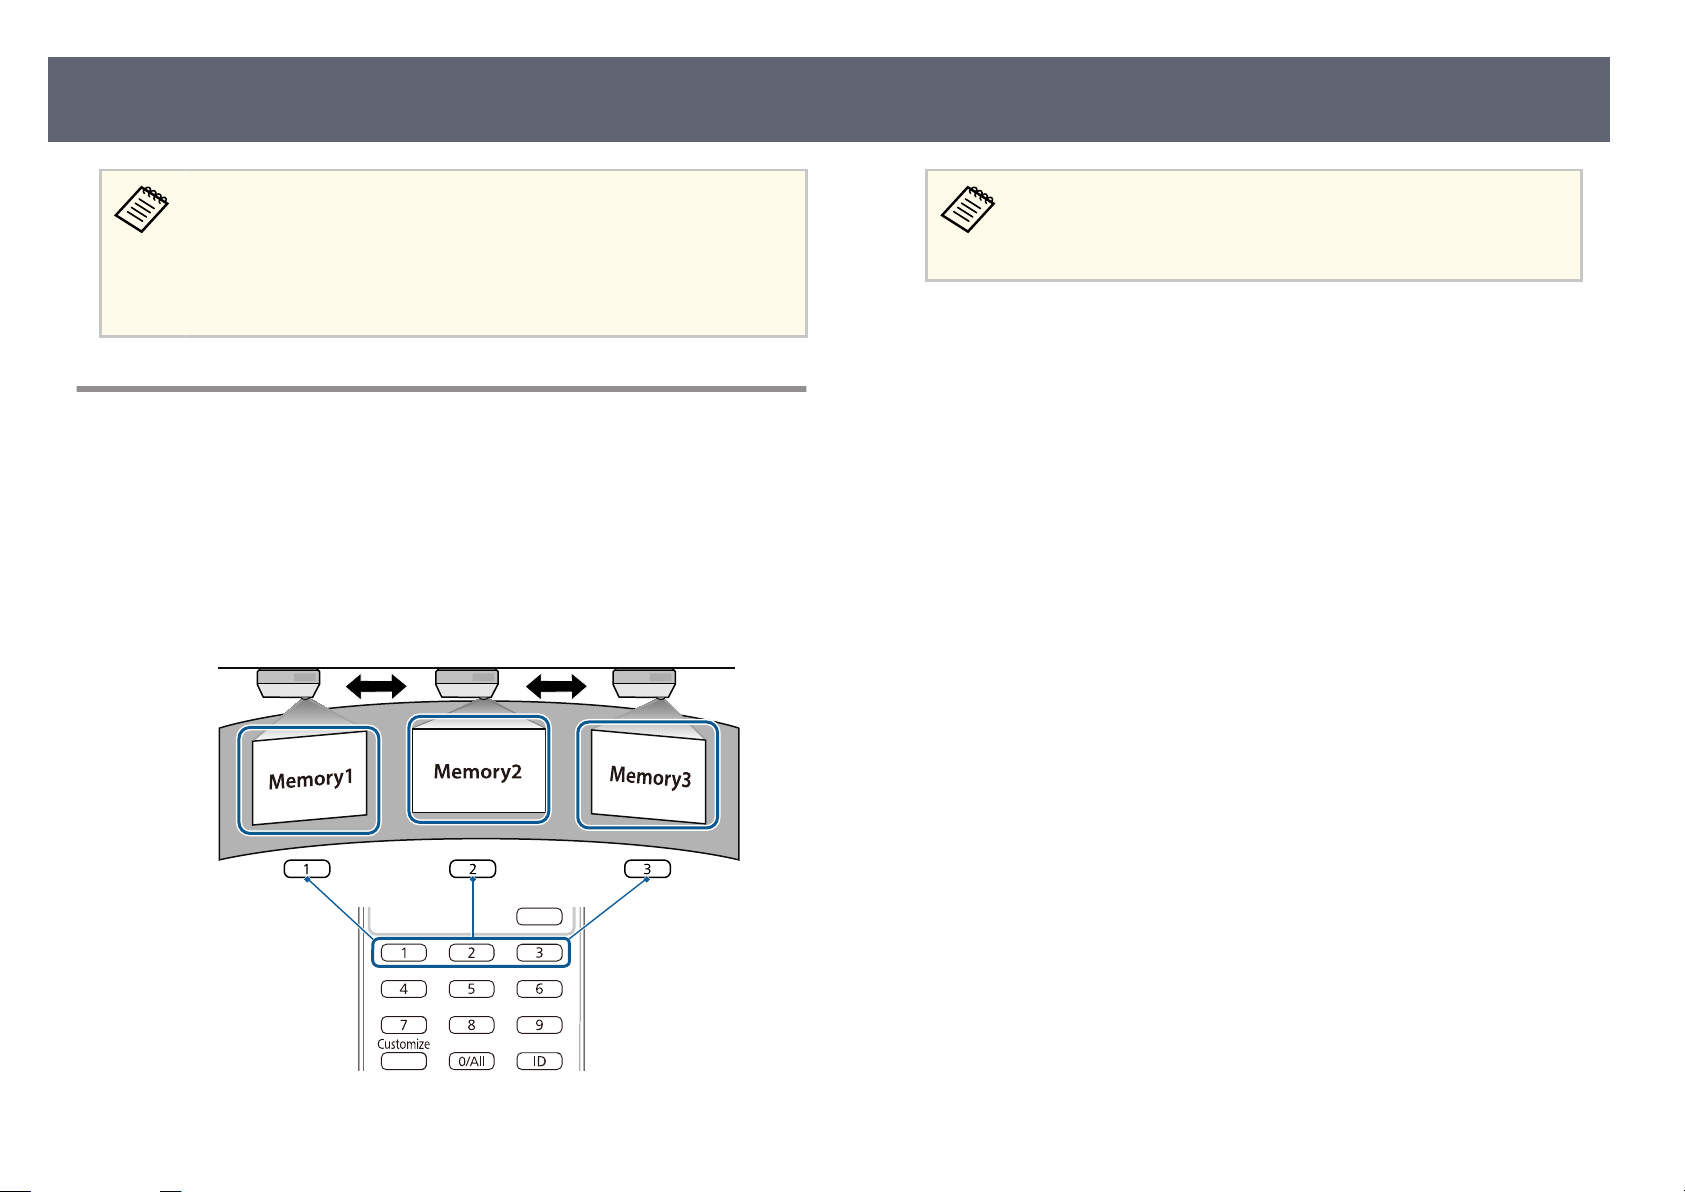
Image Shape
73
•
To sav
e the current shape of an image you have adjusted, select Save
Memory. You can save up to three image shapes in the memory.
s Installation > Geometry Correction > Memory > Save Memory
•
To reset the Point Correction settings to their original positions, select
Reset on the Point Correction screen.
Loading Image Shape Setting from Memory
You can load the image shape settings you selected and saved to the projector's
ry and apply them to the current image.
memo
Turn on the projector and display an image.
a
Press the numeric button (1, 2, or 3) on the remote control that matches
b
t
umber of the saved setting.
he n
When you have nish
c
instructions.
•
e ill
ustration above is only an example.
•
You can also load the saved image shape settings by selecting
Load Memory in the Memory menu.
ed loading the settings, follow the on-screen
Page 74
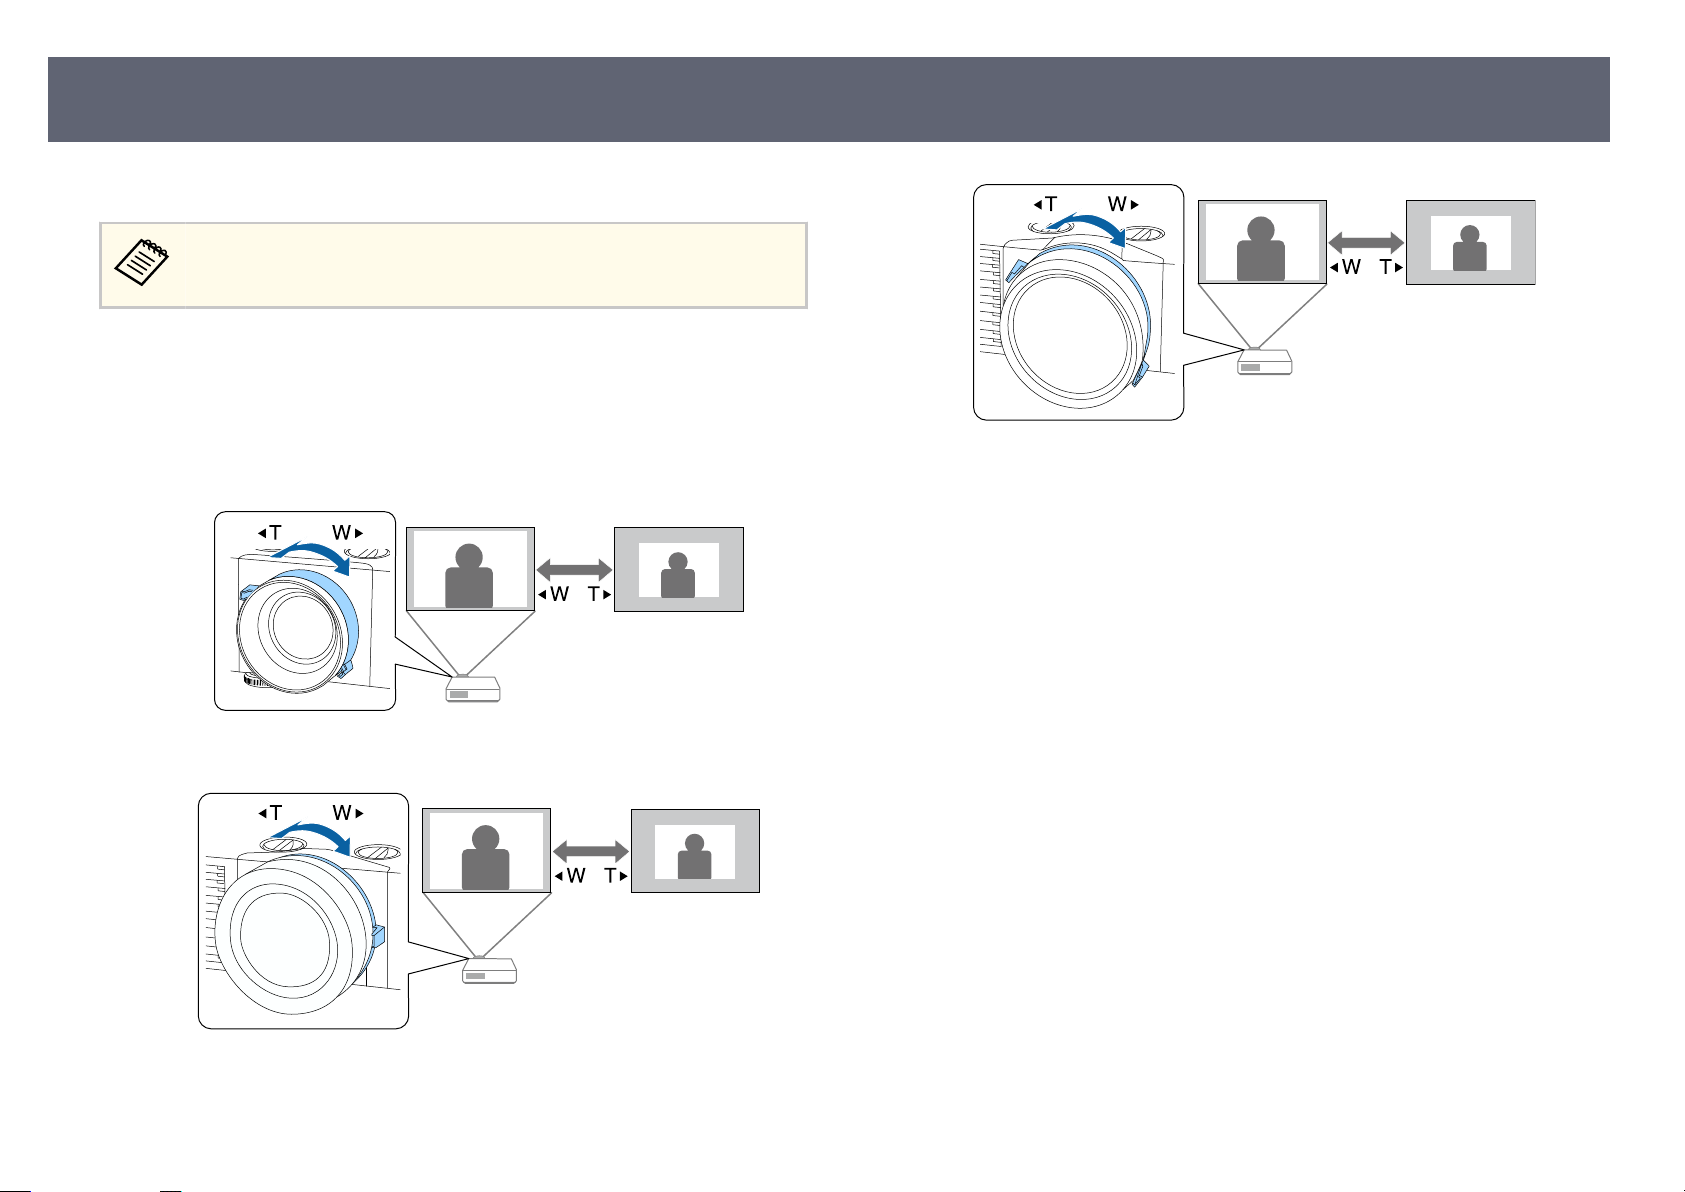
Resizing the Image with the Zoom Ring
You can resize the image using the projector's zoom ring.
74
Wait 30 minutes aer turnin
zoom, and lens shi for maximum accuracy.
Turn on the projector and display an image.
a
Rotate the zoom ring to enlarge or reduce the image.
b
EB-L890E/EB-L895E/EB-L690E/EB-L890U/EB-L895U/EB-L790U/EBL690U
EB-L790SE/EB-L795SE/EB-L790SU/EB-L690SU/EB-L695SU
g on the projector before setting the focus,
EB-L690SE/EB-L695SE
Page 75
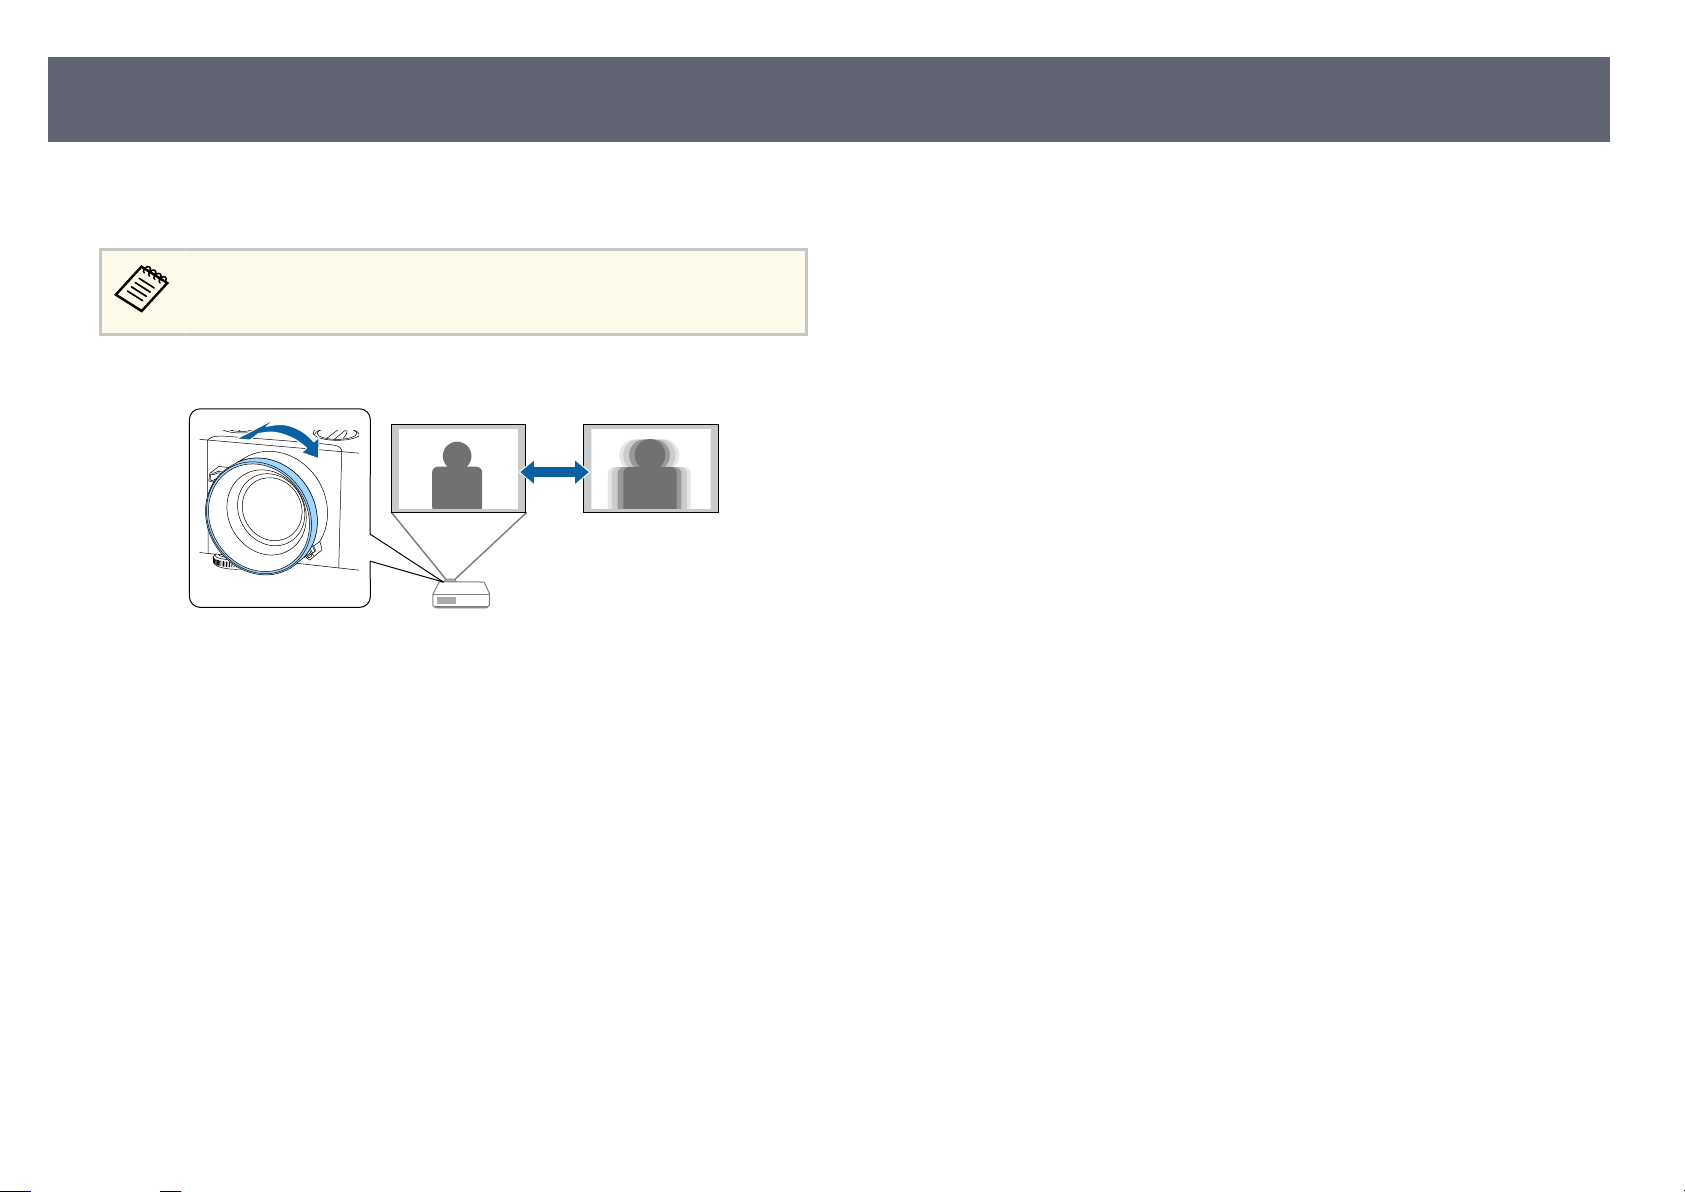
Focusing the Image Using the Focus Ring
You can correct the focus using the focus ring. (EB-L890E/EB-L895E/EBL690E/EB-L890U/EB-L895U/EB-L790U/EB-L690U)
75
Wait 30 minutes aer turnin
zoom, and lens shi for maximum accuracy.
Turn the focus ring to focus the entire screen.
g on the projector before setting the focus,
Page 76
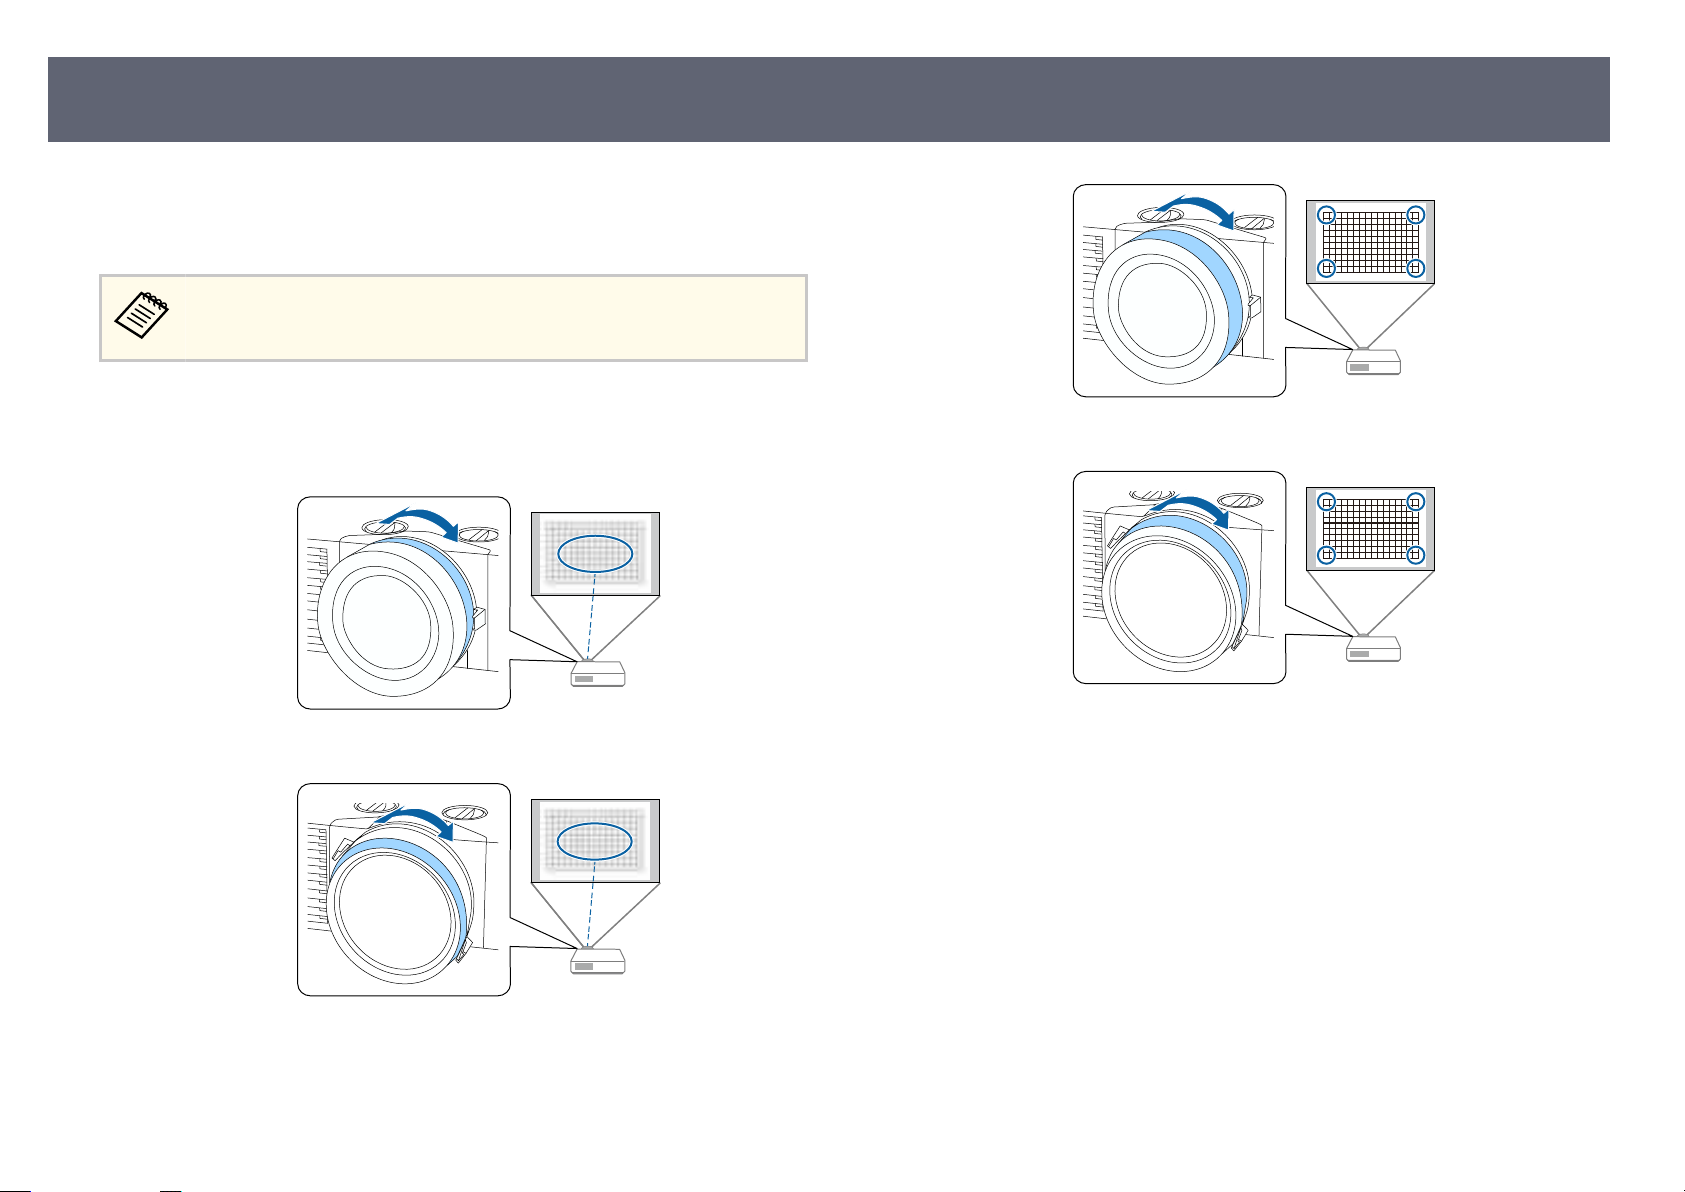
Focusing the Image Using the Focus Ring (Center/Corner)
You can correct the focus using the center focus ring and corner
us ring. (EB-L790SE/EB-L795SE/EB-L690SE/EB-L695SE/EB-L790SU/EB-
foc
L690SU/EB-L695SU)
76
Wait 30 minutes aer turnin
zoom, and lens shi for maximum accuracy.
Adjust the center focus while looking at the center of the projection
a
screen.
EB-L790SE/EB-L795SE/EB-L790SU/EB-L690SU/EB-L695SU
EB-L690SE/EB-L695SE
g on the projector before setting the focus,
EB-L690SE/EB-L695SE
If the image is still not focused, repeat steps 1 and 2 to adjust it again.
c
Related Links
g
•
"Projector Parts - Front/Top" p.18
Adjust the corner focus while looking at the four corners of the projection
b
scre
en.
EB-L790SE/EB-L795SE/EB-L790SU/EB-L690SU/EB-L695SU
Page 77
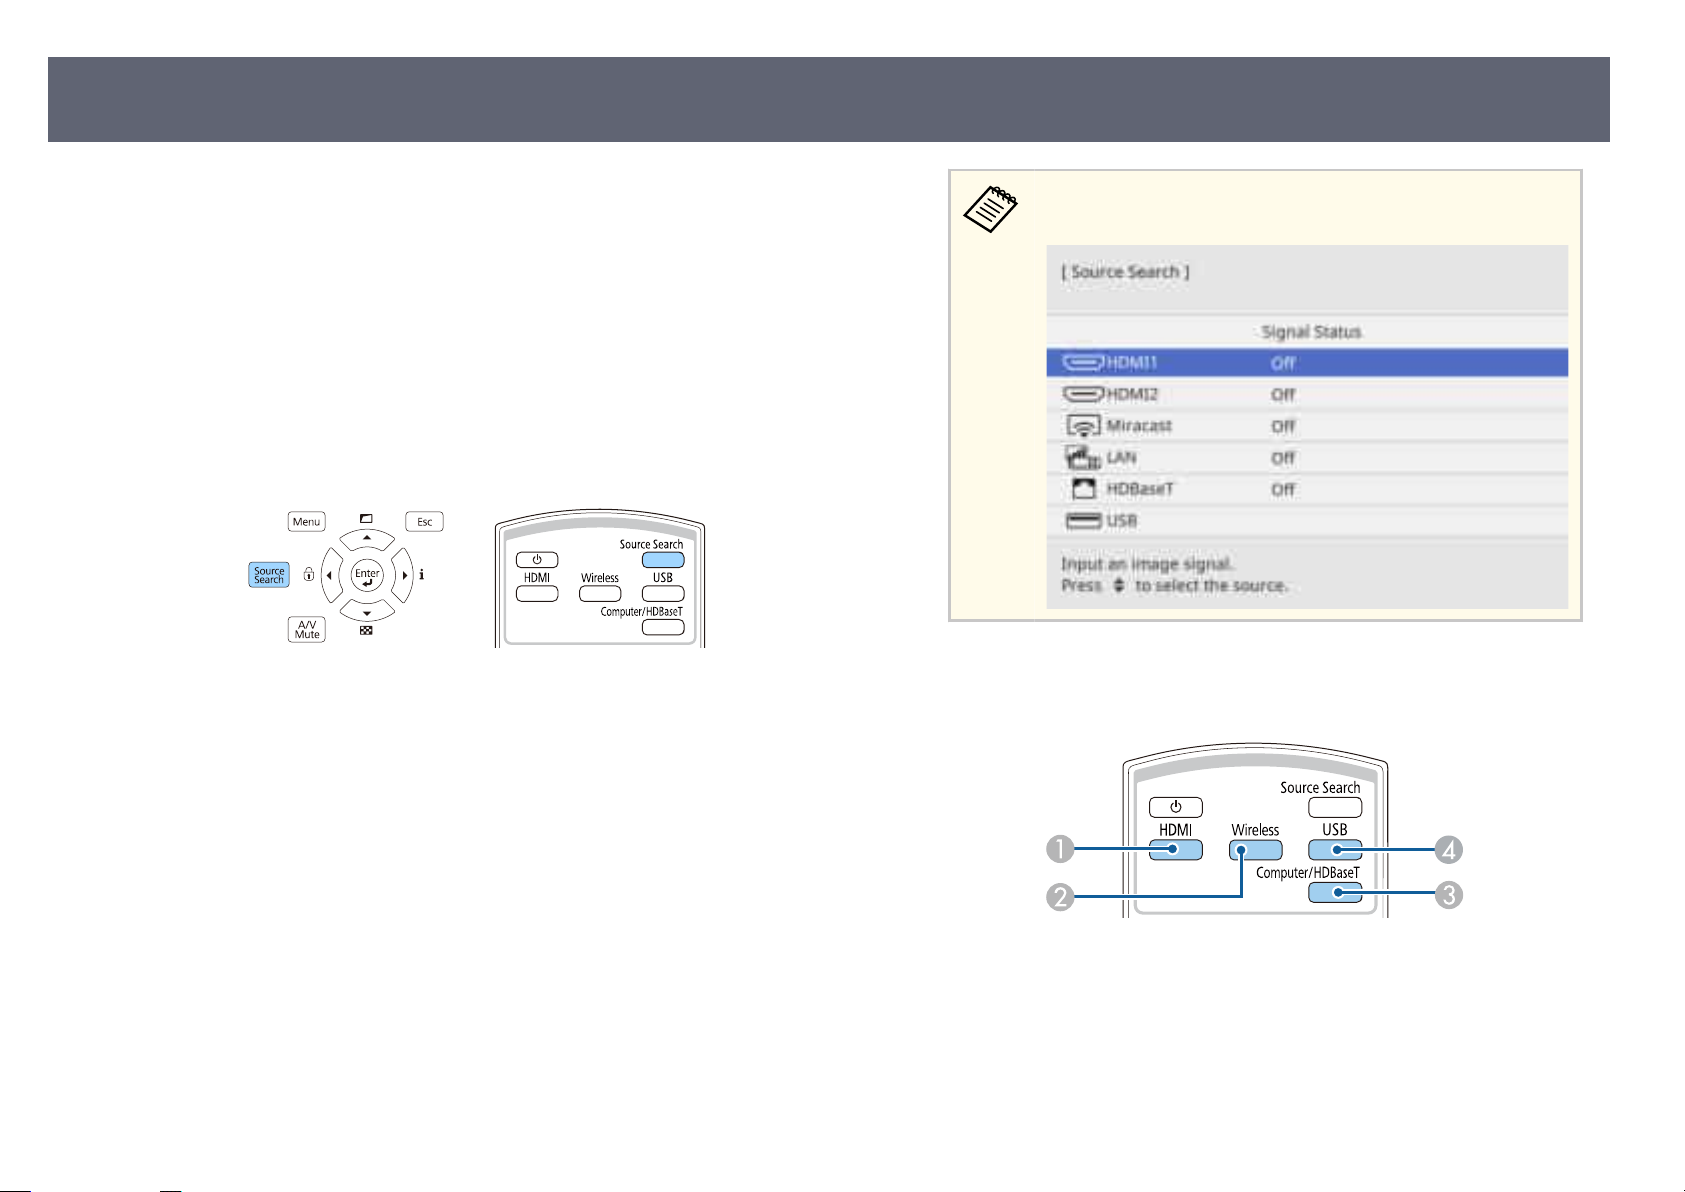
Selecting an Image Source
77
When multiple image sources are connected to the projector, such as a
uter and DVD player, you can switch from one image source to the other.
comp
Make sure the connected image source you want to use is turned on.
a
For video image sources, insert a DVD or other video media and press
b
p
.
lay
Do one of the following:
c
•
Pres
s the [Source Search] button on the control panel or remote control
until you see the image from the source you want.
is screen is displayed when no image signal is detected. Check
th
e cable connections between the projector and image source.
•
Pres
s the button for the source you want on the remote control. If there
is more than one port for that source, press the button again to cycle
through the sources.
HDMI sources (HDMI1 and HDMI2 ports)
A
Network source (LAN and Miracast)
B
Computer/HDBaseT port source (HDBaseT port)
C
USB port source
D
•
s the [Home] button on the remote control.
Pres
Page 78
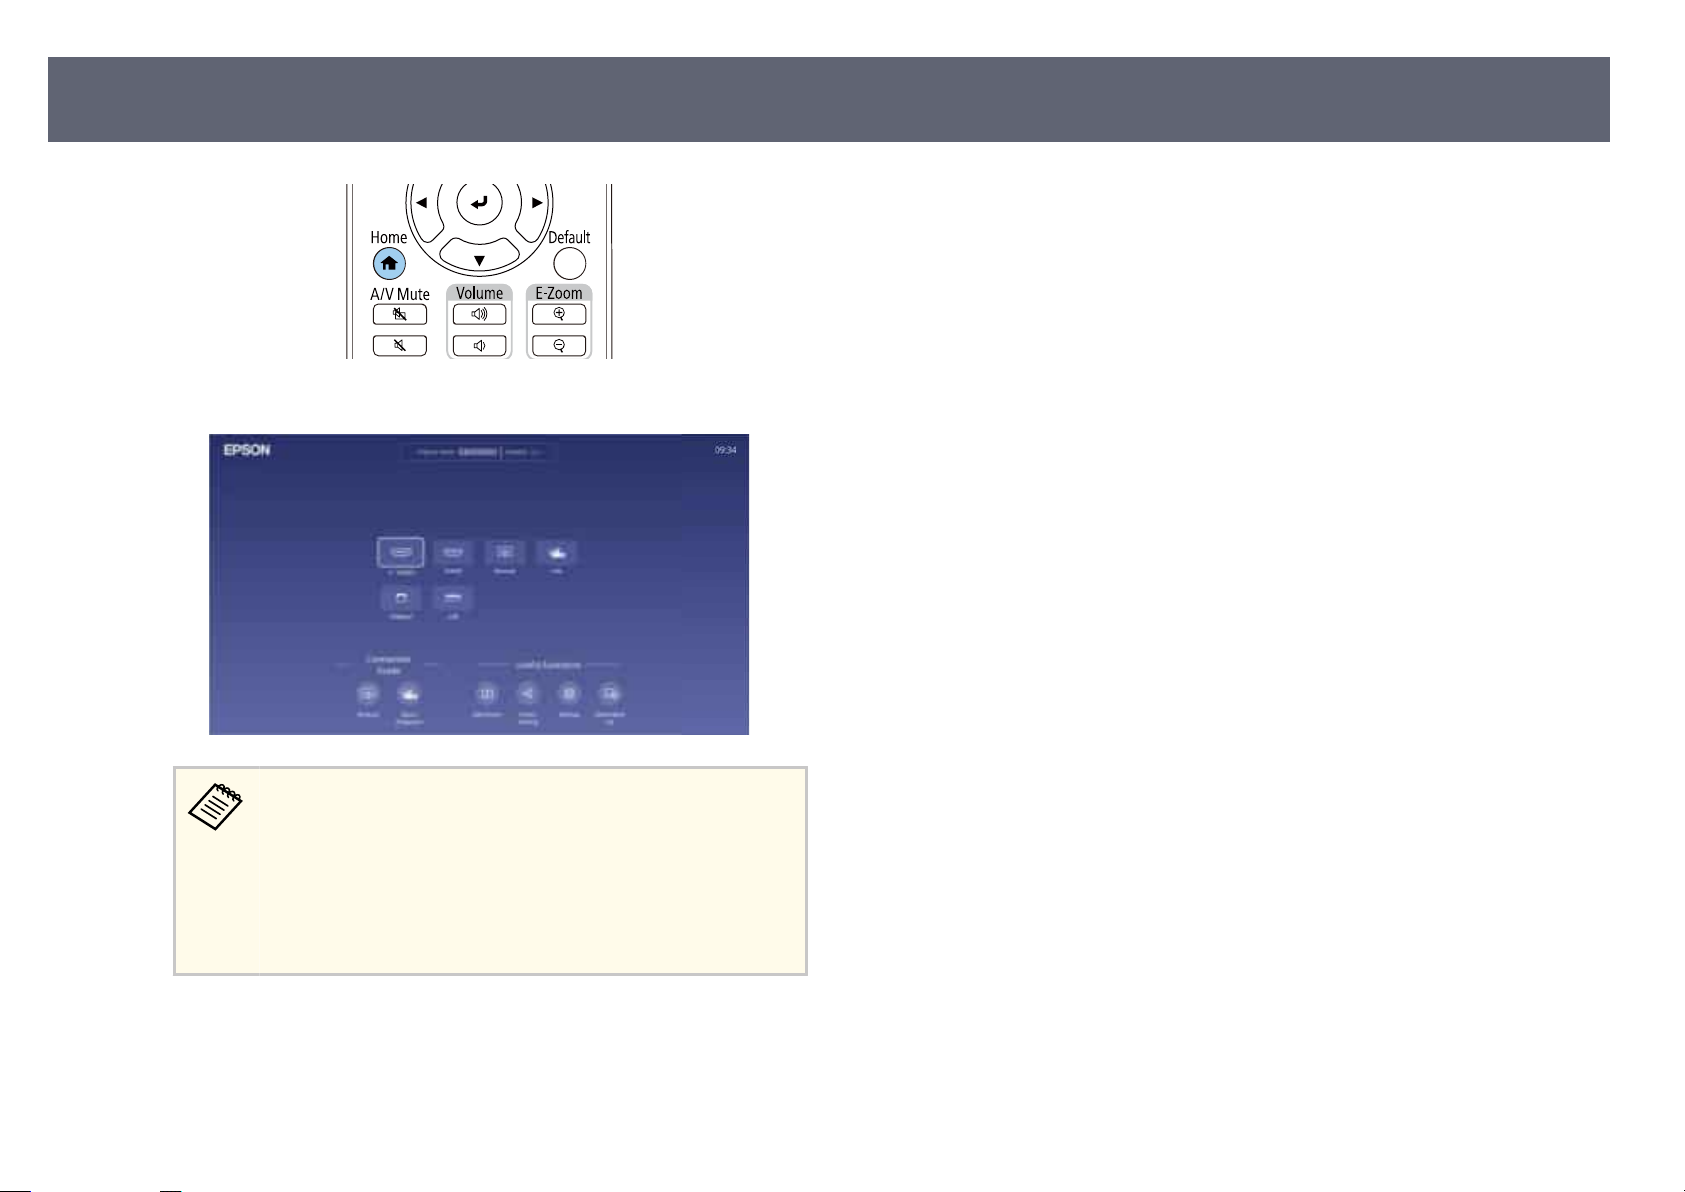
Selecting an Image Source
en select the source you want to use from the screen displayed.
78
•
e display order of the input sources changes when the
projector detects an input signal. (e detected input source
appears in the upper le position.)
•
A check mark appears on the image from the current input
source. You can check a preview of the current input image for
most sources as a thumbnail (other than the USB input source
in Content Playback mode).
Related Links
g
•
ojector Parts - Remote Control" p.23
"Pr
Page 79
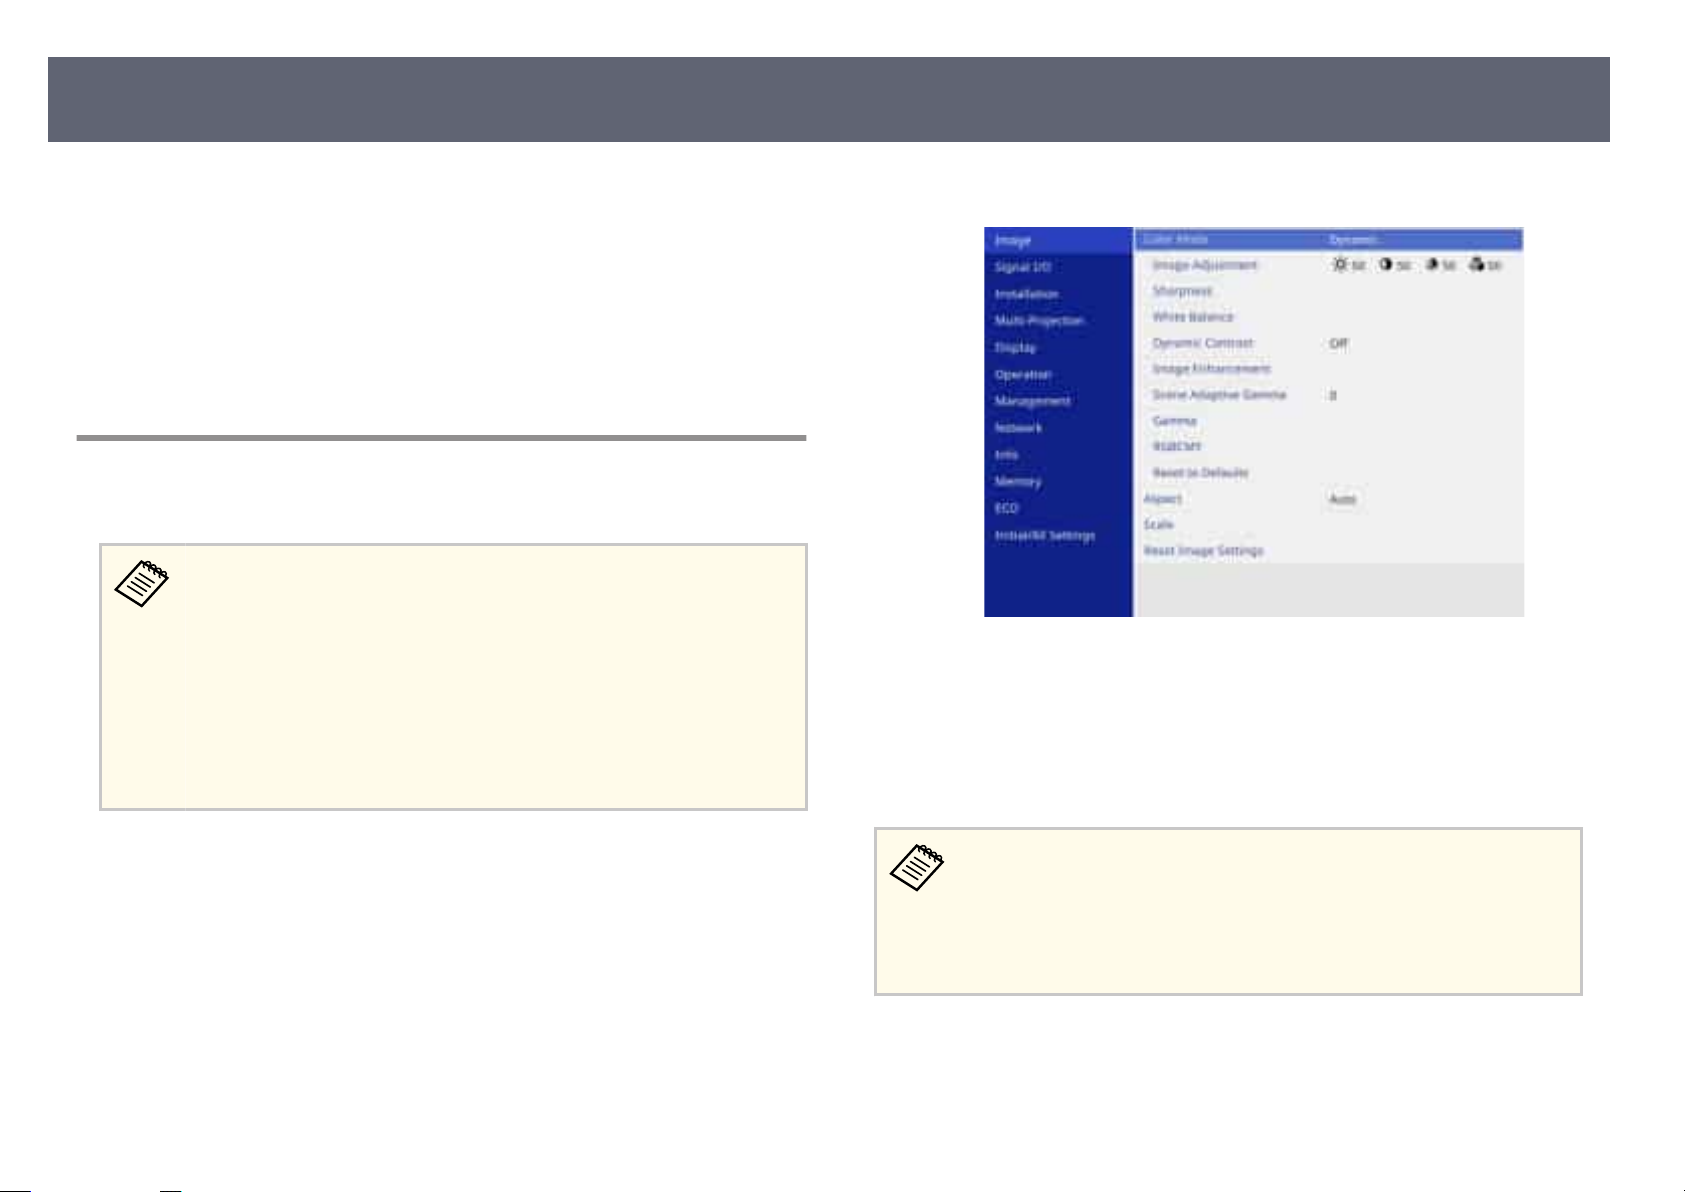
Image Aspect Ratio
79
e projector can display images in dierent width-to-height ratios called
ect ratios. Normally, the input signal from your video source determines
asp
the image's aspect ratio. However, you can change the aspect ratio for certain
images to t your screen.
Related Links
g
•
"Changing the Image Aspect Ratio" p.79
•
"Available Image Aspect Ratios" p.80
Changing the Image Aspect Ratio
You can change the aspect ratio of the displayed image.
•
•
•
e Screen Type setting in the projector's Installation menu before
Set th
changing the aspect ratio.
Available only when using one of the following input sources:
•
HDMI
•
HDBaseT
Available only when the Scale setting is turned o or the Scale Mode
setting is set to Full Display.
s Image > Scale > Scale Mode
Select the I
c
Select Aspect and press [Enter].
d
Se
e
f
lect the aspect ratio for your input signal.
Press [Menu] or [Esc] to exit the menus.
mage menu and press [Enter].
Turn on the projector and switch to the image source you want to use.
a
Press the [Menu] button on the control panel or remote control.
b
•
e availab
•
If there are margins between the edge of the image and the projected
screen frame, you can adjust the position of the image using the Screen
Position setting in the projector's Installation menu.
s Installation > Screen Position
Relat
g
•
•
ed Links
m
age Quality Settings - Image Menu" p.186
"I
"Projector Installation Settings - Installation Menu" p.191
le aspect ratio setting varies depending on the input signal.
Page 80
Image Aspect Ratio
Available Image Aspect Ratios
You can select the following image aspect ratios, depending on the selected
Scre
en Type setting and the input signal from your image source.
Note that using the aspect ratio function of the projector to reduce,
ge, or split the projected image for commercial purposes or for public
enlar
viewing may infringe upon the rights of the copyright holder of that image
based on copyright law.
Aspect mode Description
Auto Automatically sets the aspect ratio according to the
t signal.
inpu
80
4:3
(Avail
able when Screen
Type is set to 4:3)
16:9
(Avail
able when Screen
Type is set to 4:3 or 16:10)
Full
(Avail
able when Screen
Type is set to 16:6, 16:9,
16:10 or 21:9)
H-Zoom
V-Zo
om
(Available when Screen
Type is set to 4:3, 16:9,
16:10 or 21:9)
Native
(Avail
able when Screen
Type is set to 4:3, 16:9,
16:10 or 21:9)
Converts the aspect ratio of the image to 4:3.
Converts the aspect ratio of the image to 16:9.
Displays images using the full size of the projection
area, but does not maintain the aspect ratio.
Displays images using the full width (H-Zoom) or full
height (V-Zoom) of the projection area and maintains
the aspect ratio of the image. Areas that exceed the
edges of the projected screen are not projected.
Displays images as is (aspect ratio and resolution
are maintained). Areas that exceed the edges of the
projected screen are not projected.
Page 81
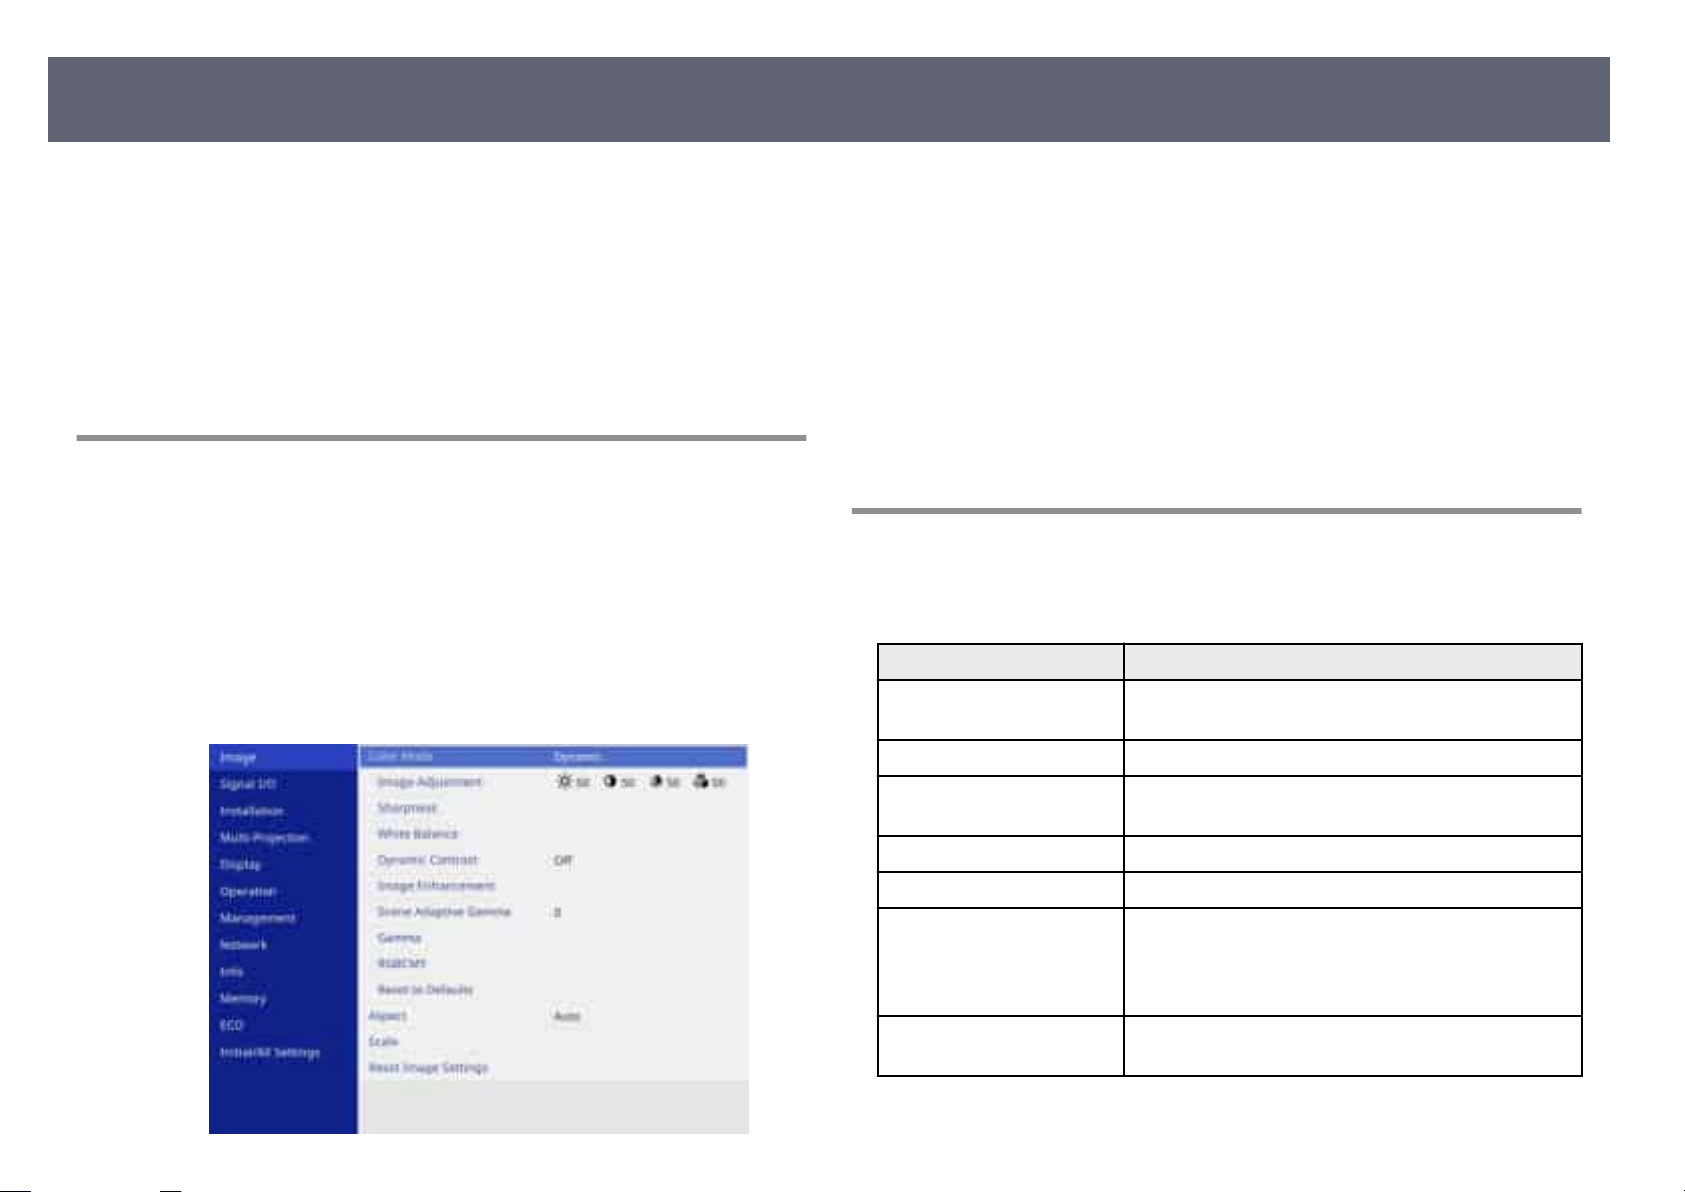
Adjusting Image Quality (Color Mode)
81
e projector oers dierent color modes to provide optimum brightness,
trast, and color for a variety of viewing environments and image types.
con
You can select the mode designed to match your image and environment, or
experiment with the available modes.
Related Links
g
•
"Changing the Color Mode" p.81
•
"Available Color Modes" p.81
Changing the Color Mode
You can change the projector's Color Mode using the remote control to optimize
the image for your viewing environment.
Turn on the projector and switch to the image source you want to use.
a
Press the [Menu] button on the control panel or remote control.
b
c
Select the I
mage menu and press [Enter].
Select Color Mode and press [Enter].
d
Se
e
f
g
•
•
lect the color mode for your input signal.
Press [Menu] or [Esc] to exit the menus.
Relat
ed Links
age Quality Settings - Image Menu" p.186
"Im
"Multiple Projector Operation Settings - Multi-Projection Menu" p.193
Available Color Modes
You can set the projector to use these color modes, depending on the input
sour
ce you are using:
Color mode Description
Dynamic is is the brightest mode. Best for prioritizing
br
ightness.
Presentation Best for projecting vivid images.
Natural Reproduces colors faithfully. Ideal for projecting still
pict
ures such as photos.
Cinema Best for enjoying content such as movies.
BT.709 Produces images that conform to the ITU-R BT.709.
DICOM SIM Best for projecting X-ray photographs and other
medic
al images. is mode is for reference purposes
only and should not be used to make medical
diagnoses.
Multi-Projection Best for projecting from multiple projectors (reduces
the co
lor tone dierence between images).
Page 82
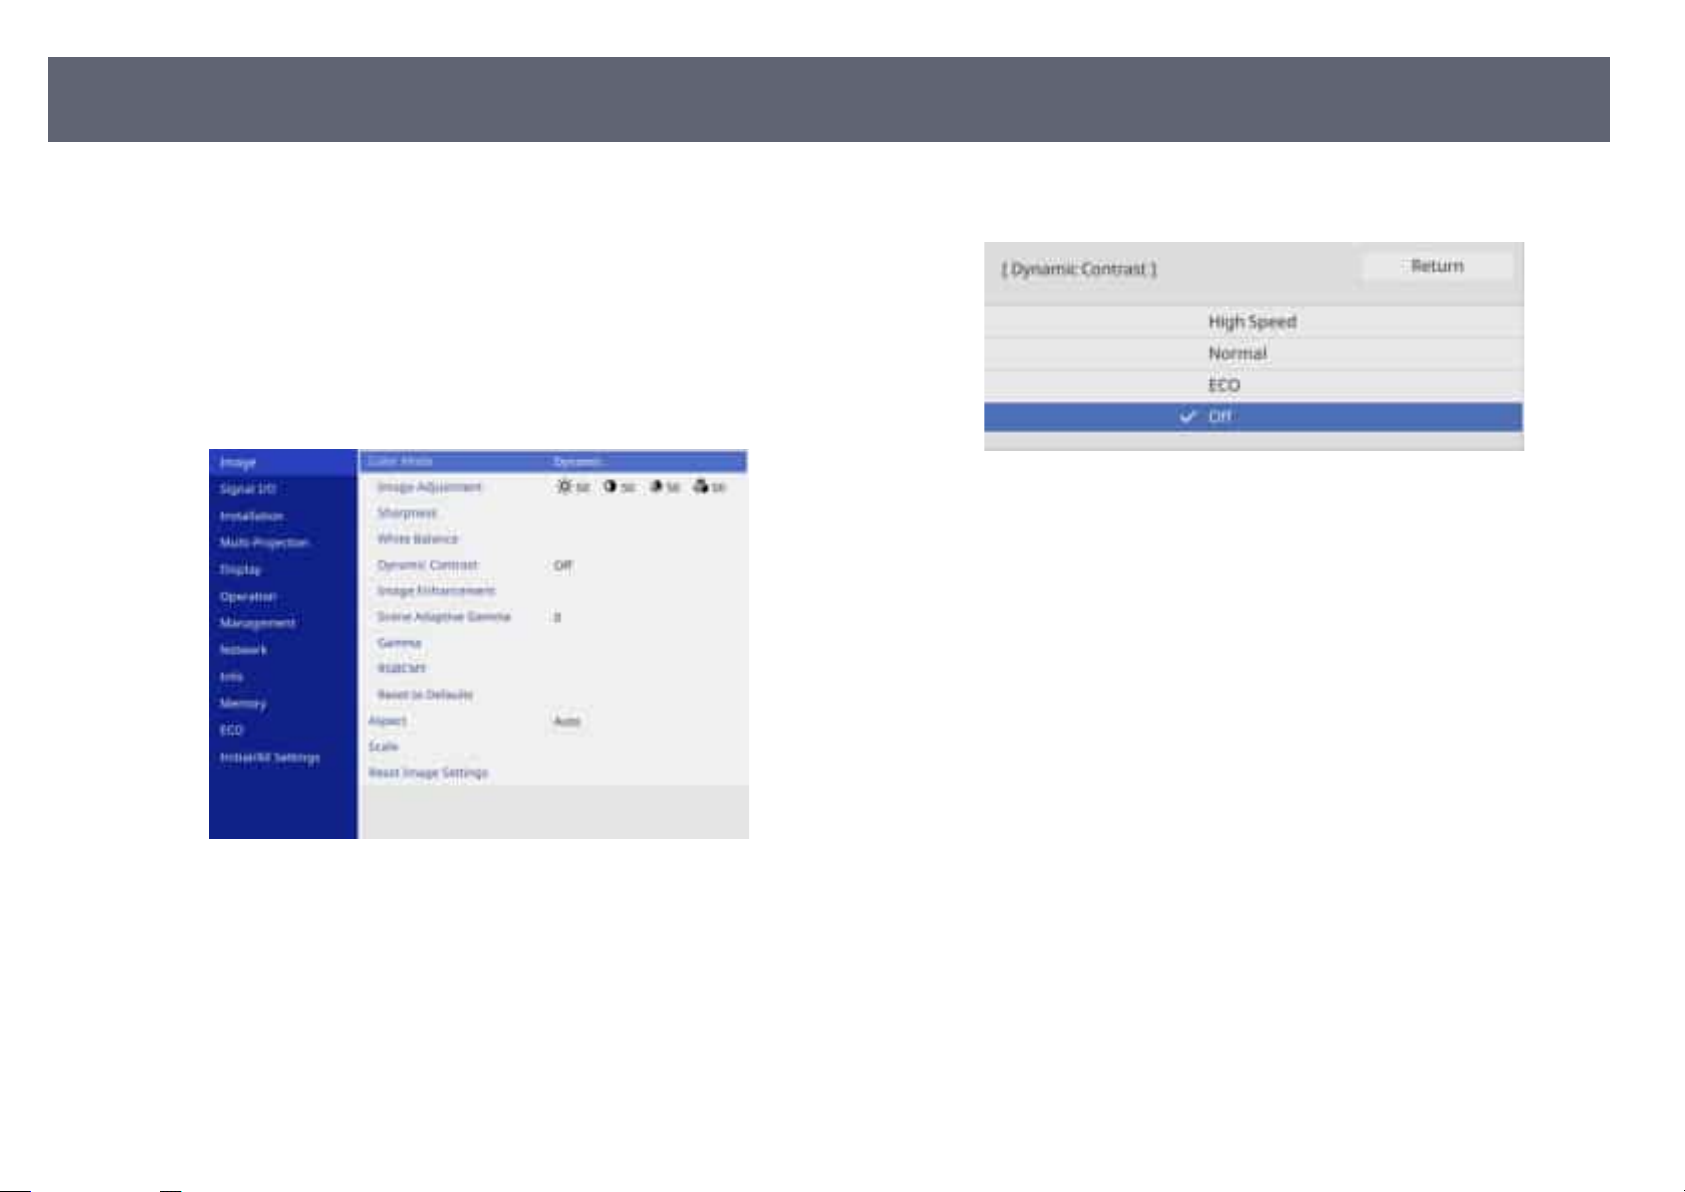
Turning On Automatic Luminance Adjustment
You can turn on Dynamic Contrast to automatically optimize the image
luminan
content you project.
a
b
ce. is improves the image contrast based on the brightness of the
Turn on the projector and switch to the image source you want to use.
Press the [Menu] button on the control panel or remote control.
•
ECO t
o adjust brightness while minimizing power consumption
without compromising image quality.
82
Select the I
c
Select Dynamic Contrast and press [Enter].
d
Ch
e
oose one of the following options and press [Enter]:
•
Normal
changes.
•
High Speed to adjust brightness as soon as the scene changes.
Brightness changes signicantly.
mage menu and press [Enter].
for standard brightness adjustment using minimal brightness
Press [Menu] or [Esc] to exit the menus.
f
Page 83
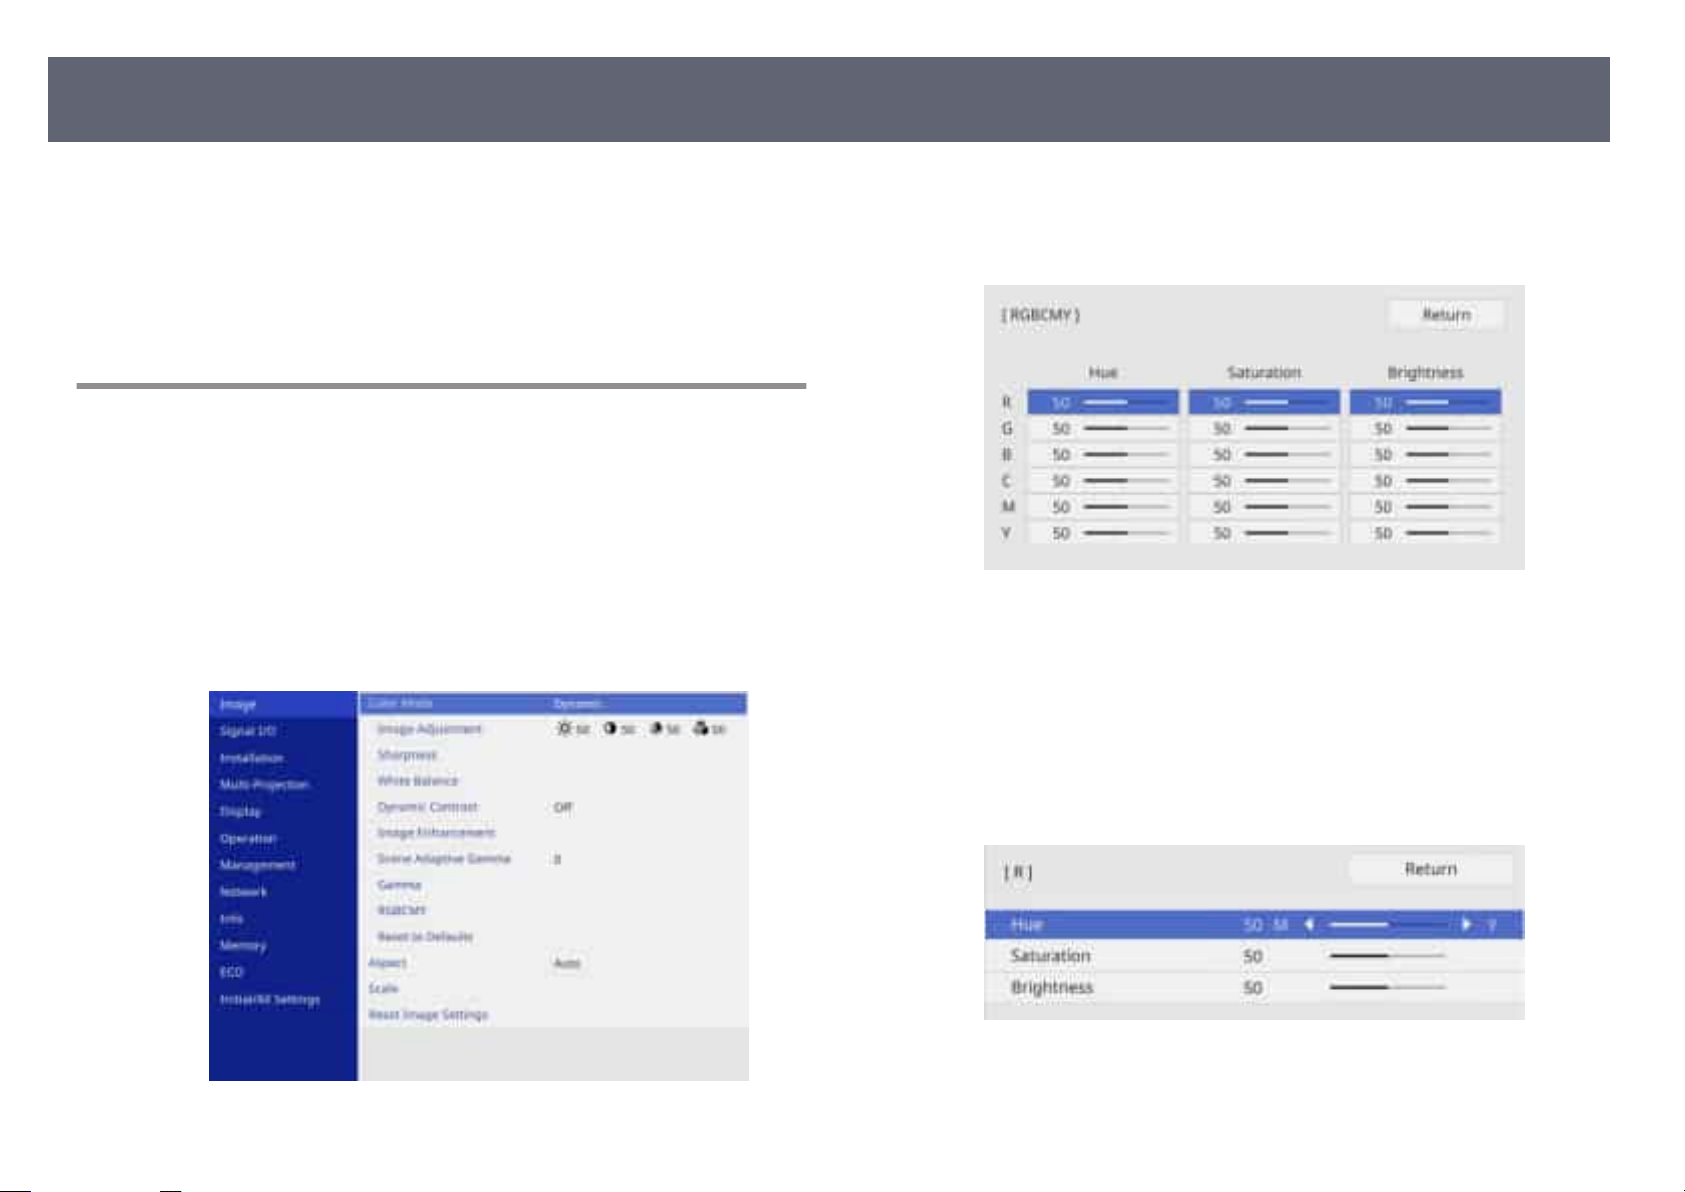
Adjusting the Image Color
83
You can ne-tune various aspects of how colors are displayed in your projected
es.
imag
Related Links
g
•
"Adjusting the Hue, Saturation, and Brightness" p.83
•
"Adjusting the Gamma" p.84
Adjusting the Hue, Saturation, and Brightness
You can adjust the Hue, Saturation, and Brightness settings for individual image
colors.
Turn on the projector and switch to the image source you want to use.
a
Press the [Menu] button on the control panel or remote control.
b
c
Select the I
mage menu and press [Enter].
Select RGBCMY and press [Enter].
d
Se
e
f
lect the color to adjust, and press [Enter].
Do the following as necessary for each setting:
•
•
•
ust the overall hue of the color, bluish - greenish - reddish, adjust
To adj
the Hue setting.
To adjust the overall vividness of the color, adjust the Saturation
setting.
To adjust the overall color brightness of the color, adjust the Brightness
setting.
Press [Menu] or [Esc] to exit the menus.
g
Page 84
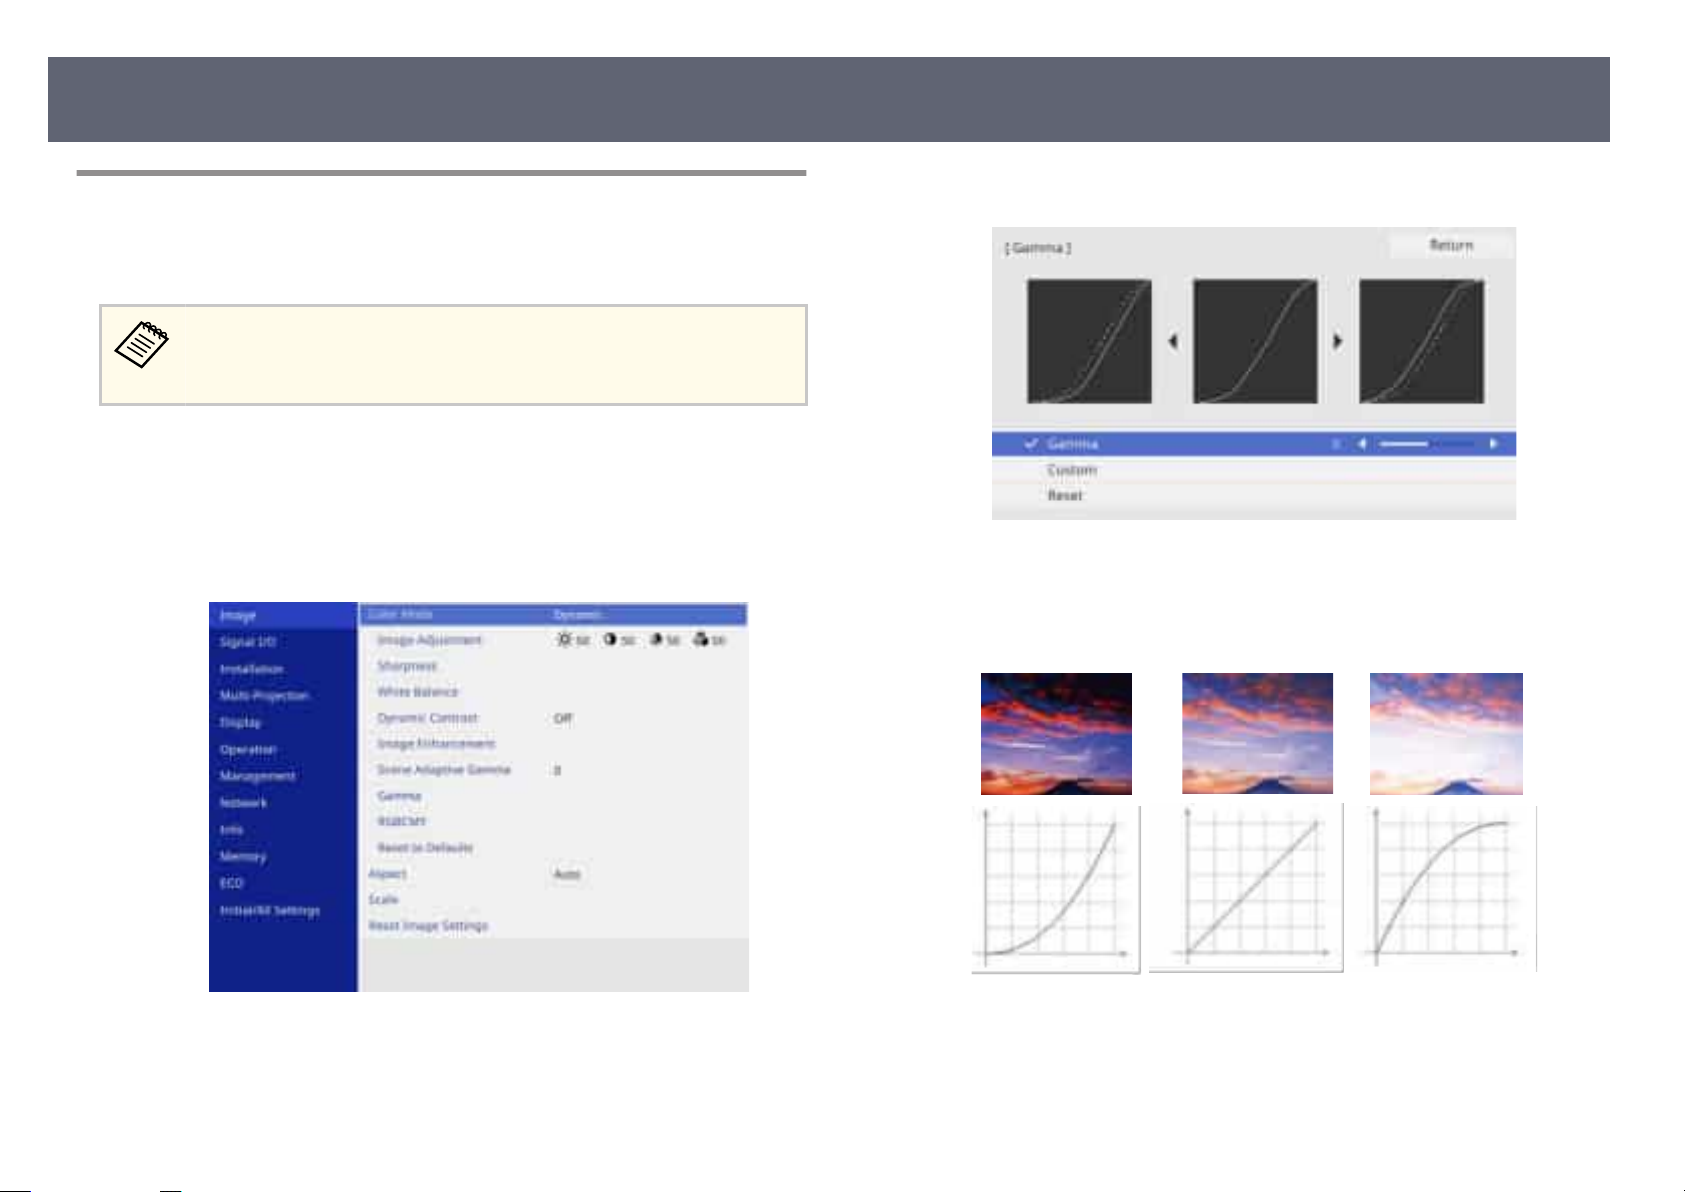
Adjusting the Image Color
84
Adjusting the Gamma
You can correct dierences
dierent image sources by adjusting the Gamma setting.
To optimize the color tone according to the scene, and to obtain a more
vivid image, correct the image by adjusting the Scene Adaptive Gamma
setting.
Turn on the projector and switch to the image source you want to use.
a
Press the [Menu] button on the control panel or remote control.
b
c
Select the I
mage menu and press [Enter].
in projected image colors that occur between
Adjust the correction value for the Gamma s
e
When you select a smaller value, you can reduce the overall brightness of
the image to make the image sharper. When you select a larger value, the
dark areas of images become brighter, but the color saturation for lighter
areas may become weaker.
etting and press [Enter].
Select Gamma and press [Enter].
d
Page 85
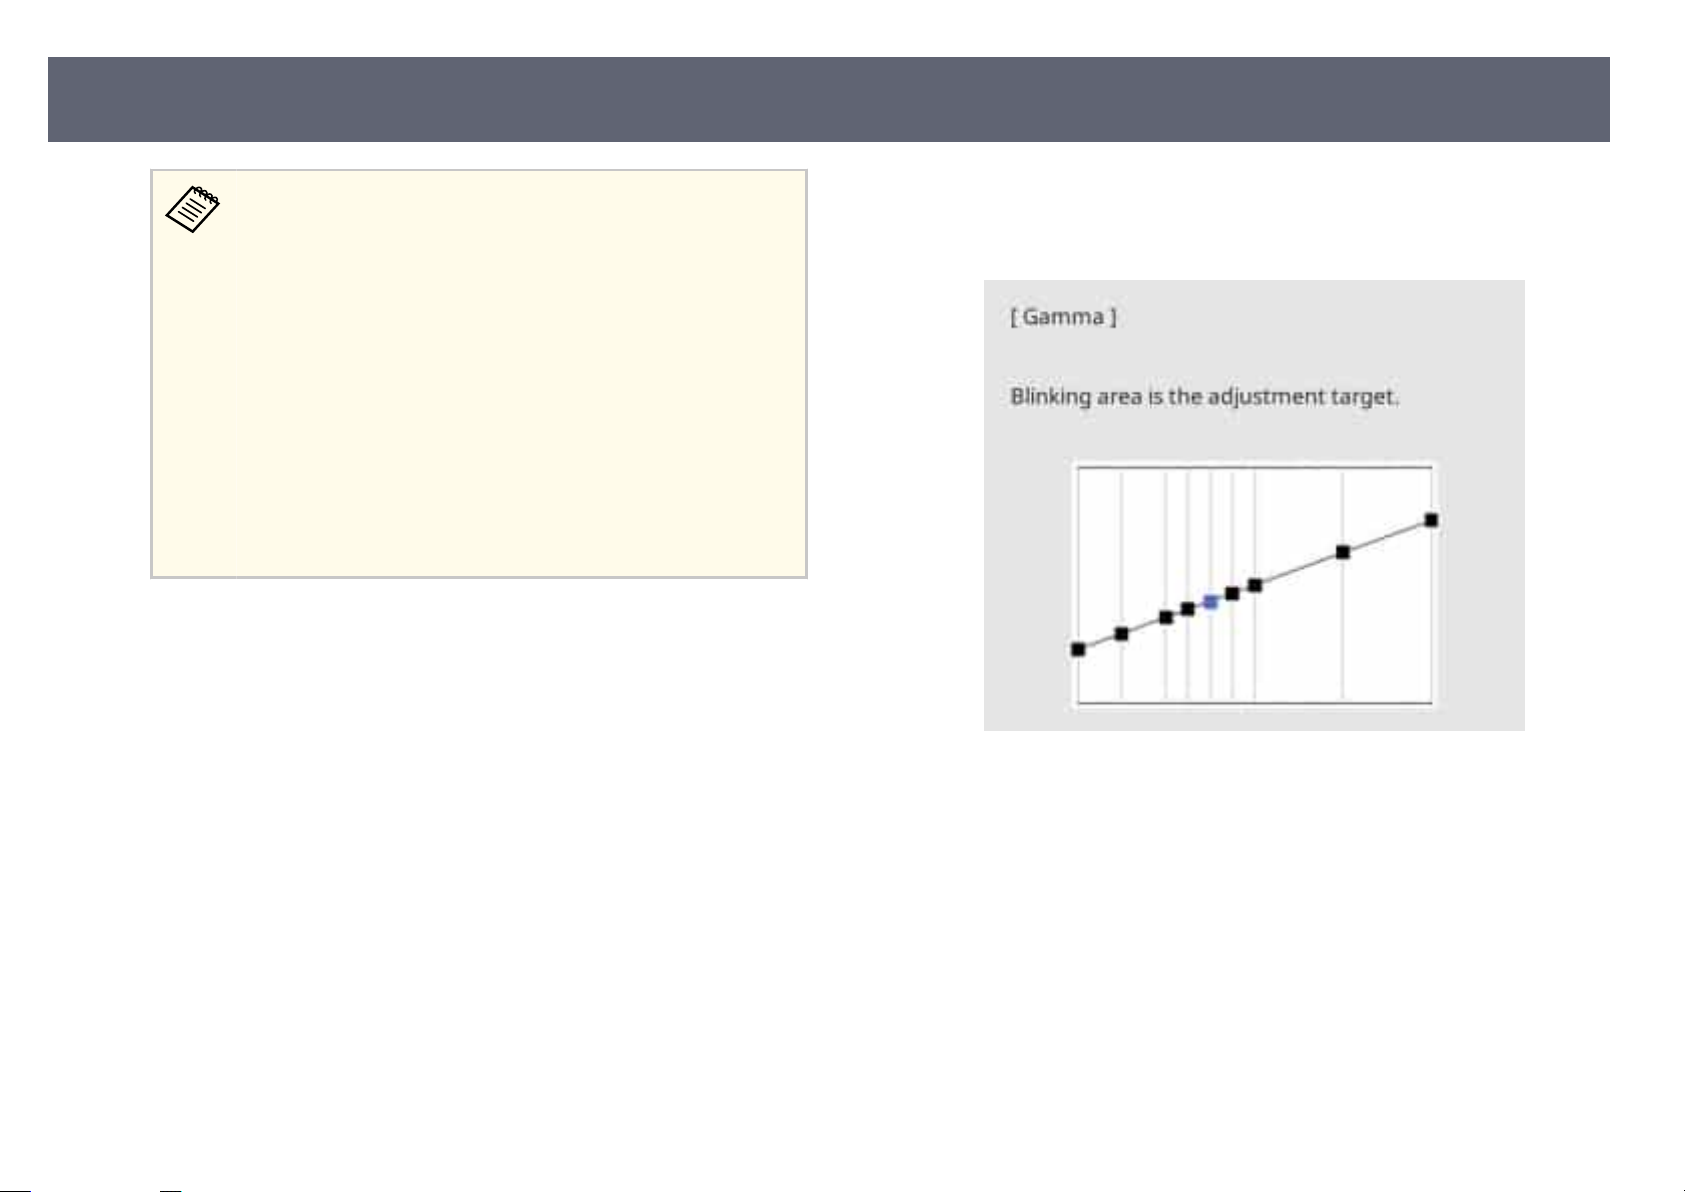
Adjusting the Image Color
85
•
If yo
Dynamic or DICOM SIM in the projector's Image menu, the
gamma setting method is reversed.
When you select a larger value, you can reduce the overall
brightness of the image to make the image sharper. When you
select a smaller value, the dark areas of images become brighter,
but the color saturation for lighter areas may become weaker.
•
If you set the Color Mode setting to DICOM SIM in the
projector's Image menu, select the adjustment value according
to the projection size.
•
•
•
Medical images may not be reproduced correctly depending on
your settings and screen specications.
If you want to make ner ad
f
u set the Color Mode setting to anything other than
If the projection size is 120 inches or less, select a small value.
If the projection size is 120 inches or more, select a large value.
justments, select Custom and press [Enter].
Press the le o
g
adjust on the gamma adjustment graph. en press the up or down arrow
button to adjust the value and press [Enter].
ht arrow buttons to select the color tone you want to
r rig
Press [Menu] or [Esc] to exit the menus.
h
Relat
g
•
ed Links
m
age Quality Settings - Image Menu" p.186
"I
Page 86
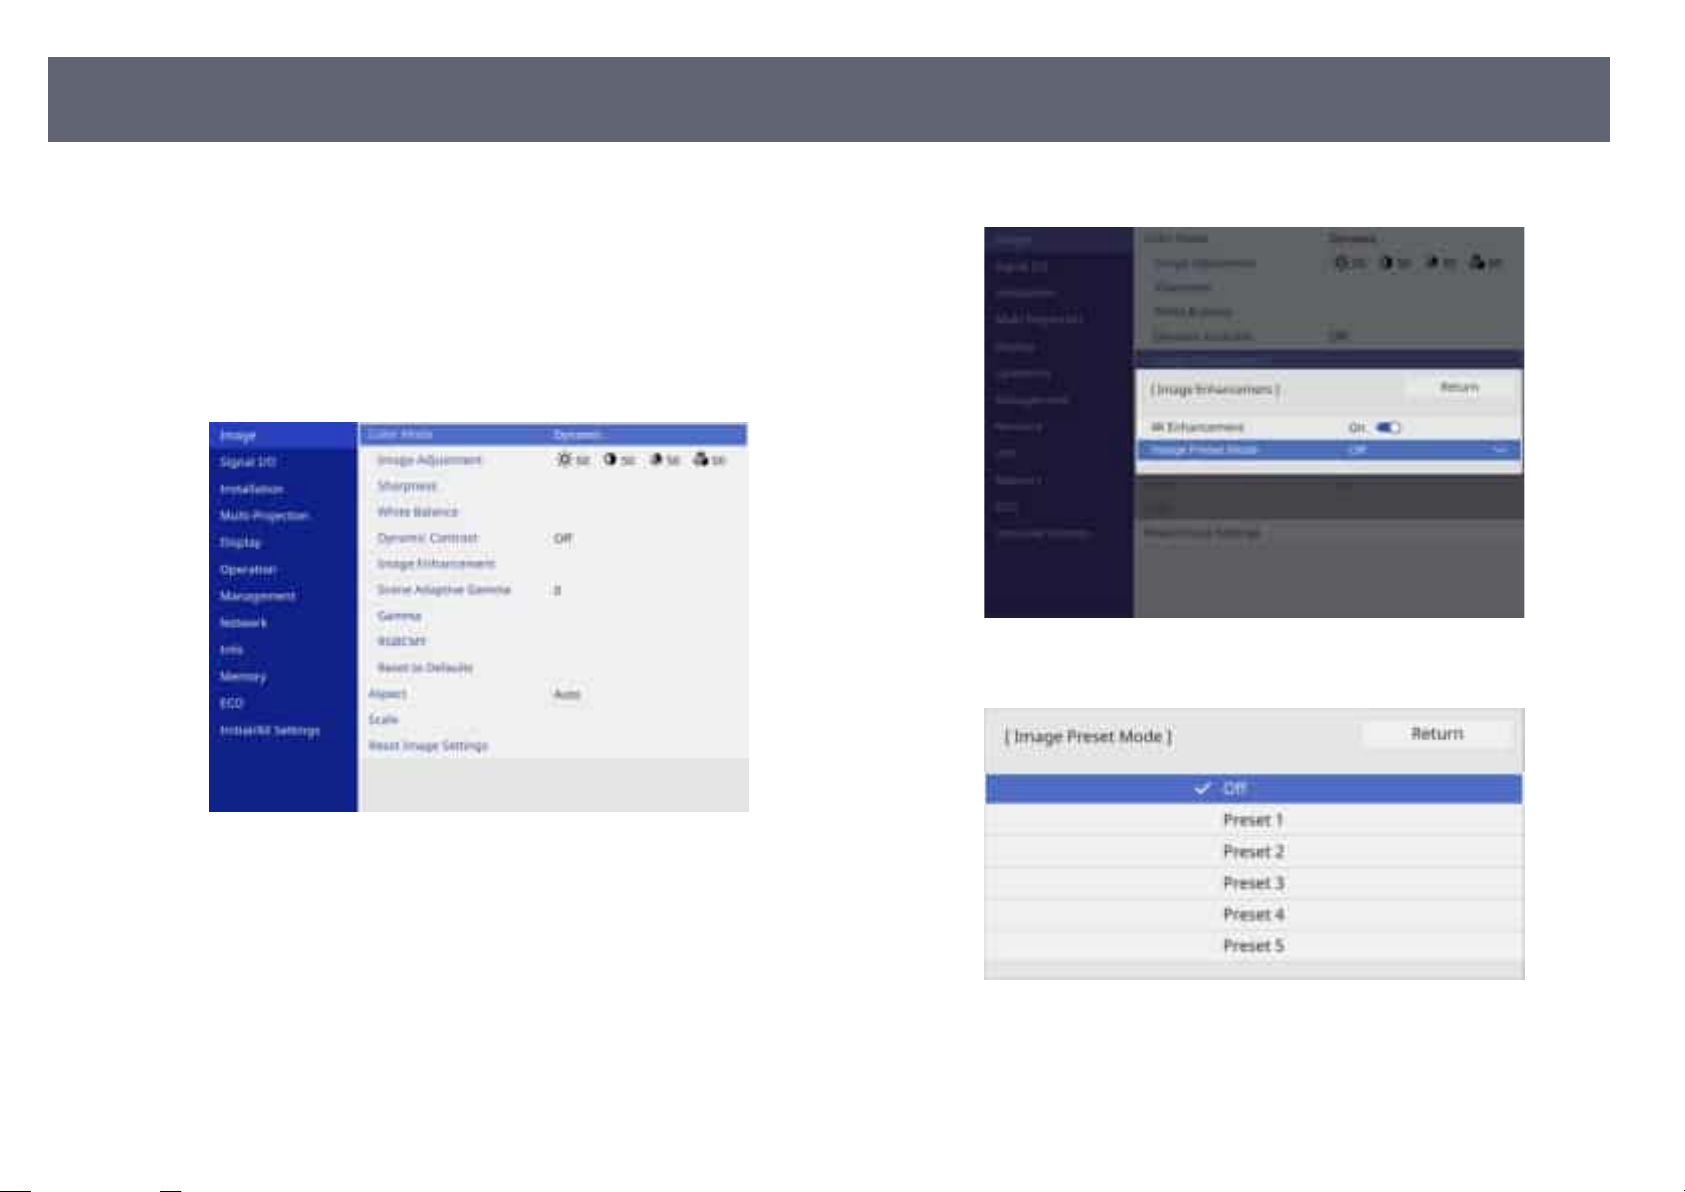
Adjusting the Image Resolution
86
You can adjust the resolution of the image to reproduce a clear image with an
atic texture and material feel.
emph
Turn on the projector and switch to the image source you want to use.
a
Press the [Menu] button on the control panel or remote control.
b
c
Select the I
mage menu and press [Enter].
Select Image Preset Mode and press [Enter].
e
Select the preset option and press [Enter].
f
Select Image Enhancement and press [Enter].
d
e following settings saved in the preset option are applied to the image.
•
No
ise Reduction
•
MPEG Noise Reduction
Page 87
Adjusting the Image Resolution
87
•
Adjust each setting individually as necessary.
g
•
•
•
Press [Menu] or [Esc] to exit the menus.
h
l Enhancement
Detai
To re
duce ickering in images, adjust the Noise Reduction setting.
To reduce the noise or artifacts seen in MPEG video, adjust the MPEG
Noise Reduction setting.
To create a more emphatic texture and material feel of the image, adjust
the Detail Enhancement setting.
e settings value in the preset option are overwritten.
Page 88
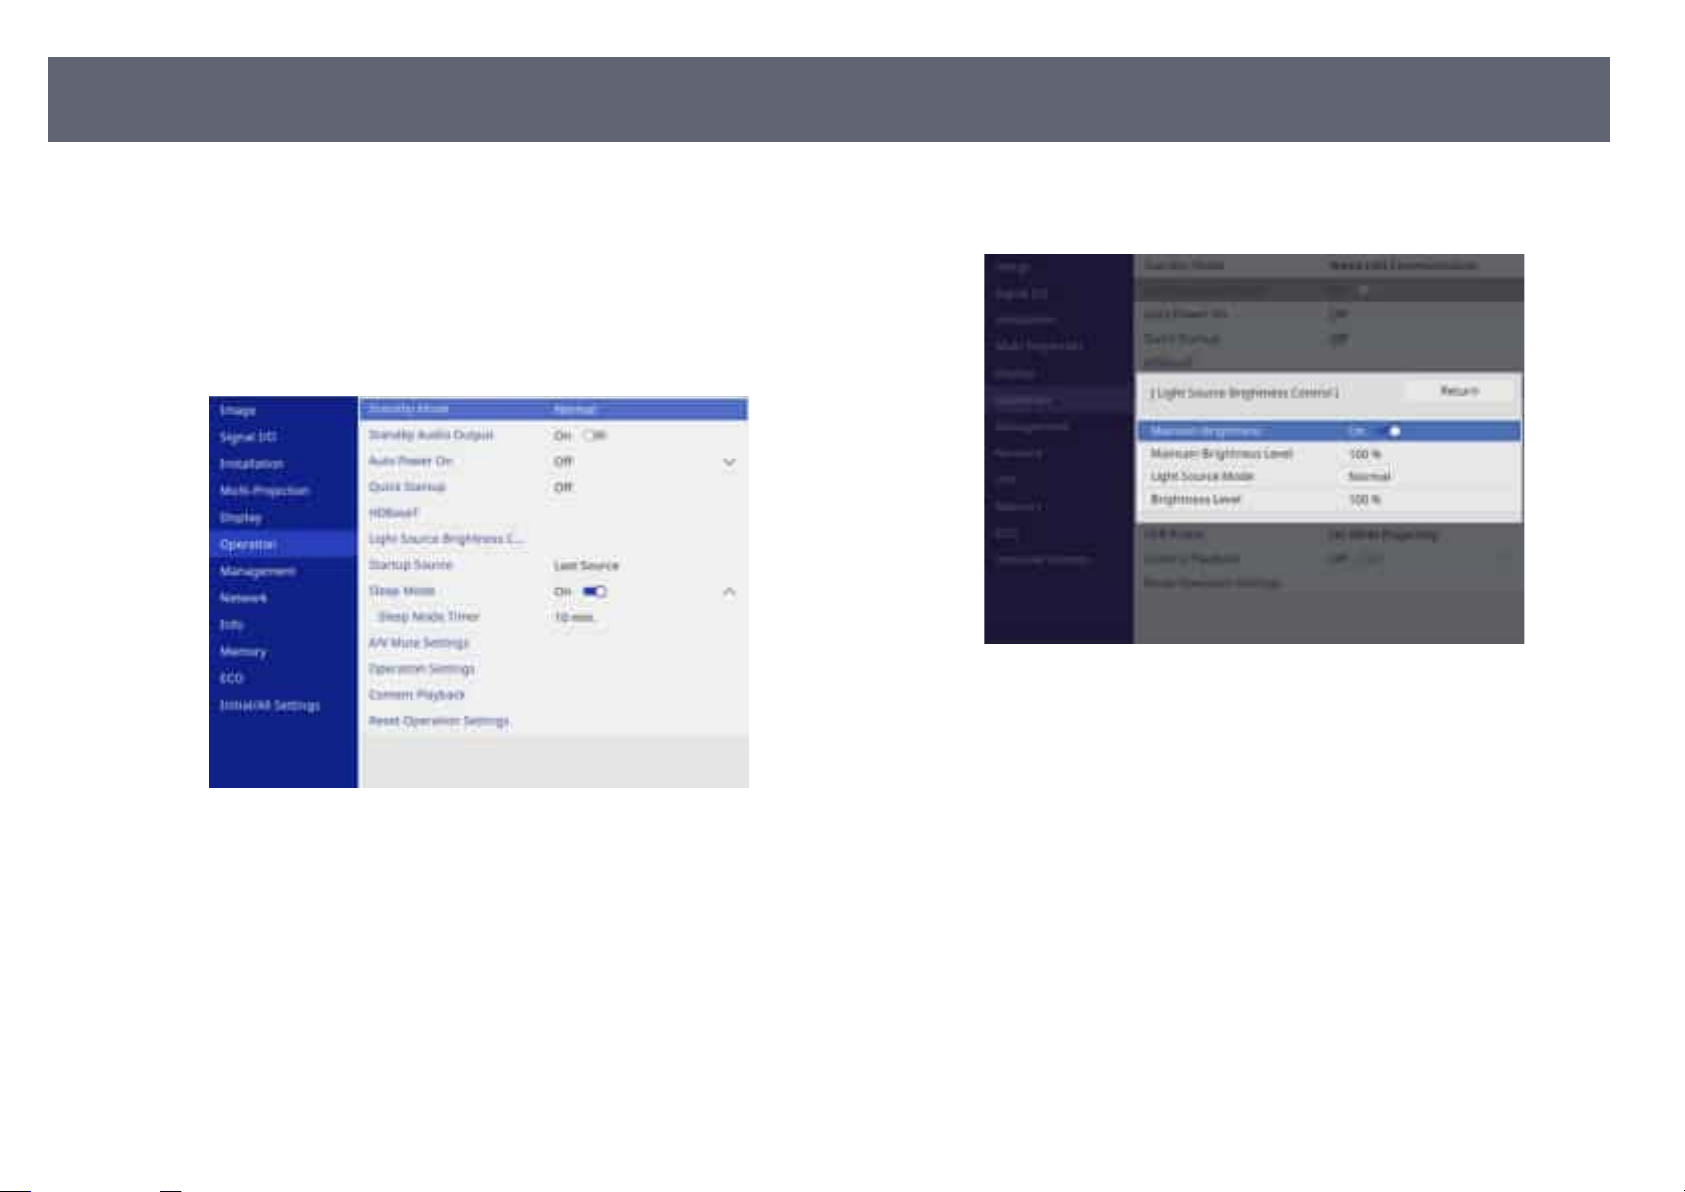
Adjusting the Brightness
88
You can adjust the brightness of your projector's light source.
Turn on the projector and switch to the image source you want to use.
a
Press the [Menu] button on the control panel or remote control.
b
Select the O
c
Select Light Source Brightness Control and press [Enter].
d
peration menu and press [Enter].
If you want to maintain the brightness at a spe
e
Maintain Brightness setting and select On.
If you turn o
f
setting:
•
•
•
•
Normal lets you set the brightness to the maximum level. is makes
the light source operation time approximately 20,000 hours.
Quiet lets you set the brightness to 70% and reduces fan noise. is
makes the light source operation time approximately 20,000 hours.
Extended lets you set the brightness to 70% and extends the life
expectancy of the light source. is makes the light source operation
time approximately 30,000 hours.
Custom lets you to select a custom brightness level between 70 to 100%.
Maintain Brightness, select the Light Source Mode
cic level, select the
Page 89
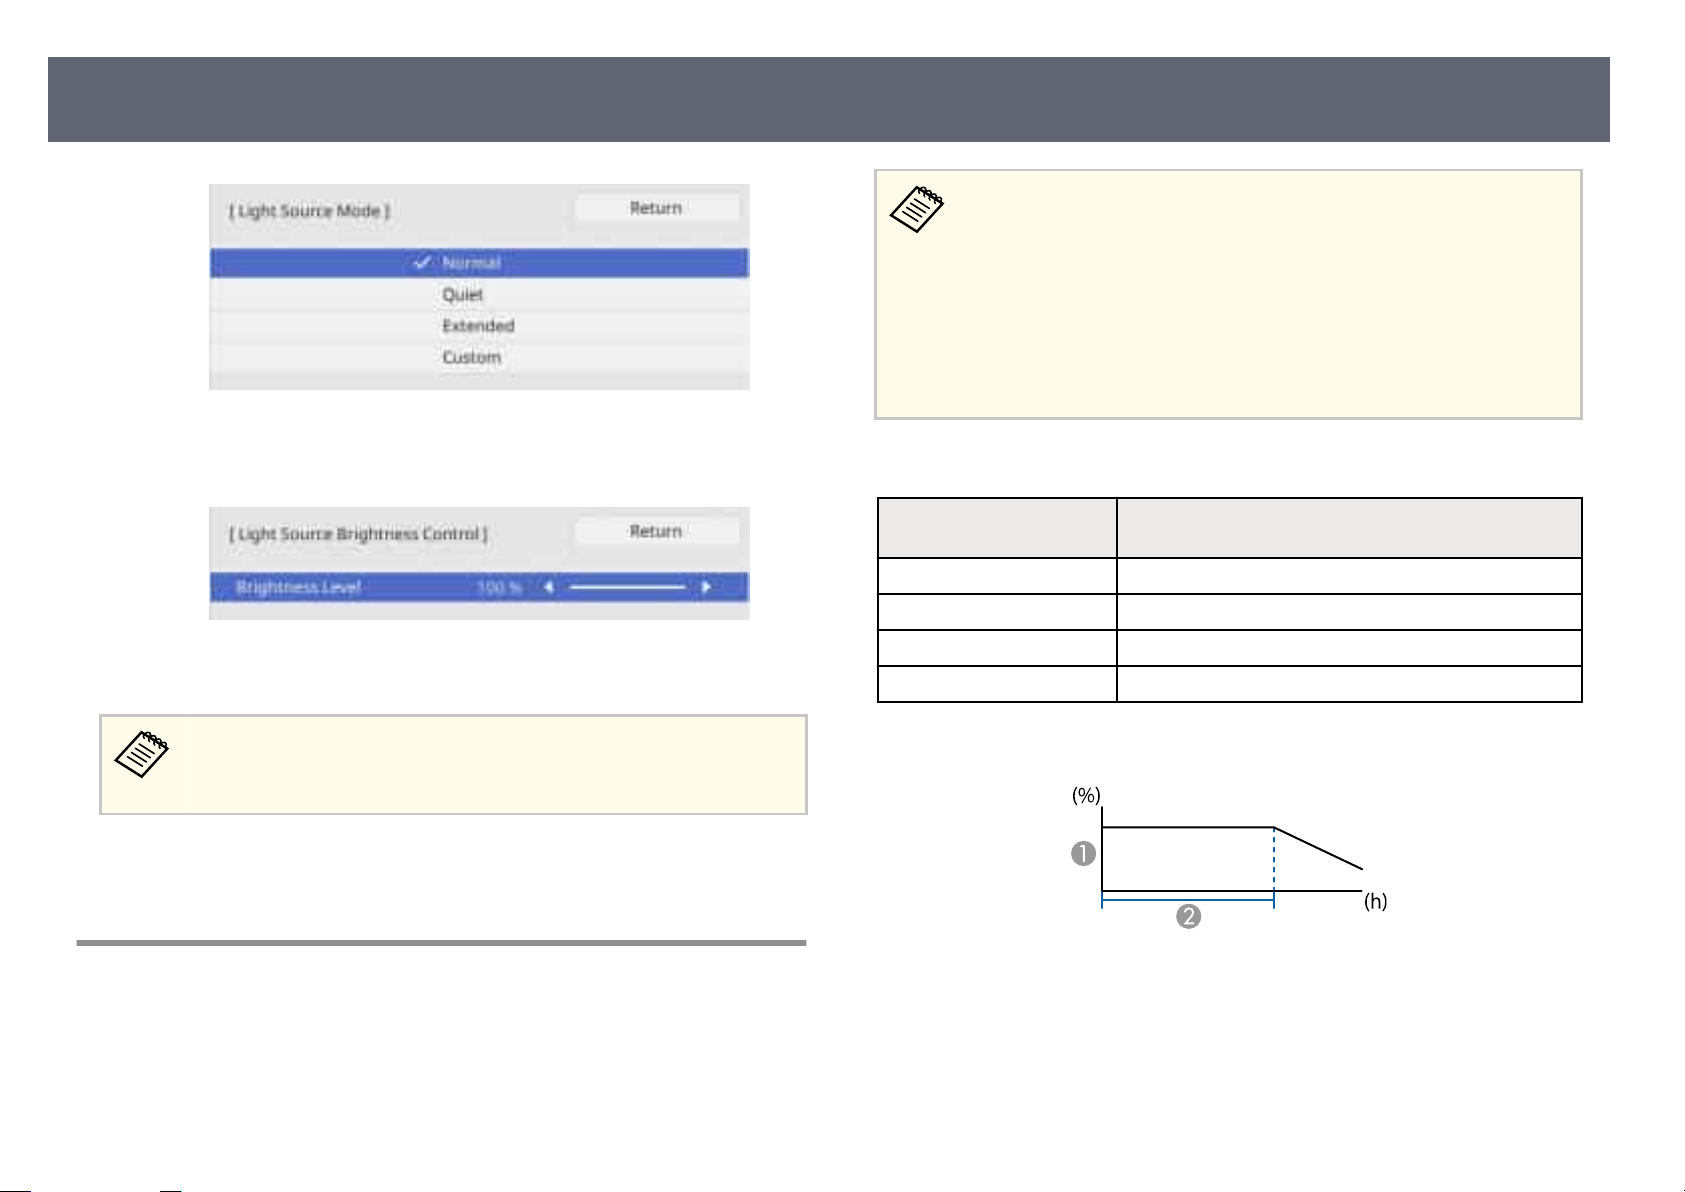
Adjusting the Brightness
If you set the Light Source Mode setting to Custom, select Brightness
g
Level and use the le and right arrow buttons to select the brightness.
Press [Menu] or [Esc] to exit the menus.
h
•
e light s
conditions and usage.
•
e hours listed here are an approximate and are not guaranteed.
•
You may need to replace internal parts sooner than the estimated light
source operation time.
•
If Maintain Brightness is turned on, and you have exceeded the usage
hours listed here, you may not be able to select a high Maintain
Brightness Level setting.
Maintain Brightness o
Brightness Level setting Time before the brightness of the light source is reduced
100% 20,000 hours
90% 21,000 hours
80% 24,000 hours
70% 30,000 hours
ource operation time varies depending on the environmental
by half (ap
proximate)
89
For the best results in maintaining a constant brightness, set the
Ligh
t Source Calibration setting to Run Periodically in the projector's
Management menu.
Related Links
g
•
ht Source Operation Time" p.89
"Lig
Light Source Operation Time
e light source operation time varies depending on the Brightness Level
setting and whether Maintain Brightness is on or o.
Maintain Brightness on
Maintain brightness level
A
Time the projector can maintain constant brightness (approximate)
B
Page 90
Adjusting the Brightness
90
Maintain Brightness Level
ing
sett
85% 6,000 hours
80% 10,000 hours
75% 14,000 hours
70% 19,000 hours
Hours
Page 91
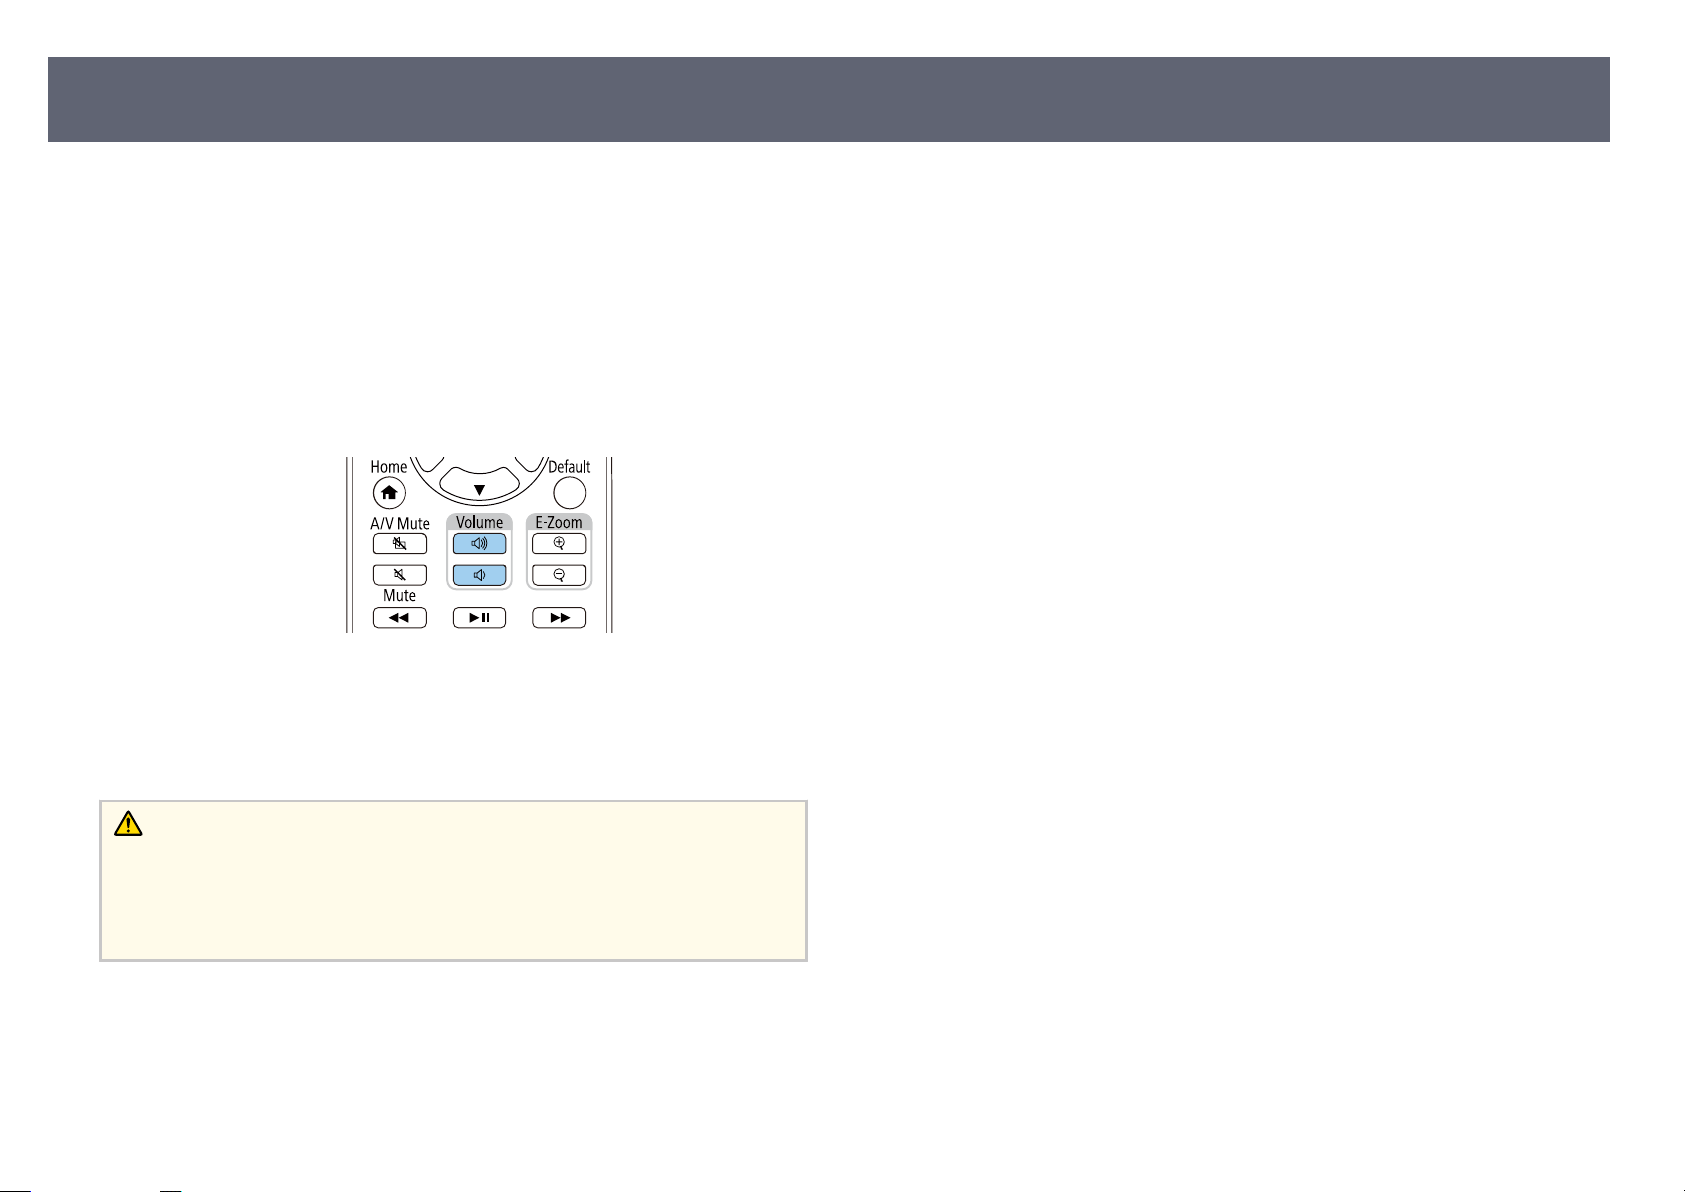
Controlling the Volume with the Volume Buttons
e volume buttons control the projector's internal speaker system.
u can also control the volume of any external speakers you connected to the
Yo
projector.
You must adjust the volume separately for each connected input source.
Turn on the projector and start a presentation.
a
To lower or raise the volume, press the [Volume] buttons on the remote
b
co
rol as shown.
nt
A volume gauge appears on the screen.
91
To set the volume to a spe
c
the projector's Signal I/O menu.
cic level for an input source, select Volume in
Caution
t start a presentation at a high volume setting. Sudden loud noises may cause
Do no
hearing loss.
Always lower the volume before powering o, so that you can power on and then
gradually increase the volume.
Page 92

Adjusting Projector Features
low the instructions in these sections to use your projector's adjustment features.
Fol
Related Links
g
•
"Projecting Two Images Simultaneously" p.93
•
"Projecting a PC Free Presentation" p.96
•
"Projecting in Content Playback Mode" p.101
•
"Shutting O the Image and Sound Temporarily" p.107
•
"Stopping Video Action Temporarily" p.108
•
"Turning O the Sound Temporarily (Mute)" p.109
•
"Zooming Images (E-Zoom)" p.110
•
"Saving a User's Logo Image" p.111
•
"Saving Settings to Memory and Using Saved Settings " p.113
•
"Using Advanced Image Adjustment Features" p.114
•
"Multi-Projection Features" p.117
•
"External Camera Usage" p.128
•
"Projector Security Features" p.130
Page 93
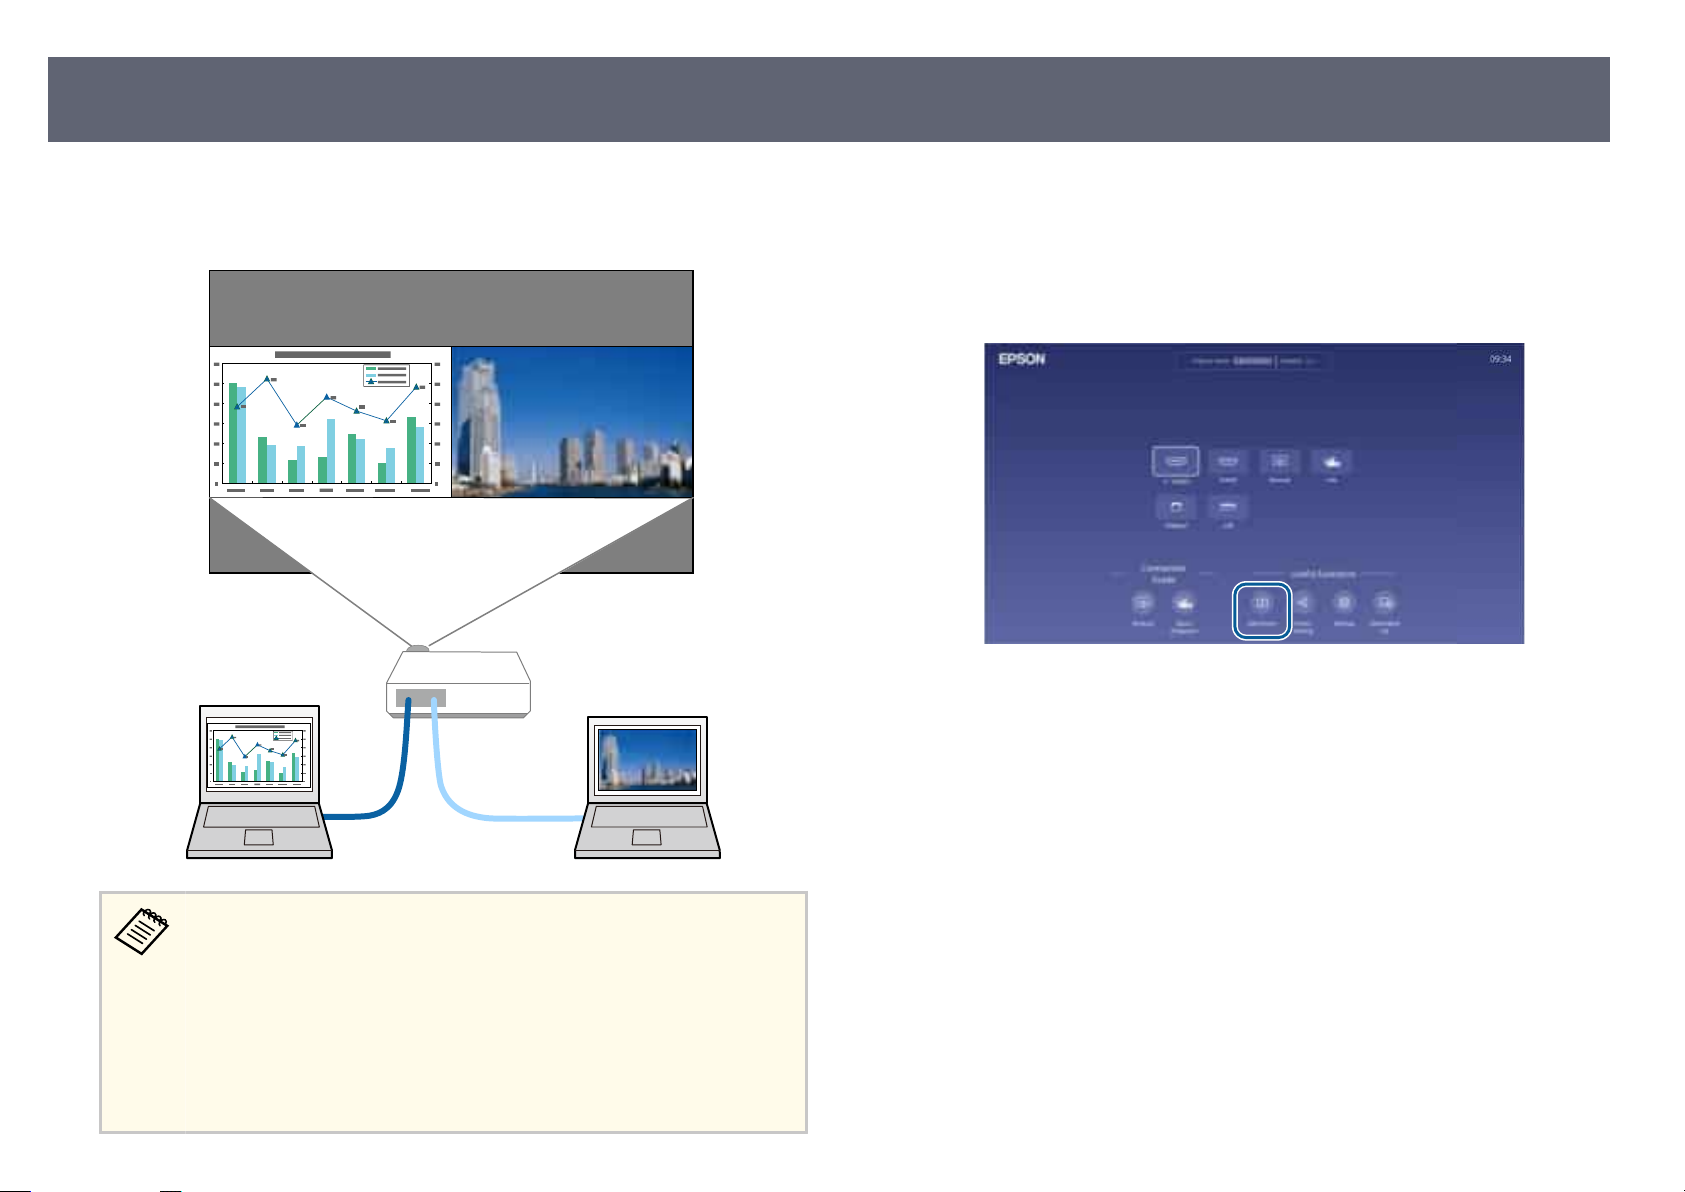
Projecting Two Images Simultaneously
93
You can use the split screen feature to simultaneously project two images from
dierent
remote control or the projector menus.
image sources. You can control the split screen feature using the
Turn on the projector and display an image
a
Press the [Home] button.
b
Select S
c
Press the [Menu] button.
d
plit Screen.
•
While using the split screen feature, other projector features may not
be available and some settings may be automatically applied to both
images.
•
You cannot perform split screen projection when the Content
Playback setting is set to On in the projector's Operation menu.
•
You may not be able to perform split screen projection when you
use the Scale feature or the Edge Blending feature in the projector's
Multi-Projection menu.
Page 94
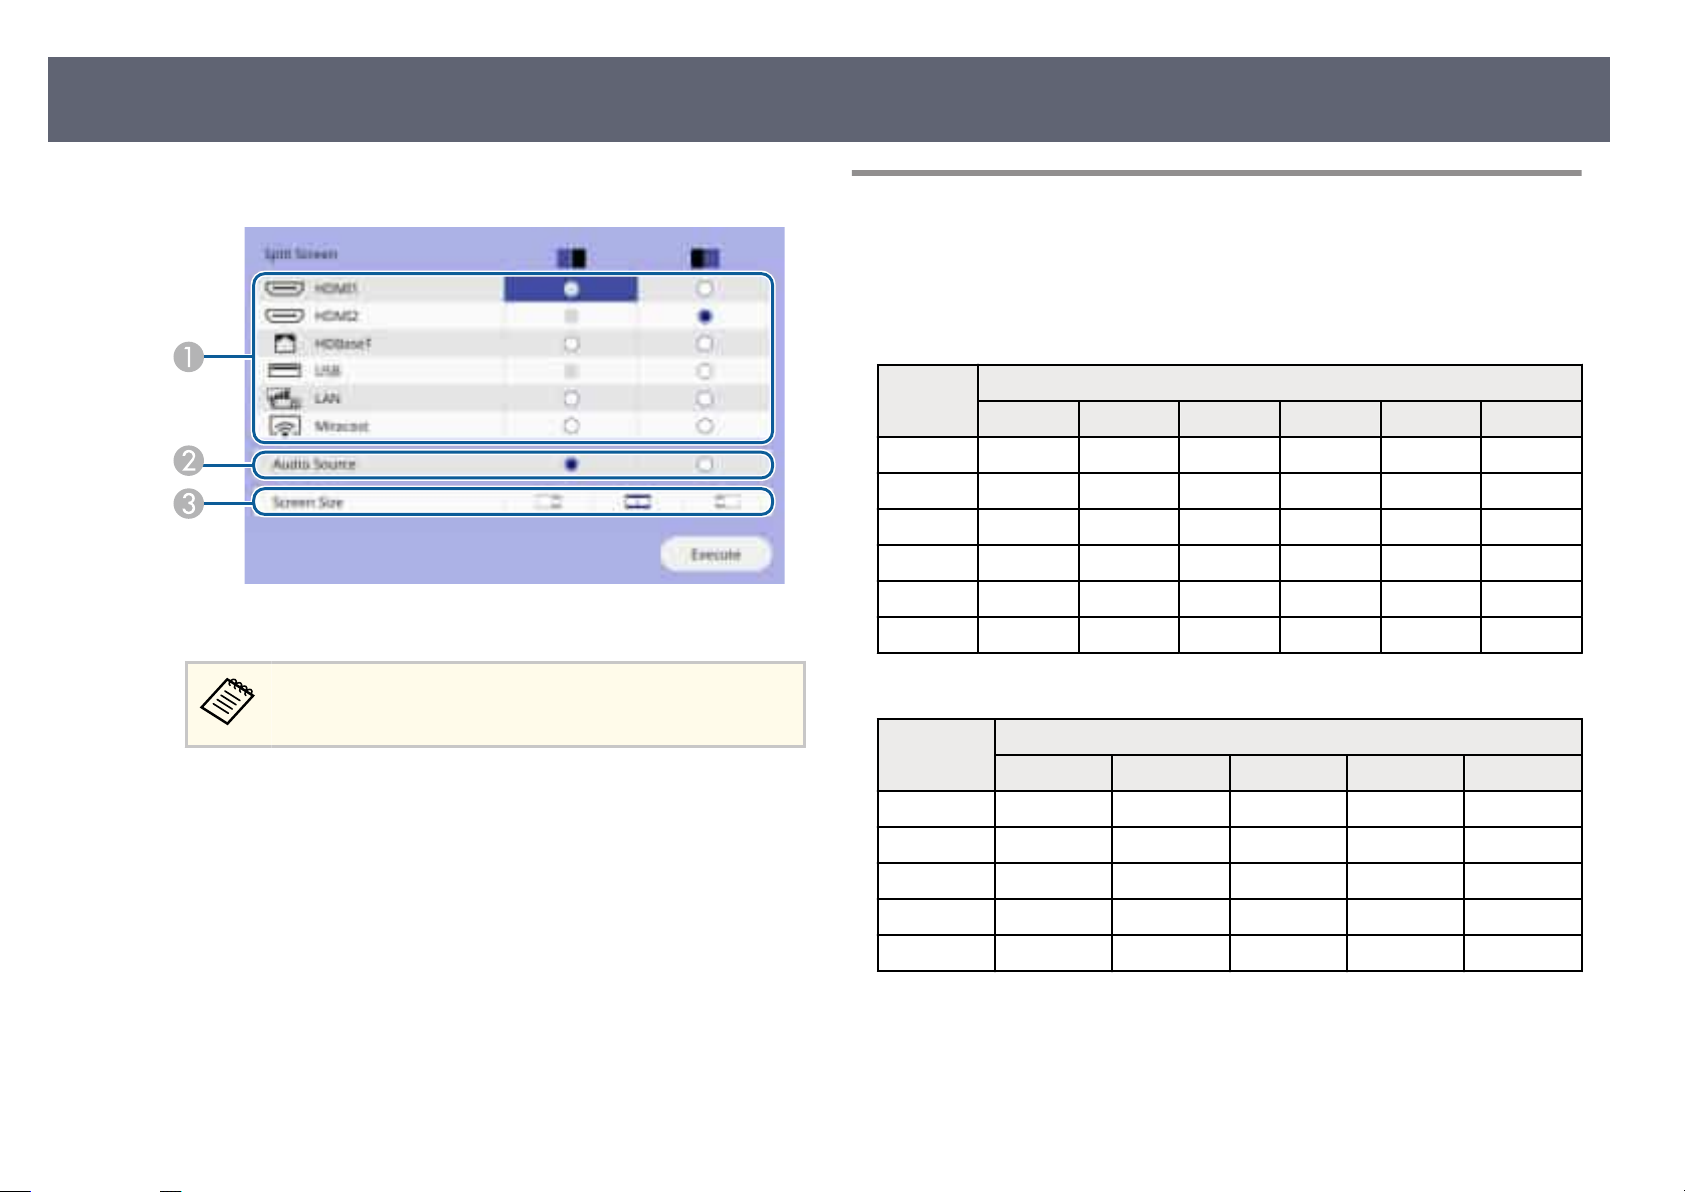
Projecting Two Images Simultaneously
94
When splitting screen into halves, do the following as necessary:
e
Select the input source.
A
You can only select input sources that can be combined.
Select the screen from which you want to hear audio.
B
Select the screen size.
C
Input Sources for Split Screen Projection
e combinations of input sources that can be projected on a split screen are
lis
ted below.
EB-L890E/EB-L895E/EB-L790SE/EB-L795SE/EB-L690E/EB-L890U/EBL895U/EB-L790U/EB-L790SU/EB-L690U/EB-L690SU/EB-L695SU
Le
Scre
en
HDMI1 - ✓ ✓ ✓ - -
HDMI2 ✓ - - ✓ ✓ ✓
HDBaseT ✓ - - ✓ ✓ ✓
USB ✓ ✓ ✓ - - ✓
LAN - ✓ ✓ - - -
Miracast - ✓ ✓ ✓ - -
EB-L690SE/EB-L695SE
Le Screen Rig
HDMI1 - ✓ ✓ ✓ ✓
HDMI1 HDMI2 HDBaseT USB LAN Miracast
HDMI1 HDMI2 HDBaseT USB LAN
Right Screen
ht Screen
Select E
f
To exi
g
Related Links
g
•
"In
put Sources for Split Screen Projection" p.94
•
"Split Screen Projection Restrictions" p.95
xecute and press [Enter].
t the split screen feature, press [Esc].
HDMI2 ✓ - - ✓ ✓
HDBaseT ✓ - - ✓ ✓
USB ✓ ✓ ✓ - -
LAN ✓ ✓ ✓ - -
Page 95

Projecting Two Images Simultaneously
Split Screen Projection Restrictions
Operating restrictions
95
e fol
•
•
•
•
•
•
•
Image restrictions
•
•
g
•
•
•
•
lowing operations cannot be performed during split screen projection.
Setting the projector's menu
E-Zoom
Switching the aspect mode (the aspect mode is set to Auto)
Operations using the [Customize] button on the remote control, other than
displaying the network information on the projected surface.
Applying the Dynamic Contrast setting
Displaying the network information on the projected surface by a method
other than pressing the [Customize] button.
Displaying the Miracast information bar
Even if you set No-signal Screen to Logo in the projector's Display menu,
the blue screen appears when no image signal is being input.
When you create a single unied image projected from multiple projectors
and use the split screen feature, the second projector does not detect an image
signal.
Related Links
"Image Aspect Ratio" p.79
"Zooming Images (E-Zoom)" p.110
"Turning On Automatic Luminance Adjustment" p.82
"Adjusting the Menu Settings" p.183
Page 96
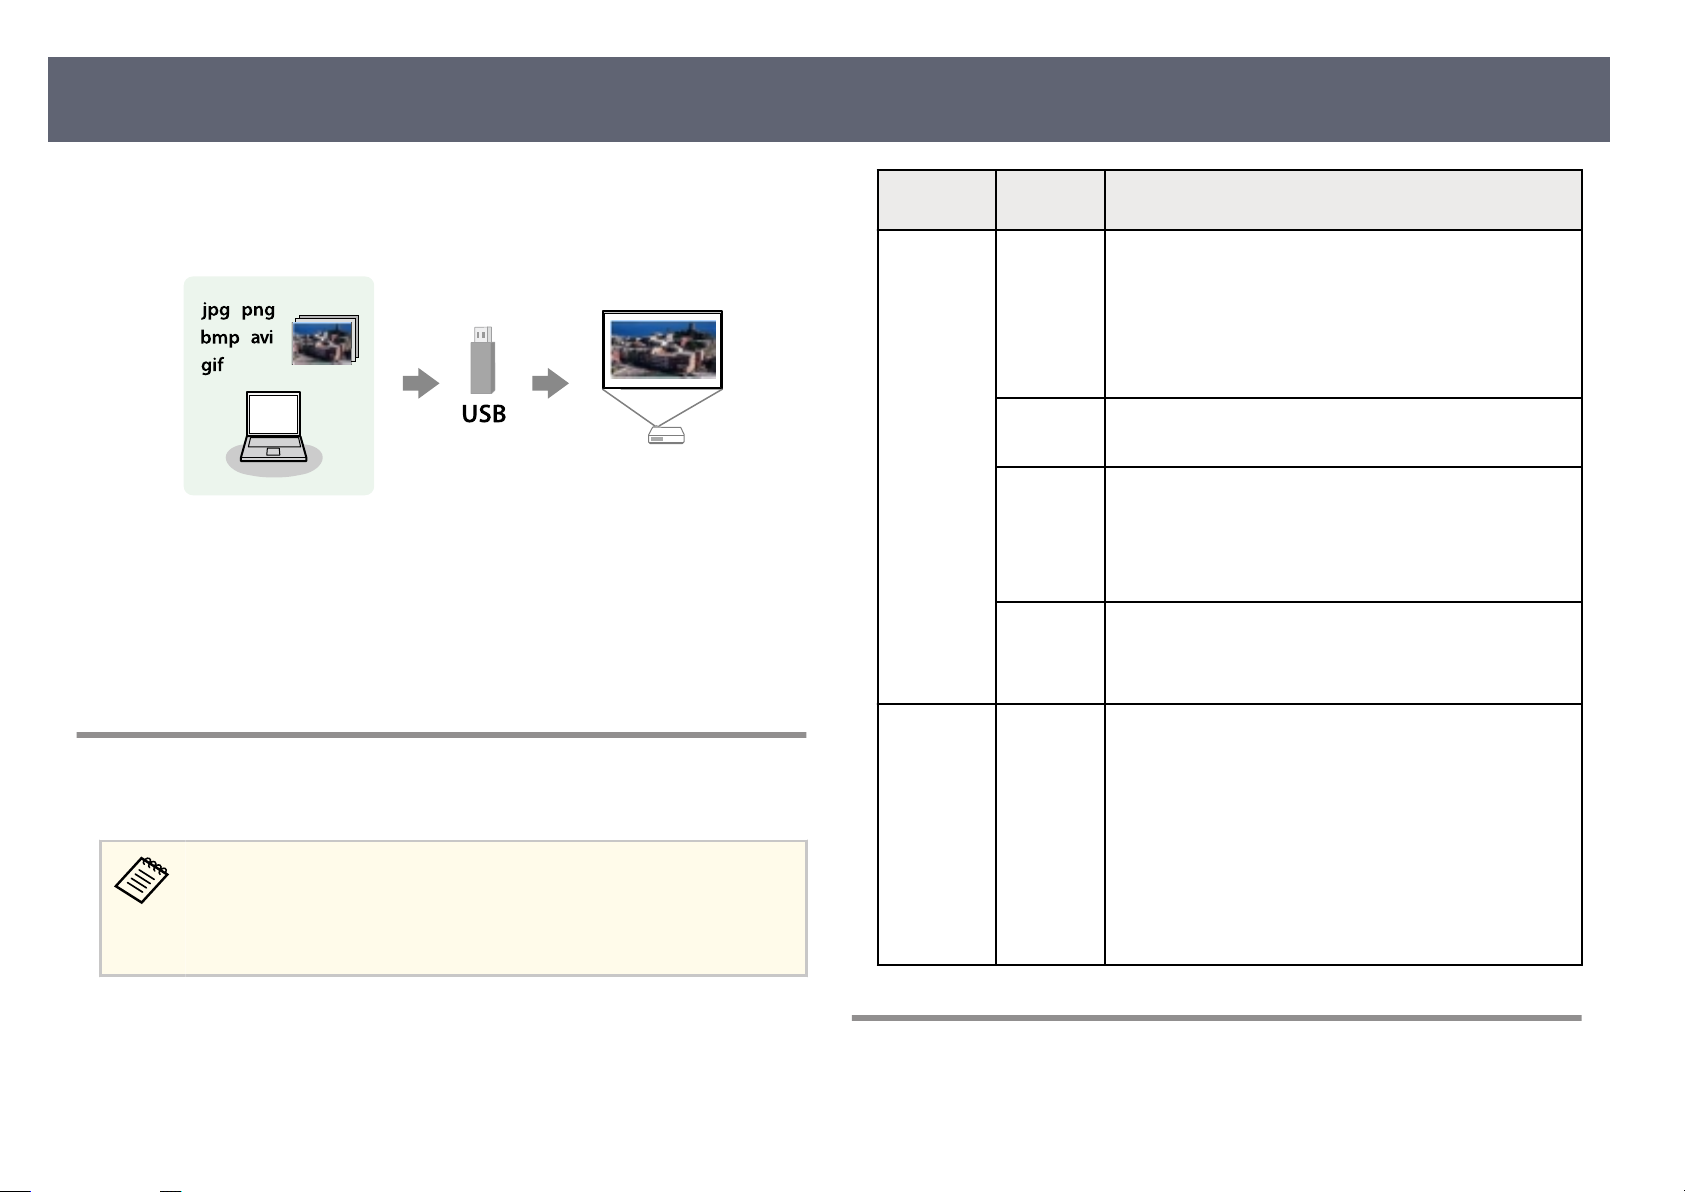
Projecting a PC Free Presentation
96
You can use your projector's PC Free feature whenever you connect a USB
device t
hat contains compatible presentation les. is lets you quickly and
easily display a presentation and control it using the projector's remote control.
Related Links
g
•
pported PC Free File Types" p.96
"Su
•
"Precautions on PC Free Projection" p.96
•
"Starting a PC Free Slide Show" p.97
•
"Starting a PC Free Movie Presentation" p.98
•
"PC Free Display Options" p.99
Supported PC Free File Types
You can project these types of les using t
•
•
est results, place your les on media that is formatted in
For b
FAT16/32.
If you have trouble projecting from media formatted for non-Windows
le systems, try formatting the media for Windows instead.
he projector's PC Free feature.
File contents File type
(extensio
Image .jpg Make sure the le is no
.bmp Make sure the le is not:
.gif Make sure the le is no
.png Make sure the le is not:
Movie .avi •
Details
n)
•
CMYK format
•
Progressive format
•
Highly compressed
•
Above 8,192 × 8,192 resolution
•
Above 1,280 × 800 resolution
•
Above 1,280 × 800 resolution
•
Animated
•
Interlaced
•
Above 1,280 × 800 resolution
•
Interlaced
Versio
n: AVI 1.0 only
•
Resolution: 1,280 × 720 or less
•
Size: 2 GB or less
•
Movie Codec: Motion JPEG
•
Frame Rate: up to 30 fps
•
Audio Codec: LPCM or IMA ADPCM
•
Audio Sampling Rate: 11.025 kHz, 22.05 kHz, 44.1
kHz, 16 kHz, 24 kHz, 32 kHz, or 48 kHz
t:
t:
Precautions on PC Free Projection
Note the following precautions when using PC Free features.
Page 97
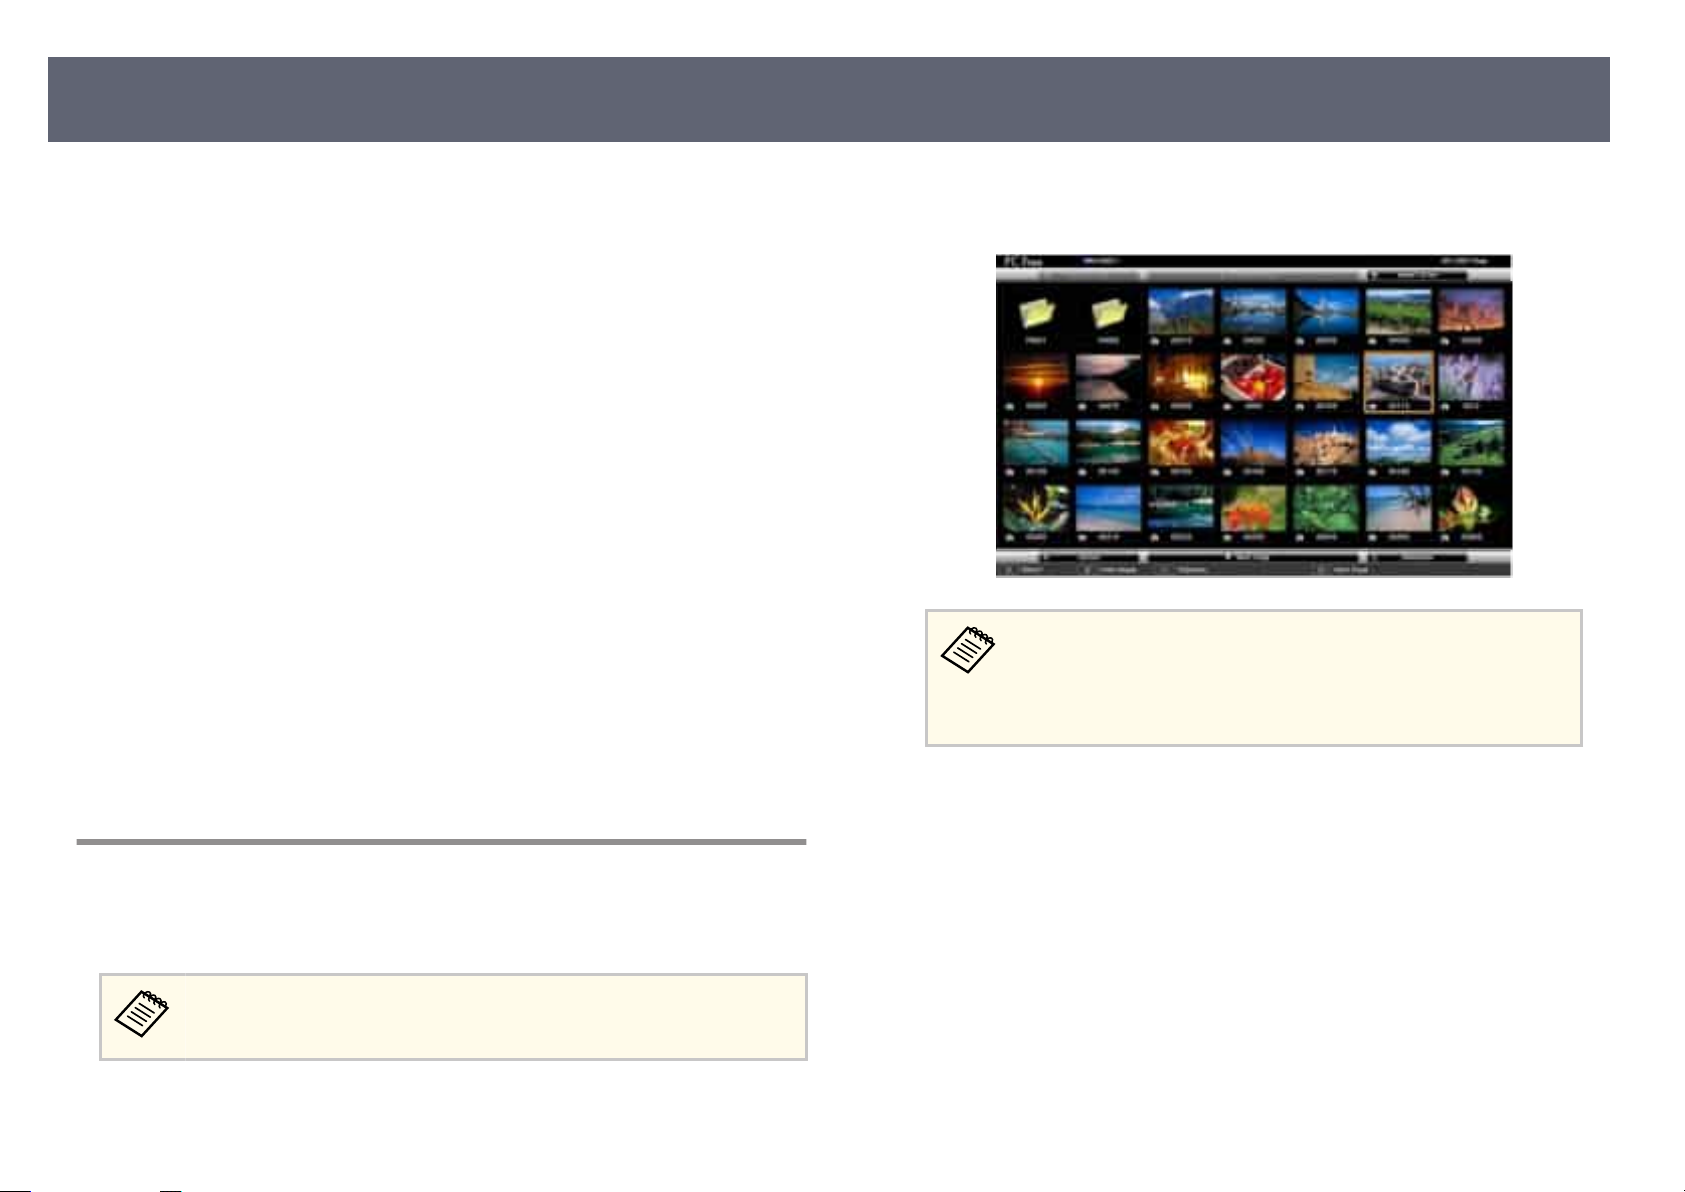
Projecting a PC Free Presentation
97
•
•
•
•
•
•
•
g
•
•
•
annot use a USB key for PC Free features.
You c
Do not disconnect the USB storage device while it is being accessed;
otherwise, PC Free may not operate correctly.
You may not be able to use the security features on certain USB storage
devices with PC Free features.
When connecting a USB device that includes an AC adapter, connect the AC
adapter to an electrical outlet when you use the device with your projector.
Some commercially available USB card readers may not be compatible with
the projector.
e projector can recognize up to 5 cards inserted into the connected card
reader at one time.
You can use the following functions while projecting in PC Free.
•
Freeze
•
A/V Mute
•
E-Zoom
Related Links
"Stopping Video Action Temporarily" p.108
"Shutting O the Image and Sound Temporarily" p.107
"Zooming Images (E-Zoom)" p.110
Starting a PC Free Slide Show
Aer connecting a USB device to the projector, you can switch to the USB input
source and start your slide show.
You can change the PC Free operation options or add special eects
highlighting Option at the bottom of the screen and pressing [Enter].
by
Press the [USB] button on the remote control.
a
e PC Free le list screen is displayed.
•
e Select Drive screen is displayed, press the arrow buttons to
If th
select the drive and press [Enter].
•
To display images on the other USB drive, highlight Select Drive
at the top of the le list screen and press [Enter].
Do one of the following to locate your les:
b
•
I
u need to display les inside a subfolder on your device, press the
f yo
arrow buttons to highlight the folder and press [Enter].
•
To move back up a folder level on your device, highlight Back to Top
and press [Enter].
•
To view additional les in a folder, highlight Next Page or Previous
Page and press [Enter].
Page 98
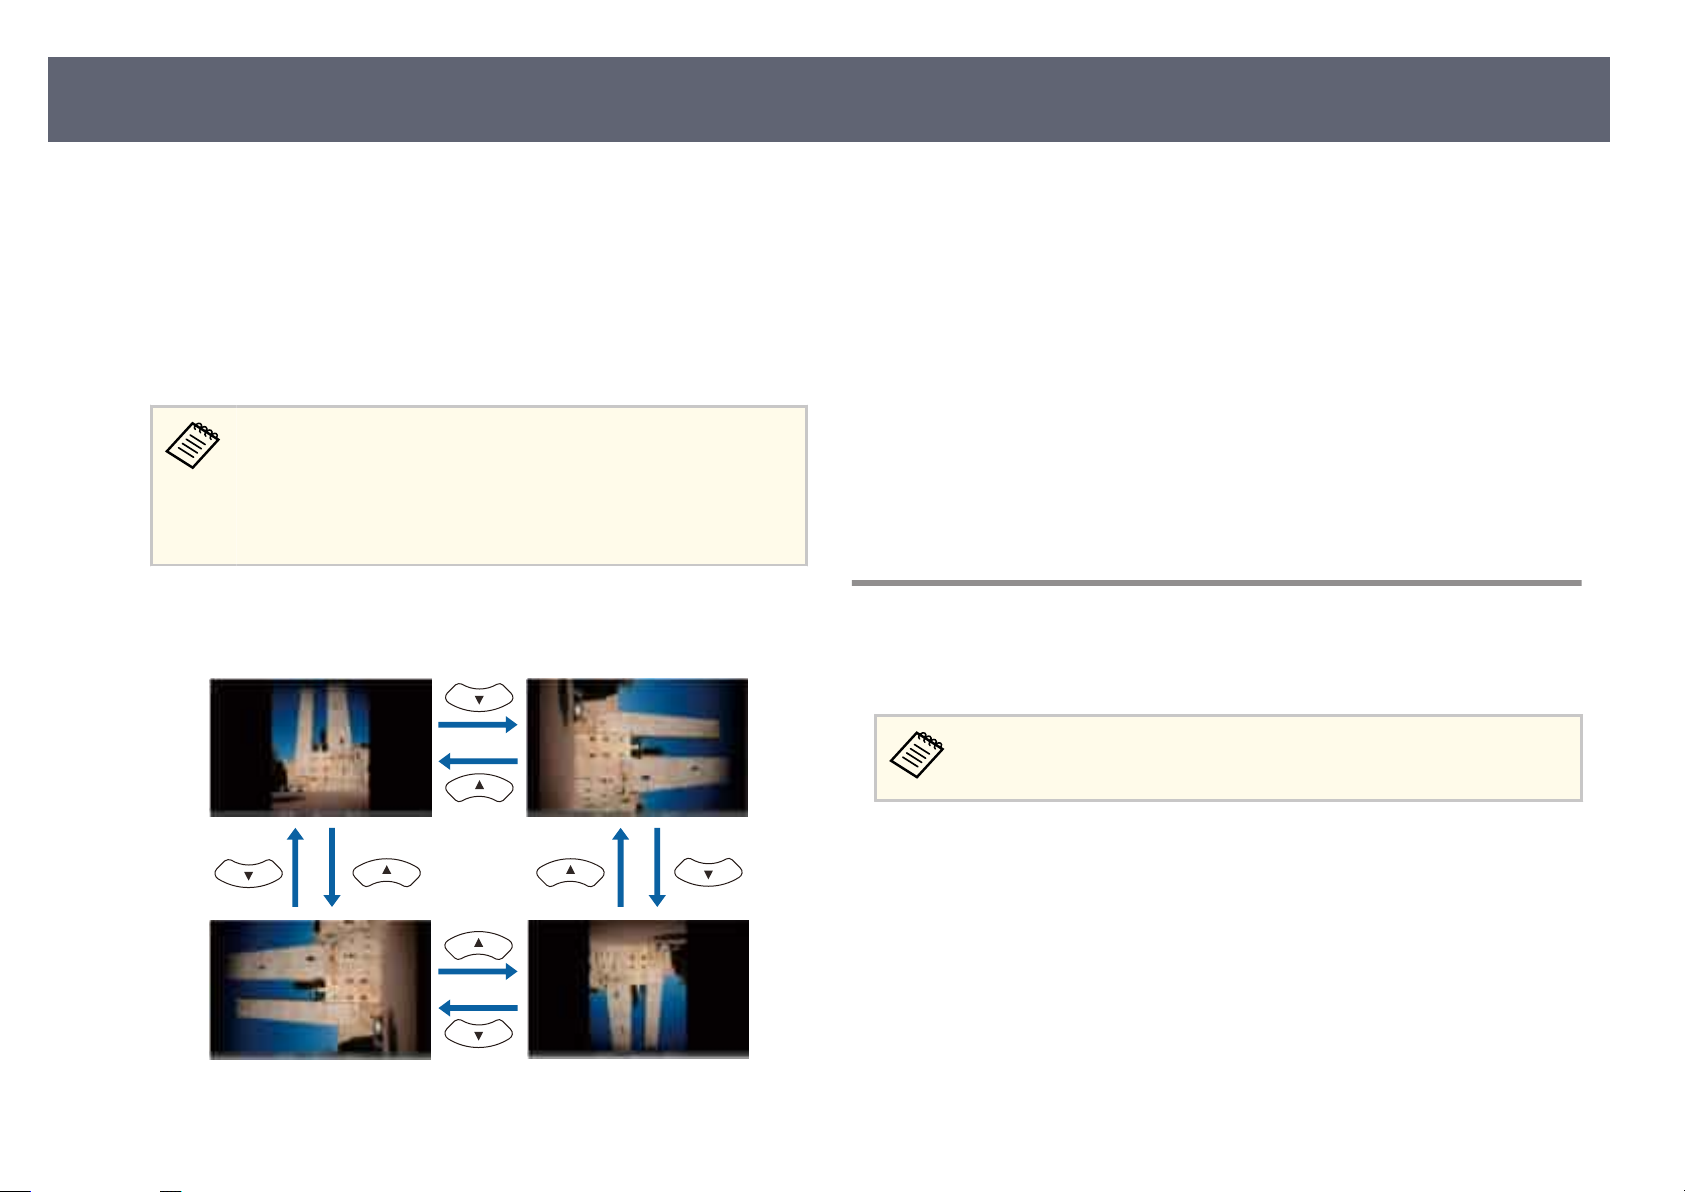
Projecting a PC Free Presentation
98
Do one of the following:
c
•
To display an individual image, press the arrow buttons to highlight the
image and press [Enter]. (Press the [Esc] button to return to the le list
screen.)
•
To display a slide show of all the images in a folder, press the arrow
buttons to highlight the Slideshow option at the bottom of the screen
and press [Enter].
•
•
While projecting, use the following commands to control the display:
d
•
T
tate a displayed image, press the up or down arrow button.
o ro
an change the image switching time by highlighting Option
You c
at the bottom of the screen and pressing [Enter].
If any le names are longer than the display area or include
unsupported symbols, the le names may be shortened or
changed only on the screen display.
•
To stop the display, follow the on-screen instructions or press the [Esc]
e
but
You return to the le list screen.
Turn o the USB device, if necessary, and then disconnect the device from
f
th
e projector.
Related Links
g
•
"Connecting to a USB Device" p.36
•
"PC Free Display Options" p.99
ve to the next or previous image, press the le or right arrow
To mo
button.
ton.
Starting a PC Free Movie Presentation
Aer connecting a USB device to the projector, you can switch to the USB input
urce and start your movie.
so
You can change the PC Free operation options by highlighting Opt
the bottom of the screen and pressing [Enter].
ion at
Press the [USB] button on the remote control.
a
e PC Fre
e le list screen is displayed.
Page 99
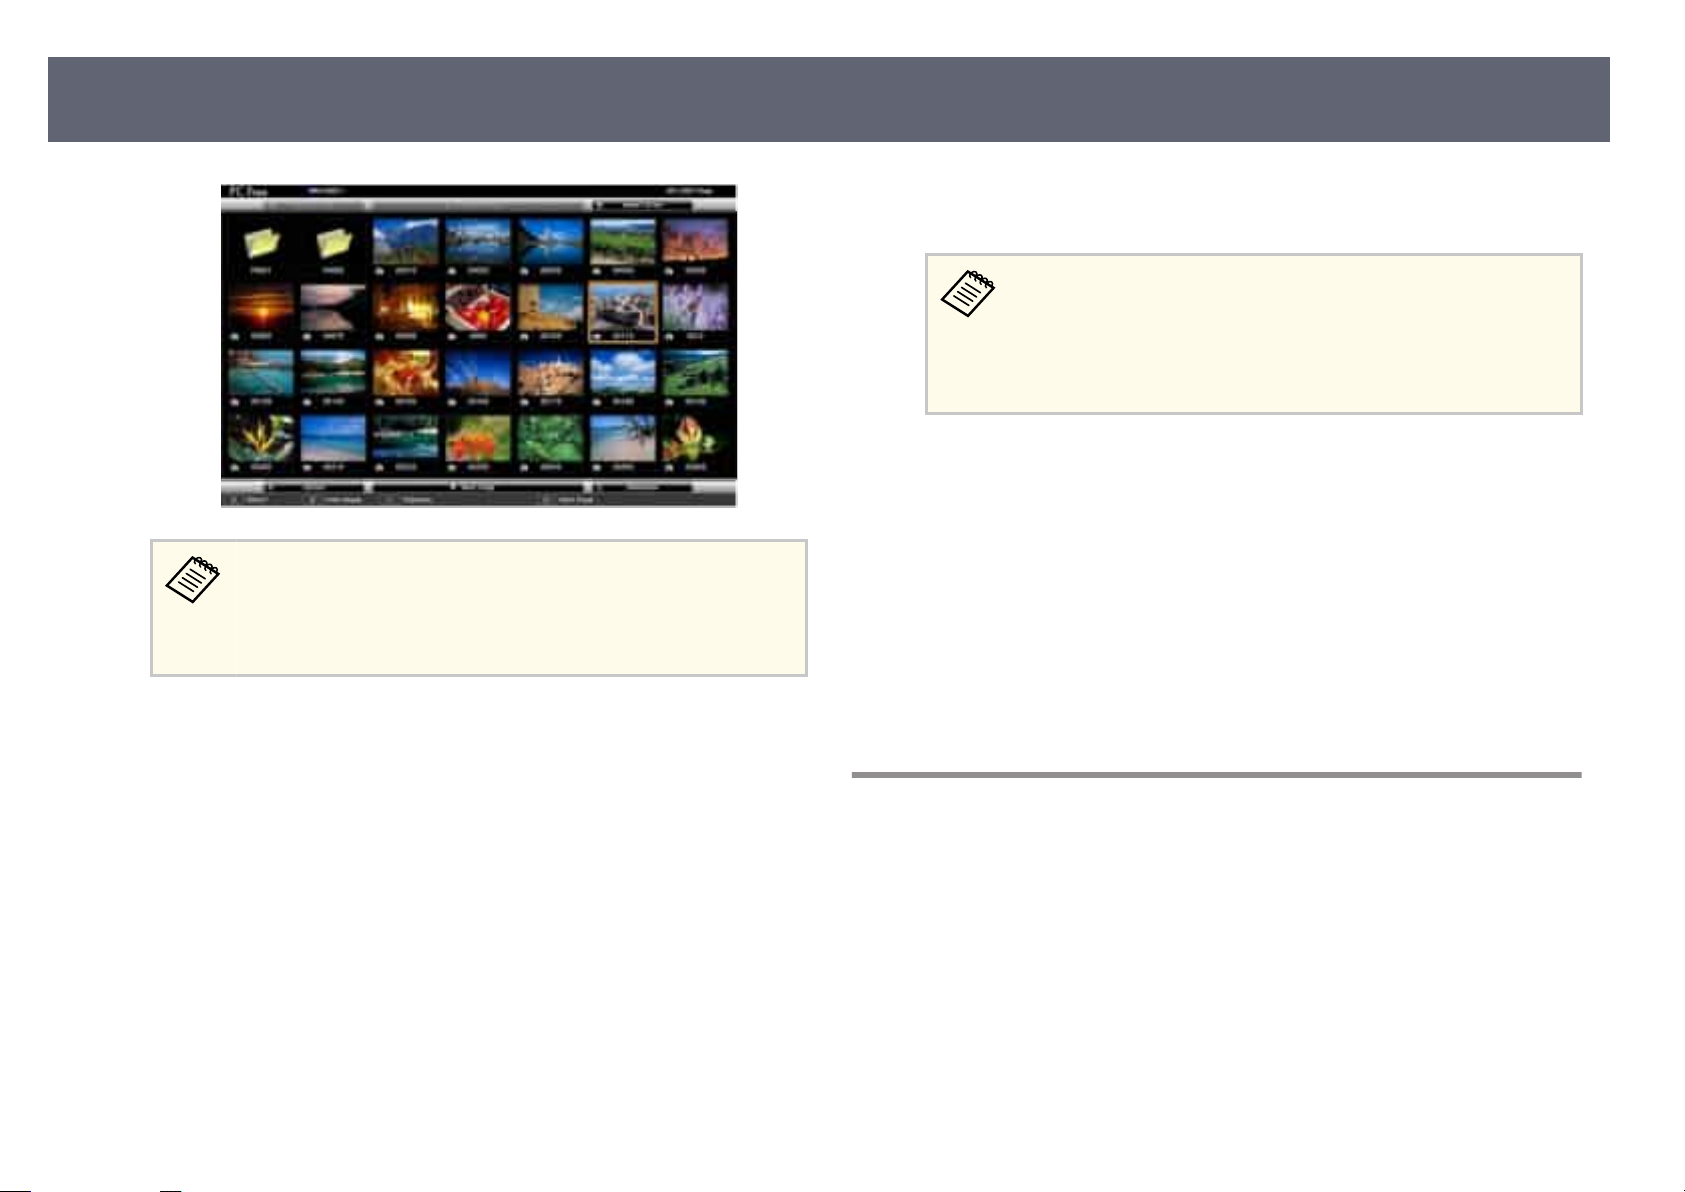
Projecting a PC Free Presentation
99
•
If th
e Select Drive screen is displayed, press the arrow buttons to
select the drive and press [Enter].
•
To display movie les on the other USB drive, highlight Select
Drive at the top of the le list screen and press [Enter].
Do one of the following to locate your les:
b
•
If yo
u need to display les inside a subfolder on your device, press the
arrow buttons to highlight the folder and press [Enter].
•
To move back up a folder level on your device, highlight Back to Top
and press [Enter].
•
To view additional les in a folder, highlight Next Page or Previous
Page and press [Enter].
To play back a movie, press the arrow buttons to highlight the le an
c
d
e
g
•
•
ess [Enter].
pr
•
•
To stop movie playback, press the [Esc] button, highlight E
[Enter].
You return to the le list screen.
Turn o the USB device, if necessary, and then disconnect the device from
th
e projector.
Related Links
"Connecting to a USB Device" p.36
"PC Free Display Options" p.99
le names are longer than the display area or include
If any
unsupported symbols, the le names may be shortened or
changed only on the screen display.
If you want to play back all the movies in a folder in sequence,
select the Slideshow option at the bottom of the screen.
, and press
xit
PC Free Display Options
You can select these display options when using PC Free. To access this screen,
highlig
ht Option at the bottom of the PC Free le list screen and press [Enter].
d
Page 100
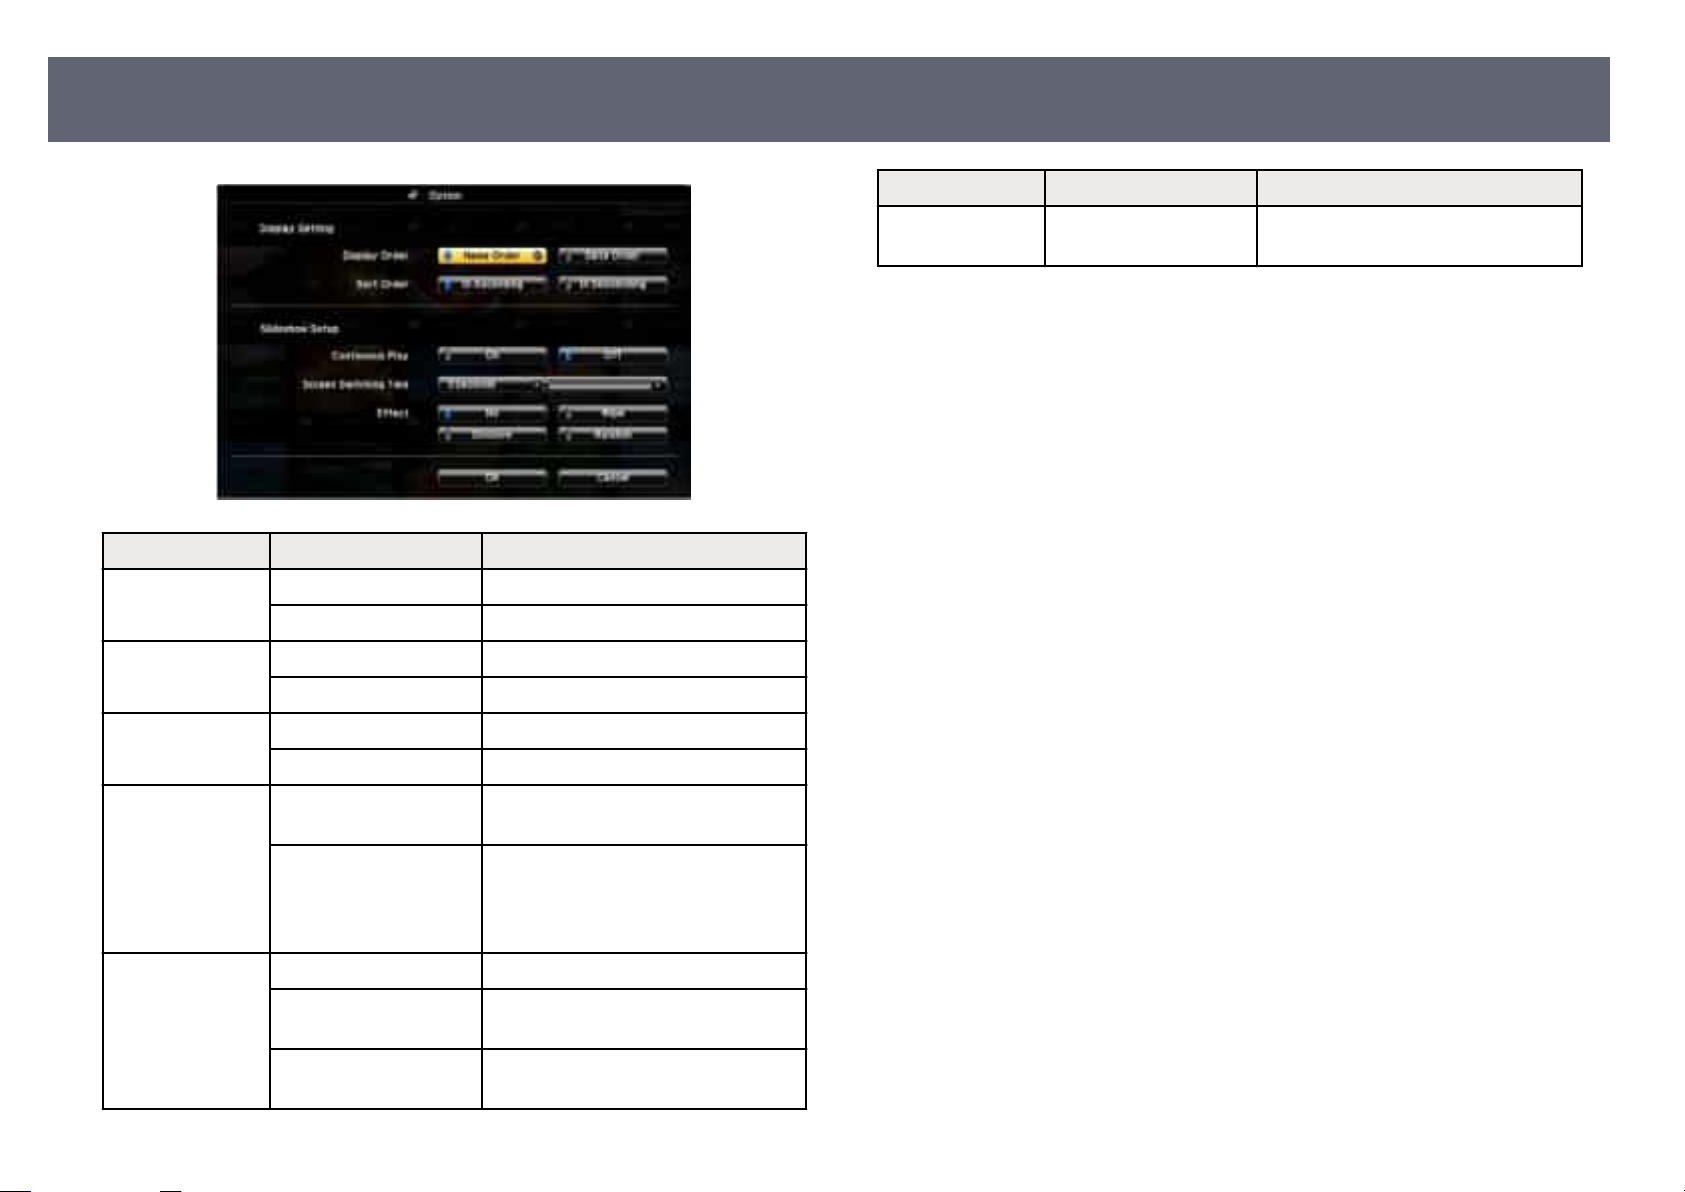
Projecting a PC Free Presentation
Setting Options Description
Display Order Name Order Displays les in name order
Setting Options Description
Random Transitions between images using a
random var
100
iety of eects
Date Order Displays les in date o
Sort Order In Ascending Sorts les in rst-t
In Descending Sorts les in last-t
Continuous Play On Displays a slide show continuously
O Displays a slide show once
Screen Switching
Time
Eect No No eect
N
o Does not display the next le
automatically
1 Second to 60 Seconds Displays les for t
switches to the next le automatically;
high resolution images may switch at
a slightly slower rate
Wi
pe Transitions between images using a
wip
e eect
Dissolve Transitions between images using a
diss
olve eect
rder
o-last order
o-rst order
he selected time and
 Loading...