

Page 1
Introduction Manual
©1998-2000 E-MU Systems Inc. All rights reserved.
FI11584 Rev. A
E-MU World Headquarters Europe, Africa, Middle East
E-MU / ENSONIQ E-MU / ENSONIQ
P.O. Box 660015 Suite 6, Adam Ferguson House
Scotts Valley, CA USA Eskmills Industrial Park
95067-0015 Musselburgh, East Lothian
Telephone: 831-438-1921 Scotland, EH21 7PQ
Fax: 831-438-8612 Tel: +44 (0) 131-653-6556
Internet: www.emu.com
Fax: +44 (0) 131-665-0473
www.emuparis.com
The following are registered worldwide trademarks owned and/or exclusively licensed by E-MU®, E-MU
Systems®, and PARIS®. All other trademarks are the property of their respective holders.
Important Notice:
In order to obtain warranty service on your PARIS unit, the serial number sticker must be intact and you must
have a sales receipt or other proof of purchase. If there is no serial number sticker on PARIS, please contact
E-MU Systems at once.
This manual is copyrighted and all rights are reserved by E-MU Systems, Inc. This document may not, in whole
or in part, be copied, photocopied, reproduced, translated, or reduced to any electronic medium or machine
readable form without prior written consent from E-MU / ENSONIQ. The PARIS application is copyrighted and
all rights are reserved by Intelligent Devices. The PARIS driver and effects software and PARIS firmware are
copyrighted and all rights are reserved by E-MU Systems, Inc.
Page 2

Table of Contents
Welcome to PARIS! 1
The PARIS Documentation ...........................................................................................................................1
All Roads Lead to PARIS................................................................................................................................1
Onward... ......................................................................................................................................................1
A Special Note for MEC Users.......................................................................................................................1
Listening to the PARIS Tutorial Projects 3
Overview .......................................................................................................................................................3
Install the Tutorial Audio Files Onto Your Hard Drive ................................................................................3
Unlocking the Audio Files on a Windows PC........................................................................................3
Linking the Audio Files to the Project Files .................................................................................................3
Playing the PARIS Tutorial ............................................................................................................................6
About the Other PARIS Tutorial Files ...........................................................................................................7
Getting Ready for the Introduction Tutorials ........................................................................................7
Creating a New PARIS Project.......................................................................................................................7
Saving a Project ............................................................................................................................................7
Adding Audio Files to a Project ....................................................................................................................7
The Editor Window 9
Getting There ................................................................................................................................................ 9
SUSHI Bar & Command Bars ........................................................................................................................9
Open the Audio Bin......................................................................................................................................9
Some Important Terminology ....................................................................................................................10
Audio Files ............................................................................................................................................10
Objects ..................................................................................................................................................10
Segments...............................................................................................................................................10
The Playing Field ........................................................................................................................................10
The Now Line .......................................................................................................................................11
Placing Objects on the Playing Field .......................................................................................................... 11
Using The Time Locked Selector Tool ..................................................................................................11
Context-Sensitive Cursors ..........................................................................................................................12
Playing Tracks ............................................................................................................................................. 12
From the Transport Window................................................................................................................12
From the Computer Keyboard .............................................................................................................13
From the C16 Pro .................................................................................................................................13
Other Functions on the C16 Pro and in the Transport Window ........................................................ 13
Before Proceeding with the Tutorial... .................................................................................................13
The Audio, Bipolar and Name Buttons ...................................................................................................... 13
The Paris Rulers .......................................................................................................................................... 14
Using Markers ............................................................................................................................................. 14
Using the Zoom Bars .................................................................................................................................. 15
Changing the Vertical (Tracks) Magnification .....................................................................................16
Working with the Horizontal (Time) Zoom Bar .................................................................................. 16
Changing the Horizontal (Time) Magnification..................................................................................16
Scrolling in the Editor Window ...........................................................................................................16
Saving and Recalling Local Views .............................................................................................................. 17
Saving Local Views ...............................................................................................................................17
Recalling Local Views ...........................................................................................................................17
Table of Contents PARIS Introduction
Page 3

Editing Exercises 19
Exercise #1 - Manipulating Audio Objects .................................................................................................19
Exercise #2 - Creating a Fade-In .................................................................................................................21
Exercise #3 - Setting Sync Points ................................................................................................................ 22
Moving Audio Objects to Object Jails ........................................................................................................24
Using The Nudge & Slip Command Bar Features ...................................................................................... 25
Using the All Button ............................................................................................................................25
Start, End and Slip ................................................................................................................................ 25
Using the Start Tool .............................................................................................................................. 25
Using the End Tool ............................................................................................................................... 25
Using the Slip Tool ...............................................................................................................................26
Get Out of Jail Free .....................................................................................................................................26
The Mixer Window 27
Overview .....................................................................................................................................................27
Viewing Various Mixer Window Components ..........................................................................................27
The Green Null Arrow Lights on the C16 Pro ..................................................................................... 29
Mixing Volume Levels Using the C16 Pro Faders ................................................................................ 29
Panning Controls .................................................................................................................................30
Soloing Channels .................................................................................................................................30
Muting Channels ................................................................................................................................. 31
Adjusting EQ (Equalization) from the C16 Pro .......................................................................................... 31
Using the PARIS Effects............................................................................................................................... 32
Sending a Channel to an Effect ...........................................................................................................32
Selecting Effects .................................................................................................................................... 32
Editing Effects ....................................................................................................................................... 33
Effect Presets .........................................................................................................................................33
Recalling a Preset ..................................................................................................................................34
Saving a Preset ...................................................................................................................................... 34
Mixer Automation ......................................................................................................................................35
Automating Fader Moves .....................................................................................................................35
Automating Channel Mutes from the C16 Pro ...................................................................................35
Recording Panning Changes in the Mixer Window ............................................................................ 36
Exiting Mixer Automation Mode on the C16 Pro ...............................................................................36
Recording Your First PARIS Track 37
Setting Up ...................................................................................................................................................37
Setting the Record Path ..............................................................................................................................37
Enabling Recording .................................................................................................................................... 37
Setting Levels ..............................................................................................................................................37
Entering Record ..........................................................................................................................................38
Playing Back Your Recording ...................................................................................................................... 38
Tour of the C16 Pro 39
The Transport Section................................................................................................................................. 39
Numeric Keypad for Locating Views, Markers & Mode Buttons .............................................................. 40
The Channel Controls Section ...................................................................................................................41
Fader Strip and Main L/R Fader Section .....................................................................................................42
Jog Wheel Edit Functions, Undo and Control Room Functions ...............................................................43
PARIS Introduction Table of Contents
Page 4

Tour of the Mixer Window 45
Overview of the Mixer Window ................................................................................................................. 45
The Channel Section ..................................................................................................................................46
EQ Modules ................................................................................................................................................47
Aux Send Modules ...................................................................................................................................... 48
Aux Masters Section General Controls....................................................................................................... 49
Aux Send Master Module .....................................................................................................................50
Aux Return Master module ..................................................................................................................50
Master Fader Module ..................................................................................................................................51
The Channel Status Bar ..............................................................................................................................52
Using the Channel Status Bar ..............................................................................................................52
Hiding Individual Channels ................................................................................................................52
Viewing the Selected Channel .............................................................................................................52
Table of Contents PARIS Introduction
Page 5

Welcome to PARIS!
The PARIS Documentation
Congratulations on your purchase of E-MU’s PARIS. In your PARIS box, you’ll find two publications that
together will set you on your way to harnessing the incredible power of your new PARIS system.
The PARIS Introduction is where you’ll want to start as you get to know PARIS. This booklet will acquaint you
with many of the major features of PARIS by showing you step-by-step how to perform various operations. In
following its tutorials, you’ll gain a feel for how your PARIS system works.
The authoritative PARIS Reference is the primary manual for PARIS, with information organized according to
the windows presented in the PARIS software. Consult the PARIS Reference when you need detailed
information regarding any aspect of the PARIS hardware or software.
All Roads Lead to PARIS
There are as many creative methods as there are audio artists. A great deal of care has been given to ensuring
that PARIS provides methods and tools that you’ll find easy to use, no matter how you like to work. Whether
you like to click on buttons or type shortcuts from a keyboard, PARIS has been programmed with you in
mind. In a number of cases, the methods you’ll be learning in the PARIS Introduction represent just one of
several ways in which a given task can be accomplished. In the Introduction tutorials, we have not listed at
every turn the different paths to the same result, in an effort to help keep things moving along. Once you’ve
gained a basic familiarity with PARIS, make sure to consult the PARIS Reference for more comprehensive
descriptions of its methods and features.
Onward...
We’re confident that you’re about to have a very enjoyable experience as you get to know PARIS. You’ll
probably find the Introduction most helpful if you go through it all at once—the whole thing will take about
an hour.
Start off with all of the faders on your C16 Pro turned all the way down—you’ll learn how to synchronize
them to the onscreen controls later on. If for some reason you get interrupted somewhere in the middle of
the Introduction, type “P” to go to the Project Window and select Save from the File menu to store your work-
in-progress onto your hard drive. That way, you’ll be able to jump back in to the Introduction when you’re
ready.
A Special Note for MEC Users
Your MEC Master Module provides considerable signal-routing flexibility. When you first launch PARIS, its
main stereo outputs are routed to Output jacks 1 and 2 of your MEC Master Module, and PARIS’ monitor
outputs are directed to Output jacks 3 and 4. The PARIS Introduction demonstrates some features—such as
soloing channels—that require you to be listening to the monitor outputs. For that reason, connect Outputs
3 and 4 to your amplifier or other monitoring system while reading the PARIS Introduction. (Chapter 14 of the
PARIS Reference explains configuring the MEC Master Module.)
If you have any problems with your PARIS system, call E-MU Customer Service at (831) 438-1921. For the
latest PARIS information, visit the PARIS World Wide Web site at http://www.emuparis.com.
E-MU PARIS Introduction 1
Page 6

Page 7
Listening to the PARIS Tutorial Projects
Overview
This section explains how to install the PARIS Tutorial Project Audio Files onto your hard drive. You’ll also
learn how to play the PARIS Tutorial Projects placed on your hard drive when you installed PARIS itself. A
Project is the type of file that keeps track of everything related to a piece of music or audio.
Note: You must have a basic understanding of standard computer functions to use PARIS. If you don’t,
please read the manuals that came with your computer.
Your PARIS system was shipped from the factory with a demonstration CD-ROM containing the Audio Files
you’ll need for the PARIS Tutorials. PARIS can record and play back Audio Files directly to and from the
internal hard drive in your computer, or to a separate external SCSI hard drive. You may consider recording
PARIS files to a removable SCSI device—a removable drive can be handy for archiving your work, or for
transporting your Projects and Audio Files to someone else’s PARIS studio.
Install the Tutorial Audio Files Onto Your Hard Drive
1. With your computer already booted up, insert the PARIS CD-ROM into your CD-ROM drive.
2. Locate the Tutorial folder/directory on the CD-ROM.
You’ll need 316MB of free disk space on your hard drive for the Tutorial Audio Files.
3. Copy the entire PARIS Tutorial folder/directory to any location on your hard drive.
Unlocking the Audio Files on a Windows PC
All files on a Windows PC CD-ROM are marked as read-only. This means they cannot be changed or edited.
When you copy files from the CD-ROM to your hard disk—as you’ve just done—those files retain their read-
only status on your hard disk. You’ll need to “unlock” your newly copied audio Files. E-MU has provided a
handy batch file that does it for you. Perform the following steps:
1. In your just-copied Paris Tutorial folder, you’ll find a file called “unlock.bat” (if you have Windows set to
not show extensions it will appear simply as “Unlock”).
2. Double-click on the “Unlock.bat” icon. A DOS window will appear as the batch file runs, then disappear.
(If the DOS window remains on the screen, simply close it.) The files are now unlocked, and you can
proceed.
Linking the Audio Files to the Project Files
Any time PARIS records an Audio File, a path from the Audio File to its Project file is established, much the
same way other computer applications keep track of “linked” files. When the Audio Files are in the same
folder as the Project File, PARIS automatically establishes a link. Because the copied Audio Files and Project
files are NOT in the same folder on your hard disk, this is a good opportunity to learn how to re-establish the
file path between the Tutorial Project and its Audio Files. This is very easy to do, and needs to done only
once.
1. Launch the PARIS application.
2. From the Project Window File Menu, choose Open Project.
PARIS will present the following dialog:
3. Click the No button.
E-MU PARIS Introduction 3
Page 8
4. Double-click the Projects folder—it’s inside the PARIS folder installed on your hard drive.
5. Select the file called “Crop Circles Tutorial.ppj” and click the Open button.
6. The dialog box show below appears, informing you that 18 audio files are missing. We deliberately placed
the Project file outside of the Audio file folder so that you could learn how to find missing files. Once
PARIS learns where the Audio files are located, the files will be automatically licked each time you open
the Project. (If the Project file and Audio files are in the same folder, PARIS automatically links them.)
7. At this point, the necessary Audio Files are not linked to the Tutorial Project. From the Windows Menu,
choose Audio Window (8), and the Audio Window will appear, as shown in the following illustration.
The red square to the left of
each Audio File’s name
indicates that the Project
does not know where the
Audio File is.
8. From the Edit Menu, choose Select Missing.
4 E-MU PARIS Introduction
Page 9
9. All of the missing
Audio Files that do not
have a “linked” file
path will be selected.
Note: Not everything
in this window is
selected, as you can
see. The items that are
not selected are called
“Segments.” Segments
will be explained later
in the Introduction.
10.From the Functions Menu, choose Search for Files.
11.You will now see a standard Mac or PC dialog box similar to the one shown below. Navigate to the PARIS
Tutorial folder, and open it. You’ll see the PARIS Audio Files needed for the Tutorial Project. Click on any
one of the files and then click the Open button.
E-MU PARIS Introduction 5
Page 10
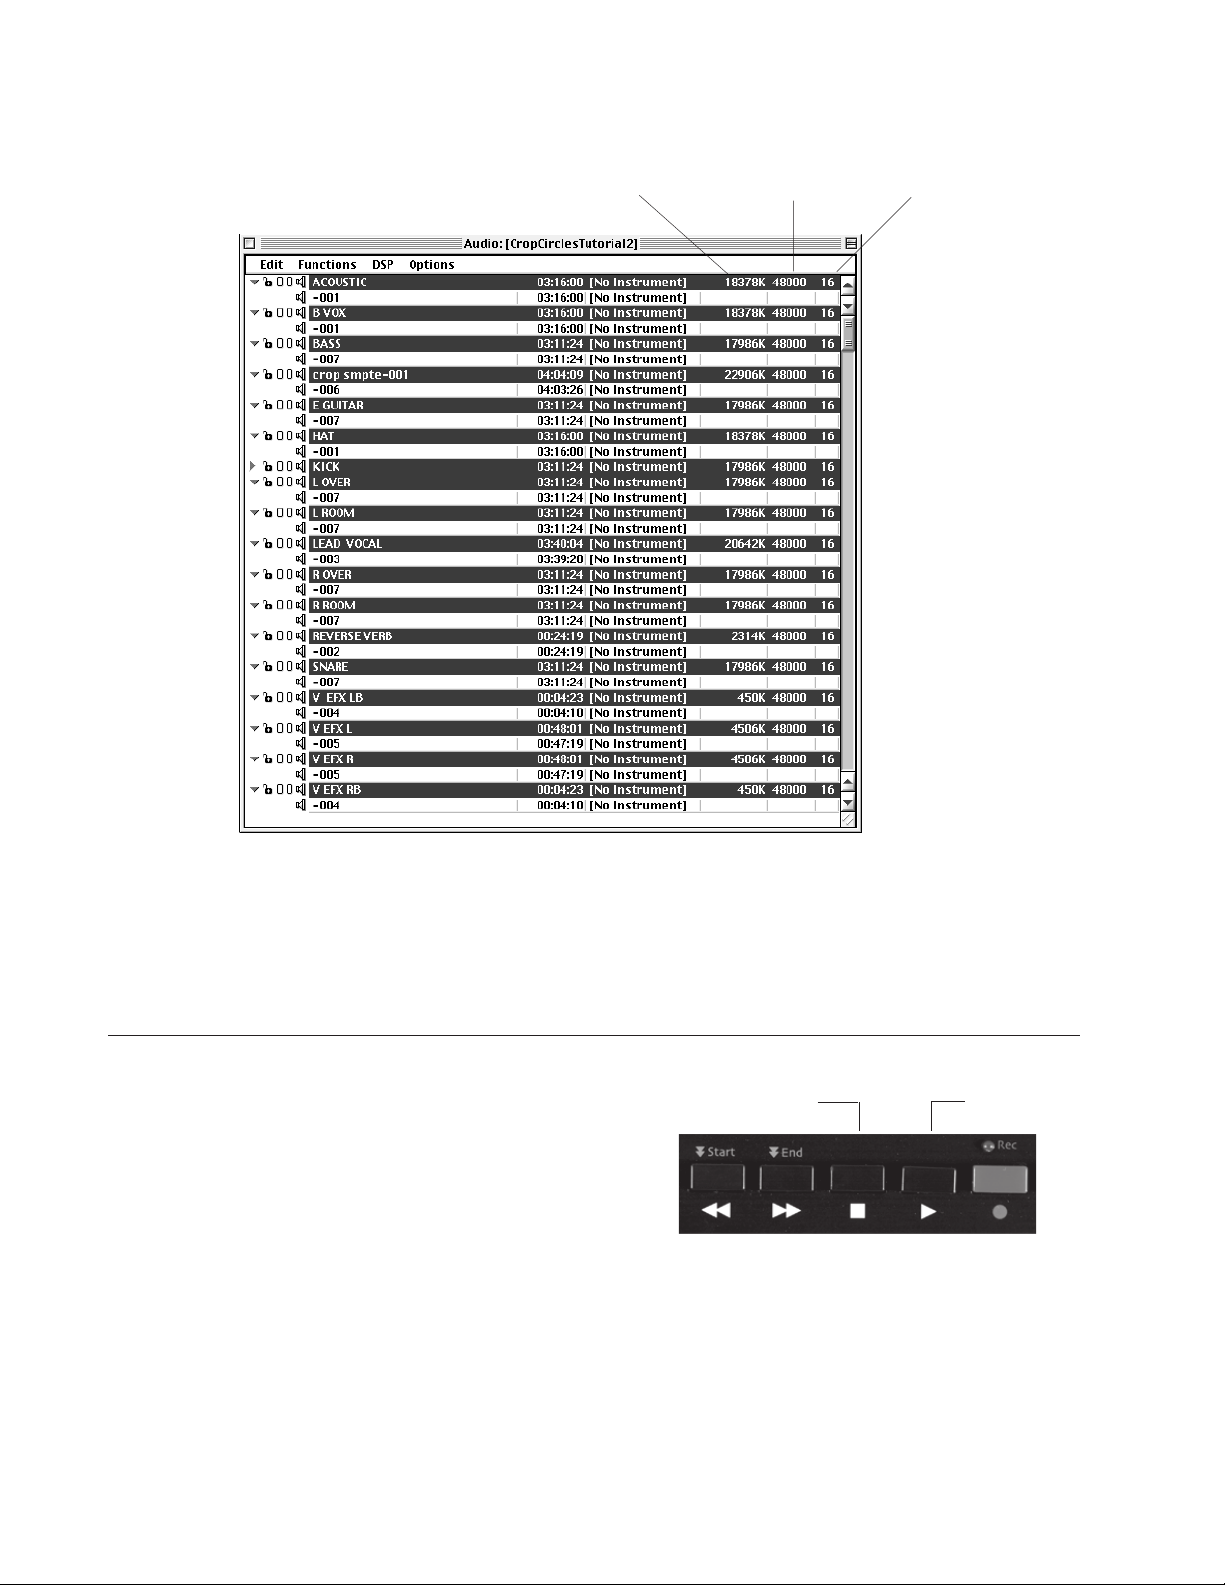
12.The Audio Window will look as shown below, with each Audio File’s size now listed and the red “Missing”
indicator now unlit.
File size Sample rate Bit depth
13. Select View mode on the C16 Pro, then type 1. On the keypad to bring forward the Project Window.
14. Select Save from the Project Window’s File menu to save the Audio Files’ present location into the “Crop
Circles Tutorial.ppj” Project.
Playing the PARIS Tutorial
1. Press the Play button on the C16 Pro.
2. As “Crop Circles Tutorial” plays, and View mode
selected on the C16 Pro, type 2. on the keypad to bring
forward the Editor Window.
3. Type 3. on the C16 keypad to view the current mix of
the tutorial’s Tracks in the Mixer Window.
4. When the tutorial Project has finished playing, press the
Stop button on the C16 Pro.
Note: You can also control the playback of PARIS Tracks —
and perform other operations—by using the controls in the
Transport Window, which can be viewed by typing “t” on
your keyboard.
Stop Play
6 E-MU PARIS Introduction
Page 11
About the Other PARIS Tutorial Files
Two Projects were created in your “Tutorial” folder when you installed PARIS. They are:
“Crop Circles Tutorial.ppj”—This is the Project you just listened to.
“Crop Circles no auto.ppj”—This is “Crop Circles Tutorial” without automated mix changes that you can use
to create your own mix of the song.
Getting Ready for the Introduction Tutorials
For the next portion of the Introduction, you’ll be working with a new Project you’ll be creating, starting
from scratch.
Creating a New PARIS Project
1. Type “P” on your keyboard (or type 1. on the C16 Pro’s keypad in View mode) to bring up the Project
Window, and select “New Project” from the File menu.
2. If PARIS asks you if you’d like to save the current Project, answer as you desire. If you haven’t created a
new Project, click the No button.
PARIS’ windows open.
Saving a Project
Let’s immediately save the new Project to establish its name and location on your hard drive.
1. Type “P” to return to the Project Window.
2. Select Save As... from the File menu.
3. Navigate to a folder/directory in which you’d like to save this Project.
4. Name the Project “Tutorial 1” PARIS will add the “ppj” file extension automatically as the saving
operation is completed.
5. Click the Save button to complete the procedure.
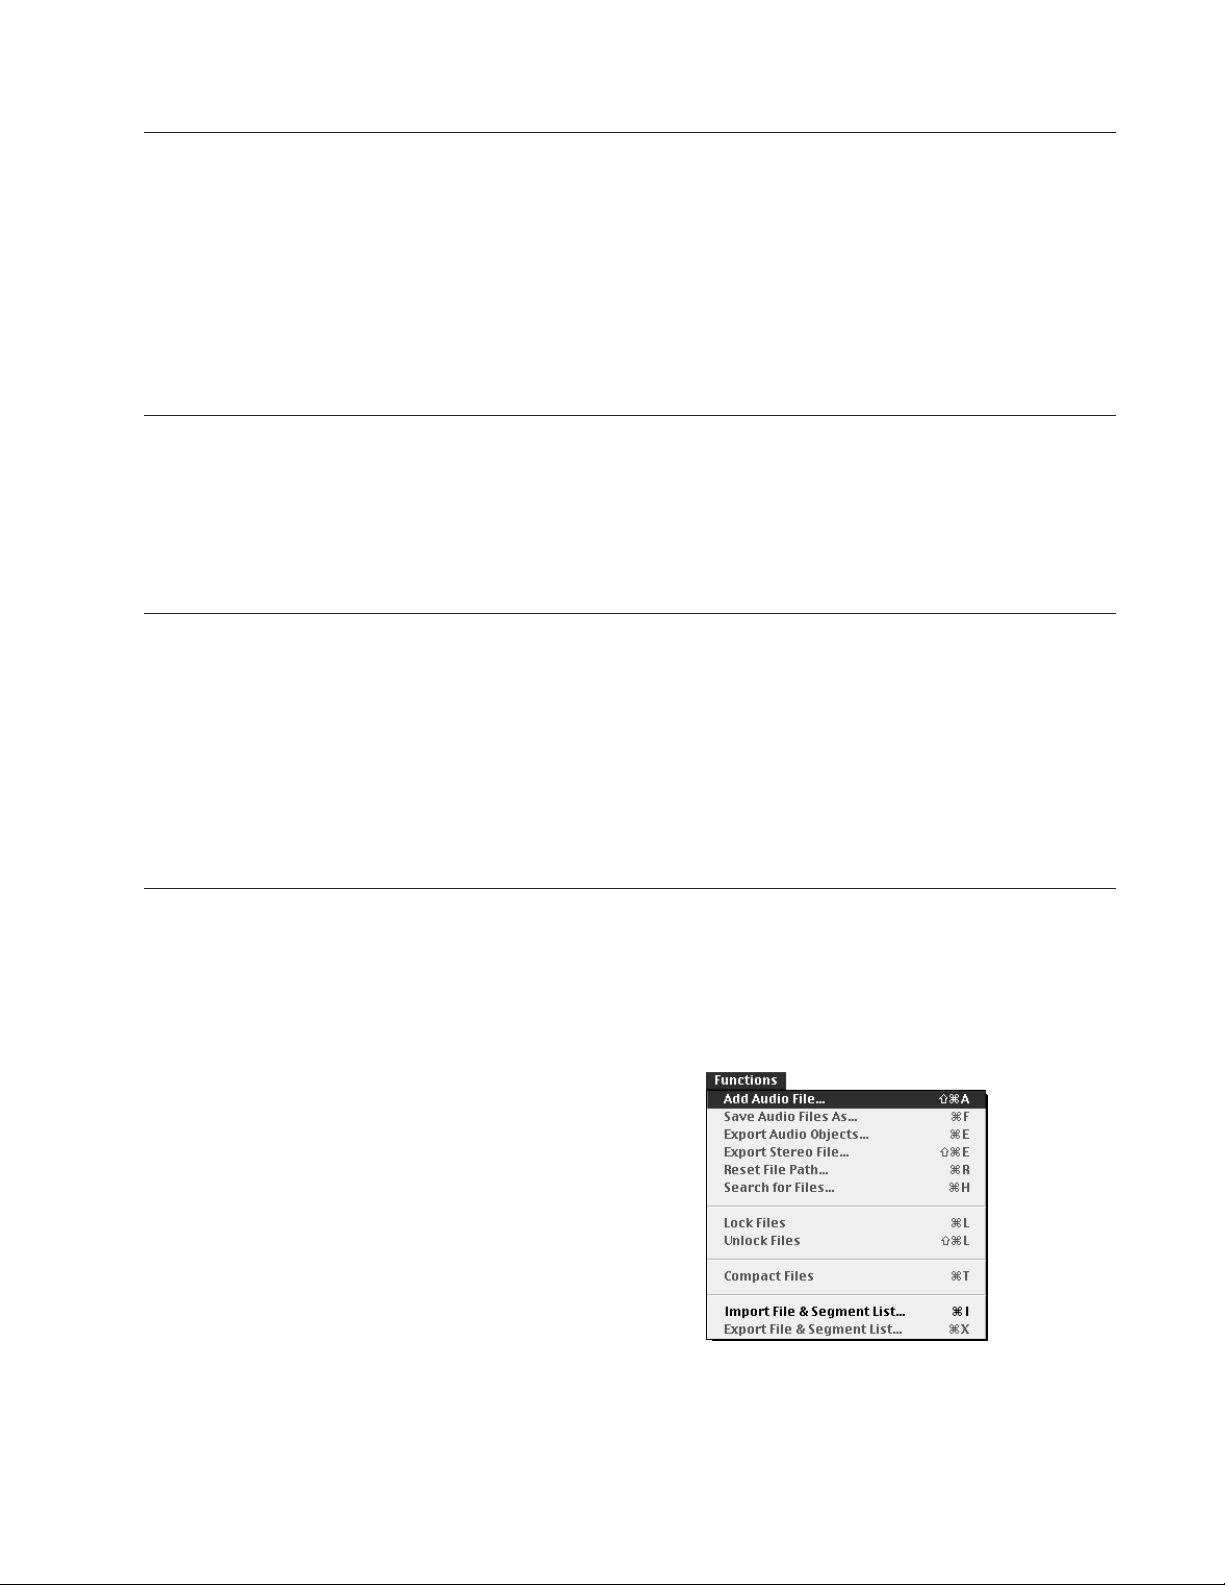
Adding Audio Files to a Project
You’ll be working with an Audio File that was used in “Crop Circles Tutorial.” This file has to be brought into
your newly created Project.
To add Audio Files to a Project:
1. Type “A” on your keyboard to call up the Audio Window.
2. Select Add Audio File... from the Functions menu.
3. Navigate to the Audio Files in the PARIS Tutorial folder and select LEAD VOCAL.paf.
E-MU PARIS Introduction 7
Page 12
4. Click the Open button.
LEAD VOCAL has been added to your new Project, as shown in the Audio Window.
8 E-MU PARIS Introduction
Page 13
The Editor Window
The Editor Window is where PARIS Tracks are created and edited. Much of your time in PARIS will be spent in
this powerful place.
Getting There
You can open the Editor Window in any of three ways:
1. Type “E” on the keyboard to call up the Editor Window.
2. Select Editor from the Windows menu in the Project Window.
3. Press the Views button on the C16 Pro and, on the C16 Pro’s keypad, press the 2 button, followed by the
period (“.”) button.
Tip: As you become familiar with PARIS’ windows, you’ll find that you can also employ this third method
using the Locator Window and your keyboard’s numeric keypad.
SUSHI Bar & Command Bars
In the upper-left-hand corner of the Editor Window you’ll find the Standard User Show Hide Indicator (SUSHI)
Bar.
Show / Hide Bar Grid & Snap Bar
Object Jails BarInformation Bar
Tools Bar Nudge & Slip Bar
Note: The Crossfade Bar—its button is next to the Object Data Bar—is not currently implemented.
The SUSHI Bar icons are buttons that allow you to display or hide the Command Bars needed to perform
various editing or display functions. You can view all the Command Bars at once, or show only the Bars
needed for the current task at hand. When each button is depressed—as shown above—its Bar is visible.
1. Click each of the buttons. The related Command Bars will appear or disappear.
2. When you’re done experimenting, turn all of the Bars on.
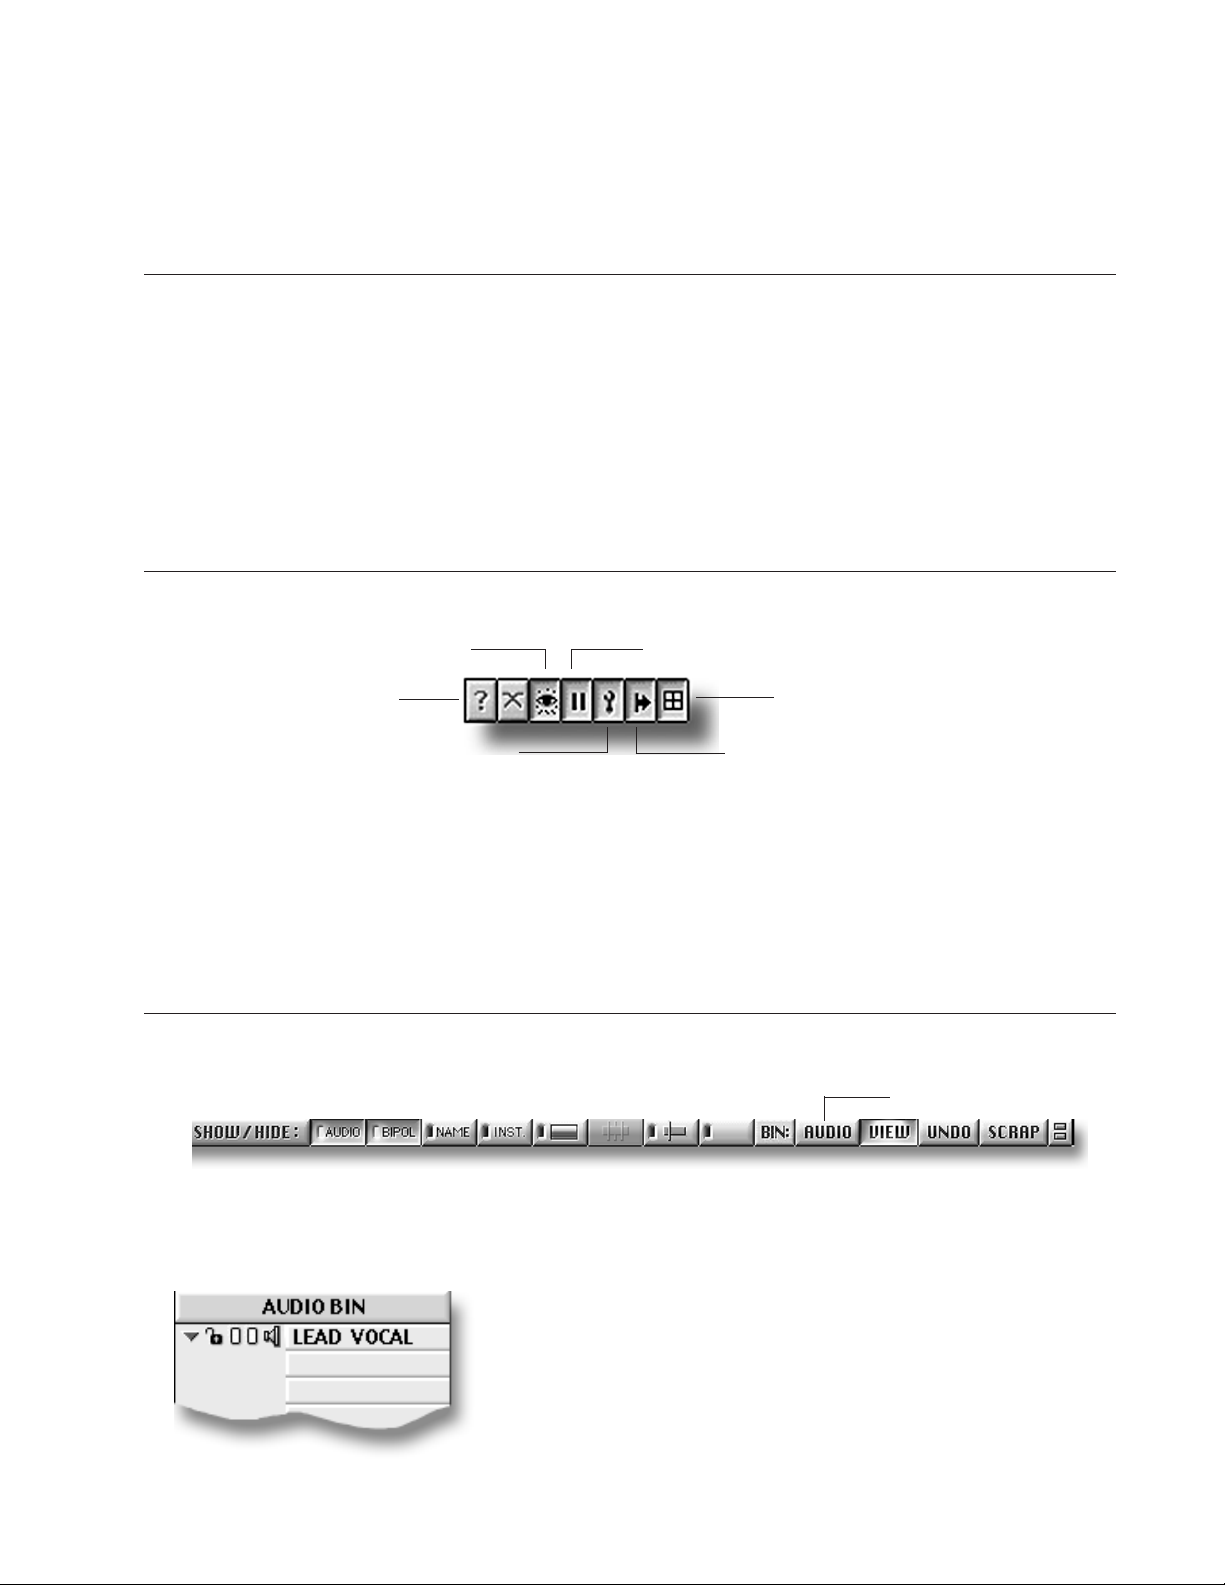
Open the Audio Bin
1. Click on the Show/Hide Bar button in the SUSHI bar if the Show/Hide Bar is not currently visible.
Audio Bin button
2. Click on the Audio button directly to the right of the Bin label.
The Audio Bin appears along the right-hand edge of the Editor Window. It shows the Audio Files you
added to the Project earlier in this book.
Tip: Drag the lower right-hand corner of the Audio Bin outward toward
the right edge of your monitor a little, then drag the lower left-hand
corner of the Audio Bin inward toward the center of the screen to widen
the Bin enough to show the complete names of your Audio Files.
The Audio Bin is a pared-down version of the Audio Window that—
among other uses—provides easy access to the Audio Files you’ll want
to work with in the Editor Window.
E-MU PARIS Introduction 9
Page 14
Some Important Terminology
Much of the activity in the Editor window revolves around Audio Files, Objects and Segments. While closely
related, these are three distinctly separate things, and understanding this is important to mastering PARIS.
Audio Files
Audio Files are your sound files on your hard disk. Audio Files are not directly edited in PARIS, though they
can be subjected to a variety of special procedures in the Audio Window.
Objects
When an Audio File is dragged into the Editor Window from the Bin, it appears in the editing area—called
the “Playing Field”—as an Object. An Object, though it looks and acts like chunk of sound, is really just a
graphic representation of instructions that tell PARIS how to play the Audio File on which it’s based. When
you perform editing operations on an Object, you’re changing these instructions. This powerful form of
editing is called “non-destructive” since it doesn’t actually affect or change the Audio File on your disk,
merely the way it’s to be played.
The same Audio File can be accessed by as many Objects as you like—this allows you to use different pieces of
the same Audio File in different places and in different ways.
Note: When you record a new Track, the Audio File you’ve recorded on your hard disk appears in the Bin,
and an Object which plays the Audio File is created on the Playing Field (you’ll be recording a Track later on).
Segments
You can drag Objects you’ve created back into the Bin for later use. When you do so, the Object appears in
the Bin as a Segment shown underneath the Audio File on which it’s based. (A Segment is also automatically
created when you record a new Audio File.)
The Playing Field
The Playing Field is the place where all Objects in PARIS are edited.
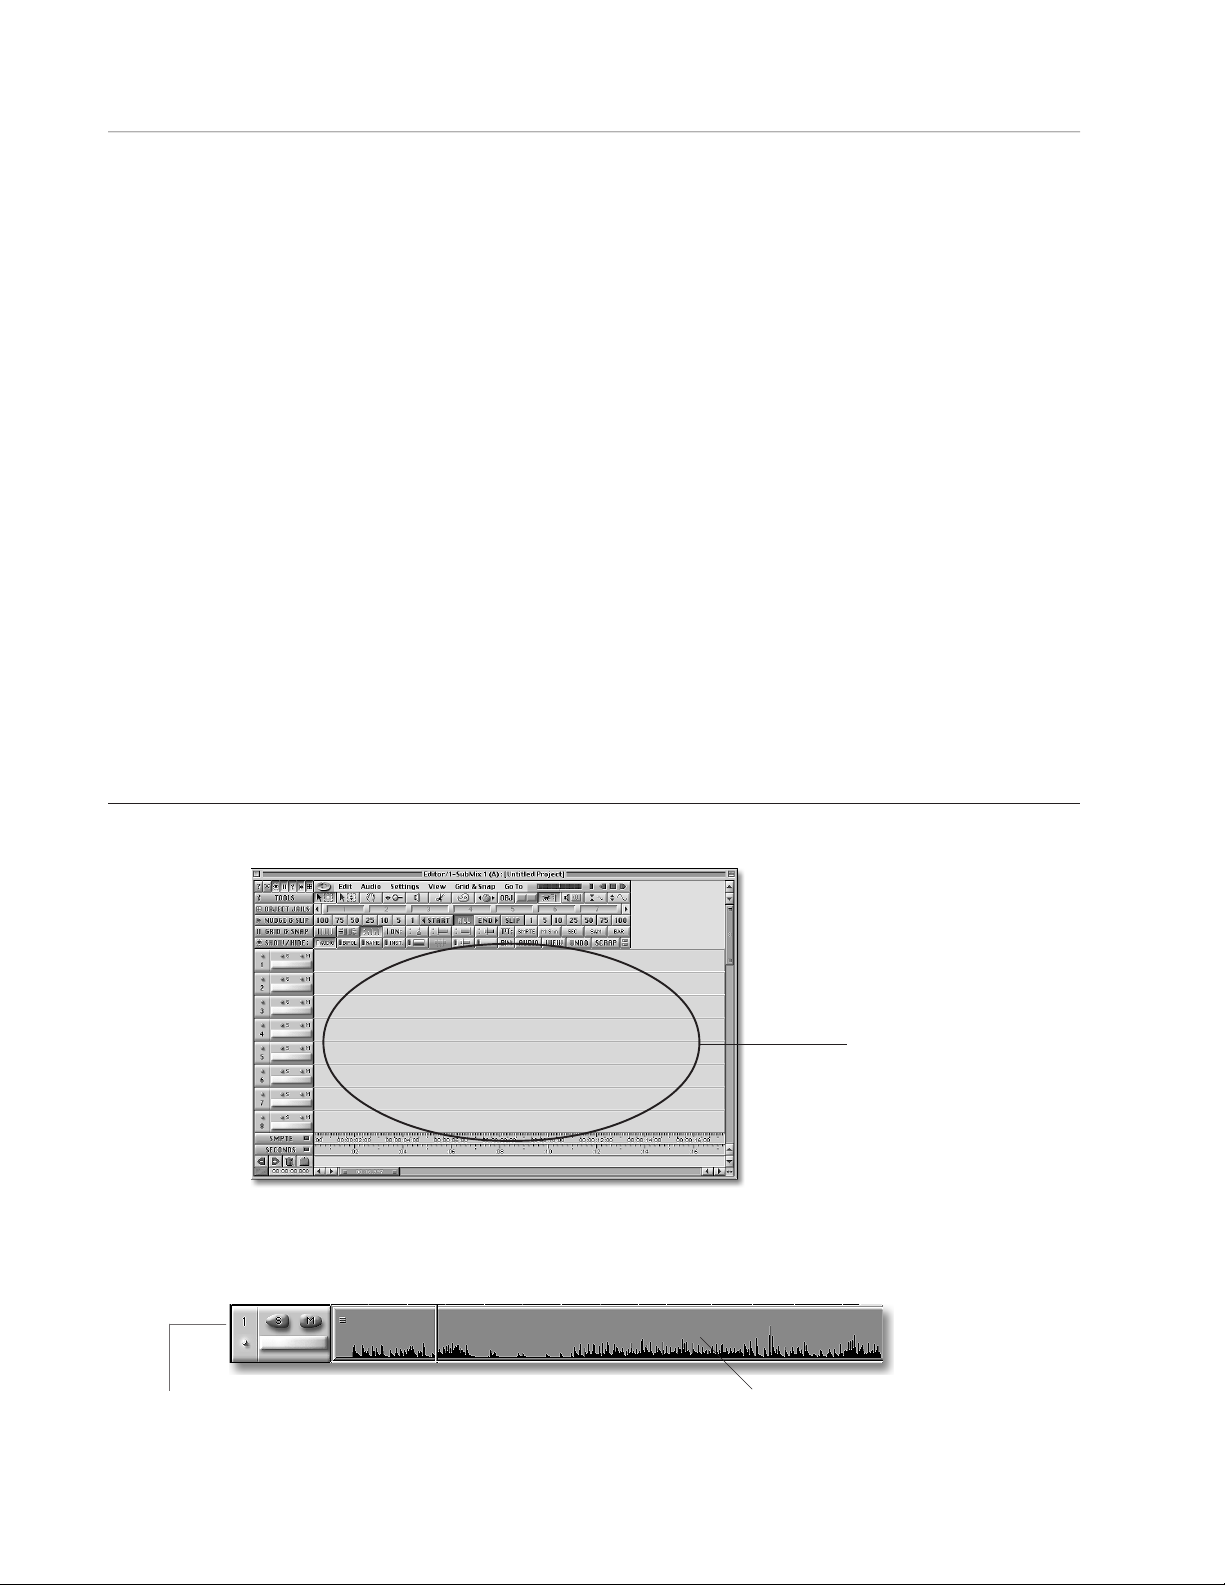
The Playing Field
The surface of the Playing Field is divided vertically into numbered Tracks. Each Track is a slot into which
Objects can be placed, and in which they can be edited.
Each Track’s number is shown along the
left border of the Editor Window
Objects are placed or created in this area.
10 E-MU PARIS Introduction
Page 15
The left edge of each Track is its beginning. PARIS reads through a Track’s Objects from this leftmost point to
the right as a Track plays and time passes.
In the Playing Field illustration on the preceeding page, eight Tracks are visible. You can use the scroll bars
along the Playing Field’s right edge to view the other eight tracks, or you can change the Editor Window’s
zoom setting, as discussed later in the Introduction.
Note: PARIS offers a an additional method for compiling multiple takes of a performance called “Free Form
Mode,” in which you can have up to 999 Tracks. Free Form mode is introduced in Chapter 4 of the PARIS
Reference. The Introduction describes working in PARIS’ standard mode, called “Constrained Mode.”
The Now Line
The Now Line is a vertical line that travels across the Playing Field to show what’s currently being played by
PARIS. When you’re not playing Tracks, the Now Line shows the location from which your next playback will
begin.
The Now Line
Placing Objects on the Playing Field
Objects are created on the Playing Field by dragging Audio Files or Segments from the Bin (or by recording a
new Track).
Using The Time Locked Selector Tool
Audio Files and Segments in a Project remember the time locations they occupied when they were last
dragged off the Playing Field into the Bin. The Time Locked Selector returns Audio Files and Segments to
these locations when you drag them from the Bin. When you drag an imported Audio File onto the Playing
Field, the Time Locked Selector tool places it at the beginning of the Track to which it’s dragged.
1. Click on the Tools Bar button in the SUSHI Bar if the Tools bar is not currently visible. The Tools Bar
provides access to the various editing devices available in the Editor Window.
2. Click on the Time Locked Selector tool button on the Tools Bar.
Time Locked Selector
button
3. In the Bin, locate the Audio File called “LEAD VOCAL” and click and drag it onto Track 1 on the Playing
Field.
Note that the Object created from the Lead Vocal snaps to the
beginning of the Track the moment it is placed on the Playing Field.
This is because you’re using the Time Locked Selector to drag an
Audio File you’ve added to the Project using the Add Audio File
feature.
Note: When a Track contains an Object, its light blue Data Present LED
switches on. This LED is located beneath the Track’s number on the left
side of the Editor Window.
Data Present
LED
E-MU PARIS Introduction 11
Page 16
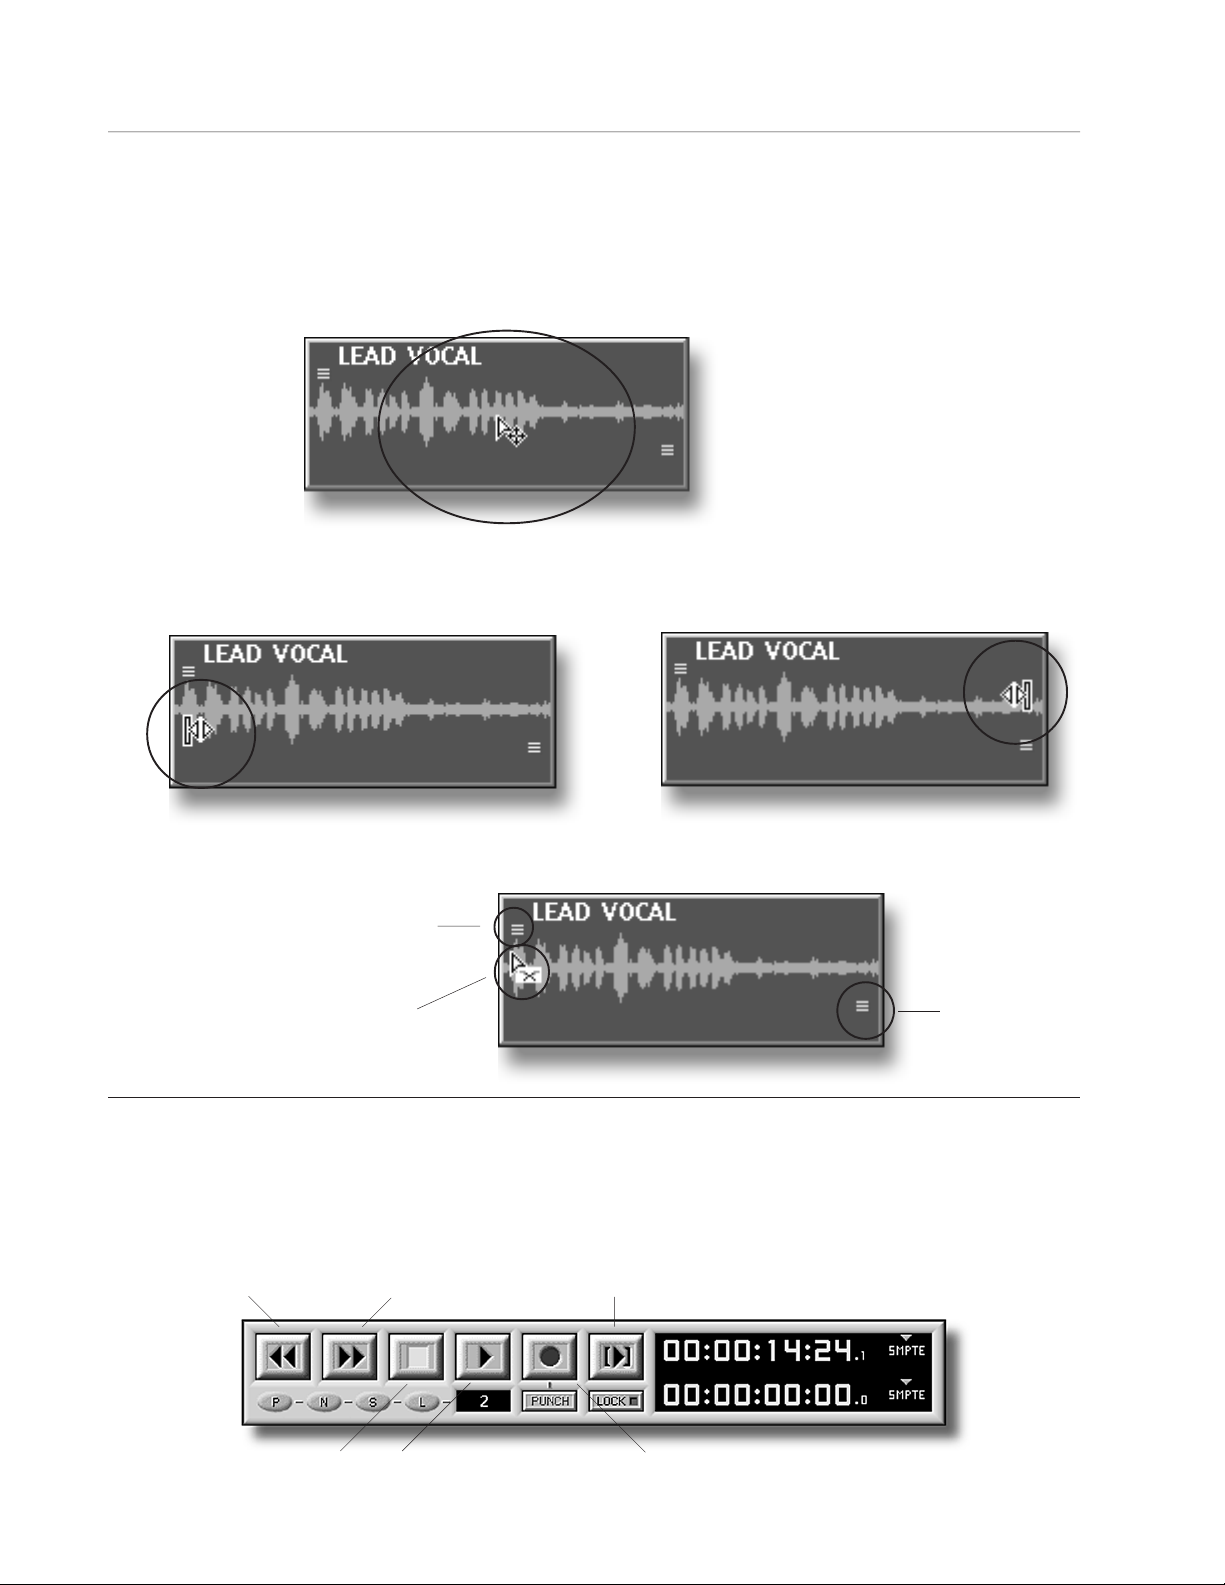
Context-Sensitive Cursors
When working with Audio Objects, you’ll notice different cursors—you can think of them as tools—that
appear on the Playing Field. The cursor shown changes depending on where you’ve positioned the mouse
pointer over an Object. The following illustrations show the cursors that will appear whenever the mouse is
positioned in the approximate areas shown.
The standard Selector tool is used to move an Object or group of Objects on the Playing Field. It’s also used to
drag Objects from the Playing Field into the Bin or into the Jails (Jails will be explained later).
The standard Selector
cursor appears when you
hold the mouse pointer
over the central area of an
Object
The Trim cursors are used for changing Object start and end times—they appear when the Selector tool is
positioned over the outer edges of an Object.
The Fade tool is used to create fade-ins and fade-outs of the selected Objects. It appears when the Selector
tool is positioned over a fade-in or fade-out handle.
Fade-in
handle
Fade
Tool
Fade-out
Playing Tracks
Transport commands can be executed from the Transport Window, the computer keyboard and the C16 Pro.
From the Transport Window
1. Press “T” on the computer keyboard to bring up the view of the Transport Window.
Rewind
Fast Forward
Loop Playback
handle
Stop Play
Record
12 E-MU PARIS Introduction
Page 17

2. Using the mouse, click on the Transport Play button, and let the transport run for about ten seconds. The
music will start to play.
3. Click on the Stop button.
4. Having to wait ten seconds every time is a drag. So let’s set the Zero point of the Project to ten seconds.
5. Turn the Jog/Shuttle Wheel unto the Transport display reads: 00:00:10:00 (or close).
6. On the C16 Pro, press and hold the Stop button, then press the Rewind button. The yellow silkscreen on
the panel indicates “Set Zero” for these two buttons.
7. Press Play and listen to the vocal again. Whenever you’re ready, press Stop
8. Now you can double-click the Rewind button to rewind to the top of the Project.
Tip: To center the Vocal in the stereo field, press “M” on the computer keyboard to bring the Mixer window
forward, then set the balance control to “C” for center. Press “E” on the computer keyboard to bring the
Editor window forward again.
From the Computer Keyboard
1. Press the space bar and the music will play. Press the space bar again and the music will stop. Press the
Return key to rewind to the top.
From the C16 Pro
1. Press Play to begin playback, and Stop to end playback.
2. Press the Rewind button twice quickly—this is called ”double-clicking”—to rewind to the top.
Other Functions on the C16 Pro and in the Transport Window
• Press the Forward button to fast forward. • Press the Forward button twice quickly to locate to the end.
• Press the Rewind button to rewind.
Before Proceeding with the Tutorial...
1. Press Stop, then locate to the beginning of your Project by pressing rewind twice in rapid secession..
The Audio, Bipolar and Name Buttons
You can decide whether or not and how you want to view your Objects’ waveforms, and whether or not
you’d like to view your Objects’ names.
1. The Show/Hide Command Bar should still be visible—if it’s not, click the Show/Hide button in the SUSHI
Bar.
2. Click the Audio button a few times, and note how it changes the appearance of the Objects on the Playing
Field.
3. Do the same using the Bipolar button—when the Audio and Bipolar buttons are on, your Objects’
wavedata is shown rising above and falling below a center zero line. When the Audio button is on but the
Bipolar button is off, the zero line is moved to the bottom of the Objects, and only wavedata above the
line is visible.
Audio button
Bipolar button
Name button
4. Click the Name button on and off to see the names of your Objects appear and disappear. (Note: The
Name Label is located at the start of the Object.)
5. When you’re done experimenting, leave all three buttons in their on—depressed—positions, so that
bipolar wavedata is visible in your Objects, and each Object’s name is visible.
E-MU PARIS Introduction 13
Page 18

The Paris Rulers
Paris offers you the option to display up to five different time Rulers at the bottom of the Playing Field.
Rulers provide time-based reference points that are used for a variety of purposes. Each Ruler can be made
visible and/or turned on or off from the Views menu or by pressing the desired button in the Grid & Snap
Bar. The position of the Ruler Mode switch determines whether the buttons will show or hide Rulers (when
the button’s pressed in), or activate them (when the button is in its present position).
Ruler Mode Switch
Minutes:Seconds:Miliseconds Ruler
Currently, the SMPTE and Seconds Rulers are visible.
The Grid & Snap Command Bar offers a set of tools for automatically lining up Objects with units of
measurements within one or more active Rulers. To learn more about the Grid & Snap Bar, see Chapter 5 of
the PARIS Reference.
Seconds Ruler
Samples Ruler
Bars/Beats RulerSMPTE Ruler
Using Markers
Markers are handy placeholders that serve a variety of purposes. You can use Markers as Locator points from
which to begin playback, you can use them to line up Objects on the Playing Field, and they can be useful
when editing Objects. PARIS can store and recall up to 999 Markers per Project. We’re going to set several
Markers using the C16 Pro while the music is playing, and then move the Now Line to those Markers using
the C16 Pro.
1. From the View menu, choose Show Markers if it’s not already checked in the menu.
The Marker control section appears at the bottom of the Editor Window under the SMPTE and Seconds
Rulers.
Previous Marker Next Marker
Set New Marker
Marker Trash
2. Press the Play button on the C16 Pro.
3. As the music plays, press the Set New
Marker button on the C16 Pro at five or six
different locations within the song.
4. Press the Stop button and double-click the Rewind button to return to the top of the Project.
The Markers you set can now be seen beneath the lowest Ruler, the Seconds Ruler.
Previous
Marker
button
Next Marker button
Set New
Marker
button
14 E-MU PARIS Introduction
Page 19

5. Press the Marker mode button on the C16 Pro,
Its yellow LED will light.
The Marker mode button
6. Press the Next Marker button on the C16 Pro to move—or “locate”—the Now Line to the first of the
Markers you’ve just set.
7. Press the Next Marker button a few more times—with each press, the Now Line will jump to the next
Marker.
8. Press the Previous Marker button to return to the last Marker before the Now Line’s current location.
9. Using the numeric keypad on the C16 Pro, type the number of a Marker you’d like locate to, followed by
the period (“.”) button. This action lets you locate the Now Line to a specific Marker location. This can
also be done using the number keys on the computer keyboard.
10.Using the mouse, click and drag all of the Markers into the Trash icon found in the Markers control
section of the Editor Window. (You’ll be setting new markers later on as you learn how to edit Objects.)
Using the Zoom Bars
The Editor Window’s innovative Zoom Bars provide an new and easy-to use method for changing the
appearance of your data.
• Both Zoom Bars allow you to alter the magnification of horizontal and vertical views .
• The horizontal (time) Zoom Bar located at the bottom of the Playing Field can be dragged to the left or
right, scrolling the view back and forth in time across the Playing Field.
• The vertical (Tracks) Zoom Bar can be dragged up or down, allowing you to view any of your Tracks.
Horizontal (time) Zoom Bar
Zoom Bars have three components:
Vertical (Tracks) Zoom Bar
1. The handles located at either end of a Zoom Bar can
be dragged to change the magnification of your view.
2. The numeric read-out in the center of each
Zoom Bar shows your current magnification.
3. The center of each Zoom Bar can be
clicked upon and dragged to scroll your
view.
E-MU PARIS Introduction 15
Page 20

Changing the Vertical (Tracks) Magnification
So far, you’ve been viewing eight of PARIS’ Tracks. You can use the vertical (Tracks) Zoom Bar to change the
number of tracks that are visible.
1. Click the bottom handle of the vertical (Tracks) Zoom Bar with the mouse pointer and drag it toward the
bottom of the screen until “16” appears in the center of the Zoom Bar.
2. Release the mouse.
You’re now viewing 16 Tracks.
3. Repeat this procedure until the Zoom Bar is showing “4” in its center.
4. Release the mouse.
You’re now viewing four tracks.
Working with the Horizontal (Time) Zoom Bar
The horizontal (time) Zoom Bar can show your current magnification in the same units of measurement
offered by the PARIS Rulers. The currently active unit of measurement is Minutes:Seconds:milliseconds. The
Zoom Bar shows “00:13:096”—therefore, you’re viewing 13 seconds and 96 milliseconds worth of time on
the Playing Field.
Note: PARIS will allow you to set your view only to legitimate values, as determined by the current sampling
rate and your monitor’s resolution. All settings in the following steps are given as approximations of the
values you’ll see on your computer.
Changing the Horizontal (Time) Magnification
1. Locate the horizontal (time) Zoom Bar at the bottom of the Editor Window.
2. Click on the right Zoom Bar handle using the mouse and drag it all the way to the left.
The display shows “00:00:13,” meaning that you’re viewing a mere 13 milliseconds-worth of time. Don’t
worry that you can’t see much wavedata in your Objects at the moment. Your view is currently
microscopic, and you’re looking at a spot that’s mostly before the wavedata begins.
Tip: The unit of measurement shown in the horizontal (time) Zoom Bar is the same as that chosen for the
Now Position Display in the lower left-hand corner of the Editor Window. To learn how to set the Now
Position Display/horizontal (time) Zoom Bar unit of measurement, see Chapter 4 in the PARIS Reference.
Scrolling in the Editor Window
Zoom Bars can be used to scroll the view shown in the Editor Window. (You can also use the standard
scrolling arrows in the corners of the Editor Window if you prefer.)
1. Click in the center of the horizontal (time) Zoom Bar with the mouse and drag it to the right—there’s the
wavedata in your Objects, viewed at high magnification.
2. Scroll back to the beginning of the Project by dragging the Zoom Bar to the left.
3. Click on the center of the vertical (tracks) Zoom Bar and drag it down and back again to view different
tracks.
4. When you’re done experimenting, scroll back to Tracks 1-4 by dragging the zoom Bar all the way back up.
5. Set the time magnification back to around 13 seconds by dragging the right-hand horizontal (time) Zoom
Bar handle to the right.
16 E-MU PARIS Introduction
Page 21

Saving and Recalling Local Views
PARIS can store and recall the appearance of any of its windows, memorizing up to 99 Local Views per
window. Local Views can be saved and recalled using the C16 Pro or your computer keyboard.
Saving Local Views
1. Set the C16 Pro to View mode by pressing its View mode button.
The View mode button
2. Press the 4 button on the C16 Pro’s keypad.
3. Press the Enter•Save button to the right of the keypad.
You’ve just saved the current appearance of the Editor Window into Local Views Location Four.
4. Drag the horizontal (time) Zoom Bar until roughly 30 seconds of time are showing on the Playing Field,
and drag the vertical (Tracks) Zoom Bar until 8 tracks are showing.
5. Press the 1 button on the C16 Pro’s keypad, followed by 0, then press the Enter•Save button.
You’ve just saved a second Local View in Location Ten.
6. Drag the vertical (tracks) Zoom Bar to show all 16 tracks, and the horizontal (time) Zoom Bar to show
about 3 minutes and 18 seconds.
7. On the C16 Pro, press the numbers 1 and 6, followed by the Enter•Save button to save that view into
Location 16.
Note: We’ve saved these Local views using Locations 4, 8 and 16 to make things easy to remember. You can
use any location from 0-99.
Recall button
Recalling Local Views
1. Press the C16 Pro’s 4 button.
2. Press the Recall button to the right of the keypad.
This restores your four-track Local View.
3. Recall the 16-track view by pressing the 1 and 6 buttons, followed by the
Recall button.
4. Recall the eight-track view by pressing the 8 button, followed by the
Recall button.
That’s all for this exercise. If you want you can save your Project… or not.
To save your Project:
1. Press “P” to bring the Project window forward.
2. Choose “Save” from the File menu.
E-MU PARIS Introduction 17
Page 22

18 E-MU PARIS Introduction
Page 23

Editing Exercises
Exercise # 1 Manipulating Audio Objects
In this tutorial lesson, you’ll learn a few new ways to modify Audio Objects on the Playing Field. PARIS’ nondestructive editing method is extremely powerful and lets you experiment as much as you want without ever
affecting the original audio. Before you begin, open the Crop Circles Tutorial.ppj from the tutorial folder. Do
you remember how to link the audio files? If not, refer back to page 4. Once the Project is open, continue on.
1. Bring up the Editor Window by pressing “E” on your computer keyboard.
2. Select View mode on the C16 Pro by pressing the View button.
3. Press 7, then Recall on the C16 Pro to recall stored view number 7.
4. Using the mouse, select the group of Objects shown below by clicking and dragging over the Objects
using “marquee” selection. To use this selection method, begin dragging in the empty track just below the
lowest Object, then drag up to select the whole group.
Start
dragging
here
5. The selected Objects will change color as they are selected.
E-MU PARIS Introduction 19
Page 24

6. Now that you’ve selected the group of Objects we’re going to move the endpoints using the C16 Pro’s Jog/
Shuttle wheel. On the C16 Pro, press the Edit Object button, located just above the Jog/Shuttle wheel.
7. Press the Select End button on the C16 Pro.
8. Now turn the Jog/Shuttle wheel clockwise and note that the ends of the Objects are being moved toward
the right. Keep turning the wheel until the Object can’t be extended any more.
9. Play over the section you just extended. Note that there is now a section of silence at the end of the
extended Objects. (You’ll still hear the Guitar and Vocal parts, but the band has stopped.) You can also see
that the audio has stopped by looking at the waveform at the end of the selected tracks.
10.In order to fix this little problem, we’re now going to drag the following Objects back over the blank
sections. Using your mouse, select the Objects shown in the screen below. Click with your mouse on the
first Object, then hold down the SHIFT key on the computer keyboard and click on the other Objects
until they’re all selected (and highlighted as shown).
Trim Cursor
11. This time we’ll use the mouse to drag the Start Points of the Objects back over the silent sections. Select
the Time-Locked Selector tool from the toolbar. With the 9 Objects selected, place the cursor on the
left side of one of the Objects, roughly in the center of the waveform. The cursor changes to the Trim
Cursor .
20 E-MU PARIS Introduction
Page 25

12. With the Trim Cursor visible, click and drag the Object Start Points to the left until they just cover the
silent sections of the previous group of Objects.
13.Press the Edit Object button on the C16 Pro to turn Edit Object off. Now you can use the Jog/Shuttle
wheel for it’s primary purpose, which is to move the Now Line. Move the Now Line to a point just before
the juncture of the groups of Objects then press Play to hear the results. If it sounds good, you’re finished.
If not, feel free to adjust to your heart’s content.
Exercise #2 - Creating a Fade-In
In this exercise we’ll perform a simple crossfade at the beginning of the Project.
1. Select View mode on the C16 Pro by pressing the View button.
2. Press 9, then Recall on the C16 Pro to recall stored view number 9.
3. Use the Previous/Next marker buttons on the C16 Pro to move the Now Line to Marker 3.
4. Select the Objects on Tracks 13 & 14, Lead Vocal and Acoustic Guitar.
5. Position the mouse cursor in the upper left corner
of the Lead Vocal Object so that the crossfade
cursor appears.
E-MU PARIS Introduction 21
Page 26

6. Click and Drag the Fade Cursor pulling the “handle” further out of the Object.
7. Hit Play on the C16 Pro and note that there is now a longer fade-in on the Guitar and Vocal.
8. Experiment with the different crossfade shapes by clicking on the shape selection area of the
Crossfade bar (left side) with the two Objects still selected. Listen to the effect of each crossfade shape.
9. Like the original fade-in better? Simply press the Undo button on the C16 Pro to “go back in time”. PARIS
allows up to 99 undos. (You may have to press Undo several times depending on how many times you
changed the crossfade shape.) Want to compare? Press Redo and hear the longer fade-in again.
The first verse of the song has been truncated off. Let’s put it back in. PARIS’ non-destructive editing makes
this job trivial.
10.Make sure the Guitar and Vocal Objects are still selected.
11.From the Tools bar, select the Time-Locked Selector tool.
12.Place the cursor on the left side of one of the Objects, roughly in the center of the waveform. The cursor
changes to the Trim Cursor .
13.Click and Drag the Start Point of the Objects left until you get to Marker 1 (close is OK).
Exercise #3 - Setting Sync Points
So far we’ve been aligning Objects by ear. Sometimes, however, you want to perfectly align two or more
Objects. Sync Points are user-defined points on Objects which will snap together. This extremely powerful
feature helps you to perfectly align different Objects of a song. For example, you could place Sync Points on
the downbeat of two unsynced Objects and then snap them exactly together. It’s a very cool feature. In this
exercise, you’ll learn about Sync Points, the Grid, and how the Snap feature works.
1. Now we’re going to add a Sync Point at Marker 5 on Track 13. To do this:
a. Move the Now Line to Marker 5 by pressing the Previous/Next buttons on the C16 Pro.
b. Select just the Lead Vocal Object on Track 13.
c. From the Audio Menu, select “Add Sync Point”.
d. Use the Jog/Shuttle wheel to move the Now Line away from Marker 5.
e. There should be a green bar on the Object exactly at Marker 5.
f. If you don’t see a green line there, press the “Show Sync Points” button on the Show/Hide bar.
Try out the button even if you do see it. The Sync Point on the Object goes off and on.
22 E-MU PARIS Introduction
Page 27

6. Next, we’ll add a Sync Point to another Object. In the end these two Sync Points will be snapped together.
Select Editor View #8 from the C16 Pro. B-Vox-001 will appear roughly in the center of the screen.
7. Click on Marker 7 (at the bottom of the screen) to bring the Now Line to this point.
8. Select the B-Vox Object.
9. From the Audio Menu, select “Add Sync Point”. If you move the Now Line away you’ll see a green line
across the Object which is the Sync Point. Press the “Show Sync Points” button if you don’t see the
green line.
10.Select the buttons shown in the picture below. Turn off any of the other buttons. The important buttons
are labelled.
Snap On
Show Sync Points
11.OK this is the cool part. First select the Non-time aligned selector tool, then (Mac-Option click),
(PC-Right click) in the very center of the B-Vox Object and drag it toward the beginning of the Project.
This makes a copy of the Object.
12. When you get to Marker 5 where you placed the other Sync Point the B-Vox Object will stick in place. In
other words, it has “snapped” to the Sync Point.
13.Select Marker 5 and then use the Jog/Shuttle wheel to move just a little bit further back. Now press Play
and listen to the doubled vocal, perfectly time aligned.
14. If you want to play around a little more, try adding a crossfade to the beginning and the end of the
doubled vocal. Since the Sync Points are still locked, you don’t have to worry about losing sync.
Use Sync Point
E-MU PARIS Introduction 23
Page 28

Moving Audio Objects to Object Jails
PARIS provides 32 separate clipboard locations in which you can store Objects—these are called “Object
Jails.” Each Jail can hold Objects from one track or from multiple tracks. You can drag any selected Objects
into any of the 32 Jails, and there they’ll remain until you drag them back onto the Playing Field. You can
also copy Objects on the Playing Field into a Jail. In addition, if the Time Locked Selector tool is used to drag
an Objects or Objects out of the Jails, their original placement on the Playing Field will be restored. Unlike
conventional clipboards, the contents of the Jails can be saved with the Project so that they’re available the
next time the Project is opened.
There are many uses for Object Jails. You may have several alternate vocal takes in different Jails and freely
exchange them to and from the Jails and the Playing Field. Perhaps you are working on a stereo remix
Project—you may choose to edit your original two-track master, placing various sections into the Object Jails,
and then reorder them to create alternate mixes. The Jails can also be handy holding tanks when creating
and placing sound effects.
Note: The first Jail is actually the traditional cut/copy clipboard. Whenever you cut or copy something on
the Playing Field, it automatically appears in the first Jail, overwriting anything previously there—this
provides handy visual feedback to let you know something has been cut or copied. This also means that you
should use one of the other 31 Jails for the storing of Objects that you don’t want to accidentally overwrite.
The Object Jails appear in the Object Jails Bar—if the Object Jails button in the SUSHI Bar is not
currently in its On position, click it to view the Object Jails Bar.
Clicking on the right scroll buttons will display higher-numbered Jails. Clicking on the left scroll button will
display lower-numbered Jails.
We’re going to copy the audio data at tracks 13 & 14 into Object Jail 2.
1. Select View 9 from the C16 Pro.
2. Select the Objects on Tracks 13 & 14 shown below using the click-and-drag method described earlier.
3. If you’re using a Mac, hold down the Option key; if you’re using a Windows PC, hold down the righthand mouse button while you drag.
4. Click on the selected Objects and drag them into Object Jail 2.
You’ve just placed a copy of the selected tracks into Object Jail 2.
Note: Throughout the Editor Window,
dragging on a Mac while holding down
the Option key or dragging with the righthand mouse button on a Windows PC
makes a copy of the selected Object.
24 E-MU PARIS Introduction
Page 29

Using The Nudge & Slip Command Bar Features
The buttons on the Nudge & Slip Command Bar allow you to edit Audio Objects with a very high degree of
precision, from 1-millisecond increments to 100-millisecond increments.
If the Nudge & Slip Bar is not visible, click on the Nudge & slip button on the SUSHI Bar.
Note: Though the Nudge & Slip Bar allows you to work with much finer increments, we’ll be using the 100millisecond buttons in order to most clearly see how its features work.
Using the All Button
The All button alters the placement of Objects on the Playing Field.
1. Select View 9
2. Select the Objects on Tracks 13 and 14 using the click-and-drag method.
3. Click on the All button in the Nudge & Slip Command Bar.
4. Click on the Left 100-Millisecond button five times—the selected Objects move to the
right on the Playing Field in five 100-millisecond steps.
5. Click on the Right 100-Millisecond button five times—the selected Objects move back to the
left on the Playing Field in 100-millisecond steps.
Start, End and Slip
The Nudge & Slip Bar also offers Start, End and Slip tools. To understand what these tools do, it’s helpful to
remember that an Object is merely a set of instructions for playing the Audio File on which it’s based.
Therefore, if an Object instructs PARIS to start playing an Audio File from the middle, it doesn’t mean that
audio earlier than that point has been removed from the file; it just means it’s not to be played. The Start and
End tools allow you to shift the start and end points of an Object—revealing more or less of the Audio File on
which it’s based. When you use Slip, the size of the Object remains the same, but it plays a different piece of
the Audio File.
The Start, End and Slip tools work with the Nudge & Slip Bar’s millisecond-increment buttons in the same
way that the All tool does.
Using the Start Tool
1. Click on the Start button in the Nudge & Slip Bar.
2. Click on the Left 100-Millisecond button 5 times. This will cause the Objects to start playback of their
Audio Files 500 milliseconds earlier. The visual effect is that you’ve revealed 500-millisecond chunks of
the Audio Files at the beginning of the Objects.
3. Now reverse the process by clicking on the Right 100-Millisecond button 5 times. This will return the
Objects to their original starting points.
Using the End Tool
1. Click on the End button in the Nudge & Slip Command Bar.
2 Click on the Left 100-millisecond button 5 times. This will make the Objects end playback of their Audio
Files 500 milliseconds sooner.
3. Now reverse the process by clicking on the Right 100-millisecond button 5 times. This will return the
Objects to the original lengths.
E-MU PARIS Introduction 25
Page 30

Using the Slip Tool
1. Click on the Slip button in the Nudge & Slip Command Bar.
2. Click on the Right 100-Millisecond button 5 times. The wave data inside the Objects’ start and end points
slips forward, causing their Audio Files to play from an earlier point in time.
3. Use the C16 Pro to locate to the first Marker you originally set.
4. Press Play on the C16 Pro, and you will notice that you’re hearing earlier pieces of the Audio Files, even
though the start and end times of the Objects have not changed on the Playing Field.
5. Now click the left 100-Millisecond button 10 times. The first five clicks return the Objects to the original
sections of their Audio Files, while the next five slip the Audio Files backward.
6. Play the Objects again and you will now hear the music start and end from a later point in time.
7. Click the right-hand 100-Millisecond button five times to return to the original section of the Objects’
Audio Files.
Get Out of Jail Free
Bad news: You’ve changed the original edit points of your cutout Objects (although you could Undo
everything you’ve done; see Chapter 6 of the PARIS Reference). Good news: You’ve saved an un-edited version
of them in Object Jail 2. Let’s drag the un-edited Objects back onto the Playing Field.
1. Clear the currently selected Audio Objects off of Tracks 13 and 14 by pressing the Delete/Backspace key on
your computer keyboard.
2. On the Grid & Snap Bar, turn the Markers On/Off button off.
3. Choose Time-Locked Selector Tool in the Tools Command Bar instead of the standard Selector.
4. If you’re using a Mac, press and hold down the Option key; if you’re using a Windows PC, click on the
right-hand mouse button.
5. Drag the Objects out of Jail 2 and onto Tracks 13 and 14. Note that they are still “Time-Locked” to their
original positions on the Playing Field.
Note: As you can see, Jail 2 still contains its Objects. This is because we copied the Objects in the Jail back
onto the Playing Field by holding down the Option key on the Mac and the right-hand mouse button on a
Windows PC as we dragged. Had we dragged without doing so, the Objects would have been simply removed
from the Jail and placed on the Playing Field.
26 E-MU PARIS Introduction
Page 31

The Mixer Window
Overview
PARIS’ Mixer Window allows you to mix your Tracks without using a conventional hardware mixer and
without the need for external effects processors. Some key features and benefits of mixing in PARIS are:
• The Mixer section looks like a real mixer. If you’ve ever used a physical mixing console, you’ll feel
immediately at home in PARIS’ mixing environment. Faders act as faders should, and panning, EQ
controls and Effect sends and returns act just like their real-world counterparts.
• Many of the faders, knobs and buttons on the C16 Pro perform Mixing Window functions, making the
experience even more enjoyable and intuitive. You can mix with a mouse, or with your hands.
• Up to 99 Local Views of the Mixer Window can be stored and recalled, allowing you to customize your
mixer to suit your working style, as well as specific situations.
• The Mixer provides you with up to 8 simultaneous high-quality 24-bit effects. Reverbs, gates, compressor/
limiters, delays, chorus and more are always available. Four full-band parametric EQs are available on each
of the 16 mix channels, providing an wealth of EQ power without having to purchase additional “plugin” modules.
• Mixer Window moves can be easily automated, including volume, pan, and Mute changes.
• Multiple mixes can be saved as different Projects and recalled easily, allowing you pick and chose from
among various mixes without having to redo all of your settings.
Viewing Various Mixer Window Components
The Mixer Window provides many more mixing tools than can fit on anyone’s monitor. As a result, you can
choose to hide or show various mixer elements. (You can also change the order in which some of your tools
are displayed.)
1. Type “M” to call up the Mixer
Window. As currently configured,
one EQ section is visible for each
channel.
2. From the EQ menu, select
Show 2 EQ Sections.
A second EQ module appears.
EQ Master module
Fader
EQ band 1
EQ module
EQ display
Pan module
Level LED array
EQ band 2
E-MU PARIS Introduction 27
Page 32

3. Go back to the EQ menu and select Show 1 EQ Section.
4. From the Aux menu, select Show 1 Aux Send
Section.
An Aux Send module will appear in each of the eight
displayed channels.
Aux Send module
At this point, your display is likely to be pretty full.
As you’ll see later on, even though there are four bands of EQ for each channel, and eight Aux Sends, you
only need to display one of each.
5. You’re currently viewing Channels 1-8. Channels in the Mixer
Window are hard-wired to their like-numbered Editor Window
Tracks (with the exception of Free Form Mode; see Chapter 4 in
the PARIS Reference). Channel 1 always controls Track 1, and so
on. To view Channels 9-16, click the right-hand scrolling arrow
beneath Channel 8.
6. Click the left-hand channel-scrolling arrow to return to Channels 1-8.
Each channel’s number appears in its strip located beneath its fader.
28 E-MU PARIS Introduction
Page 33

Tip: You can tell at a glance which channels you’re viewing by looking at the small rectangles in the
lower left-hand region of the Mixer Window, next to the numbers of the Now Position display. The
channels currently in view are shown in aqua; hidden channels are shown in a sand color.
Tip: There’s a special bird’s-eye Mixer Window view available if you want to see all 16 channels at once.
With the C16 Pro’s View LED lit, type “9” followed by a period (“.”) on the C16 Pro—The Mini-Mixer
appears. Close the Mini-Mixer window before continuing with this tutorial.
7. In the same way that you can scroll to additional channels, you
can also view other Master Aux Send/Return modules by
clicking on the right-hand scroll arrow beneath the second
Master Aux module.
8. Click the left-hand Aux Master-scrolling arrow to return to Aux
Master 1 and 2.
The Green Null Arrow Lights on the C16 Pro
The green Null arrow lights above the faders on the C16 Pro are provided to help you physically reset the
C16 Pro faders to match the positions of channel faders in the Mixer Window when beginning a mixdown in
a Project, or when resuming a mixdown in a saved Project you’ve re-opened. At this point in the Tutorial, the
upward-pointing Null arrow light for all 16 faders—and the Master fader—are lit.
To reset and activate C16 Pro faders:
1. Push Fader 1 in the direction of the up or down Null arrow—in this case, upward—until the
arrow begins to blink quickly. The blinking signifies that you’re approaching the point at
which the physical fader will agree with the one in the Mixer Window (this is referred to as
the “null point”).
2. Continue pushing the fader. As you get close to the null point, the blinking will slow; the light will go out
altogether when you actually reach it. When the Null arrow light switches off, you have control of the
channel’s level using the physical fader on the C16 Pro.
3. Repeat Steps 1 and 2 for Faders 2, 3 and 4.
Mixing Volume Levels Using the C16 Pro Faders
Now that you’ve activated the C16 Pro faders, you can change the levels of the Project’s Tracks.
1. Press the Play button and move any of the four faders as the music plays.
See how the faders in the Mixer Window follow the moves you’re making on the C16 Pro.
Note: If you make fader level changes in the Mixer Window using your mouse, you’ll see the affected
fader’s Null arrow re-light on the C16 Pro. This signifies that the onscreen and physical faders need to be
re-synchronized.
E-MU PARIS Introduction 29
Page 34

Panning Controls
1. Press the Select button for
Fader 13 on the C16 Pro. Its
yellow LED will light to show
that Channel 13 is selected for
editing.
2. Turn the Pan knob in the Channel Controls
section of the C16 Pro. When a channel is
selected—the procedure you performed in
Step 1—the controls in this section change
the settings of the selected channel.
The Select button
3. As you turn the Pan knob, watch Channel 1’s Pan value change
in the Mixer Window. When it shows L48. stop turning the
knob.
4. Rewind the Project and press the Play button to hear the Lead
Vocal’s new stereo location.
5. Repeat Steps 1 and 2 for Channel 7, panning the bass to a new
position.
6. Type “P” to call up the Project Window, and select Save As…
from the File menu to save your work as a new Project.
Soloing Channels
1. Rewind to the top of the Project and press Play.
2. Press the master Solo button located directly
above the Main L/R fader on the C16 Pro. Its red
LED will flash on and off.
3. Press Channel 13’s Mute/Solo button on the C16
Pro. Its red LED flashes and the Vocal on Track 1
is heard all by itself.
4. Press Channel 1’s Mute/Solo button again to un-solo
the Track.
5. Press the master Solo button again and the master
Solo function will be turned off.
Pan knob
Channel Solo button
Channel Mute button
Channel 13’s Mute/Solo
button
30 E-MU PARIS Introduction
Page 35

Muting Channels
1. Press Channel 13’s Mute button to silence Track 13.
2. Press the button again to turn Track 13 back on.
3. Press the Stop button to stop playback.
Tip: You can mute the entire mix by pressing the Mute button above the Main L/R faders on the C16 Pro.
Adjusting EQ (Equalization) from the C16 Pro
PARIS provides four bands of parametric EQ for each of its channels. These bands can be adjusted from the
Mixer Window or the C16 Pro. We’ll demonstrate the adjustment of EQ from the C16 Pro.
1. Rewind the Project.
2. Press the Select button for Track 13, the Lead Vocal.
3. Repeatedly press the EQ Band select button found in the Channel
Controls section of the C16 Pro. The EQ Band button allows you to
choose the EQ band to be adjusted in the selected channel. Watch the
EQ modules in the Mixer Window—as you select each band, that band
becomes visible in the displayed EQ module for each channel. This
allows you to display only one EQ module per channel, and yet always
be able to see what you’re doing when you set EQ on the C16 Pro.
4. Stop pressing the EQ Band button when the EQ 1 Band LED on the C16
Pro is lit.
5. Press the EQ Band button again and hold it down for 2 seconds. This action will turn on EQ band 1 . (You
can turn an EQ band off by repeating this process.)
6. Press the master Solo button found above the Main L-R fader to its On position. Solo Channel 13 by
pressing its Mute/Solo button—this will allow you to hear your EQ changes clearly.
7. Press the Play button.
8. Turn the Level knob in the Channel Controls section of the C16
Pro to the right, raising this EQ band’s level about +10 to
+11dB—you can view this value changing in the Mixer Window.
9. Turn the Freq (frequency) knob located to the right of the Level
knob up and down to sweep the range of frequencies being
boosted, from 20Hz to 20kHz. Settle on a frequency of about
2.5k, (2500 Hz).
10.Sweep the BW (bandwidth) knob, located to the right of the Freq
knob, up and down. Leave this—which sets the width of the EQ
band to be affected—at about 2.5 (octaves).
11.Using your mouse, click on any of the symbols beneath Channel
13’s Filter Mode Selector switch in the Mixer Window. Each
symbol selects one of the five possible EQ filter modes that
determine the shape of the EQ to be applied (to learn more, see
Chapter 9 in the PARIS Reference).
12.Select EQ 2 by repeating Steps 4-10, using a different frequency.
13.Un-solo Track 13 when you’re done changing its EQ settings.
14.Hit the Stop button when you’re done listening, and rewind to the top of the Project.
Level knob Freq knob BW knob
EQ Band button
EQ Band LEDs
Tip: You can use a channel’s All EQ button to quickly turn on or off all of the
channel’s EQ modules at once.
E-MU PARIS Introduction 31
Page 36

Using the PARIS Effects
Sending a Channel to an Effect
1. Mute all of your channels except Channel 14, the acoustic guitar—this will make it easy to hear the
changes you’re about to make.
2. Locate Channel 14’s Aux Send 1 module in the Mixer
Window, and use the mouse to turn its On/Off button to
the On position—its blue LED will light. When this
button is on, Channel 14’s signal is sent out on the Aux
1 bus.
If Aux 1 is not visible, repeatedly press the Aux Send
button on the C16 Pro until the first of its 1-8 LEDs is lit,
and Aux 1 appears next to the Aux Send On/Off switch
in the Mixer Window.
Aux Send button
Aux Send
Amount
knob
Aux Send
Pan
Position
Aux Send LEDs
Selecting Effects
Every PARIS system includes a suite of high-quality 24-bit Effects that can be utilized by any channel.
Aux Send
On/Off
Switch
Aux Send
Amount
Aux Send
Pan knob
Tip: You can purchase additional Effect Plug-Ins—visit the PARIS Web site at http://www.emuparis.com for
more information.
1. Locate the first Aux Master module in the Mixer Window.
The name of the
Aux Master module
is shown here
2. Using the mouse, click on and hold down the Aux Master’s
Select FX button.
A pop-up menu appears showing you the Effects available in
your PARIS system.
3. Drag the cursor to select click Non Lin Rev (nonlinear reverb),
and let go.
4. Press the Play button to hear the acoustic guitar with nonlinear
reverb added.
32 E-MU PARIS Introduction
Page 37

5. Repeat Steps 2 and 3 to try out other effects for the guitar track.
6. When you’re done experimenting, select NonLin Reverb again, press the Stop button and Rewind to the
top.
Editing Effects
1. Click on the Effect Name in the Aux Master 1 section.
2. The Effects Editing window for Non Lin Reverb appears:
You can edit an Effect parameter in various ways:
Parameter knob
• You can click on its up and/or down buttons.
• You can raise or lower its value by clicking and dragging its knob.
• You can click on its value, type new value and hit R
• You can click and drag a graphic representation of the parameter where available.
In some Effect-editing windows, you’ll see the Show Advanced Parameters button.
Pressing this button causes additional “expert” parameters to appear.
1. Click the Show Advanced Parameters button.
PARIS also provides on-screen definitions of each Effect parameter.
1. Press the Help button to view the definition of the currently selected parameter.
2. Select another parameter by clicking on its name—PARIS now shows you the
definition of the newly selected parameter.
ETURN or ENTER.
Up/down
buttons
Parameter value
Effect Presets
PARIS allows you to store and recall Effects edits as Presets. You can store a Preset in the current Project, or in
the Presets Library, where it can be accessed by any Project. PARIS also contains a collection of preprogrammed get-started Presets for each effect.
All Preset activities occur in the Preset Tools Window. This window is accessed by pressing the
Preset Tools button in each Effect’s main editing window.
1. Press Non Lin Reverb’s Preset Tools button—the Preset Tools Window appears, as shown on
the following page.
E-MU PARIS Introduction 33
Page 38

The Preset Tools Window has four basic components:
1. The field at the very top of the window is used for
The Preset Tools
Window
entering the names of new Presets as they’re created.
2. The four buttons—Erase, Replace, Name and Recall—
perform certain operations upon the currently selected
Preset.
3. The upper large window shows the Presets in the current
Project.
4. The lower large window shows the current Effect’s
Presets in the Preset Library.
Presets are selected by clicking on their names. Once
selected, the upper buttons can be used to perform certain
actions upon the selected Preset.
Tip: Presets can be moved back and forth between the
current Project and the Preset Library by selecting them
and clicking the appropriate arrow button between the two
windows.
Recalling a Preset
1. Press the Play button.
2. Click on the name of the Inverse Preset, causing it to highlight.
3. Click the Recall button to recall this Preset and install it into the Effect—notice how the sound changes.
4. Recall the other Library Presets to hear what they sound like, and finish by selecting and installing the
Default Preset found in the upper window.
5. Press the Stop button and rewind to the beginning of the Project.
Saving a Preset
1. Change some parameter values using any of the methods described earlier.
2. Type your new Preset’s name—you can use “Tutorial Preset”—in the naming field.
3. Hit R
ETURN or ENTER on your keyboard—you’ve saved a Preset, and its name now shows in the list of Project
Presets in the upper large window.
We’ve been describing the use of Effects added to a channel after its signal has passed through its EQ
module(s) and fader. Effects, however, can be added at various points along the channel signal path. You can
also add Effects to audio as it enters the channel strip—these Effects are called “Inserts.” To learn more about
PARIS Effects, see Chapter 13 of the PARIS Reference.
34 E-MU PARIS Introduction
Page 39

Mixer Automation
PARIS provides powerful automation tools for use in the Mixer Window. Faders and pan movements, as well
as channel mutes, can be recorded using the mouse or the C16 Pro. You can record multiple automation
elements for any channel, all at once, or one element at a time. The following tutorial shows how to record
fader moves and channel mutes from the C16 Pro, and panning from the Mixer Window.
To prepare for this exercise, open the “Crop Circles no auto.ppj” Project from the PARIS Tutorial folder on
your hard disk. When asked, don’t save the “Crop Circles
Tutorial.ppj” Project.
Automating Fader Moves
1. Type “E” on your computer keyboard to bring forward the
Editor Window.
2. Set a new Marker at approximately 06:17 just before the
band comes in.
3. Type “M” on your computer keyboard to bring forward the
Mixer Window.
4. Select View #1.
5. Locate the Automation Edit buttons directly under Faders 1 through 7 and click them on—the buttons
will “invert” and the blue LEDs will light. Doing this arms Channels 1 through 7 for the recording of
automation.
6. Click the Automation Enable buttons located to the left of the Automation Edit buttons and click them
on for Channels 1 through 7. The buttons will “invert” and the yellow LEDs will light. Clicking these
buttons allows recorded automation to play back.
7. Press the Auto. button the C16 Pro. This button is locatedjust above and to the right of the Master fader.
Note that the red and green LEDs above channels 1-7 are now lit, indicating that these tracks are enabled
for recording and playback of Automation data. (Note: This step is only necessary for fader automation.)
8. Move the faders for Channels 1 through 7 out of their nulled state—so that neither of its Null arrows is
lit—if necessary.
9. Press Play on the C16 Pro.
10.After playback has started, place the C16 Pro in automation “Write-mode”, by pressing the Select buttons
for channels 1 through 7. The yellow LEDs will be flashing.
11.Move faders 1 though 7 on the C16 Pro, while listening to the mix.
12.Press the Stop button and jump back to the marker you set in step 1.
13.Press Play—your fader moves play back.
14.Press Stop and rewind to the top.
Automation
Enable button
Automation Edit
button
PARIS can record movements from all 16 faders in addition to the Main L/R fader. Repeat the above steps for
other channels if you would like to automate them.
Automating Channel Mutes from the C16 Pro
1 Select the Marker you set in step one of “Automating Fader Moves”.
2. Turn on Channel 2’s Automation Edit and Automation Enable buttons in the Mixer Window (if they
aren’t already on).
4. Press Play on the C16 Pro.
5. Press Channel 2’s Mute button on the C16 Pro.
6. After a couple of bars, press the Mute button again to turn the Channel back on.
7. Press the Stop button, rewind and press Play to hear the mute automation play back.
8. Press the Stop button when you’re done listening.
Tip: To ensure proper playback of Mute automation, disengage the Mute after recording your automation.
E-MU PARIS Introduction 35
Page 40

Recording Panning Changes in the Mixer Window
1. Press Play on the C16 Pro.
Since Fader 1’s Automation Edit and Enable buttons are still switched on from the volume automation
tutorial, no further preparation is required.
2. Using the mouse in the Mixer Window, click and drag the panning knob for Channel 1 to pan the loop
back and forth a few times.
3. Press Stop, rewind to the top and press Play. Your panning automation will play back.
Exiting Mixer Automation Mode on the C16 Pro
1. To turn off Automation Edit and Automation Enable from Channels 1 through 7:
a. Quickly tap the Select button on Channels 1 through 7. The green LED on each Channel will go out.
b. Press and hold the Select button for about one second on Channels 1 through 7. The red LED on each
channel will go out.
(This may take a little practice to master. These functions toggle on/off. Tap for green-Enable. Press for
one second for red-Edit.)
2. To exit automation mode on the C16 Pro, press the Auto button, turning Automation mode off. The
yellow LED will no longer flash.
36 E-MU PARIS Introduction
Page 41

Recording Your First PARIS Track
Now that you’re familiar with the concepts behind PARIS, let’s finish the tutorial section of the Introduction
by recording a track.
We’ll record the Track into a new Project.
1. Type “P” on the keyboard to call up the Project Window.
2. Select New Project from the File menu.
3. If PARIS asks you if you’d like to save your current Project before opening a new one, answer as you wish.
Setting Up
1. Connect a line level audio source—such as the output of a CD player, or the line out of a mixing
console—to the Audio Input 1 jack on your IF-2 or Interface 442.
Note: You’ll need to know whether the output level of your audio source is -10dB or +4dB. If you’re using
an IF-2, set its top panel button accordingly. If you’re using an Interface 442, send PARIS a -10dB signal for
this tutorial. The -10 default setting for the 442 can be changed in PARIS’ Patchbay Window, described in
Chapter 14 of the PARIS Reference.
Setting the Record Path
1. Type “P” on your keyboard to call up the Project Window.
2. From the Setting menu, select Set Record Path...
A standard Save dialog box will appear. The Record Path establishes a location on your hard drive to
which the Audio File you’ll be recording will be written.
3. Navigate to the location on your hard drive in which you’d like to place your recording.
4. Assign a name to the Audio File you’ll be creating. If you do multiple takes of your recording, all of the
resulting Audio Files will be written to the selected location using this name, along with a number
signifying the order in which the takes are recorded. (You can select a new Record Path—and name—for
your recordings at any time.)
5. Click Save to finish setting the Record Path.
Enabling Recording
1. Type “M” to call up the Mixer Window.
2. Click the Record Enable button at the bottom of Channel 1—its red LED will
light, signifying that you’re ready to record.
Tip: You can also select a channel and enable recording from the C16 Pro;
see Chapter 2 of the PARIS Reference for more details.
Record Enable button
Setting Levels
Each channel’s level LED strip shows the channel’s output level. When setting the recording level for a Track,
you’ll want to set the channel fader so that its numerical level window shows “0.0.” This guarantees that the
playback volume you see in its LED strip will be exactly the same level that is being received by the channel’s
input. This symmetry is commonly referred to as “unity gain.”
Audio should be as loud as possible for best fidelity, causing the red LEDs in the selected channel’s LED strip
to flash occasionally. Recording volume adjustments are made at the signal’s source—your CD player or
mixer, for example. PARIS’ channel faders control the channel’s output volume, not the channel’s input level.
E-MU PARIS Introduction 37
Page 42

1. Using your mouse, establish unity gain by setting
Channel 1’s fader so that its numeric readout
shows “0.0.”
2. Send a sample of the audio you’ll be recording into
PARIS and note its level in Channel 1’s Level LED
meter.
3. Adjust the level of your audio source if necessary.
Fader
Numeric
readout
Level LED strip
Entering Record
1. Double-click the Rewind button on the C16 Pro to ensure that you’re recording from the beginning of
your Project.
2. On the C16 Pro, hold down the Record button and press the Play button—you’re now recording.
3. Send your audio source into PARIS.
4. After 10-15 seconds, press the Stop button on the C16 Pro. You can record longer if you like; 10-15
seconds is enough for tutorial purposes. The amount of actual recording time available is dependent on
the amount of free space on your hard drive.
Playing Back Your Recording
1. Type “E” on the keyboard to call up the Editor Window where you can see an Object representing your
newly recorded hard-disk Audio File. You can open the Bin to view the Audio File itself.
2. Press the Play button. The Now Line will move across the Playing Field as PARIS plays your recording.
3. If you’d like to save the Project containing your recording, type “P” to call up the Project Window and
select Save As... from the File menu to store your Project on your hard drive.
38 E-MU PARIS Introduction
Page 43

Tour of the C16 Pro
The Transport Section
Previous
Pressing the Previous button on the C16 Pro will move
the Now Line back in time by one Marker.
Next
Pressing the Next button on the C16 Pro will move the
Now Line to the next Marker on the Project time line.
Set New
Pressing the Set New
button on the C16 Pro will
create a new Marker with
the next available Marker
number in increasing
numerical order.
Locate
Pressing the Locate button
on the C16 Pro will move
the Now Line to the
position indicated by the
current Locate Time
display.
Loop Start/End
Hold Set New and press the Loop Start or Loop End
buttons to set the corresponding special Marker time
to the Current Time (this reflects the current position
of the Now Line).
Punch In/Out
Hold Set New and press the Punch In or Punch Out
buttons to set the corresponding special Marker time
to the Current Time (this reflects the current position
of the Now Line).
Rewind
Pressing this button moves backward in
time through the Project from the current
position of the Now Line. Double-clicking
this button will cause the Now Line to jump
to the start point of the Project.
Fast Forward
Use the Fast Forward button to advance
through the Project from the Now Line’s
current position. Double-clicking this button
will cause the Now Line to jump to the end
point of the Project.
Stop
Pressing the Stop button will halt playback of all
Objects. The Now Line will pause at the time the
Stop button was pressed. Resume play from this
point by hitting the Play button.
Play
Clicking the Play button will start playback from the
current position of the Now Line. When recording,
hitting the Play button will disengage recording without
stopping playback.
Record
The red Record button initiates the recording
process on all Tracks that are armed for
recording. (If a record path has not been
specified, you will be prompted to do so.) The
red Rec LED on the C16 Pro will light. Tracks
can be armed for recording from the Mixer
Window, by clicking on the “R” button found
in the channel’s fader section, or from the C16
Pro by selecting the desired Track and pressing
the “Track Record Enable” button. You can stop
the recording process by hitting the Stop button
or the Play button. Using the Stop button pauses
the Project; using the Play button causes the
recording process to stop, but playback
continues, allowing you to punch in and punch
out as needed.
E-MU PARIS Introduction 39
Page 44

Numeric Keypad for Locating Views, Markers & Mode Buttons
The keypad is always in one of the four modes. The current mode is indicated by a yellow LED. The keypad
has different behaviors for each of the four modes.
• Marker—For managing time location Markers
• View—For managing screen Views
• Data—For data entry of numerical values (not currently implemented)
• Function—For performing pre-programmed functions (not currently implemented)
Marker
There are up to 999 Markers available in each Project.
When entering Marker numbers you do not need to
enter leading zeros.
To Recall a Marker, enter the Marker number then hit
Recall.
To Recall and Locate to a Marker, enter the Marker
number and hit the “.” button.
View
To Save a Local View, enter a view number then hit the
Enter•Save button.
If you enter a View number that has already been used,
you will be prompted to confirm that you want to
replace the older View.
To Recall a Local View, enter the view number then hit
Recall button.
To Recall a Single Window, enter the View number, then
hit the “.” button.
To close the front window, press the “0” button, then
press the “.” button. You can also type Command-W
(Alt-W) or click in the window’s close box if it has one.
In View mode, entering numbers followed by a period
or dot will open various important windows:
1 . Project Window
2 . Editor Window
3 . Mixer Window
4 . Transport Window
5 . Locator Window
6 . Instruments Window
7 . Patch Bay Window
8 . Audio Window
9 . Mini-Mixer Window
10 . Instruments Window
11 . Big Display Window
12 . Master Mixer Window
13 . Markers Window
14 . MIDI Devices Window
15 . MIDI Instruments Window
16 . MIDI Chunks Window
0 . Closes the front window (except for the Project
Window, which is always open until you quit PARIS).
40 E-MU PARIS Introduction
Page 45

The Channel Controls Section
EQ Band
From the C16 Pro, select a channel and use the
Channel Controls EQ Band button to select the
band you wish to adjust. Press and release the
button to choose the band. The selected band
indicated by the LED next to the button (1, 2, 3, 4)
will always appear on the screen, scrolling other
EQ bands or mixer sections off the screen as
necessary. Adjusting any of the three EQ knobs on
the C16 Pro will also cause the selected EQ band
to be displayed on the screen if the Mixer Window
is visible.
Level, Freq, BW Controls
From the Channel Controls section of the C16
Pro, use one of the three dedicated EQ control
knobs (Level, Freq, BW) to adjust the settings
for the selected channel. Adjusting any one of
the EQ knobs on the C16 Pro will also cause
the selected channel’s EQ module to be
displayed on the screen if the Mixer Window
is visible and at least one EQ section is enabled
for display in the EQ Menu.
.
EQ Band - On/Off Toggle Feature
From the C16 Pro, hold the EQ Band select
button down for 2 seconds to toggle on or
off the band currently indicated by the LED
next to the button (1, 2, 3, 4).
Aux Send
The Aux Send button in the Channel Controls section
on the C16 Pro is used to pick one of the selected
channel’s eight Aux busses—as indicated by the LEDs
next to the button—and the Amount knob is used to
adjust its Send Amount level.
Pan Knob
Use the Pan knob in the Channel Controls section of
the C16 Pro to adjust the setting for the selected channel.
Adjusting the Pan knob on the C16 Pro will also cause
the changes to be displayed in the selected channel’s
Pan module onscreen if the Mixer Window is visible.
Fine
Pressing the Fine button allows precise
control of the Pan and EQ Frequency
controls
E-MU PARIS Introduction 41
Page 46

Fader Strip and Main L/R Fader Section
Channel Status Indicators
There are two channel status LEDs located at the top of
each of the 16 channels on the C16 Pro.
Input Source
When the green Input LED is on, it
indicates that the signal passing
through the channel is coming directly
from an external source, instead of one
of the disk playback tracks. When off,
the channel is processing one of 16
playback tracks.
Mute
Pressing a channel’s Mute button
will mute the channel—the Mute
button’s red LED will be
illuminated. Pressing the button
again will un-mute the channel
and turn off the LED.
Pressing a channel’s Mute button
when the Master Solo LED is on
will add the channel to the solo
group—the Mute button’s LED
will blink. Pressing the button
again will remove the channel
from the solo group.
Rec Status
When the red Rec LED is blinking, it indicates
that channel is enabled for record. When the LED
is on solidly, the channel is being recorded. This
LED is represented in the Mixer Window by the
“R” button in the fader module.
Master Solo
To use the solo function from the C16
Pro, make sure that solo button mode
is enabled by pressing the master Solo
button in the Main L/R strip. Solo
button mode is enabled when the red
LED in the Solo button is blinking. The
channel Mute buttons become channel
Solo buttons when the Solo function is
enabled.
Note: Only three channels can be
soloed per Submix.
The main L/R Mute switch will silence
both Left and Right channels of the
mix.
Master Fader
The Master Fader is a stereo fader which
controls the Left and Right channels of
the main stereo mix.
On the C16 Pro, the Master Fader is
labeled Main L/R and is located to the
right of the 16 channel faders.
42 E-MU PARIS Introduction
Page 47

Jog Wheel Edit Functions, Undo and Control Room Functions
Monitor Level Control
This knob controls the level of the stereo Monitor
outputs. The Monitor outputs are typically connected
to the amplifiers driving control room monitors. The
output connectors on the Interface 2 and Interface
442 can be assigned to the Monitor output signal in
the Patch Bay. The Interface MEC has dedicated
connectors for the Monitor outputs. For best fidelity,
set this knob to 12 o’clock.
Edit Object
The Edit Object button allows the
Jog Wheel to edit the selected
Audio Object’s Start time, End
time or Position in time on the
Playing Field.
Press the Edit Object button,
followed by the Start, Position or
End button.
Monitor Dim/Mute Switch
This switch is used to attenuate or mute the Monitor
outputs. Clicking on the switch will “dim” or
attenuate the level of the monitors by 20 dB. The
indicator will illuminate solidly when the Monitor
outputs are dimmed. Double-clicking will mute the
Monitor outputs. The indicator will flash when the
monitors are muted.
Undo/Redo
Paris has 99 levels of undo and
redo. The Undo LED becomes lit
whenever edits are performed in
the Editor Window. Pressing
Undo repeatedly will undo each
edit performed until the yellow
led turns off.
The Redo LED lights after the
first level of undo is performed.
Press the Redo button to get
back any edits that have been
undone, until the Redo light
turns off, at which time there
are no more levels of Redo left
in the edit buffer.
Jog Wheel
The Jog Wheel scrubs through the
audio, allowing you to hear it at
slow speed and in reverse.
The Shuttle function moves the
Now Line in either coarse and fine
increments.
The Edit Object button enables the
jog wheel for use in the Editor
Window.
Select Next/Previous Object
Pressing the right or left arrow
selects the previous or next Object
on the Playing Field.
You can hold either of these buttons
and click the other to select the
next-lowest or -highest Track as a
destination for pasting in the Editor
Window.
E-MU PARIS Introduction 43
Page 48

44 E-MU PARIS Introduction
Page 49

Tour of the Mixer Window
Overview of the Mixer Window
Channel Inserts
Use this section to assign Insert effects and turn them on or
off.
Aux Sends
Up to 8 busses can be used per
channel
EQ Section
Up to 4 fully parametric bands
available per channel
Master Fader Section
Aux Master Section
The Aux Masters sends
and receives are
located here. Up to 8
Aux Master modules
can be displayed.
Channel Status Bar
The Channel Status Bar is located to
the left of the scroll bar on the
bottom of the Mixer Window below
the channel modules. The Channel
Status Bar contains an array of
indicators which show which
channels are visible in the window,
or hidden, and which one is
currently selected on the C16 Pro if
connected.
Channel Fader section
Collapsing Sections
The modules in the channel section of the Mixer may be collapsed or
expanded using the arrow controls along the left edge of the window.
When collapsed, the modules are displayed with a minimized view of
their controls showing just the data readouts and indicators without
the graphic knobs and switches. The data readouts are editable in
collapsed modules. In the illustration above, the EQ, All EQ and Pan
modules are collapsed.
Aux Masters Label
Each Aux Master section can be
labeled by typing in this area
and pressing the ENTER key.
E-MU PARIS Introduction 45
Page 50

The Channel Section
The controls in this section are common to all of the 16 channel modules.
Pan
The position of the post-fader signal in the
stereo mix is adjusted with this control. The
control range is L100 to R 100 with C being
the center pan position. The current value is
displayed in the readout. When the module
is collapsed, only the readout is displayed.
Solo
This button is used to solo the channel.
Soloing a channel does not affect the Main
Left/Right mix. The solo signal is taken
post-fader, and if a channel is muted it
cannot be soloed. Whenever any signal is
soloed, the Solo warning indicator in the
Master Section will come on.
Clicking on a channel Solo button will add
the channel to the solo group if other
channels are already soloed. Clicking on
the button again will remove the channel
from the solo group and will turn off the
LED.
Fader
Record Enable
Each channel can be independently enabled
for recording. In the Mixer Window, this
switch is a button labelled “R” located below
the fader. When the channel is enabled for
record, the Red LED will be lit.
When a channel is enabled for record, the
input signal may be heard and its signal level
is shown on the channel meter.
Automation Enable
The playback of automated mixing information may be
enabled or disabled individually for each channel using
the switch labeled “A” located below its fader.
When the switch is on, previously recorded automation
will be applied to the channel controls during playback.
When the switch is off, the channel is not affected by
automation.
Automation Edit
The recording or editing of automated mixing
information may be enabled or disabled
individually for each channel using the switch
labeled “E” located below the fader. When the
switch is on, previously recorded automation will
be updated with new changes to the channel
controls. When the switch is off, changes to the
channel controls will not affect any previously
recorded automation data.
Mute
This button is used to mute the channel.
When the channel is muted, its signal is not
routed to the Main Left/Right mix. Channel
mutes affect the Main L/R stereo bus, but
do not affect the solo bus. When one or
more of the channels is muted, the Mute
On indicator in the Master Section will be
illuminated.
Meter
Channel Name Strip
The Channel Name strip is the white bar
located below the fader. The name strip can
be used to add a text label to the channel.
By default, the label contains only the
channel number. All channel name data is
automatically saved as part of the Project
file.
Adding a label to a channel:
1. Click on the name strip. Note that the
existing label will be displayed in a red
highlight color indicating that you may edit
the text.
2. Type the name that you wish to see on
the channel. The practical limit for label
names is approximately six or seven
characters. Longer names may be entered,
but may not be displayed completely.
3. When you have finished typing press the
R
ETURN key to enter the text. The label text
will be re displayed in addition to the
channel number in the normal black color.
46 E-MU PARIS Introduction
Page 51

EQ Modules
There are four fully parametric bands of EQ available per channel in each of PARIS’ sixteen channels. Each
band is a multi-mode filter that may be individually enabled or disabled, and all four may be bypassed at
once. Only enabled filters affect the channel’s signal.
You can use the scroll bar on the right side of the Mixer Window to display an EQ band which is not
currently visible.
Filter Mode Selector
This control is a five-position slide
switch with graphic icons representing
the five available filter modes:
1 High Pass (Low Cutoff)
2 Low Shelf
3 Band Pass
4 High Shelf
5 Low Pass (High Cutoff)
Change the filter mode by clicking on
the slide switch or the filter mode icons
beneath it with the mouse.
Level
Sets the amount of boost or cut to be
applied by the filter at the selected
center frequency. This parameter is also
referred to as filter “Gain”. Its range
extends from -18 to +18 dB and the
current value is displayed in the
readout. This control operates only in
the low shelf, bandpass and high shelf
filter modes (Modes 2,3,4)
Trim Control
This control sets the amount of gain
to be applied to the pre-EQ signal. This
control can be used to prevent clipping
by compensating for the positive or
negative gain introduced by the active
EQ bands. The control range is -20 to
+20 dB and the current value is
displayed in the readout.
In/Out Switch
Click on the switch to enable or disable
(bypass) the band. When the filter is
enabled, the switch is labeled with a one
(1) and has an illuminated blue
indicator. When the filter is disabled, the
switch is labeled with a zero (0) and the
indicator is not illuminated.
Frequency
Sets the center frequency for the
filter. The control range is 20 Hz to
20 kHz (20000) and the current
value is displayed in the readout.
This control operates in all filter
modes.
Bandwidth (BW)
Adjusts the width of the range of
frequencies affected by the filter. This
filter parameter is also sometimes
referred to as “Q”. The control range
is 0.1 octave to 5 octaves and the
current value is displayed in the
readout. This control operates only in
the bandpass filter mode (Mode 3).
ALL EQ Switch
Click on the switch to bypass or
engage all of the active EQ bands on
the channel together. When the
channel’s EQ is active, the All EQ
switch LED is lit. When the EQ is
bypassed, the LED is not illuminated.
Bypassing routes the signal around the
four EQ sections but does not affect
the settings of the In/Out switch on
the four individual bands.
Phase Switch
Click on the switch to reverse
Graphic EQ Display
Provides a visual indicator of the
EQ frequency curve for all four EQ
sections. Double click on the
display screen to bring up a large
EQ display.
the channel’s phase by 180
degrees. When the channel’s
phase is reversed, the blue
indicator in the Phase switch
lights.
E-MU PARIS Introduction 47
Page 52

Aux Send Modules
PARIS provides eight Aux Send busses, each of which can be configured as either mono or stereo.
Insert Effect Section
Up to eight in-line Effects can be assigned to a channel (4 EDS effects and 4 DX
or VST effects). Click on a LED/button at the left of the Insert section to view
the pop-up Effect selection menu. After you’ve selected an Effect and released
the mouse, click on the Effect’s name to call up its editing window.
Insert Effect Bypass
Click on the red LED/bypass
button to bypass the insert
effects.
Enable Switch
Click on this button to enable or
disable the output of the send unit to
Send Bus Assignment
This readout contains an identifying
text label describing the effect to
which the send bus is routed. This
shows the Effect chosen in the
corresponding Aux Send/Return
Master (or an abbreviation of its
name).
Send Source Selector Switch
When the send module is not collapsed, the
slide switch is used to select one of the three
possible tap points or signal sources. When
the send module is collapsed, clicking on the
text label itself will toggle through the
settings. In the Mini-Mixer Window, the
selector is labeled TAP and the setting of the
switch is shown and changed in the readout.
The three possible settings of the switch are
labeled as follows:
Expanded label Collapsed label The send source signal is:
PRE PRE FADER Post-EQ, pre-fader, pre-pan
P/P POST-F PRE-P Post-EQ, post-fader, pre-pan
POST POST PAN Post-EQ, post-fader, post-pan
Pan ( stereo balance) Control
Used when the Aux send is configured as a stereo
bus. The range of the control is -10 to +10.
the send bus. When the blue indicator
is on and the button label is 1, the send
is enabled and its signal is connected
to the displayed Aux bus. When the
indicator is off and the label is 0, the
send is disabled and its signal is not
routed to the displayed Aux bus.
Send Amount
This control knob is used to adjust the
amount of signal from the channel
that is sent to the send bus. The
numeric value readout shows the
current value, and the range of the
control is -20 to +20 dB.
48 E-MU PARIS Introduction
Page 53

Aux Masters Section General Controls
There are eight Aux Master modules, each containing one Aux Send Master module and one stereo Aux
Return module. On the right side of the channel modules section there is a movable divider bar that can be
positioned to display from one to eight Aux Master modules, or none if the divider is moved over to the left
edge of the Master Fader module.
Each Aux Master module contains the Master Aux Send module for one of the eight Aux busses and one
stereo Aux Return module, as well as the following elements:
Switchable Aux Meter
The Send and Return signals are metered on the
switchable stereo meter which separates the Send
and Return modules. Position the meter select
switch to select either the send (SND) or return
(RTN) signals for metering.
Aux Return Name Strip
The Aux Return Name strip is the white bar
located below the return module. The name
strip can be used to add a text label to the
Aux return.
Automation Enable
The playback of automated mixing information may be
enabled or disabled individually for each Aux Master
module using the switch labeled “A” located below the
fader.
When the switch is on, previously recorded automation
will be applied to the Aux Master. When the switch is off,
the Aux Master will not be affected by automation.
Automation Edit
The recording or editing of automated mixing information may be enabled or disabled
individually for each Aux Master module using the switch labeled “E” located below
the fader. When the switch is on, previously recorded automation will be updated
with new changes to the Aux Master module controls. When the switch is off, changes
to the Aux Master module controls will not affect any previously recorded automation
data.
E-MU PARIS Introduction 49
Page 54

Aux Send Master Module
There are eight Aux send busses. Each of the eight aux send busses has a Master Send module which controls
the final level of the send bus signal and its destination assignment. Each Aux Master Send module has the
following features: The send signal can be metered on the switchable stereo meter that separates the Master
Aux Send and Return modules when the meter function switch is set to SND.
Aux Return Master module
There are eight stereo Aux Returns. The Aux Returns are used to bring signals back into the stereo mix from
internal Effects processing Plug-Ins. The return signal can be metered on the switchable stereo meter which
separates the Master Aux Send and Return modules when the switch is set to RTN.
Stereo Mono Switch
This button is used to configure the Aux Send as a stereo bus. When configured as a stereo bus, the send
has an adjustable Balance control. When this switch is enabled, its blue indicator is on, the label above
the button reads “STEREO” and the send is configured as a stereo bus. When disabled, the blue indicator
is off, the label above the button reads “MONO” and the send is configured as a mono bus. Changing
the state of this switch may cause reconfiguration of the individual channel sends assigned to the bus.
Solo Button
This button is used to solo the
input of the Aux Return module.
Master Send Level Control
This control knob is used to adjust
the amount of signal from the aux
send bus that is sent to the Effect
input. The numeric value readout
shows the current value, and the
range of the control is -40 to +40 dB.
Select FX
Clicking on the LED brings up a list
of the available effects. Up to 4 return
effects can be connected in series.
Right click-PC or OPTION click-Mac
to Mute an effect.
Solo Button
This button is used to solo the
output of the Aux Send bus. When
solo is active the yellow indicator
in the Solo button will be on.
Mute Button
This button is used to mute the output
of the Aux Send bus. When the send
is muted the red indicator in the Mute
button will be on.
Balance Control
This control adjusts the balance
between the left and right channels
of the stereo aux send.
Edit FX
Clicking on the Effect name
displays the Effect editing window
for the Effect to which the send is
assigned. The details of the
individual Effect editing windows
appear in the documentation for
the individual Plug-In Effects.
Mute Button
This button is used to mute the output
of the Aux Return module to the main
stereo mix.
Master Return Level Control
This control knob is used to adjust the
amount of signal from the Aux Return
input that is sent to the main stereo
mix. This control acts like a stereo
version of the channel faders. The
numeric value readout shows the
current value, and the range of the
control is -80 to +0 dB like the channel
fader.
Balance Control
This control adjusts the balance
between the left and right channels
of the stereo Aux Return signal.
50 E-MU PARIS Introduction
Page 55

Master Fader Module
Solo Level Control
This knob is used to adjust the relative
level of the Solo signal in the Monitor
outputs. The control range is -20 to
+20 dB and the current value is
displayed in the readout.
Solo Warning Indicator
This indicator is on whenever Solo is
active for any signal in the Mixer. This
acts as a warning or reminder that the
Monitor output is connected to the solo
bus instead of the Main L/R stereo mix.
Clicking on the Solo warning indicator
will reset any signals which are soloed
to a normal non-soloed state and turn
off the Solo function.
Monitor Level Control
This knob controls the level of the stereo
Monitor outputs. The Monitor outputs
are typically connected to the amplifiers
driving your control room monitors. Two
of the output connectors on the Interface
2 and Interface 442 can be assigned to
the Monitor output signal in the Patch
Bay. The Interface MEC has dedicated
connectors for the Monitor outputs.
This should be set at “0” for normal
operation.
Monitor Dim/Mute Switch
This switch is used to attenuate or
mute the Monitor outputs. Clicking
on the switch will “dim” or attenuate
the level of the monitors by 20 dB. The
indicator will illuminate solidly when
the Monitor outputs are dimmed.
Double-clicking will mute the
Monitor outputs. The indicator will
flash when the monitors are muted.
Mute Warning Indicator
This indicator is on whenever one or
more channels are muted in the
Mixer. This acts as a reminder that one
or more channels are not connected
to the Main L/R stereo mix. Clicking
on the Mute warning indicator will
un-mute any and all signals which are
muted.
L/R Balance Control
This control adjusts the balance between
the Left and Right channels of the main
stereo mix.
Left and Right Main Mute Switches
These switches are used to mute the Left
and Right channels of the main stereo
mix.
Monitor Mono Switch
This switch is used to collapse the
stereo signals of the Monitor outputs
into a mono signal. The indicator will
illuminate when the Monitor outputs
are in mono.
Headroom Meter
The red indicator is turned on
automatically when the peak level in
the Left or Right channels of the main
stereo mix exceeds the headroom
limits of the system. Press the
indicator to reset the LED. The
numeric readouts on each side of the
indicator displays the maximum
signal level reached since the last time
the readout was reset. They can be
reset individually by clicking on the
numbers in the readout window area.
Master Fader
The Master Fader is a stereo fader
which controls the Left and Right
channels of the main stereo mix.
E-MU PARIS Introduction 51
Page 56

The Channel Status Bar
Using the Channel Status Bar
The Channel Status Bar is located to the left of the scroll bar on the bottom of the Mixer Window below the
channel modules. The Channel Status Bar contains an array of indicators that show which channels are
visible in the window, or hidden, and which one is currently selected on the C16 Pro.
indicator color channel status
aqua visible on screen
sand not visible on screen
dark red hidden
outlined selected on C16 Pro
Hiding Individual Channels
Individual channels may be hidden or revealed by clicking on the matching channel icon on the Channel
Status Bar. When a channel is hidden, its indicator will be shown as dark red. When the channel is active, its
indicator will be colored sand or aqua.
Viewing the Selected Channel
Pressing any one of the 16 Select buttons on the C16 Pro will cause the selected channel to appear in the
Mixer Window. The selected channel is indicated on the C16 Pro by a yellow LED in the channel’s Select
button and in the Mixer Window by a blue dot in the slider of the on-screen fader and an outlined indicator
in the Channel Status Bar. If the selected channel was not visible before, the window will automatically scroll
to reveal the selected channel. Using the Channel Controls on the C16 Pro to change settings will also cause
the selected channel to be displayed.
The song used in the PARIS Tutorial is “Crop Circles” by Crash Palace.
Crash Palace appears courtesy of Trauma Records.
52 E-MU PARIS Introduction
 Loading...