

Page 1

User’s Guide
Realtime Transwave Synth
L
EADING THE WORLD IN SOUND INNOV A TION
TM
Page 2
READ THIS FIRST!
WARNING!!WARNING!!
CAUTION
RISK OF ELECTRIC SHOCK
DO NOT OPEN
CAUTION : TO REDUCE THE DANGER OF ELECTRIC SHOCK
DO NOT REMOVE COVER (OR BACK)
NO USER SERVICEABLE PARTS INSIDE
REFER SERVICING TO QUALIFIED SERVICE PERSONNEL
This symbol is intended to alert the user to the
presence of uninsulated "dangerous voltage"
within the product's enclosure that may be of
sufficient magnitude to constitute a risk of electronic shock to persons.
This symbol is intended to alert the user to the
presence of important operating and maintenance (servicing) instructions in the literature
accompanying the appliance.
SEE IMPORTANT SAFETY INSTRUCTIONS ON BACK COVER!
Page 3

TM
User’s Guide
Version 1.10
Page 4

FIZMO User’s Guide
Written, designed, and illustrated by Robby Berman
Copyright © 1998
EMU-ENSONIQ ® Corp
155 Great Valley Parkway
Box 3035
Malvern, PA 19355-0735
USA
World Wide Web—
Printed in U.S.A.
All Rights Reserved
Please record the following information:
Your Authorized ENSONIQ Dealer:_________________________________________ Phone:________________________
Your Dealer Sales Representative:_________________________________________________
Serial Number of Unit:___________________________ Date of Purchase:_________________
Your Authorized ENSONIQ Dealer is your primary source for service and support. The above information will be helpful in
communicating with your Authorized ENSONIQ Dealer, and provide necessary information should you need to contact
ENSONIQ Customer Service. If you have any questions concerning the use of this unit, please contact your Authorized
ENSONIQ Dealer first. For additional technical support, or to find the name of the nearest Authorized ENSONIQ Repair
Station, call ENSONIQ Customer Service at (610) 647-3930 Monday through Friday.
This manual is copyrighted and all rights are reserved by EMU-ENSONIQ Corp. This document may not, in whole or in part, be
copied, photocopied, reproduced, translated, or reduced to any electronic medium or machine readable form without prior
written consent from EMU-ENSONIQ Corp. The FIZMO software/firmware is copyrighted and all rights are reserved by EMUENSONIQ Corp.
http://www.ensoniq.com
Although every effort has been made to ensure the accuracy of the text and illustrations in this manual, no guarantee is made
or implied in this regard.
IMPORTANT:
Note: This equipment has been tested and found to comply with the limits for a Class B digital device, pursuant to part 15 of
the FCC Rules. These limits are designed to provide reasonable protection against harmful interference in a residential
installation. This equipment generates, uses and can radiate radio frequency energy and, if not installed and used in
accordance with the instructions, may cause harmful interference to radio communications. However, there is no guarantee
that interference will not occur in a particular installation. If this equipment does cause harmful interference to radio or
television reception, which can be determined by turning the equipment off and on, the user is encouraged to try to correct
the interference by one or more of the following measures:
* Reorient or relocate the receiving antenna.
* Increase the separation between the equipment and receiver.
* Connect the equipment into an outlet on a circuit different from that to which the receiver is connected.
* Consult the dealer or an experienced radio/TV technician for help.
Changes or modifications to the product not expressly approved by ENSONIQ could void the user's FCC authority to operate
the equipment.
In order to fulfill warranty requirements, your FIZMO should be serviced only by an Authorized ENSONIQ Repair Station. The
ENSONIQ serial number label must appear on the outside of the unit, or the ENSONIQ warranty is void.
ENSONIQ and FIZMO are trademarks of EMU-ENSONIQ Corp.
Part Number 9310023501-B Model Number MM 173
Page 5

Table of Contents
Table of Contents
1—Meet FIZMO 1
About the FIZMO User’s Guide ..........................................................................................................1
What’s in the FIZMO box?.................................................................................................................1
The FIZMO Demos.............................................................................................................................1
is
What
FIZMO’s Display.................................................................................................................................3
The -/No and +/Yes Buttons.............................................................................................................3
How FIZMO’s Memory Works............................................................................................................3
2—Setting Up 5
Listening to FIZMO ............................................................................................................................5
Using FIZMO’s Audio Input.................................................................................................................5
Connecting a Dual Foot Switch to FIZMO...........................................................................................6
Making MIDI Connections..................................................................................................................7
Supplying Power to FIZMO.................................................................................................................7
a FIZMO Preset?..................................................................................................................2
3—Playing FIZMO 9
Selecting Presets ..............................................................................................................................9
Realtime Performance Controls.........................................................................................................9
4—The Arpeggiator 11
Turning the Arpeggiator On and Off................................................................................................ 11
Selecting an Arpeggiator Preset..................................................................................................... 11
The Arpeggiator Keyboard Button .................................................................................................. 12
The Tempo Button.......................................................................................................................... 12
The Range Button........................................................................................................................... 13
Editing Arpeggiator Presets............................................................................................................ 13
5—Editing, Creating and Saving Presets 15
The Compare Button and LED ........................................................................................................ 15
Changing, Layering and Mapping a Preset’s Sounds....................................................................... 15
Editing and Setting Up a Preset’s Effects....................................................................................... 18
Saving a Preset .............................................................................................................................. 20
6—Programming Sounds 21
Understanding FIZMO Sounds ........................................................................................................ 21
Modulation ..................................................................................................................................... 21
Selecting a Sound for Programming ............................................................................................... 26
OSC................................................................................................................................................ 26
Wave.............................................................................................................................................. 26
Pitch............................................................................................................................................... 27
Glide ............................................................................................................................................... 28
Filter............................................................................................................................................... 28
Amplitude ....................................................................................................................................... 29
Effect Bus....................................................................................................................................... 30
ENSONIQ FIZMO User’s Guide i
Page 6

Table of Contents
7—MIDI 31
Receiving MIDI................................................................................................................................31
Transmitting MIDI........................................................................................................................... 32
Dumping Data To and From FIZMO................................................................................................. 33
Assorted MIDI Parameters............................................................................................................. 34
The Four System Controllers.......................................................................................................... 34
Recording and Playing Back Edits Using NRPNs............................................................................. 35
FIZMO MIDI Implementation Chart ................................................................................................. 36
8—Supplemental Info 37
FIZMO’s Factory Presets................................................................................................................ 37
Sound Location-to-MIDI Program Change Translator ...................................................................... 39
FIZMO's Arpeggiator Presets ......................................................................................................... 40
Updating FIZMO’s Operating System .............................................................................................. 41
Restoring FIZMO’s Factory Presets and Sounds............................................................................. 41
What is MIDI? ................................................................................................................................42
Proper Care of FIZMO .................................................................................................................... 45
Index 47
ii ENSONIQ FIZMO User’s Guide
Page 7
1—Meet FIZMO
1—Meet FIZMO
Congratulations on your purchase of ENSONIQ’s FIZMO. FIZMO is a unique new synthesizer based on
ENSONIQ’s exclusive Transwaves: evolving waveforms that provide the basis for incredibly animated, alive
sounds. FIZMO utilizes both traditional synth techniques and its own array of potent modulation tools—as well as
ENSONIQ’s acclaimed effects—to create CD-quality sounds unlike anything heard anywhere else. FIZMO’s
extensive realtime controls and vocoder allow you to easily shape sounds with your hands and mouth as you play,
while its intelligent, interactive arpeggiator pulses away in the background.
Straight out of the box, FIZMO’s ready to go, with 64 great-sounding presets pre-programmed by ENSONIQ.
Turn the F, I, Z, M and O knobs as you play to hear the selected preset change shape. You can also build your
own preset from scratch using FIZMO’s many handy front panel knobs.
About the FIZMO User’s Guide
Notes, Tips, Warnings
As you read the User’s Guide, you’ll see notes tips and warnings interspersed throughout the text, offset by their
gray background. Each contains a particular kind of information:
• Notes provide additional information relating to the topic being discussed.
• Tips describe applications for the topic under discussion.
• Warnings provide important information that helps you avoid damage to your work, FIZMO or you yourself.
Button Illustrations
Where button or knob illustrations appear in the User’s Guide, buttons
The button referred
to in the text
referred to in the accompanying text are shown in black, while knobs are
shown with a black outer ring (except for the FIZMO knobs in
Chapter 3
).
Keyboard Range Mode
What’s in the FIZMO box?
In your FIZMO box, you’ll find:
• FIZMO • a power supply for FIZMO • the FIZMO User’s Guide
Tip: See Page 44 for information on FIZMO’s proper care.
The FIZMO Demos
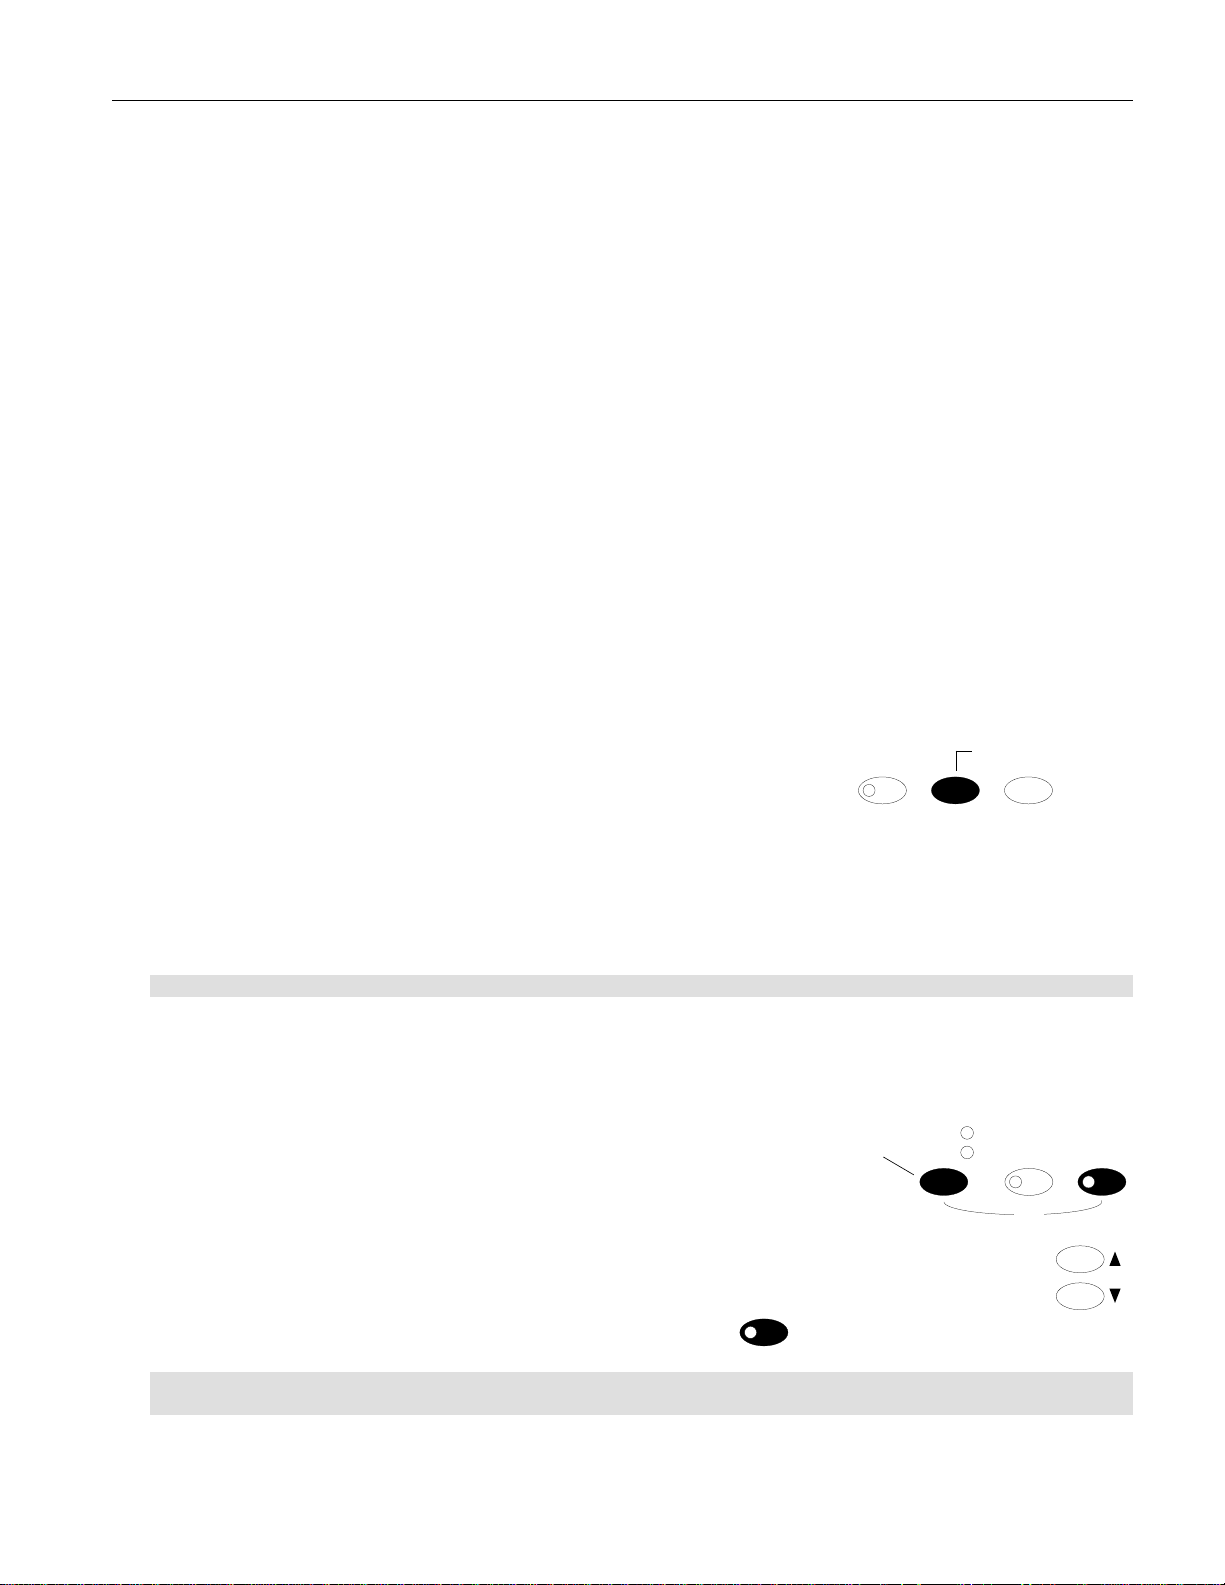
FIZMO contains brief demonstration songs that can give you an idea of its sonic capabilities. To play a demo:
1. Press and hold down the preset bank-selection button.
2. While continuing to hold down the preset bank-selection
button, press the +/Yes button, and then release both
buttons. The display will show FIZMO’s first demo, d001.
3. Press the +/Yes button to begin playing the demo. To stop
the demo, press the button again.
4. To select the next demo in FIZMO’s memory, press the Variations up arrow button in the Effects
section of FIZMO’s front panel. (To re-select an earlier demo press the down arrow button.)
5. To exit FIZMO’s demo-playing mode, press the -/No button.
Preset bank-
selection button
- / No
Bank 1
Bank 2
- / No + / Yes
Demo
Variation
Note: While the demo plays, FIZMO’s front-panel controls are de-activated; turning knobs and such will have no
effect. When you press the -/No button to exit demo mode, normal functionality is restored.
ENSONIQ FIZMO User’s Guide 1
Page 8
1—Meet FIZMO
What is a FIZMO Preset?
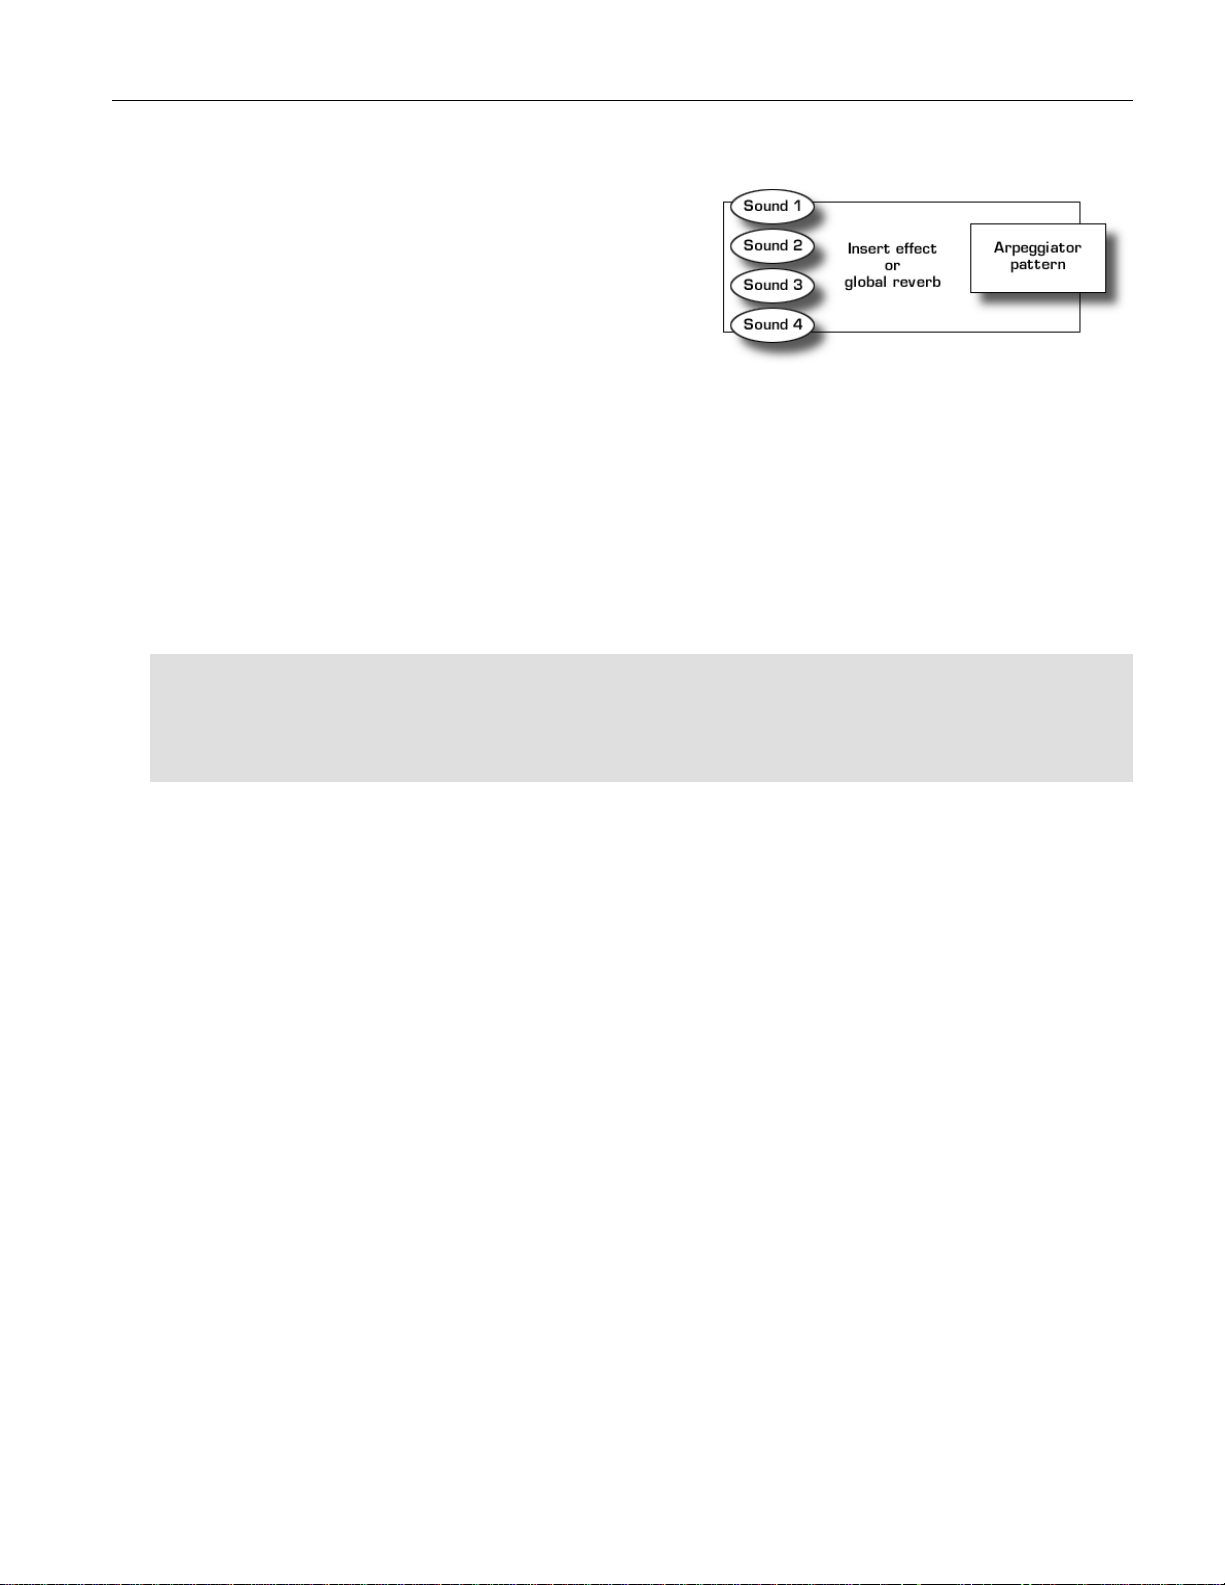
Whenever you turn FIZMO on and start playing, you’re playing
a preset. A preset contains:
• from one to four sounds.
• an insert effect or global reverb.
• an arpeggiator pattern you can turn on or off.
Any of the sounds in a preset can be:
• layered on top of each other, in the same or different areas of the keyboard.
• split, so that each sound plays only in a pre-determined portion of FIZMO’s keyboard.
Chapter 3
describes how to select and play presets.
Chapter 5
describes how to edit, create and save presets.
About Sounds
A sound in FIZMO is comprised of up to two oscillators, each of which plays one of FIZMO’s onboard waves.
Most of the knobs on FIZMO’s front panel allow you to change the characteristics of the currently selected
oscillator.
sounds in a preset.
Note: Since each preset can contain up to four sounds, and each sound can contain up to two oscillators—each
of which plays its own wave—a preset can utilize up to eight different oscillators and waves.
Note: When you press a key on the keyboard, each active oscillator plays its wave. FIZMO can sound up to 48
waves at a time; therefore, the number of notes that can be played simultaneously depends on the number of
sounds and oscillators active in the current preset.
Chapter 5
describes how to select any of FIZMO’s 256 sounds, as well as how to layer and split
Chapter 6
describes how to select and edit oscillators, and provides a description of waves.
About Effects
A preset’s sounds can be processed by any one of FIZMO’s large selection of onboard 44.1 kHz (CD-quality)
effects. These effects fall into two basic categories:
• FIZMO’s global reverbs can provide a natural ambience to your preset.
• FIZMO’s insert effects are powerful effects that perform a wide variety of processing tasks, from reverbs to
delays, choruses to distortions as well as some unique ENSONIQ-exclusive effects. The vocoder, introduced
below, is one of the insert effects.
Each FIZMO effect is pre-programmed with its own set of variations from which to choose. Chapter 5 discusses
selecting and editing effects.
Introducing the FIZMO Vocoder
FIZMO includes a special effect called a “vocoder.” Vocoders were popular in the 1970’s, and can be heard on
many records of that era. A vocoder is an interactive filter that allows you to use your mouth to shape a preset’s
frequency content. When an effect that uses the vocoder is selected, you can speak or sing into a microphone
plugged into FIZMO’s rear-panel Audio Input jack: the frequencies of the notes you play on the keyboard as you
speak or sing will mimic the shape of your mouth, making FIZMO’s notes sound as if they’re being sung. The
vocoder is described in
Chapter 5
.
The FIZMO Arpeggiator
An arpeggiator is a device that records notes struck on the keyboard and plays them back repeatedly in preprogrammed patterns. FIZMO’s arpeggiator provides a variety of ways in which you can add notes to a pattern,
as well as a wide selection of options that allow you to set how the arpeggiator plays its notes. FIZMO’s
arpeggiator is also MIDI-interactive.
Chapter 4
describes the arpeggiator in detail.
2 ENSONIQ FIZMO User’s Guide
Page 9

1—Meet FIZMO
FIZMO’s Display
FIZMO’s 4-character LED display provides information as you adjust FIZMO’s settings. Many
settings have their own knobs—in such a case, the display shows you the setting’s current value
when you turn its knob. Some settings, called “parameters,” are accessed by pressing the
appropriate button on FIZMO’s front panel. Values and parameters names are often shown in abbreviated form
on FIZMO's display, as noted throughout the User’s Guide.
Tip: Most of FIZMO’s display abbreviations appear in the User’s Guide Index; if you see something you don’t
understand, the Index can direct you to an explanation.
The -/No and +/Yes Buttons
As you work on FIZMO, you’ll find numerous settings whose values you’ll want to raise or
lower, and features you’ll want to activate or de-activate. To perform either of these tasks,
press the -/No or +/Yes button:
• To lower a displayed value, click the -/No button.
• To raise a displayed value, click the +/Yes button.
• To activate a displayed feature, press the +/Yes button.
• To de-activate a displayed feature, press the -/No button.
Tip: To increment or decrement through values at a greater speed, double-click the desired button, holding it
down after the second click. To move at high speed, triple-click the button, holding it down after the third click.
- / No + / Yes
How FIZMO’s Memory Works
FIZMO contains three types of memory, RAM (“Random Access Memory”), ROM (“Read-Only Memory”) and
FLASH:
• RAM is a form of memory that can be written to and read from instantaneously. It’s also impermanent, and is
cleared when FIZMO is turned off.
• FLASH is a form of memory ideal for saving data that you want to retain permanently, or until you manually
change it. Data must be burned into FLASH, a slightly slower process than writing data to RAM.
• ROM is a permanent, unchangeable form of memory that contains factory-programmed data such as waves
and other items that FIZMO requires to operate.
FIZMO’s presets, sounds, arpeggiator data and global settings are stored in FLASH so that they’re in place each
time you power up FIZMO. When you select a preset, its components are automatically—and instantly—copied
into RAM so that they can be played, shaped in realtime and edited. When you save a preset (Page 20) or your
current global settings (Page 34), you’ll see the word “burn” displayed during the saving process, indicating that
your data is being burned into FLASH. When you update FIZMO’s operating system—the software code that
makes it run—it, too, will be burned into FLASH automatically (see Page 41).
ENSONIQ FIZMO User’s Guide 3
Page 10

ENSONIQ FIZMO User’s Guide
Page 11
2—Setting Up
2—Setting Up
Listening to FIZMO
There are essentially two ways to hear the sound FIZMO produces:
• You can listen to FIZMO by connecting its outputs to a mixer or amplifier and listening to the mixer or
amplifier.
• You can listen to FIZMO through headphones.
Connecting FIZMO to a Mixer or Amplifier
To Listen to FIZMO in Stereo
1. Connect one end of a 1/4” audio cable to FIZMO’s rear-panel Left Main Out jack.
2. Connect the other end to an input on your mixer or amplifier.
3. Connect one end of a second 1/4” audio cable to FIZMO’s Right Main Out jack.
4. Connect the other end of the cable to a second input on your mixer or amplifier.
To Listen to FIZMO in Mono
1. Connect one end of a 1/4” mono cable to either of FIZMO’s rear-panel Main Out jacks—when you connect
a cable to a single Main Out jack, FIZMO sends all of its sound out of the connected jack in mono.
2. Connect the other end to an input on your mixer or amplifier.
Right/Mono Left/Mono
Main Out
Tip: You can use 1/4”-to-RCA-type adapters to connect FIZMO to a home stereo, but do so with care, since the
dynamic range of FIZMO is much greater than that of a CD or tape, and can damage your speakers if set to too
high a volume. Follow the guidelines in “Setting FIZMO’s Output Volume” below to avoid damage to your
system.
Connecting FIZMO to Headphones
1. Connect your 1/4” stereo headphone plug to the Phones jack on FIZMO’s rear panel.
Tip: If your headphones use a mini plug, you can buy an inexpensive mini-to-1/4” adapter that will allow
you to connect the headphones to FIZMO.
Setting FIZMO’s Output Volume
Volume
Note: Each of FIZMO’s oscillators has its own Amp setting that controls the oscillator’s volume. The Volume
knob described above controls FIZMO’s overall level.
FIZMO, like all digital equipment, sounds best when its Volume knob is all the way up. If you’ve
connected FIZMO to a mixer or amplifier, use their input level control to find a level for FIZMO that
works with the rest of your gear. When FIZMO is connected to a home stereo, turn FIZMO’s Volume
knob all the way down, power up (described later in this chapter) and, while playing FIZMO’s keyboard
as hard as you plan to, slowly turn up its Volume knob to find a volume that sounds good without
distorting your stereo’s inputs.
Using FIZMO’s Audio Input
Audio Input
The rear-panel Audio Input jack allows you to connect a microphone or line-level audio
signal to FIZMO in order to control its vocoder or to process external audio through its
onboard insert effects. The input volume is set using the Input Level knob located to its
right (when viewed from the back), as described in the following section.
(Mic or Line)
Phones
Input Level
ENSONIQ FIZMO User’s Guide 5
Page 12
2—Setting Up
Setting the Audio Input Volume
To set the optimal input volume:
1. After connecting a microphone or line-level signal to the Audio Input jack, speak into the microphone or send
audio at a typical volume into FIZMO.
2. Adjust the input volume by slowly turning the rear-panel Input Level knob up or down until the
Input Clip LED just above the Effects section of FIZMO’s front panel lights occasionally.
Routing a Microphone to an Insert Effect
A microphone connected to FIZMO’s Audio Input jack will always be routed to the vocoder insert effect (see
Page 19). You can also send the microphone’s audio to any other insert effect. To do this, tap the MIDI Edit
button until LnIn (for “Line In”) is displayed; in a moment or so, the current LnIn value will be displayed. Use the
-/No or +/Yes button to set the parameter to:
• On to direct the microphone’s audio to any of FIZMO’s insert effects.
• OFF to direct the microphone’s audio only to the vocoder insert effect.
Tip: To learn about insert effects, see Page 18.
Note: Whenever LnIn is set to its On value, you’ll hear your microphone through the currently selected insert
effect. If you’re hearing unexpected sounds through your effects, make sure to set the LnIn parameter to OFF.
Input Clip
Connecting a Dual Foot Switch to FIZMO
You can connect an ENSONIQ SW-10 dual foot switch—purchased separately—to FIZMO’s Dual
Foot Switch jack. With an SW-10 installed, you can use your feet for selecting presets, starting,
stopping and latching the arpeggiator, setting the arpeggiator’s tempo and for realtime modulation.
Programming the Behavior of a Dual Foot Switch
The behavior of the pedals of a dual foot switch are determined by the settings of the Ft 1 and Ft 2
parameters—the Ft 1 parameter sets the behavior of the right-hand pedal, and the Ft 2 parameter sets the
behavior of the left pedal. To set either parameter’s value:
1. After connecting an SW-10, tap the MIDI Edit button repeatedly until the desired parameter—Ft 1
or Ft 2—appears. After roughly one second, the parameter’s current setting will be displayed.
2. Press the -/No or +/Yes button to select the desired value for the parameter.
When you select: the pedal will:
OFF
SuS
Sos
SyS1
SyS2
SyS3
SyS4
ArP
ArPL
tAP
iPrS
dPrS
do nothing.
function as a traditional sustain pedal.
operate as a traditional sostenuto pedal.
send a value of 127 to any setting modulated by Sys1 (Page 21).
send a value of 127 to any setting modulated by Sys2 (Page 21).
send a value of 127 to any setting modulated by Sys3 (Page 21).
send a value of 127 to any setting modulated by Sys4 (Page 21).
toggle the arpeggiator on or off (
Chapter 4
).
route the keyboard to the arpeggiator while the pedal is held down (Page 12).
allow you to set the FIZMO’s system tempo by tapping the pedal (Page 13).
the next-highest preset in the current preset bank (Page 9) will be selected.
the next-lowest preset in the current preset bank (Page 9) will be selected.
Dual Foot Switch
(Sustain)
MIDI
Edit
Tip: If you don’t require the extended functionality of a dual footswitch, you can purchase and connect an
ENSONIQ SW-2 single footswitch to FIZMO’s foot-switch jack. The Ft 1 parameter will control its behavior.
6 ENSONIQ FIZMO User’s Guide
Page 13
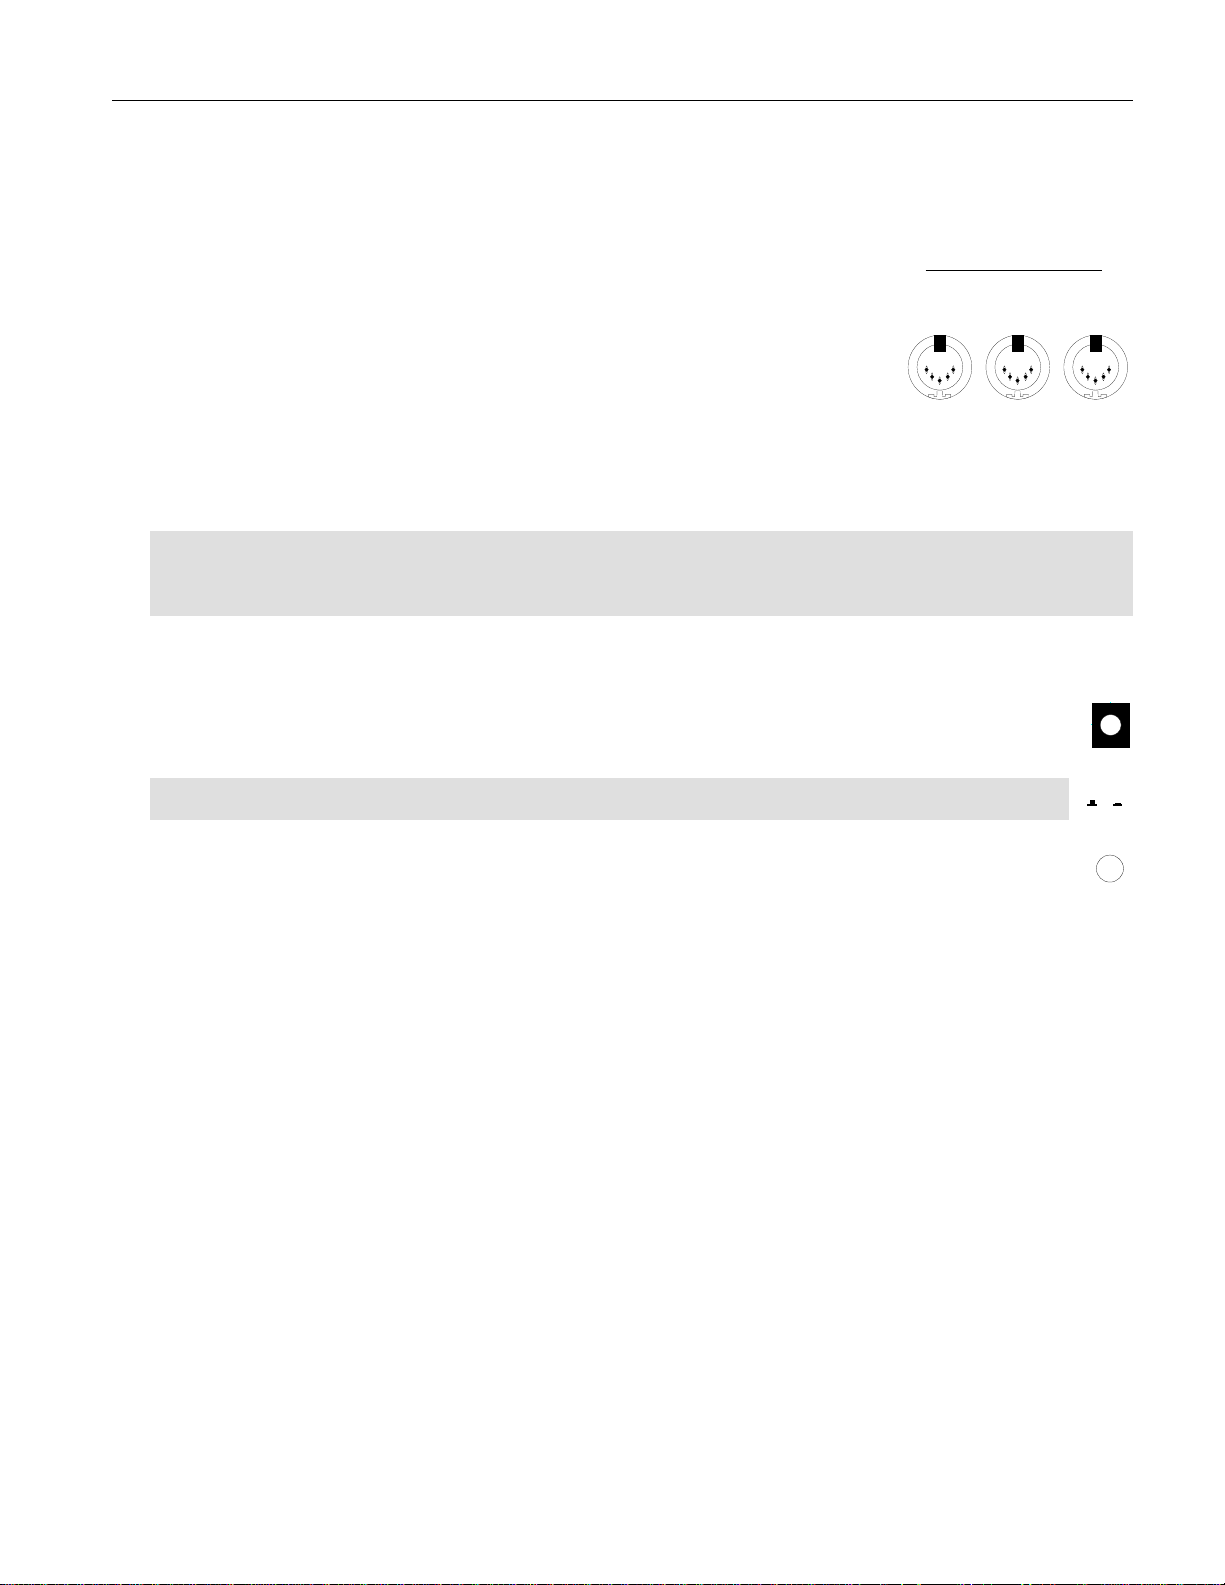
Making MIDI Connections
2—Setting Up
Before FIZMO can transmit or receive MIDI data—as described in
Chapter 7
—its rear-panel MIDI jacks must be
connected to the rest of your MIDI studio. Each jack handles a particular task:
• MIDI Thru—When FIZMO is part of a MIDI daisy-chain, with one MIDI device
connected to another and that one to the next so on, any MIDI data FIZMO
Thru Out In
MIDI
receives is passed along from this jack to the next device in the daisy-chain.
• MIDI Out—This jack transmits MIDI data generated by FIZMO, including data
produced by its keyboard, arpeggiator, FIZMO knobs or during a SysEx data
dump.
• MIDI In—FIZMO receives MIDI data from external devices using the MIDI In
jack. You can use MIDI to play FIZMO, add notes or supply timing information
to its arpeggiator, and receive dumps of SysEx data.
Supplying Power to FIZMO
Warning: Before connecting FIZMO’s power supply, make sure that FIZMO’s rear-panel Power button is in its
“out” position.
Tip: See Page 45 for additional information on polarization and grounding.
Connect the small plug of FIZMO’s AC power supply to FIZMO’s rear-panel Power In jack. Connect the
other end to a standard household outlet (if the supplied adapter doesn’t match your outlet, contact your
authorized ENSONIQ dealer).
Turning On FIZMO
Power In
9V AC, 1A
Warning: As with all audio equipment, before turning FIZMO on, turn down your monitoring system to
avoid any unwanted level spikes.
To turn FIZMO on, press its rear-panel Power button until it latches in its On—pushed-in—position.
Power
Off On
ENSONIQ FIZMO User’s Guide 7
Page 14

ENSONIQ FIZMO User’s Guide
Page 15

3—Playing FIZMO
3—Playing FIZMO
Playing FIZMO is all about enjoying its presets and manipulating them. This chapter describes the selection of
presets and FIZMO’s realtime performance controls.
Note: Presets are described in
Chapter 1
.
Selecting Presets
FIZMO contains 64 presets arranged into two banks of 32 presets each, a bank being a collection of presets.
Preset-Selection Mode
To select a preset, you must first enter FIZMO’s preset-selection mode. You can tell if
you’re in preset-selection mode by looking at FIZMO’s display or at the Bank 1 and
Bank 2 LEDs located underneath and just to the left of FIZMO’s display. When you’re
in preset-selection mode, a “P” appears in the left side of the display, and one of the
two LEDs will be lit. If this is not the case, you can enter preset-selection mode by
selecting a preset bank, as described below.
Selecting a Preset Bank
To select one or the other preset bank, click the preset bank-selection button. Each
click selects one or the other of the two preset banks, as indicated by the Bank 1
and Bank 2 LEDs. When a bank is selected, its LED lights.
Selecting a Specific Preset
Click the -/No and +/Yes buttons to select an individual preset from either preset bank. The
number of the currently selected preset is shown in FIZMO’s display.
Tip: See Page 37 for a list of FIZMO’s presets.
“P” shows that you’re in
preset-selection mode.
Bank 1
Bank 2
P 01
Bank 1
Bank 2
Preset bankselection button
P 01
“01” signifies
Preset 1.
Realtime Performance Controls
FIZMO’s realtime performance controls allow you to simultaneously re-shape all of a preset’s sounds as you play.
These controls have an immediate effect on the presets, and are thus called “realtime” controls. The realtime
performance controls do not permanently change the currently selected preset—when you next select it, it will be
restored to its original state. To permanently alter a preset, you must edit it (
Note: Most the many FIZMO knobs and buttons dedicated to editing also result in instantly heard changes. They
are described in
Note: FIZMO’s realtime controls also transmit MIDI data from FIZMO’s MIDI Out jack as described in
Chapters 5
and 6.
Chapter 5
Keyboard Performance Controls
You can affect the way a preset sounds by how you play FIZMO’s keyboard:
• The keyboard is velocity-sensitive, so that it senses how hard or soft you play. In addition to affecting the
volume of the notes you hear, velocity can be used to change the value of various oscillator settings.
• When you strike a key and press it down, the keyboard generates channel pressure messages that can also
affect oscillator or effect settings.
Tip: Most of the effects in factory-programmed presets are designed to respond to velocity and/or pressure.
To learn how to program oscillators to respond to velocity and pressure, see “Modulation” in
ENSONIQ FIZMO User’s Guide 9
) or its sounds (
Chapter 6
Chapter 6
Chapter 7
.
).
.
Page 16
3—Playing FIZMO
Setting the Keyboard’s Velocity Response
You can adjust the FIZMO keyboard’s response to the force with which you play, allowing you to get the
most out of FIZMO’s sounds, regardless of how hard you like to play. To set this parameter:
MIDI
1. Press the MIDI Edit button repeatedly until “tch” is displayed—after approximately one second, the
current velocity curve value will be displayed.
Edit
2. Press the -/No or +/Yes button to select one of the six available velocity curves:
• Curve 1 is designed for musicians who play softly, while Curve 4 will suit players who play hard. Try each
curve to find the setting with which FIZMO’s sounds feel most responsive to your playing.
• Curve 5 causes the keyboard to always play as if you’ve struck its keys with a medium amount of force
(a MIDI velocity value of 64).
• Curve 6 causes the keyboard to always play as if you’ve struck its keys with a maximum amount of force
(a MIDI velocity value of 127).
The Pitch Bend and Mod Wheels
The two wheels to the left of FIZMO’s keyboard are its pitch bend wheel—on the left—and mod wheel—on the
right. These two wheels can be moved as you play; each has its own effect on the currently selected preset.
The Pitch Bend Wheel
The pitch bend wheel bends the pitch of notes upward when the wheel is pushed forward, or downward when it’s
pulled back. In its center position, no pitch-bend is applied. When shipped from the factory, the wheel bends pitch
by up to two semitones. To change the maximum pitch bend amount, tap the MIDI Edit button until bEnd
appears in FIZMO’s display—in a moment, the bEnd parameter’s current value will appear. Use the /No or +/Yes button to select the desired maximum amount of pitch-bending.
Tip: FIZMO can bend only those notes currently held down, letting sustained notes remain at their original pitch.
To activate held pitch-bending, tap the MIDI Edit button until PhLd appears in FIZMO’s display—in a moment, the
parameter’s current value will appear. Use the -/No or +/Yes button to set the PhLd parameter to “On.”
MIDI
Edit
The Modulation Wheel
The modulation wheel (or “mod wheel”) can be used to raise the value of any of FIZMO’s modulators
programmed to respond to the mod wheel. These modulators can be applied to various oscillator and effect
settings. The mod wheel is typically used for adding vibrato to sounds. Modulation is described on Page 21.
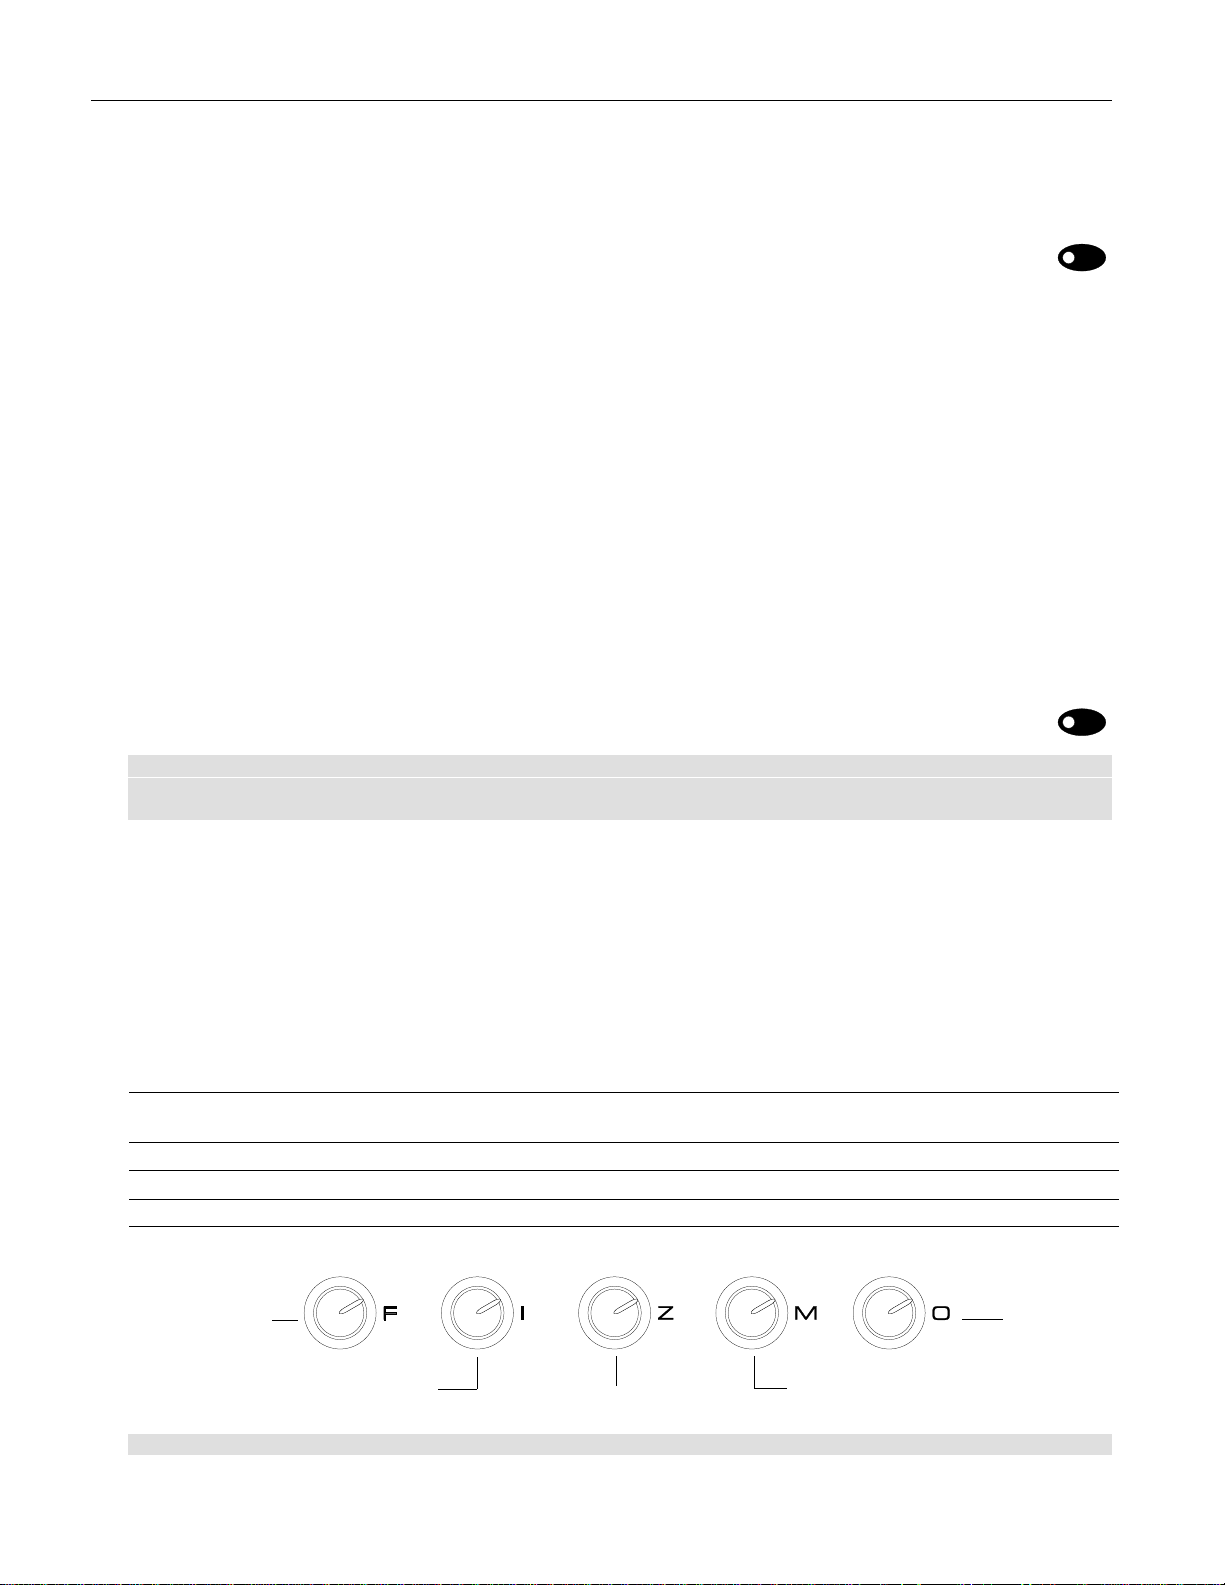
The FIZMO Knobs
The easiest way to shape FIZMO presets in realtime is to turn the F-I-Z-M-O knobs. The presets created at the
factory are programmed to respond to these knobs in enjoyable ways, as described on Page 37.
When you twist the: it:
F knob adjusts the value of any setting to which Sys3 is applied as a modulator (Page 21).
In all factory-programmed sounds, Sys 3 modulates preset effects (Page 18).
I knob selects from among the frames in the preset’s Transwaves (Page 26).
Z knob adjusts the filter cutoffs of the preset’s oscillators (Page 28).
M knob detunes the preset’s oscillators (Page on page 21).
O knob adjusts the value of any setting to which Sys4 is applied as a modulator (Page 21).
Effect modulation
Wave modulation
Brightness
Detuning
Sys4 control
Tip: You can make your current FIZMO knob settings permanent by saving the preset—see Page 20.
10 ENSONIQ FIZMO User’s Guide
Page 17
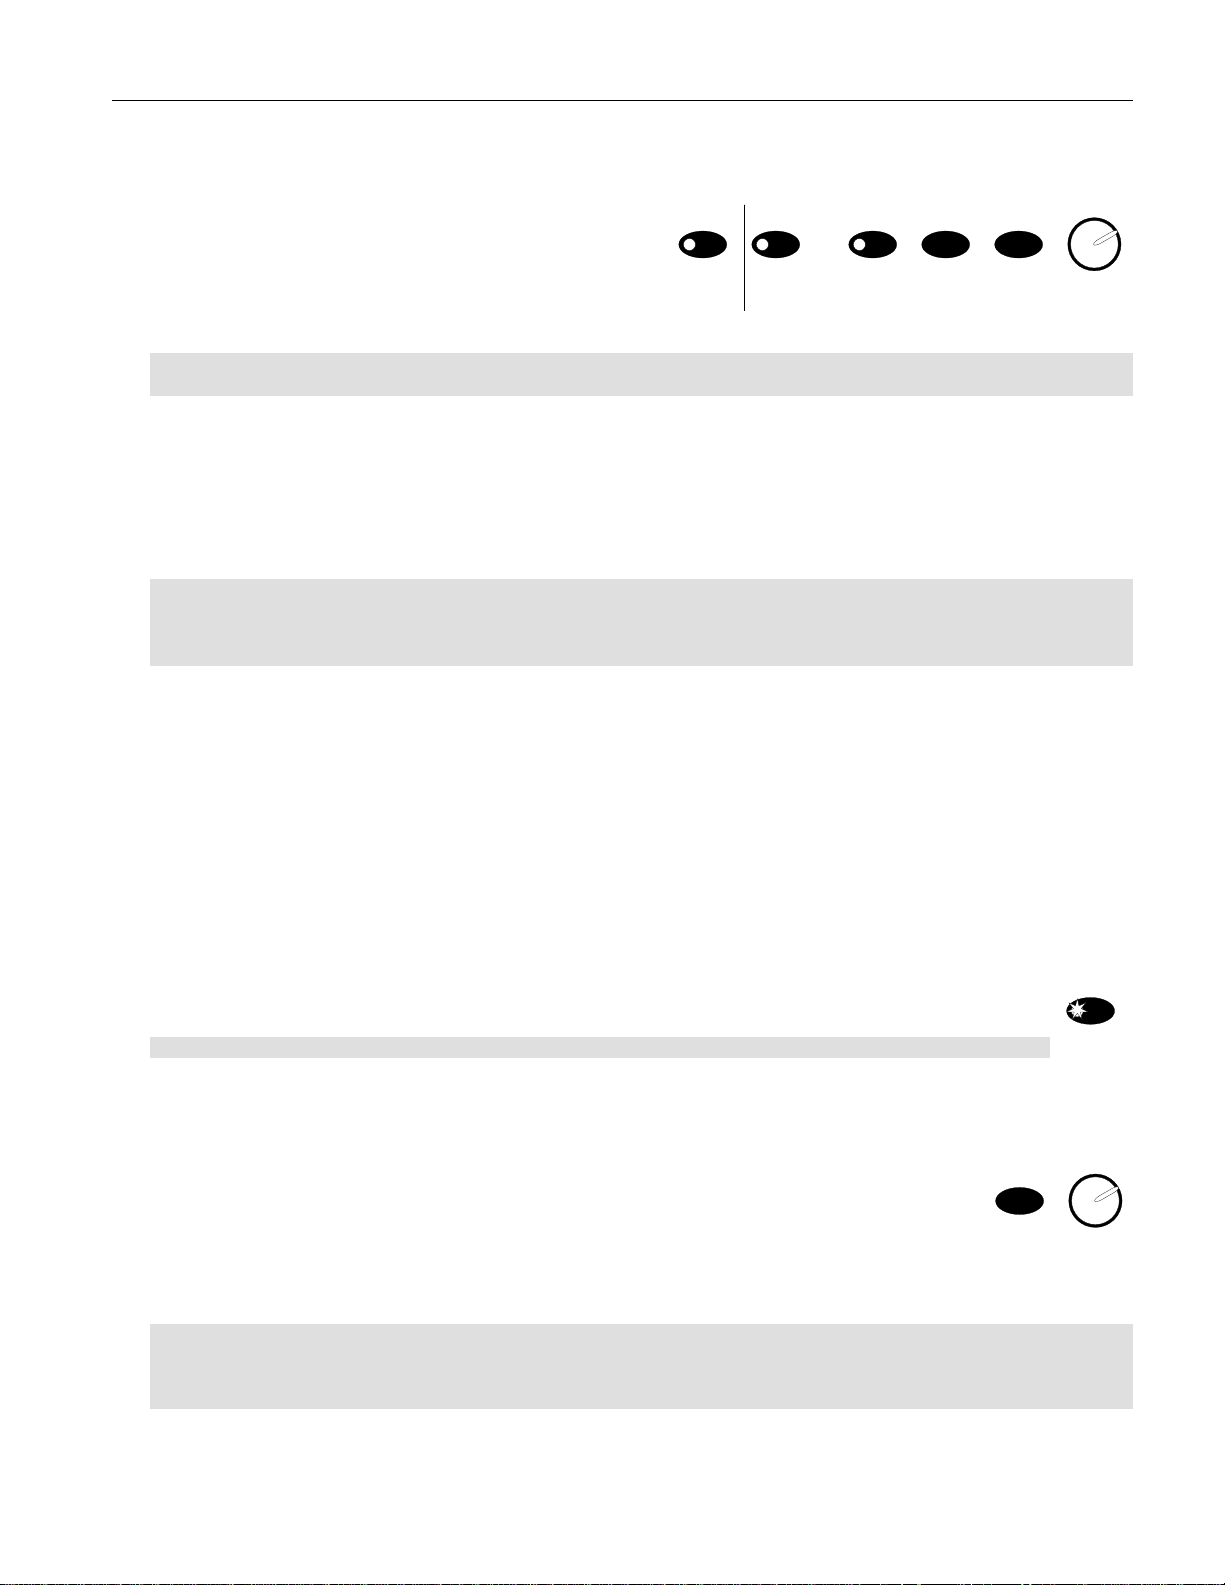
4—The Arpeggiator
4—The Arpeggiator
FIZMO’s arpeggiator produces mesmerizing, repetitive
Tempo Arpeggiator
streams of musical notes using the active sounds in the
currently selected preset. The arpeggiator can play both
pre-programmed phrases, and can generate fantastic
On/OffTap Keyboard Range Mode
Value
new music based on notes that you play. You can also
play along with the arpeggiator.
Tip: The arpeggiator can be synchronized to MIDI clocks so that you can synchronize it to an external MIDI
device. You can also supply the arpeggiator with notes via MIDI. See
Chapter 7
.
Understanding Arpeggiator Presets
Whenever you use the arpeggiator, you’re using an “arpeggiator preset.” An arpeggiator preset tells the
arpeggiator what notes to play, and how to play them by determining the arpeggiator’s operating mode and also
containing a variety of parameters that influence certain important aspects of its behavior (these are detailed in
“Editing Arpeggiator Presets” on Page 13).
Note: Each FIZMO preset contains an arpeggiator preset, and remembers the current state of the arpeggiator’s
other settings when the preset was last saved. Therefore, when you change any arpeggiator setting, the LED in
the Sound Edit button lights to show that the preset has been edited. See Page 20 to learn how to save a
preset—and your current arpeggiator settings.
Arpeggiator Operating Modes
The arpeggiator can function in either of two modes, or a combination of both. The operating mode is determined
by the type, or types, of information the arpeggiator preset contains. An arpeggiator preset can contain a:
• pattern—A pattern is a pre-programmed phrase containing note or controller data. When an arpeggiator
preset contains a pattern, you can transpose its note data to any key or octave by striking a key on FIZMO’s
keyboard.
• control algorithm—A control algorithm allows you to play notes into the arpeggiator, and tells the arpeggiator
in what order to play those notes.
Turning the Arpeggiator On and Off
To turn the arpeggiator on, click the Arpeggiator On/Off button—when the arpeggiator is on, the
button’s LED lights.
Tip: You can also turn the arpeggiator on and off using a foot switch—see Page 6.
Arpeggiator
On/Off
Selecting an Arpeggiator Preset
FIZMO contains over a hundred arpeggiator presets. To select one:
1. Click the Arpeggiator Mode button—or hold down the button and turn the Arpeggiator
Value knob—until PrSt is displayed. In a moment or so, the number of the currently
selected arpeggiator preset will be displayed.
2. Turn the Arpeggiator Value knob or use the -/No or +/Yes button to select the desired
arpeggiator preset. The arpeggiator preset already saved in the preset is shown as snd; the other
arpeggiator presets are identified by number.
Tip: For a list of FIZMO's arpeggiator presets, see Page 40.
Tip: The control algorithm contained in the highest-numbered arpeggiator preset performs a unique function: any
notes you supply to the arpeggiator are sustained for as long as the arpeggiator is turned on.
ENSONIQ FIZMO User’s Guide 11
Mode
Value
Page 18

4—The Arpeggiator
The Arpeggiator Keyboard Button
The Arpeggiator Keyboard button determines whether FIZMO’s keyboard—and incoming MIDI notes;
see Page 31—will supply notes to the arpeggiator, or will bypass the arpeggiator and play the sounds
of the currently selected preset. When you save a preset, it remembers the current state of the
Keyboard button. The Keyboard button contains an LED; each time you press the Keyboard button, the LED
turns on or off. When the LED is:
• lit, you can give the arpeggiator notes to play, and/or transpose an arpeggiator pattern, using the keyboard.
You can also use FIZMO’s pitch bend and modulation wheels to manipulate the notes the arpeggiator plays.
• unlit, you can play along with the arpeggiator.
Tip: The setting of the HELd arpeggiator preset parameter determines how you can supply the arpeggiator notes
when using a control algorithm. See “Held Mode and Control Algorithm Notes” on Page 14.
You can set the keyboard’s behavior on a system-wide level so that it behaves in the manner you find most
convenient. To do this, tap the MIDI Edit button until bPAS (for “Arpeggiator Bypass parameter”) is displayed; in a
moment or so, the parameter’s current value will be displayed. Use the -/No or +/Yes button to set it to:
Value: Displayed as: So that:
Bypass Off
Bypass On
Preset
Arpeggiator On/ Off
OFF
On
PSEt
ArP
the keyboard always supplies notes to the arpeggiator.
the keyboard always plays the current preset.
when a new preset is selected, FIZMO will set the Keyboard button and
LED to the on/off state stored in the preset.
if the arpeggiator is turned on, the keyboard will supply it notes; if it’s
off, the keyboard will play the currently selected preset.
Keyboard
Note: You can override the setting of the Arpeggiator Bypass parameter at any time by pressing the Keyboard
button manually.
Note: When shipped from the factory, the Arpeggiator Bypass parameter is set to ArP.
Tip: You can use a foot switch to temporarily direct the keyboard to the arpeggiator—see Page 6.
The Tempo Button
You can set the tempo of the currently selected arpeggiator preset by tapping the Arpeggiator Tempo
button—when you press the button, the current tempo value is displayed in beats per minute (bpm). The
arpeggiator’s tempo can be set anywhere from 25 bpm (t25) to 320 bpm (t320). The Tempo button’s
LED is always flashing, showing the current arpeggiator tempo.
Tip: You can also hold down the Arpeggiator Tempo button and turn the Arpeggiator Value knob to set the
tempo. In addition, once you’ve pressed the Arpeggiator Tempo button, you can use the -/No or +/Yes button to
set the tempo.
The system-wide Arpeggiator Tempo Source parameter allows you to set the behavior of the arpeggiator’s tempo
as you select presets. To access and set this parameter, tap the MIDI Edit button until AtPO is displayed; in a
moment or so, the parameter’s current value will be displayed. Use the -/No or +/Yes button to set it to:
Value: Displayed as: So that:
Preset
Front panel
PSet
FPnL
When a new preset is selected, the arpeggiator tempo will be set to the tempo
stored in the preset.
the tempo selected using the Tempo button will remain in place when a new
preset is selected.
Tempo
Tap
Note: You can override the setting of the Arpeggiator Tempo Source parameter at any time by setting the
Arpeggiator Tempo from the front panel.
Note: When shipped from the factory the Arpeggiator Tempo Source parameter is set to FPnL.
12 ENSONIQ FIZMO User’s Guide
Page 19

4—The Arpeggiator
Note: Some factory presets may not contain a tempo. The currently selected tempo will remain in place when
such a preset is selected, even when the Arpeggiator Tempo source parameter is set to PSet.
The Arpeggiator Tempo, AKA the System Clock
The arpeggiator tempo setting provides timing information to more than just the arpeggiator. It’s also the system
clock, providing a timing reference for oscillator LFOs and noise generators (see Page 25), as well as various
time-based preset effects accessible with computer editing software. This allows for the programming of sounds
and preset effects whose elements are synchronized with each other and/or with external MIDI devices.
Note: The arpeggiator tempo/system clock—and therefore FIZMO’s arpeggiator, sounds and effects—can be
controlled by incoming MIDI clocks. See Page 31.
The Range Button
The Arpeggiator Range button allows you to extend the number of octaves over which the arpeggiator’s
notes will be played when using an arpeggiator preset that contains a control algorithm. When the
arpeggiator’s range is set to Oct0, its notes will play in their original range.
When the arpeggiator range is: the arpeggiator notes will play in their original octave, as well as:
Oct1
Oct2
Oct3
Oct4
an octave above and below the original range.
two octaves above and below the original range.
three octaves above and below the original range.
four octaves above and below the original range.
Range
To set the arpeggiator range, tap the Range button.
Tip: You can also hold down the Arpeggiator Range button and turn the Arpeggiator Value knob to set the
desired octave range. In addition, once you’ve pressed the Arpeggiator Range button, you can use the -/No or
+/Yes button to for this purpose.
Note: The Range setting respects the low-note/high-note boundaries set with the Lo n and Hi n arpeggiator
preset parameters (Page 13), allowing you to extend the octave ranges of the arpeggiator’s notes only in the
desired high or low direction.
Editing Arpeggiator Presets
Each arpeggiator preset contains a collection of parameters that allow you to set its sound and
behavior. To select and edit these parameters, tap the Arpeggiator Mode button—or hold down
the Arpeggiator Mode button and turn the Arpeggiator Value knob—until the desired parameter
is displayed. In a moment or so, the selected parameter’s value will be displayed. Turn the
Arpeggiator Value knob, or use the -/No or +/Yes button to select the desired value. The parameters are:
Parameter: Displayed as: What it does:
Preset
Note Resolution
Note Duration
Feel
Minor Thirds
Thirds
PrSt
nrES
Ndur
FEEL
-3rd
3rd
selects an arpeggiator preset by number; see Page 11.
sets the rhythmic value of each note when using a control algorithm; may be
set to HOLE (whole note), HALF (half-note), Qtr (quarter note), 8th (eighth
note), 16th (sixteenth note), 32nd (thirty-second note), 32n3 (thirty-secondnote triplet),16t3 (sixteenth-note triplet), 8th3 (eighth-note triplet), Qtr3
(quarter-note triplet), HLF3 (half-note triplet), HOL3 (whole-note triplet)
sets the length of notes as a percentage of the current nrES value
adds a pre-programmed musical feel to notes used by control algorithm;
range is OFF,1-49; values 1-25 add swing, from 50% to 75% (13=63%)
adds a minor third to notes when using a control algorithm; can be OFF, On
adds a major third to notes when using a control algorithm; can be OFF, On
Mode
Value
ENSONIQ FIZMO User’s Guide 13
Page 20

4—The Arpeggiator
Parameter: Displayed as: What it does:
Fourths
Fifths
Octaves
Low Note
High Note
Touch
Center Range
Note Limit
Held Mode
4th
5th
Oct
Lo n
Hi n
tch
CEnt
ntLt
HEld
adds a fourth to notes when using a control algorithm; can be OFF, On
adds a fifth to notes when using a control algorithm; can be OFF, On
adds an octave to notes when using a control algorithm; can be OFF, On
sets the lowest-pitched note that arpeggiator will accept from keyboard
when supplying notes to control algorithm; also sets the lowest note that
arpeggiator will play
sets the highest-pitched note that arpeggiator will accept from keyboard
when supplying notes to control algorithm; also sets the highest note that
arpeggiator will play
when set to OFF, all arpeggiator notes play at a MIDI velocity of 127; when
set to On, arpeggiator uses velocity of notes played on keyboard
when set to On, moves notes played by a control algorithm to an octave
location centered around Middle C; when set to OFF, notes play in original
octaves
limits the number of notes the arpeggiator will play before repeating
when set to On, arpeggiator remembers last notes played on keyboard or via
MIDI; when set to OFF, arpeggiator remembers notes only for as long they’re
held down on keyboard or played via MIDI; see “Held Mode and Control
Algorithm Notes” below
Note: You can activate one of the arpeggiator intervals—-3rd, 3rd, 4th, 5th, Oct—at a time. If you activate a
new interval when another is already turned on, the old interval will be replaced by the new one.
Note: Some arpeggiator presets may contain added minor 3rds, 3rds, 4ths, 5ths or octaves. In such cases, the
settings for the -3rd, 3rd, 4th, 5th and Oct parameters will be ignored.
Note: Setting the -3rd, 3rd, 4th, 5th or Oct parameters to On may cause notes to sound beyond the lownote/high-note boundaries established with the Lo n and Hi n parameters.
Held Mode and Control Algorithm Notes
The setting of the HELd arpeggiator preset parameter, described above, determines the manner in which you can
supply notes to be played by a control algorithm. When the HELd parameter is set to:
• OFF, the arpeggiator remembers notes only for so long as they’re being played. Once you stop playing the
notes, the control algorithm stops paying them as well.
• On, the arpeggiator remembers the last notes you supplied it. After you stop playing them on FIZMO’s
keyboard or from an external MIDI device, the control algorithm continues to play the notes until you turn the
arpeggiator off, or supply it new notes. You can add notes to those already being played by the control
algorithm in either of two ways:
1. As long as you continue to hold down at least one of the keys you used to supply the control algorithm
with notes, you can add additional notes by playing them on the keyboard or via MIDI. When no keys are
held down, the next note played will replace the notes currently in use.
2. When you’ve connected an ENSONIQ SW-10 foot switch to FIZMO and assigned one of its pedals to
sustain (see Page 6), you can hold down the pedal and add additional notes to the control algorithm by
playing them on the keyboard or via MIDI.
14 ENSONIQ FIZMO User’s Guide
Page 21

5—Editing, Creating and Saving Presets
5—Editing, Creating and Saving Presets
As described in
Chapter 1
, when you play FIZMO, you’re playing a preset. A preset contains four sounds—any of
which can be turned on or off—processed by one of FIZMO’s effects. There are two basic aspects, therefore, to
editing or creating a whole new preset from an old one:
• Setting up the preset’s sounds—the selection and activation of the sounds to be used in the preset, the
setting up of sound-layering, and the mapping of sounds across FIZMO’s keyboard.
• Setting up the preset’s effects—the selection of the type of effect to be used by the preset, and the
choosing of the desired variation for the selected effect.
Note: Each preset also contains its own arpeggiator setup and arpeggiator preset—see
Chapter 4
.
When you’ve programmed the preset to your satisfaction and would FIZMO to remember it, you must save the
preset to FIZMO’s FLASH memory, as described on Page 20.
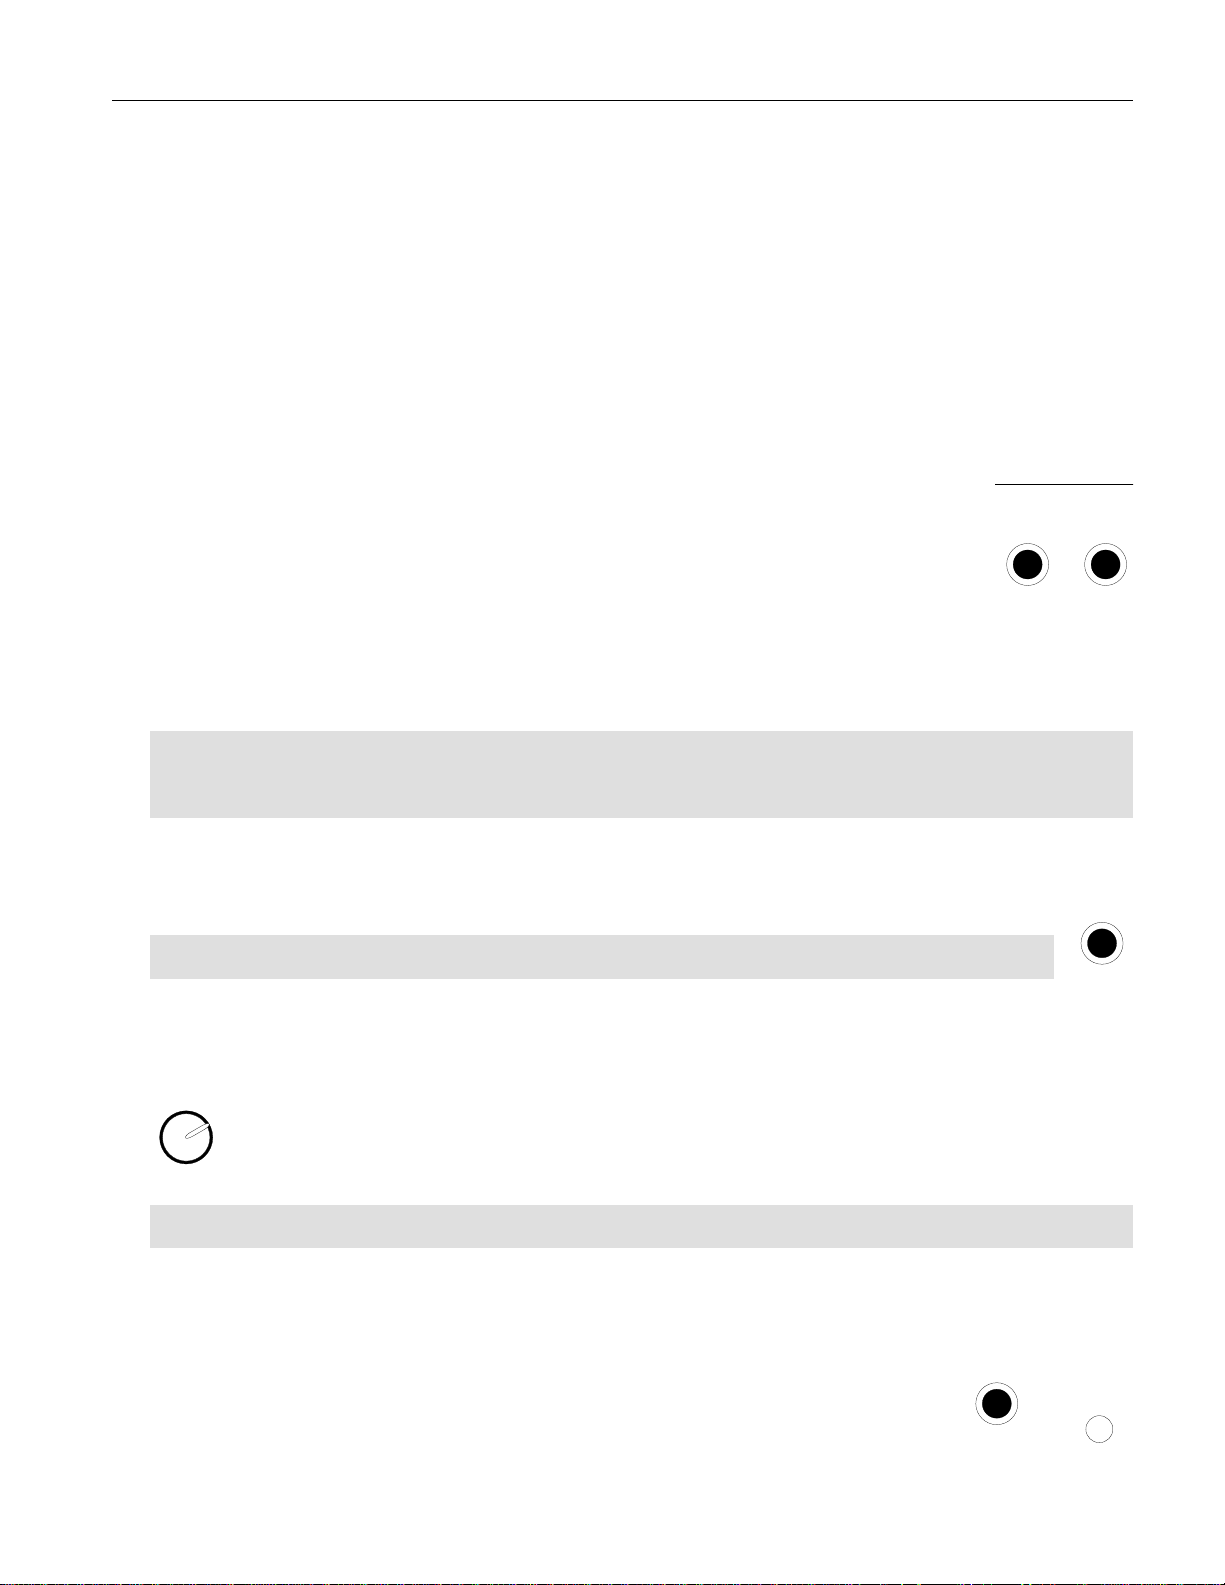
The Compare Button and LED
When you make any changes to a preset, FIZMO copies the preset and the changes you’ve made into a
Compare
Save
special area of memory called the “Compare buffer.” This buffer holds onto your edited preset so that you
can compare it to the last-saved version of the preset—the Compare button acts as a toggle switch
between the two versions. When you first alter a preset, the LED in the Compare button lights to signify that
the preset has been changed (and that the edited preset has been copied to the Compare buffer).
• Press the Compare button once to hear the last-saved version of the preset—the
button’s LED flashes to indicate that you’re now listening to the un-edited version
of the preset.
Compare
• To return to your edits, press the button again: the LED once again lights solidly,
and your edits are heard when you play the keyboard.
Compare
Flashing LED:
saved preset
Solidly lit LED:
edited preset
Tip: Any additional changes you make while listening to the last-saved version of the preset will cause the
Compare LED to light solidly, indicating that you are once again listening to the edited version of the preset, with
the most recent change added.
Changing, Layering and Mapping a Preset’s Sounds
Sounds, Presets and Memory
Each preset contains four memory slots for its sounds. Since there are 64 presets in FIZMO, there
are 256 sound memory slots altogether—and 256 sounds. Each of FIZMO’s sounds resides in one
of the memory slots associated with a preset.
Each of the four slots in a preset has its own button that you can press to turn its sound on—so that
it’s heard when you play the preset—or off. The LED in each button lets you tell at a glance if its
sound is turned on—if the LED is lit or flashing, the sound will be heard when you play the preset.
How Sounds Work in Presets
You can use sounds in a preset in any of three general ways:
• You can use just one of its sounds.
• You can layer up to four of its sounds on top of each other or in different areas of the keyboard.
• You can split up to four of its sounds into convenient pre-mapped octave ranges.
Sound
1
2
3
4
ENSONIQ FIZMO User’s Guide 15
Page 22

5—Editing, Creating and Saving Presets
Using a Single Sound in a Preset
To use a single sound in a preset, simply turn on the desired sound. To do this:
1. Press the Sound’s button—the button’s LED lights solidly and the sound is heard when you play the preset.
2. To switch to another of the preset’s sounds, press its button—its LED will light solidly and the newly
selected sound will be heard instead of the first sound when you play the preset. The first sound’s LED will
turn off.
3. To turn off a sound press its button a second time—its LED will go out, and the sound will no longer be heard
when you play the preset.
Layering Sounds in a Preset
By layering sounds in a preset, you can accomplish a few different things, depending on each sound’s key range,
the area of the keyboard in which the sound is programmed to play:
• You can layer sounds that extend the entire range of the keyboard, so that when you play any key, the
sounds are heard simultaneously, on top of each other.
• You can layer sounds assigned to different areas of the keyboard in order to set up splits of your own design.
• You can combine both methods to have some sounds play on top of each in certain areas of the keyboard,
while other areas of the keyboard play single sounds.
Tip: Use FIZMO’s split feature, described on Page 17, to split sounds across the keyboard into factoryprogrammed key ranges.
To Layer Sounds that Span the Entire Keyboard
1. Press the Sound button for the first sound you want to use in your layering—the LED in the Sound button
lights solidly.
2. Double-click the Sound button for the second sound you want to layer—its LED lights solidly, and the first
sound’s LED flashes.
3. Repeat Step 2 for any additional sounds you want to layer. In each case, the last-activated sound’s Sound
button LED will light solidly, and LEDs associated with previously layered sounds will flash.
4. To remove a sound from a group of layered sounds, its LED must be solidly lit (not flashing). If the LED for
the sound you want to remove is flashing, press its button once. Once its LED is solidly lit, press the button
once more to remove it from the group of layered sounds.
To Map and Layer Sounds in Specific Key Ranges
Use each sound’s Sound button and FIZMO’s keyboard to map the sound to a specific key range:
1. Press and hold down the sound’s button.
2. While continuing to hold down the sound’s button, press the lowest key of the desired key range, and then
the highest key—as you press each key, its name will be displayed (C4 is Middle C).
3. Release the Sound button—the sound will only play in the specified area of the keyboard. To change a
sound’s key range, simply repeat Steps 1-3.
When you let go of each sound’s button, FIZMO will automatically layer the sound with any other sounds that are
already turned on. Its LED will be solidly lit, and the sound button LEDs for all other active sounds will flash.
Note: It’s possible to set up sound key ranges so that no sound is programmed to play in some an area of the
keyboard—while harmless, this can be confusing to encounter unexpectedly. If an area of the keyboard produces
no sound when you play a preset, use the above method to reset the key ranges of the preset’s sounds.
16 ENSONIQ FIZMO User’s Guide
Page 23

5—Editing, Creating and Saving Presets
The Split Feature
When different areas of the keyboard play different sounds, the sounds are said to be “split” across the
keyboard. While you can set up any kind of four-way split in a preset using FIZMO’s Layer feature (described
above), FIZMO also provides an easy-to-use automatic Split feature in which each sound plays in a factorydefined area of the FIZMO keyboard. The Split feature prevents the possibility of inadvertently mapping a
preset’s sounds (see Page 16) so that some areas of the keyboard produce play no sound whatsoever.
When using the Split feature, the preset’s four sounds are mapped across the keyboard in the following manner:
Sound 1 Sound 2 Sound 3 Sound 4
Middle C
Tip: In a split, Sound 1 is pre-mapped to the lower two octaves on the keyboard, making it perfect for a bass
sound. To learn how to select a new sound for the Sound 1 slot, see “Selecting a New Preset Sound” below.
If you use all four sounds in a split, they’ll play in the ranges shown above. If you use fewer than four sounds, the
Split feature will automatically extend the key range of sounds you use to cover any gaps created by the absence
of one of the four possible sounds in the map shown above. It does this according to the following rules:
• The lowest-numbered sound in the split will be extended to the bottom of the keyboard.
• Each sound will extend upward to fill the gap created by the absence of a sound, or sounds, directly above it.
To Create a Split
1. Press and hold down the Sound button associated with any of the sounds you want to use in the split.
2. While continuing to hold Step 1’s Sound button down, click, one-by-one, the sound buttons associated with
any other sounds you want to include in the split.
3. Release Step 1’s button.
4. To remove a sound from the split, its LED must be solidly lit (not flashing). If the sound’s LED is flashing,
press its button once. Once the LED is solidly lit, press the button once more to remove it from the split.
Selecting a New Preset Sound
In FIZMO’s sound-selection and -editing mode, you can assign any of the 256
onboard sounds to any sound slot in the currently selected preset. To enter this
mode, press the desired slot’s Sound button. When you click a sound’s button, its
name is shown in FIZMO’s display. Each sound is identified by the number of the
preset to which it belongs, and by the slot it occupies within the preset.
The sound’s number
Note: If the display is currently showing a sound name, you’re already in sound-
selection and -editing mode.
In order to select a new sound for a slot, the LED in its button should be solidly lit (not flashing). If this is not the
case, click the desired Sound button once. You can select sounds at any time, whether you’ve got a single sound
turned or a whole group of layered or split sounds.
Press the -/No or +/Yes buttons to select any of FIZMO’s onboard sounds, from the current preset or any other.
As you select each sound, you can play FIZMO’s keyboard to audition it. If you know which preset contains the
sound you’d like to use, it’s a simple matter to press the -/No or +/Yes button to dial up the preset, and then the
sound within the preset.
The preset to which
the sound belongs.
01-1
in the preset
When you select a new sound, FIZMO copies it into the sound slot—this allows you to edit the sound for use in
the current preset without affecting the preset from which it was copied.
Chapter 6
describes editing sounds.
ENSONIQ FIZMO User’s Guide 17
Page 24

5—Editing, Creating and Saving Presets
Editing and Setting Up a Preset’s Effects
Effects
Insert
FIZMO contains two powerful effects processors that are always available for
the processing of a preset’s sounds. Together, these processors provide two
types of effects:
Reverb
VariationSelect Mix
• FIZMO’s Insert effects provide a broad range of effect choices, from the conventional—effects such as
reverbs, delays and choruses—to the unusual, such as the Chatterbox effect and FIZMO’s Vocoder, which is
described on Page 19. You can also route a microphone into any insert effect—see “Using FIZMO’s Audio
Inputs” on Page 5.
• FIZMO’s global reverb allows you to adorn any preset’s sounds with a natural-sounding ambience.
Each insert effect—and the global reverb—is pre-programmed with a set of variations from which to choose, as
described in “To Select an Insert Effect or Global Reverb Variation” on Page 19.
For each preset, you can select an insert effect and variation and a global reverb variation through which the
preset’s sounds will be processed. You can also set the overall wet/dry—or un-effect sound/processed
sound—balance for the preset’s insert effect and global reverb.
Note: Each sound in a preset is comprised of two components called “oscillators,” both of which can be
individually routed to the preset’s insert effect or global reverb, or left un-effected, or “dry.” See Page 30.
Choosing an Insert Effect
1. Press the Effects Select Insert button.
2. Press the -/No or +/Yes button to select the desired insert effect from the list of 41 insert
effects below. You can try out any insert effect before deciding which one you want to use.
Effects
Insert
Reverb
Select
Insert Effect: Displayed as: Insert Effect: Displayed as:
Parametric EQ
Hall Reverb
Large Room
Small Room
Large Plate
Small Plate
Non Linear Reverb 1
Non Linear Reverb 2
Gated Reverb
Stereo Chorus
8 Voice Chorus
Reverb > Chorus
Reverb > Flanger
Reverb > Phaser
Chorus > Reverb
Flanger > Reverb
Phaser > Reverb
EQ > Reverb
Spinner > Reverb
DDL > Chorus
DDL > Flanger
Para
HALL
Lroo
Sroo
LPLt
SPlt
nLr1
nLr2
GatE
Cho
8Cho
rCho
rFLG
rPHS
Chor
FLGr
PHSr
Eqr
SPin
dCho
dFLG
DDL > Phaser
DDL > EQ
Multi-tap DDL
Distortion > Chorus
Distortion > Flanger
Distortion > Phaser
Distortion > Autowah
ResVCF > DDL
Dist > VCF > DDL
Pitch Detune
Chatter Box
Formant Morph
Rotary Speaker
Tunable Speaker
Guitar Amp
Dist > DDL > Tremolo
Comp > DDL > Tremolo
EQ > Comp > Gate
EQ Cho DDL
Vocoder
dPha
dEq
taP
dStC
dStF
dStP
dCry
rEsd
drES
Pitc
CHat
ForF
roTS
tunE
Gutr
trLo
cdSt
qCGt
qChd
Codr
Note: FIZMO requires a few milliseconds to install a just-selected insert effect.
18 ENSONIQ FIZMO User’s Guide
Page 25

5—Editing, Creating and Saving Presets
Using the Vocoder Insert Effect
FIZMO’s vocoder insert effect allows you to shape sounds using your mouth by speaking or singing into a
microphone connect to FIZMO’s rear-panel Audio Input jack.
Tip: To learn how to connect a microphone and set its level, see “Using FIZMO’s Audio Inputs” on Page 5.
Once you’ve connected the microphone and set its level, select the vocoder insert effect and play some keys on
FIZMO’s keyboard while speaking or singing into the microphone—FIZMO will shape the preset’s sounds to
mimic the shapes your mouth makes, forming words constructed from music.
Note: While you can sing into your microphone while using the vocoder insert effect, the pitch of FIZMO’s notes
will reflect what you play on the keyboard (or via MIDI), not what you sing.
To Select an Insert Effect or Global Reverb Variation
Each insert effect and the global reverb has a collection of useful—and sometimes exciting—pre-programmed
variations from which you can choose to find the best one for the preset you’re working on. Variations are
selected using the up-and-down-arrow Variation buttons.
To select a variation for a preset’s insert effect:
1. Press the Effects Select Insert button so that its LED is lit (if it’s already lit, skip to
Step 2.)
2. Use the Variation buttons to select from among the insert effect’s variations,
displayed as “v01,” “v02” and so on. You can try out each of the variations before
deciding on the one you want to use.
Effects
Insert
Reverb
VariationSelect
To select a global reverb variation for a preset:
1. Press the Effects Select Reverb button so that its LED is lit (if it’s already lit, skip to
Step 2.)
2. Use the Variation buttons to select from among the global reverb’s variations. You
can try out each of the variations before deciding on the one you want to use.
Effects
Insert
Reverb
VariationSelect
The global reverb variations are:
Variation: Displayed as:
Preset—the variation contained in the saved version of the preset
Smooth Plate
Large Hall
Small Hall
Big Room
Small Room
Reflections
Bright
Huge Place
PSet
r01
r02
r03
r04
r05
r06
r07
r08
Adjusting an Effect’s Wet/Dry Mix
When using an effects processor—such as the those in FIZMO—the word “wet” describes sound that has been
subjected to effect processing, while the word “dry” refers to sound that has not. FIZMO’s Mix knob allows you
to adjust the balance between a preset’s sounds as they’re heard prior to processing and their processed
versions. This can be useful when you want to add processing to preset sounds without letting the effect
overwhelm their original characteristics—at other times, you may well want to hear only the effected versions.
Note: FIZMO’s three global reverb effect busses allow you to apply a light, average or heavy amount of global
reverb to each oscillator that comprises a preset’s sounds, as described on Page 30. The Mix knob allows you to
adjust the overall volume of the global reverb while retaining these three different relative amounts of reverb.
ENSONIQ FIZMO User’s Guide 19
Page 26

5—Editing, Creating and Saving Presets
To adjust the wet/dry mix for a preset’s insert effect:
Effects
Insert
1. Press the Effects Select Insert button so that its LED is lit (if it’s already
lit, skip to Step 2.)
Reverb
VariationSelect Mix
2. Turn the Mix knob to achieve the desired wet/dry balance.
To adjust the wet/dry mix for a preset’s global reverb:
Effects
Insert
1. Press the Effects Select Reverb button so that its LED is lit (if it’s already
lit, skip to Step 2.)
2. Turn the Mix knob to achieve the desired wet/dry balance.
Reverb
VariationSelect Mix
Tip: The Mix knob is always active for the effect whose LED is lit, so it can be used as a realtime control for that
depth of that effect.
Saving a Preset
If you’d like FIZMO to retain the edits you’ve made to a preset or a new preset you’ve created, you’ll need to
save it to FIZMO’s FLASH memory. When you save a preset, all of its sounds are saved as well, to the four
sound memory locations associated with the preset. In addition, FIZMO will also save the current state of the
arpeggiator—described in
Chapter 4
the time the preset is saved.
To save a preset:
1. Press the Save button. Its LED will begin to flash, and the preset you’ve edited—or the preset you
started with to construct a new one—will be displayed.
FIZMO is packed with presets when it’s shipped from the factory, so there are no preset memory locations
that don’t already contain a preset. When you save a new preset, therefore, the new preset must always
replace an older one. You can select the preset whose memory location you want to use—this will cause the
preset currently in that location to be erased, replaced by the preset you’re saving.
2. If you’d like to replace a different preset than the one currently being displayed, use the -/No or +/Yes
buttons to select the desired preset.
3. When you’ve selected the preset whose memory location you want to use for your new preset, press the
Save button a second time. The word “burn” will be displayed as the preset is burned into the selected
location in FIZMO’s FLASH memory.
—as part of the preset, including whether it’s turned on or off at
Compare
Save
Tip: To learn more about FIZMO’s memory, including FLASH, see Page 3.
Tip: You can also store FIZMO presets in an external MIDI storage device. See Page 33.
Tip: To learn how to restore FIZMO’s factory presets, see Page 41.
20 ENSONIQ FIZMO User’s Guide
Page 27

6—Programming Sounds
Understanding FIZMO Sounds
6—Programming Sounds
This chapter describes the editing, or
programming, of FIZMO sounds using the
sound-related knobs and buttons grouped
together on FIZMO’s front panel. Before
beginning to tweak or create new sounds,
take a moment to familiarize yourself with
what exactly makes up each of the
sounds in a FIZMO preset.
OSC Pitch
1
2
Effect Bus
Select
Wave
Select
Fine
Tune
Modulation
Modulation
Glide Envelope
Amount
Mono
Amount
Pitch
Filter
Amp
Time
Filter Modulation
Cutoff Resonance
Attack Decay Sustain Release
Select Velocity
Envelope
Modulation
Amount
Track
Keyboard
Mode
Noise
LFO
Select Shape
Amplitude
Level Pan
Note: Experienced synthesists will recognize FIZMO’s familiar sound-programming tools.
Two Oscillators Equals One Sound
The oscillator is the basic building block of a FIZMO sound. An oscillator is a structure that plays one of the
waves—sound recordings—stored in FIZMO, and contains settings that allow you to shape the sound of the
wave, and to send it to one of FIZMO’s effects. Each sound has two oscillators—you can use either in a sound,
or both. When you program a sound, what you’re doing is telling its oscillators if, what and how to play.
Tip: The programming changes you make are instantly heard (except as noted). This makes the oscillator
programming buttons and knob realtime controls for the oscillator being edited.
The Flow of an Oscillator
It can be helpful when programming an oscillator to understand how its sound flows from the basic wave all the
way to FIZMO’s outputs—this is called the oscillator’s “signal flow.” As you can see, the journey begins at the
wave and travels through pitch, glide, filter and amplitude controls before being sent to one of its preset’s effects.
Speed
Controls the pitch at
which the wave plays.
Controls frequency
content
One of the
preset’s effects.
FIZMO’s stereo
outputs
Controls the wave
the oscillator plays.
Controls how the oscillator
moves from note to note
Controls volume and
stereo panning.
Note: The structure of this chapter, from “Wave” forward, reflects the above signal flow. Most of the section
headings in the chapter follow the labeling of sections of FIZMO’s front panel.
Modulation
Much of the art in programming comes from the creative application of modulation. Modulation—a technical word
for “change”—alters an oscillator setting as you play. This can bring oscillators to life by allowing them to change
shape as you listen, and provide for greater sonic complexity. Various oscillator settings in FIZMO can be
modulated by any of its collection of modulators, as noted throughout this chapter. In each case, the modulator
raises and/or lowers the setting’s initial value. Modulation is applied to a setting by:
1. manually establishing the setting’s initial value.
2. selecting a modulator by repeatedly clicking the setting’s Modulation button until the desired
modulator is displayed. If you prefer, you can click the Modulation button once and use the -/No
or +/Yes button to select the desired modulator.
3. setting the amount of modulation to be applied by turning the setting’s Amount knob. The
amount of modulation is shown in FIZMO’s display as a positive or negative number—negative
numbers being those preceded by a minus sign. The effect of a positive or negative modulation
value depends on the selected modulator, as described in the chart that follows.
Modulation
Amount
ENSONIQ FIZMO User’s Guide 21
Page 28

6—Programming Sounds
Modulator: Displayed as: What it does to a setting’s initial value:
OFF
FULL
LFO
Stepped noise
Low-pass-filtered,
or smooth, noise
Envelope 1
Envelope 2
Envelope 3
Velocity
Velocity and
pressure
MIDI Note
Keyboard
Pressure
Pitch wheel
Modulation wheel
Modulation wheel
and pressure
Foot switch
Sustain pedal
Sostenuto pedal
System Controller 1
System Controller 2
System Controller 3
System Controller 4
Patch Selects
Global LFO
OFF
FULL
LFO
noiS
LPF
En1
En2
En3
tch
tPrS
notE
BrD
PrS
Ptch
CtL1
CtPr
Foot
SuSt
SOSt
SYS1
SYS2
SYS3
SYS4
PSEL
GLFO
Nothing—modulation of the setting is turned off.
The corresponding modulation Amount knob resets it to a value corresponding to
the Amount value, allowing you to sweep it in realtime by turning the Amount knob.
With a positive Amount value, it’s moved upward as the oscillator’s LFO’s wave
moves above its zero crossing and downward as it moves beneath (Page 24). With
a negative Amount, the opposite occurs.
With a positive Amount value, it’s moved upward in large random steps as the
oscillator’s noise generator goes up in level and downward as it goes down (Page
24). With a negative Amount, the opposite occurs.
With a positive Amount value, it’s moved upward in small increments as the
oscillator’s noise generator goes up smoothly in level and downward as it goes
down (Page 24). With a negative Amount, the opposite occurs.
With a positive Amount value, it’s raised, with the value changing over time
according to the shape of the selected envelope. With a negative Amount, the
envelope’s shape is inverted, lowering the setting’s value.
With a positive Amount value, it’s raised by harder keystrokes on FIZMO’s
keyboard; with a negative Amount, it’s lowered by harder keystrokes.
With a positive Amount value, it’s raised by harder keystrokes and the pressing
down of keys on the keyboard; with a negative Amount, the opposite occurs.
With a positive Amount value, received MIDI notes set it to the corresponding
absolute value. With a negative Amount, sets it to the MIDI note’s mirror image.
With a positive Amount value, notes played higher than Middle C raise it, and notes
below Middle C lower it; with a negative Amount, the opposite occurs.
With a positive Amount value, it’s raised when you press down on a key; with a
negative amount, the opposite occurs.
With a positive Amount value, it’s raised when you push the pitch bend wheel
forward from its center position, and lowered when you pull it back from this
position; with a negative Amount, the opposite occurs.
With a positive Amount value, it’s raised when you push the modulation wheel
forward; with a negative Amount, its lowered when you push the wheel forward.
With a positive Amount value, it’s raised when you push the modulation wheel
forward or press down on a key; with a negative Amount, the opposite occurs.
With a positive Amount value, it’s raised when MIDI Foot Pedal (Controller #4 ) data
is received via MIDI; with a negative Amount, it’s lowered.
With a positive Amount value, pressing a sustain pedal (Page 6) sets it to its highest
value; with a negative Amount, a pedal-press sets it to its lowest value.
With a positive Amount value, pressing a sostenuto pedal (Page 6) sets it to its
highest value; with a negative Amount, a pedal-press sets it to its lowest.
With a positive Amount value, the selected system controller (Page 34) raises it;
with a negative Amount, the system controller lowers it.
Note: When modulating a setting on FIZMO itself, System Controller 3 is the “F”
FIZMO knob and System Controller 4 is the “O” FIZMO knob; when transmitting or
receiving MIDI data, they are the designated MIDI controllers (see Page 34).
With a positive Amount value, received MIDI Patch Select messages from a left
Patch Select button raises it by 1/4 its full value, a right Patch Select button by 1/2
its full value, and both buttons to its full value. With a negative Amount, its value is
lowered by the above amounts.
With a positive Amount value, it’s moved upward as the system-wide Global LFO’s
wave moves above its zero crossing and downward as it moves beneath. With a
negative Amount, the opposite occurs. Global LFO is optimized for producing
vibrato when the modulation wheel is pushed forward.
Note: In cases where a corresponding MIDI message exists for a modulator, modulation can be applied by
received MIDI data.
Note: When you change modulators, effect of the change will not be heard until the next played note.
22 ENSONIQ FIZMO User’s Guide
Page 29

6—Programming Sounds
Envelope
An envelope is a special type of modulator that brings
together level and time settings to describe a shape that
can be used for a variety of programming purposes. The
power of envelopes lies in their dynamism—an
envelope’s shape affects a setting over a period of time
Envelope
Pitch
Filter
Amp
Mode
Attack Decay Sustain Release
Velocity
starting from the moment a note begins playing. As with any modulator, the envelope affects the setting’s initial
value. For easy editing, FIZMO’s front panel presents its envelopes using a traditional ADSR structure—“ADSR”
stands for “Attack, Decay, Sustain, Release,” the four settings with which you construct the envelope’s shape:
• Attack—as a note starts playing, Attack sets the amount of time it takes for the enveloped setting to move
from its initial value to its highest value.
• Decay—sets how long the setting will remain at its highest value before moving to its Sustain value.
• Sustain—the value at which the setting will remain after its Attack and Decay stages, for long as the note
continues to be played.
• Release—sets how long it will take the setting to return to its lowest value when you stop playing the note.
Decay time
Attack time
Sustain level
Release time
Note: Under its hood, FIZMO’s envelopes are actually complex 5-stage envelopes with five time and four level
settings and are programmed using computer editing software. When edited from FIZMO’s front panel,
envelopes are forced into an ADSR-compliant shape, and their characteristics may therefore dramatically change.
There are three envelopes available to each oscillator in FIZMO, and each typically handles one important task:
• Envelope 1 is usually assigned the oscillator’s Pitch Tune setting, allowing you to raise and shape its pitch
(see Page 27). To do this, select Envelope 1 as the modulator in the Pitch section of FIZMO’s front panel.
• Envelope 2 is connected to the oscillator’s Filter Cutoff setting, allowing you to raise and shape its frequency
content (see Page 28). You can set the amount of enveloping to be applied to the filter with the Envelope
button in the Filter section of FIZMO’s front panel.
• Envelope 3 allows you to control the shaping of the oscillator’s volume, or “amplitude”—it’s connected to
the oscillator’s Amplitude Level setting Page 29).
In addition, each envelope can modulate any setting to which modulation can be applied—see Page 21.
Tip: To negatively apply an envelope—so that it lowers a setting’s initial value—to an oscillator’s Pitch Tune or
Filter Cutoff settings, apply the envelope as a modulator with a negative amount.
Programming FIZMO Envelopes
Use the controls in FIZMO’s front-panel Envelope section to program any of its three envelopes. Press
one of the three buttons beneath the “Envelope” label to select the envelope you wish to program. To
program:
Envelope
Pitch
Filter
Amp
• Envelope 1, press the Pitch button. • Envelope 2, press the Filter button.
• Envelope 3, press the Amp (for “Amplitude”) button.
Note: Changes made to an envelope are not heard in notes that have already begun playing.
To Set an Envelope’s Shape
Once you’ve selected the envelope you want to program, you turn the
Attack, Decay, Sustain and Release knobs to set their values to the
desired setting for the selected envelope.
Attack Decay Sustain Release
ENSONIQ FIZMO User’s Guide 23
Page 30

6—Programming Sounds
Envelope Modes
Each envelope can operate in any of the three modes that determine how and when it will travel through its
Attack, Decay and Release stages:
Mode: Displayed as: When this mode is selected, the envelope:
Normal
Finish
Repeat
To set the currently selected envelope’s mode, tap the Envelope Mode button until the desired mode is
displayed.
Envelopes and Velocity
nor
fin
rPt
behaves normally. The envelope begins when you play a note, and when
you stop playing the note, the setting it’s shaping moves from its current
value back to its initial value at the speed set with the Release setting.
moves through all of its stages. The envelope begins when you play a note,
and ignores when you stop playing the note, running through all of its
stages as programmed. Finish mode can be especially useful for
programming a percussive hit to play all the way through when you play and
quickly release a note on the keyboard.
moves through all of its stages, over and over. The envelope begins when
you press a key on the keyboard, and as you continue to hold down the
key, the envelope runs through all of its stages, again and again until you let
go of the key. Repeat mode is useful in the creation of trilling notes.
Mode
You can make an envelope more “playable” by programming it to respond to velocity. When it does so,
the envelope only pushes the setting it’s shaping to the maximum programmed value with the hardest of
keystrikes on the keyboard. Softer keystrikes will apply the envelope’s shape to the setting to lesser
degrees. To activate the currently selected envelope’s response to velocity, tap the Envelope Velocity
button until its LED lights.
LFO and Noise
FIZMO provides each oscillator its own LFO and noise generator. These modulators supply two constantly
changing forms of modulation:
• The LFO—for “Low Frequency Oscillator”—is an oscillator that produces a low-frequency wave that’s not
heard directly but which can be applied as a regular, repetitive modulator to an oscillator’s settings. Waves,
by nature, cycle between high and low amplitudes as they play. As the LFO’s wave goes up in amplitude, it
pushes the value of the setting being modulated higher. As its amplitude decreases, it pushes the setting
downward. The LFO is useful for creating vibrato and other repetitive effects.
• Noise is a random-value generator that moves the setting being modulated up or down by unpredictable
amounts. Noise can be applied in “stepped” or “smooth” form: stepped noise changes the setting’s value in
radical, extreme jumps, while smooth noise changes the settings by smaller, subtler amounts. When
selecting a modulator, stepped noise is displayed as “noiS,” and smooth noise is displayed as “LPF” (for
“low-pass-filtered noise”).
Note: A separate system-wide LFO, called the Global LFO, is also available as a modulator (see the chart on
Page 22. The Global LFO is optimized for the creation of vibrato.
Programming an Oscillator’s LFO and Noise
The Modulation section of FIZMO’s front panel allows you to customize an oscillator’s
LFO and noise modulators. To edit an oscillator’s:
• LFO, tap the Modulation Select button until the LFO LED lights.
• noise, tap the Modulation Select button until the Noise LED lights.
Modulation
Noise
LFO
Select Shape
Velocity
Speed
24 ENSONIQ FIZMO User’s Guide
Page 31

Setting the LFO Wave’s Shape
6—Programming Sounds
The type of modulation produced by an LFO depends on the shape of its wave, since the shape sets the
slope at which the modulated setting rises and falls. Tap the Modulation Select button until the LFO LED
is lit and then tap the Modulation Shape button to program the LFO to produce any of the following shapes:
Wave shape: Displayed as: Character:
Triangle
tri
a triangle-shaped wave; commonly used to modulate pitch for the
production of vibrato
Sine + Triangle
Sine
Rising triangle
Stri
Sin
rtri
a somewhat rounded triangle wave
a rounded, pure fundamental wave
a positive-going-only triangle wave that rises and falls back to the setting’s
initial value; useful for simulating vibrato on stringed instruments such as a
guitar where a player can only bend notes upward when creating vibrato
Rising sine
rSin
a positive-going-only sine wave that rises and falls back to the setting’s
initial value; useful for simulating vibrato on stringed instruments such as a
guitar where a player can only bend notes upward when creating vibrato
Sawtooth
Square
Positive ramp
Sau
SQr
dEcr
a jagged wave commonly used for special effects
a positive-going-only square wave useful for creating trilling effects
a positive-going-only decrementing ramp that starts at its peak level and
falls back to the setting’s initial value
Tip: Once you’ve tapped the Modulation Shape button once, you can use the -/No or +/Yes button to select an
LFO shape.
Note: The shape of the noise modulator is by definition irregular and cannot be set using the Shape button.
Shape
Setting the Speed of an Oscillator’s LFO or Noise
An LFO can produce its cyclical modulation—and noise its random modulation—at different speeds, causing the
modulated setting’s value to change slowly or rapidly. In addition, both modulators can be synchronized with
FIZMO’s system clock (Page 13) so that their modulation speeds correspond rhythmically with the arpeggiator or
with received MIDI clocks. FIZMO allows you to set the speed of an oscillator’s LFO or noise by:
1. tapping the Modulation Select button until the desired LED—LFO or Noise—is lit.
2. turning the Modulation Speed knob to select the desired value.
Speed
You can set the speed of an LFO or noise to:
Value: Displayed as: The LFO or noise will modulate settings at:
Thirty-second note
Sixteenth-note triplet
Sixteenth note
Eighth-note triplet
Eighth note
Quarter-note triplet
Quarter note
Half-note triplet
Half note
Whole-note triplet
Whole note
32nd
16t3
16th
8th3
8th
Qtr3
Qtr
HLF3
HALF
HOL3
HOLE
a thirty-second note rate based on the system tempo
a sixteenth-note triplet rate based on the system tempo
a sixteenth note rate based on the system tempo
an eighth-note triplet rate based on the system tempo
an eighth note rate based on the system tempo
a quarter-note triplet rate based on the system tempo
a quarter note rate based on the system tempo
a half-note triplet rate based on the system tempo
a half note rate based on the system tempo
a whole-note triplet rate based on the system tempo
a whole note rate based on the system tempo
0-99 0-99 the selected absolute speed value, with higher numbers representing
greater speeds
ENSONIQ FIZMO User’s Guide 25
Page 32

6—Programming Sounds
Sound
Selecting a Sound for Programming
Before you can program a sound’s oscillators, you must select the desired sound. To do this:
1. Press the desired sound’s Sound button—its LED will light solidly.
OSC
Turning Oscillators On and Off
In order for an oscillator to be heard, it must be turned on (its sound must be turned on, too; see
Page 16). The OSC 1 and OSC 2 buttons correspond to the selected sound’s first and second
oscillators, respectively. The LEDs in the OSC 1 and OSC 2 buttons tell you if either oscillator is
turned on—if an oscillator is on, its LED is lit or flashing. To turn a sound’s oscillators on off:
1. Press the desired oscillators’ OSC button—its LED will light, and the oscillator will be heard when you play
the preset.
2. To turn on the sound’s other oscillator, double-click its OSC button—its LED will light, and the previously
activated oscillator’s LED will begin to flash. Both oscillators will now be heard when you play the preset.
3. To turn off an oscillator, the LED in its button must be solidly lit. If the LED corresponding to the oscillator
you want to silence is flashing, press its OSC button. To turn off the oscillator, press its OSC button again.
Selecting an Oscillator for Programming
FIZMO’s oscillator-programming buttons and knobs affect the oscillator whose OSC button LED is solidly lit. If
the OSC-button LED corresponding to the oscillator you want to program is flashing or unlit, press the button to
select the oscillator for editing.
1
2
3
4
OSC
1
2
Tip: You can select both oscillators at once in order to simultaneously edit their settings. To do this, press both
OSC buttons at the same time—this display will show both. When you adjust the value of a setting, both
oscillators will be set to the selected value.
Wave
Wave
What is a Wave?
Each oscillator plays one of the sound recordings—or “waves”—stored in FIZMO's
memory. A wave is an oscillator’s raw sonic material. FIZMO contains three types of
waves:
• Sawtooth and square waves provide the building blocks for constructing vintage synth textures. Each is a
single recording of a classic synth waveform that plays continuously, looping from start to end over and over
again as you hold down a key.
• The FIZDRUMS wave offers a collection of drum sounds spread out over the entire range of the keyboard.
Each time you strike a key, the corresponding drum sound plays once and then stops.
• ENSONIQ’s exclusive Transwaves provide the foundation of FIZMO’s unique sound. These special waves
consist of multiple related or unrelated recordings strung together into a single entity. FIZMO allows you to
program the portions of a Transwave to be played when you strike, and as you hold, a key.
What is a Transwave?
Transwaves, first introduced in ENSONIQ’s VFX synthesizer, are special waves comprised of multiple sound
recordings arranged one after another in “frames.” Transwaves can provide an exciting degree of animation, or
liveness, to sounds. The recordings in a Transwave may be related to one another—with each frame capturing a
stage in the evolution of a single sound—or they may be unrelated, resulting in a random-sounding wave that can
be useful in providing a touch of the unexpected to a sound. You can use modulation to control which frames will
be heard when you play a note, resulting in all manner of dynamic timbral changes.
Select
Modulation
Amount
26 ENSONIQ FIZMO User’s Guide
Page 33

Selecting an Oscillator’s Wave
6—Programming Sounds
Wave
To select an oscillator’s wave, turn the Wave Select knob to select the desired wave by its number:
Synth and Drum Waves
1
SAWTOOTH
2
SQUARE WAVE
3
FIZDRUMS
Transwaves
4
LONG GONG 2
5
CHIME-X
6
MIRROR-X
7
SPARKLERS
8
TUBULAR-X
9
BELL XWAVE 3
10
BELL XWAVE 4
11
MULTI BELL
12
REZ LOOPS-2
13
FAT SQUAREZ
14
SAW REZ SWEEP
15
TRANS BOY
16
QUITE ODD
17
STEPS REZ
18
REZ SWEEP
19
TINE XWAVE
20
REZ POP ATAKS
21
VOWELS
22
SYLLABLES
23
VODER-X
24
TRANSWAVE AA
25
TRANSWAVE AH
26
TRANSWAVE EE
27
TRANSWAVE OO
28
HARMONIX
29
BASS REZ 2
30
CYBORG
31
TRANS E.PIANO
32
FRANKENWAVE
33
TRANZGRUV 04
34
LIGHT YEARS
35
TRANZGRUV 05
36
RAT BREATH X
37
PULSEWAVEMOD
38
SAMPLE & HOLD
39
GREEN TRANCE
40
YELLOW TRANCE
41
COLOR WHEEL
42
1K TEST SINE
43
TRAN-REZ BASS
44
ANA BS XWAVE
45
TRANZGRUV 09
46
TRANZGRUV 10
47
STEPS
48
CLAVINEX
49
TRANZGRUV 02
50
U B RANDOM
51
STEP UP
52
REZ SQUARE
53
GET EVEN
54
POLYMOD SWEEP
55
ANALOG PAD X
56
ORGAN XWAVE
57
TRI SWEEP
58
BRAINIAC
Select
Tip: Once you’ve turned the Wave Select knob, you can also use the -/No or +/Yes button to select waves.
Modulating a Wave
You can modulate the portion of the wave to be heard when you play a note. With no modulation, a wave plays
from the beginning. With positive modulation, the wave plays from a location somewhere after its beginning.
Tip: Negative wave modulation causes the wave to play closer to its beginning; this can be useful when a wave
has been programmed—using computer editing software—to start playing somewhere in the middle.
To modulate an oscillator’s wave:
1. Tap the Wave Modulation button to select the desired modulator (see Page 22).
2. Turn the Wave Amount knob to set the desired modulation amount.
Tip: When using a Transwave, selecting the FULL modulator allows you to select the frames that will be heard
when you play a note. Turn the modulation Amount knob to select the desired frame; you can “sweep” the
Transwave’s frames by turning the knob as a note plays.
Pitch
Setting an Oscillator’s Tuning
Each oscillator will, by default, play the pitch corresponding to the key you play on the
keyboard. To change this, turn the Pitch Tune knob to select the number of semitones
by which you want to shift the oscillator’s pitch upward or downward, shown on the
display as numbers and negative numbers, respectively.
Pitch
Tune
Modulation
Amount
Fine
Amount
Modulation
ENSONIQ FIZMO User’s Guide 27
Page 34

6—Programming Sounds
Tip: To change the tuning of an oscillator in fine increments, press and hold down the Pitch Modulation button,
and while continuing to hold the button, turn the Tuning knob—the display will show the number of cents by which
you’re re-tuning the oscillator as a number, or negative number, followed by a “c.”
Tip: Once you’ve turned the Pitch Tune knob, you can also use the -/No or +/Yes button to set tuning.
Note: You can alter FIZMO’s overall tuning using its tunE setting. See Page 34. This system-wide tunE setting
applies to all of the oscillators in all of FIZMO’s sounds and presets.
Modulating an Oscillator’s Tuning
To modulate an oscillator’s tuning:
1. Tap the Wave Modulation button to select the desired modulator (see Page 22).
2. Turn the Pitch Amount knob to set the desired modulation amount.
Modulation
Tip: When you want to use an envelope for the modulation of an oscillator’s pitch, we recommend using
Envelope 1—though not mandatory, this envelope is typically used for this purpose. It’s pre-labeled “Pitch” in the
Envelope area of FIZMO’s front panel for your convenience.
Pitch and the Oscillator LFO
Each oscillator’s LFO (Page 24) is always routed to its pitch. To adjust the amount of LFO
applied to the pitch, or to turn it off altogether when you want to use the LFO for purposes other
than pitch modulation, hold down the Pitch Modulation button and turn its Amount knob.
Modulation
Amount
Amount
Glide
The Glide controls allow you to program the number of notes that the oscillator can play at once
and set the manner in which the oscillator’s notes move from one to the next:
• When the Glide mono mode is turned on, the oscillator always plays a single note at a time.
When mono mode is off, FIZMO’s standard 48-oscillator polyphony allows you to play
single-note lines or chords.
• You can program the oscillator to glide from the pitch of one note to the pitch of the next,
and set the speed of this transition using the Glide Time knob.
Tip: When you hold down more than one note in mono mode, FIZMO plays the last-played note. If you let go of
the note, FIZMO will play the lowest note currently being held.
Note: In mono mode, while more than one note is held down, the oscillator’s envelopes do not restart with each
new keystrike in order to allow you to use the Glide Time knob to program a seamless glide from note to note.
To activate mono mode, tap the Glide Mono button to light its LED.
Mono
To program the oscillator to glide from one note to the next, turn the Glide Time knob to set the speed
of the note-to-note transition—from 0 to 99—or select Off for no gliding between notes. Once you’ve
turned the knob, you can also use the -/No or +/Yes button to set the glide time.
Filter
Each oscillator has its own low-pass resonant four-pole filter with
which you can set the high-frequency content of the oscillator’s
wave. A low-pass filter allows all frequencies of a wave that fall
beneath a specified frequency—called the “cutoff frequency”—to
be heard. An oscillator’s cutoff setting is given shape by Envelope
2 and may also be modulated by any of FIZMO’s modulators. You
can also apply “resonance,” or “Q,” a popular whistle-like vintage
synth effect.
Filter
Envelope
Cutoff Resonance
Modulation
Glide
Time
Mono
Time
Track
Amount
Keyboard
28 ENSONIQ FIZMO User’s Guide
Page 35

6—Programming Sounds
To Set a Filter’s Cutoff Frequency
To set an oscillator filter’s cutoff frequency, turn the Filter Cutoff knob. The range of the knob is from
127—where all of the wave’s frequencies are allowed to pass, since they all fall beneath the cutoff
frequency—to 0, where the no frequencies are lower than the cutoff setting, and the wave is therefore
silenced. For a bright sound, set the cutoff to a higher value, and vice versa.
Filter
Cutoff
To Apply Resonance to an Oscillator’s Filter
Resonance occurs when you increase the volume of a filter’s cutoff frequency. To do this, turn the
Filter Resonance knob to select a value from 0 to 49, representing the amount by which you’re
increasing the cutoff frequency’s volume. (Once you’ve turned the Filter Resonance knob, you can also
use the -/No or +/Yes button to set the amount of resonance.)
Resonance
Note: When you change a filter’s resonance setting, the change is not heard until the next played note.
Programming Filter Enveloping
In each oscillator, Envelope 2 is pre-assigned the task of changing the cutoff setting by a prescribed amount over
a specified period of time. This allows the brightness of the oscillator’s note to change as it plays, allowing for the
creation of interesting effects and realistic simulations of real-world sounds.
To Set the Amount of Enveloping
1. Press the Filter Envelope button so that its LED lights.
Envelope
2. Turn the Filter Amount knob—or use the -/No or +/Yes button—to set the degree of enveloping.
The display shows a possible range of from 0 to 127.
Programming the Filter Cutoff to Track FIZMO’s Keyboard
You can program the cutoff setting so that it tracks FIZMO’s keyboard—as you play higherpitched notes, the sound gets brighter, as in real-world instruments.
1. Press and hold down the Filter Keyboard button.
2. While continuing to press the Keyboard button, turn the Filter Amount knob to set the
degree of keyboard tracking, from -16 to 16. Positive values cause the cutoff value to rise
when higher notes are played, and lower when lower notes are played. Negative values invert the keyboard
tracking, so that higher notes reduce the cutoff’s value, and lower notes raise it.
3. To turn off tracking, press the Filter Keyboard button again.
Tip: Once you’ve turned the Filter Amount knob, you can also use the -/No or +/Yes button to set tracking.
Modulating the Filter Cutoff
To modulate a filter’s cutoff setting, tap the Filter Modulation button to select the desired
modulator (see Page 22), and turn the Filter Amount knob to set the modulation amount.
Amplitude
The Amplitude section of FIZMO’s front panel contains controls for setting the oscillator’s
volume and stereo panning.
Amount
Track
Amount
Keyboard
Amount
Modulation
Amplitude
Setting an Oscillator’s Volume
Level Pan
To set the oscillator’s volume, turn the Amplitude Level knob. You can set an oscillator’s volume anywhere from
- 30 to 14. Negative values decrease the oscillator’s volume, while non-signed values increase it; a value of 0
leaves the oscillator’s volume unchanged.
ENSONIQ FIZMO User’s Guide 29
Page 36

6—Programming Sounds
Tip: Once you’ve turned the Amplitude Level knob, you can also use the -/No or +/Yes button to set the
oscillator’s volume.
Tip: Envelope 3 is pre-assigned to the oscillator’s level setting, allowing you to program volume changes that
occur over a period of time, and to set the oscillator’s decay time.
Setting an Oscillator’s Stereo Position
To set the position of an oscillator in the stereo field, turn the Amplitude Pan knob. This knob has a
range of - 63, for panning the oscillator far left, to 63, for panning it far right. A value of 0 centers the
oscillator.
Tip: Once you’ve turned the Amplitude Pan knob, you can also use the -/No or +/Yes button to set the
oscillator’s stereo position.
Effect Bus
Selecting an Oscillator’s Effect Bus
To apply a preset’s insert effect or global reverb to an oscillator, you must first assign the oscillator to the
appropriate effect bus—an effect bus is a conduit through which the oscillator’s sound travels to reach the
preset’s effects. Since global reverb is such a frequently used effect, three effect busses are provided to allow
you to choose the amount of reverb to be applied to the oscillator. There are four possible effect busses overall
from which to choose:
• the insert bus (displayed as “inS”)—Select the insert bus when you intend to apply the preset’s insert effect
to the oscillator.
• global reverb bus 1 (“r1”)—Select the r1 bus to apply a just a touch of global reverb to the oscillator.
• global reverb bus 2 (“r2”)— Select the r2 bus to apply an average amount of global reverb to the oscillator.
• global reverb bus 3 (“r3”)—Select the r3 bus to apply a large amount of global reverb to the oscillator.
• the dry bus (“dry”)—The dry bus actually doesn’t send the oscillator to an effect at all: it sends it to
FIZMO’s outputs un-effected, or “dry.”
Pan
Tip: To learn more about FIZMO’s effects, see Page 18.
Note: When you change an oscillator’s effect-bus assignment, the change is not heard until the next played note.
Note: FIZMO’s Effects section provides a Mix knob that you can use to set an insert effect’s wet/dry, or
processed sound/un-processed sound, balance. It also allows you to set an overall global reverb level while
retaining the differences in the relative amounts of reverb being applied by the r1, r2 or r3 effect busses.
To Select an Oscillator’s Effect Bus
1. Tap the Effect Bus Select button until the desired bus is displayed. Once you’ve tapped the Effect
Bus Select button, you can also use the -/No or +/Yes button to assign the oscillator to the desired
bus.
Effect Bus
Select
30 ENSONIQ FIZMO User’s Guide
Page 37

7—MIDI
FIZMO is a six-channel MIDI device that allows you to direct MIDI data to its presets, sounds and arpeggiator,
and lets you transmit MIDI data from its keyboard and arpeggiator to any external MIDI device. This lets you to
record from FIZMO’s keyboard—or the arpeggiator—into a MIDI sequencer, or to play an external MIDI device
using FIZMO’s keyboard. The F-I-Z-M-O knobs, pitch bend and modulation also transmit MIDI data. In addition, its
arpeggiator—as well as LFOs, noise and effects—can be synchronized to any external MIDI timing source that
can transmit MIDI clocks. (For a beginner’s look at MIDI, see Page 42.)
Note: Successful MIDI operations depend on the proper connection of FIZMO to your other MIDI devices. See
Page 7 for details.
Note: Technical documentation of FIZMO’s MIDI capabilities can be found at the end of this chapter.
Receiving MIDI
FIZMO can direct incoming MIDI data to up to six internal areas, each of which uses its own MIDI channel—this
allows you to play up to six separate melodies or chords in FIZMO via MIDI, and/or to direct MIDI notes to its
arpeggiator. Any six consecutive MIDI channels can be used. To select the channels you want to use, you must
select the lowest-numbered of the desired channels, called the “base channel.” To do this, tap the Edit MIDI
button—or press it and use the -/No or +/Yes button—until bChn is displayed. In a moment or so, the number of
the currently selected base channel will be displayed. Use the -/No or +/Yes button to select the first of the six
MIDI channels you want to use.
7—MIDI
Note: If the base channel is Channel12 or higher, there will not be six higher-numbered channels available within
MIDI’s 16-channel limit.
FIZMO directs each channel’s received MIDI data to a pre-determined destination, as shown below.
The base channel
which plays:
Base + 1 Base + 2
or supplies
notes to:
which plays:
Note: MIDI data received on the base channel itself will
play the current preset or supply notes to the arpeggiator
according to the current state of the Arpeggiator
Keyboard button (Page 12).
Base + 3 Base + 4 Base + 5
in the current preset
Playing FIZMO and Feeding the Arpeggiator Via MIDI
• To play the currently selected preset via MIDI, or to send FIZMO sounds to be arpeggiated, send data on the
base channel, and make sure the Arpeggiator Keyboard button is in the desired position.
• You can also play the currently selected preset using the arpeggiator’s MIDI channel.
• To play any of the currently selected preset’s individual sounds, send data on the sound’s MIDI channel.
FIZMO’s sounds can be programmed to respond to any MIDI control message. They’re programmed at the
factory to respond to standard MIDI controllers such as velocity, pitch bend and modulation wheel messages.
The SYS1, SYS2, SYS3 and SYS4 parameters, described on Page 34, allow you to direct non-standard MIDI
control messages to any modulatable oscillator parameters (see Page 21).
Note: The arpeggiator automatically synchronizes itself to MIDI clock data received by FIZMO.
ENSONIQ FIZMO User’s Guide 31
Page 38

7—MIDI
Selecting Presets Via MIDI
You can select any of FIZMO’s 64 presets via MIDI by sending it the Program Change message corresponding to
the preset’s number. The presets are mapped to Program Changes 0-63; therefore, to select a preset via MIDI:
• If your external controller sends Program Change values of 0-63, select the desired preset by sending a
Program Change value that’s one number lower than the number of the desired preset.
• If your external MIDI device transmits Program Change values from 1-64 instead of 0-63, the value you send
FIZMO will be the number of the selected preset.
Selecting Preset Sounds Via MIDI
You can change a sound in the currently selected preset by sending the appropriate data on the sound’s MIDI
channel. To select a sound in the first preset bank, send FIZMO a Bank Select LSB value of 0 followed by the
sound’s Program Change number—the 128 sounds can be selected with Program Change values of 0-127 or 1128, depending on the Program Change value range of your external MIDI device. To select a sound in the
second preset bank, send a Bank Select LSB value of 1 followed by the sound’s Program Change number.
Tip: For a table showing the Program Change value corresponding to each of FIZMO's sounds, see Page 39.
Transmitting MIDI
Notes and Controller Data
The setting of the Keyboard MIDI parameter (brd) determines the preset-playing and MIDItransmission capabilities of the keyboard, pitch bend and modulation wheels. To set the parameter, tap
the MIDI Edit button—or press it and use the -/No or +/Yes button—until brd is displayed. When the
current brd value appears, use the -/No or +/Yes button to select the desired value. If brd is set to:
• LOCL, the keyboard and pitch bend and modulation wheels play onboard sounds and do not transmit MIDI.
• both, and the Arpeggiator Keyboard LED is unlit, FIZMO’s keyboard and pitch bend and modulation wheels
play onboard sounds and transmit MIDI note and controller data on the selected base channel (Page 31).
• Out, and the Arpeggiator Keyboard LED is unlit, FIZMO’s keyboard and pitch bend and modulation wheels
transmit MIDI note and controller data on the currently selected base channel. Onboard sounds do not play.
Note: When brd is set to Out, FIZMO operates in traditional Local-Off mode, wherein its sounds play only via
MIDI and not from its own keyboard.
The setting of the Arpeggiator MIDI Out parameter (Aout) determines the preset-playing and MIDI-transmission
capabilities of the arpeggiator. To set the Aout parameter, tap the MIDI Edit button—or press it and use the -/No
or +/Yes button—until Aout is displayed. In a moment, the parameter’s current value will appear. Use the -/No or
+/Yes button to select the desired value. When Aout is set to:
• LOCL, the arpeggiator plays the currently selected preset. It does not transmit MIDI note or controller data.
• both, the arpeggiator plays the currently selected preset and transmits the arpeggiator’s notes, as well as
controller data contained in the currently selected arpeggiator preset, on the base channel plus one.
• Out, FIZMO transmits the arpeggiator’s notes, as well as controller data contained in the currently selected
arpeggiator preset, on the base channel plus one. It does not play the currently selected preset.
MIDI
Edit
Bank Selects and Program Changes
When you select a new preset, a Program Change message corresponding to the preset’s number will be
transmitted on the base channel. The 64 presets are assigned to Program Change value 0-63, respectively.
When you select a new sound, FIZMO transmits Bank Select and Program Change values on its MIDI channel:
• Sound button 1 transmits Bank Select and Program Change data on the base channel plus two.
• Sound button 2 transmits Bank Select and Program Change data on the base channel plus three.
• Sound button 3 transmits Bank Select and Program Change data on the base channel plus four.
• Sound button 4 transmits Bank Select and Program Change data on the base channel plus five.
32 ENSONIQ FIZMO User’s Guide
Page 39

When selecting one of the 127 sounds belonging to presets in Bank 1, a Bank Select LSB value of 0 is
transmitted along with a Program Change value corresponding to the selected sound, from 0-127.
When selecting one of the 127 sounds belonging to presets in Bank 2, a Bank Select LSB value of 1 is
transmitted along with a Program Change value corresponding to the selected sound, from 0-127.
Dumping Data To and From FIZMO
FIZMO uses MIDI SysEx (for “System Exclusive”) data as a means for transmitting presets and sounds via MIDI
for storage in an external MIDI device—such as a disk drive or sequencer—and for returning them back to
FIZMO. The movement of SysEx data from device to device is called “dumping.”
Note: Presets and sounds are not erased from FIZMO’s memory when you dump them to an external device.
Setting FIZMO’s SysEx ID
7—MIDI
SysEx data is designed to be understood only by the device for which it’s intended. This allows you to
send FIZMO SysEx data without fear that another MIDI instrument will attempt to load it. It also
contains an ID number that allows you direct the data to the desired FIZMO in a system containing
more than one. To set FIZMO’s SysEx ID, tap the MIDI Edit button until id is displayed; in a moment,
FIZMO’s current id number will appear. Use the -/No or +/Yes button to select the desired number.
Warning: When returning SysEx data back to FIZMO, make sure that FIZMO’s id parameter is set to the same
value that was in place when you originally dumped the data to your external MIDI device.
MIDI
Edit
Sending SysEx Data
To dump a preset or preset bank to an external MIDI device:
1. Prepare the external device to receive a SysEx dump—consult its documentation to learn how.
2. Press the MIDI Dump button—its LED will begin to flash.
3. Use the -/No or +/Yes button to select the preset you’d like to dump, or select bAn1 to dump all of the
presets in Bank 1, or bAn2 to dump all of the presets in Bank 2.
4. Press the Dump button again to execute the dump.
To dump a preset sound:
1. Select the preset containing the sound you want to dump.
2. Press the Dump button—its LED will begin to flash.
3. Select the sound by pressing its Sound button.
4. Press the Dump button.
Note: If your external device does not successfully receive the SysEx dump, you can slow down the speed at
which FIZMO sends the data by resetting the dLAY parameter. See Page 34.
Dump
Dump
Receiving SysEx Data
To receive a SysEx data dump containing a preset or preset bank, initiate the dump from the external
device—consult its documentation to learn how. When the preset is received by FIZMO, it’s placed in the
Compare buffer from where it can be auditioned. Save the preset to store it in FIZMO’s memory (see Page 20).
To receive an individual sound in a SysEx dump:
1. Select the preset in which you want to save the sound (Page 9).
2. Press the Sound button corresponding to the sound slot in which you want to place the sound (Page 15).
3. Initiate the dump from the external device—consult its documentation to learn how. The sound will be
dumped into the designated slot in the currently selected preset, and the newly-edited preset will be placed
in the Compare buffer (Page 15) so you can hear it.
4. Save the preset (see Page 20).
ENSONIQ FIZMO User’s Guide 33
Page 40

7—MIDI
Assorted MIDI Parameters
FIZMO's global parameters let you configure FIZMO for use in your studio. To set these parameters,
tap the MIDI Edit button, or press it and use the -/No or +/Yes button, until the desired parameter is
displayed—when its current value appears, use the -/No or +/Yes button to select the desired value.
Parameter: Displayed as: What it does:
Base channel
SysEx ID
Touch
Foot Switch 1
Foot Switch 2
Pitch Bend
Held Pitch Bend
Tune
Keyboard MIDI
System Controller 1
System Controller 2
System Controller 3
System Controller 4
NRPN
Arpeggiator MIDI Out
Arpeggiator Bypass
Arpeggiator Tempo
Source
Dump Delay
Line In
bChn
iD
tch
Ft 1
Ft 2
bEnd
PhLd
tunE
brd
SYS1
SYS2
SYS3
SYS4
nrPn
Aout
bPAS
AtPO
dLAY
LnIn
selects FIZMO’s reception/transmission MIDI channels; see Page 31
assigns an ID number to FIZMO for use with SysEx data; see Page 33
allows you to set the response of FIZMO’s keyboard; see Page 10
allows you to designate the function of the left- and right-hand pedal,
respectively, in an attached SW-10 foot switch; see Page 6
sets the maximum amount of upward and downward pitch bend
applied by FIZMO’s pitch bend wheel; see Page 10
enables or disables held pitch-bend feature; see Page 10
raises or lowers FIZMO’s tuning by cents; from -50c to (plus) 50c
sets whether FIZMO’s keyboard will play onboard sounds, transmit
MIDI or both; see Page 32
designates a MIDI controller for use as SYS1 or SYS2 modulator in
FIZMO’s sounds; see “The Four System Controllers” below
designates a MIDI controller to be transmitted when the F knob is
turned; see “The Four System Controllers” below
designates a MIDI controller to be transmitted when the Z knob is
turned; see “The Four System Controllers” below
enables or disables transmission of NRPN data; see “Recording and
Playing Back Edits Using NRPNs” on Page 35
sets whether the arpeggiator will transmit MIDI data; see Page 32
sets whether FIZMO’s keyboard will be directed to the arpeggiator or
bypass it; see Page 12
sets the behavior of the arpeggiator tempo when a new preset is
selected; see Page 12
slows the transmission of SysEx data when transmitting to a slow
external MIDI device; 0 is fastest setting, 3 is slowest
determines a connected microphone’s audio routing; see Page 5
MIDI
Edit
Saving MIDI Edit Button Parameter Values to FLASH
To make the above settings permanent, they must be burned to FLASH memory. To do this, press the
Sound Save button when any of the above parameters are displayed. FIZMO will show brn?, asking you
to verify that you want to write your current global settings to FLASH. Press the +/Yes button to execute
the procedure, or the -/No button to cancel it. The display will show burn as FIZMO saves the settings.
Tip: To learn how to reset the global parameters to their factory values, see Page 41.
Compare
Save
The Four System Controllers
FIZMO provides four special system controllers that can be used for the modulation of its sounds—as
modulators called “SYS1,” SYS2,” “SYS3” and “SYS4” as described on Page 21—and for the transmission of
MIDI controller data. Any of the four can be assigned to any type of MIDI controller data, as listed on Page 35:
• When you designate a MIDI controller as System Controller 1 or System Controller 2, if FIZMO receives
data of that type, it’s directed to any oscillator setting to which SYS1 or SYS2 is applied as a modulator.
• When you designate a MIDI controller as System Controller 3 or System Controller 4, FIZMO transmits that
type of data when either the F or O F-I-Z-M-O knobs are turned, respectively.
34 ENSONIQ FIZMO User’s Guide
Page 41

7—MIDI
Note: You can record F and O knob movements into an external MIDI sequencer set to receive the type of
controller data assigned to SYS3 and SYS4. When playing back such data, make sure that your SYS3 and SYS4
assignments have not changed, or your movements will not be reproduced.
List of MIDI Controllers
Bank Select #000—Bank Select Balance #040—Balance LSB GenPurpse5#080—General Purpose 5
Mod Wheel #001— Mod Wheel or Lever MIDIContrl#041—UNDEFINED GenPurpse6#081—General Purpose 6
Breath #002—Breath Controller Pan #042—Pan LSB GenPurpse7#082—General Purpose 7
MIDIContrl#003—UNDEFINED Expression#043 —Expression LSB GenPurpse8#083—General Purpose 8
FootContrl#00—Foot Controller FXControl1#044—Effect Control 1 LSB Portamento#084—Portamento Control
Glide Time#00—Portamento Time FXControl2#045—Effect Control 2 LSB MIDIContrl#085—UNDEFINED
Data Entry#00—Data Entry MSB MIDIContrl#046—UNDEFINED MIDIContrl#086—UNDEFINED
Volume #007—Volume MIDIContrl#047—UNDEFINED MIDIContrl#087—UNDEFINED
Balance #008—Balance GenPurpse1#048—UNDEFINED MIDIContrl#088—UNDEFINED
MIDIContrl#009—UNDEFINED GenPurpse2#049—General Purpose 1 LSB MIDIContrl#089—UNDEFINED
Pan #010—Pan GenPurpse3#050—General Purpose 2 LSB MIDIContrl#090—UNDEFINED
Expression#011—Expression GenPurpse4#051—General Purpose 3 LSB FX Depth 1#091—Effects Depth 1
FX Control1#012—Effect Control 1 MIDIContrl#052—General Purpose 4 LSB FX Depth 2#092—Effects Depth 2
FX Control2#013—Effect Control 2 MIDIContrl#053—UNDEFINED FX Depth 3#093—Effects Depth 3
MIDIContrl#014—UNDEFINED MIDIContrl#054—UNDEFINED FX Depth 4#094—Effects Depth 4
MIDIContrl#015—UNDEFINED MIDIContrl#055—UNDEFINED FX Depth 5#095—Effects Depth 5
GenPurpse1#016—General Purpose 1 MIDIContrl#056—UNDEFINED Data Inc #096—Data Inc
GenPurpse2#017—General Purpose 2 MIDIContrl#057—UNDEFINED Data Dec #097—Data Dec
GenPurpse3#018—General Purpose 3 MIDIContrl#058—UNDEFINED NonRgPmLSB#098—Non Reg param Num LSB
GenPurpse4#019—General Purpose 4 MIDIContrl#059—UNDEFINED NonRgPmMSB#099—Non Reg param Num MSB
MIDIContrl#020—UNDEFINED MIDIContrl#060—UNDEFINED RgParamLSB#100—Reg param Num LSB
MIDIContrl#021—UNDEFINED MIDIContrl#061—UNDEFINED RgParamMSB#101—Reg param Num MSB
MIDIContrl#022—UNDEFINED MIDIContrl#062—UNDEFINED MIDIContrl#102—UNDEFINED
MIDIContrl#023—UNDEFINED MIDIContrl#063—UNDEFINED MIDIContrl#103—UNDEFINED
MIDIContrl#024—UNDEFINED Sustain #064—Sustain MIDIContrl#104—UNDEFINED
MIDIContrl#025—UNDEFINED PortOn/Off#065—Portamento On/Off MIDIContrl#105—UNDEFINED
MIDIContrl#026—UNDEFINED Sostenuto #066—Sostenuto MIDIContrl#106—UNDEFINED
MIDIContrl#027—UNDEFINED Soft Pedal#067—Soft Pedal MIDIContrl#107—UNDEFINED
MIDIContrl#028—UNDEFINED LegatoFtsw#068—Legato Ftsw MIDIContrl#108—UNDEFINED
MIDIContrl#029—UNDEFINED Hold 2 #069—Hold 2 MIDIContrl#109—UNDEFINED
MIDIContrl#030—UNDEFINED PatchSelct#070—Snd Variation (Patch Select) MIDIContrl#110—UNDEFINED
MIDIContrl#031—UNDEFINED Timbre #071—Harmonic Content (Timbre) MIDIContrl#111—UNDEFINED
BankSelect#032—Bank Select LSB Release #072—Release MIDIContrl#112—UNDEFINED
Mod Wheel #033—Mod Wheel LSB Attack #073—Attack MIDIContrl#113—UNDEFINED
Breath #034—Breath Controller LSB Brightness#074—Brightness MIDIContrl#114—UNDEFINED
MIDIContrl#035—UNDEFINED SoundCntl6#075—Sound Controller 6 MIDIContrl#115—UNDEFINED
FootContrl#036—Foot Controller LSB SoundCntl7#076—Sound Controller 7 MIDIContrl#116—UNDEFINED
Glide Time#037—Portamento Time LSB SoundCntl8#077—Sound Controller 8 MIDIContrl#117—UNDEFINED
Data Entry#038—Data Entry LSB SoundCntl9#078—Sound Controller 9 MIDIContrl#118—UNDEFINED
Volume #039—Volume LSB SoundCtl10#079—Sound Controller 10 MIDIContrl#119—UNDEFINED
Recording and Playing Back Edits Using NRPNs
When FIZMO’s NRPN (for “Non-Registered Parameter”) transmission is enabled, NRPN data is sent from
FIZMO’s MIDI Out jack when you edit its oscillators. This allows you to record your edits into an external
sequencer. You can re-transmit this data back to FIZMO—along with the Bank Select and Program Changes
required to select the desired preset—to play back your edits. NRPN reception is always enabled in FIZMO.
To enable NRPN transmission, tap the MIDI Edit button—or press it and use the -/No or +/Yes button—until
nrPn is displayed. In a moment, the current nrPn value will be shown. Use the -/No or +/Yes button to set it to
On to enable NRPN transmission, or OFF to disable it.
ENSONIQ FIZMO User’s Guide 35
Page 42

7—MIDI
FIZMO MIDI Implementation Chart
FIZMO MIDI Implementation Chart Version 1.0
Function… Transmitted Recognized Remarks
Basic
Channel
Mode Default
Note
Default
Changed
Messages
Altered
1
1-16
POLY
X
X
1-16
1-16
POLY/MULTI
X
X
True Voice 21-108 21-108
Number
Velocity Note On
Note Off
After
Touch
Key
Channel
O
O
X
O
O
O
O
O
Pitch Bend OO
Control
0-119 0-119
Change
Program
Change
True # 0-127
0-127
0-127
0-127
System Exclusive OO
System
Common
System
Real Time
Aux
Messages
Song Position
Song Select
Tune Request
Clock
Commands
Local On/Off
All Notes Off
Active Sensing
System Reset
X
X
X
O
X
X
O
X
X
X
X
X
O
X
X
O
X
X
Notes
FIZMO’s presets receive data on base
channel; arpeggiator on base+1; Sound
1 on base+2; Sound 2 on base+3;
Sound 3on base+4; Sound 4 on
base+5
Reception on base channel and base+1
is POLY; base+2-5 is MULTI
arpeggiator note reception is filtered by
LoIn and HiIn parameters
Keyboard produces channel pressure
only
Bank Select MSB is always 0
Program Changes 0-63 received on
base channel select presets; Bank
Select LSB0 + Program Change on
Sound MIDI channel selects sounds
from preset bank 1, Bank Select LSB1
+ Program Change on Sound MIDI
channel selects sounds from preset
bank 2
Mode 1: Omni On, Poly Mode 2: Omni On, Mono O: Yes
Mode 3: Omni Off, Poly Mode 4: Omni Off, Mono X: No
36 ENSONIQ FIZMO User’s Guide
Page 43

8—Supplemental Information
8—Supplemental Info
FIZMO’s Factory Presets
Preset Bank 1
01 MovieLife Pad Rich, complex evolving pad. Play one note and tweak the “O” knob for an interesting organic effect.
02 DelArpLayers
03 Bass&Lead A bass/lead split with 16th note arpeggiation on the Bass
04 DK Pad A mellow analog-style pad with vocal, string, and bell components. Sounds great with the arpeggiator.
05 Phasestep VelSwt A unique lead with a pitched, percussive attack and a rhythmic layer produced with harder velocities.
06 AnaStrng Pad Lush analog string pad perfect for that big orchestral wash. “O” knob raises one layer by an octave,
07 Eden Pad Huge evolving pad with lots going on at the touch of a single key. “O” knob raises the pitch of some
08 Gargantuan Big noisy rhythmic sound that works as a bass or lead sound.
09 Percolator Splt Synth bass on the left hand, bright comp sound with synched delays on the right hand. Arpeggiator
10 ChimeHorn+ Nice analog horn sound with soft chime component. “O” knob turns chime down. Try Sounds 3 and 4
11 Trigger Split A bubbly rhythmic sound that follows system tempo. Left hand split is mono, right hand is polyphonic.
12 Belly Bass Bass sound with rhythmic chimes riding on top. “O” knob turns off chimes, leaving only the bass.
13 MultiBass 1
14 Chainsaw Lead The name says it. A bright, cutting lead sound that will cut through anything. “O” knob adds a
15 Phiz Zplit Split with an arpeggiated bass and retro lead. The “O” knob crossfades between lead sounds.
16 Sand Storm Huge pad with lots going on. “O” knob accentuates the rhythmic component
17 RhythmPad Split Warm bass/pad split. The rhythmic component of the pad is synched to clock.
18 Sharp Pad
19 Arp Percs Four quick percussive synth sounds perfect for arpeggiating. Try different combinations split and/or
20 Twinkle Arp Great 3-way split, with arpeggiated bass on the bottom, an arpeggiated chime pad in the middle, and
21 EP Pad Warm electric piano with an analog-type pad that follows. “O” knob turns the pad component down.
22 RandomArps
23 4 Leads A collection of patches suitable for leads or basses. Try various combinations.
24 CC Rhythm Lead A searing lead sound with a rhythmic “chaser” component. “O” knob fades out the “chaser.”
25 SH's A collection of sample -and-hold sounds, ranging from pitched to way out there.
26 PhizClavZplit Wacky bass/key split. Try tweaking the “O” knob while the bass arpeggiates!
27 Saturn Dance Bass and pad split. Arpeggiator only affects lower split. “O” knob lowers the level of rhythmic
28 HornFrogg Stab Huge layer with velocity-triggered bass patch.
29 String Bass Splt Analog-style bass/string split. The “O” knob crossfades between string textures.
30 Bell Bass Splt Tight synth bass on the left hand, a bell pad on the right hand. Arpeggiator only affects lower split
31 Dance Selects Noisy rhythmic groove that just keeps going. “O” knob completely changes the sound’s character.
32 Glappin VelSwtch Kind of metallic, kind of analog comp sound with a resonant blip sweeping in the background. “O”
A variety of delicate arpeggiator sounds. Try different combinations of the four sounds and
arpeggiator patterns for an endless variety of moving textures.
Arpeggiator affects only the lower two octaves.
another by a fifth. Try selecting the individual sounds or layer combinations for different string pads.
components. Arpeggiator uses a special preset that sweeps the filter while letting you play keys.
only affects upper split.
for alternate horn sounds.
Sounds 3 and 4 can be selected or layered for alternate bass sounds.
Phat chorused bass sound. “0” knob changes the octave range of some oscillators. The arpeggiator
affects only the upper three octaves. Try different sounds layered with Sound 4 for different effects.
rhythmic “drumming” sound to the mix.
Bright velocity-sensitive pad with many uses. Try tweaking the “O” knob for a resonant low-end
effect. Also arpeggiates well.
layered. “O” knob plays with pitch and panning.
lead on top. The “O” knob mainly affects the chime pad. Try this with and without the arpeggiator.
Try layering Sounds 3 and 4 with Sound 1 for alternate pads.
A collection of arpeggiator sounds. Try different combinations for various effects. The “O” knob
performs transpositions on each sound.
components, making the sound more “normal”
knob reduces the level of the blips.
ENSONIQ FIZMO User's Guide 37
Page 44

8—Supplemental Information
Preset Bank 2
33 Ray’s Interupt Rich, evolving data pad. The “O” knob will fade in other components when turned counter-clockwise.
34 AtomicSplashDown The name says it all!
35 Big Pad A big pad with a resonant attack. Try substituting Sounds 2 and 3.
36 Bellzigger A nice mellow bell preset if played with staccato notes. Holding the keys will produce an evolving bell
37 4 Pads 3 Rich pad with sharp attack. Tweak the “O” knob for an interesting harmony.
38 Motion Pad A bright analog-sounding pad with nice movement and character. “O” knob changes the octave of
39 Rez O’Pad A vintage resonant brass pad. Try the other sounds in this preset for more analog variations.
40 AnaArpSelects A collection of analog-style arpeggiators. Tweak the “O” knob to add harmony, tweak the “F” knob
41 Arp Layer A basic set of arpeggiator sounds. The “O” knob will crossfade between sounds and add harmony.
42 ArpSplit Analog-style bass/string split. Try different arpeggiator patterns on the bass for different effects.
43 HiPass Arps Arpeggiator preset with sweeping resonant filter. Tweak the “O” knob to add harmonies.
44 Arp Pad 1 Bright evolving pad with a quick release that works great with the arpeggiator. “O” knob turns down
45 OutThereSplit It’s out there. A wild evolving patch that’s perfect for that next horror film score.
46 NorthHunting Pad Big evolving pad with complex, rich textures. The “O” knob fades out certain components.
47 HornPulsa Pad “Analog” horn sound with a subtle bell-like component.
48 Lead Me To It Vintage lead with synched delays. “F” knob controls the feedback of the delay, the “O” knob adds
49 I.O.U. etc. This preset talks to you. Sound 1 says, “I owe you.” Sounds 2-4 provide an alternate selection of
50 Trance/BellSplit Left hand plays a trance chord. Chord consists of the note played, a 4th below the note, a major 2nd
51 YesZap Stab Bright analog pad with a resonant blip at the beginning. “O” knob lowers the volume of the blip.
52 Rich Vel Splt Rich and unique sound suitable for pads, leads, or comp. This preset has several split and velocity-
53 Sand Soft Pad A nice, mellow, evolving EP pad. This preset has a sweeping resonant pattern.
54 Crystal Split Very glassy and sustained pad in the lower three octaves, an arpeggiated bell pattern in the upper
55 QMe noise A bright percussive lead harp sound with a wild filter sweep behind it. “O” knob increases the volume
56 Jim’s Interupt Warm, evolving lead. This preset is saved with the “O” knob fully tweaked to add harmonies. Turn
57 Organs
58 4 Analogs Four basic analog-style patches. Arpeggiator adds sweeping resonance.
59 Trans Puls Splt Split with bass in the left hand, a rhythmic speaking pad in the right hand. The “O” knob changes the
60 CozmicPad Feel the cosmos. The “O” knob will transport you to another level of existence.
61 Warp Bass A nasty, warped techno-bass. The “O” knob will fade in the resonant, rhythmic noise. Sounds 3 and
62 Vocoder Gruv Sounds 2, 3 and 4 are routed to the vocoder effect. Mic input is required to hear these voices. Sound
63 Drum Fun A synth drum map prefect for those dance grooves. Sounds 1-4 route the kit to different effects
64 Template Preset A handy starting point for programming your own sounds from scratch.
pad. Try tweaking both the Mod Wheel and “O” knob with keys depressed.
some layers. Try playing with different combinations of Sounds 1 through 4.
to add sync-able rhythmic delays.
Tweaking the “O” knob adds a 5th above the string pad, giving the preset an almost Asian flavor.
the wacky gliding component.
that perfect fifth harmony you’ve been looking for.
sounds with a somewhat “vocal” quality.
above the note, and a 5th above the note. Right hand plays an analog bell lead. The “O” knob
changes inversion of the chord.
triggered components.
two octaves. The “O” knob tweaks harmonies.
of the “noisy” part.
the “O” knob counter-clockwise to remove harmonies.
Leslie organ sound. “F” knob changes rotary speaker speed. “O” knob reduces “percussion
component
character of the pad, the arpeggiator will play notes and modulate the filter of the rhythmic pad. Try
adding Sound 2 to the upper split as well.
4 are variants of an electronic groove, with different components controlled by the “O” knob,
pressure, and the mod wheel.
1 plays a groove—“O” knob turns groove off. Turn “O” knob all the way up to hear only vocoder.
busses. “O” knob turns the drum sounds backwards. Try turning on the arpeggiator and see what
kind of random madness you can generate.
38 ENSONIQ FIZMO User's Guide
Page 45

8—Supplemental Information
Sound Location-to-MIDI Program Change Translator
FIZMO Preset Bank 1—Bank Select LSB 0 FIZMO Preset Bank 2—Bank Select LSB 1
FIZMO Program FIZMO Program FIZMO Program FIZMO Program
Preset Sound Change Preset Sound Change Preset Sound Change Preset Sound Change
1 1 0 17 1 64 33 1 0 49 1 64
2 1 4 18 1 68 34 1 4 50 1 68
3 1 8 19 1 72 35 1 8 51 1 72
4 1 12 20 1 76 36 1 12 52 1 76
5 1 16 21 1 80 37 1 16 53 1 80
6 1 20 22 1 84 38 1 20 54 1 84
7 1 24 23 1 88 39 1 24 55 1 88
8 1 28 24 1 92 40 1 28 56 1 92
9 1 32 25 1 96 41 1 32 57 1 96
10 1 36 26 1 100 42 1 36 58 1 100
11 1 40 27 1 104 43 1 40 59 1 104
12 1 44 28 1 108 44 1 44 60 1 108
13 1 48 29 1 112 45 1 48 61 1 112
14 1 52 30 1 116 46 1 52 62 1 116
15 1 56 31 1 120 47 1 56 63 1 120
16 1 60 32 1 124 48 1 60 64 1 124
21 265 21 265
32 366 32 366
43 467 43 467
25 269 25 269
36 370 36 370
47 471 47 471
29 273 29 273
310 374 310 3 74
411 475 411 4 75
213 277 213 2 77
314 378 314 3 78
415 479 415 4 79
217 281 217 2 81
318 382 318 3 82
419 483 419 4 83
221 285 221 2 85
322 386 322 3 86
423 487 423 4 87
225 289 225 2 89
326 390 326 3 90
427 491 427 4 91
229 293 229 2 93
330 394 330 3 94
431 495 431 4 95
233 297 233 2 97
334 398 334 3 98
435 499 435 4 99
2 37 2 101 2 37 2 101
3 38 3 102 3 38 3 102
4 39 4 103 4 39 4 103
2 41 2 105 2 41 2 105
3 42 3 106 3 42 3 106
4 43 4 107 4 43 4 107
2 45 2 109 2 45 2 109
3 46 3 110 3 46 3 110
4 47 4 111 4 47 4 111
2 49 2 113 2 49 2 113
3 50 3 114 3 50 3 114
4 51 4 115 4 51 4 115
2 53 2 117 2 53 2 117
3 54 3 118 3 54 3 118
4 55 4 119 4 55 4 119
2 57 2 121 2 57 2 121
3 58 3 122 3 58 3 122
4 59 4 123 4 59 4 123
2 61 2 125 2 61 2 125
3 62 3 126 3 62 3 126
4 63 4 127 4 63 4 127
ENSONIQ FIZMO User's Guide 39
Page 46

8—Supplemental Information
FIZMO's Arpeggiator Presets
Preset: Name:
000: default
001: Up/down 1
002: Random 1
003: Up 2
004: Down 1
005: Up/down vintage 1
006: Up/down choppy 1
007: Double up/down 1
008: Down vintage 1
009: Picked
010: Picked 2
011: Random 2
012: Random 3
013: 16 notes 1
014: 8 notes choppy 1
015: 1 multi
016: Up 1
017: Up 4x 1
018: Octave jump 1
019: 8 octaves up/down 1
020: 8 octaves up/down 2
021: Octave jump 2
022: Interleaved 1
023: Interleaved 2
024: Sustained pluck 1
025: Dance around 1
026: Wild Thing 1
027: Wild Thing 2
028: Down 2
029: Cycle 1
030: Cycle 2
031: Sweeper 1
032: Sweeper 2
033: Sweeper 3
034: Sweeper 4
035: Sweeper 5
036: Sweeper 6
037: Sweeper 7
038: 4ths up 1
039: 4ths down 1
040: 4ths up/down 1
041: 4ths up/down 2
042: 4th up sweep
043: 5ths up 1
044: 5ths down 1
045: 5ths up/down 1
046: 5th up sweep
047: Double-stops up
048: Up Down 2
049: Up/up/down/down
050: Up/up/down/down 2
051: Double-stops 2
Preset: Name:
052: Transwave mod 1
053: Double down
054: Pad 1
055: Random 8 octaves
056: Skippy 1
057: Skippy 2
058: Spread octave 1
059: Spread octave 2
060: Doubled up
061: Doubled up2
062: Up/down velocity 1
063: Doubled down 2
064: Bass Line 1
065: Bass Line 2
066: Bass Line 3
067: Octave up
068: Octave down
069: Octave Up
070: Riff
071: Riff
072: Octave down
073: Riff
074: Riff
075: Riff 11
076: Riff 12
077: Riff 13
078: Riff 14
079: Riff 15
080: Riff 16
081: Riff 17
082: Riff 18
083: Riff 19
084: Riff 20
085: Riff 21
086: Riff 22
087: Riff 23
088: Riff 24
089: Riff 25
090: Riff 26
091: Riff 27
092: Riff 28
093: Riff 29
094: Riff 30
095: Riff 31
096: Riff 32
097: Riff 33
098: Riff 34
099: Riff 35
100: Riff 40
101: Riff 41
102: Mod wheel, 2 bars
103: Mod wheel, 4 bars
Preset: Name:
104: Mod whl up/dwn, 8 bars
105: Md whl up/dwn, 16 bars
106: Pan 2 bars
107: Pan Random
108: Pan Random 2
109: Pan out/in
110: Filter mod, 4 bar
111: Filter mod, 8 bar
112: Filter mod, 16 bar
113: Transwave mod, 2 bars
114: Transwave mod, 4 bars
115: Detune mod, 2 bars
116: Detune mod, 4 bars
117: Sustain on
40 ENSONIQ FIZMO User's Guide
Page 47

8—Supplemental Information
Updating FIZMO’s Operating System
The software that makes FIZMO run is called its “operating system” or “OS.” FIZMO’s OS is stored in its
FLASH memory (see Page 3). From time to time, ENSONIQ may release a new FIZMO OS—a new OS typically
contains feature enhancements to make you FIZMO even more powerful, and may also includes changes to
FIZMO’s software that will make it operate more smoothly. To keep up with the latest FIZMO development, and
obtain OS updates as they’re published, visit the ENSONIQ World Wide Web site at
Note: If you can’t access ENSONIQ Web site, or don’t own a computer, see your authorized ENSONIQ dealer
for assistance in updating your FIZMO.
http://www.ensoniq.com
.
To Find Out Which Version of the FIZMO OS is Currently Installed
MIDI
To learn which version of the FIZMO OS you’re currently using, hold down the MIDI Edit button and,
while continuing to hold it, press the Dump button—the current OS version’s number will be displayed.
To Update FIZMO’s OS
FIZMO operating system updates are Standard MIDI File sequences that deliver the OS to FIZMO as packets of
SysEx data on one of the sequence’s tracks. You can “play” the new OS right into FIZMO from any sequencer
program that can play a Standard MIDI File containing SysEx data.
1. Download the OS update file appropriate to your Mac OS or Windows computer from ENSONIQ’s Web site.
2. Double-click the file to decompress it, saving it to a convenient location on your computer’ hard drive.
3. Load the OS sequence file into your sequencing program.
4. Direct Track 1 of the OS sequence to FIZMO.
5. Start playback of the sequence—you can follow FIZMO’s progress by watching its display:
• FIZMO will begin the process by clearing memory for the OS; you’ll see ErAS (“erase”) on its display,
followed by rdY (“ready”) to show that FIZMO’s waiting for the first packet of SysEx data.
• As data is being received by FIZMO, its display will show Ld (“load”) and a small animation.
• When FIZMO finishes receiving a packet, it will burn its data to FLASH memory, showing burn on its
display. When each packet has been burned, the display will return to rdy to show that FIZMO’s awaiting
the next chunk of data.
6. Let the sequence play to its end. When the new OS is in place, FIZMO will restart itself.
Edit
Dump
Troubleshooting the OS Updating Procedure
The speed at which the OS SysEx data is transmitted to FIZMO is dependent on your MIDI setup. If the
sequence plays too quickly, FIZMO will not have time to burn one packet of data before the next arrives—E OS
(“error OS”) will appear in its display to show that the updating process has failed. If this occurs, set the playback
speed of the sequence to a slower tempo and try again. A tempo of 100 bpm will usually suffice, but you can set
it as low as you need to. If you continue to have problems, call ENSONIQ Customer Service at 610-647-3930.
Restoring FIZMO’s Factory Presets and Sounds
If you wish to restore FIZMO’s factory presets and sounds, hold down the Save button and, while
still holding it, press the Compare button. FIZMO’s display will show rst? (“reset?”). Press the
+/Yes button to restore the presets and sounds. The display will show burn as the factory presets
and sounds are burned into FLASH.
Note: This procedure also restores all system-wide parameters to their factory default values.
Warning: When you restore FIZMO’s factory presets and sounds, all presets and sounds currently in memory
are erased. Make sure you’re not erasing anything you want to keep. (You can dump any presets or sounds to an
external MIDI storage device; see Page 33.)
ENSONIQ FIZMO User’s Guide 41
Compare
Save
Page 48

8—Supplemental Information
What is MIDI?
Musical instrument and computer manufacturers have agreed upon a set of standards that allows their products
to communicate with each other. It's called “MIDI,” an acronym for “Musical Instrument Digital Interface.” There
are two basic aspects to the MIDI standards: the kind of wiring to be used for connecting MIDI devices, and the
nature of messages that will be sent through those wires.
Life In The MIDI World
MIDI has opened up incredible possibilities for musicians and music lovers alike. Here are some of the things
MIDI has made possible:
• Musicians can record their performances into MIDI recorders—called sequencers—which are found in
keyboard workstations, in stand-alone boxes, and in computers. Once recorded, MIDI-recorded
performances can be tweaked and nudged to perfection. Musical arrangements can be re-orchestrated after
they’ve been recorded. Full-blown multi-instrument recordings can be easily created.
• Keyboardists can connect their instruments to a myriad of sound-producing MIDI boxes. MIDI allows a
conventional-looking keyboard to control a number of such devices at the same time, providing for the
creation of new, complex timbres. These same capabilities are available to computer users. Actually, pretty
much any musical instrument can be outfitted to control MIDI devices.
• Musicians can benefit from the communication possible between MIDI instruments and computers to
program sounds for their instruments on their computers, taking advantage of the computers’ large graphic
displays.
• Internal data from one MIDI device can be transmitted to another for storage.
• Recording engineers can control mixing consoles and effects devices with MIDI.
Understanding MIDI
MIDI Hardware
The architects of MIDI had to settle, first of all, on the MIDI hardware: the wires. All MIDI cables have the same
kind of plug on either end. There are three MIDI sockets, or jacks, on the back of most MIDI instruments. The
MIDI Thru jack is for MIDI data that passes through the instrument unchanged on its way to some other MIDI
device. The instrument sends out its own MIDI information through the MIDI Out jack. The MIDI In jack is for MIDI
MIDI OutMIDI Thru MIDI In
information coming into the instrument.
The MIDI cable itself can carry 16 independent channels of MIDI information that travel together through the wire.
This means that you can have 16 separate MIDI conversations going on at once among instruments and/or
computers connected together with MIDI cables.
How MIDI Channels Work
MIDI instruments can be set up to listen to specific channels and ignore everything else that’s going on. This
allows a central device such as a keyboard or your personal computer to control each instrument individually.
Some instruments are capable of responding to as many as 16 channels at once. Such instruments are referred
to as being multi-timbral—it’s as if there are up to 16 musical instruments in one box, and MIDI allows you to
control each sound separately, as shown in the illustration on the following page.
42 ENSONIQ FIZMO User’s Guide
Page 49

8—Supplemental Information
sound 1
sound 2
sound 3
sound 4
sound 5
sound 6
sound 7
sound 8
sound 9
sound 10
sound 11
sound 12
sound 13
sound 14
sound 15
sound 16
MIDI rigs can also combine both possibilities, with some instruments programmed to respond to one MIDI
channel or another, and multi-timbral devices set up to receive up to 16 channels at once.
This MIDI device
or
responds to
MIDI channel 1
This device
responds to
MIDI channel 16
This MIDI device responds
to MIDI channel 2
This
device
responds
to MIDI
channels
3-15
MIDI messages travel up and down all these channels, and these constitute the second major component of the
MIDI Spec.
How MIDI Messages Work
MIDI works in a manner reminiscent of the old player pianos, whose sheets of hole-punched paper told the
keyboard mechanism which keys to press down and when. It’s not sound that’s sent through MIDI cables; it’s
instructions from one MIDI device—called the “controller”—to another. Of course, MIDI generally doesn’t cause
any keys to physically move.
Suppose a keyboardist presses a note on a keyboard which is controlling some sound-producing MIDI box. The
controller would send out a Key Down (or “note-on”) message for that note. The MIDI box receiving such a
message would play the note. When the keyboardist lets go, the controller would send out a Key Up message,
and the receiving device would stop sounding the note. It’s as simple at that.
MIDI captures the expressive nuances in a performance by sending out other kinds of messages. Controllers can
sense how hard a musician plays—referred to in the MIDI world as “velocity”—and can instruct other devices to
respond accordingly. Sustain and sostenuto foot pedals also send out MIDI messages. There are many tools for
expression that can be transmitted and responded to via MIDI.
To tell a MIDI instrument which sound program you want to hear, you would send a MIDI Program Change.
ENSONIQ FIZMO User’s Guide 43
Page 50

8—Supplemental Information
MIDI can also send messages that have the same effect as pushing buttons and twirling knobs on a receiving
device. To make sure that only the intended instrument listens to such instructions, MIDI sends it a special
greeting in a language only it can understand. Every MIDI device has such a language, and these “hey there”
messages are referred to as “System Exclusive headers.” System Exclusive data is often referred to as SysEx
data.
In MIDI recording, all of the messages that a controller produces are sent to a sequencer. Most sequencers have
Record, Stop and Play buttons, since they're usually designed to resemble tape recorders. When the Record
button is pressed, the sequencer captures incoming MIDI information. Pressing Stop tells the sequencer to store
that information in its memory. When Play is pressed, it sends it back out.
The Art of MIDI
The fact that MIDI is so simple to use is a testament to the cleverness of its designers. Its true magic, however,
lies in MIDI’s power as a tool in the creative process, and in the imaginations of those artists who wield it.
44 ENSONIQ FIZMO User’s Guide
Page 51

Proper Care of FIZMO
8—Supplemental Information
Temperature Guidelines
FIZMO contains a substantial amount of computerized
and electronic circuitry that can be susceptible to
damage when exposed to extreme temperature
changes. When FIZMO is brought inside after sitting in
a cold climate (i.e., the back seat of your car),
condensation builds up on the internal circuitry in much
the same way a pair of glasses fogs up when you come
inside on a cold day. If the unit is powered up as this
condensation occurs, components can short out or be
damaged. Excessively high temperatures also pose a
threat to the unit, stressing both the internal circuits as
well as the case. With this in mind, it is highly advisable
to follow these precautions when storing and setting up
your FIZMO:
• Avoid leaving FIZMO in temperatures of less than
50 degrees Fahrenheit or more than 100 degrees
Fahrenheit.
• When bringing FIZMO indoors after travel, allow
the unit at least 20 minutes to reach room
temperature before powering up. In the case of
excessive outdoor temperatures (below 50
degrees Fahrenheit or above 100 degrees
Fahrenheit), allow an hour or more before power
up.
• Avoid leaving FIZMO inside a vehicle exposed to
direct sunlight.
Clean Up and Maintenance
Clean the exterior of your FIZMO with a soft, lint-free,
dry (or slightly damp) cloth. You can use a slightly
dampened cloth (with a mild neutral detergent) to
remove stubborn dirt, but make sure that FIZMO is
thoroughly dry before turning on the power. Never use
alcohol, benzene, volatile cleaners, solvents, abrasives,
polish or rubbing compounds.
Polarization and Grounding
Since FIZMO has an external power adapter, there are
no dangerous voltages inside its case. Some other
products with two-prong power cords have polarized
plugs which can only be inserted into an outlet the
proper way.
Three-prong
PolarizedNon-polarized
with earth ground
To avoid shock hazards or equipment damage, we
recommend the following precautions:
• If you own equipment with two-pronged power
cords, check to see if they are polarized or nonpolarized. You might consider having an authorized
repair station change any non-polarized plugs on
older equipment to polarized plugs to avoid future
problems.
• Exercise caution when using extension cords or
plug adapters. Proper polarization should always
be maintained from the outlet to the plug. The use
of polarized extension cords and adapters is the
easiest way to maintain proper polarity.
• Whenever possible, connect all products with
grounded power cords to the same outlet ground.
This will ensure a common ground level to prevent
equipment damage and minimize hum in the audio
output.
AC outlet testers are available from many electronic
supply and hardware stores. These can be used to
check for proper polarity of outlets and cords.
AC Line Conditioning
As with any computer device, FIZMO is sensitive to
sharp peaks and drops in the AC line voltage. Lightning
strikes, power drops, or sudden and erratic surges in
the AC line voltage can scramble the internal memory,
and in some cases, damage the unit's hardware. Here
are a few suggestions to help guard against such
occurrences:
• A surge/spike suppressor. A surge/spike
suppresser absorbs surges and protects your gear
from all but the most severe over-voltage
conditions. You can get multi-outlet power strips
with built-in surge/spike suppressers for little more
than the cost of unprotected power strips, so
using one is a good investment for all your
electronic equipment.
• A line conditioner. This is the best, but by far the
more expensive way to protect your gear. In
addition to protecting against surges and spikes, a
line conditioner guards the equipment against
excessively high or low line voltages. If you use
FIZMO in lots of different locations with varying or
unknown AC line conditions, you might consider
investing in a line conditioner.
Other products, such as older guitar amplifiers, do not
have polarized plugs and can be connected to an outlet
incorrectly. This may result in dangerous high voltages
on the audio connections, which could cause you
physical harm or damage any properly grounded
equipment to which they are connected, such as your
ENSONIQ product.
ENSONIQ FIZMO User’s Guide 45
Page 52

ENSONIQ FIZMO User’s Guide
Page 53

Index
Index
-/No button, 3
+/Yes button, 3
3rd, 13
-3rd, 13
4th, 14
5th, 14
A
AC power, 7
ADSR, 23
Amount knob, 21
Amp LED, 23
Amplitude
envelope, 23
overview, 29
setting level, 29
setting panning, 30
Amplitude Level knob, 29
Amplitude Pan knob, 30
32
Aout,
Arpeggiator
Arpeggiator Bypass, 12, 34
Arpeggiator Keyboard button, 12
Arpeggiator MIDI Out, 32, 34
Arpeggiator Mode button, 11, 13
, 34
adding notes to, 14
applying swing, 13
introduced, 2
operating modes, 11
overview, 11
presets
Center Range, 14
control algorithm, 11
defined, 11
editing, 13
Feel, 13
Fifths, 14
Fourths, 14
Held Mode, 14
High Note, 14
list, 40
Low Note, 14
Minor Thirds, 13
Note Duration, 13
Note Limit, 14
Note Resolution, 13
Octaves, 14
pattern, 11
saving, 11, 20
selecting, 11
Thirds, 13
Touch, 14
where they're stored, 3
setting note range, 13
setting tempo, 12
transmitting MIDI from, 32
turning on and off, 11
using keyboard with, 12
Arpeggiator On/Off button, 11
Arpeggiator Range button, 13
Arpeggiator Tempo button, 12
Arpeggiator Tempo Source, 12,
34
Arpeggiator Value knob, 12, 13
AtPO, 12, 34
Attack, 23
Attack knob, 23
Audio Input jack, 5
routing microphone to effects,
6
Audio outputs, 5
setting FIZMO's volume, 5
B
Bank 1 LED, 9
Bank 2 LED, 9
Bank Selects
MSB, 36
receiving, 32
transmitting, 32
Base channel, 34
defined, 31
setting, 31
bChn, 31, 34
bEnd, 10, 34
Black and white buttons, 1
bPAS, 12, 34
brd, 32, 34
Brightness, 10, 29
burn, 3, 20, 34
Button illustrations, 1
Bypassing the arpeggiator, 12
C
CEnt, 14
Center Range, 14
See
Channel pressure.
Cleaning, 45
Compare buffer, 15
Compare button, 15
Control algorithm, 11
Cutoff
defined, 28
modulating, 29
setting, 29
Cutoff knob, 29
Pressure
D
d001, 1
Decay, 23
Decay knob, 23
Demo, 1
Detuning, 10
Display, 3
dLAY, 34
Down/up arrow buttons, 19
Dry
defined, 19
Dual Foot Switch jack, 6
Dump button, 33
Dump Delay, 34
Dumping
overview, 33
receiving data, 33
sending data, 33
setting ID, 33
slowing, 34
E
Edit button, 34
Effect Bus
overview, 30
Effect Bus Select button, 30
Effects
applying, 30
global reverb
described, 18
selecting variations, 19
list of, 19
insert effects
defined, 18
list of, 18
selecting, 18
variations, 19
vocoder, 19
introduced, 2
overview, 18
routing microphone to, 6
routing oscillators to, 30
setting microphone input level,
6
vocoder
introduced, 2
warping with F knob, 10
wet/dry mix, 19
Effects Insert Select button, 18,
19
Effects Mix Knob, 19
Effects Reverb Select button, 19
Effects Variations buttons, 19
Envelope button, 29
Envelope Mode button, 24
Envelope Velocity button, 24
Envelopes
ADSR, 23
and velocity, 24
assigning, 23
defined, 23
programming, 23
selecting, 23
setting mode, 24
shaping, 23
ENSONIQ FIZMO User's Guide 47
Page 54

Index
F
F knob, 34
using, 10
Feel, 13
Fifths, 14
Filter
adding resonance, 29
cutoff
adjusting with Z knob, 10
envelope, 23
enveloping, 29
keyboard tracking, 29
modulating, 29
overview, 28
setting cutoff, 29
Filter Cutoff knob, 29
Filter Envelope button, 29
Filter Keyboard button, 29
Filter LED, 23
Filter Resonance knob, 29
Fine, 27
F-I-Z-M-O knobs, 10
recording via MIDI, 34, 35
FLASH, 3
burning
global settings, 34
presets and sounds, 20
Foot switch
configuring, 6
connecting, 6
Foot Switch 1-2, 6, 34
Fourths, 14
Ft 1, 6, 34
Ft 2, 6, 34
G
Glide
enabling, 28
overview, 28
setting speed, 28
Glide Mono button, 28
Glide Time knob, 28
Global LFO, 21, 24
Global reverb
adjusting wet/dry mix, 20
described, 18
selecting variations, 19
list of, 19
Grounding, 45
H
Headphones, using, 5
HEld, 14
Held mode, 14
Held Pitch Bend, 34
Hi n, 14
High Note, 14
Home stereo
connecting FIZMO to, 5
I
I knob
using, 10
id, 33, 34
Illustrations, about, 1
Input Clip LED, 6
Input Level knob, 5
Insert effects
adjusting wet/dry mix, 20
defined, 18
list of, 18
selecting, 18
variations, 19
vocoder, 19
Insert Select button, 18, 19
K
Keyboard
and the arpeggiator, 12
button
Arpeggiator, 12
filter tracking, 29
playing presets, 9
transmitting MIDI from, 32
Keyboard button
Filter, 29
Keyboard MIDI, 32, 34
See
Keyboard splitting.
Splits
L
Layering sounds
across entire keyboard, 16
in specific key ranges, 16
overview, 16
LED display, 3
Level knob, 29
LFO
and pitch modulation, 28
defined, 24
global, 24
programming, 24
setting speed, 25
setting wave shape, 25
LFO LED, 24
Line In, 6, 34
Listening to FIZMO, 5
LnIn, 6, 34
Lo n, 14
See
Loudness.
Low Note, 14
Low-pass filter, 28
LSB, 32, 33
Volume knob
M
M knob
using, 10
Main Out connections, 5
Memory, FIZMO's, 3
Microphone
connecting to FIZMO, 5
routing to effects, 6
setting level, 6
Middle C, 16
MIDI
Arpeggiator MIDI Out, 34
assignable controllers, 34
Bank Selects
receiving, 32
base channel, 34
defined, 31
setting, 31
connections, 7
Dump Delay, 34
dumping SysEx data
overview, 33
receiving data, 33
sending data, 33
setting ID, 33
slowing, 34
Implementation Chart, 36
In, 7
jacks, 7
Keyboard MIDI, 34
NRPNs, 34, 35
Out, 7
Program Changes
receiving, 32, 39
reception
arpeggiator
feeding notes to, 31
controller messages, 31, 35
overview, 31
presets
playing, 31
selecting, 32
setting channels, 31
sounds
playing, 31
selecting, 32
SysEx ID, 34
Thru, 7
transmission
Bank Selects & Program
Changes, 32
notes and controllers, 32
What is MIDI?, 42
MIDI Dump button, 33
MIDI Edit button, 34
Minor Thirds, 13
Mix Knob, 19
Mode button, 13, 24
Modulation
envelopes
ADSR, 23
and velocity, 24
assigning, 23
defined, 23
programming, 23
selecting, 23
setting mode, 24
shaping, 23
48 ENSONIQ FIZMO User's Guide
Page 55

Index
LFO
defined, 24
programming, 24
setting speed, 25
setting wave shape, 25
list of modulators, 21
noise
defined, 24
programming, 24
setting speed, 25
of filter cutoff, 29
of pitch, 28
of waves, 27
overview, 21
programming, 21
Modulation button, 21
Modulation Shape button, 25
Modulation Speed knob, 25
Modulation wheel
using, 10
Modulators list, 21
Monitoring FIZMO, 5
Mono
using FIZMO in, 5
Mono button, 28
MSB, 36
N
Ndur, 13
No button, 3
Noise
defined, 24
programming, 24
setting speed, 25
Noise LED, 24
Note Duration, 13
Note Limit, 14
Note Resolution, 13
Notes, 1
Notes, maximum number, 2
nrES, 13
NRPN, 34
NRPNs
use of, 35
ntLt, 14
O
O knob, 34
using, 10
Oct, 14
Octaves, 14
Operating system
updating, 41
troubleshooting, 41
viewing current version, 41
See
OS.
OSC
OSC 1 & 2 buttons, 26
Oscillator
Operating system
overview, 26
stereo panning, 30
volume, 29
Oscillators
defined, 21
modulation
envelopes, 23
LFO and Noise, 24
list of modulators, 21
overview, 21
programming, 21
programming, 26
Amplitude, 29
level, 29
panning, 30
Effect Bus, 30
Filter, 28
cutoff, 29
envelope, 29
keyboard tracking, 29
modulation, 29
resonance, 29
Glide, 28
Pitch, 27
modulating, 28
recording edits via MIDI, 35
Wave, 26
list of, 27
modulating, 27
selecting, 27
selecting for programming, 26
turning on and off, 26
P
P, 9
Pan knob, 30
Pattern, 11
See
Pedal.
Permanent memory.
PhLd, 10
Phones jack, 5
Pitch
detuning with M knob, 10
envelope, 23
modulation, 28
overview, 27
tuning oscillators, 27
Pitch Bend, 34
Pitch bend wheel
configuring, 10
using, 10
Pitch LED, 23
Pitch Tune knob, 27
Polarization, 45
Polyphony, 2
Portamento, 28
Power In jack, 7
line conditioning, 45
polarization & grounding, 45
Power On/Off Switch, 7
Power supply
Foot switch
LFO, 28
See
FLASH
connecting, 7
line conditioning, 45
polarization & grounding, 45
Powering up FIZMO
connecting, 7
Preset banks
selecting, 9
Presets
and arpeggiator presets, 11
defined, 2
dumping via MIDI, 33
editing
layering sounds, 16
overview, 15
selecting new sounds, 17
splitting the keyboard, 17
using a single sound, 16
effects
global reverb, 18
selecting variations, 19
insert effects, 18
selecting, 18
variations, 19
vocoder, 19
overview, 18
setting wet/dry mix, 19
introduced, 2
playing, 9
F-I-Z-M-O knobs, 10
Modulation wheel, 10
on the keyboard, 9, 10
Pitch bend wheel, 10
playing via MIDI, 31
realtime control, 9
receiving via MIDI, 33
restoring factory presets, 41
saving, 20
selecting, 9
selecting via MIDI, 32
Program Changes, 32
sounds
overview, 15
transmitting Program Changes,
32
where they're stored, 3
Preset-selection mode, 9
Pressure
using, 9
Program Changes
receiving, 32, 39
transmitting, 32
Programming sounds.
Oscillators
PrSt, 11, 13
See
Q
Q, 29
ENSONIQ FIZMO User's Guide 49
Page 56

Index
R
RAM, 3
Range button, 13
Realtime controls
defined, 9
F-I-Z-M-O knobs, 10
modulation wheel, 10
pitch bend wheel, 10
pressure, 9
using, 9
velocity, 9
Release, 23
Release knob, 23
Resonance, 29
Resonance knob, 29
Reverb Select button, 19
ROM, 3
Routing effects, 30
S
Shape button, 25
Signal flow, 21
snd, 11
Sound 1-4 buttons, 15
lit or flashing LED, 15
Sound programming.
Oscillators
Sound slots.
Sounds
activating, 16
creating splits, 16, 17
defined, 21
dumping via MIDI, 33
in presets, 15
introduced, 2
layering, 16
playing via MIDI, 31
receiving via MIDI, 33
restoring factory sounds, 41
saving, 20
selecting, 17
for programming, 26
selecting via MIDI, 32
Bank Selects & Program
transmitting
Bank Selects, 32
See
Changes, 32, 39
See
Presets
Program Changes, 32
where they're stored, 3
Speed knob, 25
Split feature, 17
key ranges, 17
Splits
creating
using layering, 16
using the Split feature, 17
See
Stacking.
Stereo
oscillator panning, 30
system.
using FIZMO in, 5
Sustain, 23
Sustain knob, 23
SW-10, 6, 14
Swing, 13
SYS1, 34
SYS2, 34
SYS3, 34
SYS4, 34
SysEx dumping.
SysEx ID, 33, 34
System clock
defined, 13
LFO and Noise, 25
setting, 12
System Controller 1-4, 34
System Controllers, 34
System Exclusive.
Layering
See
Home stereo
See
See
Dumping
Dumping
T
t, 12
tch, 10, 14, 34
Temperature guidelines, 45
Tempo button, 12
Thirds, 13
Time knob, 28
Tips, 1
Touch, 14, 34
Track, 29
Transwaves
defined, 26
modulating, 27
Tune, 34
Tune knob, 27
Tuning
of FIZMO, 34
of oscillators, 27
U
Up/down arrow buttons, 19
User’s Guide, 1
V
Value knob, 12, 13
Variations buttons, 19
Velocity
adjusting response, 10
using, 9
Vocoder
connecting microphone, 5
introduced, 2
setting input level, 6
using, 19
Volume knob, 5
W
Warnings, 1
Wave
defined, 26
list of, 27
modulating, 27
modulating with I knob, 10
overview, 26
selecting, 27
Wave Select knob, 27
Wet defined, 19
Wet/Dry mix
overview, 19
White and black buttons, 1
Y
Yes button, 3
Z
Z knob
using, 10
50 ENSONIQ FIZMO User's Guide
Page 57

"INSTRUCTIONS PERTAINING TO A RISK OF FIRE,
ELECTRIC SHOCK, OR INJURY TO PERSONS"
IMPORTANT SAFETY INSTRUCTIONS
WARNING—When using electric products, basic precautions should always be followed, including
the following:
1. Read all the instructions before using the product.
2. Do not use this product near water - for example, near a bathtub, washbowl, kitchen s ink, in a wet
basement, or near a swimming pool, or the like.
3. This product should be used only with a cart or stand that is recommended by the manufacturer.
4. This product, either alone or in combination with an amplifier and headphones or speakers, may be
capable of producing sound levels that could cause permanent hearing loss . Do not operate for a
long period of time at a high volume level or at a level that is uncomfortable. If you experience any
hearing loss or ringing in the ears, you should consult an audiologist.
5 . The product should be located so that its location or position does not interfere with its proper
ventilation.
6 . The product should be located away from heat sources such as radiators, heat registers, or other
products that produce heat.
7 . The product should be connected to a powe r supply only of the type described in the operating
instructions or as marked on the product.
8. This product may be equipped with a polarized line plug (one blade wider than the other). This is a
safety featu r e . If you are unable to insert the plug into the outlet, contact an electrician to replace
your obsolete outlet. Do not defeat the safety purpose of the plug.
9. The power supply cord of the product should be unplugged from the outlet when left unused for a
long period of time.
10. Care should be taken so that objects do not fall and liquids are not spilled into the enclosure through
openings.
11. The product should be serviced by qualified service personnel when:
a. The power supply cord or the plug has been damaged; or
b. Objects have fallen, or liquid has been spilled into the product; or
c. The product has been exposed to rain; or
d. The product does not appear to operate normally or exhibits a marked change in performance;
or
e. The product has been dropped, or the enclosure damaged.
12 . Do not attempt to service the product beyond that described in the user-maintenance instructions.
All other servicing should be referred to qualified service personnel.
SAVE THESE INSTRUCTIONS
Page 58

L
EADING THE WORLD IN SOUND INNOV A TION
TM
 Loading...