

Page 1
Quick Start Guide
11b/g Wireless Long Range Multi-function 7+1 AP
ECB3500 is a powerful, enhanced, enterprise level product that supports 7 multi-functions to operate for
every kind of working environment.
This is a Wireless high transmit output power and high data rate indoor
device which plays different roles of Access Point/ Client Bridge /
Repeater / WDS AP / WDS Bridge / Client Router / AP Router. It
operates seamlessly in the 2.4 GHz frequency spectrum supporting the
802.11b (2.4GHz, 11Mbps) and super high speed of 802.11g (2.4GHz,
108Mbps) wireless standards. It supports high output power level
settings, bandwidth selection, RSSI indicator and antenna diversity
which enable the best transmitting and receiving signal for traffic
communication.
The attractive design, high performance, and array of features make ECB3500 a suitable wireless
solution for your residence or office.
This Guide will assist you in setting up the device as quickly as possible and with the least effort.
Hardware Installation
1. Place the unit in an appropriate place after
conducting a site survey.
2. Plug one end of the Ethernet cable into the
RJ-45 port on the rear panel of the device and
another end into your PC/Notebook.
3. Insert the DC-inlet of the power adapter into
the port labeled “DC-IN” and the other end
into the power socket on the wall.
IP Address Configuration
The default IP address of the device is
192.168.1.1 (Access Point mode). In order to log
into this device, you must first configure the
TCP/IP settings of your PC/Notebook.
4. In the control panel, double click Network
Connections and then double click on the
connection of your Network Interface Card
(NIC). You will then see the following screen.
5. Select Internet Protocol (TCP/IP) and then
click on the Properties button. This will allow
you to configure the TCP/IP settings of your
PC/Notebook.
6. Select Use the following IP Address radio
button and then enter the IP address
(192.168.1.21) and subnet mask
(255.255.255.0). Ensure that the IP address
and subnet mask are on the same subnet as
the device.
7. Click on the OK button to close this window,
and once again to close LAN properties
window.
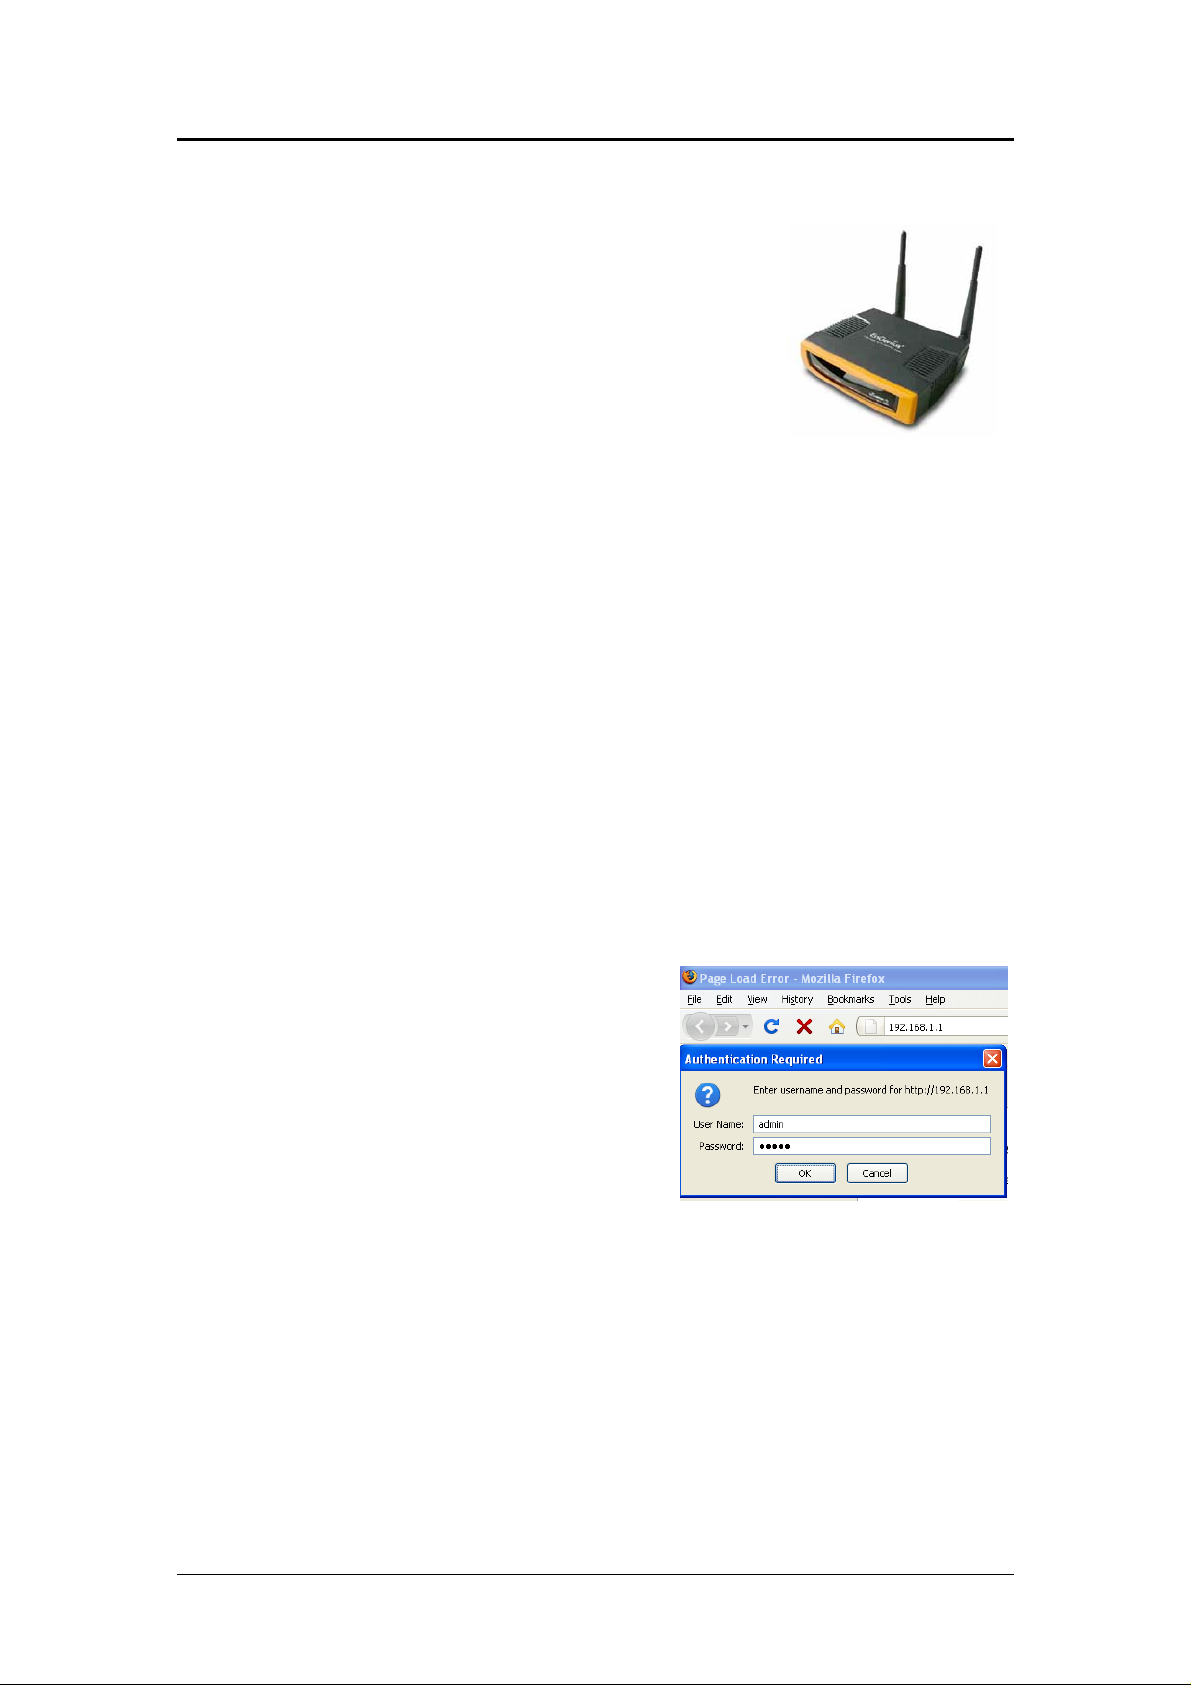
Logging In
1. To configure the device through the
web-browser, enter the IP address of the
Bridge (default: 192.168.1.1) into the
address bar of the web-browser and press
Enter.
2. After connecting to the IP address, the
web-browser will display the login page.
Specify admin as the default User Name and
Password, and then click on the Login
button.
Administration
1. Click on the Administration link under the
Management menu. This option allows you
to create a new password for the device. For
security it is highly recommended for securit y
reasons.
2. Name: Specify a user name into the first field.
3. Password: Specify a password into this field
and then re-type the password into the
Confirm Password field.
4. Click on the Apply button to save the
changes.
Quick Start Guide v.1.0
Refer to User’s Manual for complete instructions 1
Page 2

Quick Start Guide
Long Range Wireless Access Point / Client Bridge
Switching Between Operating Modes
Wireless Network & Security
This device can operate in the following modes:
Access Point, Client Bridge, WDS Bridge,
Repeater, AP Router, and Client Router.
1. Click on the System Properties link under
the System navigation drop-down menu.
2. Device Name: Specify a name for the device.
This is not the SSID.
3. Country/Region: Select the country from the
drop-down list.
4. Operating Mode: Select an operating mode
from the list (Access Point, Client Bridge, or
Client Router) and then click on the Apply
button.
5. Refer to the User’s Manual for a detailed
description and configuration for each
Operating Mode.
IP and DHCP Settings
1. Click on the IP Settings link under the
System drop-down menu This page
allows you to configure the device with a
static IP address or a DHCP client.
2. IP Network Setting: Select Obtain an IP
address automatically (DHCP) radio
button if the Access Point is connected to a
DHCP server. Select Specify an IP
Address radio button if you would lik e the
device to use a static IP address. In this
case, you would be required to specify an
IP address, subnet mask, and default
gateway IP address.
3. IP Address: Specify an IP address
4. IP Subnet Mask: Specify the subnet mask
for the IP address
5. Default Gateway: Specify the IP address
of the default gateway.
6. Click on the Apply button to save the
changes.
Note: If you change the IP address here, you may
need to adjust your PC’s network settings to
access the network again.
1. Click on the Wireless Network link on the
Wireless drop-down menu. This page
allows you to configure the wireless mode,
channel, SSID, and security settings.
2. Wireless Mode: Depending on the type of
wireless clients that are connected to the
network, you may select B, G, B/G-mixed
or Super G mode.
3. Channel: Select a channel from the
drop-down list. The channels available are
based on the country’s regulation.
4. Current Profiles: You may configure up to
four different wireless profiles. Click on the
Edit button to modify the profile and place
a check in the Enable box to activate the
profile.
5. SSID: The SSID must be identical on all
points of the wireless network and cannot
exceed 32 characters.
6. VLAN ID: If you have enabled VLAN
tagging on your network, specify the VLAN
tag ID.
7. Suppressed SSID: Place a check in this
box if you would like to hide the SSID. By
enabling this feature, wireless clients will
not be able to scan this access point in a
site survey.
8. Station Separation: This is also known as
layer 2 isolation. Clients connected to this
Access Point will not be able to directly
communicate with each other.
9. Security Mode: By default, the security is
disabled. Refer to the next section to
configure the security features such as
WEP, WPA, WPA-PSK, WPA2,
WPA2-PSK and WPA-Mixed.
10. Refer to the User’s Manual for a detailed
description and configuration for each
security feature.
11. Click on the Apply button to save the
changes.
Quick Start Guide v.1.0
Refer to User’s Manual for complete instructions 2
 Loading...