

EnGenius ENS202EXT-CP, EAP300-CP Quick Installation Manual
EnGenius Captive Portal “Ready”
Quick Installation Guide
Version 1.2 (for Hotspotsystem)
*** MUST READ ***
The package labelled “Captive Portal Ready” herein contains a Third-Party firmware &
management feature. It has distinctly different properties, configuration and capabilities
of that the stock product mentioned in the datasheet, CD user manual and box
packaging. This Quick Installation Guide supersedes any datasheet, CD user manual
and information on the box packaging to contain important instructions in setting up
your EnGenius Captive Portal Ready wireless networks. Please read and follow this
guide thoroughly to have an enjoyable experience in setting up your EnGenius Captive
Portal Ready Wireless Network.
Note: Guest authentication feature requires a separate paid subscription from thirdparty cloud captive providers to work.
Check List:
• Internet connection should be already setup & ready to use* (ADSL /Cable/Fiber modem router)
• Modem/Router must provide RJ45 port to connect with EAP300-CP or ENS202EXT-CP. An Ethernet cable
is further required for the ENS202EXT-CP
• Internet Browser (Recent version of Microsoft Internet Explorer or Firefox browser)
• A pencil or pen ready to use “My Personal Notes” on the last page to assist you in remembering
any account names and passwords created
Important Notes:
• (*) The internet connection should give you the ability to ping www.yahoo.com (resolve DNS) and to
normally browse a web page via http and https (SSL). If in doubt, use a laptop or computer with your
existing internet connection (which you will be connecting the equipment to) and type
http://www.yahoo.com on your browser. If there is no response, you need to resolve this with your internet
service provider before proceeding further this Quick Installation Guide
Installing the first device
STEP 1
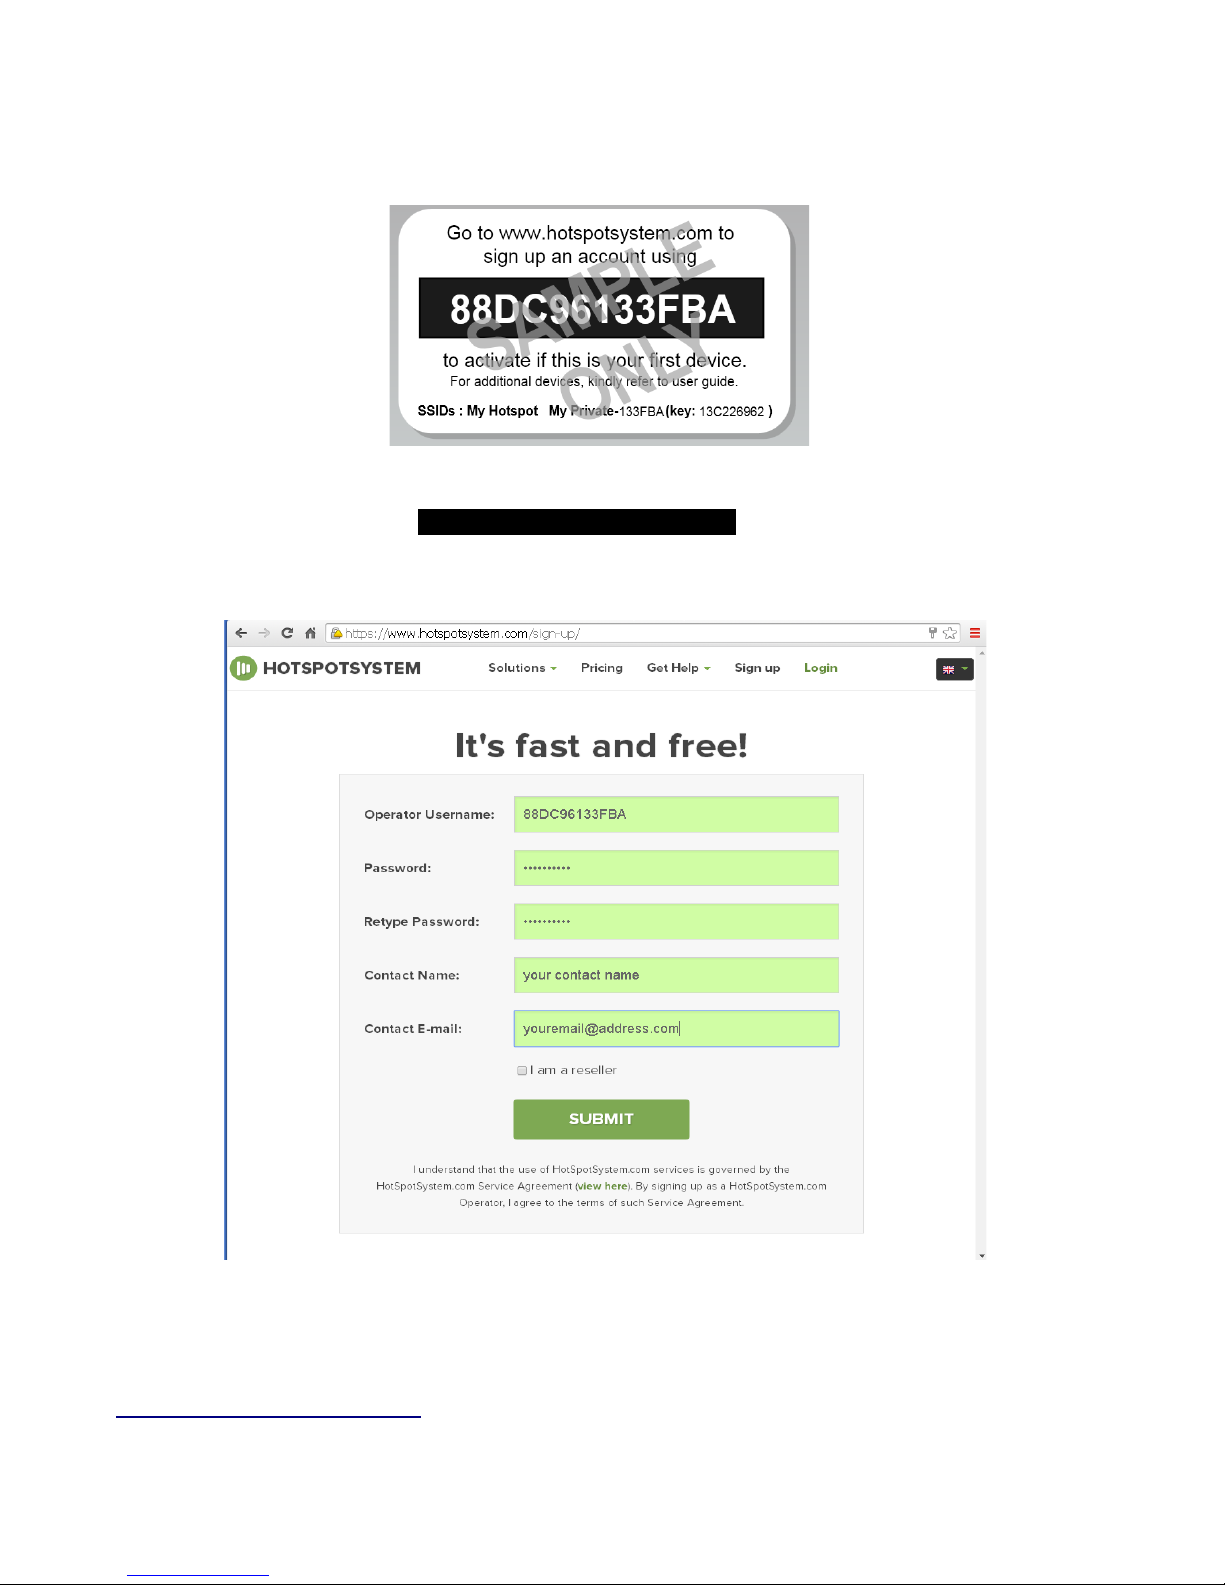
Follow the instructions on the users ID-sticker. The sticker is located on the device.
Go to the www.hotspotsystem.com and click ‘Sign up’ or ‘Sign up for free’. Sign up an account
using the operator username [the-characters-on-the-ID-sticker] to activate if this is your first device.
For adding additional device refer to the instructions later on in this manual.
Note:
- You can change the language in the top right corner
- As a reseller you have the possibility to make inter-alias, a sub portal. For more details see
http://www.hotspotsystem.com. Choose ‘I am a reseller’ in the sign up form
2

STEP 2
Once you have signed up, click continue and choose your business model.
We recommend you to choose Hotspot FREE, which you can further modify and add information
like name, location, address, default bandwidth, skin of splash page, type of location and the
currency you want to use in case of payments. Click ‘submit’ to save the changes and continue the
process. (You can always change your Business Model at any time later)
3
 Loading...