

ENERGY SISTEM T5850 HDTV User Manual

1
User manual

3
1. IMPORTANT SAFETY INSTRUCTION
To ensure your safety and the safety of others, please ensure that you read all the safety information before operating this product.
Keep this information in a safe place for future reference.
This symbol indicates that this product incorporates double insulation between hazardous
mains voltage and user accessible parts.
WARNING: To reduce the risk of fire or electric shock, do not expose this apparatus to rain or
moisture.
Safety Considerations.
≥ Position the cables so that they cannot be walked on or pinched by items placed on or against
them.
≥ Do not use the set top box in humid or damp conditions.
≥ Do not allow the set top box to get wet.
≥ Do not expose the set top box to dripping or splashing.
≥ Do not place water filled objects such as vases on top of the set top box.
≥ Do not place naked flame sources, such as candles, on the top of the set top box.
Ventilation
The slots and openings on the set top box are for ventilation. Do not cover or block them as it may
cause overheating.
NEVER let children push anything into the holes or slots on the case.
Servicing
There are no user serviceable parts in this set top box.
Battery Disposal
Please ensure batteries are disposed of safely.
Never dispose of batteries in a fire or with other household waste.
Check with your local authority for disposal regulations.
4
Cleaning
ALWAYS unplug the set top box before you clean it.
Do not use liquid or aerosol cleaners.
Clean the set top box with a soft, damp (not wet) cloth.
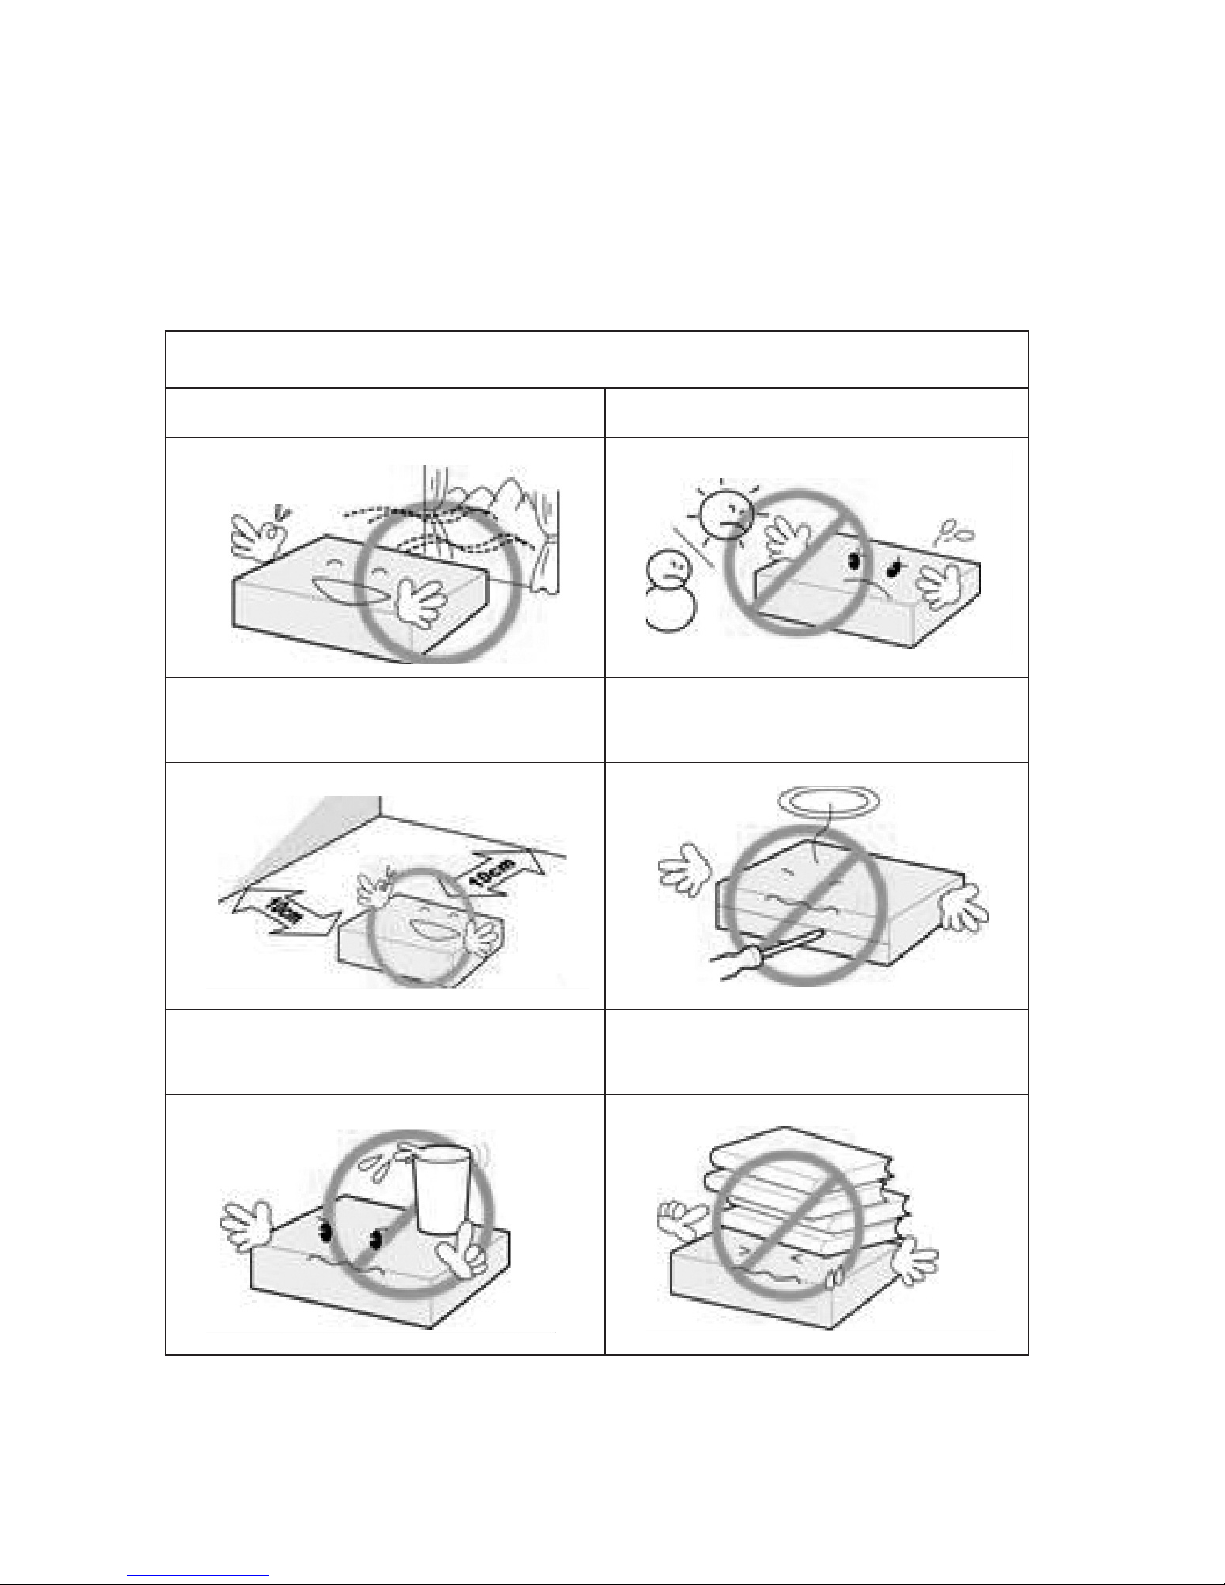
T5850 handling and care
Place the product in a well-ventilated area. Don’t install it in the cold or under direct sunlight.
Leave a minimum 10cm gap all around the product
Do not disassemble, repair,
or reorganize the product
Don’t place cups with water or other liquids
on the top of the product
Don’t place objects on the top of the product
5
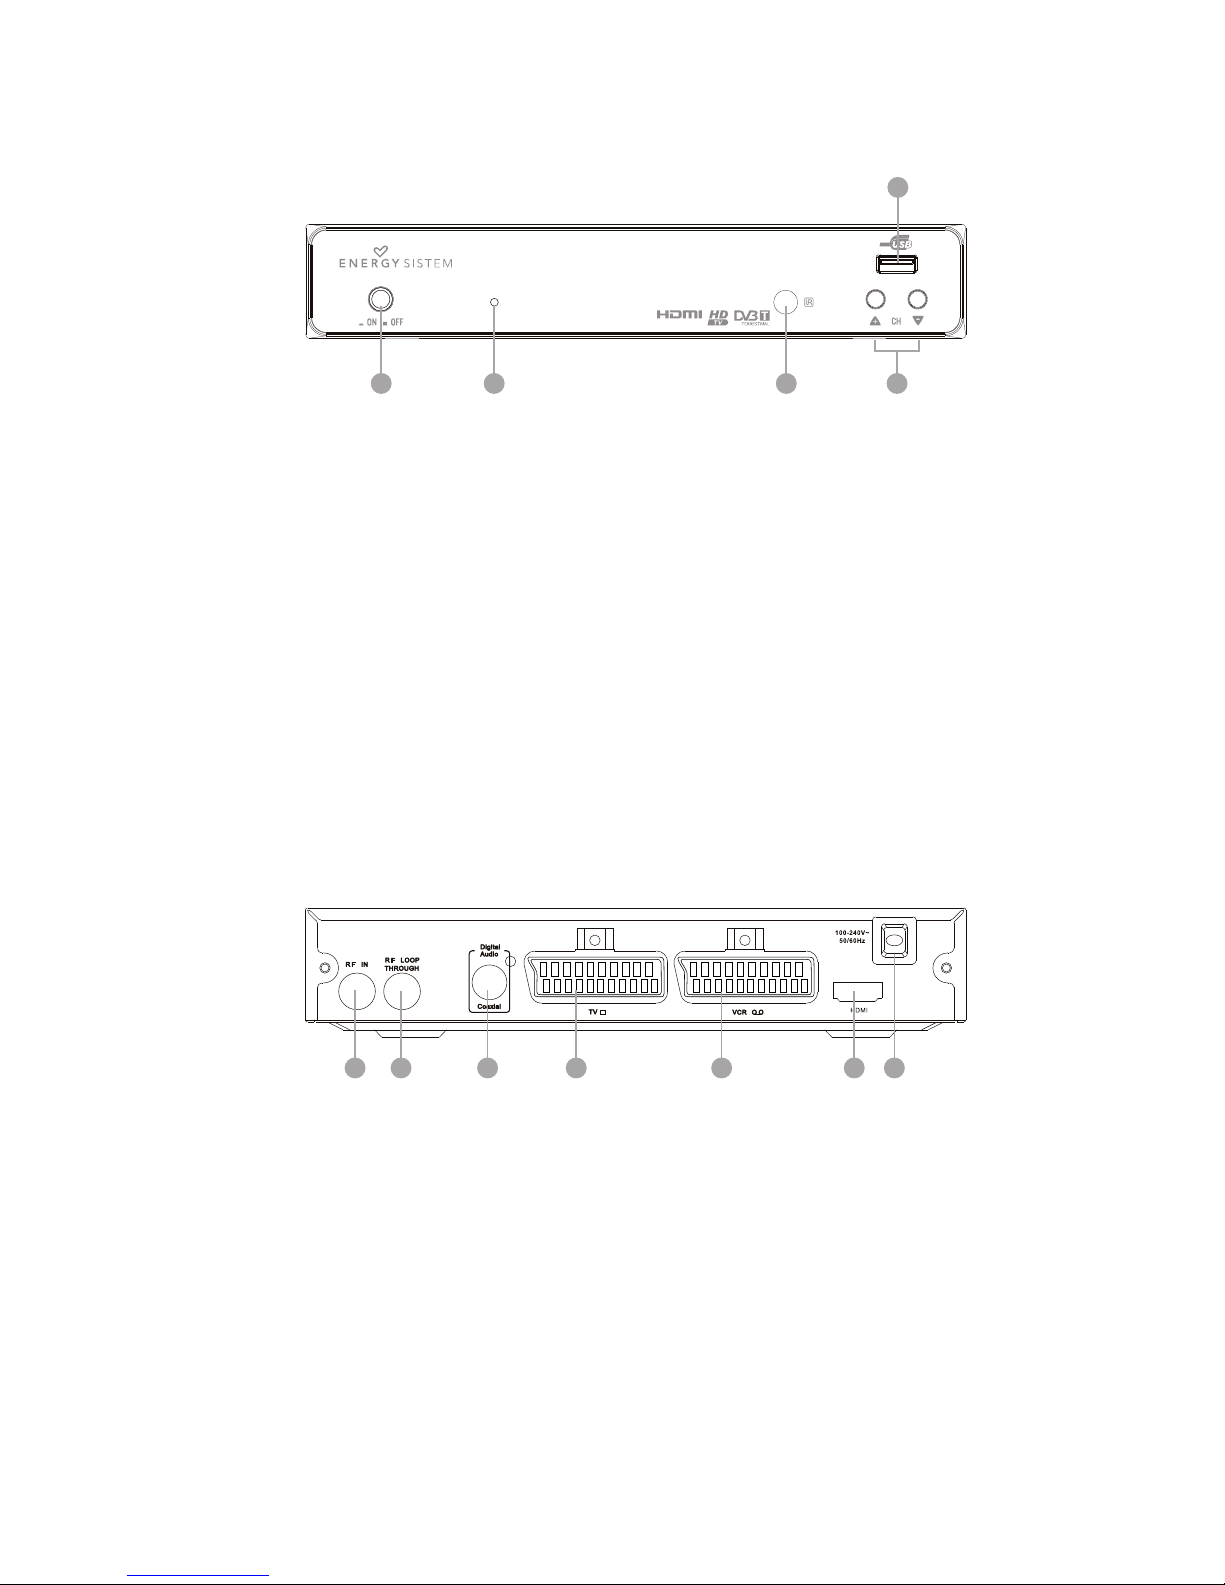
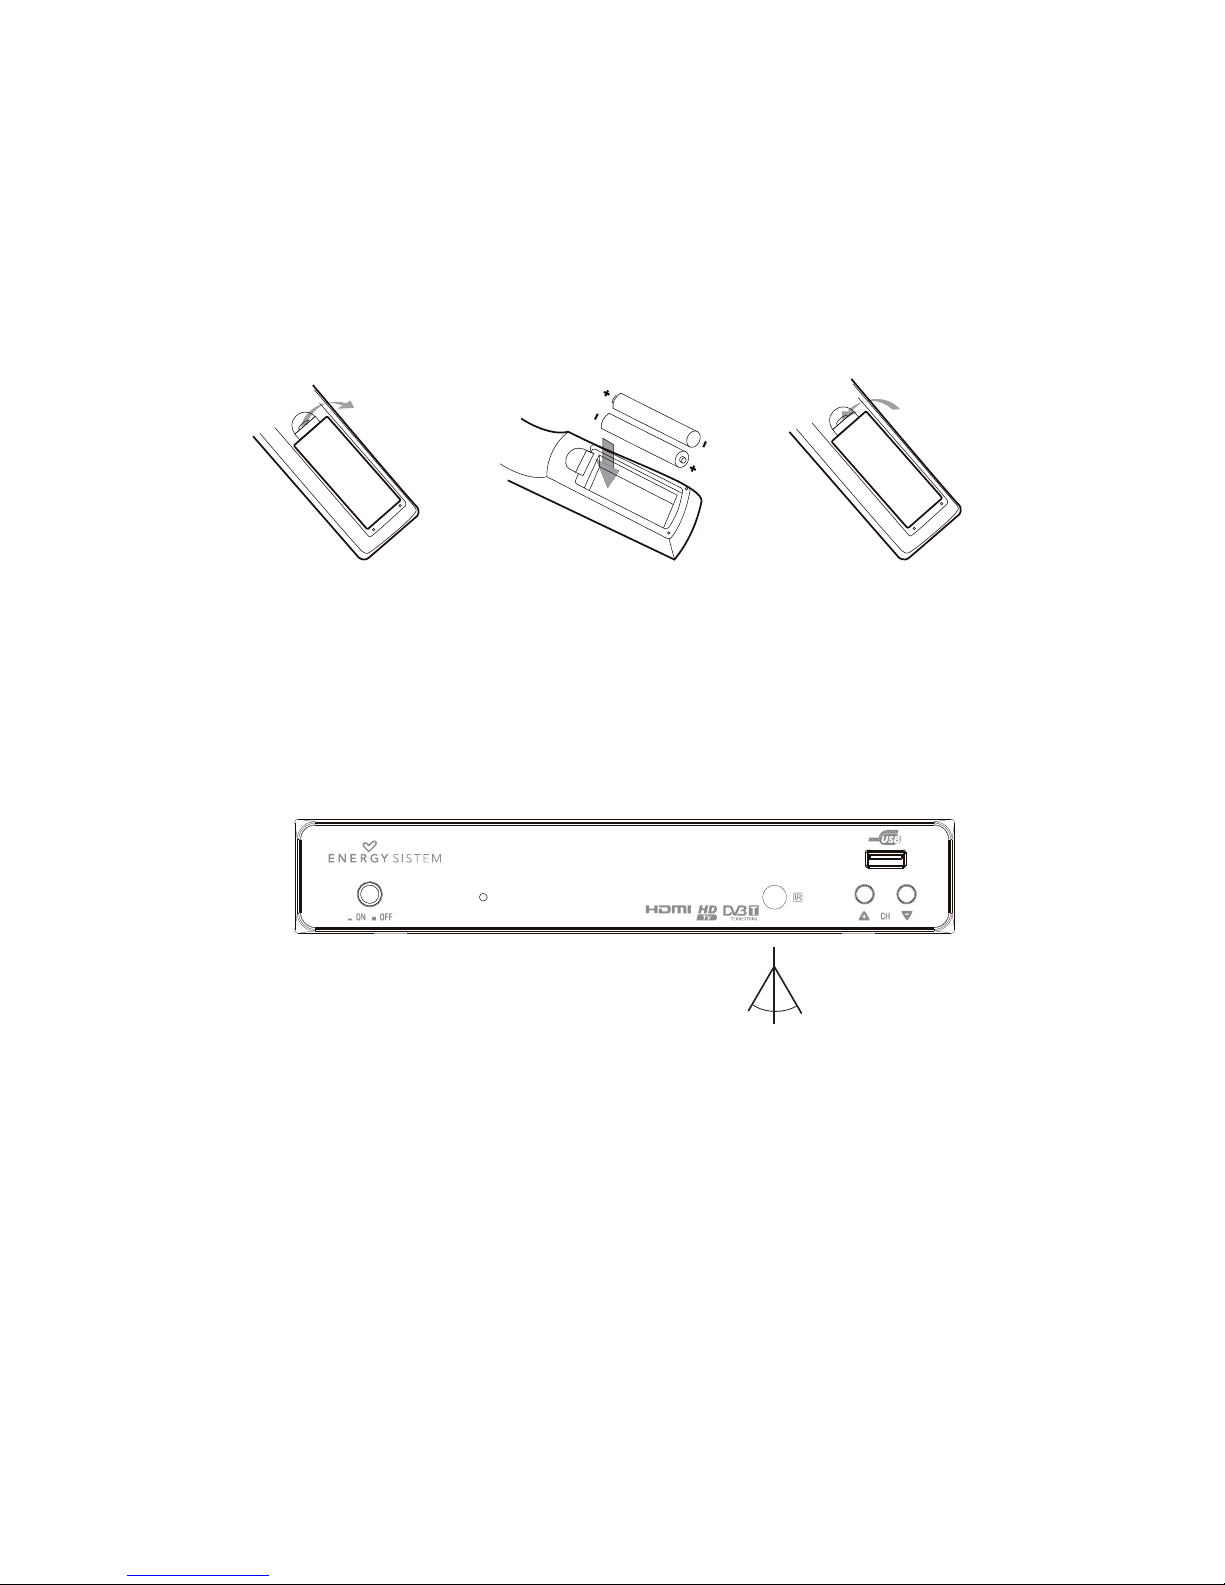
2. FRONT PANEL
1. POWER: Used to turn on/off the main power supply
2. STANDBY INDICATOR: Used to visually show power state of the set top box, the led will turn red if
the set top box enters in standby mode:
Green = on
Red = standby
No light = off
3. REMOTE CONTROL SENSOR: Used to receive the signal from the Remote Control.
4. CHANNEL UP/DOWN: Used to change channels without using the Remote Control.
5. USB PORT: Used to attach your external USB hub/card reader/storage device.
3. REAL PANEL
1. RF IN: This socket connects to your external aerial.
2. RF LOOP THROUGH: This socket will bypass the RF signal to either your TV or another video
system.
3. COAXIAL: This socket connects to a coaxial socket on your surround sound system.
4. VCR SCART: This socket connects to either a DVD or other video system.
5. TV SCART: This socket connects to your TV.
6. HDMI OUT This socket connects to HDMI in device.
7. MAINS CABLE: This is used to connect to your main power supply.
1
2 3 4
5
6 7
1
2 3 4
5
6
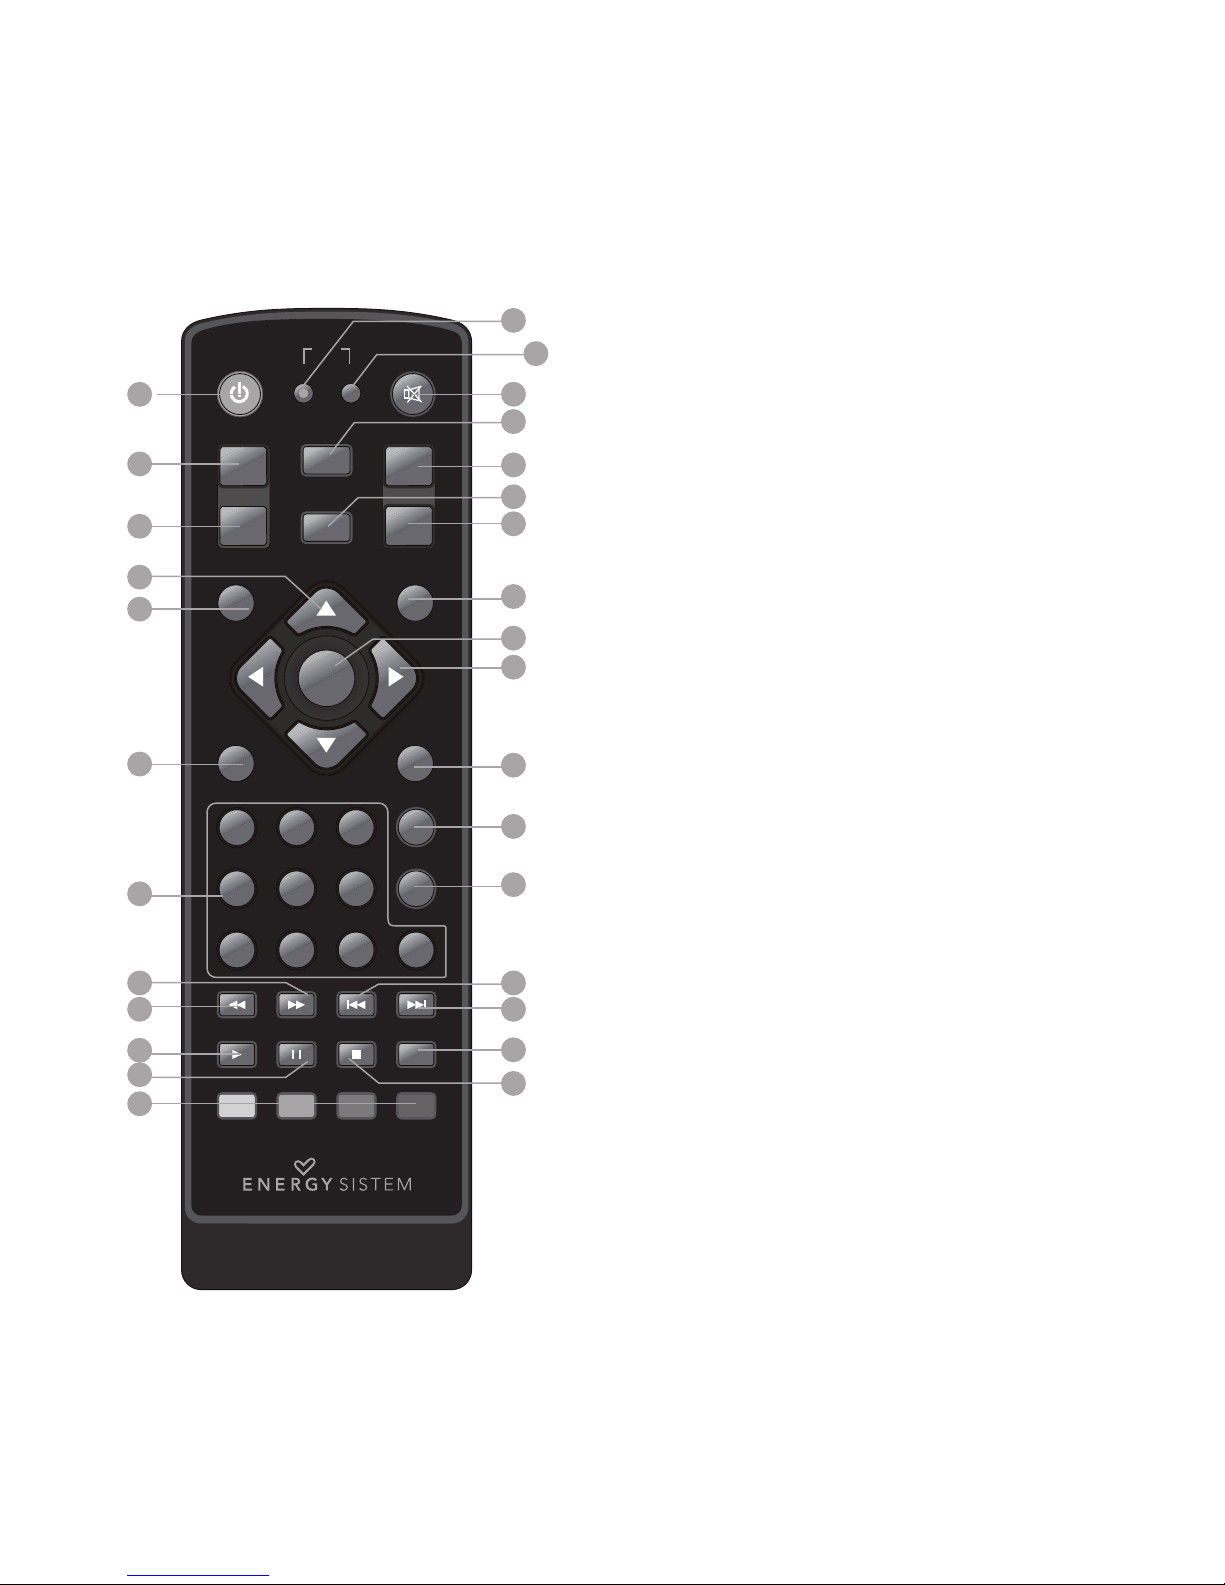
4. REMOTE CONTROL
4.1. BUTTON DESCRIPTIONS
1. MUTE: Mute/unmute the sound.
2. INFO: Displays additional channel information.
3. TTX: Displays Teletext Information.
4. DTV/VCR: Switches the product to VCR input if it is in DTV
state. Switches the product to DTV if it is in VCR state.
5. SUBTITLE: Selects Subtitles Language.
6. EXIT: Exits the current Menu or returns to the previous Menu.
7. OK: Confirms an entry or selection. Displays the list of
channels.
8. RIGHT / LEFT: Navigates through the Menus. Increases or
decreases volume.
9. TV/RADIO: Switches from TV function to Radio function and
from Radio to TV.
10. RECALL: Used to switch between the last two viewed
channels.
11. GOTO: Jumps to a desired playback time.
12. PREV: Skips to the previous track during playing media and
skips to the previous channel during playing DTV.
13. NEXT: Skips to the next track during playing media and skips
to the next channel during playing DTV.
14. REPEAT: Selects Repeat or turn off Repeat mode.
15. STOP: Stops media playback.
16. STANDBY: Switch the product to on or standby mode.
17. EPG: (Electronic Program Guide): Turns the program guide on.
18. AUDIO: Selects an Audio Language or Audio Mode.
19. UP / DOWN: Navigates through the Menus. Selects the next
or previous channel.
20. MENU: Open main menu window.
21. FAVOURITE: Access your Fav. channels menu.
22. 0-9 (Numeric Buttons): Selects a channel or setting.
23. FWD: Searches for wards during media playback.
24. REV: Searches backwards during media playback.
25. PLAY: Starts or resumes media playback.
26. PAUSE: Pauses media playback.
27. COLOUR BUTTONS: Operate different functions in TEXT
screen or other menus.
28. LIST: Show the recorded programs list.
29. REC: Record the program manually.
OK
MU TE
TT XIN FO
FW D
EP G
CH +
CH -
FAVOU RI TE
GOTO
RE V
STAN DB Y
RE CA LL
PREV NE XT
TV /R AD IO
ME NU EX IT
PAUS E STO P REPEAT
SU BT IT LE
AU DI O
PL AY
VO L+VO L-
1 2 3
4 5 6
7 8 9 0
DT V/ VC R
REC
PVR
LIST
1
2
3
4
5
6
7
8
9
10
11
12
13
14
15
16
17
18
19
20
21
22
23
24
25
26
27
28
29
Note: The TEXT SUBTITLES, AUDIO availability
depends on the available channels.
7
4.2. INSTALLING THE BATTERIES
Remove the battery cover from the remote control and put 2xAAA size batteries inside the
compartment.
The following diagram shows the correct way to insert batteries.
OP
E
N
CL
OSE
1. Open the cover 2. Install batteries 3. Close the cover
4.3. USING THE REMOTE CONTROL
To use the remote control, point it towards to the front of the digital receiver.
The remote control has a range of 7 metres from the receiver at an angle of 60 degrees.
The remote control will not work if the way to the receiver is blocked.
Sunlight or other very strong light will decrease the sensitivity of the remote control.
30º 30º
 Loading...