

ENERGY SISTEM T3300 User Manual
1
User manual
3
1. INTRODUCTION
Thank you f or purchasing this E nergyTM T3300. Fi rst of all, welcome t o the Energy DV B-T receivers
world. Th e following sect ions provide an over view of your new de vice and its basi cs features.
Please r ead everyth ing carefully be fore start u sing the product.
2. IMPORTANT SAFETY INSTRUCTIONS
To ensure your saf ety and the saf ety of others , please ensure th at you read all the sa fety inform ation befo re operating this p roduct.
Keep this in formation in a saf e place for futur e reference.
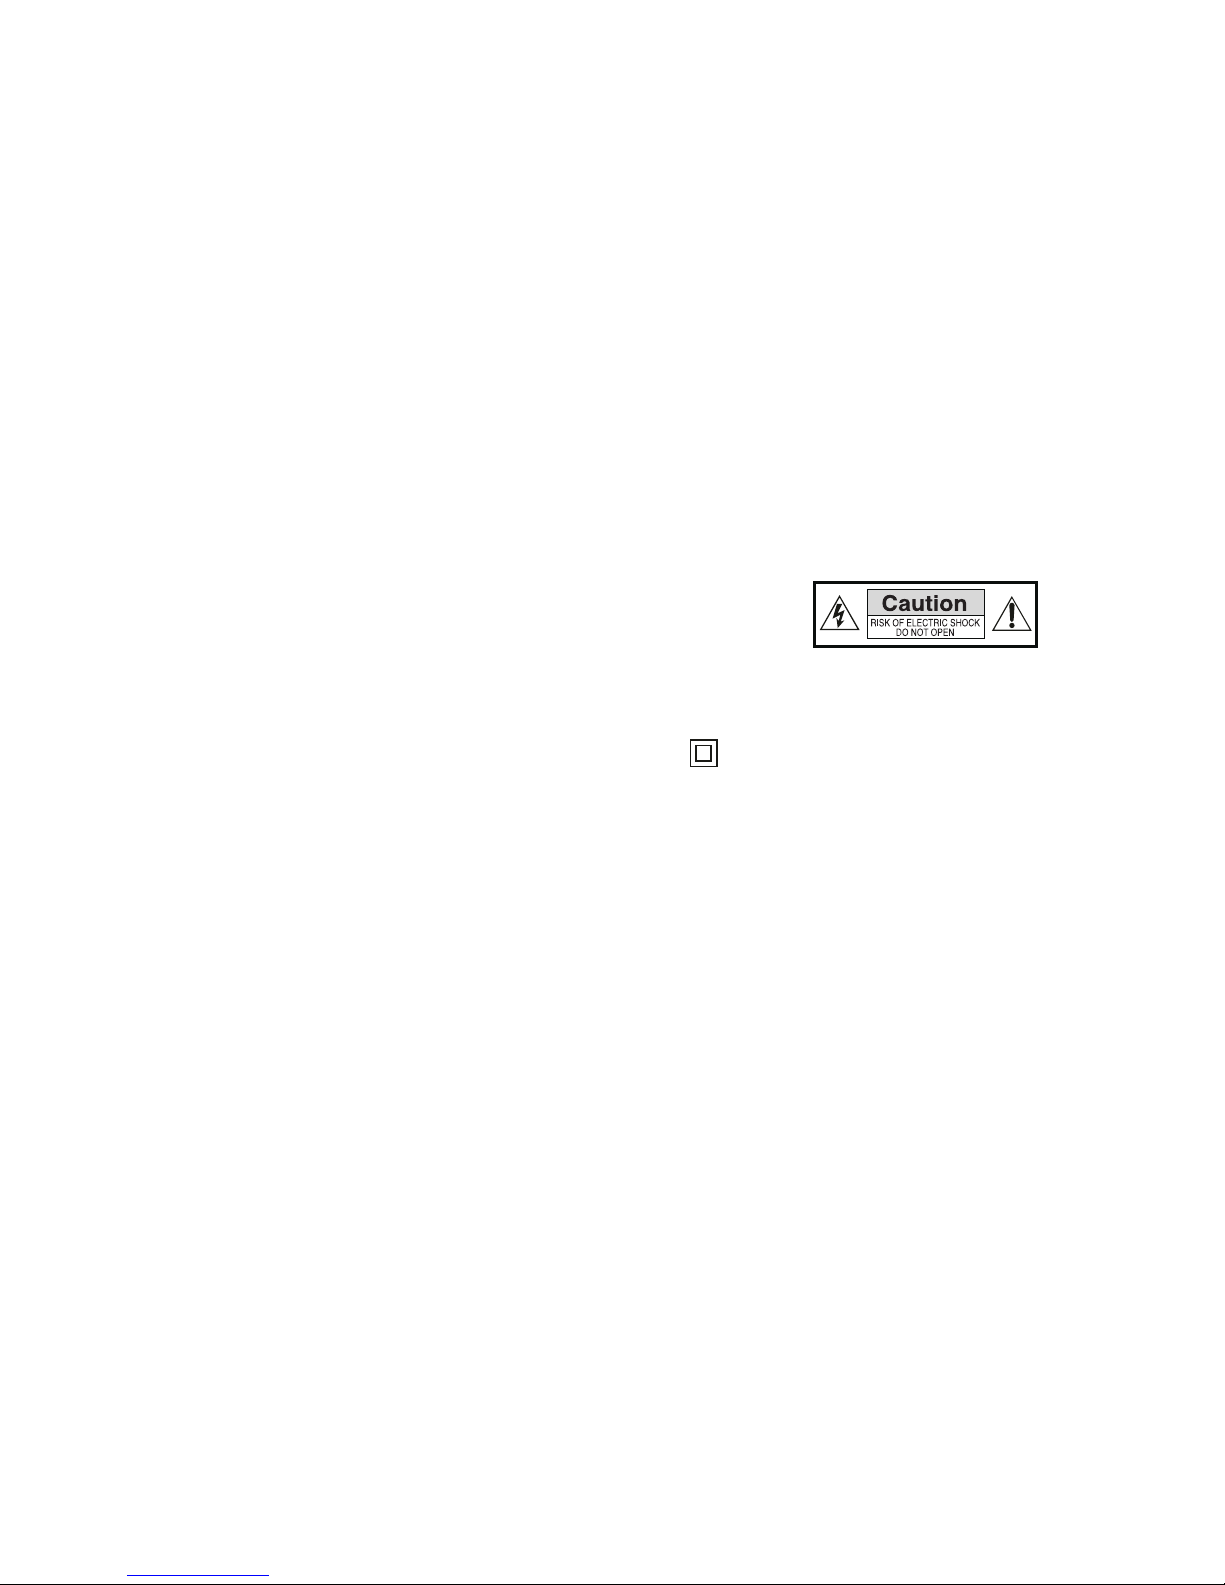
This sym bol indicates that t his product incor porates double ins ulation betwe en hazardous
mains volt age and user acces sible parts.
WARNING: To reduce t he risk of fire or ele ctric shock, do no t expose this appa ratus to rain or
moistur e.
SAFETY CONSIDERATIONS.
≥ Positio n the cables so that t hey cannot be walke d on or pinched by items pl aced on or against
them.
≥ Do not remo ve the cover or back. T here are no user-ser viceable par ts inside. Refe r servicing to
qualifi ed personnel.
≥ Do not expo se your T3300 to wat er (dripping or splashing ).
≥ No object s filled with liquid s, such as vases, sho uld be placed on the unit.
≥ Keep the pr oduct away from dir ect sunlight and he at source such as ra diators or stove s.
≥ Do not place t he product on unsta ble cart, stand , tripod, bracket or t able. The unit may fa ll,
result ing in possible dama ge or injury.
≥ Do not let th e device drop or shock .
≥ We recommen d you to unplug the powe r from the outlet w hen the unit is not in use .
VENTILATION
The slot s and openings on the set t op box are for venti lation. Do not cover o r block them as it
may cause o verheating.
NEVER le t children push any thing into the hole s or slots on the case .
4
5
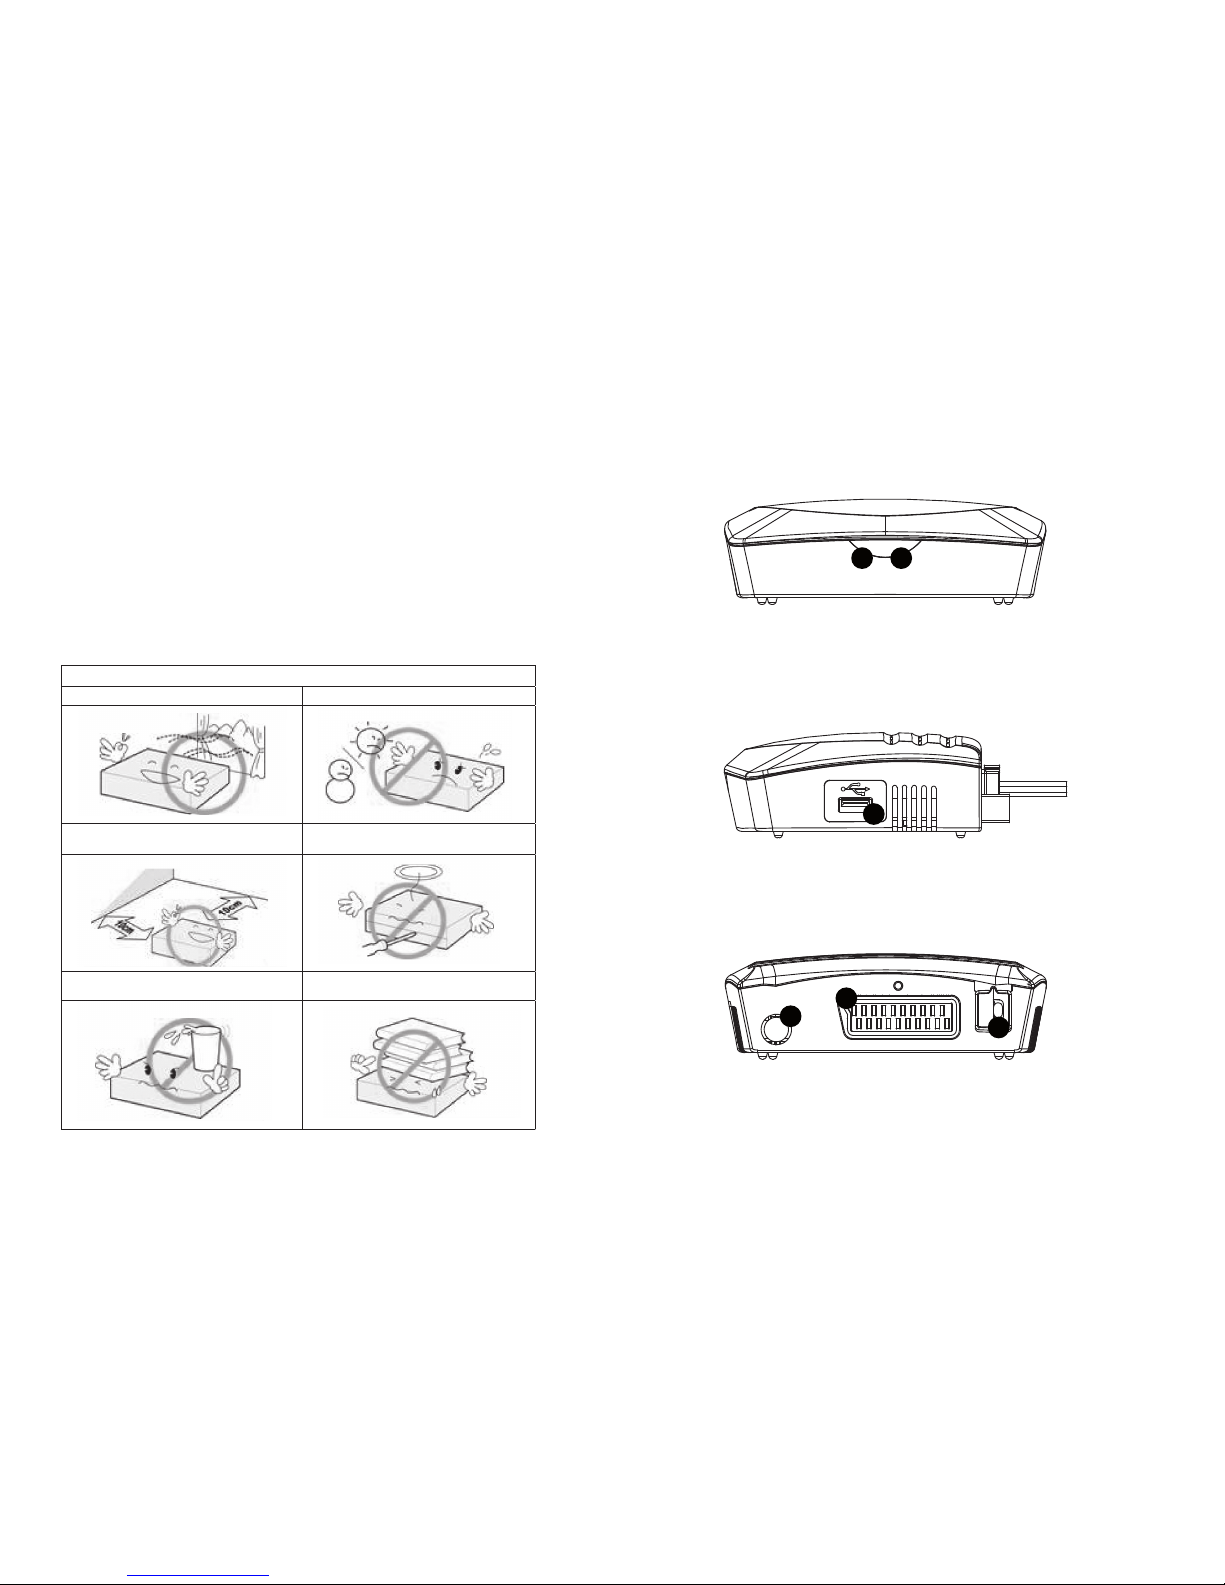
3. GENERAL VIEW
3.1. FRONT PANEL
1. STANDBY INDIC ATOR: Used to visua lly show the power st ate of the set top bo x: green LED will
show if is tur ned on the set top box a nd red LED will be ligh t if the set top box en tered standby
mode.
2. REMOTE CONT ROL SENSOR: Used t o receive the sign al from the remot e control.
3. USB CONNECTOR : Used to connect t o an external US B device.
3.2. REAR PANEL
1. RF IN: This so cket connects to y our external aer ial.
2. TV SCAR T: This socke t connects to your T V.
3. MAINS CABL E: This is used to conn ect to your main powe r supply.
1
1
2
3
2
1
1
2
3
2
3
SERVICING
There ar e no user service able parts in th is set top box.
BATTERY DISPOSAL
Please en sure batteri es are disposed of s afely.
Never disp ose of batterie s in a fire or with ot her household wast e.
Check wit h your local author ity for dispos al regulations .
CLEANING
ALWAYS unplug the se t top box before you c lean it.
Do not use liqu id or aerosol cleane rs.
Clean the s et top box with a sof t, damp (not wet) cloth.
T3300 HANDLING AND CARE
Place t he produc t in a well- ventila ted are a Don’t ins tall it in t he cold or un der direc t sunlig ht
Leave a m inimum 10c m gap all ar ound the pr oduct
Do not dis assem ble, repa ir,
or reor ganize t he produc t
Don’t pla ce cups wi th water o r other liq uids
on the to p of the prod uct
Don’t pla ce objec ts on the top o f the prod uct
1
2
3
6
7
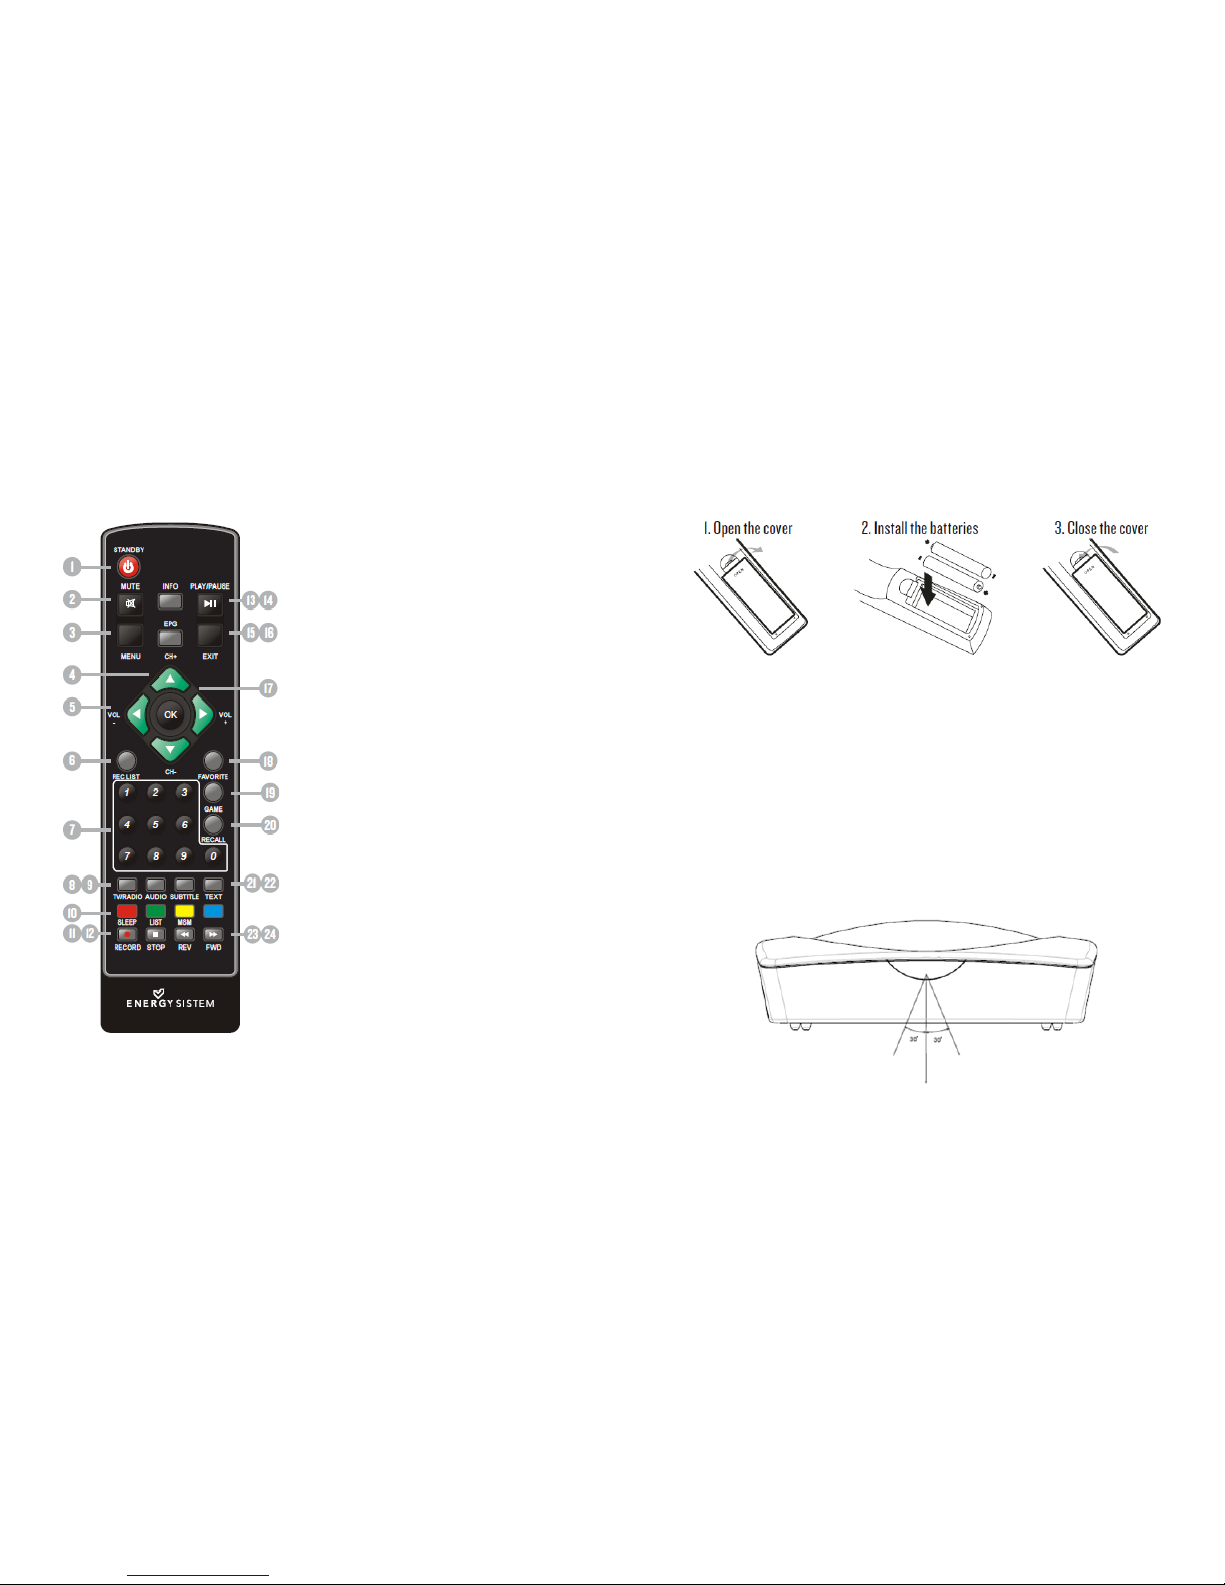
4.2. INSTALLING THE BATTERIES
Remove th e battery cov er from the remot e control and put 2 xAAA si ze batteries in side the
compar tment.
The diag ram shows the corr ect way to insta ll the batterie s inside the batte ry compartm ent.
≥ Keep bat teries out of reac h of children. If someo ne swallows a coin cell o r battery mus t receive
immediate m edical attent ion.
≥ Do not att empt to reactiv ate the batter ies using heat, loading , or by other means. Ne ver dispose
of batt eries in fire, or dis assemble or short c ircuit. Replace bat teries at leas t once a year to
avoid spilla ge.
≥ Replace bo th batteries a t the same time and rep lace them with the s ame type.
≥ When not us ing the remote cont rol for a long time, rem ove the batteri es.
4.3. USING THE REMOTE CONTROL
To use the remot e control point it t owards the fron t of the digital se t top box.
The remo te control has a ra nge of up to 7 metres f rom the set top box at a n angle of up to 60
degree s.
4. REMOTE CONTROL
4.1. BUTTON DESCRIPTIONS
NOTE: S UBTITLE S/TEX T/AUDIO may not
be avail able for all ch annels.
The remo te control will no t operate if its pa th is blocked.
Sunlight o r very bright lig ht will decreas e the sensitiv ity of the remot e control.
1. STANDBY: Swi tch the set t op box bet ween on and st andby
mode.
2. MUTE: Mut e/unmute t he sound.
3. MENU: Open th e main menu wi ndow.
4. CH+/-: Move ar ound the men u screens or c hange the
channe ls in normal p lay mode.
5. VOL+/-: Move around t he menu scr eens or chan ge the
volume i n normal pla y mode.
6. RECLIST: Sho w the recor ded prog rams list.
7. NUMBER KE YS: Selec t channel n umbers or in put
number s in menus.
8. TV/RADIO : Switch b etween T V channel s and Radio
stati on
9. AUDIO: Sele ct the avail able audio t rack or set t he sound
mode as L R(stereo), LL(le ft), RR(right).
10. COLOR KEY S (RED/GREE N/YELL OW/BLUE): Ope rate
diff erent fun ctions in T EXT scr een or other m enus.
RED: SLE EP funct ion (adjust able timer).
GREEN: L IST funct ion.
YELLO W: MSM – Multi S creen Mos aic.
11. RECORD: Rec ord the pro gram manu ally.
12. STOP: St op the curr ent recor ding if exi sts or stop t he
playb ack and ret urn to DTV m ode.
13. INFO: Displ ay inform ation abou t the chann el being
viewe d or furthe r informa tion abou t the progr am when in
norma l play mode.
14. PLAY/PAUSE : Pause or pla yback the p rogram b eing
viewe d.
15. EPG: Displ ay inform ation abou t the prog ram being
viewe d and what ’s on next.
16. EXIT: Retu rn to the pre vious scr een or menu.
17. OK: Con firm a sele ction wit hin a menu.
18. FAVORITE: Ac cess your f avourite c hannels.
19. GAME: Sele ct an acce ssory: G omoku, Cal endar or
Calcul ator.
20. RECALL : Switch b etween t he last two v iewed cha nnels.
21. SUBTITL E: Switc h among dif ferent su btitles t hat are
broad casted.
22. TEXT: Di splay tele text (if av ailable in t he broadc asted
stre am).
23. REV: Fas t backwa rd at selec table spee ds.
24. FWD: Fas t forwar d at selec table spee ds.
8
9
6. USER INTERFACE - MAIN MENU
Note that t he first time you u se T3300 it will au tomatically sho w the Setup->Instal lation screen in
order to sc an for TV and radi o channels. Please r efer to Setup->Ins tallation in page 10 .
Once the cha nnel scan is finish ed and all the channels a re stored into t he database, you c an start
to watch t he digital terr estrial TV ch annel or listen to the r adio broadcas t, some typical op erations
are giv en in this chapter.
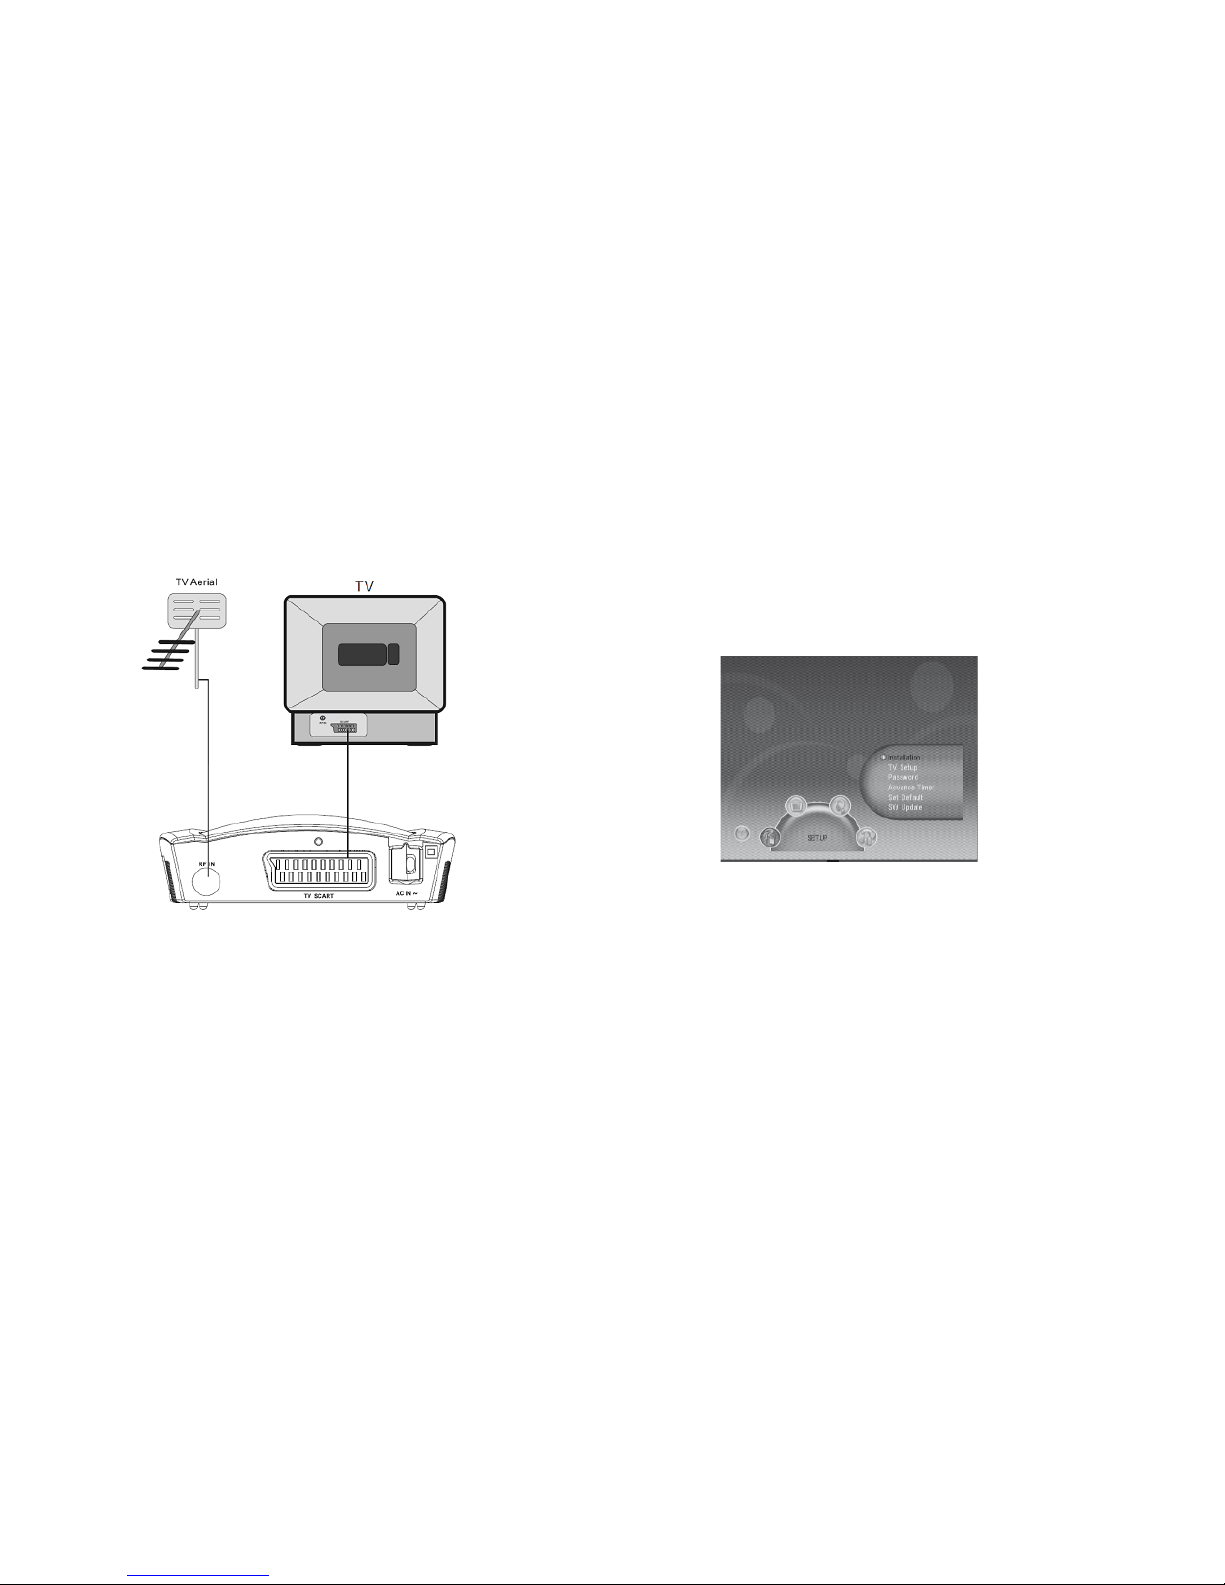
Press <Menu> t o enter Main Menu. See F igure 1.
Press <Inf o> to display T3300 ve rsion informat ion.
Figure 1. Ma in Menu - Setup
5. CONNECTIONS
CAUTION : Make sure to check th at the voltage of t he wall outlet has t he same rating tha n the
receiv er.
To prevent the r isk of electric sh ock, do not open the cov er or the back of the re ceiver.
5.1. CONNECTING TO A TV SET
When conne cting the recei ver to other equipmen t (e.g. TV, VCR and amplifie r) make sure to
refer to r elevant user man ual for instruc tion. Also, make sur e you disconnect all t he equipments
from the m ains supply befor e the connection.
10
11
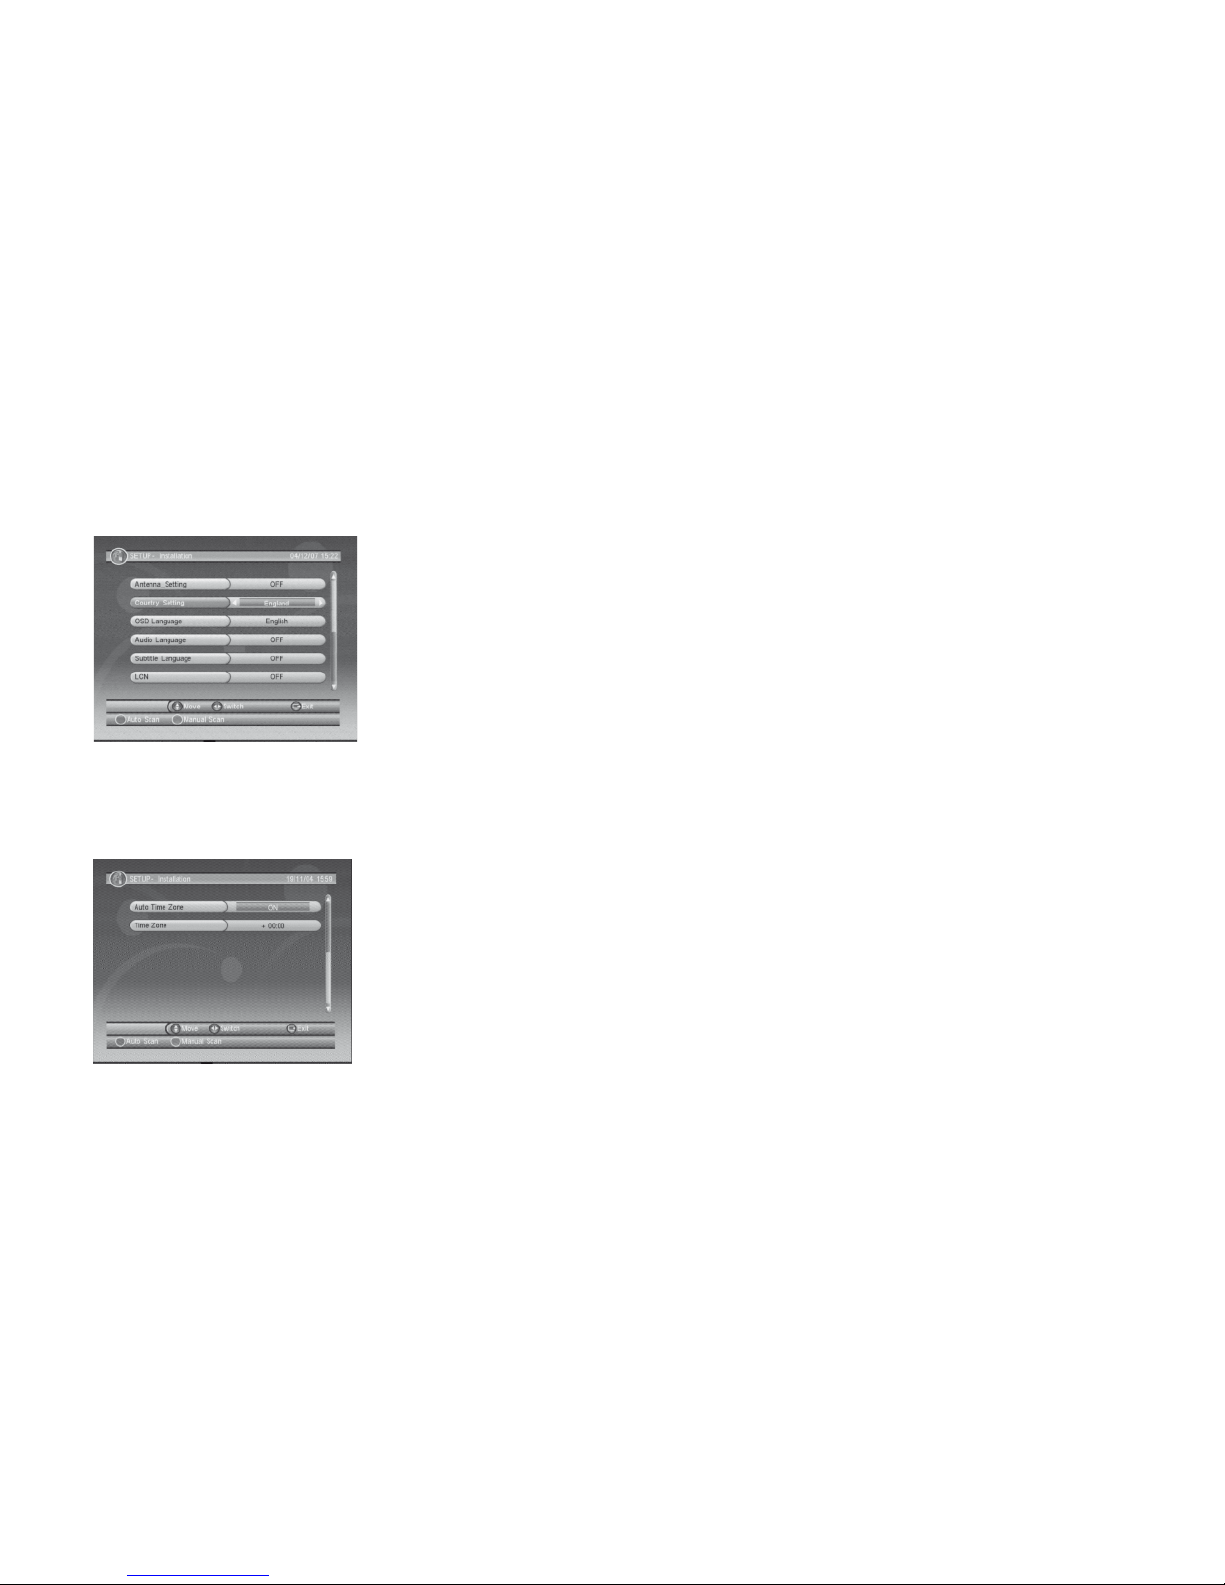
Antenna Setting
Set the an tenna power on or of f to supply +5V pow er to antenna or not.
Note: The d efault is OFF, set this opti on to ON only if T3300 i s connected to an act ive antenna
which ampli fies the recei ved RF signal, oth erwise pleas e set it to OFF.
Country Setting
Set the cou ntry for Auto S can, Manual Scan a nd Time Zone.
Note: Cha nge the Country S etting will aut omatically cha nge the default Tim e Zone and set the
default Fr equency and Bandw idth for Auto Sc an.
OSD Language
Set the On S creen Display Lan guage.
Audio Language
Set the aud io language for wa tching a program (ava ilability depen ds on channel broadc aster).
Subtitle Language
Set the lan guage for display ing subtitle pr ogram (availabilit y depends on channe l broadcaster).
LCN
Set the Lo gical Channel Numb er to ON or OFF.
Note: LCN i s a number that uniquel y identifies a log ical channel, whi ch is popular in some
Europea n countries such as E ngland or France.
Auto Time Zone / Time Zone
Allows yo u to enable or disable a uto time zone update . If you know the GMT (Gre enwich Mean
Time) time zone o ffset of your loc ation, set the Au to Time Zone to OFF and s elect an appropri ate
Time Zone, o therwise set i t to ON and let the sys tem update the time z one automatica lly
accordin g to the transpor t stream. See Fi gure 3.
Note: Som e Countries are co vered with more t han one Time Zone.
Auto Scan
Auto Sca n will erase the dat abase first, an d scan default fr equency and bandw idth by Countr y
Setti ng.
Press <RE D> button to star t Auto Scan.
Press <OK> but ton to confirm c lear action and st art Auto Scan.
It cost s time to do Auto Scan , you can press <Ex it> button to exi t at anytime. See F igure 4,
Figure 5 .
6.1. SETUP
Set the sy stem setting s. See Figure 1.
6.1.1. Installation
Figure 2 . SETUP - Installa tion.
Figure 3 . SETUP - Installa tion (continued)
Set the re ceiving and playi ng program set tings of T3300. S ee Figure 2, Figur e 3.
 Loading...