

ENERGY SISTEM P4350 User Manual

User Manual

PRECAUTIONS
We strongly recommend reading the points below before operating this product.
≥ Back up the data periodically to another safe media. Under no circumstances there is any liability
regarding to data damage or loss in a HDD.
≥ Do not place the player near devices that emit strong magnetic fields. It may cause data damage
or loss on the HDD.
≥ Do not disassemble or remodel the device. It may cause damage and/or data loss to the player.
≥ Do not power off the device while a file is playing.
≥ Do not let the player drop or shock: the HDD may suffer unrecoverable data loss or even render it
unusable.
≥ Do not use the device under heavy moisture or wet conditions. If any liquid gets in contact with
P4350 unplug the power right away.
≥ Do not touch P4350 with wet hands. It may cause electric shock.
≥ The power outlet shall be installed near the equipment and shall be easily accessible.
≥ In hot environments take care of the temperature reached by P4350 because it can overheat if
used for long time. The device may stop to preserve integrity in such conditions but if you force
P4350 to continue working it may cause damage and/or data loss to the unit.

1. Media ............................................................................................................................................................... 4
1.1. Internal hard disk ..................................................................................................................................4
1.1.1. Drive Installation 4
1.1.2. Connection with computer 5
1.1.3. Device detection 5
Windows 98SE 5
Windows Me/2000/XP/Vista, Mac OS X, Linux 5
1.1.4. Partitioning and Formatting Hard Disk Drive 6
Windows 2000/XP 6
Windows Vista 9
1.2. USB Devices .........................................................................................................................................12
1.3. Network ................................................................................................................................................12
1.3.1. Connection types 12
1.3.2. File sharing 13
Windows XP 13
Windows Vista 14
2. Front and back views .....................................................................................................................................15
3. Connections....................................................................................................................................................16
3.1. Video - Composite ................................................................................................................................16
3.2. Video - S-Video .....................................................................................................................................16
3.3. Video - Components .............................................................................................................................16
3.4. Audio - Stereo analog ..........................................................................................................................17
3.5. Audio - Digital optical / coaxial ...........................................................................................................17
3.6. Audio/Video - HDMI .............................................................................................................................17
4. Remote Control ..............................................................................................................................................18
5. Main Menu .....................................................................................................................................................19
5.1. Hard disk ..............................................................................................................................................19
5.2. Network ................................................................................................................................................19
5.3. USB Disk ...............................................................................................................................................19
5.4. Setup ....................................................................................................................................................19
5.4.1. A/V (Audio/video Settings) 20
5.4.2. Etc 21
5.4.3. Network 22
5.4.4. Exit 22
6. Firmware upgrade .........................................................................................................................................22
7. Troubleshooting ............................................................................................................................................ 23
8. Specifications ................................................................................................................................................ 24
4
1. MEDIA
1.1. INTERNAL HARD DISK
Follow step-by-step the points below for a successful setup. Notice that some steps may vary
depending on the operating system.
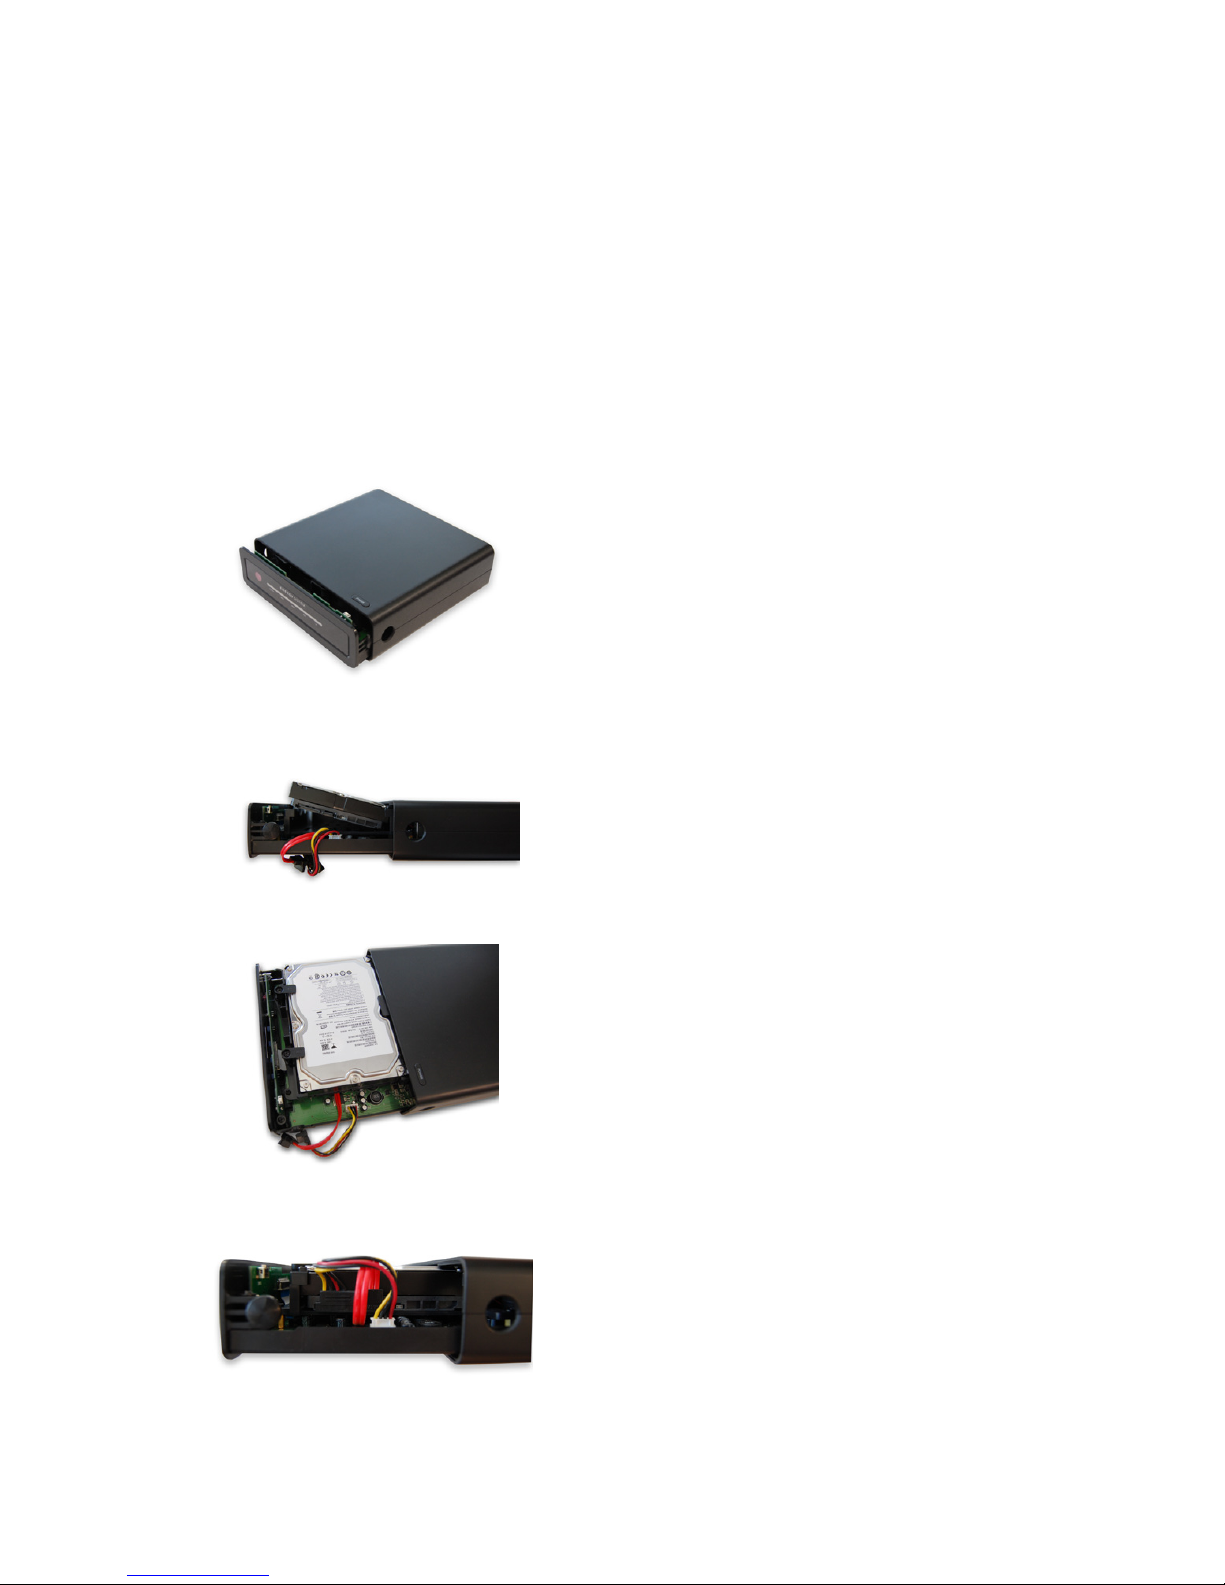
1.1.1. Drive Installation
Unplug P4350 from mains supply before starting the hard disk installation.
1. Press the lateral buttons at the same time
to slide out the hard disk tray.
2. Fit the hard disk inside the bracket in the
right position.
3. Turn the two latches to secure the hard
disk in place.
4. Connect the SATA cables and slide in
carefully the hard disk tray to the original
position. Make sure that the lateral
buttons are properly adjusted.
5
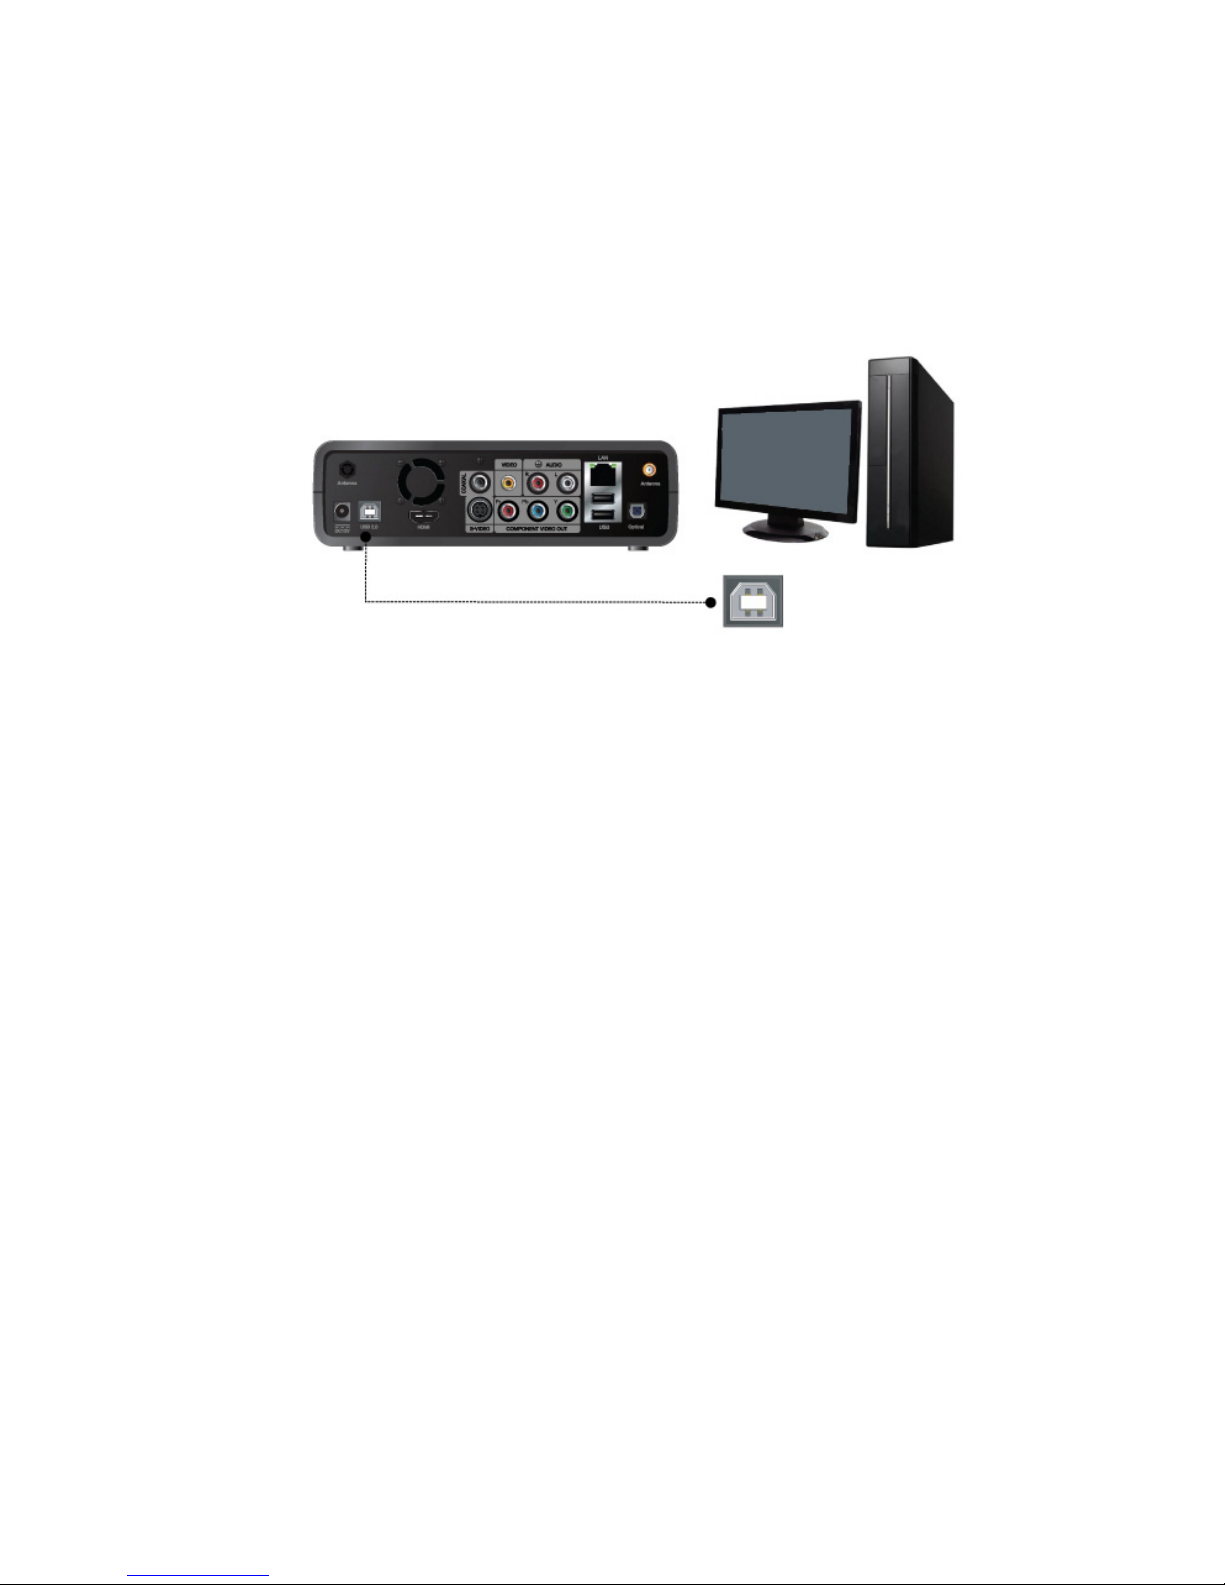
1.1.2. Connection with computer
P4350 can cummunicate at USB1.1 (12Mbps) or USB2.0 (480Mbps) speed with the computer. It is
recommended to use USB2.0 which allows faster transfer rates. If your computer has a mix of USB1.1
and USB2.0 ports read the corresponding manual to be able to select the appropriate port.
1.1.3. Device detection
Windows 98SE
In Windows 98SE, install the device driver included in the CD-ROM.
You can also download the driver at www.energysistem.com.
1. Run setup.exe file before connecting P4350.
2. Reboot after finishing installation.
3. Connect P4350 to the computer. An ‘Add New Hardware’ procedure will start; follow the
suggested steps.
4. Check that the hard disk drive inside the player is listed on the ‘Device Manager’ tab.
Windows Me/2000/XP/Vista, Mac OS X, Linux
This operating systems have built-in support for external USB hard disks so you don’t need to install
any driver.
To prevent file system corruption remember to follow the correct steps when disconnecting P4350
from the computer:
≥ Windows: Use the ‘Safely remove hardware’ procedure.
≥ Mac OS: Discard the corresponding Desktop icon into Trash Bin before disconnecting P4350 from
USB port.
6
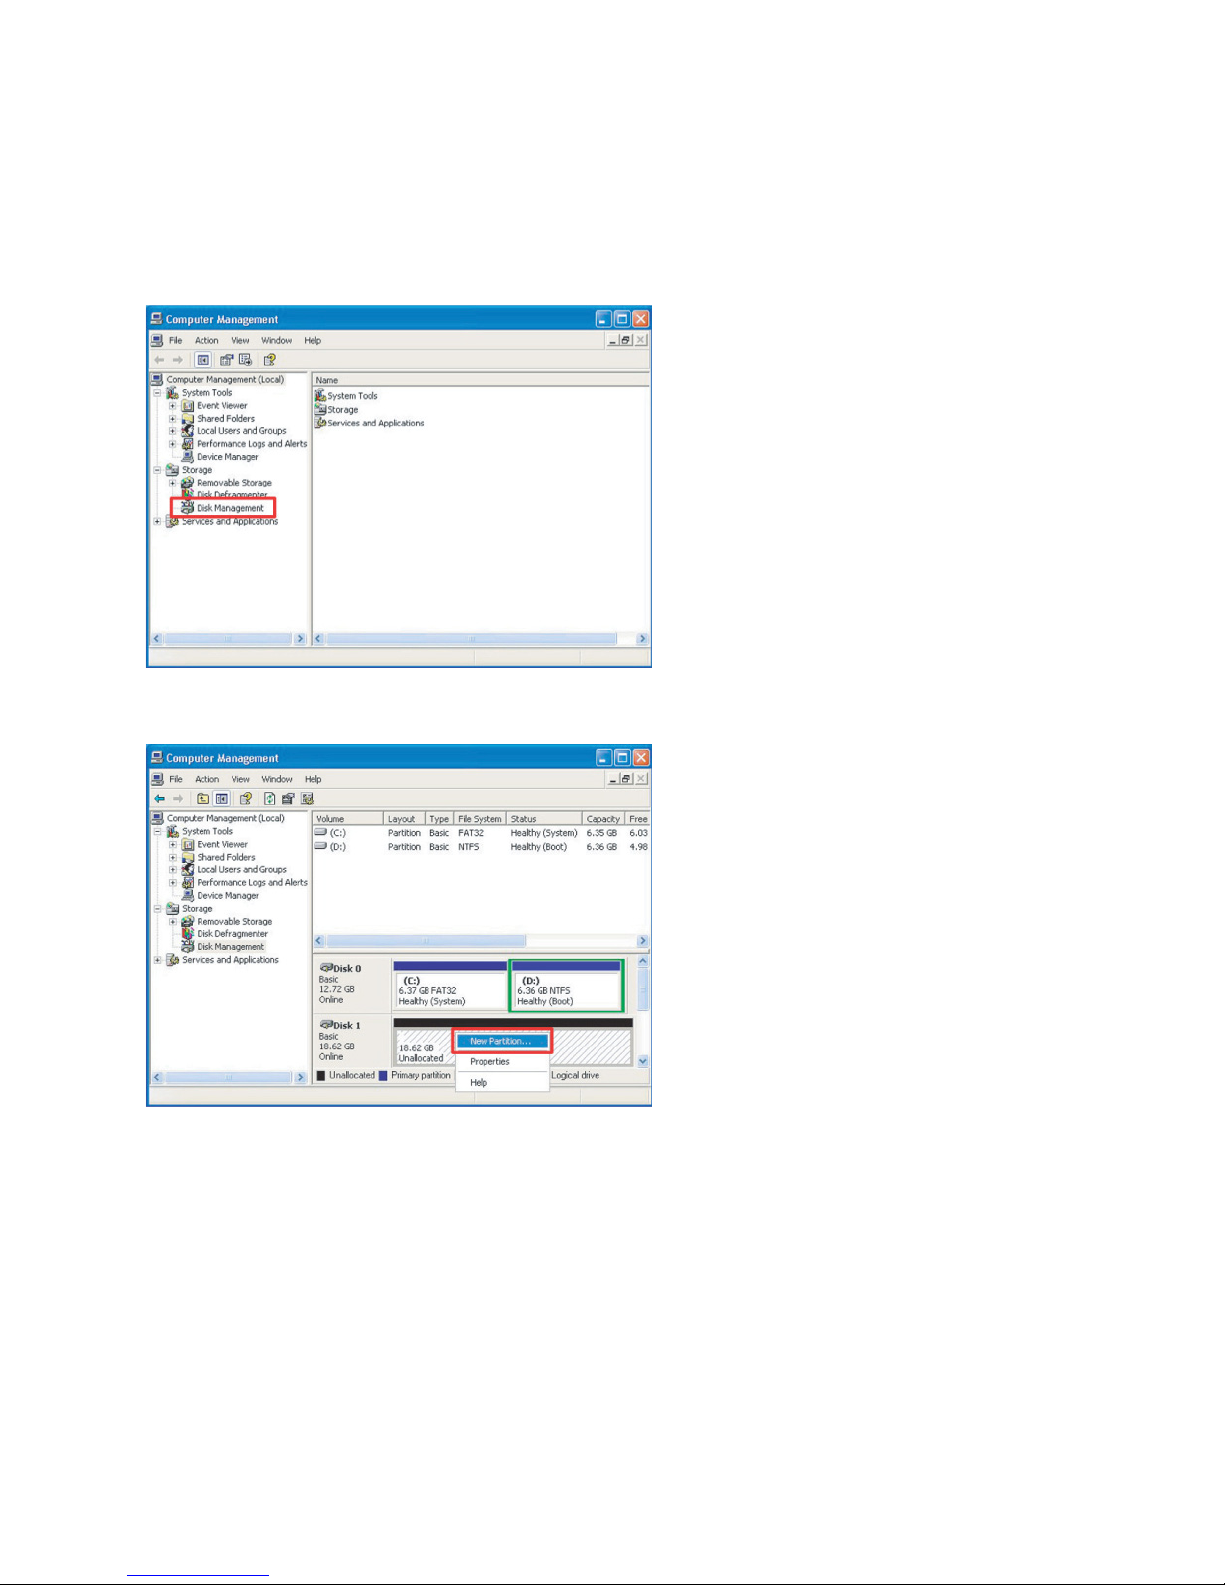
1.1.4. Partitioning and Formatting Hard Disk Drive
Windows 2000/XP
Note: There are slight changes in this procedure depending on the operating system version.
1. Select [Start>Control
Panel>Management Tools>Computer
Management] and then [Disk Management] under [Storage] section.
2. In the list of connected disks locate the
one that corresponds to P4350.
3. Activate the disk using MBR partition
table (GUID partition table is not supported) if it is not already activated..
To create a FAT32 partition:
4. Create a new partition by right-clicking
an unallocated space in the disk and
select [New partition] from the menu
that appears.
7
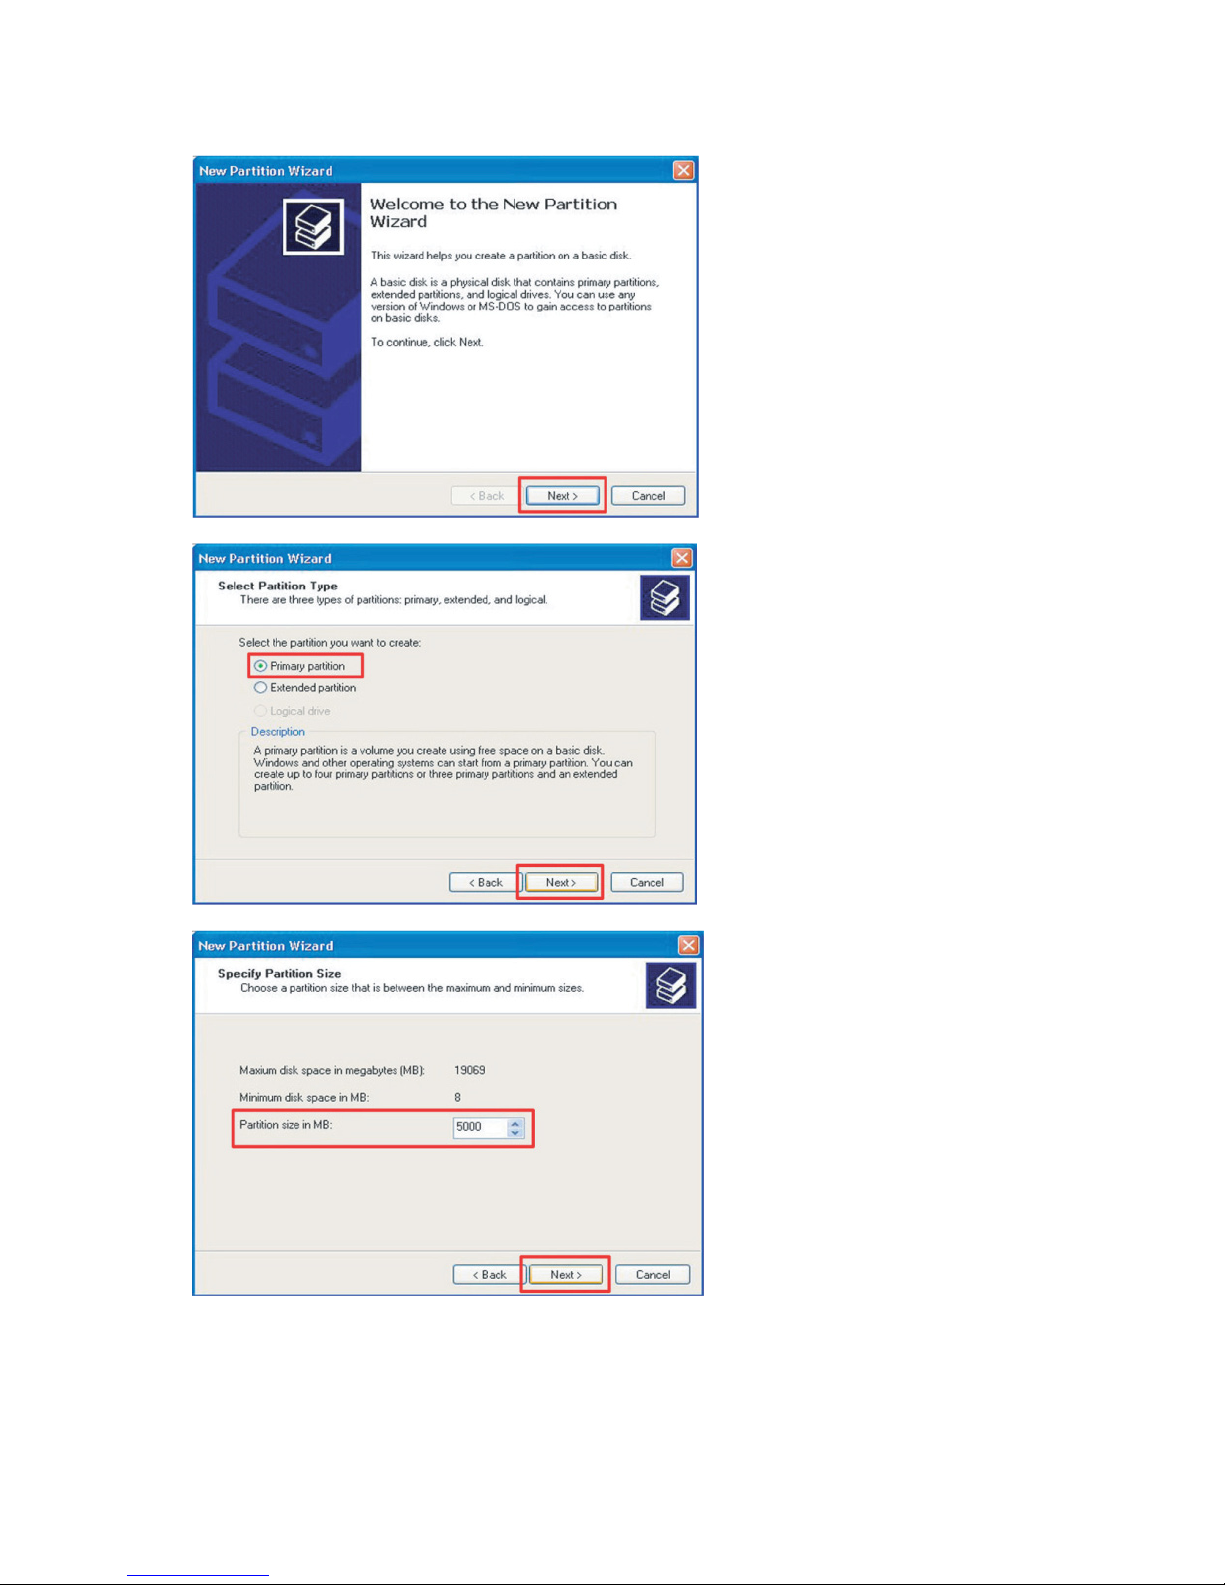
5. ‘New Partition Wizard’ will show. Click
[Next] to continue.
6. Select [Primary Partition] and click
[Next] to continue.
7. Enter the desired partition size and click
[Next] to continue.
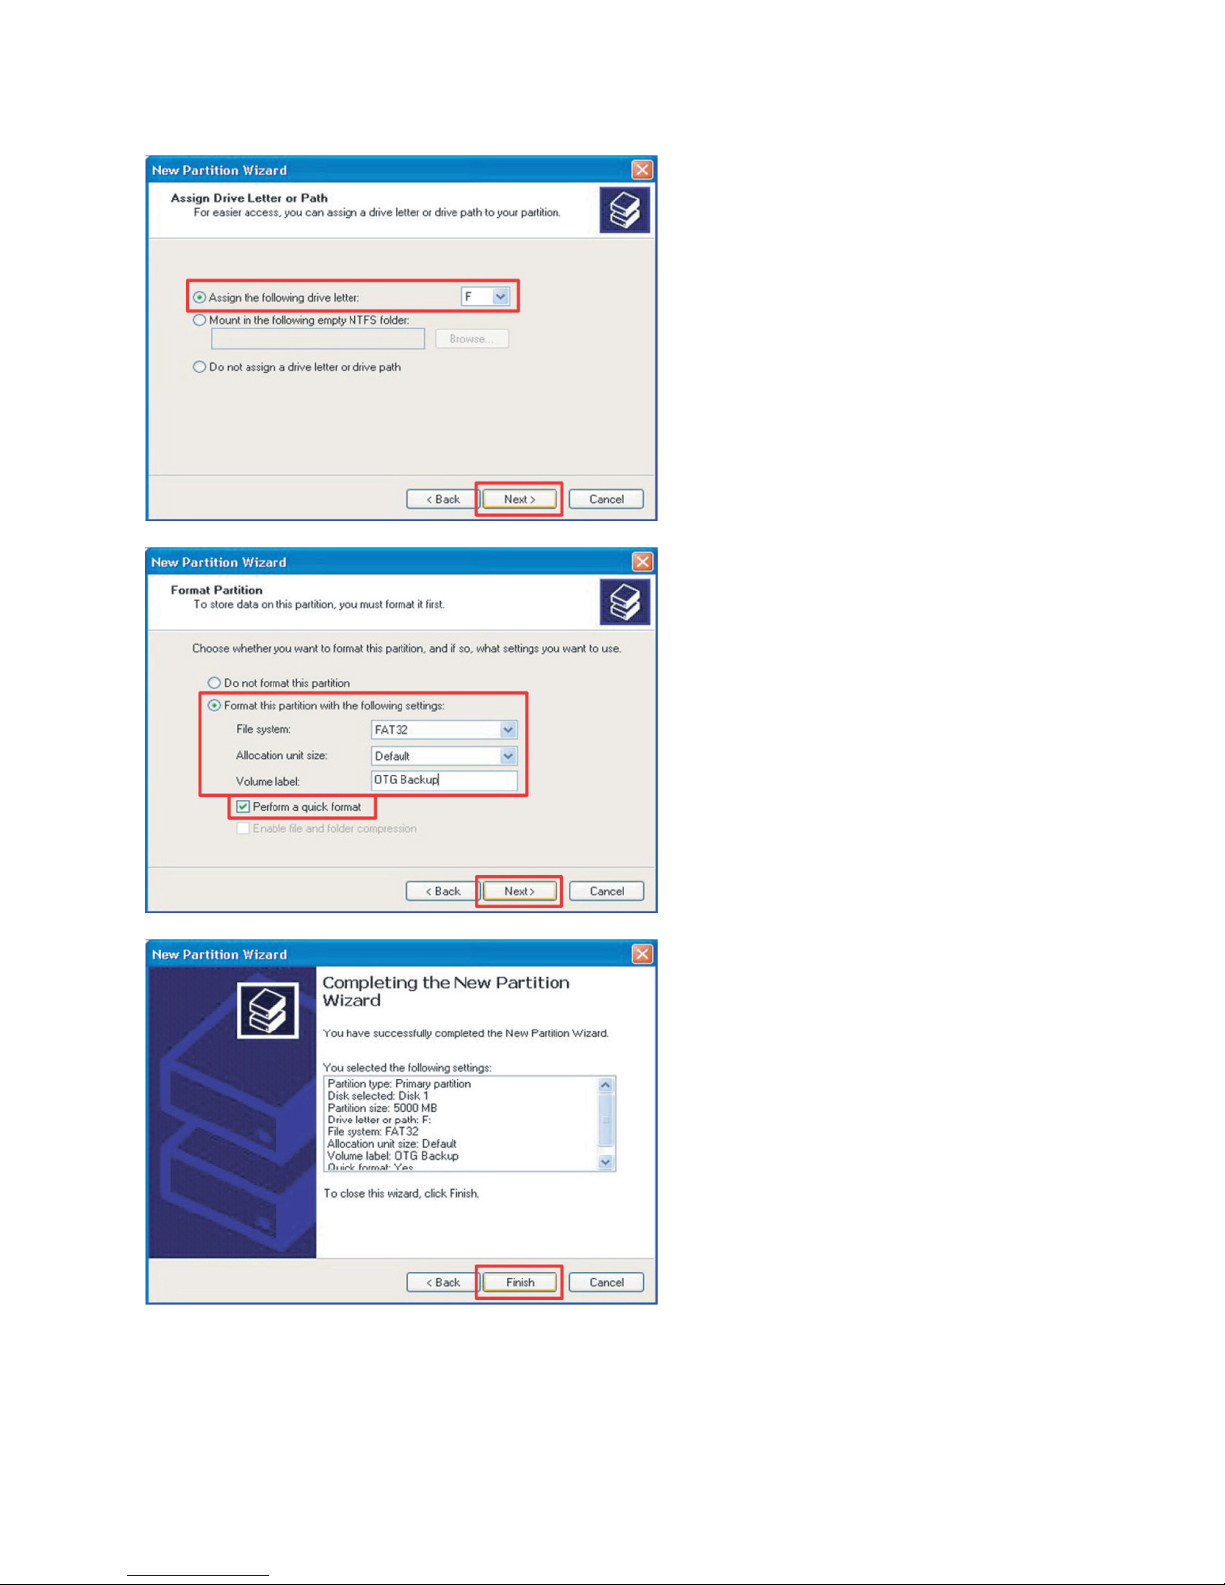
8
8. Assign a drive letter to the partition (you
can accept the letter suggested by the
wizard), click [Next].
9. Select [Format this partition with the
following settings]; FAT32 as [File
system] and then check [Perform a quick
format]. Click [Next] to continue.
10. Check the settings are correct and click
[Finish].
Windows will perform the requested
operations to create the new FAT32
partition.
To create a NTFS partition, follow the steps
4-10 but at step 9 select NTFS as [File system].
 Loading...