

Eneo NXD-1602M User Manual
Please read this manual thoroughly before use and keep it handy for future reference.
NXD-1602M
Full HD NETWORK CAMERA
GB

2
DESCRIPTION
---------------------------------------------------------------------------------------------------------------------------
The
NXD-1602M vandal resistant dome is an internet protocol based megapixel network
camera with a built-in web based viewer accessible by multiple browsers. The camera has a
connection feature for third-party applications. It is supplied with Zelaris Elements utility
software to search, configure, manage, live view, record and playback.
The camera supports dual compression formats and multiple streaming simultaneously. The
two standard compression formats include H.264 and MJPEG. The multiple streams can be
configured to a variety of resolutions, bit rates and frame rates.
The camera uses 1/2.8 inch CMOS sensor and Focal length 3~9mm lens and also supports
PoE (Power over Ethernet), DC12V, and AC24V.
Model
NXD-1602M Full HD, Day and Night, WDR, Vandal resistant dome
Components
Quantity Description
2 Camera
2 Installation CD
1 Accessory kit for installing Dome Camera
1 Template sheet
1 Extension connector kit
NOTE
Adapter for DC12V / AC24V are not supplied.
3
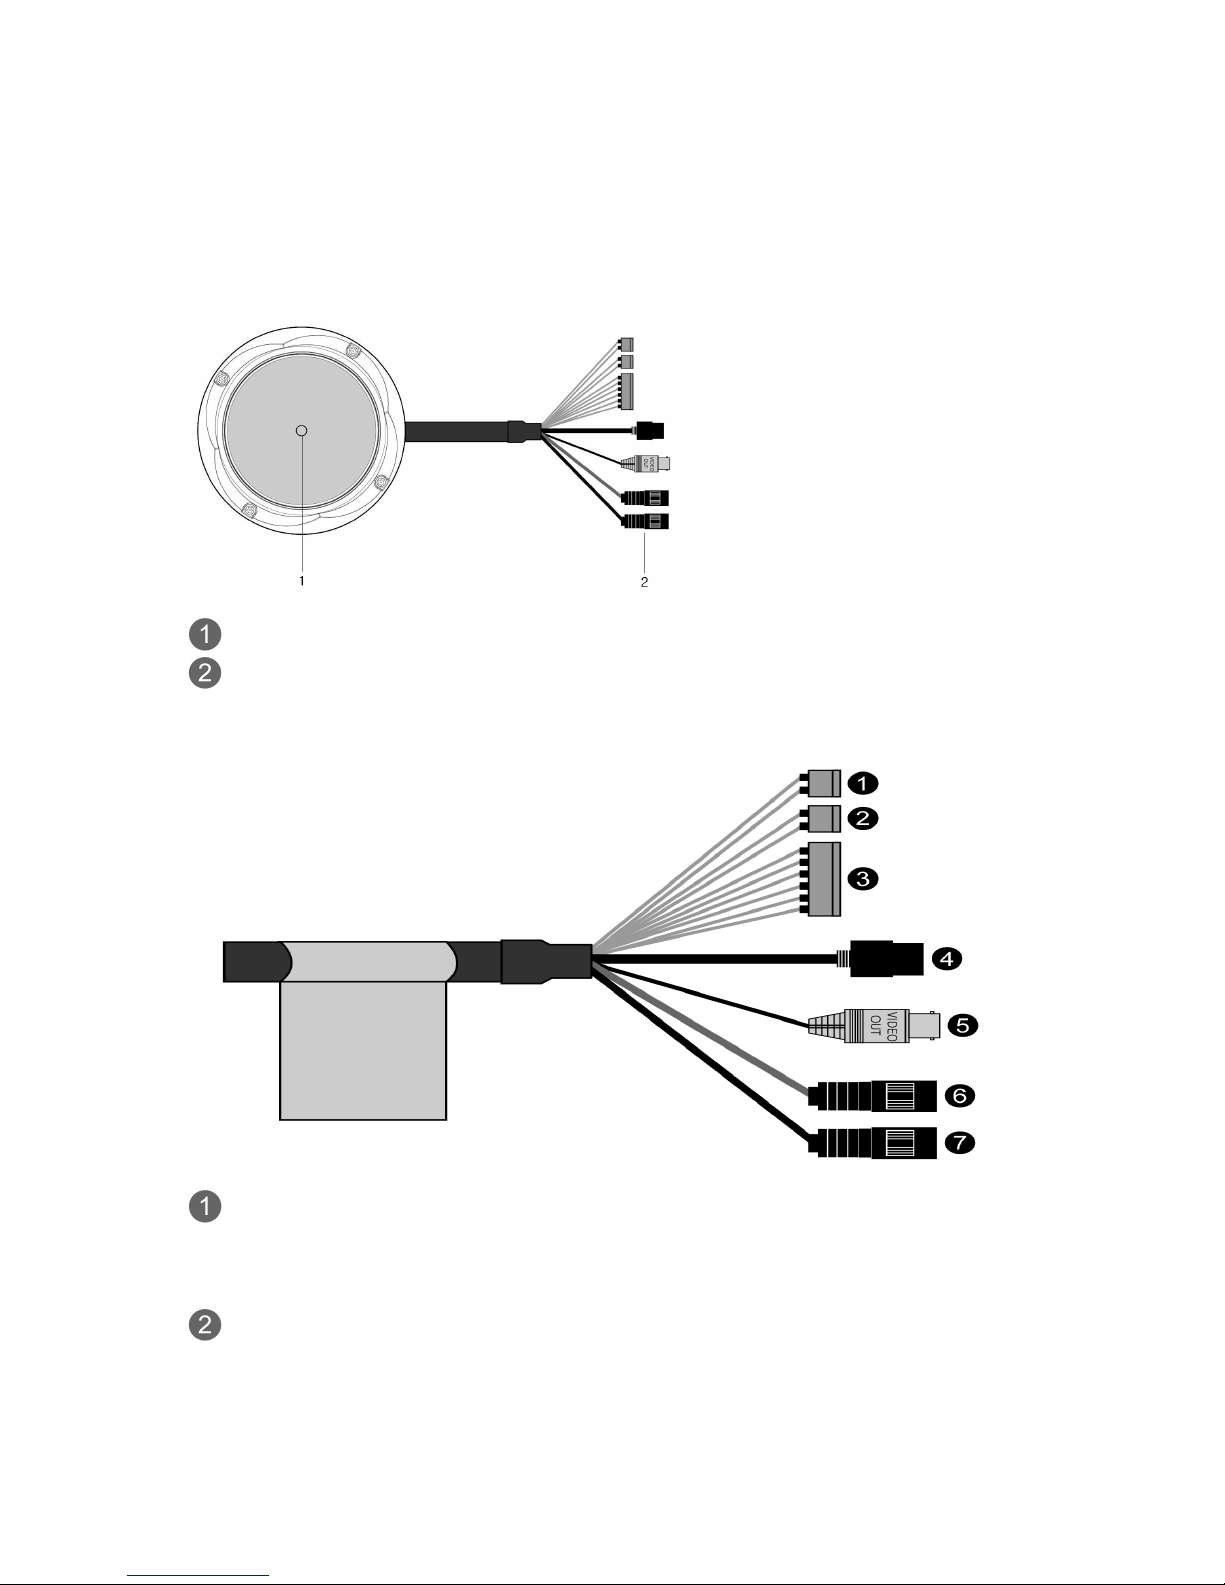
Camera Layout
Top View
Lens: 3-9mm vary-focal megapixel lens
Connection Cable: 26pin camera extension cable
Connection Cable
Main POWER connection
- RED;
DC12V or AC24V
- WHITE; GND or AC24V
Heater POWER connection (Optional)
- ORANGE
; DC12V or AC24V
- BLACK; GND or AC24V
4
ALARM connection
- PINK; Alarm Input 1
- GREEN; GND
- YELLOW; Alarm Input 2
- BROWN; GND
- Light BLUE
; Alarm Out
- GRAY; GND
RJ-45 connection: Connect Ethernet cable or supplies power to the camera if PoE is
available.
BNC connection: Connect BNC cable for composite video output.
SPEAKER connection (GRAY): Connect external speaker for audio output.
MIC connection (BLACK): Supplies external microphone as an audio input source.
5
INSTALLATION
---------------------------------------------------------------------------------------------------------------------------
Before Installation
Before installing the camera, thoroughly familiarize yourself with the information in this
section of the manual.
To ensure secure access to the IP camera, place the camera behind a firewall when it is
connected to a network.
Starting Installation
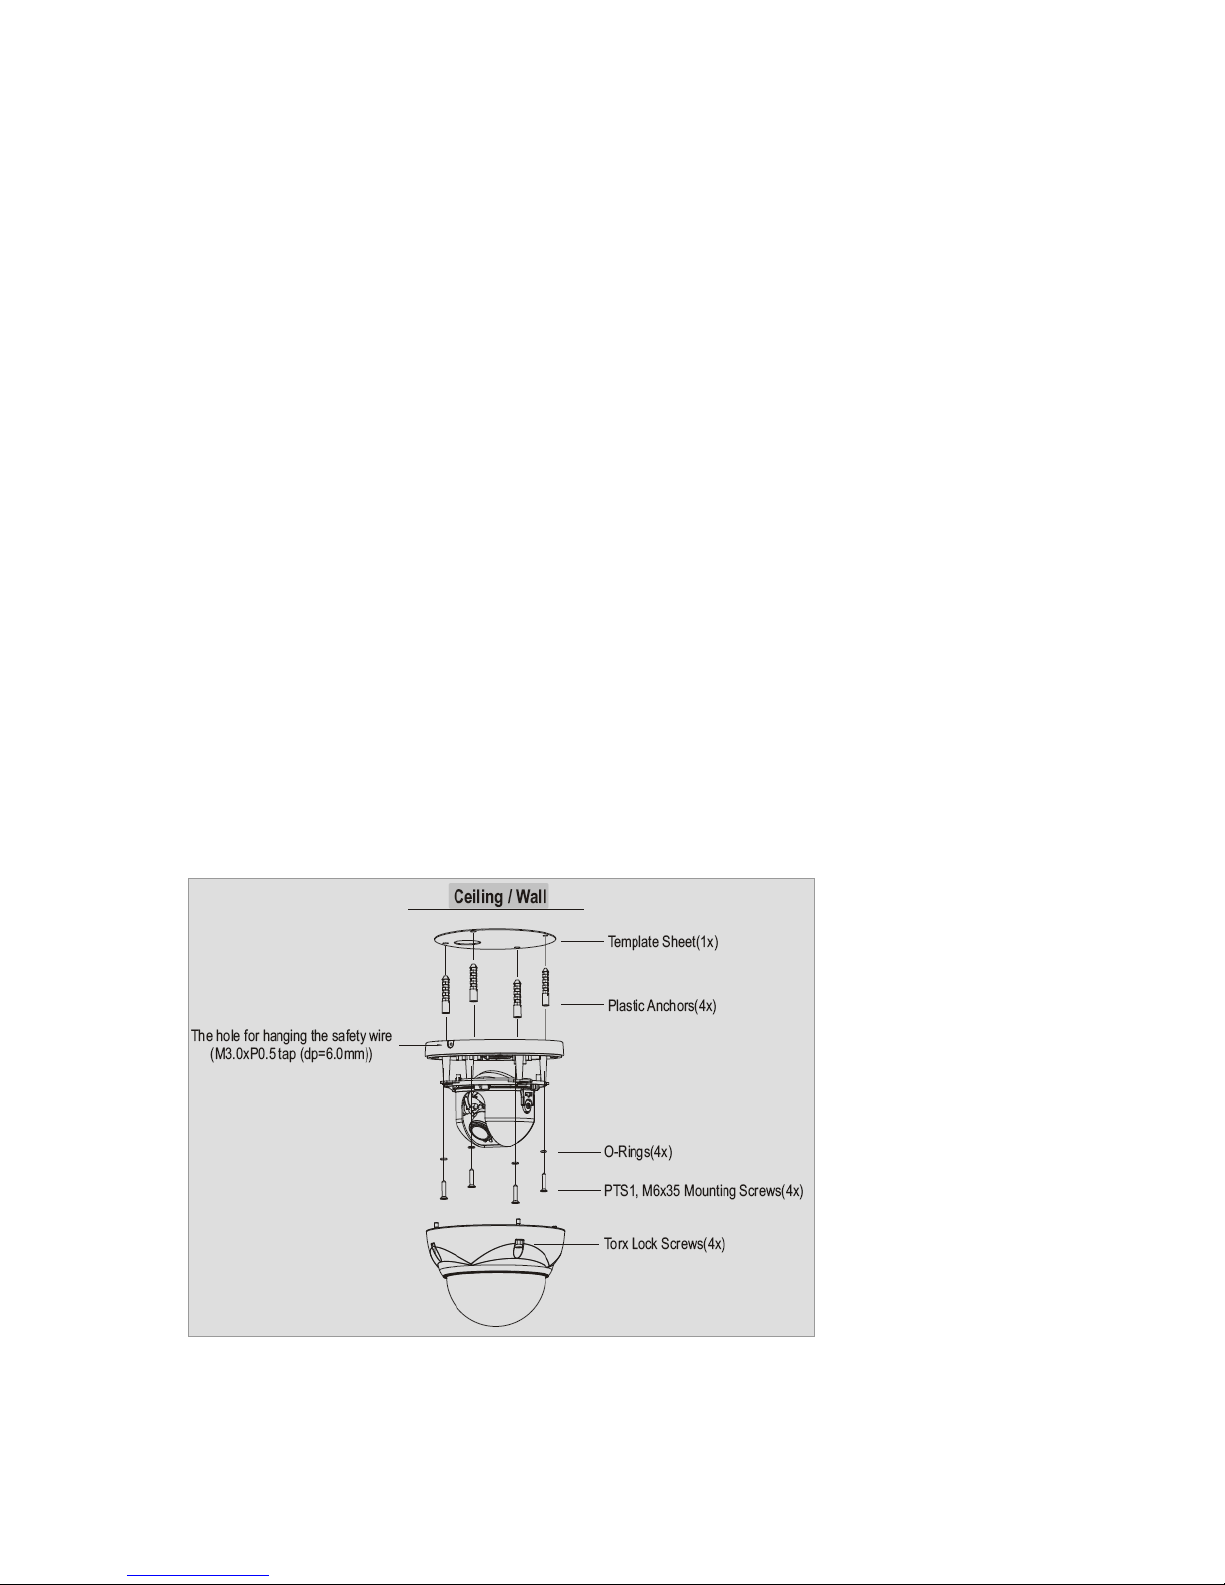
Base Installation
1. Position the supplied template in the mounting location, use this template to drill
the required mounting holes and cable access holes
NOTE
The total mass of the main unit is approx 1.3kg. Check whether the ceiling to which
the Dome Camera is installed is strong enough to hold the unit mass. If not, either
mount ifn a different position or strengthen the ceiling.
[Lock Screw]
2. Attach safety wire for securing the dome camera to ceiling or structure.
 Loading...