

Page 1

GETTING AROUND
on the E4K
© 1995 E-mu Systems, Inc.
All Rights Reserved
• FI499 Rev. A
E-MU WORLD HEADQUARTERS
E-MU SYSTEMS, INC. U.S.A.
P.O. BOX 660015
SCOTTS VALLEY, CA USA
95067–0015
TELEPHONE: 408-438-1921
FAX: 408-438-8612
EUROPE, AFRICA, MIDDLE EAST
E-MU SYSTEMS, LTD.
SUITE 6, ADAM FERGUSON HOUSE
ESKMILLS INDUSTRIAL PARK
MUSSELBURGH, EAST LOTHIAN
SCOTLAND, EH21 7PQ
TELEPHONE: +44 (0) 131-653-6556
FAX: +44 (0) 131-665-0473
Sprints & Presets 1
Page 2
WELCOME
IN THIS BOOKLET
• Getting Around
• SoundSprinting
•␣ RT Controllers
•␣ Bookmarks
•␣ Demo Sequences
•␣ Sound Designing
•␣ Sequencer
•␣ Controller Charts
REAL TIME CONTROLLERS
ASSIGNABLE KEYS
SEQUENCER
PRESET
SAMPLE
EMULATOR
LEVEL
EXIT
PAGE
PRESET SELECT
ENTER
RETURN
0.987654321
WELCOME
If you have just met the E4K for the first time, we suggest that you follow
through these “guided tours” until you get familiar with the way the E4K
operates.
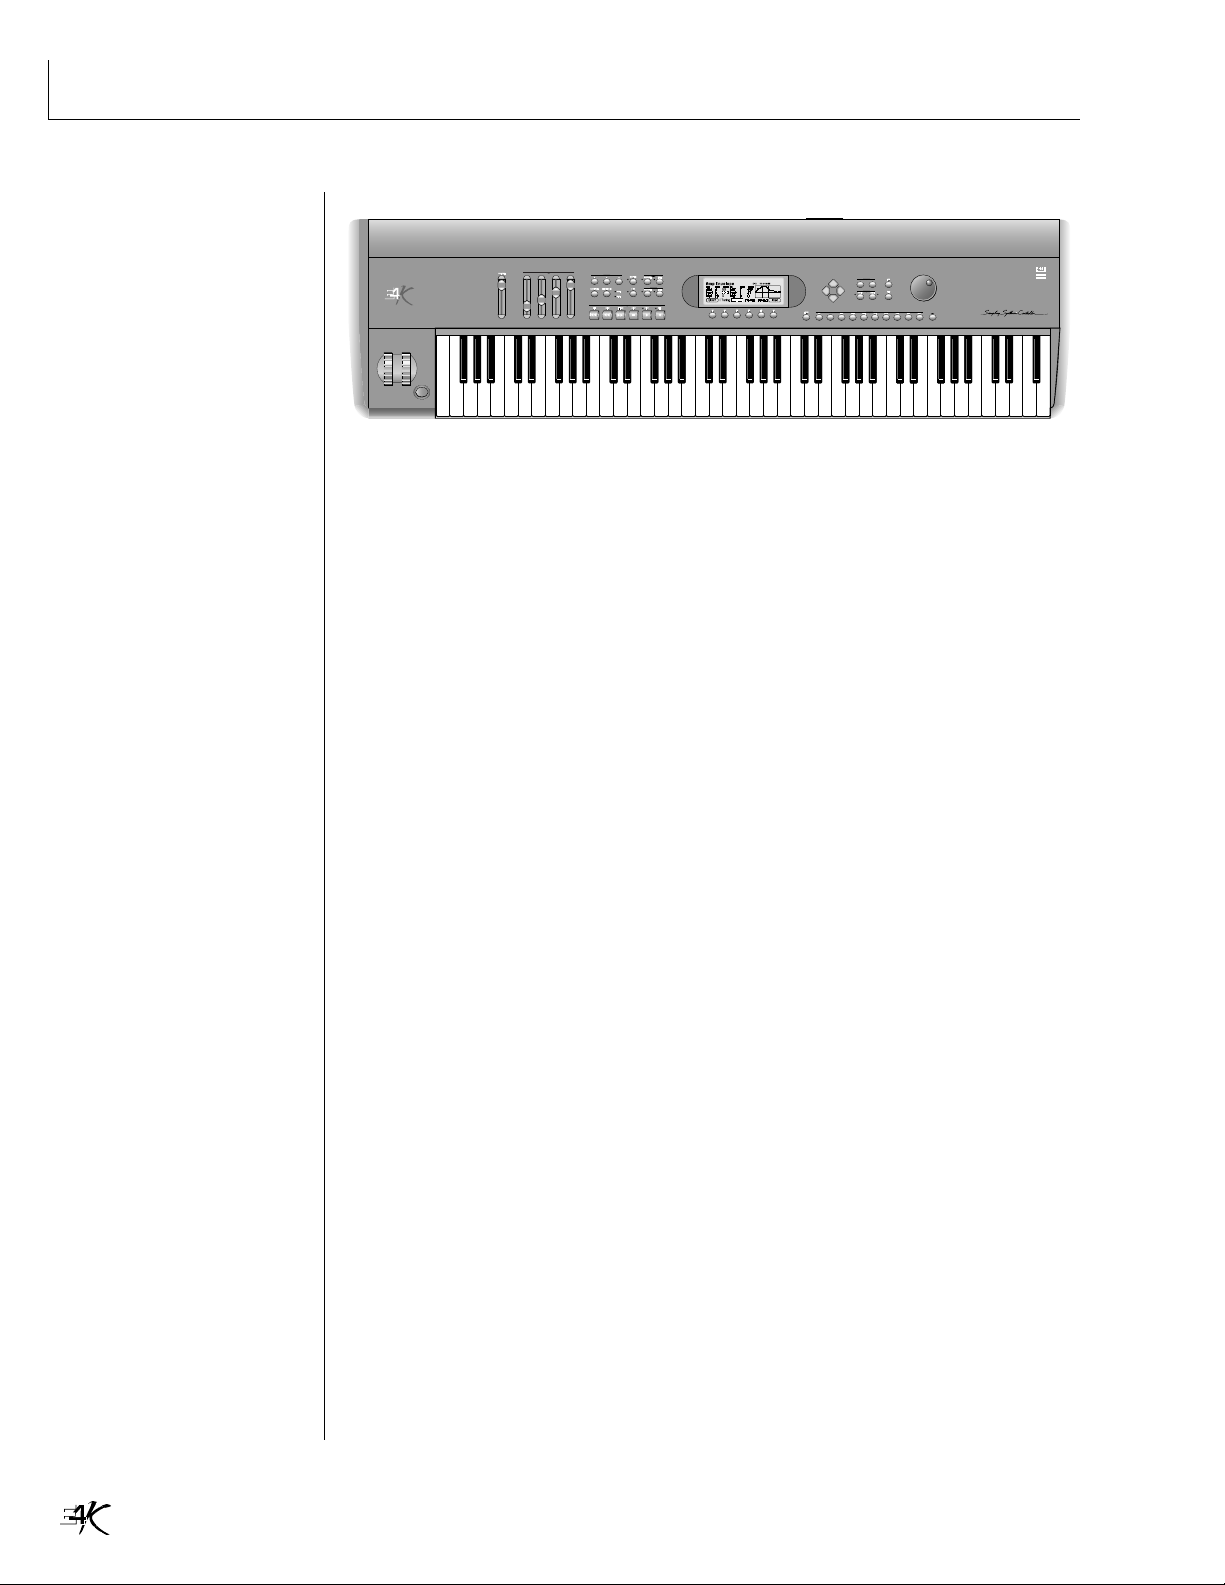
THE EMULATOR FOUR MODULAR SYSTEM
The E4K is divided up into six main modules and each module contains a
particular group of functions. To access a module, you simply press the
module button and a page of choices appears. The six modules are as follows:
■ Disk Module: The disk module controls all disk operations such as loading
and saving banks, presets and samples. It also contains several utilities to
format and backup the hard disk.
■ Master Module: This module contains functions that affect the entire
machine: Memory status, master tuning, erase bank, name bank, output
levels, miscellaneous functions, master MIDI settings. In addition, the Master
module contains the master effects settings and the sequencer submodule.
The effects and the sequencer are also accessible via dedicated front panel
buttons.
■ Sample Manage Module: This is where you go to record your own samples.
You can also rename, copy, erase or place them on the keyboard.
■ Sample Edit Module: With this module, you can loop (with several auto-
matic looping options) or edit the length of a sample. This module also
contains many types of digital signal processors which actually modify the
raw sample data. Fortunately, the E4K contains an “Undo” function which
lets you restore the original sample if you aren't happy with the results.
■ Preset Manage Module: This module handles the preset “housekeeping”
chores such as naming, erasing, copying and exporting.
■ Preset Edit Module: This is the synthesizer module where raw samples are
turned into expressive new instruments. Samples can be arranged on the
keyboard, switched or crossfaded in just about any possible way. Digital
Modular Synthesis is term we use to describe the E4K's powerful synthesis
engine. Any modulation source can be connected to any destination through
the use of virtual patch cords. There are 58 modulation sources and 55 destinations on the E4K, including Z-plane filters, complex envelopes, LFOs and
modulation processors, which allow complex synthesis models to be built.
Getting Around on the E4K2
Page 3
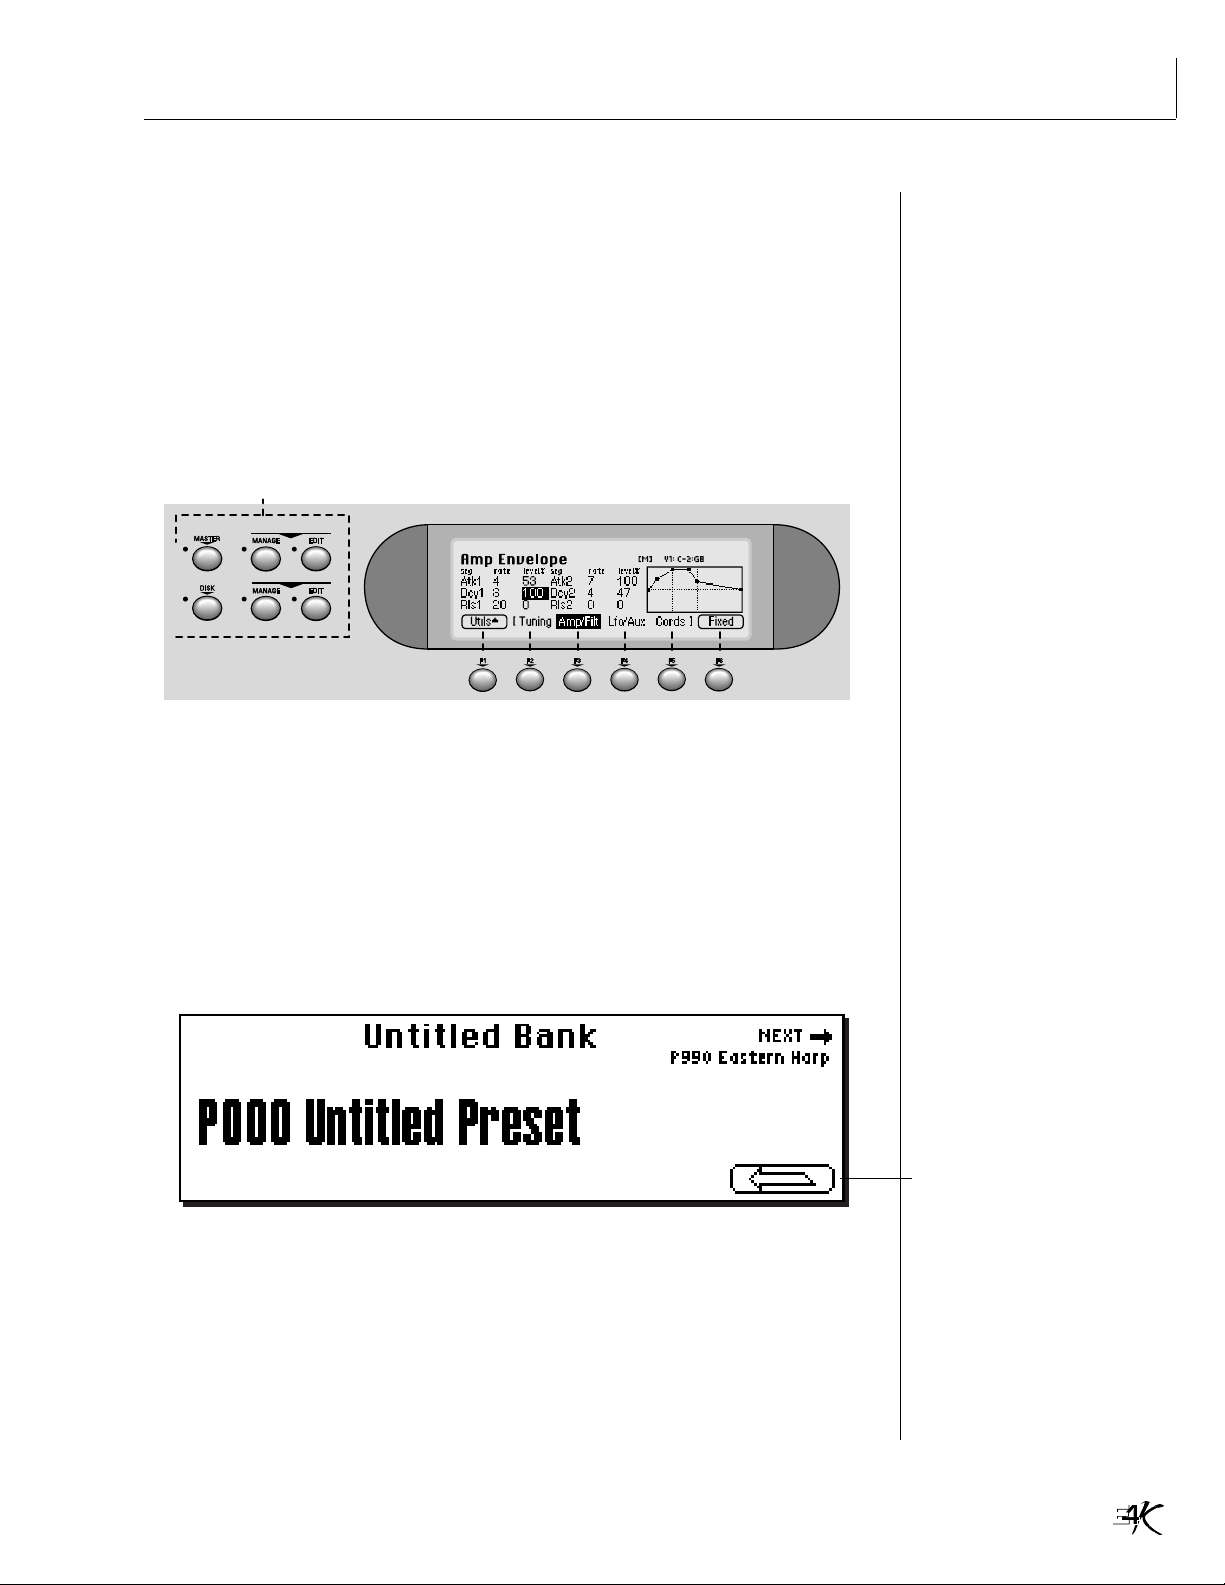
Activating Modules and Selecting Functions
Each module has an associated switch. These are grouped on the left side of
the display. Pressing the associated switch activates the module and is indicated by an LED next to the switch. Upon activation the top line of the
display will show the module identifier.
Once the module has been activated, the function keys below the display are
used to select the function located directly above it. You can think of the E4K
like a book— each time you press a function key, you are turning to another
page in the book. The module select keys are like chapters in the book.
Module Select Keys
PRESET
SAMPLE
NAVIGATION
Function Keys
When you're finished with a module, either press its button again to deactivate, or simply activate a new module. Any time you make a mistake, get
confused or otherwise “get lost in the module”, you can bail out by simply
deactivating, then reactivating the module.
Main Screen
When all the module LEDs are off, you are in the main preset selection
screen (shown below). This screen can also be accessed by pressing the Exit
key repeatedly from wherever you are.
Hot Tip…
If you want to “Lock” the Sprint, Load, Save and Multi keys on the Main
screen instead of the arrow key, simply press and hold the arrow key for
two seconds. To hide the menu options again, press Hide.
Press and hold this key for two
seconds to display the menu bar
at the bottom of the display
instead of the arrow.
Getting Around 3
Page 4
SOUNDSPRINTING
LOADING & PLAYING SOUNDSPRINTS
Normally when using a sampler, you must load a bank of presets into
memory before playing. The E4K can also be used this way, but for browsing
presets there is a much better way. SoundSprint is a new routine which
allows you to load presets quickly into memory one at a time as you browse
through them.
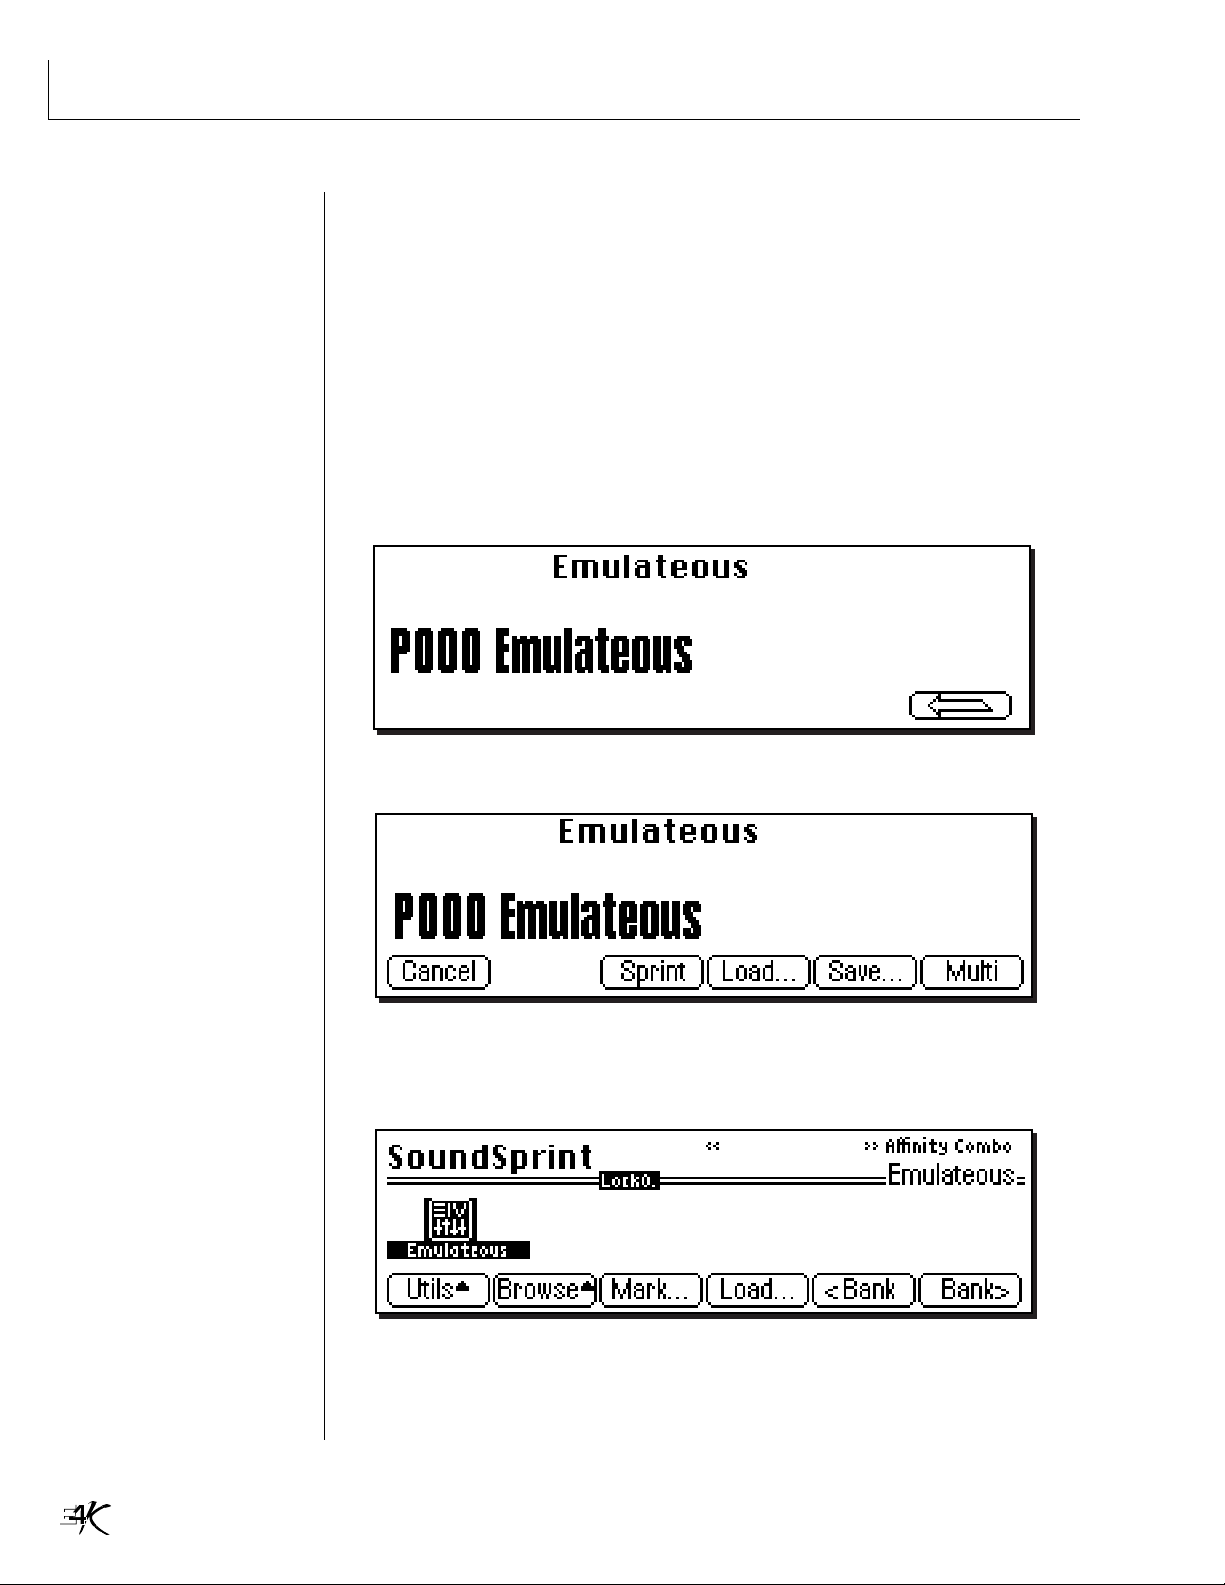
þ To Access Presets Via SoundSprint:
1. Turn on the E4K and wait for it to come up. The E4K power switch is
located on the rear panel adjacent to the power cord. The display will
appear as shown below.
2. Press the Arrow function key (F6) in the lower right corner of the display.
Press
- Tip: You could also press
Assignable key 3 to instantly
jump to the sprint page. Don't
hold the key too long or it will
reassign itself!
3. A row of soft-keys will appear along the bottom of the display. Press
Sprint (F3) to access SoundSprint mode. After pressing Sprint, the following screen will appear.
4. You are now in SoundSprint mode. Notice that the Disk LED is lit,
indicating that you are in the Disk module. You could have arrived at this
same screen via the disk module and preset browser. The Sprint key is
simply a direct jump to the Sprint page.
Getting Around on the E4K4
Page 5
REAL-TIME CONTROLLERS
5. Use the bank soft-keys (F5 & F6), the left/right cursor keys, the previous/
next keys or the data entry control to select presets. The previous and
next banks in the folder are shown in the upper right of the Sprint
display window.
If you get lost…
If in your mad button pressing, you find yourself somewhere other than the
Sprint screen, use this shortcut. The E4K is shipped with Assignable Key 3
programmed to access SoundSprint mode. Simply press Assignable Key #3.
To program an assignable key…
If Assignable Key #3 is not programmed for the Sprint page, you can easily
reprogram it. First go to the Sprint page (Main Screen, Arrow, Sprint), then
press and hold the Assignable Key 3 for two seconds. Now it's programmed!
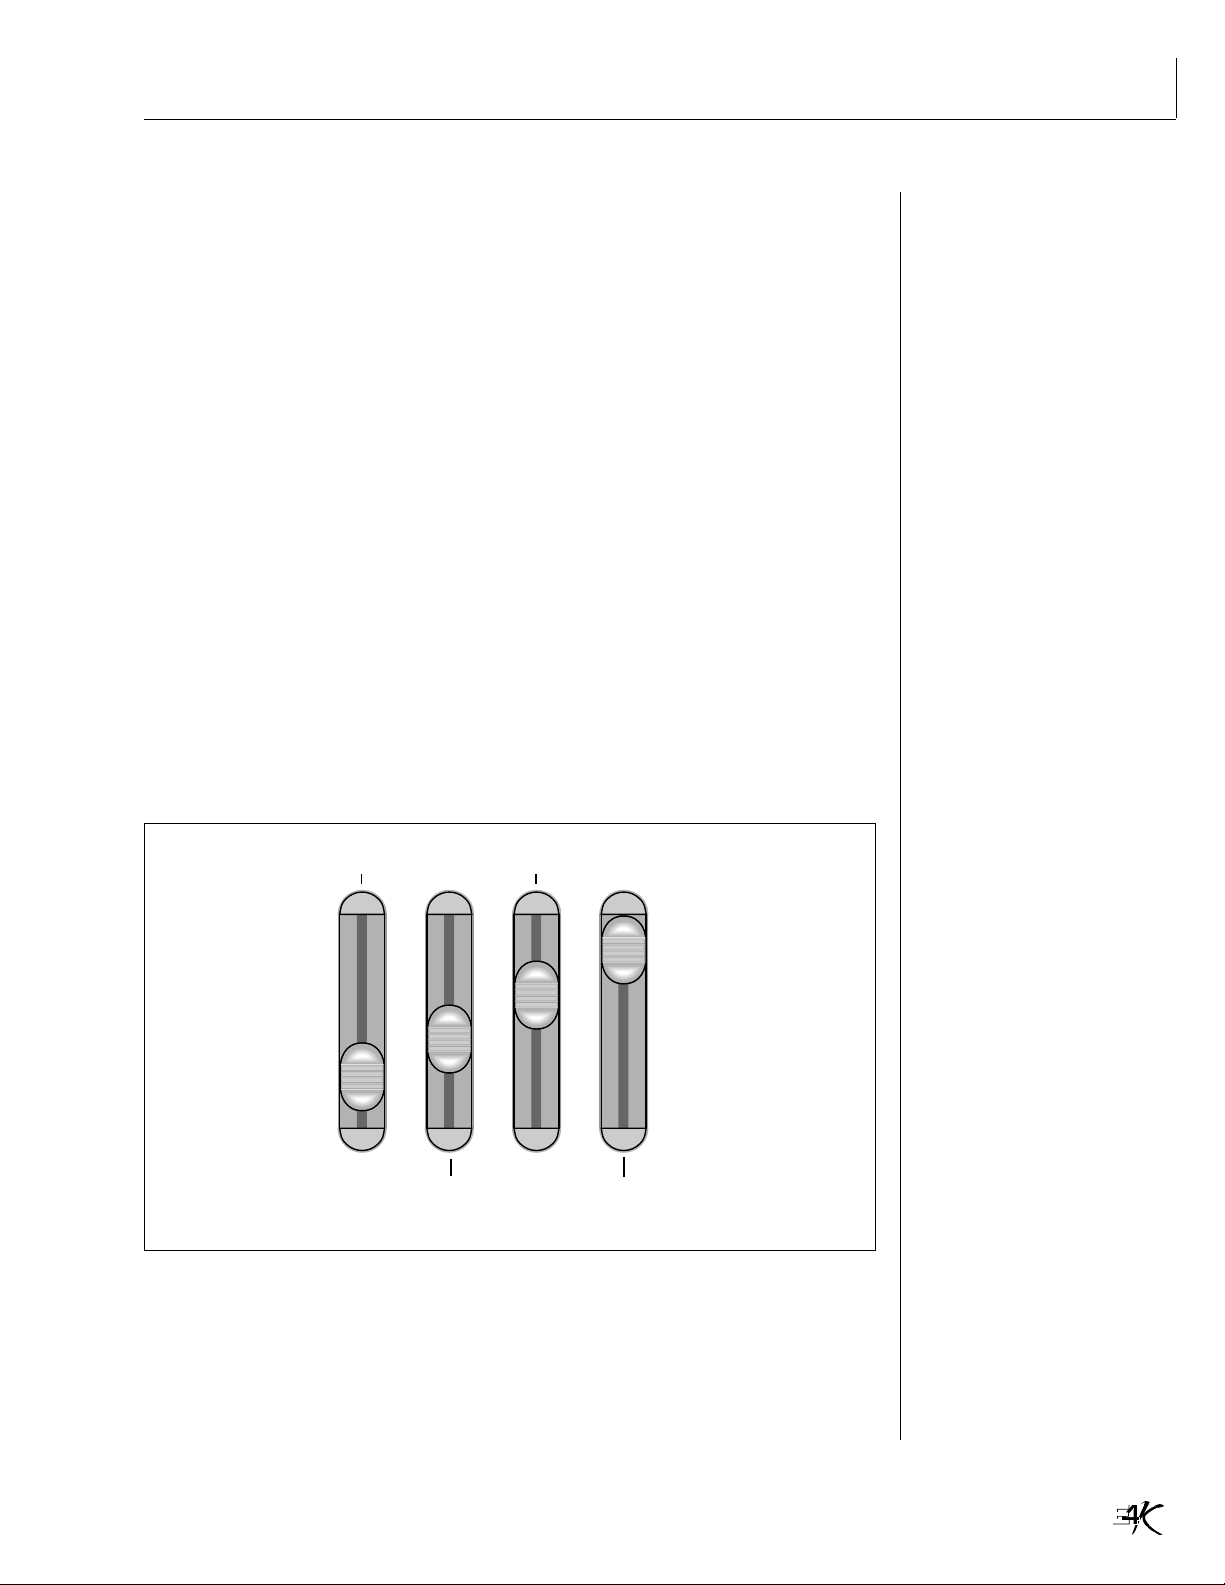
CHECK OUT THE REAL-TIME CONTROLLERS
Each of the Sprint presets is a carefully crafted Instrument with real-time
controllers programmed to control the most important aspects of the sound.
The back of this booklet contains a Sprint preset listing with a description of
what the real-time controllers do in each preset. For many of the Sprint
presets, the sliders are programmed according to the diagram below.
These are only generalized labels; many of the presets use the sliders for
wildly different uses.
Filter Envelope
Resonance
Chorus or ??
or Add Voice
Don't forget to check out the other real-time controllers such as the “Thumby
Button”, modulation wheels and keyboard aftertouch (pressure).
To get back the original sound…
After fiddling with the sliders you may just want to get back to the original
settings. Simply press Assignable Key #3 which has been programmed to
jump to the Sprint page. The original slider settings will instantly reload.
- Tip: Aftertouch is applied by
pressing down harder on the key
after the note has been made.
- Tip: If you find a set of
slider settings that you like
better than the factory settings
go to Preset Edit, Global and
adjust controllers A-D. Then
save the bank back to itself.
Sprints & Presets 5
Page 6
SETTING BOOKMARKS
BOOKMARKS
If you find a preset you really like, you might want to attach a Bookmark to
it. Bookmarks allow you to instantly select and load a SoundSprint. Up to
100 bookmarks can be saved and store in nonvolatile EEPROM.
þ To Set a Bookmark:
1. From the SoundSprint Browser, select the preset you wish to bookmark
using the left/right cursor keys.
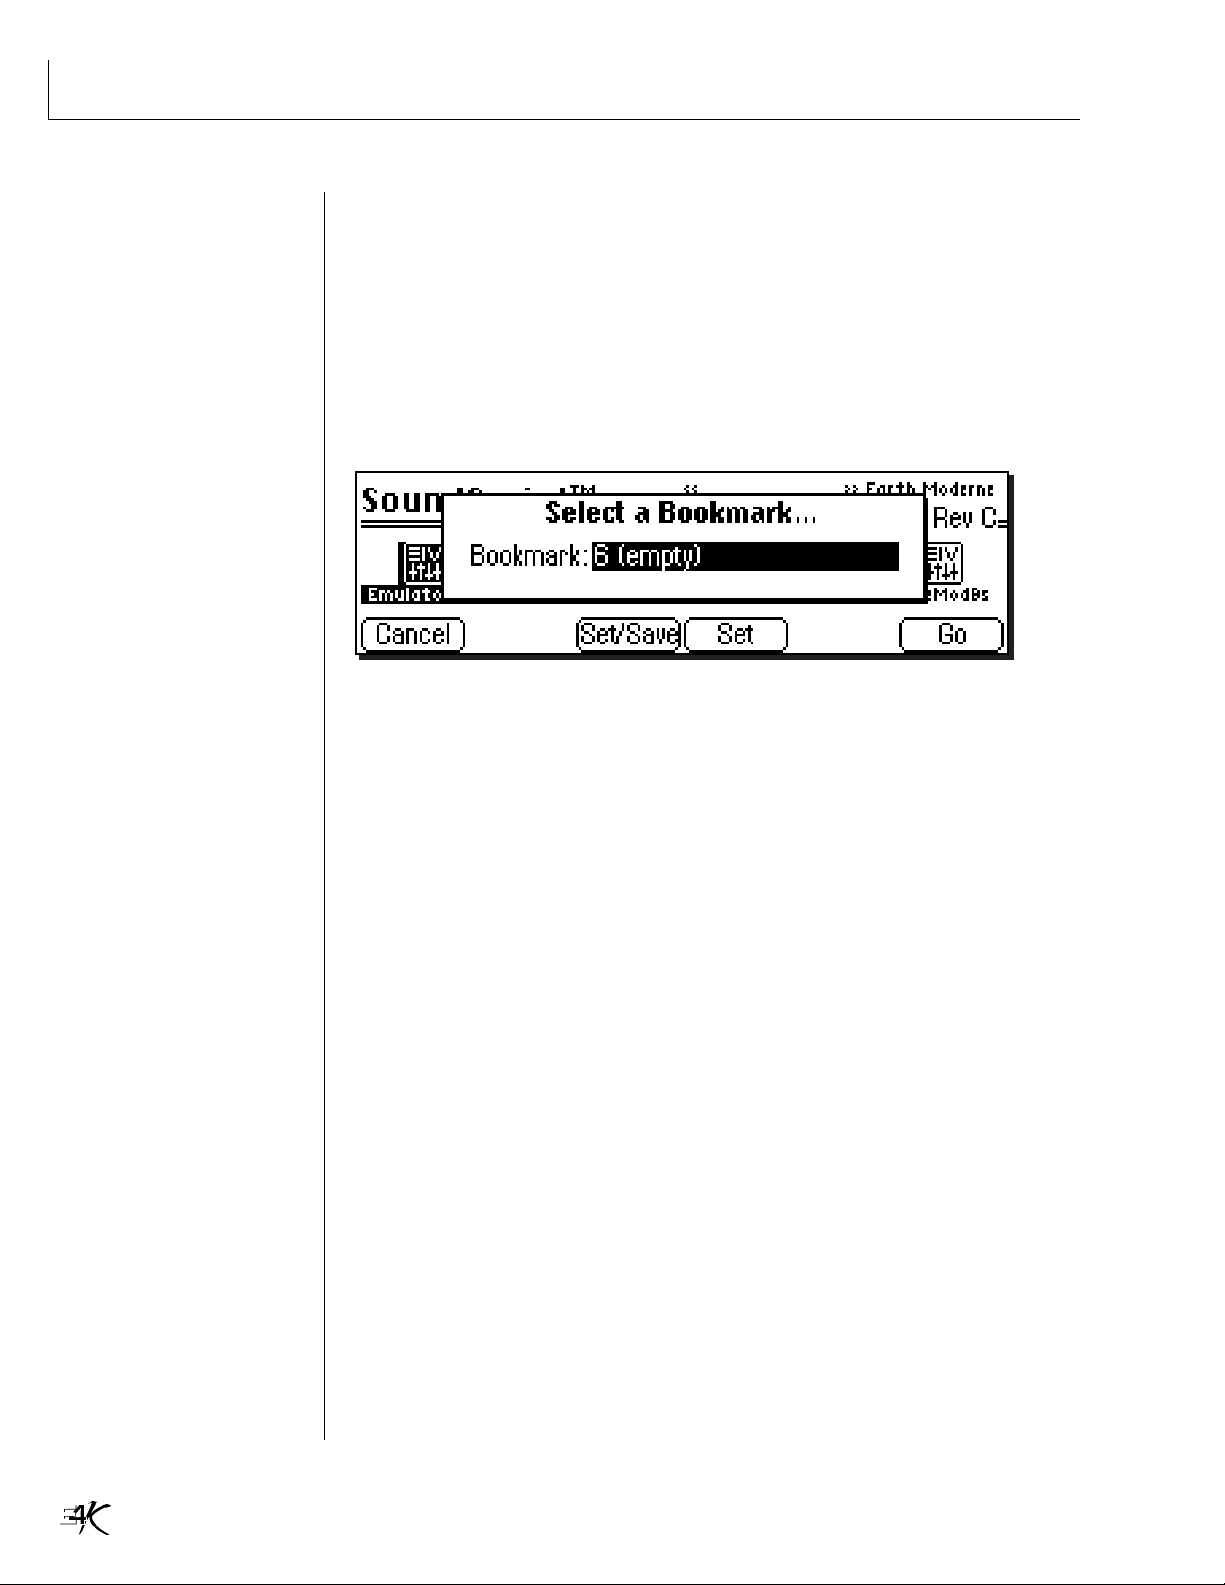
2. Press the Mark… function key (F3). The following screen will appear.
3. Select a bookmark location using the data entry control or inc/dec keys.
4. After selecting a location, press the Set function key (F4) to set the
bookmark. Press the Set/Save function key (F3) if you want to save the
bookmarks to nonvolatile memory.
• The numeric keypad selects a bookmark from the rank of 10 you last
selected with the Lock engaged.
5. Press the Go function key (F6) to go to the currently selected preset.
6. Press Cancel (F1) to cancel the operation.
þ Alternate Method to Set a Bookmark:
1. From the SoundSprint Browser, select the preset you wish to bookmark
using the left/right cursor keys.
2. Press and hold the Set key located to the right side of the numeric keys.
While holding the Set key, press one of the numeric keys. A pop up
dialog box will inform you that the bookmark is set.
• If you don't Save your bookmarks using the Set/Save button, they will be
lost when power is turned off.
Getting Around on the E4K6
Page 7

þ To Select a Bookmark:
1. From the SoundSprint Browser, simply press the numeric key(s) corresponding to the bookmark you wish to select. For example, if you want
to select the preset at bookmark number 9, press 9 on the numeric keys.
The preset will be selected and loaded.
2. The Lock key locks the first digit of the two digit bookmark number.
Press and hold the Lock key (located to the left of the numeric keys)
while pressing one of the numeric keys to lock the most significant digit.
Press the Lock key by itself to turn Lock mode On or Off. The lock indicator on the display is shown below.
3. With Lock Off, two digits must be entered to select a bookmark. For
example, to select bookmark 9, you would press 0, then 9.
4. With the most significant digit locked, only one key press is required to
select a bookmark.
Indicates first digit is locked at 0
SELECTING BOOKMARKS
5. To select another rank of 10 bookmarks, press and hold the Lock key
and press one of the numeric keys. The display will inform you which
rank of 10 bookmarks is now selected.
SoundSprint preset locations…
When you load a preset via SoundSprint, it is placed in a special area which
happens to be the upper ten preset locations, 990-999. Press the Disk button,
extinguishing the LED. The main preset screen will appear.
Scroll through the presets using the data entry control or inc/dec keys. Note
that the last presets you “Sprinted” are still loaded up in the highest number
preset locations (990-999).
- Tip: When you Save a
bank, the E4K asks you if you
want to save the SoundSprint
presets (in locations 990-999)
as well as the other presets.
Sprints & Presets 7
Page 8

DEMO SEQUENCES
LISTENING TO THE DEMO SEQUENCES
SoundSprints are great for auditioning sounds and for solo playing, but for
live performance or multi-timbral sequencing it's usually better to load up an
entire Bank of presets. This gives you instant access to every preset in the
bank. This is also where RAM (memory) comes into play. The more RAM you
have in your E4K, the more sounds can be loaded at one time. The E4K
comes standard with 4 megabytes of RAM, but can be expanded all the way
up to 128 megabytes (See the Appendix chapter of the operation manual for
details).
þ To Load a Bank:
1. From the SoundSprint Browser, press the Browse key. A second row of
function keys will appear. (From the main screen, press the Disk module
key, then the Browse key.)
2. Select Folders by pressing F2. The following screen will appear.
Up
Left Right
Down
CURSOR KEYS
3. Use the cursor keys to select folders. For now, select the Demos folder,
then press Browse again.
4. Select Banks to view the banks in the Demos folder. The following screen
will appear.
5. Select one of the demo banks using the cursor keys, your choice. Press
Load to load the selected bank.
6. A dialog box will appear informing you that you are about to overwrite
the data in memory. Don't worry, this only erases the data in RAM. All
your sounds are safely stored on the internal hard disk. Press Yes (F6) to
load the bank.
7. A progress bar will appear, then you're back to the main screen.
Getting Around on the E4K8
Page 9

8. The preset is trying to tell you how to play the demo sequence, but you
have to press the Arrow key first.
DEMO SEQUENCES
9. This screen should look familiar. The demo sequences are multi-timbral,
meaning that they have multiple presets (sounds) playing at the same
time. Press the Multi button (F6) to put the E4K into multi mode. The
screen will change to look like this.
10. The multimode screen shows you which preset is assigned to each MIDI
channel as well as a lot of other information. You can read all about this
in the main operation manual. For now, press the sequencer Play button
on the front panel and listen to a demo sequence. Press Stop to stop.
11. Using a feature called “Magic Load Preset”, the next demo bank will be
automatically loaded when the current sequence ends. When the bank is
finished loading, press Play on the sequencer controls to play the demo
sequence associated with the bank.
• You might want to turn Magic Load Preset Off when you are finished since
selecting preset #127 is programmed to load a hard disk bank, This may
cause confusion when you are sequencing.
Demo Sequences 9
Page 10

ONWARD…
- Tip: Banks in the Sprint
folder contain only one preset
each.
12. If you want to check out the individual presets, press the Omni key. This
puts you back into “single preset mode”. Select presets using the data
entry control, inc/dec keys or the left/right cursor keys.
13. To select a bank from a different folder, press the Arrow key, then Load.
14. From the screen shown above, use the up cursor key to select the folder
field. Use the data entry control or inc/dec keys to select another folder.
After selecting new folder, move the cursor back down to the bank field
to select a bank. Press OK to load the bank.
15. Once the bank has loaded, use the data entry control, inc/dec keys or the
left/right cursor keys to select presets within that bank.
Easy as cake…
You're probably starting to learn your way around. Feel free to explore. That's
what the E4K is all about. You don't have to worry about losing any sounds
unless you Save a bank over another one. So go forth and conquer. The E4K
is an incredibly powerful instrument and you won't learn it all overnight. Be
patient and don't be afraid to get in there and experiment.
Going back into SoundSprint mode…
When you try to load SoundSprints after loading a bank, you will inevitably
come across a small roadblock in the form of a “Sample Memory Full” message. Not to worry. You have to erase the bank first. Here's how…
1. Switch back to Omni mode. SoundSprint does not work in Multi mode.
(Main Screen, Arrow, Omni)
2. Press the Master module button on the front panel.
3. Press Bank. Three additional soft-key buttons will appear.
4. Press Erase. A pop up dialog box inquires if you really want to erase all
presets, samples and sequences from the bank.
5. Yes you do, so press OK (F6) to erase the bank.
6. Now press Assignable Key 3. This key jumps you immediately into Sprint
mode. (See page 5 if this key does not work as promised.)
Getting Around on the E4K10
Page 11

THE PROGRAMMER'S TOOLBOX
The E4K is a powerful sampling synthesizer and one of the neatest things
about owning one is the opportunity for doing some creative sound design.
You might think that developing voices with a sampler begins with a microphone, but this need not be the case. With the sound elements that are
provided on the internal Hard Drive in the ToolBox folder, along with the
powerful synthesis and re-sampling features of the E4K, you will find that
you can develop patches which are extremely unique and musical. You can
conjure up wild and exotic sound effects without a microphone. Here's how
the Toolbox works.
Before you begin…
Turn SoundSprint mode Off. From the SoundSprint page, press Utils (F1).
Press SprntOff (F5). Press the Disk button, extinguishing the LED, to go back
to the main screen.
E4K Synthesis
1. Load the SD's Tool Box bank in the Tools folder. This will clean up your
RAM workspace and load up the samples and preset templates you need.
SOUND DESIGNING
2. Familiarize yourself with the toolbox by scanning through the samples
first. Enter the Sample Manage module and select subsequent samples for
listening, with the cursor keys.
The first set of samples is a set of looped sine waves tuned to the first 32
partials of the harmonic series, based on A-440 Hz. Following these is a
set of short complex waves (labelled Cpx) tuned to A3-440 Hz and looped
as single cycles. These are interesting because their structure changes over
very few samples and by moving the loop point, a dramatic change in
timbre can be achieved. After this there are two “air samples”( two
different types of looped noise), and a set of “knocks” with either a
woody or metallic character.
3. Press the Sample Manage button, extinguishing the LED. You should
now be back in the main screen in Omni mode.
Now check out the presets, for this is where the real value becomes clear.
Some of these presets won’t play very well because they have literally too
many sample layers and this eats up all the instrument’s polyphony, but the
main purpose is to use these sounds for re-sampling; creating new samples.
Presets 000~002 are each a set of 32 harmonics layered up. The difference
between them is in the effect of the real-time faders. For each preset, faders
A~C remove different sets of partials. Fader D consistently controls a low pass
filter. By trying different real-time fader values on these presets, a very wide
variety of simple waveforms can be generated. For example, with preset 000
move faders A and D up to about halfway to get a “clarinet tone”.
Designing Sounds 11
Page 12

SOUND DESIGNING
þ To Resample the Wave
1. Enter the Sample Manage module
2. Select New.
3. Select resample 16 bit as the source.
4. Turn Off the right side to make this a monaural sample.
5. Press Arm (F5), then play A3 (the 4th A from the bottom of the keyboard). The following screen will appear.
6. Set the Automatic Parameters as shown above: Truncate: both,
Normalize: relative, Loop: 1/8.
7. Press Keep (F4), to keep the sample. The E4K will perform automatic
truncation, gain boosting and looping on the sample you just recorded.
The sample will be named, “Wavemake#00”. You now have a single cycle
wave ready to use in building up a preset.
8. Press Sample Manage twice to go out of the module, then back in. Your
new sample will be selected and you can play the keyboard to hear it.
Wave Sequencing
Presets 003~006 also use a layered set of 32 partials, but in this case the
partials are dissonant or the faders have a more complex effect. Experiment
to find the sound that you need, then resample it.
1. Turn the right channel on since these presets are stereo.
2. Set the sample length to 2.4 seconds or longer.
3. Set the automatic loop parameter to: 1/2 + xfd. This should produce an
acceptable loop. (See the E4K operation manual for more information on
the automatic parameters.)
Additive Synthesis
Preset 007 is a special case and here, the 32 harmonics are laid out along the
keyboard white notes, starting with harmonic number one on key A1. Play
the harmonics to get the desired wave timbre before resampling it.
Preset 008 uses a layer of four complex waves to generate new waves for resampling. The faders move the sample loop points around to give different
timbres and fader D adds a chorus effect. Again, when you have the desired
basic sound, use the resampling technique to capture the new wave.
Getting Around on the E4K12
Page 13

Fat Waves
Preset 009 “Multi Whatever” is a very useful tool for synthesizing complex
waveforms. Try this…
1. Load any sample into the preset - do this by entering preset edit and
going to the main voice page shown below.
2. Move the cursor to the sample field in Voice 1 (shown above) and choose
a wave - a complex wave would be a good choice. Put the sustain pedal
down and play handfuls of notes to the right and left of C3. You hear a
layer of the identical note.
SOUND DESIGNING
Fader D: begins to detune the notes the further they get away from the
center.
Fader C: adds a little random vibrato
Faders A & B: set and sweep a filter.
The result is a “Chorused” or multi source effect, just waiting to be
resampled as a new stereo wave then used as a building block for more
presets. Practically any sample can be given new life by “multiplying” it with
the “Multi-Whatever” preset template! Try recording your voice (sing an
“aah” tone) then use the multi-whatever technique to generate a choir.
Preset 010 is a simple example of using source waves as oscillators for a
synthesizer. Find some good source waves then load them into the preset and
use the real-time faders as basic sample loop, filter, filter amount and chorus
controls.
Fader A: Adjusts the Sample Loop Start Point
Fader B: Adjusts the Filter Envelope Amount and increases Resonance
Fader C: Adjusts the Filter and Amplifier Envelope Rates
Fader D: Adds a Chorus effect to Voice 1
After a few hours you will be using the tool box to generate new waves which
you can then compile into presets. The presets can be brought to life by
adding some of the knocks and taps also provided. Mixing an “air” sample
into a preset is an effective way of adding ambience. And don’t forget, when
you are re-sampling, any FX you add with the Effects processors will also be
resampled - you resample exactly what you hear.
Designing Sounds 13
Page 14

SOUND DESIGNING
A word about housekeeping…
After a session with the toolbox, you could find that your RAM bank contains quite a few “weeds” - bits and pieces that are by-products of preset
building. A good and safe method of keeping your disk neat and tidy is to
simply “export” presets rather than try to clean up the bank and save it. This
is the method:
1. Enter the Disk module, press Browse and go to the Folders level.
2. Press Utils (F1). Press New (F2) to create a new folder and label it “My
Presets”.
3. Go back to the Tool Box bank that you have been working on. Select the
new preset that you have constructed.
4. Enter the Preset Manage module. Select Export (F5).
5. In the dialog box, choose the folder “My Sounds”, and then the first
empty Bank. Press OK (F6).
6. Your preset will be saved as its own bank (Sprint style) in its own folder.
Discard the bank in RAM with all its weeds - the original toolbox is safely
intact on the hard drive.
Getting Around on the E4K14
Page 15

USING THE SEQUENCER
USING THE SEQUENCER
The E4K's sequencer was originally designed as a “scratchpad” to quickly and
easily capture your musical ideas. With key features such as Standard MIDI
File Import/Export, 16 track operation and the ability to resample a sequence,
the sequencer becomes a powerful composition and synthesis tool.
Before you begin…
Load a bank from the Multis folder. Loading a bank gives you a variety of
sounds to work with when sequencing.
þ To Record a Sequence:
1. Press Record , then press Play. Start playing the keyboard.
2. Press Stop when you are finished recording. Press Play to play back the
sequence. That's it!
3. To record another track, repeat step one.
þ To Record a Multitimbral Sequence:
1. From the main screen, press the Arrow function key (F6) in the lower left
corner of the display. Four additional soft key choices will appear.
2. Press the Multi function key (F6). The following screen will appear.
3. Use the up/down cursor keys to select the MIDI channel you want to
record. (Ch 1 might be a good place to start.) Press SetKybd (F2) to select
the MIDI channel. The selected channel will be recorded on track one.
- Tip: The sequencer can be
programmed to start recording
immediately or when you play
the first note. This function is
located under Sequencer
Utilities, Setup.
4. Move the cursor to the preset field and select a preset.
5. Now press the Sequencer key, then the Trnsprt key (F3). The following
screen will appear.
TIP: Program Assignable Key #1 to the Sequencer Transport screen to save
time jumping back and forth. Press and Hold Assignable Key 1 for 2 seconds.
Using the Sequencer 15
Page 16

USING THE SEQUENCER
10. Ready to record another track? Press the Master Module button to go to
11. On the sequencer transport controls, press Record , then press Play.
12. Press Stop, then RTZ to return the sequence to the beginning of the
13. Press Play. The sequence should play back with the two tracks using two
6. To begin recording, press Record, then press Play on the sequencer
transport controls. Start playing the keyboard. You can use either the
front panel transport controls or the function keys to control the sequencer.
7. Press Stop, then RTZ when you have finished playing.
8. Press Play. The sequence should play back exactly as you played it.
9. If you aren't happy with your performance and want to play it again,
move the cursor down to the Track 1 field and change the status back to
R (record). Then re-record the track (step #3).
the Multimode screen, select another MIDI channel (perhaps to channel
2). Also change the preset associated with the new channel.
Begin playing the keyboard to record on track two.
song.
different presets.
- Tip: Standard MIDI Files
should be named according to
the format: 12345678.MID
(up to 8 characters followed by
“.MID”).
14. If you make a mistake on a track, go back to the Transport screen
(using Assignable Key #1) and reset the track status to R (record). Then rerecord the track. Try out the Solo and Mute modes on one of the tracks.
You can adjust the volume and pan position of each channels in the
Multimode screen.
15. After recording, you can change the presets associated with each channel
in the Multimode screen.
Sequencer trick…
• Record a sequence moving just the real-time control sliders. Play the
keyboard while the sequence controls the sliders and creates complex
sound envelopes. Resample the result to capture a wild new sound.
Standard MIDI Files…
The most powerful aspect of the sequencer is its ability to read and write
Standard MIDI Files from your computer sequencer. Simply export your
computer sequencer file as a “Standard MIDI File” in DOS format and transfer via floppy disk to the E4K.
þ To Import a Standard MIDI File:
1. From the Disk Browser, select the Floppy Drive.
2. Press Browse again and select Banks. The Standard MIDI Files will appear
as Banks.
3. Press the Load function key (F4). A popup dialog box will appear warning
you that loading will destroy the bank.
4. Press the Merge function key (F4). The selected sequence will be merged
into the current bank and placed in the first empty sequence location.
Getting Around on the E4K16
Page 17

SOUNDSPRINT REAL-TIME CONTROLLERS
SOUNDSPRINT CONTROLLER FUNCTIONS
The following charts list the real-time controller functions in each SoundSprint preset. In each preset the
real-time controllers adjust important aspects of the sound and a very wide range of timbres can be synthesized without any programming knowledge. The realtime controllers are PERFORMANCE controls, designed
to be actuated while playing.These controls are just a part of what makes the E4K such a great instrument.
Sometimes a controller will adjust several parameters at once to achieve a desired effect. On some presets the
controls are somewhat standardized. A quick glance at the chart shows that the Slider A is often used to
control the Filter Cutoff. Likewise Slider C often controls the envelope times.
• If you find a set of slider settings that you like better than the factory settings, go to Preset Edit, Global
and adjust controllers A-D. Then save the bank back to itself.
NAME SLIDER A SLIDER B SLIDER C SLIDER D THUMBY MOD WHL PRESSURE
Emulateous Filter Add Voice Attack Chorus FF Pitch 1-oct LFO -> Filter LFO -> Pitch
Affinity Combo Filter Add Voice Rates Filter FF Glide Filter None
Belltazaar Filter Samp Retrig Attack Add Voice FF Glide LFO -> Pan None
Smok'in B3 Add Voice Add Voice Pitch Vc-2 None LFO Rate LFO -> Pitch None
P5 Brass Filter Resonance LFO -> Filt Chor Amt LFO -> Pitch LFO -> Pitch None
Piano Padiano Filter Release Sub Voice Add Voice 2nd Vc Glide LFO -> Pan None
Full on SG Voice XSw Filt Mute Pitch Chorus Pitch 1-stp LFO -> Pitch LFO -> Pitch
Oasis Filter Resonance Add Voice Add Voice FF -> Glide Filter None
And You & I Filter Resonance Attack Chorus Glide LFO -> Pitch None
Power Clav Filter Resonance Release Chorus Mom. Pitch LFO -> Pitch None
GalaxyClas Syn Filter Resonance Release LFO -> Pan FF Filter Freq LFO -> Pitch None
AdderSong Filter Resonance Release Add Voice Pitch (Oct) LFO -> Pitch None
String Ensemble Filter Resonance Attack Attack Pitch (Oct) Chorus None
Magic Organ Add Voice Add Voice Add Voice Attack A,B,C Vc Add Filter None
Xowlwn Filt/SStart Filter Attack Attack LFO -> Pitch LFO -> Pan None
Classic ElPiano Filter Decay Attack Chorus LFO -> Pan LFO -> Rate None
Groove Monkey Filter Samp Retrig Filter Env Chorus Amp Off LFO -> Pan None
Angels Choir Filter Chor/Pan Attack Chorus FF -> Pitch None None
FM Piano Pad Xswitch Filt Atk Add Voice Attack LFO-Pitch LFO -> Pitch LFO -> Pitch
Bender Filter Samp Start Pitch Chorus Pitch (4th) LFO -> Pitch LFO -> Pitch
Gothic Tower Filter Add Voice Attack Add Voice Pitch (m3rd) LFO -> Pitch LFO -> Pitch
SoundSprints 17
Page 18

SOUNDSPRINT REAL-TIME CONTROLLERS
NAME SLIDER A SLIDER B SLIDER C SLIDER D THUMBY MOD WHL PRESSURE
Mexating Filter Add Voice Samp Start LFO -> Pan Mom Glide None None
Tron Strgs/Vox Filter Add Voice Add Voice Chorus FF Release LFO -> Pitch None
Fretless Filter Vol Env Add Voice Chorus Lag Pitch None LFO -> Pitch
Omega Synth Filter Sub Voice Attack Release FF Glide (Oct) LFO -> Pitch LFO -> Pitch
Ny Guitar/Strg 2nd Voice 2nd Vc Filt Attack Chorus Filt Freq/Res LFO -> Pitch None
PmpChp Groove Filter Samp Start Env Samp Retrig Amp Off LFO -> Pan None
Simple Beauty Filter Add Voice Attack Pitch FF Filter Res LFO -> Pitch None
Clarinet Filter Add Voice Attack Filt -A Pitch LFO -> Pitch LFO -> Pitch
Tight ElecPiano Filter Loop Start Resonance Chorus Pitch/Chorus None None
Earth Moderne Filter Add Voice Add Voice Resonance FF Glide LFO -> Pitch None
Glass Vox Filter Samp Start Release Chorus Filter Mute LFO -> Pitch None
SawBigBass Filter Resonance Attack Chorus FF Glide (Oct) LFO -> Pitch None
Ice Mirage Filter Sub. Voice Attack Pitch FF Pitch (5th) LFO -> Pitch None
Dance Split Filt/Chor Resonance Release Pitch FF Chorus LFO -> Pitch None
EuroBass Filter Resonance Samp Start Chorus Lag Pitch LFO -> Pitch None
Kaleida Filter Sub Voice Attack LFO -> Pan FF Glide LFO -> Pan None
Breathy Bonettes Filter Vc-1 Add Voice Filter Vc-2 Chorus Vc-2 Pitch Filter LFO -> Pitch
Mister Mini Filter Vc-2 Pitch Glide Chorus Pitch (m3rd) LFO -> Pitch None
Dream Pad Filter Attack Release Glide Filt Res LFO -> Pitch LFO -> Pitch
Breathy Trumpet Add Voice Filt Mute Glide Chorus Pitch LFO->Pitc/Fil LFO-> Pit/Filt
Base Case Filter Layer Perc. Layer Pitch Bend Resonance Non
Electric Funk Filt Mute Samp Start Attack Chorus Mom. Filter LFO -> Pitch LFO -> Pitch
Pad Sweep Filter Resonance LFO-Filt LFO -> Pan Mom. Glide LFO -> Pitch None
Violin Performer Add Voice Samp Start Xswitch Chorus Pitch LFO -> Pitch None
Pop Rock'in Kit Add Vc/Fil Xfade Filter Chorus None Samp Start None
Bassoon Filter Add Voice Attack Filter V1 Fiter LFO -> Pitch LFO -> Pitch
Yum Lead Filter Resonance Release Decay FF Pitch (Oct) None LFO -> Pitch
Serious Organ Filter Samp Start Add Voice Chorus None None None
Getting Around on the E4K18
Page 19

SOUNDSPRINT REAL-TIME CONTROLLERS
NAME SLIDER A SLIDER B SLIDER C SLIDER D THUMBY MOD WHL PRESSURE
Memory Brass Filter Resonance LFO -> Pan Chrs Amt Pitch Thumb Pitch LFO -Pitch
Sax FIlter Resonance Release Chorus Mom. SStart LFO -> Pitch None
Tron Flutes Filter Add Voice Attack Resonance Pitch LFO -> Pitch None
Crystal Spectr. Filter Resonance Samp Start Chorus FF->LFO->Pan LFO -> Pitch None
Combi Brass Sect Filter Resonance Samp Start Chorus FF Glide LFO -> Pitch None
Acoustic Bass Filter Attack Release Chorus Lag Pitch LFO -> Pitch None
Orynoko Choir Filter Attack Release LFO -> Pan FF Glide LFO -> Pitch None
Slicer Filter Samp Start Glide Pitch Pitch Thumb Pitch LFO -> Pitch
Section Strings Filter Resonance Attack Attack Pitch (Oct) Chorus None
Acid Filter Resonance LFO->Pitch Glide Filter LFO -> Pitch None
Plucker Filter Resonance Release LFO -> Pan Pitch (1 Step) LFO -> Pitch None
English Horn Filter Add Voice Attack Vc-1 Filter Fiter LFO -> Pitch LFO -> Pitch
Just Noises! Filter Resonance Samp Start Glide Pitch (1 Step) LFO Pan None
Sinthy Trumpets Filter Resonance Add Voice Attack AddPitch (Oct) Add Vc Filter LFO -> Pitch
FM Tine Piano Filter Attack Filter Env Chorus Chorus LFO -> Pitch None
Endland Journey Filter Resonance Vc-2 Pitch Chorus Vc-2 Pitch Filter Freq None
Pulse Mod Bass Filter Resonance Filter Env Chorus Mom. Glide LFO -> Pitch None
French Horn Filter Add Voice Attack Chorus Pitch (4th) LFO -> Pitch None
Piano Filter Decay Attack Chorus FF Filter LFO -> Amp None
AutoChorister Filter LFO- Res Atk/Rel LFO Rate FF Glide Chorus None
Cool Vibes Filter Add Voice Attack Chorus Mom. Release LFO -> Amp None
Sax Quartet Filter Add Voice Add Voice Chorus FF Attack LFO -> Pitch LFO -> Pitch
Cathedral Synth Filter LFO Rate SStrt/Add V Filter Vc-3 FF Filt Env Add Voice None
RT Mini II Xfade Filter Resonance Attack/Rel Pitch (1 Step) LFO -> Pitch None
Hearts Of Space Filter Resonance Filt Attack Vol Attack Mom. Glide LFO -> Pitch Filter
808 Machine Kit Filter Resonance Samp Start Glide Samp Retrig LFO -> Pan None
Cellonikal Whizz Filter Resonance Amp Env Chorus Pitch LFO -> Pitch None
Rockin' Organ Filter Samp Start Chorus LFO -> Pan X Fade None None
Live Bass Add Voice Add Voice Filt Res Chorus Mom Vc Add LFO -> Pitch Pitch Bend
SoundSprints 19
Page 20

SOUNDSPRINT REAL-TIME CONTROLLERS
NAME SLIDER A SLIDER B SLIDER C SLIDER D THUMBY MOD WHL PRESSURE
Jupiter Synth Filter Resonance Filt Env Atk Vol Env Rel Glide LFO -> Pitch LFO -> Pitch
Muted Combo Filter Samp Start Vel->SStart Chorus Lag Pitch LFO -> Pitch None
Harpsichord Filter Resonance S-Start Chorus Reverse LFO -> Pitch None
Green Haze Filter Samp Start Glide Pitch Pitch 1/2Step Thumb Pitch LFO -> Pitch
Tales of Tuva Filter Filter Env Attack LFO Amt Pitch 1 Step LFO -> Pitch None
FX/Ana Drums Filter Resonance Release Trigger Pitch 1 Step LFO -> Pan None
Sizzpad Filter Amp Env Filter Env Vc-2 Filt Env Pitch 1 Step None LFO -> Pitch
Pop Horn Punch Add Voice Pitch Down Pitch Up Attack Pitch 1/2Step LFO -> Pitch None
Voice O Le' Add Voice Filter Mute Release Pitch Mom. Glide LFO -> Pitch None
Q Bass Filter Decay LFO->Pitch Chorus Lag Pitch LFO -> Pitch None
Pan Flutes Filter Samp Start Attack Chorus Pitch 1/2Step LFO -> Pitch Pitch
Shamisen Filter Glide Release Chorus Pitch 1/2Step LFO -> Pitch LFO -> Pitch
Coming Along Add Voice Resonance Filter Chorus LFO -> Pan LFO -> Pitch None
Basic Kit Filter Resonance S-Start Chorus Pitch 1Step LFO -> Pan None
E-Saw Stack Filter Resonance Attack Release Mom Pitch LFO -> Pitch LFO -> Pitch
Crazy Tenors Filter Add Voice Release Chorus Mom Filter Filter LFO -> Pitch
Bell Organ Filter Resonance S-Start Filter Env FF Pitchoct LFO -> Pitch None
H 2 O Filter Resonance Attack Add Voice FF Glide LFO -> Pitch None
Hot & Nasty Filter Samp Start Pitch LFO->Retrig Add Voice Add Voice LFO -> Pitch
Vocalis Blender Filter Resonance Atk/Rel Chorus FF Glide LFO -> Pitch None
Taiko Drum Add Voice Filter Release Chorus Pitch LFO -> Pitch None
Halo of Stars Filter S-Start Attack Pitch->LFO Glide Qntz LFO None
1600 Green Hills Road Scotts Valley, California U.S.A 95067-0015
E-mu PN FI499 Rev A
Getting Around on the E4K20
 Loading...