How it Works
Log In / Sign Up
Buy Points
How it Works
FAQ
Contact Us
Questions and Suggestions
Users
Emporia
Loading...
A
Active
3
ACTIVEglam
2
C
C151
2
C160
2
Care Plus
2
Classic
4
CLASSIC 2G
CLASSIC V26
Click
5
Comfort
4
CONNECT
3
D
D32ABT
D39ABT
D40
D40AB
D40ABB
E
ECO
Eco C160
Elegance
3
Elegance Plus
5
Elegance Plus GPS
4
Essence Plus
3
Essential
4
Euphoria
8
EUPHORIA 3G
F
F220i
2
FB85
FLIP
3
FLIPbasic
9
FLIPBASIC F220
FLIP BLACK
2
FLIP CHAMPAGNE
2
G
GLAM
14
GLAM V34
K
KFT19
2
L
LIFE
Life Plus
3
LOLA-FON
M
Mobile Phone
O
One
4
P
Prime
4
PURE
6
R
RL1
S
S1
2
S2
Select
Select Basic
SIMPLICITY
SMART
2
SMART 2
4
Loading...
Loading...
Nothing found
Active
User Manual
2 pgs
3.66 Mb
0
User Manual [de]
2 pgs
919.62 Kb
0
Instruction Manual [fr]
2 pgs
3.65 Mb
0
Table of contents
Loading...
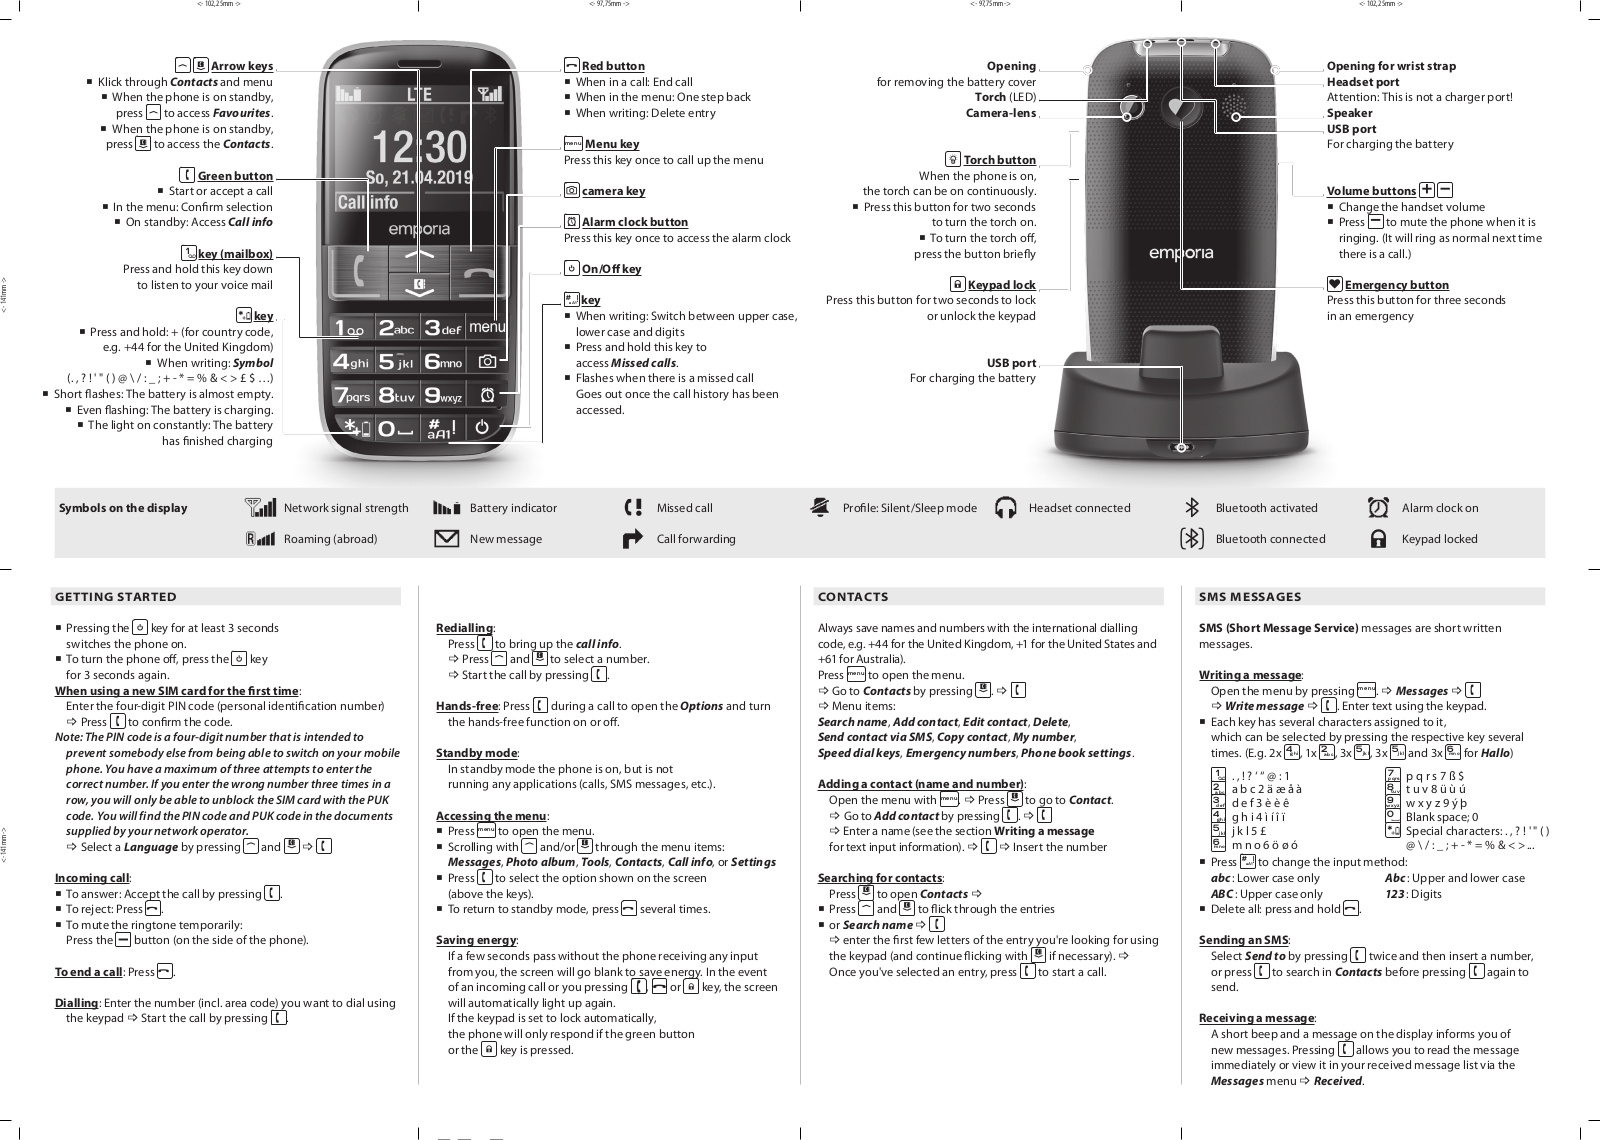
Emporia Active User Manual
...
Emporia User Manual
Download
Specifications and Main Features
Frequently Asked Questions
User Manual
Download
Loading...
+
hidden pages
Unhide
You need points to download manuals.
1 point = 1 manual.
You can buy points or you can get point for every manual you upload.
Buy points
Upload your manuals
 Loading...