

Page 1
Daniel CUI
Ultrasonic Meter Software
Standard Edition
Quick Start Manual
DANIEL MEASUREMENT AND CONTROL, INC.
AN EMERSON PROCESS MANAGEMENT COMPANY
HOUSTON, TEXAS
Part Number 3-9000-741
Version 4.21
MARCH 2008
For Daniel Gas and Liquid Ultrasonic Meters
Page 2

Page 3

Important Instructions
Daniel Measurement and Control, Inc. (Daniel) designs, manufactures and tests its
products to meet many national and international standards. Because these
instruments are sophisticated technical products, you must properly install, use and
maintain them to ensure they continue to operate within their normal specifications.
The following instructions must be adhered to and integrated into your safety
program when installing, using and maintaining Daniel products.
• Read all instructions prior to installing, operating and servicing the product.
If this instruction manual is not the correct manual, call
1-713-827-6314 (24-hour response number for both Service and Sales
Support) and the requested manual will be provided. Save this instruction
manual for future reference.
• If you do not understand any of the instructions, contact your Daniel
representative for clarification.
• Follow all warnings, cautions and instructions marked on and supplied with
the product.
• Inform and educate your personnel in the proper installation, operation and
maintenance of the product.
• Install your equipment as specified in the installation instructions of the
appropriate instruction manual and per applicable local and national codes.
Connect all products to the proper electrical and pressure sources.
• To ensure proper performance, use qualified personnel to install, operate,
update, program and maintain the product.
• When replacement parts are required, ensure that qualified people use
replacement parts specified by the manufacturer. Unauthorized parts and
procedures can affect the product's performance and place the safe operation
of your process at risk. Look-alike substitutions may result in fire, electrical
hazards or improper operation.
• Ensure that all equipment doors are closed and protective covers are in
place, except when maintenance is being performed by qualified persons, to
prevent personal injury.
• ALWAYS READ AND FOLLOW THE DANIEL® LIQUID AND GAS
ULTRASONIC FLOW METER REFERENCE, INSTALLATION, AND
OPERATIONS MANUAL AND ALL PRODUCT WARNINGS AND
INSTRUCTIONS.
• Use of this equipment for any purpose other than its intended purpose may
result in property damage and/or serious personal injury or death.
• Before opening the flameproof enclosure in a flammable atmosphere, the
electrical circuits must be interrupted.
Page 4

Daniel CUI Quick Start Manual
NOTICE
THE CONTENTS OF THIS PUBLICATION ARE PRESENTED FOR INFORMATIONAL PURPOSES ONLY,
AND WHILE EVERY EFFORT HAS BEEN MADE TO ENSURE THEIR ACCURACY, THEY ARE NOT TO
BE CONSTRUED AS WARRANTIES OR GUARANTEES, EXPRESSED OR IMPLIED, REGARDING THE
PRODUCTS OR SERVICES DESCRIBED HEREIN OR THEIR USE OR APPLICABILITY. ALL SALES ARE
GOVERNED BY DANIEL'S TERMS AND CONDITIONS, WHICH ARE AVAILABLE UPON REQUEST. WE
RESERVE THE RIGHT TO MODIFY OR IMPROVE THE DESIGNS OR SPECIFICATIONS OF SUCH
PRODUCTS AT ANY TIME.
DANIEL DOES NOT ASSUME RESPONSIBILITY FOR THE SELECTION, USE OR MAINTENANCE OF
ANY PRODUCT. RESPONSIBILITY FOR PROPER SELECTION, USE AND MAINTENANCE OF ANY
DANIEL PRODUCT REMAINS SOLELY WITH THE PURCHASER AND END-USER.
TO THE BEST OF DANIEL'S KNOWLEDGE THE INFORMATION HEREIN IS COMPLETE AND
ACCURATE. DANIEL MAKES NO WARRANTIES, EXPRESSED OR IMPLIED, INCLUDING THE IMPLIED
WARRANTIES OF MERCHANTABILITY AND FITNESS FOR A PARTICULAR PURPOSE WITH
RESPECT TO THIS MANUAL AND, IN NO EVENT, SHALL DANIEL BE LIABLE FOR ANY INCIDENTAL,
PUNITIVE, SPECIAL OR CONSEQUENTIAL DAMAGES INCLUDING, BUT NOT LIMITED TO, LOSS OF
PRODUCTION, LOSS OF PROFITS, LOSS OF REVENUE OR USE AND COSTS INCURRED INCLUDING
WITHOUT LIMITATION FOR CAPITAL, FUEL AND POWER, AND CLAIMS OF THIRD PARTIES.
PRODUCT NAMES USED HEREIN ARE FOR MANUFACTURER OR SUPPLIER IDENTIFICATION ONLY
AND MAY BE TRADEMARKS/REGISTERED TRADEMARKS OF THESE COMPANIES.
DANIEL AND THE DANIEL LOGO ARE REGISTERED TRADEMARKS OF DANIEL INDUSTRIES, INC.
THE EMERSON LOGO IS A TRADEMARK AND SERVICE MARK OF EMERSON ELECTRIC CO.
COPYRIGHT
All rights reserved. No part of this work may be reproduced or copied in any form or by any
means - graphic, electronic, or mechanical — without first receiving the written permission of
©
2008 BY DANIEL MEASUREMENT AND CONTROL, INC., HOUSTON, TEXAS,
U.S.A.
Daniel Measurement and Control, Inc. Houston, Texas, U.S.A.
Page 5
1
DANIEL CUI
Table of Contents
1. Introduction .................................................................................... 1
2. System Requirements ..................................................................... 2
3. Daniel CUI Installation Instructions..................................................... 3
1. INTRODUCTION
1.1 About this Manual
Welcome to the Daniel CUI Quick Start Manual.
We designed the Daniel CUI Quick Start Manual to help you get started
with the Daniel CUI software.
Each section provides step-by-step procedures that can be followed while
running the Daniel CUI program. Press F1 at any time to access
Daniel CUI’s online help, or select Help Topics from the help menu.
This manual assumes that you are familiar with
Microsoft
with a mouse, or use a keyboard.
® Windows®, and that you can point and click
MAR 2008 About this Manual
Page 6
2 SYSTEM REQUIREMENTS
2. SYSTEM REQUIREMENTS
This section lists the system requirements needed to run Daniel CUI.
Ensure that your personal computer (PC) system has the minimum
system requirements described below.
• PC with a 133MHz Pentium or higher processor (Pentium/400MHz or
higher recommended) and meets the system requirements for the
operating system installed.
• 100MB of free hard disk space
• One Super VGA monitor with at least 800x600 resolution
• One serial port available for remote/local connection to the Daniel Mark
II or Mark III Gas Ultrasonic Meter or the Daniel Liquid Ultrasonic
Meter (for on-line operations)
• One Ethernet port available for remote/local connection to the Daniel
Mark III Gas Ultrasonic Meter or the Daniel Liquid Ultrasonic Meter
(for on-line operations)
• One parallel port available for connection to a local printer, or a
connection to a network printer (optional)
• One Windows®-compatible printer with graphic capability (optional)
• One Windows®-compatible modem (for remote connection only)
• One Windows®-compatible mouse (i.e. mouse, trackball, or touchpad)
• Microsoft® Excel® 2000 or later version with local printer driver
installed (optional)
DANIEL CUI
The log file(s) are CSV format if Excel 2000 or later is not available.
• Windows® 2000
•Windows® XP
• Windows Vista™ - Ultimate, Business, Home Basic, Enterprise, or
Home Premium Editions
• Internet Explorer® 5.0 or later version
• Microsoft's XML parser v2.6 or above. Daniel CUI will inform you if you
do not have a compatible version of the XML parser when it is first
started. It will then explain how to install it from the installation disk.
About this Manual MAR 2008
Page 7

DANIEL CUI INSTALLATION INSTRUCTIONS 3
DANIEL CUI
3. DANIEL CUI INSTALLATION INSTRUCTIONS
IMPORTANT MESSAGE FOR USERS OF Windows® 2000
SERVICE PACK 4 AND MARK III METERS!
Windows
connecting or cause Daniel CUI to crash when attempting a direct serial or modem
connection to a Daniel Mark III Gas Ultrasonic Meter or a Daniel Liquid Ultrasonic
Meter. This is a known Issue documented in the Microsoft Knowledge Base Article
824301 "Script Error" Error Message When You Try to Connect to a Server by Using
a Remote Access Connection. A Hotfix is available from Microsoft. Please see
® 2000 Service Pack 4 has a problem that will prevent Daniel CUI from
Section 3.2.4 below on where to find this patch. It is necessary to address this issue
if you intend to communicate with a Daniel Mark III Gas Ultrasonic Meter or a Daniel
Liquid Ultrasonic Meter with Daniel CUI using a serial port or modem. If you are only
communicating to a meter using Ethernet, then it is not necessary to take any action
on this issue. This issue does not affect communications to Daniel Mark II Gas
Ultrasonic Meters.
3.1 Installing Daniel CUI
Perform the following steps to install Daniel CUI:
1. Make sure you have Administrative rights before proceeding. If you
are not sure, continue and the installation program will inform you if
you don’t and abort the installation.
2. Insert the CD in the appropriate drive.
MAR 2008 Installing Daniel CUI
Page 8
4 DANIEL CUI INSTALLATION INSTRUCTIONS
For Windows XP and 2000
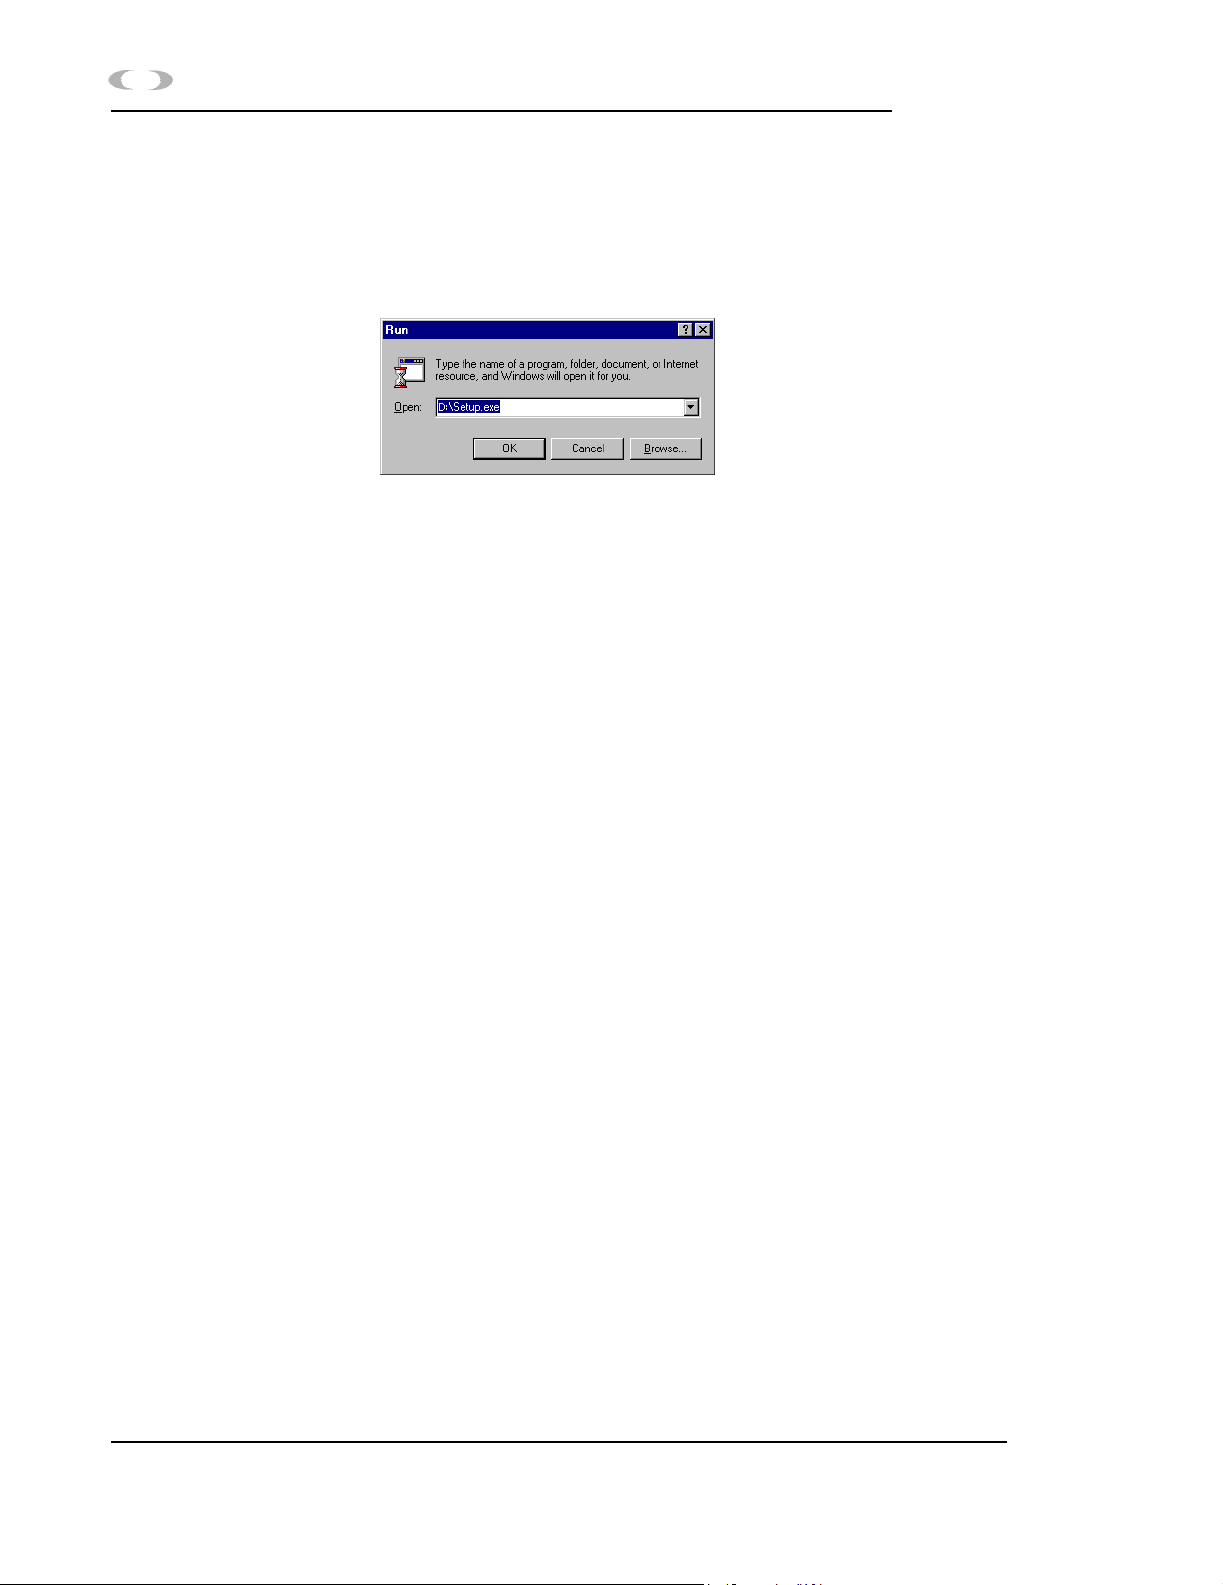
• From the Windows® task bar (lower left corner), click the Start
button, then select Run. The Run window displays (see Figure 3-1).
Figure 3-1 Start>Run Window
• Type the path and file name (e.g., d:\setup.exe) in the Open
data box or click the Browse button to locate the directory
containing the setup file.
• After selecting the correct file, click on the OK button.
DANIEL CUI
For Windows Vista™
• If a dialog showing the CD disk contents does not automatically
appear, from the task bar at the bottom of the screen click on the
Start button, select Computer and then the CD drive containing the
disk.
• Double-click Setup.exe from the list of files to start the installation.
• You will receive a message An unidentified program wants
access to your computer, select Allow - I trust this program.
I know where it's from or I've used it before.
3. Windows® opens the setup file and the Installation Wizard begins.
Follow the instructions provided on each screen.
4. After Daniel CUI is installed, proceed to Section 3.2 for instructions on
installing the Daniel Direct Connection driver. This is only necessary
if you are planning to communicate with a Daniel Mark III Gas
Ultrasonic Meter or a Daniel Liquid Ultrasonic Meter over a serial
port. If you are using Windows® 2000 or Windows® XP and have
already installed a driver called Daniel Mark III Direct Connection
driver from a version of Daniel CUI earlier than version 4.00, we
recommend following the procedure in Section 3.2.3 to remove this
driver and install a standard Windows® driver that ships with
Windows® 2000 and Windows® XP.
Installing Daniel CUI MAR 2008
Page 9

DANIEL CUI INSTALLATION INSTRUCTIONS 5
DANIEL CUI
3.2 Installing a Direct Connection Driver
For Daniel Mark III Gas Ultrasonic Meter or a Daniel Liquid Ultrasonic
Meter
Perform the following steps to install the Daniel Direct Connection driver
in order for Daniel CUI to communicate with a Daniel Mark III Gas
Ultrasonic Meter or a Daniel Liquid Ultrasonic Meter using a serial port.
This process and driver to install varies slightly for the different
operating systems.
3.2.1 Instructions for Windows® XP or Windows® 2000
The dialogs included in this section are from Windows® XP. The written
instructions will point out differences for Windows® 2000.
1. From the task bar at the bottom of the screen click the Start button.
Use the Settings>Control Panel menu path for Windows® 2000 or
Control Panel for Windows® XP.
2. For Windows® XP only, if the Control Panel looks like the dialog
below, click the Printers and Other Hardware icon.
Figure 3-2 Windows® XP Control Panel
3. Now, double-click the icon Phone and Modem.
4. The Phone and Modems Options displays. Select the Modems tab.
Make sure there are not any modem drivers installed for the COM
port for which you plan to install the direct connection driver.
MAR 2008 Installing a Direct Connection Driver
Page 10

6 DANIEL CUI INSTALLATION INSTRUCTIONS
This is necessary due to a limitation in the Microsoft® Dial-up
Networking that will prevent it from working correctly if multiple
drivers are assigned to the same COM port.
To delete any drivers, select them and click Remove. Then click the
Add button to start the installation wizard.
DANIEL CUI
Figure 3-3 Phone and Modem Options Dialog
5. On the first page of the wizard, select the check box “Don't detect my
modem; I will select it from a list”
Figure 3-4 Don’t Detect My Modem Dialog
and click the Next button to continue.
Installing a Direct Connection Driver MAR 2008
Page 11

DANIEL CUI
6. On the second page of the wizard, select (Standard Modem Types)
DANIEL CUI INSTALLATION INSTRUCTIONS 7
under Manufacturer and Communications cable between two
computers
under Models. Click the Next button to continue.
Figure 3-5 Install New Modem Dialog
7. Select the Selected port s radio button and select only the desired
ports you wish to use to communicate with a Daniel Mark III Gas
Ultrasonic Meter or a Daniel Liquid Ultrasonic Meter meter. Click
the Next button to continue.
Figure 3-6 Select PortsDialog Box
MAR 2008 Installing a Direct Connection Driver
Page 12

8 DANIEL CUI INSTALLATION INSTRUCTIONS
8. When the driver is successfully installed, click the Finish button to
close the wizard.
DANIEL CUI
Figure 3-7 Driver Installation Complete
9. The Communications cable between two computers driver will now
appear in the Modem list. Multiple instances of the driver will
appear, if it was installed for multiple COM ports. Click the OK button
to close the dialog. This completes the driver installation.
Figure 3-8 Driver Installation Complete
Installing a Direct Connection Driver MAR 2008
Page 13

DANIEL CUI INSTALLATION INSTRUCTIONS 9
DANIEL CUI
3.2.2 Instructions for Windows Vista™
1. From the task bar at the bottom of the screen click on the Start button
and select Control Panel.
2. Now, double-click on the icon
Phone and Modems Options.
3. The Phone and Modems Options displays. Select the Modems tab.
Make sure there are not any modem drivers installed for the COM
port for which you plan to install the direct connection driver. This is
necessary due to a limitation in the Microsoft® Dial-up Networking
that will prevent it from working correctly if multiple drivers are
assigned to the same COM port.
To delete any drivers, select them and click
Add button to start the installation wizard.
Remove. Then click on the
Figure 3-9 Modem Properties Dialog
4. Windows Vista™ may display a message Windows needs your
permission to continue. Select Continue to proceed.
MAR 2008 Installing a Direct Connection Driver
Page 14

10 DANIEL CUI INSTALLATION INSTRUCTIONS
5. On the first page of the wizard, select the check box "Don't detect my
modem; I will select it from a list"
and click on the Next button to
continue.
DANIEL CUI
Figure 3-10 Detect My Modem Dialog
6. On the second page of the wizard, click on the Have Disk button.
Figure 3-11 Install New Modem Dialog - Have Disk Selection
Installing a Direct Connection Driver MAR 2008
Page 15

DANIEL CUI
7. Enter the installation directory for Daniel CUI, under "Copy
8. From the list of Models, select Daniel Direct Connection and click
DANIEL CUI INSTALLATION INSTRUCTIONS 11
manufacturer's files from:" (the default installation directory is
typically C:\Program Files\Daniel\Daniel CUI). Click on the
Browse button, if necessary, to search for the Daniel CUI installation
directory. Click on the OK button to continue.
Figure 3-12 Install from Disk Dialog
on the Next button to continue.
Figure 3-13 Daniel Mark III Direct Connection
MAR 2008 Installing a Direct Connection Driver
Page 16

12 DANIEL CUI INSTALLATION INSTRUCTIONS
9. Select the Selected ports radio button and select only the desired ports
you wish to use to communicate with a Daniel Mark III Gas
Ultrasonic Meter or a Daniel Liquid Ultrasonic Meter. Click on the
Next button to continue.
DANIEL CUI
Figure 3-14 Modem Port Selection Dialog Box
10.When the driver is successfully installed, click on the Finish button to
close the wizard.
Figure 3-15 Complete Modem Installation
Installing a Direct Connection Driver MAR 2008
Page 17

DANIEL CUI
11. The Daniel Direct Connection driver will now appear in the
DANIEL CUI INSTALLATION INSTRUCTIONS 13
Modem list. Multiple instances of the driver will appear, if it was
installed for multiple COM ports. Click on the OK button to close the
dialog. This completes the driver installation.
Figure 3-16 Driver Installation Complete
3.2.3 Instructions to Upgrade Direct Connection Driver for
Windows® XP or Windows® 2000
1. From the task bar at the bottom of the screen click the Start button.
Use the Settings>Control Panel menu path for Windows® 2000 or
Control Panel for Windows® XP.
MAR 2008 Installing a Direct Connection Driver
Page 18

14 DANIEL CUI INSTALLATION INSTRUCTIONS
2. For Windows® XP only, if the Control Panel looks like the dialog
below, click the
Printers and Other Hardware icon.
DANIEL CUI
Figure 3-17 Windows® XP Control Panel
3. Now, double-click the icon Phone and Modem.
4. The Phone and Modems Options dialog box displays. Select the
Modems tab. Select the Daniel Mark III Direct Connection
driver in the list and click the Remove button to delete this driver. A
dialog will appear asking to confirm removing this driver. Click Yes
to delete the driver.
Figure 3-18 Phone and Modem Options Dialog
Installing a Direct Connection Driver MAR 2008
Page 19

DANIEL CUI
5. The Phone and Modem Options Modems tab now should not contain
DANIEL CUI INSTALLATION INSTRUCTIONS 15
any modem drivers for the COM port for which you plan to install the
new direct connection driver. This is necessary due to a limitation in
the Microsoft® Dial-up Networking that will prevent it from working
correctly if multiple drivers are assigned to the same COM port. Now
click the Add button to start the installation wizard.
Figure 3-19 Phone and Modem Options Dialog
6. On the first page of the wizard, select the check box “Don't detect my
modem; I will select it from a list”
Figure 3-20 Don’t Detect My Modem Dialog
and click the Next button to continue.
MAR 2008 Installing a Direct Connection Driver
Page 20

16 DANIEL CUI INSTALLATION INSTRUCTIONS
7. On the second page of the wizard, select (Standard Modem Types) under
Manufacturer and
Models. Click the
Communications cable between two computers under
Next button to continue.
DANIEL CUI
Figure 3-21 Install New Modem Dialog
8. Select the Selected ports radio button and select only the desired ports
you wish to use to communicate to a Mark III meter. Click the Next
button to continue.
Figure 3-22 Example Modem Installation Dialog Box
Installing a Direct Connection Driver MAR 2008
Page 21

DANIEL CUI
9. When the driver is successfully installed, click the Finish button to
DANIEL CUI INSTALLATION INSTRUCTIONS 17
close the wizard.
Figure 3-23 Driver Installation Complete
10. The Communications cable between two computers driver will now
appear in the Modem list. Multiple instances of the driver will
appear, if it was installed for multiple COM ports. click the OK button
to close the dialog. This completes the driver installation.
Figure 3-24 Driver Installation Complete
MAR 2008 Installing a Direct Connection Driver
Page 22

18 DANIEL CUI INSTALLATION INSTRUCTIONS
3.2.4 Obtaining Hotfixes for Microsoft® Windows®
1. If you are using an English North American version of Windows®
2000, the Hotfixes can be found on the Daniel CUI Installation CD
under a directory called Windows Hotfixes. Just run the hotfix for the
appropriate Windows® operating system and Knowledge Base Article
Number. Daniel Customer Service can also provide these hotfixes if
you do not have a Daniel CUI Installation CD available.
2. For all other versions of Windows® 2000, go to the link below for the
particular Knowledge Base Article to find out how to contact Microsoft
for hotfixes for your version of Windows®.
3. KB 824301: For the Windows® 2000 Service Pack 4 Issue that will
prevent Daniel CUI from connecting to a Daniel Mark III Gas
Ultrasonic Meter or a Daniel Liquid Ultrasonic Meter over serial or
dial-up connections, go to this link:
http://support.microsoft.com/default.aspx?scid=kb;[LN];824301
DANIEL CUI
Installing a Direct Connection Driver MAR 2008
Page 23

DANIEL CUI
3.3 Uninstalling Daniel CUI
Uninstall Using Windows® XP or Windows 2000
Perform the following steps to uninstall Daniel CUI:
1. From the task bar at the bottom of the screen, click the Start button.
Use the Settings>Control Panel menu path for Windows® 2000 or the
Control Panel menu path for Windows® XP. The Settings Control
Panel window appears (see Figure 3-25).
DANIEL CUI INSTALLATION INSTRUCTIONS 19
Figure 3-25 Settings>Control Panel Menu
2. Double-click the Add/Remove Programs icon.
MAR 2008 Uninstalling Daniel CUI
Page 24

20 DANIEL CUI INSTALLATION INSTRUCTIONS
3. The Add/Remove Program Properties window displays.
DANIEL CUI
Figure 3-26 Add/Remove Program Properties
Use the scroll bar and then select Daniel CUI. click the Add/Remove
button.
4. Windows® displays the Confirm File Deletion window.
Figure 3-27 Confirm File Deletion
5. Click the Yes button to continue. Windows® deletes the program and
all related files.
Or,
Click the
No button to abort the process and return to the Add/
Remove Program Properties window.
Uninstalling Daniel CUI MAR 2008
Page 25

21 DANIEL CUI INSTALLATION INSTRUCTIONS
Uninstall Using Windows Vista™
Perform the following steps to uninstall Daniel CUI:
1. From the task bar at the bottom of the screen, click on the Start button.
Use the Start>Control Panel menu path for Windows Vista™. The
Settings Control Panel window appears.
DANIEL CUI
Figure 3-28 Windows Vista™ Control Panel
2. Double-click on the Programs and Features icon and the Uninstall or
Change a program dialog appears.
Figure 3-29 Windows Vista™ Uninstall Dialog
Uninstalling Daniel CUI MAR 2008
Page 26

22 DANIEL CUI INSTALLATION INSTRUCTIONS
Select Daniel CUI from the programs list, then click on the Uninstall/
Change
Continue button to proceed with the InstallShield wizard or click the
Cancel button to abort the process.
button. If you get the Users Account Control dialog, click the
3. Windows® displays the Daniel CUI - InstallShield Wizard. Click on
Yes button to remove Daniel CUI and all of its features or click on
the
the
No button to abort the process.
DANIEL CUI
Figure 3-30 Windows Vista™ Uninstall Conformation
4. If you clicked the Yes button in the previous step, the Daniel CUI InstallShield Wizard appears. Click on the Finish button to complete
the process and close the wizard,
Figure 3-31 Windows Vista™ Finish Uninstalling
Uninstalling Daniel CUI MAR 2008
Page 27

23 DANIEL CUI INSTALLATION INSTRUCTIONS
3.4 Installation Troubleshooting Tips
Before installing Daniel CUI, shut down all Windows® programs,
including any virus checking programs. Most virus checking software has
little or no impact on the installation process. However, if you encounter
installation errors, turn off the virus checking software and re-install
Daniel CUI.
• Run scan disk on your hard drive. Hard drive errors can cause
problems with the installation process.
• Check to make sure there is enough free disk space on the fixed disk to
meet the system requirements (see Section 2.).
3.5 Additional Sources
For additional related information, refer to one of the following manuals:
DANIEL CUI
• Gas Ultrasonic Products
• 3-9000-740 Daniel Ultrasonic Gas Flow Meter Mark II Electronics
Reference, Installation, and Operations Manual
• 3-9000-743 Daniel Ultrasonic Gas Flow Meter Mark III Electronics
Reference, Installation, and Operations Manual
• Liquid Ultrasonic Products
• 3-9000-750 Daniel Series 3800 Liquid Ultrasonic Flow Meter
Reference, Installation, and Operations Manual
Installation Troubleshooting Tips MAR 2008
Page 28

24 DANIEL CUI INSTALLATION INSTRUCTIONS
DANIEL CUI
This page is intentionally left blank.
Additional Sources MAR 2008
Page 29

DANIEL MEASUREMENT AND CONTROL, INC. RETURN
POLICY FOR WARRANTY AND NON-WARRANTY
MATERIAL
Use the following procedure for returning equipment to the Daniel factory in the
United States.
Step 1 Obtaining a RMA Number
A Return Material Authorization (RMA) number must be obtained prior to
returning any equipment for any reason.
To obtain a RMA number, call the Customer Service Department at 713-827-5033
between 8:00 a.m. and 5:00 p.m. (Central Standard Time), Monday through
Friday, except holidays or email daniel.support@emersonprocess.com.
No product returns will be accepted without a RMA number and will be returned at the
customer's expense.
For warranty consideration, the product must be returned to Daniel within twelve (12)
months of the date of original shipment or within eighteen (18) months of the date of
original shipment of the product to destinations outside the United States. The
Purchaser must prepay any shipping charges
In addition, the Purchaser is responsible for insuring any product shipped for
return, and assumes the risk of loss of the product during shipment.
• The following information is required at the time the RMA is issued:
• Customer name
• Contact name
• Billing address
• Contact Phone # and email address
• Daniel SO #, PO #, or Invoice #
• Item(s) to be returned
• Reason for return
• End user and final destination address
• Consignee's complete name, address, contact name and phone
number
• A RMA number is required for each original order. (Example: Two
fittings purchased on two separate orders now being returned require
two RMA numbers.)
For product returns from locations outside the United States, Daniel
Customer Service personnel will provide additional shipping
requirements.
Page 30

Step 2 Cleaning and Decontamination
Prior to shipment, thoroughly clean and decontaminate all equipment removing
all foreign substances. This includes all substances used for cleaning the
equipment. The cleaning and decontamination requirement applies to any part
exposed to process fluids or cleaning substances.
Shipping equipment that has not been decontaminated may be in violation of
U.S. Department of Transportation (DOT) regulations. For your reference, the
requirements for packaging and labeling hazardous substances are listed in DOT
regulations 49 CFR 172, 178, and 179.
If you suspect that a part has been contaminated, the part must be completely
drained and flushed to remove contaminants.
MAY CAUSE DEATH OR SERIOUS INJURY TO PERSONNEL
Contents may be under pressure or materials may be hazardous
Follow appropriate handling instructions for accessing pressurized equipment. Avoid
contact with hazardous materials or contaminated units and parts. Failure to do so may
result in death or serious injury.
Decontamination/Cleaning Statement
A blank Decontamination/Cleaning Statement is provided on the "Returned
Material Authorization Repair Form for Used Equipment".
• A Decontamination/Cleaning Statement is required for each returned
part.
• Fully complete each form and include a signature. If the decontamination statement is incomplete, the customer may be charged for
decontamination and cleaning.
If the equipment has been exposed to a known hazardous substance with any
characteristic that can be identified in the Code of Federal Regulations, 40 CFR
261.20 through 261.24, the chemical abstracts number and hazardous waste
number/hazard code must be stated in the space provided on the form.
Two (2) copies of each Decontamination/Cleaning Statement must be provided:
• One (1) copy must be attached to the outside of the package.
• One (1) copy must be included inside the package.
Page 31

Step 3 Material Safety Data Sheets (MSDS)
Provide a Material Safety Data Sheet (MSDS) with the returned equipment for
each substance that has come in contact with the equipment being returned,
including substances used for decontamination and cleaning.
A MSDS sheet is required by law to be available to people exposed to
specific hazardous substances, with one exception: if the equipment has only
been exposed to food-grade substances or potable water, or other substances for
which an MSDS is not applicable, the Decontamination/Cleaning Statement form
alone is acceptable.
Two (2) copies of each MSDS must be provided:
• One (1) copy must be attached to the outside of the package.
• One (1) copy must be provided inside the package.
Step 4 Packaging
Shipping a Device With Possible Contamination
To meet DOT requirements for identifying hazardous substances, ship only one
device per package.
Shipping a Device Without Any Potential Contamination
Devices being returned may be shipped together in one package, if there is no
potential of foreign substance contamination.
Step 5 Shipping
Before returning used equipment:
• Mark each package clearly with a RMA number.
• Include a Decontamination/Cleaning Statement inside the package.
• Attach a duplicate Decontamination/Cleaning statement to the
outside of the package.
• Include a MSDS for each substance that has come in contact with the
equipment inside the package.
• Attach a duplicate MSDS to the outside of the package.
Page 32

No product returns will be accepted without a RMA number and will be returned at the
customer's expense.
For warranty consideration, the product must be returned to Daniel within twelve (12)
months of the date of original shipment or within eighteen (18) months of the date of
original shipment of the product to destinations outside the United States. The
Purchaser must prepay any shipping charges
Ship all * mechanical equipment to the following address:
Daniel Measurement and Control, Inc.
Attn: Service Dept.
5650 Brittmoore Rd.
Houston, TX 77041
Ref: RMA#__________________
*Mechanical equipment includes: Orifice Fittings, Parts, Plates, Seal Rings,
Turbine Meters, Control Valves, Provers, Strainers, Meter Tubes, Ultrasonic
Meters, Flow Conditioners, etc.
Ship all * electronic equipment to the following address:
Daniel Measurement and Control, Inc.
Attn: Service Dept.
11100 Brittmoore Park Drive
Houston, TX 77041
Ref: RMA#___________________
*Electronic equipment includes: Gas Chromatographs, Petrocount Presets,
Danload Preset, Ultrasonic Meter Electronics (CPU boards, transducers, etc.),
2403 Totalizer, MRT 97 Indicator, Preamps, Pick Up Coils, Prover Interface
Boards, and the following Flow Computer Models: 2230, 2239, 2270, 2460, 2470,
S100, 2100, and 3000.
Page 33

DANIEL MEASUREMENT AND CONTROL, INC.
RETURNED MATERIAL AUTHORIZATION
Repair Form for Used Equipment
Including Decontamination/Cleaning Statement
1. Return Material Authorization (RMA) Number____________________________
2. Equipment to be returned:
Model Number ___________________ Serial Number ______________________
3. Reason for return:
_______________________________________________________________________
_______________________________________________________________________
_______________________________________________________________________
_______________________________________________________________________
Decontamination/Cleaning Fluids Process
A. List each substance in which the equipment was exposed. Attach additional documents if
necessary.
Common
Name
B. Circle any hazards and/or process fluid types that apply:
Infectious Radioactive Explosive Pryophoric Poison Gas
Cyanides Sulfides Corrosive Oxidizer Flammable Poison
Carcinogen Peroxide Reactive-Air Reactive-Water Reactive-Other (list):
Other Hazard Category (list):
C. Describe decontamination/cleaning process. Include MSDS description for substances used in
decontamination and cleaning processes. Attach additional documents if necessary.
CAS# if
Available
Used for Hazardous
Waste (20 CFR 261)
[ ] Yes [ ] No
[ ] Yes [ ] No
[ ] Yes [ ] No
[ ] Yes [ ] No
[ ] Yes [ ] No
[ ] Yes [ ] No
EPA Waste Code
if used for hazardous waste
Page 34

Shipping Requirements
Failure to comply with this procedure will result in the shipment being
refused.
4. Write the RMA number on the shipping package.
5. Inside the package include one copy of this document and all required
Material Safety Data Sheets (MSDS)
6. Outside of the package attach one copy of this document and all required
Material Safety Data Sheets (MSDS).
THIS EQUIPMENT, BEING RETURNED "FOR REPAIR," HAS BEEN
COMPLETELY DECONTAMINATED AND CLEANED. ALL FOREIGN
SUBSTANCES HAVE BEEN DOCUMENTED ABOVE AND MSDS
SHEETS ARE ATTACHED.
By:_______________________________ _________________________________
(Signature) (Print name)
Title:______________________________ Date:_______________________________
Company:_________________________ Phone: ____________________________
Fax:_______________________________
Page 35

This page is intentionally left blank.
Page 36

NOTES
Page 37

NOTES
Page 38

WARRANTY
1. LIMITED WARRANTY: Subject to the limitations contained in Section 2 herein, Daniel Measurement &
Control, Inc. ("Daniel") warrants that the licensed firmware embodied in the Goods will execute the
programming instructions provided by Daniel, and that the Goods manufactured by Daniel will be free from
defects in materials or workmanship under normal use and care and Services will be performed by trained
personnel using proper equipment and instrumentation for the particular Service provided. The foregoing
warranties will apply until the expiration of the applicable warranty period. Goods are warranted for twelve
(12) months from the date of initial installation or eighteen (18) months from the date of shipment by Daniel,
whichever period expires first. Consumables and Services are warranted for a period of 90 days from the date
of shipment or completion of the Services. Products purchased by Daniel from a third party for resale to Buyer
("Resale Products") shall carry only the warranty extended by the original manufacturer. Buyer agrees that
Daniel has no liability for Resale Products beyond making a reasonable commercial effort to arrange for
procurement and shipping of the Resale Products. If Buyer discovers any warranty defects and notifies Daniel
thereof in writing during the applicable warranty period, Daniel shall, at its option, correct any errors that are
found by Daniel in the firmware or Services or repair or replace F.O.B. point of manufacture that portion of the
Goods or firmware found by Daniel to be defective, or refund the purchase price of the defective portion of the
Goods/Services. All replacements or repairs necessitated by inadequate maintenance, normal wear and usage,
unsuitable power sources or environmental conditions, accident, misuse, improper installation, modification,
repair, use of unauthorized replacement parts, storage or handling, or any other cause not the fault of Daniel
are not covered by this limited warranty, and shall be at Buyer's expense. Daniel shall not be obligated to pay
any costs or charges incurred by Buyer or any other party except as may be agreed upon in writing in advance
by Daniel. All costs of dismantling, reinstallation and freight and the time and expenses of Daniel's personnel
and representatives for site travel and diagnosis under this warranty clause shall be borne by Buyer unless
accepted in writing by Daniel. Goods repaired and parts replaced by Daniel during the warranty period shall be
in warranty for the remainder of the original warranty period or ninety (90) days, whichever is longer. This
limited warranty is the only warranty made by Daniel and can be amended only in a writing signed by Daniel.
THE WARRANTIES AND REMEDIES SET FORTH ABOVE ARE EXCLUSIVE. THERE ARE NO REPRESENTATIONS OR WARRANTIES OF ANY KIND, EXPRESS OR IMPLIED, AS TO MERCHANTABILITY, FITNESS FOR
PARTICULAR PURPOSE OR ANY OTHER MATTER WITH RESPECT TO ANY OF THE GOODS OR SERVICES.
Buyer acknowledges and agrees that corrosion or erosion of materials is not covered by this warranty.
2. LIMITATION OF REMEDY AND LIABILITY
DELAY IN PERFORMANCE. THE REMEDIES OF BUYER SET FORTH IN THIS AGREEMENT ARE EXCLUSIVE.
IN NO EVENT, REGARDLESS OF THE FORM OF THE CLAIM OR CAUSE OF ACTION (WHETHER BASED IN
CONTRACT, INFRINGEMENT, NEGLIGENCE, STRICT LIABILITY, OTHER TORT OR OTHERWISE), SHALL
DANIEL'S LIABILITY TO BUYER AND/OR ITS CUSTOMERS EXCEED THE PRICE TO BUYER OF THE SPECIFIC
GOODS MANUFACTURED OR SERVICES PROVIDED BY DANIEL GIVING RISE TO THE CLAIM OR CAUSE OF
ACTION. BUYER AGREES THAT IN NO EVENT SHALL DANIEL'S LIABILITY TO BUYER AND/OR ITS
CUSTOMERS EXTEND TO INCLUDE INCIDENTAL, CONSEQUENTIAL OR PUNITIVE DAMAGES. THE TERM
"CONSEQUENTIAL DAMAGES" SHALL INCLUDE, BUT NOT BE LIMITED TO, LOSS OF ANTICIPATED
PROFITS, REVENUE OR USE AND COSTS INCURRED INCLUDING WITHOUT LIMITATION FOR CAPITAL, FUEL
AND POWER, AND CLAIMS OF BUYER'S CUSTOMERS.
: DANIEL SHALL NOT BE LIABLE FOR DAMAGES CAUSED BY
Page 39

Page 40

The sales and service offices of Daniel Measurement and Control are
located throughout the United States and in major countries overseas.
Please contact Daniel Measurement Services at11100 Brittmoore Park
Drive, Houston, Texas 77041, or phone (713) 827-6314 for the
location of the sales or service office nearest you.
Daniel Measurement Services offers both on-call and contract
maintenance service designed to provide single-source responsibility for
all Daniel products.
Daniel Measurement and Control, Inc., and Daniel Measurement Services, Inc. Divisions of
Emerson Process Management reserves the right to make changes to any of its products or
services at any time without prior notification in order to improve that product or service and to
supply the best product or service possible.
www.emersonprocess.com/daniel
 Loading...