

Page 1

RAP R11: Low Pressure Air Relay Valve Service and Adjustment
ARV-VA001-102-00
05/05/11
Low Pressure Diaphragm-Operated Air
Relay Valve
Service and Adjustment for VA001-102-01 & VA001-102-02
Page 2
RAP R11: Low Pressure Air Relay Valve Service and Adjustment
ARV-VA001-102-00
05/05/11
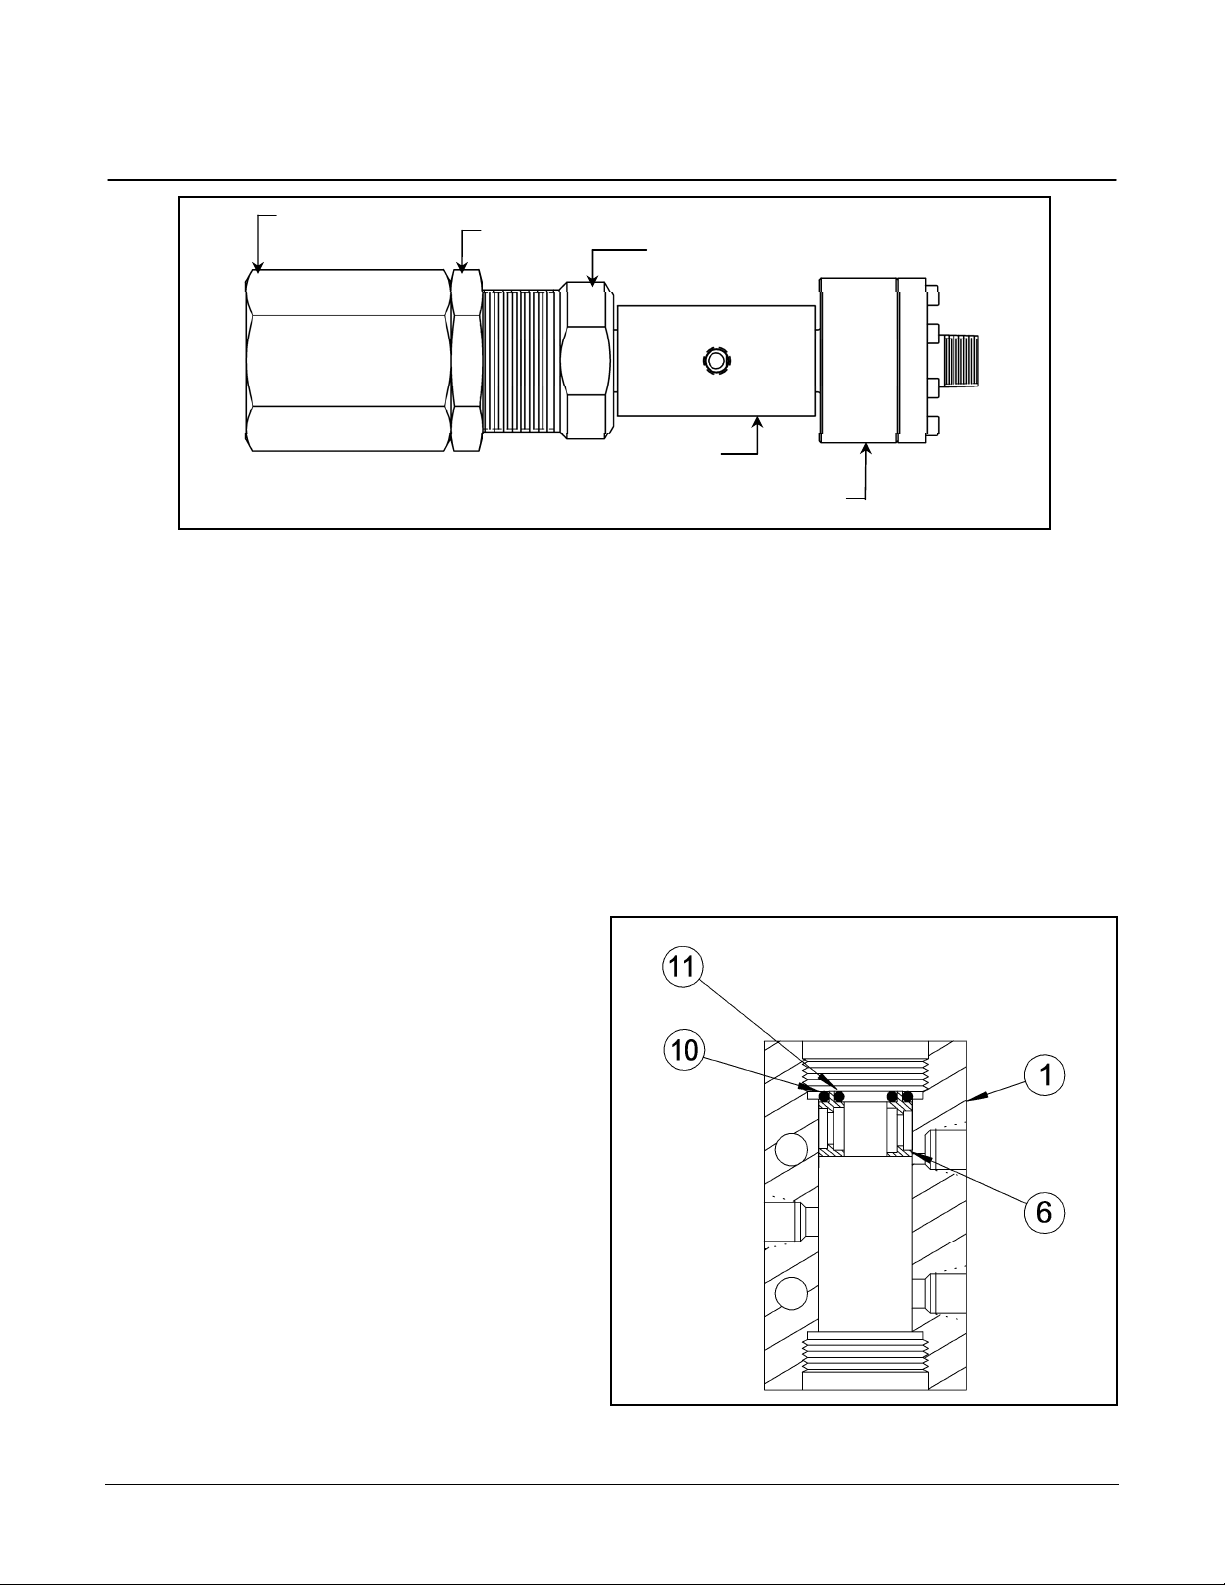
Air Relay Valve
Figure 1: Air Relay Valve with 1-1/4 Diaphragm
Adjusting Cap (3)
Locknut (4)
Spring Retainer (2)
Body (1)
Diaphragm Cylinder Assembly (9)
A. Disassemble and Clean
Information enclosed in brackets (item 1 etc.) is in reference to the complete assembly
drawings on page 6 and the illustrations throughout the document.
1. Remove spring retainer (item 2), adjusting cap (item 3) and locknut (item 4), by
unscrewing as a unit, from the body (item 1) and set aside.
2. Remove diaphragm cylinder assembly (item 9), by unscrewing as a unit, from the
body (item 1) and set aside.
3. Slowly pull valve stem (item 7) out of body (item 1) and set aside on a clean surface.
4. Carefully remove end valve sleeves (item 6) and center valve sleeve (item 5).
Note how they go together.
5. Clean stem (item 7) with a soft
cloth, Do Not scratch the stem.
Clean the end sleeves (item 6) and
center sleeve (item 5).
6. Lubricate and install new outer oring (item 10) and install new inner
o-ring (item 11), without lube, on
one end sleeve (item 6). From the
spring retainer end, fit the end
sleeve into the bore of the body
with the o-rings toward the spring
retainer threads. Insert the sleeve
until the outer o-ring is about to
enter the bore. (See Figure 2.)
Figure 2: Placing End Sleeve Seals
Page 1
Page 3
RAP R11: Low Pressure Air Relay Valve Service and Adjustment
ARV-VA001-102-00
05/05/11
Air Relay Valve
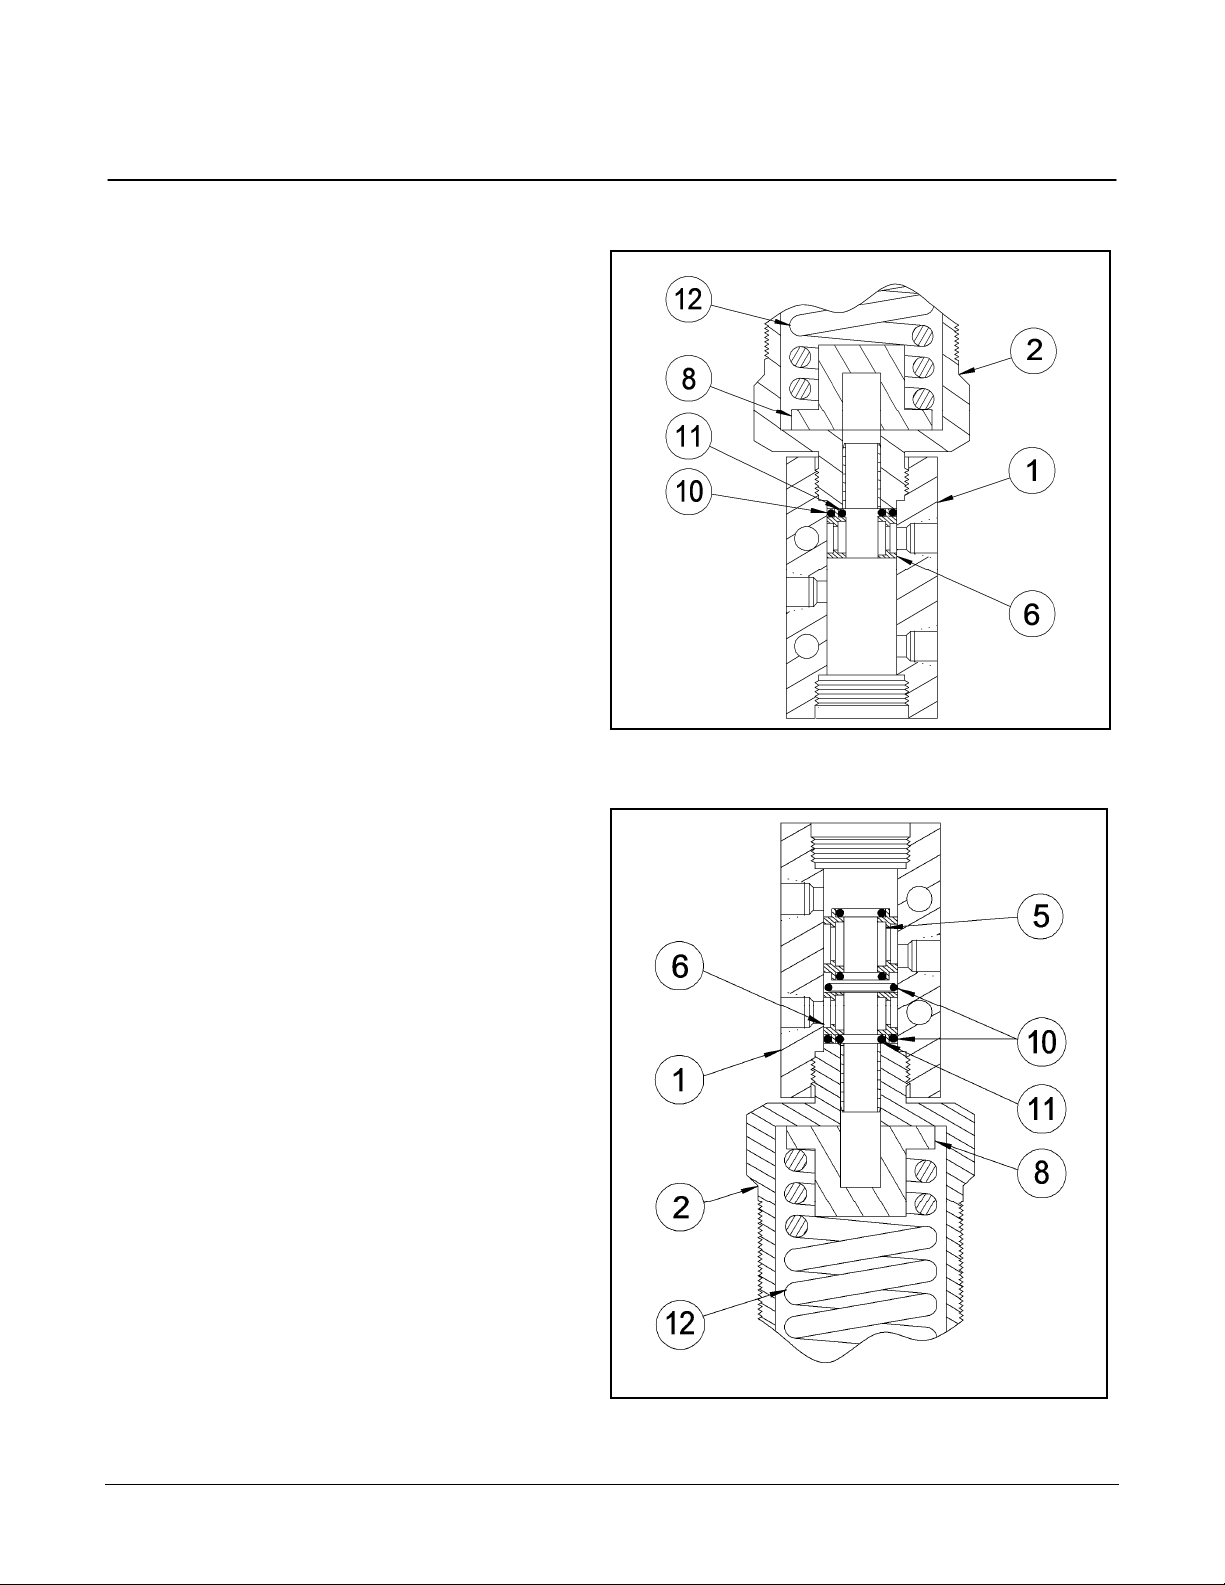
7. Install the spring retainer (item 2),
adjusting cap (item 3) and locknut
(item 4), as a unit. As you thread
the spring retainer in, it will push
the o-ring and sleeve into the bore
to the correct position. Tighten
spring retainer hand tight. (See
Figure 3)
Figure 3: Installing Spring Retainer
8. Turn the valve body (item 1) so
that the open end of the bore is up.
Install new inner o-rings (item 11),
without lube, in the center sleeve
(item 5). Place new lubricated oring (item 10) in the bore of the
body (item 1) on top of the end
sleeve (item 6). (See Figure 4)
9. Carefully slide the center sleeve
(item 5) into the bore in of the
body. When it reaches the outer oring (item 10), lying on the end
sleeve (item 6), press the center
sleeve to seat the o-ring. (See
Figure 5)
Figure 4: Placing Center Sleeve
Page 2
Page 4

RAP R11: Low Pressure Air Relay Valve Service and Adjustment
ARV-VA001-102-00
05/05/11
Air Relay Valve
10. Place a lubricated outer o-ring
(item 10) in the bore of the body
(item 1) on top of the center sleeve
(item 5). Do not try to seat o-ring
at this time. (See Figure 5)
Figure 5: Center Sleeve Seated
11. Install new inner o-rings (item 11),
without lube, and lubricated outer
ring (14) in the second end sleeve
(item 9). Slide the end sleeve into
the bore of the body (item 1) with
the o-ring grooves out toward the
cylinder threads. Insert the sleeve
until the outer o-ring is about to
enter the bore. (See Figure 6)
12. Disassemble the diaphragm
cylinder by removing the 10-32 x
¾” socket head cap screws (items
9-8) retaining the end cap (item 9-
7) and remove the diaphragm
assembly (item 9-3) from the
cylinder (item 9-1). Discard the old
diaphragm assembly (item 9-3).
(See Figure 8)
Figure 6: Placing Last End Sleeve
Page 3
Page 5

RAP R11: Low Pressure Air Relay Valve Service and Adjustment
ARV-VA001-102-00
05/05/11
Air Relay Valve
13. Clean the cylinder and end cap.
Check the breather (item 9-10) and
clean if needed.
14. Install the cylinder (item 9-1). As
you thread the cylinder in, it will
push the o-ring and sleeve into the
bore to the correct position. This
action will also seat the o-ring in
the center sleeve. Tighten cylinder
(item 9-1) hand tight to the body
(item 1).
Figure 7: Installing Cylinder
15. Lubricate the tip of the stem (item 7), note taper, and carefully insert taper end first,
pushing it through bearing (item 9-9) toward the spring end (item 3). (See Figure 8)
Figure 8: Completing Assembly
Page 4
Page 6

RAP R11: Low Pressure Air Relay Valve Service and Adjustment
ARV-VA001-102-00
05/05/11
Air Relay Valve
16. Lubricate the seal ring on the new diaphragm assembly and install it in the cylinder.
Note: The diaphragm assembly is not repairable and must be replaced in its entirety.
17. Place the end cap on the cylinder.
18. Lubricate the ¾”x10-32 screws with Never-seeze® and torque to 20 In-Lbs max. in a
criss-cross pattern.
19. Hold the assembly by gripping the diaphragm cylinder assembly, item 9, and using a
wrench on the spring retainer flats (item 3) tighten the complete assembly. Torque
to 120 inch pounds.
B. Valve Setting Procedure
1. Mount the air relay valve in a stand that has a 150-psi maximum supply with an
adjustable self-venting regulator. Connect the adjustable supply to the pilot port in
the end of the diaphragm cylinder (item 9).
2. Install a pressure gauge that reads up to 300-psi in the body cylinder port.
3. Install a 150-psi air supply in the normally open or normally close port.
4. Gradually increase or decrease the pressure, at the pilot port until the valve trips.
When the valve trips read the pilot supply gage and make a note of the pressure.
5. To adjust the trip point, remove pressure on the pilot and rotate the adjusting cap
(item 3) clockwise to increase or counter clockwise to decrease. Always remove
pressure at the pilot before adjusting the adjusting cap.
6. Adjust the cap (item 3) and take pressure readings until the valve trips at the
required pressure.
7. Tighten the locknut (item 4) to maintain the setting achieved.
If any further information is required, please feel free to contact:
Emerson Process Management
Valve Automation Inc.
2500 Park Avenue West
Mansfield, Ohio 44906
Phone: (419) 529-4311
Fax:
Please visit our website for up to date product data. www.shafervalve.com
The contents of this publication are presented for informational purpose only, and while every effort has been made to ensure their accuracy,
they are not to be construed as warranties or guarantees, express or implied, regarding the products or services described herein or their use
or applicability. We reserve the right to modify or improve the designs or specifications of such products at any time with out notice.
(419) 529-3688
Page 5
Page 7

RAP R11: Low Pressure Air Relay Valve Service and Adjustment
ARV-VA001-102-00
05/05/11
Air Relay Valve
View from VA001-102-00 assembly drawing of valves VA001-102-01 (Buna-N seals) and
VA001-102-02 (Flurocarbon seals.
 Loading...