

Page 1
Quick Start Guide
00825-0100-4952, Rev DC
Rosemount™ 0085 Pipe Clamp Sensor
Assembly
August 2017
Page 2

Quick Start Guide
August 2017
NOTICE
This guide provides basic guidelines for Rosemount 0085 Pipe Clamp Sensor. It does not provide instructions
for configuration, diagnostics, maintenance, service, troubleshooting, explosion-proof, flameproof, or
intrinsically safe (I.S.) installations. Refer to the Rosemount 0085 Pipe Clamp Sensor Reference Manual
instruction. The manual and guide are also available electronically on Emerson.com/Rosemount
If the Rosemount 0085 Sensor was ordered assembled to a temperature transmitter, see the appropriate Quick
Start Guide for information on configuration and hazardous locations certifications.
Figure 1. Rosemount 0085 Pipe Clamp Sensor Assembly Exploded View
A
B
for more
.
C
D
E
F
G
H
A. Transmitter
B. Sensor with spring loaded adapter
C. Nipple union of the extension
D. Nut
E. O-ring
F. Mounting hardware
G. Corrosion protection inlay (optional)
H. Pipe clamp
Contents
Location and orientation . . . . . . . . . . . . . . . . . . 3
Install pipe clamp sensor . . . . . . . . . . . . . . . . . . 6
Installing optional accessories . . . . . . . . . . . . . . 7
2
Rosemount X-well™ Technology considerations . 9
Product Certifications . . . . . . . . . . . . . . . . . . . . . . . 11
Page 3

August 2017
360°
Recommended
Zone
1.0 Location and orientation
The pipe clamp sensor should be mounted on the outside section of the pipe
where the process medium is in contact of the inside of the pipe wall. Ensure
that the pipe surface is clean of debris. The pipe clamp sensor should be
mounted in a secure position to ensure there is no rotational movement after
installation. To ensure ingress protection, the nut of the Rosemount 0085 Pipe
Clamp sensor can be tightened to compress the O-ring to form a seal. The nut
can be accessed and tightened by removing the sensor and the nipple union of
the extension. Refer to “Location and orientation” on page 3 for the location of
each part.
1.1 Horizontal orientation
Though the Rosemount 0085 Pipe Clamp sensor can be mounted in any
orientation for full pipe flow applications, the best practice is to mount the pipe
clamp sensor on the upper half of the pipe. Refer to Figure 2 for more
information.
Quick Start Guide
Figure 2. Horizontal Orientation
Full pipe flow Partial pipe flow
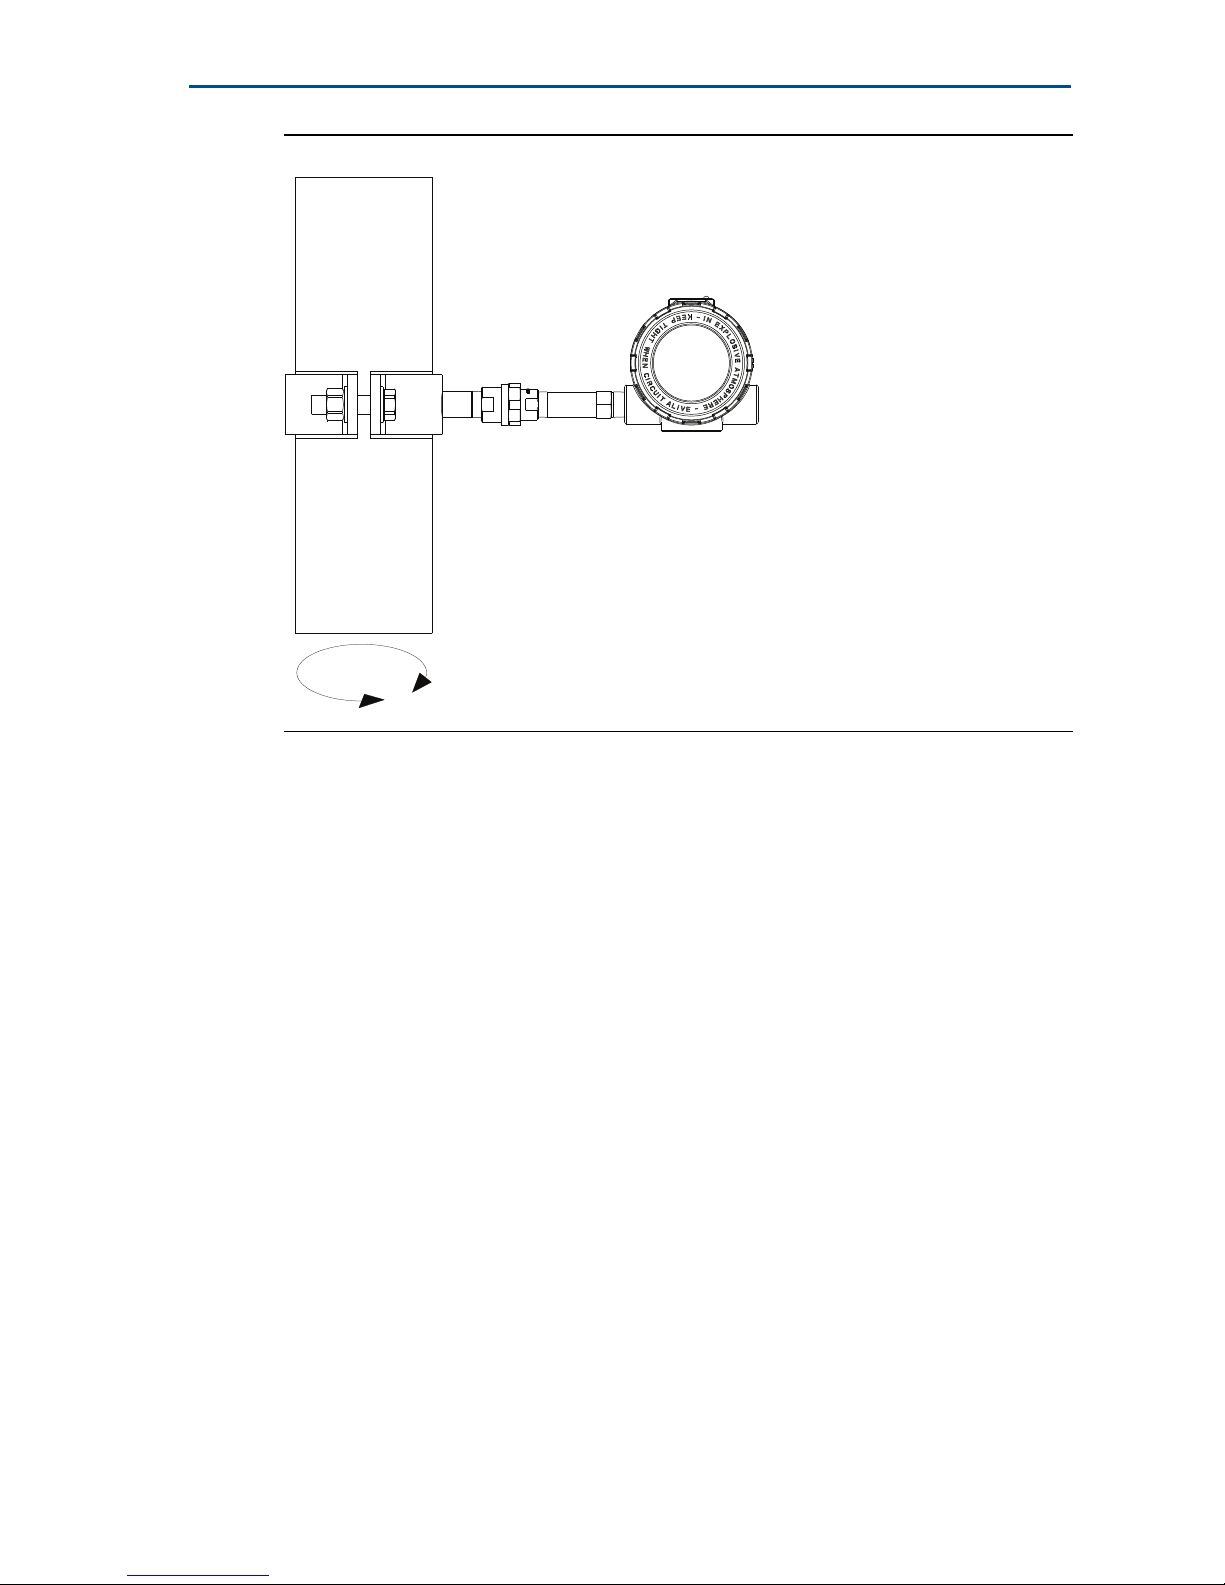
1.2 Vertical orientation
The pipe clamp sensor can be installed in any position around the circumference
of the pipe.
3
Page 4
Quick Start Guide
Figure 3. Vertical Orientation
August 2017
360°
1.3 Special considerations
Under most circumstances, the Rosemount 0085 Pipe Clamp Sensor can be
mounted in a direct mount configuration. Since heat from the process is
transferred from the pipe clamp sensor to the transmitter housing, if the
expected process temperature is near or beyond specification limits, consider
using a remote mount configuration to isolate the transmitter from the process.
Refer to the appropriate transmitter reference manual for temperature effects.
Figure 4 displays a pipe clamp sensor assembly in remote mount configuration.
4
Page 5

August 2017
Figure 4. Pipe Clamp Sensor Assembly in Remote Mount Configuration
Quick Start Guide
Wireless transmitters with external antennas allow for multiple antenna
configurations. All wireless transmitter should be appropriately 3 ft. (1 m) from
any large structure or building to allow clear communication to other devices.
Wireless transmitters with external antennas should be positioned vertically,
either straight up or straight down.
Figure 5. Wireless Transmitter Orientation
5
Page 6

Quick Start Guide
A
D
B
C
2.0 Install pipe clamp sensor
Select the area for pipe clamp sensor installation with the recommendations
outlined in “Horizontal orientation” on page 3. Mount the pipe clamp sensor on
the pipe and snug tighten the bolts. Ensure the sensor passes through the hole
of the pipe clamp and has direct contact between the sensor tip and pipe. Refer
to Figure 4 on page 5 for more information. Tighten the bolts to secure the pipe
clamp sensor to the pipe.
Figure 6. Sensor Tip and Pipe Contact
August 2017
CorrectIncorrect
A
C
B
D
A. Sensor
B. Extension of pipe clamp
C. Pipe clamp
D. Pipe
6
Page 7

August 2017
2.1 Install transmitter
See appropriate transmitter reference manual for sensor-transmitter
installation. Refer to Figure 7 for sensor lead wire terminations.
Figure 7. Sensor Lead Wire Termination
Single element 3-wire Single element 4-wire Dual element 3-wire
Quick Start Guide
2.2 Commission transmitter
See appropriate transmitter reference manual for transmitter commissioning
instructions.
3.0 Installing optional accessories
3.1 Corrosion protection inlay
The corrosion protection inlay provides a layer of protection to help minimize
the possibility of dissimilar metal corrosion between the pipe clamp and pipe.
The inlay is installed in between the pipe clamp and the pipe. Ensure the sensor
is clearing the hole in the protection inlay after installation. Refer to Figure 8 for
more information.
7
Page 8

Quick Start Guide
A
B
C
D
E
Figure 8. Pipe Clamp Sensor Assembly with Protection Inlay
August 2017
A. Extension of pipe clamp
B. Pipe clamp
C. Sensor
3.2 Replacement sensor
The spring loaded sensor can be ordered for replacement using the Rosemount
0085 Pipe Clamp Sensor Product Data Sheet
Use the following steps to replace the sensor.
1. Loosen and remove the original sensor from the extension of the pipe clamp.
2. Add pipe compound or PTFE tape (where local piping codes allow) to the
threads of the new sensor.
3. Insert the new sensor into the extension of the pipe clamp sensor and ensure
4. Screw in the sensor and tighten to 24 ft-lbs of torque.
the sensor tip passes through the hole of the pipe clamp. Refer to Figure 6 for
more information.
D. Corrosion protection inlay
E. Pipe
.
8
Page 9

August 2017
Quick Start Guide
4.0 Rosemount X-well™ Technology considerations
Rosemount X-well Technology is for temperature monitoring applications and is
not intended for control or safety applications. It is available in the Rosemount
3144P Temperature Transmitter and 648 Wireless Temperature Transmitter in a
factory assembled direct mount configuration with a Rosemount 0085 Pipe
Clamp Sensor. It cannot be used in a remote mount configuration.
Rosemount X-well Technology will only work as specified with factory supplied
and assembled Rosemount 0085 Pipe Clamp silver tipped single element sensor
with an 80 mm extension length. It will not work as specified if used with other
sensors. Installation and use of incorrect sensor will result in inaccurate process
temperature calculations. It is extremely important the above requirements and
installation steps below are followed to ensure Rosemount X-well Technology
works as specified.
In general, pipe clamp sensor installation best practices shall be followed (see
“Location and orientation” on page 3 for more details) as well as the specific
Rosemount X-well Technology requirements noted below.
Direct mounting of transmitter on pipe clamp sensor is required for
Rosemount X-well Technology to properly function. Figure 9 displays a
transmitter/pipe clamp assembly that is in a direct mount configuration.
Figure 9. Pipe Clamp Sensor Assembly in Direct Mount Configuration
Assembly shall be installed away from dynamic external temperature sources
such as a boiler or heat tracing.
9
Page 10
Quick Start Guide
The pipe clamp sensor makes direct contact with pipe surface. Moisture
buildup between sensor and pipe surface or sensor hangup in assembly can
cause inaccurate process temperature calculations. Refer to “Install pipe
clamp sensor” on page 6 for more information on proper sensor to pipe
surface contact.
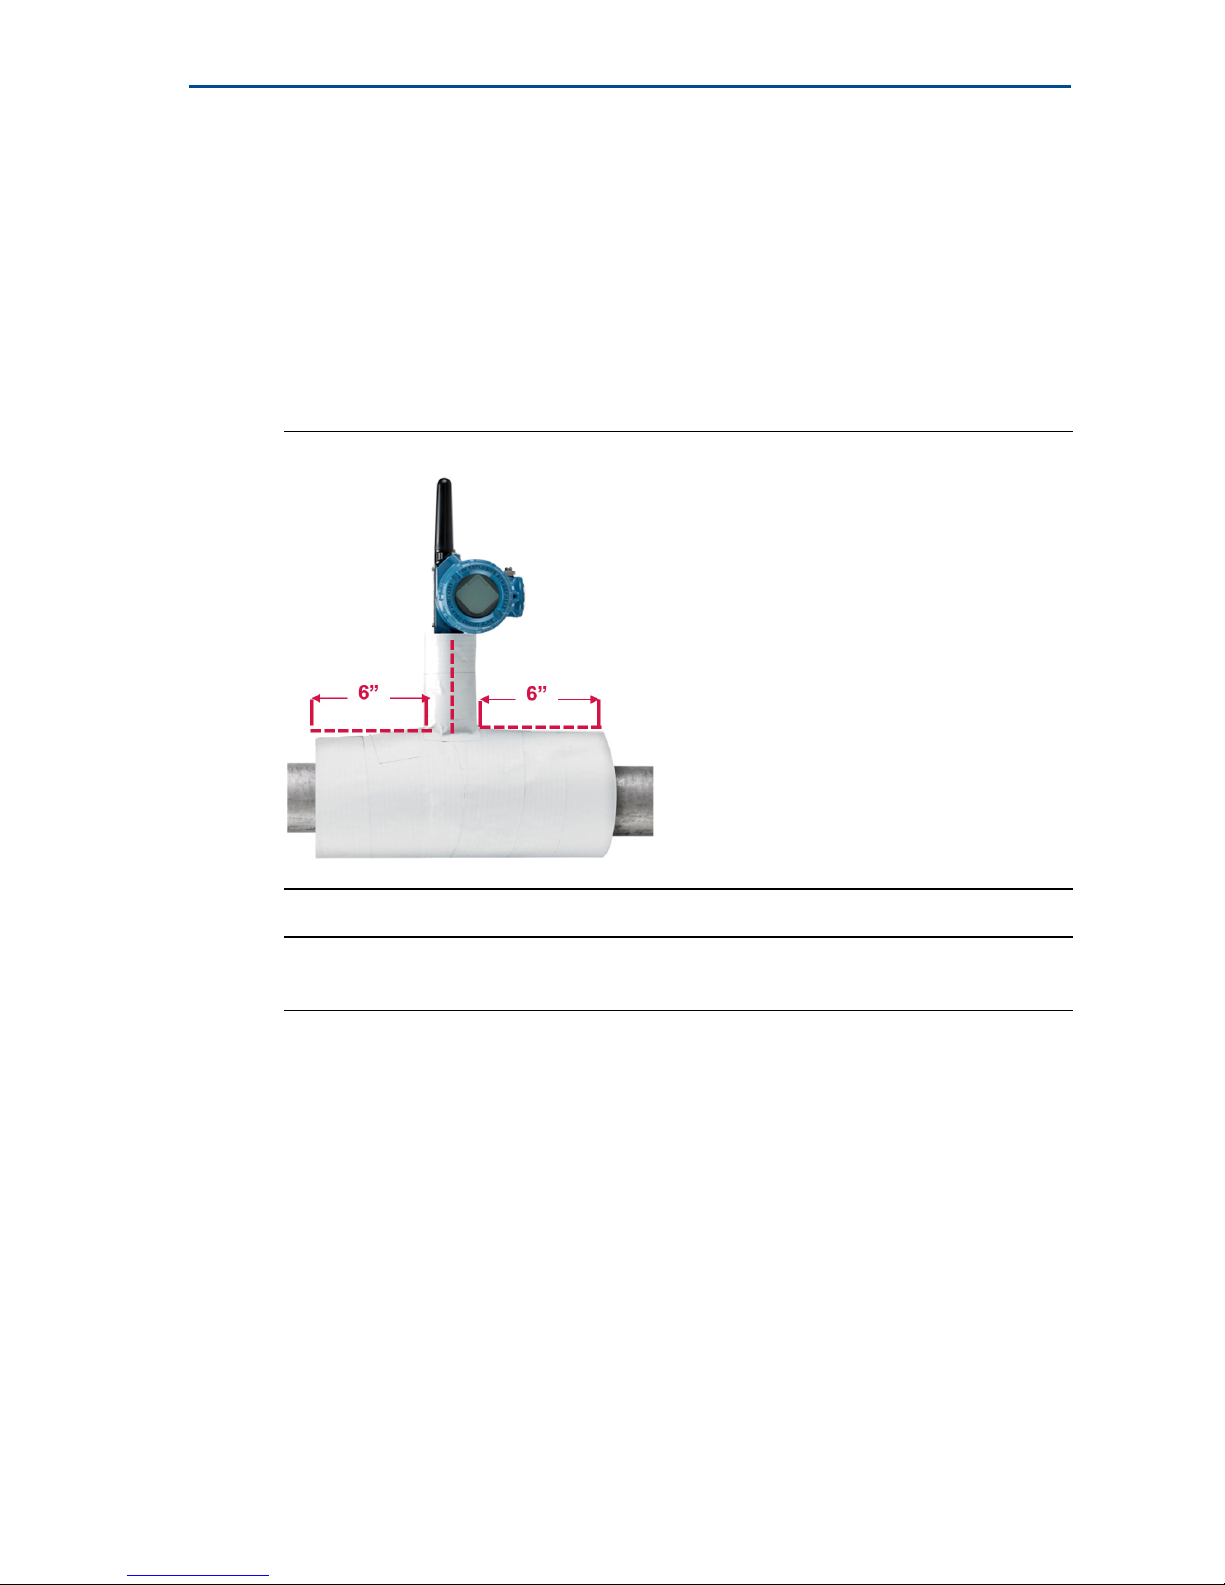
Insulation at least
over the sensor clamp assembly and sensor extension up to transmitter head
to prevent heat loss. Apply a minimum of six inches of insulation on each side
of the pipe clamp sensor. Care should be taken to minimize air gaps between
insulation and pipe. See Figure 10 for more information.
Figure 10. Pipe Clamp Insulation
August 2017
1
/2-in. thick (with R-value of > 0.42 m2 ⫻ K/W) is required
10
Note
DO NOT apply insulation over transmitter head.
Although it will come from the factory configured as such, ensure the pipe
clamp RTD sensor is assembled in the correct wire configuration. Refer to the
appropriate transmitter reference manual for correct wire configurations.
Page 11

August 2017
5.0 Product Certifications
Rev 1.10
5.1 European Directive Information
A copy of the EU Declaration of Conformity can be found at the end of the Quick
Start Guide. The most recent revision of the EU Declaration of Conformity can
be found at Emerson.com/Rosemount
5.2 Ordinary Location Certification
As standard, the transmitter has been examined and tested to determine that
the design meets the basic electrical, mechanical, and fire protection
requirements by a nationally recognized test laboratory (NRTL) as accredited by
the Federal Occupational Safety and Health Administration (OSHA).
5.3 Installing Equipment in North America
The US National Electrical Code (NEC®) and the Canadian Electrical Code (CEC)
permit the use of Division marked equipment in Zones and Zone marked
equipment in Divisions. The markings must be suitable for the area
classification, gas, and temperature class. This information is clearly defined in
the respective codes.
.
Quick Start Guide
5.4 North America
E5 FM Explosionproof and Dust-Ignitionproof
Certificate: 0R7A2.AE
Standards: FM Class 3600- 2011, FM Class 3615-2006, FM Class 3810-2005,
ANSI/NEMA
Markings: XP CL I, DIV 1, GP B, C, D, T6; DIP CL II/III, DIV 1, GP E, F, G, T6; Type 4X;
Installed per 00068-0013
E6 CSA Explosionproof, Dust-Ignitionproof
Certificate: 1063635
Standards: CAN/CSA C22.2 No. 0-M91, CSA Std. C22.2 No. 25-1966,
CSA Std. C22.2 No. 30-M1986, CSA Std. C22.2 No.94-M91,
CSA Std. C22.2 No. 142-M1987, CSA Std. C22.2 No. 213-M1987
Markings: XP Class I Groups B, C, and D; DIP Class II Groups E, F, G; Class III; Class I Div.
2 Groups A, B, C, D; Class I Zone 1 Group IIB+H2; Class I Zone 2 Group IIC;
Installed per 00068-0033
5.5 Europe
E1 ATEX Flameproof
Certificate: FM12ATEX0065X
Standards: EN60079-0:2012, EN60079-1:2007
Markings: II 2 G Ex d IIC T6…T1 Gb
®
250-1991
Special Conditions for Safe Use (X):
1. See certificate for ambient temperature range.
2. The non-metallic label may store an electrostatic charge and become a source of
ignition in Group III environments.
3. Guard the LCD display cover against impact energies greater than 4 joules.
11
Page 12

Quick Start Guide
4. Flameproof joints are not intended for repair.
5. A suitable certified Ex d or Ex tb enclosure is required to be connected to temperature
probes with Enclosure option “N”.
6. Care shall be taken by the end user to ensure that the external surface temperature on
the equipment and the neck of DIN Style Sensor probe does not exceed 130 °C.
7. Non-Standard Paint options may cause risk from electrostatic discharge. Avoid
installations that cause electrostatic build-up on painted surfaces, and only clean the
painted surfaces with a damp cloth. If paint is ordered through a special option code,
contact the manufacturer for more information.
I1 ATE X Intrinsic Safety
Certificate: Baseefa16ATEX0101X
Standards: EN60079-0:2012, EN60079-1:2007
Markings: II 1 G Ex ia IIC T5/T6 Ga see certificate for schedule
August 2017
Thermocouples; Pi = 500 mW T6 60 °C ≤ Ta ≤ +70 °C
RTDs; Pi = 192 mW T6 60 °C ≤ Ta ≤ +70 °C
RTDs; Pi = 290 mW
Special Condition for Safe Use (X):
1. The equipment must be installed in an enclosure which affords it a degree of ingress
protection of at least IP20.
5.6 International
E7 IECEx Flameproof
Certificate: IECEx FMG 12.0022X
Standards: IEC60079-0:2011, IEC60079-1:2007
Markings: Ex d IIC T6…T1 Gb
Special Conditions for Safe Use (X):
1. See certificate for ambient temperature range.
2. The non-metallic label may store an electrostatic charge and become a source of
ignition in Group III environments.
3. Guard the LCD display cover against impact energies greater than 4 joules.
4. Flameproof joints are not intended for repair.
5. A suitable certified Ex d or Ex tb enclosure is required to be connected to temperature
probes with Enclosure option “N”.
6. Care shall be taken by the end user to ensure that the external surface temperature on
the equipment and the neck of DIN Style Sensor probe does not exceed 130 °C.
7. Non-Standard Paint options may cause risk from electrostatic discharge. Avoid
installations that cause electrostatic build-up on painted surfaces, and only clean the
painted surfaces with a damp cloth. If paint is ordered through a special option code,
contact the manufacturer for more information.
T6 60 °C ≤ Ta ≤ +60 °C
T5 60 °C ≤ Ta ≤ +70 °C
5.7 EAC
EM Explosionproof/Flameproof
Markings: 1Ex db IIC T6..T1 Gb X; T6 (–50 °C to 40 °C); T5..T1 (–50 °C to 60 °C);
Special Condition for Safe Use (X):
1. See certificate.
12
IP66/IP167
Page 13

August 2017
IM Intrinsic Safety
Markings: 0Ex ia IIC T5/T6 Ga X; T5, Pi = 0.29 W, (–60 °C to +70 °C); T6, Pi = 0.29 W,
Special Condition for Safe Use (X):
1. See certificate.
KM Combination of EM, IM, and Dust-Ignitionproof
Markings: Ex tb IIIC T130 °C Db X (–60 °C to +70 °C);
Special Condition for Safe Use (X):
1. See certificate.
5.8 Korea
EP Korea Explosionproof/Flameproof
Certificate: 13-KB4BO-0560X
Markings: 1Ex db IIC T6..T1 Gb X; T6 (–50 °C to 40 °C); T5..T1 (–50 °C to 60 °C);
Special Condition for Safe Use (X):
1. See certificate.
Quick Start Guide
(–60 °C to +60 °C); T6, Pi = 0.192 W, (–60 °C to +70 °C)
Markings for both EM and IM above are included with this option.
IP66/IP167
13
Page 14
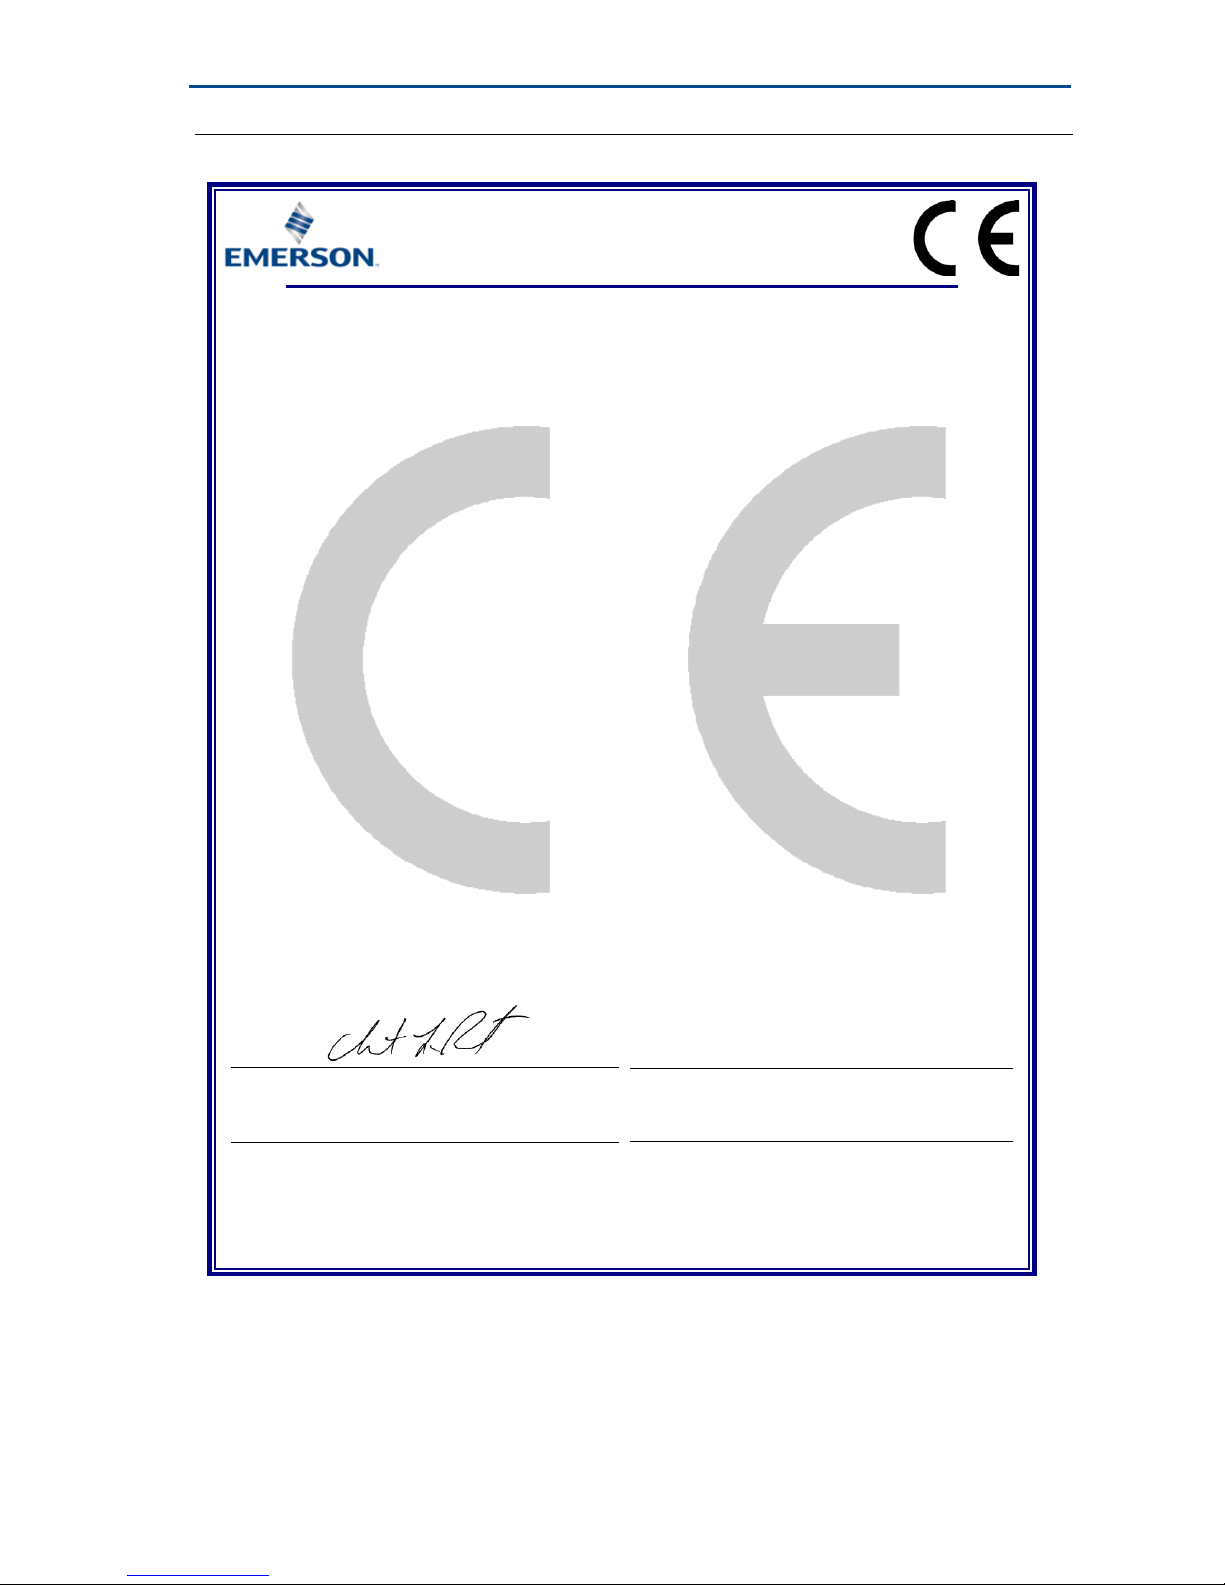
EU Declaration of Conformity
No: RMD 1059 Rev. M
Page 1 of 2
We,
Rosemount, Inc.
8200 Market Boulevard
Chanhassen, MN 55317-9685
USA
declare under our sole responsibility that the product,
Rosemount™ Model 65, 68, 78, 85, 183, 185, and 1067
Temperature Sensors
manufactured by,
Rosemount, Inc.
8200 Market Boulevard
Chanhassen, MN 55317-9685
USA
to which this declaration relates, is in conformity with the provisions of the European Union
Directives, including the latest amendments, as shown in the attached schedule.
Assumption of conformity is based on the application of the harmonized standards and, when
applicable or required, a European Union notified body certification, as shown in the attached
schedule.
Vice President of Global Quality
Chris LaPoint
31-July-2017
Quick Start Guide
Figure 11. Rosemount 0085 Pipe Clamp Sensor Declaration of Conformity
August 2017
(signature)
(name)
(function)
(date of issue)
14
Page 15

August 2017
EU Declaration of Conformity
No: RMD 1059 Rev. M
Page 2 of 2
ATEX Directive (2014/34/EU)
FM12ATEX0065X - Flameproof Certificate
Equipment Group II Category 2 G (Ex d IIC T6…T1 Gb)
Harmonized Standards:
EN60079-0:2012+A11:2013, EN60079-1:2007
FM12ATEX0065X - Dust Certificate
Equipment Group II Category 2 D (Ex tb IIIC T130°C Db)
Harmonized Standards:
EN60079-0:2012+A2013, EN60079-31:2014
BAS00ATEX3145 - Type n Certificate
Equipment Group II Category 3 G (Ex nA IIC T5 Gc)
Harmonized Standards:
EN60079-0:2012+A11:2013, EN60079-15:2010
Baseefa16ATEX0101X - Intrinsic Safety Certificate
Equipment Group II Category 1 G (Ex ia IIC T5/T6 Ga)
Harmonized Standards:
EN60079-0:2012+A11:2013, EN60079-11:2012
RoHS Directive (2011/65/EU)
Harmonized Standard: EN 50581:2012
ATEX Notified Bodies
FM Approvals [Notified Body Number: 1725]
1151 Boston Providence Turnpike
P.O. Box 9102 Norwood, MA 02062 USA
SGS Baseefa Limited [Notified Body Number: 1180]
Rockhead Business Park
Staden Lane
Buxton Derbyshire
SK17 9RZ United Kingdom
ATEX Notified Body for Quality Assurance
SGS Baseefa Limited [Notified Body Number: 1180]
Rockhead Business Park
Staden Lane
Buxton Derbyshire
SK17 9RZ United Kingdom
Quick Start Guide
15
Page 16

Quick Start Guide
ᴹ
㇑᧗⢙䍘䎵䗷ᴰབྷ⎃ᓖ䲀٬Ⲵ䜘Ԧරࡇ㺘
䜘Ԧ〠
Part Name
ᴹᇣ⢙䍘䍘Hazardous Substances
䫵
Lead
(Pb)
⊎
Mercury
(Hg)
䭹
Cadmium
(Cd)
ޝԧ䬜䬜
Hexavalent
Chromium
(Cr +6)
ཊⓤ㚄㚄㤟
Polybrominated
biphenyls
(PBB)
ཊⓤ㚄㚄㤟䟊
Polybrominated
diphenyl ethers
(PBDE)
⭥ᆀ㓴Ԧ
Electronics
Assembly
O O O O O
O
༣փ㓴Ԧ
Housing
Assembly
O O O O O
O
Րᝏಘ㓴Ԧ
Sensor
Assembly
O O O O O
O
August 2017
China RoHS
Rosemount 0085
List of Rosemount 0085 Parts with China RoHS Concentration above MCVs
ᵜ㺘Ṭ㌫ᦞ
This table is proposed in accordance with the provision of SJ/T11364.
Ѫ䈕䜘ԦⲴᡰᴹ൷䍘ᶀᯉѝ䈕ᴹᇣ⢙䍘Ⲵ䟿൷վҾ
O:
O: Indicate that said hazardous substance in all of the homogeneous materials for this part is below the limit requirement of
GB/T 26572.
Ѫ൘䈕䜘Ԧᡰ֯⭘Ⲵᡰᴹ൷䍘ᶀᯉ䟼ˈ㠣ቁᴹа㊫൷䍘ᶀᯉѝ䈕ᴹᇣ⢙䍘Ⲵ䟿儈Ҿ
X:
X: Indicate that said hazardous substance contained in at least one of the homogeneous materials used for this part is above
the limit requirement of GB/T 26572.
SJ/T11364
Ⲵ㿴ᇊ㘼ࡦ
GB/T 26572
ᡰ㿴ᇊⲴ䲀䟿㾱≲
GB/T 26572
ᡰ㿴ᇊⲴ䲀䟿㾱≲
16
Page 17

Page 18

Global Headquarters
Emerson Automation Solutions
6021 Innovation Blvd.
Shakopee, MN 55379, USA
+1 800 999 9307 or +1 952 906 8888
+1 952 949 7001
RFQ.RMD-RCC@Emerson.com
North America Regional Office
Emerson Automation Solutions
8200 Market Blvd.
Chanhassen, MN 55317, USA
+1 800 999 9307 or +1 952 906 8888
+1 952 949 7001
RMT-NA.RCCRFQ@Emerson.com
Latin America Regional Office
Emerson Automation Solutions
1300 Concord Terrace, Suite 400
Sunrise, FL 33323, USA
+1 954 846 5030
+1 954 846 5121
RFQ.RMD-RCC@Emerson.com
Europe Regional Office
Emerson Automation Solutions
Neuhofstrasse 19a P.O. Box 1046
CH 6340 Baar
Switzerland
+41 (0) 41 768 6111
+41 (0) 41 768 6300
RFQ.RMD-RCC@Emerson.com
*00825-0100-4952*
Quick Start Guide
00825-0100-4952, Rev DC
August 2017
Linkedin.com/company/Emerson-Automation-Solutions
Twitter.com/Rosemount_News
Facebook.com/Rosemount
Youtube.com/ user/RosemountMeasurement
Asia Pacific Regional Office
Emerson Automation Solutions
1 Pandan Crescent
Singapore 128461
+65 6777 8211
+65 6777 0947
Enquiries@AP.Emerson.com
Middle East and Africa Regional Office
Emerson Automation Solutions
Emerson FZE P.O. Box 17033
Jebel Ali Free Zone - South 2
Dubai, United Arab Emirates
+971 4 8118100
+971 4 8865465
RFQ.RMTMEA@Emerson.com
Google.com/+RosemountMeasurement
Standard Terms and Conditions of Sale can be found on the Ter ms
and Conditions of Sale page.
The Emerson logo is a trademark and service mark of Emerson
Electric Co.
Rosemount X-well, Rosemount, and Rosemount logotype are
trademarks of Emerson.
National Electrical Code is a registered trademark of National Fire
Protection Association, Inc.
NEMA is a registered trademark and service mark of the National
Electrical Manufacturers Association.
All other marks are the property of their respective owners.
© 2017 Emerson. All rights reserved.
 Loading...