

Page 1

Manual de instrucciones
- Radio AM/FM - Casetera
con SVCD / CD / VCD / MP3
RADIO CASETERA GRABADORA
EMMC35881
EMMC35881
RECORDER MICRO COMPONENT
SVCD/CD / VCD / MP3 - Radio AM/FM
Cassette
Instruction Manual
Page 2

Page 3

ƾ
Read this manual thoroughly before using!!!
INTRODUCTION
Thank you for purchasing our product. You now possess a quality stereo Radio / Video
Compact Disc Player. Used carefully and inaccordance with the instructions set out below
your stereo Radio/Video Compact Disc Player should give you many years of trouble free
service. Please read the instructions carefully to obtain the best results from your
purchase.
FEATURES
Ĵ Top load VCD player with analog tuner micro compo system with CFD display
Ĵ AM/FM radio
Ĵ 3 digit LCD displayer for CD
Ĵ Programmable memories
Ĵ SVCD function
Ĵ Play –Pause /Stop/Skip-search/Repeat/Program
Ĵ Tape: single tape deck
Ĵ Auto stop cassette mechanism
Ĵ Soft eject cassette door
Ĵ Automatic recording level control
Ĵ Tuning control ,volume control
Ĵ Tact switch CD control buttons
Ĵ Telescopic antenna with remote control
Ĵ Wooden speaker
Ĵ With a pair of joy sticker
CONTROL OPERATIONS AND FUNCTIONS
CONNECTING TO A TV SET AS FOLLOWING:
NOTE: When it can't work normally on first powering of this unit, please power it off. And
turn on the power again after checking the corresponding connections whether they are
ok.
NOTE: When it can't work normally on first powering of this unit, please power it off. And
turn on the power again after checking the corresponding connections whether they are
ok.
Salida de video
Salida de audio (izq.)
Salida de audio (der.)
Cable de Video / Audio
Amarillo
Blanco
Rojo
Video input jack
Entrada de audio (izq.)
si se encuentran bien.
Luego enciéndalo de nuevo después de revisar las conexiones correspondientes y vericar
NOTA: Si el aparato no funciona normalmente al encenderlo por primera vez, apáguelo.
Entrada de audio (der.)
CÓMO CONECTAR A UN TELEVISOR
CONTROLES Y FUNCIONES
• Un par de mandos para juegos
• Altavoz de madera
• Antena telescópica con control remoto
• Botones de control del CD al tacto
• Control de sintonización, control de volumen
• Control de nivel automático de grabación
• Eyección suave de la puerta del casete
• Mecanismo de detención automática del casete
• Casete: una casetera
• Reproducción - Pausa /Detener/Salto - Búsqueda/Repetición/Programa
• Función SVCD
• Memoria programable
• Pantalla LCD de tres dígitos para CD
• Radio AM / FM
con pantalla CFD
• Reproductor de VCD superior con sistema ligero componente de sintonizador análogo y
CARACTERÍSTICAS
compra.
lea estas instrucciones cuidadosamente con el n de obtener los mejores resultados de su
Discos Compactos le ofrecerá años de buen funcionamiento sin ningún problema. Por favor
acuerdo a las instrucciones descritas abajo, esta Radio Estéreo y Reproductor de Video y
y Reproductor de Video y Discos Compactos CD de calidad. Si se usa cuidadosamente y de
Gracias por haber comprado nuestro producto. Ahora tiene en sus manos una Radio Estéreo
Audio input jack(R)
Red
White
Audio output jack(R)
Audio output jack(L)
Video output jack
Audio input jack(L)
Video input jack
Yellow
Video/Audio Cable
INTRODUCCIÓN
¡¡Lea este manual detenidamente antes de usar!!
Page 4

NOTE:
1. If you want to connect the player at a scart jack to your Video recorder or TV, you have
to use an RCA-To- Scart adaptor. This adaptor is available at every Audio-Video-Retailer.
2. This player must be connected to a multi-system TV or NTSC TV for supporting NTSC
signal format.
3. Ensure that this player and other equipment to be connected are set to the standby
mode or off and disconnect the AC power cords before commencing connection.
4. Do not block ventilation holes of any of the equipment and arrange them, so that air can
circulate freely.
5. Read through the instructions before connecting other equipment.
6. Ensure that you observe the color coding when connecting audio and video cables.
7. During PLAY, the TV volume may be at a lower level than during TV broadcasts, etc. If
this is the case, adjust the volume to the desired level.
IMPORTANT SAFETY INSTRUCTIONS
1. Read these instructions. Keep these instructions.
2. Heed all warnings.
3. Follow all instructions.
4. Do not use this apparatus near water.
5. Clean only with dry cloth.
6. Do not block any ventilation openings. Install in accordance with the manufacturer's
instructions.
7. Do not install near any heat sources such as radiators, heat registers, stoves, or
other apparatus (including amplifiers) that produce heat.
8. Do not defeat the safety purpose of the polarized or grounding-type plug. A polarized
plug has two blades. A grounding type plug has two blades and a third grounding
prong. The blades or the third prong is provided for your safety. If the provided plug
does not fit into your outlet, consult an electrician for replacement of the obsolete
outlet.
10ǃ Protect the power cord from being walked on or pinch particularly at plugs,
convenience receptacles, and the point where they exit from the apparatus.
11ǃOnly use attachments/accessories specified by the manufacturer.
12ǃUnplug this apparatus during lightening storms or when unused for long periods of
time.
13ǃRefer all servicing to qualified servicing personnel. Servicing is required when the
apparatus has been damaged in any way, such as power supply cord or plug is
damaged, the appliance has been exposed to rain or moisture, does not operate
normally, or has been dropped.
14ǃThis appliance shall not be exposed to dripping or splashing water, and that no object
filled with liquid such as vases shall be placed on the apparatus
PRECAUTIONS
● When the set is not going to be used for a long time, plug the AC lead
● Never open the covers or touch the inside or insert a metal object. Any of these
operations could cause an electric shock or a fault.
● When thunder starts, unplug the power cord from the AC outlet.
● Do not expose the unit to direct sunlight, extreme heat, and high humidity, or place it
near heat sources, the sea, or in a sandy or dusty place.
● Do not clean the cabinet of the set with strong detergents or solvents as these could
damage the surface finish.
● The apparatus should not be exposed to dripping or splashing.
● Discs which can be played on this player have the following mark on them:
● Do not move the set suddenly from a very cold room into a warm room. When a
chilled CD / MP3 player is moved suddenly to a warm location, moisture condensation
may form on the pick-up lens, preventing proper operation. In this case, wait 1 to 2
hours before resuming play.
● During playback, if the CD / MP3 player is subjected to a sudden shock or jolt, some
noise may be produced, this is not a malfunction.
● Do not place any objects in the disc compartment, it may cause damage to the
mechanism.
● Remove the disc before moving the set. If the player is moved with the disc loaded,
the disc may be damaged.
● Do not store discs in high temperature, high-humidity locations. The discs may
develop warps and become unable to play. Also, discs with moisture on them may be
unplayable.
● Wipe any moisture off with a soft, dry clothe, and be sure discs are fully dry before
using.
● Handle the discs carefully so that fingerprints and dust do not adhere to the surfaces
of the discs. To clean off, use a soft cloth. Do not use a hard cloth since these will mark
the disc.
● If you switch a fluorescent lamp on or off near the set, you may hear some
interference noise; this is not a malfunction.
● Safety Check - Upon any completion of service or repairs to this product, ask service
technician to perform safety check to determine that the product is in proper operating
condition.
● Servicing - Do not attempt to service this product yourself as openings or removing
covers may expose you to dangerous voltage or other hazards. Refer all service to
qualified servicing personnel.
● service to qualified servicing personnel.
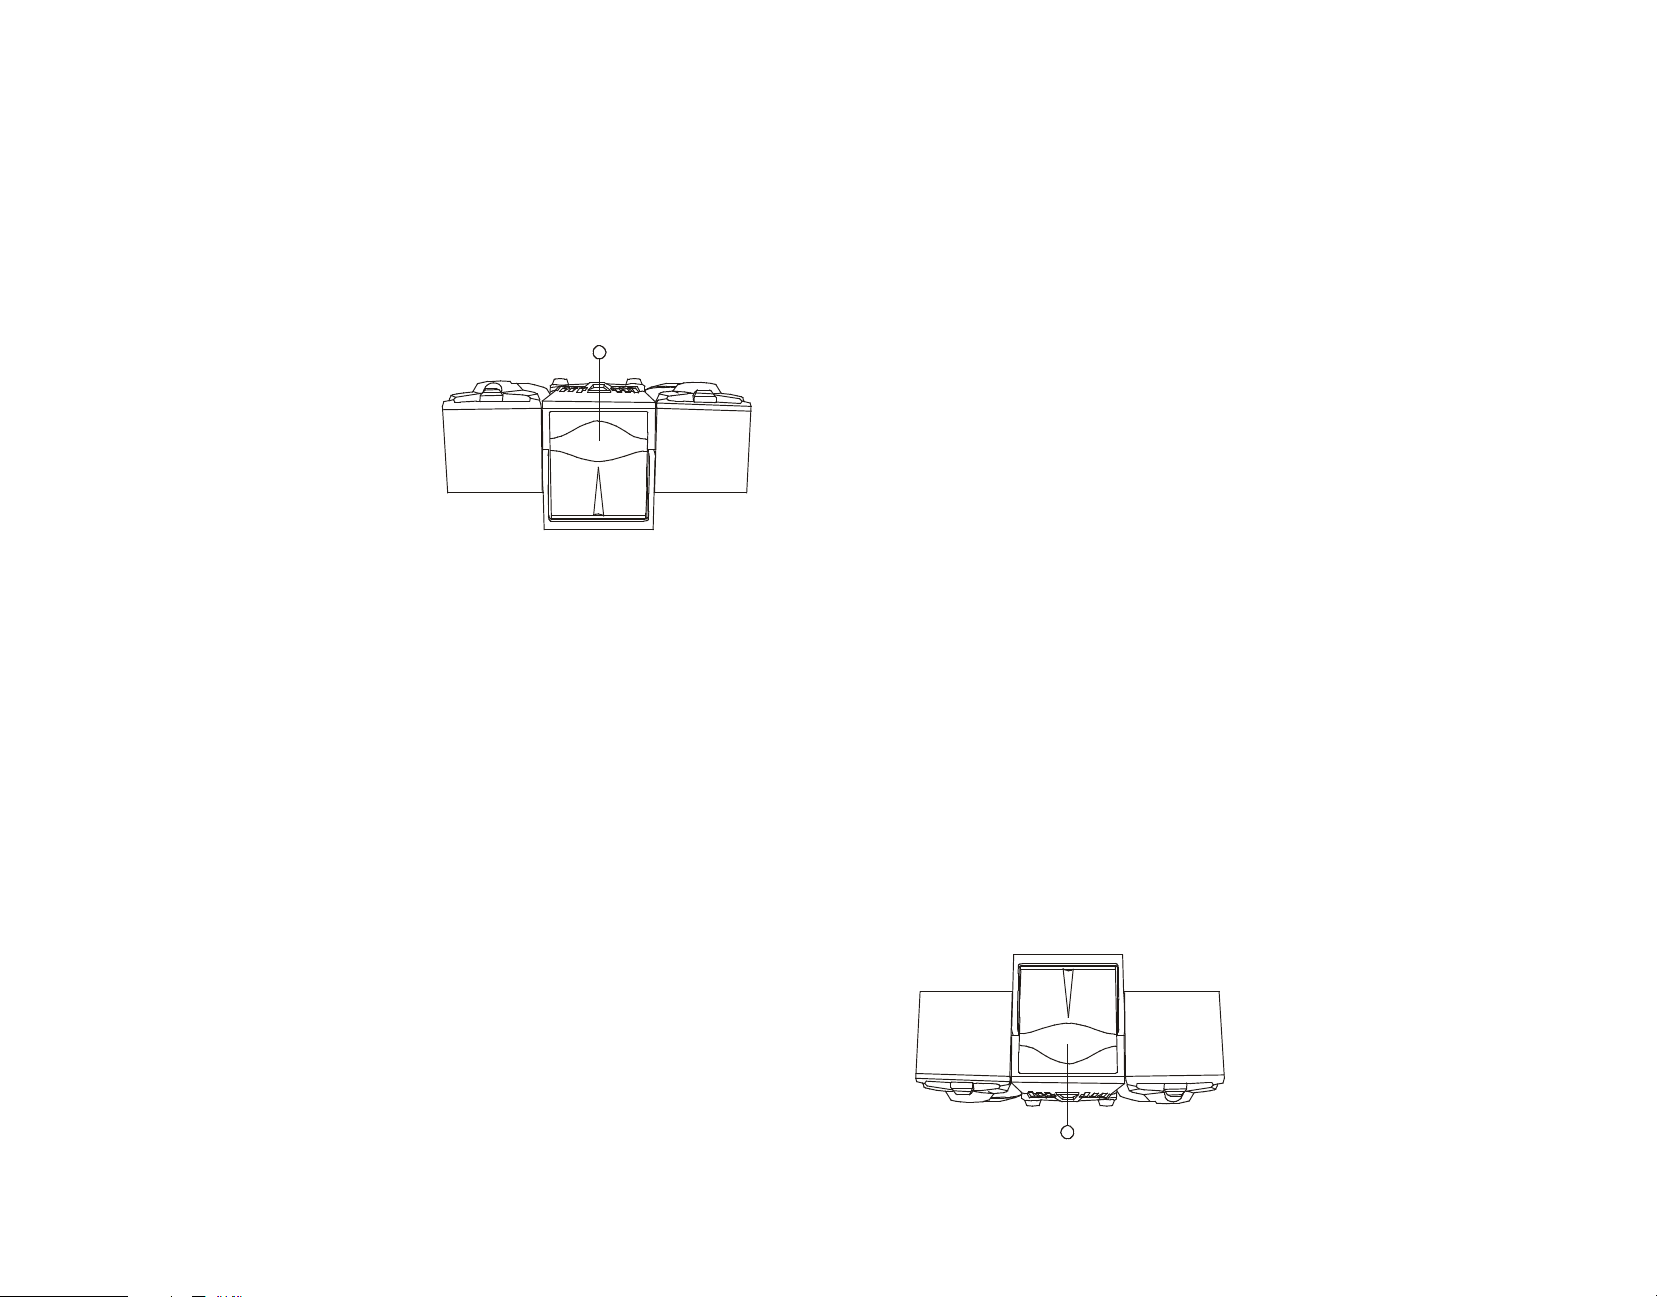
LOCATION OF CONTROLS
1. CD DOOR
2. FUNCTION
SWITCH
3. POWER SWITCH
4. PHONE JACK
5. REPEAT
cerca de fuentes de calor, el mar o en lugares con arena o polvo.
•No exponga el aparato a la luz solar directa, al calor extremo y a mucha humedad ni lo coloque
•Si hubiera una tormenta eléctrica, desenchufe del tomacorriente AC.
estas cosas puede ocasionar una descarga eléctrica o desperfecto.
•Nunca abra las tapas del aparato o toque el interior ni inserte un objeto de metal. Cualquiera de
•Cuando no se vaya a usar el aparato por un periodo largo, desenchufe el cable AC.
PRECAUCIONES
agua, tales como un orero, encima del aparato.
13.No debe de exponerse este aparato a goteras o salpicaduras de agua; no coloque objetos con
o cuando haya sufrido una caída.
enchufe, cuando se le ha expuesto a la lluvia o humedad, cuando no funcione de manera normal
servicio es necesario cuando se ha dañado el aparato de cualquier forma, incluyendo el cordón o
12.Todo servicio de mantenimiento debe de ser llevado a cabo por el personal calicado. Este
largos.
11.Desenchufe este aparato durante las tormentas eléctricas o cuando no lo utilice por periodos
10.Utilice solamente los aditamentos o accesorios especicados por el fabricante.
donde éste sale del aparato.
9.Evite que se pise o se apriete el cordón, especialmente en la parte del enchufe y en la parte de
tomacorriente obsoleto.
Si el enchufe no encaja en su tomacorriente, consulte a un electricista para que reemplace su
tremidad adicional a tierra. Estas extremidades especiales están diseñadas para su seguridad.
tiene dos extremidades. El de tierra tiene, además de las dos extremidades, una pata o ex-
8.No elimine el sistema de seguridad del enchufe polarizado o de tierra. El enchufe polarizado
otro aparato (incluyendo amplicadores) que produzca calor.
7.No lo instale cerca de fuentes de calor tales como estufas, termostatos, cocinas o cualquier
6.No obstruya las aberturas de ventilación. Instale de acuerdo a las instrucciones del fabricante.
5.Limpie solo con un paño seco.
4.No utilice este aparato cerca al agua.
3.Siga todas las instrucciones.
2.Obedezca todas las advertencias.
1.Lea estas instrucciones. Guarde estas instrucciones.
INSTRUCCIONES IMPORTANTES DE SEGURIDAD
los programas de televisión normales. Si este fuera el caso, regule el volumen a nivel deseado.
7.Durante la reproducción, el volumen del televisor puede estar a un nivel más bajo que durante
audio y video.
6.Asegúrese de prestar atención a los códigos de colores a la hora de conectar los cables de
5.Lea todas las instrucciones antes de efectuar las conexiones del equipo.
aire pueda circular libremente.
4.No obstruya los agujeros de ventilación de cualquier equipo y colóquelos de tal manera que el
apagados o desconectados de la electricidad antes de efectuar las conexiones.
3.Asegúrese de que este reproductor y cualquier otro equipo que se conecte se encuentren
formato de señal NTSC.
2.Este reproductor debe conectarse a un sistema múltiple de TV o a un televisor NTSC con
adaptador RCA. Este adaptador se encuentra disponible en cualquier tienda de audio y video.
1.Si se desea conectar el reproductor a un grabador de video o televisor, se tiene que utilizar un
NOTA:
Page 5
● When thunder starts, unplug the power cord from the AC outlet.
● Do not expose the unit to direct sunlight, extreme heat, and high humidity, or place it
near heat sources, the sea, or in a sandy or dusty place.
● Do not clean the cabinet of the set with strong detergents or solvents as these could
damage the surface finish.
● The apparatus should not be exposed to dripping or splashing.
● Discs which can be played on this player have the following mark on them:
● Do not move the set suddenly from a very cold room into a warm room. When a
chilled CD / MP3 player is moved suddenly to a warm location, moisture condensation
may form on the pick-up lens, preventing proper operation. In this case, wait 1 to 2
hours before resuming play.
● During playback, if the CD / MP3 player is subjected to a sudden shock or jolt, some
noise may be produced, this is not a malfunction.
● Do not place any objects in the disc compartment, it may cause damage to the
mechanism.
● Remove the disc before moving the set. If the player is moved with the disc loaded,
the disc may be damaged.
● Do not store discs in high temperature, high-humidity locations. The discs may
develop warps and become unable to play. Also, discs with moisture on them may be
unplayable.
● Wipe any moisture off with a soft, dry clothe, and be sure discs are fully dry before
using.
● Handle the discs carefully so that fingerprints and dust do not adhere to the surfaces
of the discs. To clean off, use a soft cloth. Do not use a hard cloth since these will mark
the disc.
● If you switch a fluorescent lamp on or off near the set, you may hear some
interference noise; this is not a malfunction.
● Safety Check - Upon any completion of service or repairs to this product, ask service
technician to perform safety check to determine that the product is in proper operating
condition.
● Servicing - Do not attempt to service this product yourself as openings or removing
covers may expose you to dangerous voltage or other hazards. Refer all service to
qualified servicing personnel.
● service to qualified servicing personnel.
LOCATION OF CONTROLS
1
1
5. REPETIR
4. ENTRADA PARA EL MICRÓFONO
3. BOTÓN DE ENCENDIDO
2. BOTÓN DE FUNCIONES
1. PUERTA DEL CD
UBICACIÓN DE LOS CONTROLES
imiento debe de ser llevado a cabo por el personal de servicio técnico calicado.
o el retiro de las tapas pueden exponerlo a voltajes peligrosos u otros riesgos. Todo manten-
•Mantenimiento o Reparaciones – No intente reparar el aparato Ud. mismo ya que las aberturas
óptimas de funcionamiento.
técnico que haga una prueba de seguridad para determinar que el producto esté en condiciones
•Revisión de Seguridad – Al nal de una reparación o mantenimiento del aparato, solicite al
de interferencia, lo cual no indica un desperfecto.
•Si se enciende o se apaga una lámpara uorescente cerca del aparato, se puede producir algo
disco.
la supercie. Para limpiar use un paño suave. No utilice un paño áspero ya que puede arañar el
•Manipule los discos con cuidado para evitar que no se adhieran huellas digitales o polvo sobre
secos antes de usarlos.
•Limpie la humedad con un paño suave y seco y asegúrese de que los discos estén totalmente
sobre la supercie quizá no puedan reproducirse.
discos pueden desnivelarse o torcerse y volverse inservibles. Además, los discos con humedad
•No guarde o almacene los discos en lugares de alta temperatura o de gran humedad. Los
disco puede dañarse.
•Retire el disco antes de trasladar el aparato. Si se traslada el aparato con el disco puesto, el
mecanismo.
•No coloque ningún objeto dentro del compartimiento del disco ya que puede causar daños al
fuerte, se puede producir algo de ruido. Esto no indica que haya un desperfecto.
•Durante la reproducción, si el reproductor de CD / MP3 es sometido a un golpe o sacudón
normal funcionamiento. En este caso, espere de 1 a 2 horas antes de reanudar su uso.
puede formar condensación de humedad en el lente de lectura, lo que puede interferir con su
ductor de CD / MP3 que se encuentra frío es trasladado repentinamente a un lugar caliente, se
•No traslade el aparato repentinamente de un ambiente frío a uno caliente. Cuando un repro-
•Los discos que puedan reproducirse en este aparato deberán de portar la siguiente marca:
•No debe exponerse el aparato a goteras o salpicaduras.
de la supercie.
•No limpie el exterior con detergentes fuertes o solventes ya que estos pueden dañar el acabado
1. CD DOOR
2. FUNCTION SWITCH
3. POWER SWITCH
4. PHONE JACK
5. REPEAT
Page 6

6. PROGRAM
7.CD PLAY/PAUSE
8.LCD DISPLAY
9.CFD
10. VOLUME CONTROL
11.CD STOP SWITCH
12.CD SKIP-
13. TUNING
14. CD SKIP+
15. BAND SWITCH
16 SPEAKER
17. CASSETTE RECORD SWITCH
18. CASSETTE PLAY SWITCH
19. CASSETTE REW SWITCH
20. CASSETTE FWD SWITCH
21 CASSETTE STOP/EJECT SWITCH
22. CASSETTE PAUSE SWITCH
23. CASSETTE HOLDER
24 .ANTENNA
25. BACK COVER
26. SPEAKER OUTPUT
TERMINAL(RIGHT).
27 SPEAKER OUTPUT
TERMINAL(LEFT)
28. AC SOCKET
29. AUDIO OUT
30. VIDEO OUT
31. JOYSTICK TERMINAL
specifications
Frequency Range FM:88-108MHz,AM:530-1700KHz
Power Requirements 120V,60Hz
Specifications are subject to change for performance improvement without notice.
POWER SUPPLY
AC OPERATION
- THE AC POWER CORD IS LOCATED
- PLUG THE AC LINE CORD INTO ANY NORMAL HOUSEHOLD AC MAINS
OUTLET IN CORRECT VOLTAGE AND THE MAINS SOCKET.
STANDBY INDICATOR
When the power is connected to AC outlet, the STANDBY LED indicator will light up. You
have to press the POWER button on the unit or POWER button on the remote to turn on
the unit.
RADIO OPERATION
1. Connect the unit to the power source.
2. Slide the FUNCTION SWITCH to "RADIO" position.
3. Select desired wave band with the BAND SWITCH.
4. Tune to desired station by rotating the TUNING KNOB.
5. Gently rotate this control back & forth until you get the strongest, clearest sound.
6. The built-in MW(AM) or LW antenna and the SW antenna rod are directional. When
receiving SW broadcast, extend the SW ELESCOPIC ANTENNA in full length.
The strongest reception can be achieved by rotating the set for MW(AM) or LW or
Telescopic Antenna for FM or SW.
7. Adjust the VOLUME KNOB to your listening preference.
8. To turn off the radio, slide the FUNCTION SWITCH to "TAPE" position.
CASSETTE OPERATION
PLAYBACK OF CASSETTE
Be sure to tighten any slack tape in the cassette before use, using either a pencil or a
ball-point pen, simply insert the pen or pencil into the centre of spool and rotate to remove
slackess.
Depress the STOP/EJECT button to open the cassette door.
Insert the cassette into the compartment with the open end facing upward and the full reel
on the left hand side, push the cassette well down and close the door, be sure not to touch
the tape surface. Set the Function switch to "TAPE" position and press the cassette play
button. To stop playback, press the STOP/EJECT button again.
AUTO STOP
When the tape reaches the end during playback or recording, the built-in auto stop system
will release the depressed play, record keys. The auto stop system operates while
recording from the built-in radio or CD player, only the cassette function is brought
automatically to stop mode and the radio or CD Player will continue to play.
TAPE RECORDING
A. Install a cassette tape.
B. Set FUNCTION SWITCH to "RADIO" position. After selecting the desired band and
tune the TUNING KNOB to desired broadcast station. Then push down RECORD
BUTTON and PLAY BUTTON simultaneously.
C. After recording the desired broadcast, depress the STOP/EJECT BUTTON lightly, and
then set FUNCTION SWITCH to "TAPE" position in order to listen to the recorded
broadcast.
D. If you desire to play recorded broadcast, please follow the instructions explained in
playback section.
Note: Tape recording is also available for VCD/CD/MP3 playback (set FUNCTION
SWITCH to "VCD/CD/MP3" position). Similar as radio recording.
External MIC recording: Set FUNCTION SWITCH to "TAPE" position, press the RECORD
BUTTON and PLAY BUTTON simultaneously and speak through external MIC.
TYPES OF CASSETTE
Use only good quality cassettes (IEC TYPE 1) for making recordings. May be used to
replay other types of cassette but is unable to make proper recordings on these more
specialized tapes.
The use of C120 cassettes is NOT recommended in this machine.
PROTECTING RECORDING
24
27
26
25 28
293031
8
10
3
11
5
6
13
12
4972
14
1718192021
22 23
15
16 16
8
10
3
11
5
6
13
12
4972
14
1718192021
22 2 3
15
16 16
24
27
26
25 28
293031
4.Sintonice la estación deseada girando el control de sintonización.
3.Seleccione la banda deseada con el selector de BANDAS.
2.Coloque el selector de FUNCIONES en la posición RADIO.
1.Conecte el equipo al tomacorriente.
FUNCIONAMIENTO DE LA RADIO
31.SALIDA DE LOS MANDOS
30.SALIDA DE VÍDEO
29.SALIDA DE AUDIO
28.ENTRADA AC
27.SALIDA DEL ALTAVOZ (IZQUIERDA)
26.SALIDA DEL ALTAVOZ (DERECHA)
25.TAPA TRASERA
24.ANTENA
23.SOSTÉN DEL CASETE
22.BOTÓN PAUSA DEL CASETE
21.BOTÓN DETENER/EYECTAR DEL CASETE
20.BOTÓN ADELANTAR DEL CASETE
19.BOTÓN RETROCEDER DEL CASETE
18.BOTÓN REPRODUCIR DEL CASETE
17.BOTÓN DE GRABACIÓN DEL CASETE
16.ALTAVOZ
15.BOTÓN DE BANDAS
14.SALTO DEL CD +
13.SINTONIZADOR
12.SALTO DEL CD -
11.BOTÓN DETENER DEL CD
10.CONTROL DE VOLUMEN
9.CFD
8.PANTALLA LCD
7.REPRODUCCIÓN/PAUSA DEL CD
6.PROGRAMA
el equipo.
iluminará. Debe presentarse el botón POWER en el aparato o en el control remoto para encender
Cuando el aparato se encuentre conectado a la electricidad, la luz indicadora STANDBY se
INDICADOR STANDBY
-Enchufe el cordón AC a un tomacorriente doméstico que cuente con el voltaje correcto.
-Conecte el cordón AC
Con energía AC
FUENTES DE ENERGÍA
Las especicaciones estar sujetas a cambio con el n de hacer mejoras sin previo aviso.
Requisitos de energía: 120V, 60Hz
Rango de frecuencia: FM: 88-108MHz, AM: 530-1700KHz
ESPECIFICACIONES
Page 7

3. Select desired wave band with the BAND SWITCH.
4. Tune to desired station by rotating the TUNING KNOB.
5. Gently rotate this control back & forth until you get the strongest, clearest sound.
6. The built-in MW(AM) or LW antenna and the SW antenna rod are directional. When
receiving SW broadcast, extend the SW ELESCOPIC ANTENNA in full length.
The strongest reception can be achieved by rotating the set for MW(AM) or LW or
Telescopic Antenna for FM or SW.
7. Adjust the VOLUME KNOB to your listening preference.
8. To turn off the radio, slide the FUNCTION SWITCH to "TAPE" position.
CASSETTE OPERATION
PLAYBACK OF CASSETTE
Be sure to tighten any slack tape in the cassette before use, using either a pencil or a
ball-point pen, simply insert the pen or pencil into the centre of spool and rotate to remove
slackess.
Depress the STOP/EJECT button to open the cassette door.
Insert the cassette into the compartment with the open end facing upward and the full reel
on the left hand side, push the cassette well down and close the door, be sure not to touch
the tape surface. Set the Function switch to "TAPE" position and press the cassette play
button. To stop playback, press the STOP/EJECT button again.
AUTO STOP
When the tape reaches the end during playback or recording, the built-in auto stop system
will release the depressed play, record keys. The auto stop system operates while
recording from the built-in radio or CD player, only the cassette function is brought
automatically to stop mode and the radio or CD Player will continue to play.
TAPE RECORDING
A. Install a cassette tape.
B. Set FUNCTION SWITCH to "RADIO" position. After selecting the desired band and
tune the TUNING KNOB to desired broadcast station. Then push down RECORD
BUTTON and PLAY BUTTON simultaneously.
C. After recording the desired broadcast, depress the STOP/EJECT BUTTON lightly, and
then set FUNCTION SWITCH to "TAPE" position in order to listen to the recorded
broadcast.
D. If you desire to play recorded broadcast, please follow the instructions explained in
playback section.
Note: Tape recording is also available for VCD/CD/MP3 playback (set FUNCTION
SWITCH to "VCD/CD/MP3" position). Similar as radio recording.
External MIC recording: Set FUNCTION SWITCH to "TAPE" position, press the RECORD
BUTTON and PLAY BUTTON simultaneously and speak through external MIC.
TYPES OF CASSETTE
Use only good quality cassettes (IEC TYPE 1) for making recordings. May be used to
replay other types of cassette but is unable to make proper recordings on these more
specialized tapes.
The use of C120 cassettes is NOT recommended in this machine.
PROTECTING RECORDING
CÓMO PROTEGER LA GRABACIÓN
NO se recomienda el uso de casetes C120 con este equipo.
este tipo de casetes especializados.
reproducir otros tipos de casetes pero las grabaciones no pueden ser las más apropiadas con
Utilice solamente casetes de buena calidad (IEC TIPO 1) para efectuar grabaciones. Se puede
TIPOS DE CASETE
través de micrófono externo.
luego presione los botones de reproducción y grabación simultáneamente y proceda a hablar a
Grabación de un micrófono externo: Coloque el botón de funciones en la posición “TAPE” y
radio.
de funciones en la posición “CVD/CD/MP3”. El procedimiento es similar a la grabación de la
Nota: También se puede grabar cintas de la reproducción de CVD/CD/MP3 (coloque el selector
sección de reproducción.
D.Si se desea reproducir un programa grabado, siguen las instrucciones que se explican en la
selector de funciones en la posición “TAPE” para escuchar lo que se ha grabado.
C.Después de grabar el programa deseado, presione el botón STOP / EJECT y coloque el
grabación (RECORD) y el botón de reproducción (PLAY) simultáneamente.
deseada sintonizara con el botón de sintonización la emisora deseada, presione el botón de
B.Coloque el selector de funciones en la posición “RADIO”. Después de seleccionar la banda
A.Instale una cinta de casete
GRABACIÓN DE CINTAS
el reproductor de discos continuarán funcionando.
reproductor de discos. Sólo la función de casete se detiene automáticamente ya que la radio o
de detención automática funciona mientras se esté grabando de la radio incorporada o del
extensión automática hará que los botones de reproducción y de grabación salten. El sistema
Cuando la cinta alcance el nal durante la reproducción o grabación, el sistema incorporado de
DETENCIÓN AUTOMÁTICA
botón STOP / EJECT de nuevo.
“TAPE” y presione el botón reproducir del casete. Para detener la reproducción, presione el
Asegúrese de no tocar la supercie de la cinta. Coloque el selector de funciones en la posición
y con el carrete lleno en el lado izquierdo. Empuje del casete hacia abajo y cierre la puerta.
Inserte el casete dentro del compartimiento con la parte que se encuentra abierta hacia arriba
Presione el botón STOP / EJECT para abrir la puerta del casete.
de carrete y girando para ajustar la cinta.
zando ya sea un lápiz o lapicero simplemente insertando el lápiz o lapicero dentro del centro
Asegúrese de ajustar la cinta que se encuentre suelta dentro del casete antes de usarlo utiliREPRODUCCIÓN DE UN CASETE
FUNCIONAMIENTO DE LA CASETERA
8.Para apagar la radio, deslice el selector de FUNCIONES a la posición de TAPE (casete).
7.Regule el control de VOLUMEN al nivel deseado.
SW.
lograr agotando el aparato en el caso de MW (AM) o la antena telescópica en el caso de FM o
recibe señal SW, extienda la antena telescópica SW totalmente. La mejor recepción se puede
6.El cable incorporado de la antena MW (AM) o LW y la antena SW son direccionales. Si se
sonido bueno y claro.
5.Suavemente gire el control de sintonización hacia adelante y hacia atrás hasta obtener un
Page 8

Normally, anything recorded on the tape is automatically erased when new recording is
made. It is possible to protect your recording from accidental erasure by removing the tabs
found on the rear of the cassette.
When the cassette is held with the recorded side upper-most and exposed tape facing the
front, the protective tab will be found on the left rear of the cassette.
All pre-recorded cassette are protected in this way to prevent accidental erasure of the
commercial recording. "Protected" cassette will prevent the record button from being
operated. If at any time you attempt to record and find that this button will not depress,
never force the mechanism or it may be damaged. Check that a cassette has been loaded
and that tab has not been removed.
Recording on a cassette from which the tabs have been removed can be done by covering
the tab openings with a piece of adhesive tape.
CARE OF CASSETTE MECHANISM
Gently clean the tape head and pinch wheel/capstan assemblies after every 10 hours of
using the unit. A range of cassette care products are available.
PLAYING VCD/CD
Set FUNCTION SWITCH to "CD/VCD" position. Open the CD door to put in a compact
disc. Close it and start reading. The LED display always shows the tracks of a disc which
are still to be played. Then it start playback at first track. Total number of tracks of the
disc are shown in stop mode.
When playing, press REPEAT button once. REPEAT INDICATOR will light up and flash
for playing the same track only. If repeat all tracks, press the REPEAT button again,
REPEAT INDICATOR will light up. To cancel repeat play, press the REPEAT button until
the repeat indicator disappears.
Playing The Entire Disc
1. Playback will start by pressing CD PLAY/PAUSE button, playback starts with the first
track.
The display will show the current track number.
2. To interrupt playback, press CD PLAY/PAUSE button. The indicator "PAUSE" will light
up.
3. To resume playback, press CD PLAY/PAUSE button once again.
4. To stop playback, press CD STOP button.
Selecting A Different Track During Play
Selecting A Different Track During Play
1. Press CD SKIP FORWARD/BACKWARD button on the unit continuously until the
desired track number appears in the display.
2. Playback starts from the desired track.
Stopping play
1. Press CD STOP button if you wish to stop play. The total track number which can be
played will now appear in the display.
2. Open the CD door on the unit to remove the CD.
REPEAT PLAY
When playing, press REPEAT button once. REPEAT INDICATOR will light up and flash
for playing the same track only. If repeat all tracks, press the REPEAT button again,
REPEAT INDICATOR will light up. To cancel repeat play, press the REPEAT button until
the repeat indicator disappears.
PROGRAM PLAY (APPLICABLE DURING REMOTE CONTROL OPERATION)
1. Press "PROG" button to make program memory in stop mode.
2. "PROG" and track positions will be shown on the TV screen.
3. Press numeric button on remote to select a track number. The track number will show
on display.
4. Repeat step (3) to program other tracks. During programming, you can press "PROG"
button to cancel the entering procedure.
5. Total programs available are 20.
6. After finishing programming, press CD PLAY/PAUSE button, playback will start from the
first programmed track (Program indicator lights up).
7. You can press CD SKIP FORWARD/BACKWARD button to select the track number in
memory.
8. In stop mode, press STOP button to cancel the program play and the program indicator
will disappear.
Note: For details of VCD/CD/MP3 operation, please see the remote handset section.
HEADPHONE JACK
For private listening, insert a 3.5mm headphone into the HEADPHONE JACK. The
SPEAKER output is automatically cut off.
CAUTION: LISTENING AT HIGH POWER FOR A LONG MOMENT COULD DAMAGE
USERS' EARS.
COMPACT DISC MAINTENANCE
1. Always use a compact disc bearing the mark as shown.
2. Notes on handling discs
* Removing the disc from its storage case and loading it.
* Do not touch the reflective recorded surface.
* Do not stick paper or write anything on the surface.
* Do not bend the disc.
3. Storage
* Store the disc in its case.
* Do not expose discs to direct sunlight or high temperatures, high humidity or dusty
places.
4. Cleaning a disc
* Should the disc become soiled, wipe off dust, dirt and fingerprints with a soft cloth.
* The disc should be cleaned from the centre to the edge.
* Never use benzene, thinners, record cleaner fluid or anti-static spray.
2.Abra la puerta del CD para retirar el disco.
que pueden reproducirse aparecerá en la pantalla.
1.Presione el botón CD STOP si se desea detener la reproducción. El número total de pistas
Cómo detener la reproducción
RECORD/PLAY HEAD
ERASE HEAD
CAPSTAIN
PINCH ROLLER
RUEDA GIRATORIA
LINGUETE
CABEZAL
2.La reproducción comenzará desde la pista deseada.
hasta que la pista deseada aparezca en la pantalla.
1.Presione el botón CD SKIP FORWARD/BACKWARD en el aparato de manera consecutiva
Cómo seleccionar una pista diferente durante la reproducción
4.Para detener la reproducción, presione el botón CD STOP.
3.Para reanudar la reproducción, presione el botón CD PLAY / PAUSE de nuevo.
“PAUSE” se iluminará.
2.Para interrumpir la reproducción, presione el botón CD PLAY / PAUSE. La luz indicadora
La pantalla mostrará el número de la pista actual.
menzará con la primera pista.
1.La reproducción comenzará presionando el botón CD PLAY / PAUSE. La reproducción co-
Cómo reproducir el disco completo
indicadora desaparezca.
iluminará. Para cancelar la función de repetición, presione el botón REPEAT hasta que la luz
repetir todas las pistas, presione el botón REPEAT de nuevo. La luz indicadora de repetición se
se iluminará de manera intermitente para repetir ésa misma pistas solamente. Si se desea
Durante la reproducción, presione el botón REPEAT una vez. La luz indicadora de repetición
pistas del disco se podrán ver cuando el disco se encuentre detenido.
pistas del disco por reproducirse. Empezará a reproducirse la primera pista. El número total de
disco compacto. Ciérrela y el equipo empezará a leerlo. La pantalla mostrará el número de
Coloque el botón de funciones en la posición “CD/VCD”. Abra la tapa del CD para colocar un
REPRODUCCIÓN DE VCD / CD
CABEZAL DE BORRADO
variedad de productos de limpieza disponibles.
Suavemente limpie el cabezal y la rueda giratoria cada 10 horas de uso del equipo. Existe una
CUIDADO DEL MECANISMO DEL CASETE
azo de cinta adhesiva.
Se puede grabar en un casete cuyas lengüetas han sido retiradas cubriéndolas con un pedcolocado un casete y que la lengüeta se haya retirado.
presionar este botón, no fuerce el mecanismo ya que puede dañarse. Verique que se haya
presionar el botón de grabación. Si en cualquier momento que Ud. desee grabar no se puede
borrado accidental con una grabación comercial. Un casete “protegido” evitará que se pueda
Todos los casetes que ya vienen pregrabados bien protegidos de esta manera para evitar el
frente, la lengüeta protectora se encuentra en la parte trasera izquierda del casete.
Si se sostiene el casete con el lado grabado hacia arriba y con la cinta expuesta hacia el
talmente retirando las lenguetas en la parte inferior del casete.
efectúa una nueva grabación. Es posible proteger una grabación de que será borrada accidenNormalmente cualquier cosa que se grabe en una cinta se borra automáticamente cuando se
Page 9

2. Open the CD door on the unit to remove the CD.
REPEAT PLAY
When playing, press REPEAT button once. REPEAT INDICATOR will light up and flash
for playing the same track only. If repeat all tracks, press the REPEAT button again,
REPEAT INDICATOR will light up. To cancel repeat play, press the REPEAT button until
the repeat indicator disappears.
PROGRAM PLAY (APPLICABLE DURING REMOTE CONTROL OPERATION)
1. Press "PROG" button to make program memory in stop mode.
2. "PROG" and track positions will be shown on the TV screen.
3. Press numeric button on remote to select a track number. The track number will show
on display.
4. Repeat step (3) to program other tracks. During programming, you can press "PROG"
button to cancel the entering procedure.
5. Total programs available are 20.
6. After finishing programming, press CD PLAY/PAUSE button, playback will start from the
first programmed track (Program indicator lights up).
7. You can press CD SKIP FORWARD/BACKWARD button to select the track number in
memory.
8. In stop mode, press STOP button to cancel the program play and the program indicator
will disappear.
Note: For details of VCD/CD/MP3 operation, please see the remote handset section.
HEADPHONE JACK
For private listening, insert a 3.5mm headphone into the HEADPHONE JACK. The
SPEAKER output is automatically cut off.
CAUTION: LISTENING AT HIGH POWER FOR A LONG MOMENT COULD DAMAGE
USERS' EARS.
COMPACT DISC MAINTENANCE
1. Always use a compact disc bearing the mark as shown.
2. Notes on handling discs
* Removing the disc from its storage case and loading it.
* Do not touch the reflective recorded surface.
* Do not stick paper or write anything on the surface.
* Do not bend the disc.
3. Storage
* Store the disc in its case.
* Do not expose discs to direct sunlight or high temperatures, high humidity or dusty
places.
4. Cleaning a disc
* Should the disc become soiled, wipe off dust, dirt and fingerprints with a soft cloth.
* The disc should be cleaned from the centre to the edge.
* Never use benzene, thinners, record cleaner fluid or anti-static spray.
FRO M T H E C E N TR E T O TH E ED GE
•Nunca utilice bencina, diluentes, limpiadores de discos o aerosoles anti estática.
DEL CENTRO HACIA AFUERA
CORRECTO INCORRECTO
•Debe limpiarse el disco desde el centro hacia afuera.
•Si el disco se ensuciara, limpie el polvo, suciedad y huellas digitales con un paño suave.
4.Limpieza del disco
•No exponga los discos a la luz solar directa, altas temperaturas, humedad o lugares con polvo.
•Guarde los discos en sus estuches
3.Almacenamiento
•No doble del disco.
•No adhiera papel ni escriba sobre la supercie.
•No toque la supercie reectora con la grabación
Al retirar el disco de su estuche y ponerlo en el equipo
2.Notas sobre cómo manipular los discos:
1.Siempre utilice un disco compacto que porten la marca:
MANTENIMIENTO DE LOS DISCOS COMPACTOS
MEN PUEDE DAÑAR LOS OÍDOS.
PRECAUCIÓN: EL USO PROLONGADO DE LOS AUDÍFONOS A NIVELES ALTOS DE VOLULa salida de audio de los altavoces quedará suprimirá automáticamente.
Para escuchar el equipo en privado, inserte audífonos de 3.5mm en la entrada para audífonos.
ENTRADA PARA AUDÍFONOS
remoto.
Nota: Para más detalles sobre el funcionamiento de VCD/CD/MP3, véase la sección del control
indicadora desaparecerán.
8.Mientras el aparato se encuentre detenido, presione el botón STOP y el programa y la luz
la pista de la memoria.
7.Se puede presionar el botón CD SKIP FORWARD/BACKWARD para seleccionar el número
iluminará).
producción comenzará con la primera pista programada (la luz indicadora de programa se
6.Después de terminar con la programación, presione el botón CD PLAY / PAUSE. La re-
5.El número total de programas disponibles es 20.
el botón “PROG” para cancelar lo que se ha ingresado.
4.Repita el paso (3) para programar otras pistas. Durante la programación, se puede presionar
pistas. El número de la pista se mostrará en la pantalla.
3.Presione los botones numéricos en el control remoto para seleccionar los números de las
2.Se mostrará en la pantalla la frase “PROG” y las posiciones de las pistas.
encuentre detenido.
1.Presione el botón “PROG” para efectuar la memoria del programa mientras el equipo se
CONTROL REMOTO)
CORRECT INCORRECT
REPRODUCCIÓN DE PROGRAMA (SOLAMENTE UTILIZANDO EL
indicadora desaparezca.
iluminará. Para cancelar la función de repetición, presione el botón REPEAT hasta que la luz
repetir todas las pistas, presione el botón REPEAT de nuevo. La luz indicadora de repetición se
se iluminará de manera intermitente para repetir esa misma pista solamente. Si se desea
Durante la reproducción, presione el botón REPEAT una vez. La luz indicadora de repetición
FROM CENTRE TO THE EDGE
REPETICIÓN DE LA REPRODUCCIÓN
Page 10

* Be sure to close the CD door, so the lens is not contaminated by dust.
* Do not touch the lens.
HANDLING A DISC
LOADING A DISC
1.Set the FUNCTION Switch to the CD position.
2.Press OPEN Button to open the CD Cover.
3.Insert a disc with the label side toward you if the disc is upside down, the Display will
show 3 dashes
4. Close the CD Door by hand.The Display will show 3 dashes and then the total number
of tracks on the disc.
NOTE: Never touch the laser lens inside the CD compartment. If it ever gets dirty,
clean it with a CD cleaner disc.
Although built to withstand a certain amount of the effects
from dust, soil and scratches, discs should be treated with
the care normally accorded to conventional analog discs
(records). Always protect a disc against scratches, soil and
dust etc. We recommend that during non-use periods the
discs should be stored in the original case.
Bear in mind the following points, since any dirt, scratches or
warping of the disc can cause broken or intermittent sound
and also noise.
● When holding the discs, take care not to touch the
playing surface.
● Store the discs in their cases. Return them to their
cases with the label surface facing up and push down
lightly on the label surface.
Do not place discs in the following locations:
Ĵ Near a heating device or a place where the temperature
is high or in dusty areas.
● Do not write on the label surface using a ballpoint pen
and do not stick labels on the MP3 / CD.
● Wipe away any fingerprints or dust on the playing
surface of a disc using a soft cloth.
● Bear in mind the following points:
Ĵ Always wipe from the inside toward the outside of the
disc.
Ĵ Never in a circular motion.
Ĵ Do not use conventional record cleaners, anti-static
agents, benzene, thinner or other solvents.
REMOVING A DISC
1. Make sure the CD is not playing. If it is, press the CD STOP ( ) Button.
2. Press OPEN button to open the CD Door.
3. Gently remove the disc.
4. Close the CD Door by hand.
5. Replace the disc in its protective storage box.
DISC PLAYING
NORMAL PLAYBACK
1.Set the FUNCTION Switch to CD position and wait about 5 seconds for CD disc will
need longer time (depended on the size & number of tracks of the disc). After the disc
read completely, the Display will then show the total number of tracks on your compact
disc.
2. Press the CD PLAY/PAUSE ( )Button to start play, The first track number "001" will
appear in the Display and the disc will start playing ( please wait for about 5 seconds for
music to start ).
3. Adjust the VOLUME control to the desired volume level.
4.To stop the disc temporarily, press the CD PLAY/PAUSE ( ) button once, and the
track “001” will flash. To resume play, press the CD PLAY/PAUSE ( ) Button again.
5. To stop playing, press the CD STOP( ) Button, then the display will show the total
number tacks of the disc
6. To turn off the CD , rotate the FUNCTION Switch to TAPE or RADIO position.
NOTE: Never press the CD DOOR down during play, this may cause malfunction or
damage the disc. Always stop the CD player by using the CD STOP ( )
Button before you take the disc out of the compartment.
If you hit or move the CD during play, the music will stop for a second
or two and then start again. This is normal for portable CD players.
SKIPPING TRACKS (SKIP)
1.This function enables you to find the beginning of any desired track during playback. If
the CD FORWARD/BACKWARD SKIP(+/-) Button is pressed once or repeatedly, the next
or the back track will be selected. This Display will show the track or song number.
2. If the CD FORWARD/BACKWARD SKIP (+/-) Button is pressed twice or more in rapid
succession, the play will go forward or backward 10 track per press.
3. When the set is in the PAUSE mode, it is also possible to select the beginning of a
certain track by using the CD SEARCH SKIP(+/-) Button or CD
FORWARD/BACKWARD SKIP (+/-) Button to reach the desired track. After selection,
press Play.
4. Press and Hold the FORWARD/BACKWARD SKIP (+/- )Button to search forward or
backward at a high speed for a particular point. Release the button to resume normal
play when the point is found.
REPEAT PLAY - SINGLE TRACK (SONG)
To repeat the SAME song over and over again, do the following:
1. When the CD is stopped, press the FORWARD/BACK SKIP Button to select the song
you like.
2. Press the REPEAT Button.
3. The REPEAT Lamp will flash on and off.
Press PLAY Button.
DO NOT STORE NEAR HEAT
tes anti estática, bencina, diluente u otros solventes.
•No utilice limpiadores de discos convencionales, agen-
•Nunca limpie en forma circular.
•Siempre limpie desde el centro hacia afuera del disco.
•Tenga en cuanta lo siguiente:
ción utilizando un paño suave.
•Limpie las huellas digitales en la supercie de reproducbolígrafo ni pegue otras etiquetas sobre el CD.
•No escriba sobre la supercie con la etiqueta con un
temperatura sea alta o en lugares con polvo.
•Cerca de algún aparato de calor, en un lugar donde la
No coloque los discos en los siguientes lugares:
presione ligeramente.
sus estuches con la parte de la etiqueta hacia arriba y
•Guarde los discos en sus estuches. Colóquelos en
tocar la supercie de reproducción.
•Cuando manipule los discos, preste atención de no
intermitentes además de ruidos.
nes o desniveles pueden causar sonidos entrecortados o
Tenga en cuenta lo siguiente, ya que la suciedad, araño-
originales mientras no estén en uso.
Recomendamos guardar los discos en sus estuches
no se arañen y protéjalos de la suciedad, del polvo, etc.
discos análogos de vinilo. Siempre evite que los discos
de tratárselos con cuidado tal como se hace con los
medida los efectos del polvo, suciedad y arañones, debe
Aunque los discos están fabricados para resistir en cierta
5.Vuelva a colocar el disco en su estuche protector.
4.Cierre de la tapa del CD con la mano.
3.Suavemente retire el disco.
2.Presione el botón OPEN para abrir la tapa del CD.
CD STOP ( ).
1.Asegúrese de que el disco no se encuentre reproduciéndose. Si fuera así, presione el botón
CÓMO RETIRAR UN DISCO
NO LOS GUARDE CERCA AL CALOR
LIMPIE DEL CENTRO HACIA AFUERA
MANEJE EL DISCO COMO SE MUESTRA
con un disco limpiador.
NOTA: Nunca toque el lente láser dentro del compartimiento del CD. Si se ensuciara, límpielo
pistas del disco.
4.Cierre la tapa del CD con la mano. La pantalla mostrará 3 guiones y luego el número total de
talla mostrará 3 guiones.
3.Inserte un disco con la etiqueta hacia arriba ya que si el disco se coloca de cabeza la pan-
2.Presione el botón OPEN (abrir) para abrir la tapa del CD.
1.Coloque el sector de funciones en la posición CD.
CÓMO COLOCAR UN DISCO
CÓMO MANIPULAR UN DISCO
•No toque el lente.
•Asegúrese de cerrar la puerta del CD para evitar que el lente se ensucie con el polvo.
Page 11

DISC PLAYING
NORMAL PLAYBACK
1.Set the FUNCTION Switch to CD position and wait about 5 seconds for CD disc will
need longer time (depended on the size & number of tracks of the disc). After the disc
read completely, the Display will then show the total number of tracks on your compact
disc.
2. Press the CD PLAY/PAUSE ( )Button to start play, The first track number "001" will
appear in the Display and the disc will start playing ( please wait for about 5 seconds for
music to start ).
3. Adjust the VOLUME control to the desired volume level.
4.To stop the disc temporarily, press the CD PLAY/PAUSE ( ) button once, and the
track “001” will flash. To resume play, press the CD PLAY/PAUSE ( ) Button again.
5. To stop playing, press the CD STOP( ) Button, then the display will show the total
number tacks of the disc
6. To turn off the CD , rotate the FUNCTION Switch to TAPE or RADIO position.
NOTE: Never press the CD DOOR down during play, this may cause malfunction or
damage the disc. Always stop the CD player by using the CD STOP ( )
Button before you take the disc out of the compartment.
If you hit or move the CD during play, the music will stop for a second
or two and then start again. This is normal for portable CD players.
SKIPPING TRACKS (SKIP)
1.This function enables you to find the beginning of any desired track during playback. If
the CD FORWARD/BACKWARD SKIP(+/-) Button is pressed once or repeatedly, the next
or the back track will be selected. This Display will show the track or song number.
2. If the CD FORWARD/BACKWARD SKIP (+/-) Button is pressed twice or more in rapid
succession, the play will go forward or backward 10 track per press.
3. When the set is in the PAUSE mode, it is also possible to select the beginning of a
certain track by using the CD SEARCH SKIP(+/-) Button or CD
FORWARD/BACKWARD SKIP (+/-) Button to reach the desired track. After selection,
press Play.
4. Press and Hold the FORWARD/BACKWARD SKIP (+/- )Button to search forward or
backward at a high speed for a particular point. Release the button to resume normal
play when the point is found.
REPEAT PLAY - SINGLE TRACK (SONG)
To repeat the SAME song over and over again, do the following:
1. When the CD is stopped, press the FORWARD/BACK SKIP Button to select the song
you like.
2. Press the REPEAT Button.
3. The REPEAT Lamp will flash on and off.
Press PLAY Button.
se apagará en la pantalla.
5.Para desactivar la función REPEAT (repetir), presione el botón REPEAT dos veces. “REP 1”
tener).
4.La canción seleccionada sonará repetidamente hasta que se presione el botón STOP (dePresione el botón PLAY (reproducir).
3.La luz indicadora de REPEAT se iluminará de manera intermitente.
2.Presione el botón REPEAT.
seleccionar la canción deseada.
1.Cuando el disco CD se encuentre detenido, presione el botón FORWARD / BACK SKIP para
Para repetir la MISMA canción varias veces, haga lo siguiente:
REPETIR REPRODUCCIÓN – UNA SOLA PISTA (CANCIÓN)
Suelte el botón para reanudar la reproducción normal cuando se llegue al punto deseado.
una búsqueda rápida hacia adelante o hacia atrás hasta llegar al punto deseado en una pista.
4.Presione y mantenga apretado el botón FORWARD / BACKWARD SKIP (+/-) para hacer
ción, presione PLAY (reproducir).
BACKWARD SKIP (+/-) y así llegar hasta la pista deseada. Después de haber hecho la selecmienzo de una pista en especial utilizando el botón CD SEARCH SKIP (+/-) o CD FORWARD /
3.Cuando el aparato se encuentre en PAUSE (pausa), también se puede seleccionar el cobotón.
sucesiva y rápida, se reproducirá 10 pistas adelante o atrás por cada vez que se presione el
2.Si se presiona el botón CD FORWARD / BACKWARD SKIP (+/-) dos o más veces de manera
anterior pista empezará a sonar. La Pantalla mostrará el número de la pista o canción.
se presiona el botón CD FORWARD / BACKWARD SKIP (+/-) una o varias veces, la siguiente o
1.Esta función permite encontrar el comienzo de una pista deseada durante la reproducción. Si
SALTO DE PISTAS (SKIP)
nuevo. Esto es normal en los reproductores de CD portátiles.
mientras éste está sonando, la música se detendrá por uno o dos segundos y luego sonará de
STOP ( ) antes de retirar el disco del compartimiento. Si se golpea o se mueve el disco
desperfectos o daños al disco. Siempre detenga la reproducción del CD utilizando el botón
NOTA: Nunca presione la puerta del CD mientras el disco esté sonando. Eso puede causar
RADIO.
6.Para desactivar la función CD, gire el selector de FUNCIONES a la posición TAPE (casete) o
número total de pistas del disco.
5.Para detener la reproducción, presione el botón CD STOP ( ). La pantalla mostrará el
botón CD PLAY/PAUSE ( ) de nuevo.
pista “001” se encenderá de forma intermitente. Para reanudar la reproducción, presione el
4.Para detener el disco temporalmente, presione una vez el botón CD PLAY/PAUSE ( ). La
3.Regule el control de VOLUMEN al nivel deseado.
unos 5 segundos para que la música comience a sonar).
la primera pista “001” aparecerá en la Pantalla y el disco comenzará a sonar (por favor espere
2.Presione el botón CD PLAY/PAUSE para comenzar a reproducir el disco. El número de
que disco se ha leído completamente, la pantalla mostrará el número total de pistas del disco.
pueden tomar más tiempo (dependiendo del tamaño y número de pistas del disco). Después de
1.Coloque el selector de FUNCIONES en la posición CD y espere 5 segundos. Algunos discos
REPRODUCCIÓN NORMAL
REPRODUCCIÓN DEL DISCO
Page 12

4. The song you selected will play over and over, till you press the STOP Button
5. To end the Repeat Function, press REPEAT Button twice. Then REP 1 will go off.
REPEAT PLAY - ALL TRACKS (SONGS)
To repeat play ALL SONGS on a disc and then play them again and again, do the
following for non-stop music.
1. When the CD is stopped, press REPEAT Button twice.
2. The REPEAT Lamp will be steady on (not flashing).
3. Press PLAY Button.
All the songs on the CD will play in order and then start all over again.
4. To end the repeat function, press REPEAT Button once.
5. To stop play, press STOP Button.
PROGRAMMED MEMORY PLAY
Up to 20 tracks can be programmed for disc play in the order you like or the same track
(song) can be repeated up to 20 times. Programming can only be done during stop mode.
1. Press PROGRAM Button during stop mode.
2.The Display will show ”PROG’ & " PO1 "
3.Press the FORWARD/BACKWARD SKIP (+/-)Buttons until the desired track shows on
the Display.
4. Press PROGRAM Button to confirm, and Display will show " P02 " for second track for
program
5. Repeat steps 3 and 4 until all the desired tracks are programmed
6.When you finished programming, press CD PLAY/PAUSE( ) Button to start playing
by program.
7.The Display will show “PROG” & the track number being played first.
8.All songs will play in the order you programmed.
9.If in middle of play you want to hear the next programmed song, press CD
FORWARD/BACKWARD SKIP (+/-) BUTTON.
10. When all the songs have finished, the set will stop.
NOTE: Programming can only be done when the CD player is in the STOP mode.
TO CLEAR THE CD MEMORY
Press CD STOP( ) button, the memory is erased, the display will return to start position.
CD/VCD REMOTE CONTROLS FUNCTION KEYS
1. STOP STOP PLAY KEY
2. b DECREASE THE TONALITY
3. RETURN TO THE ORIGINAL TONALITY
4. # INCREASE THE TONALITY
5ˊDIGIT 1-10.10+ NUMERIC KEYS.
6ˊGOTO A SPECIFIC POINT
7. .PBC TO SELECT PBC ON OR OFF MODE FOR VCD MENU
8. .PROG PROGRAMMING KEY (PLAY SEQUENCE).
9.MUTE SOUND CUT OFF KEY.(FOR VCD/CD)
10.STEP DURING VCD PLAYBACK. PRESS STEP KEY WILL
MOVE PICTURE ONE STEP FORWARD. PRESS PLAY
KEY TO RESUME NORMAL
11.RESUME PRESS THIS KEY WILL RESUME PLAYING AT WHERE
IT STOPPED PREVIOUSLY (WHEN POWER SUPPLY
NOT SHUT OFF AND STILL IN VCD MODE).
12.FREEZE FREEZE VIDEO DESPLAY.
13.REPEAT PRESS ONCE MEANS REPEATING 1 SONG.,PRESS
AGAIN MEANS REPEATING ALL SONGS. PRESS
AGAIN MEANS CANCELING THIS FUNCTION.
14.RETURN PRESS THIS KEY TO RETURN TO MAIN MENU
(PBC ON MODE)
15.REM DISPLAY OF REMAINING SONG PLAY TIME.
16.INTRO INTRODUCTION SHORT PLAY (ABOUT 10 SECONDS
OF EACH TRACK, NOT FOR MP3)
17TIME HOW MUCH TIME LEFT
18.SLOW SLOW PLAY (1/2.1/4.1/8.1/16)
19.VIEW 9 SCREEN DISPLAY DURING VCD PLAYBACK.
20.OSD PRESS ONCE MEANS DISPLAYING CURRENT SONG
PLAY TIME. PRESS AGAIN TO CANCEL THIS
FUNCTION.
21.N/P SYSTEM SELECTION.
22 ▲. UP SHIFT
23. ► RIGHT SHIFT
24. ▼ DOWN SHIFT
25. ◄ LEFT SHIFT
26.ZOOM ZOOM EFECT KEY(ZOOM2,4)
DEL CONTROL REMOTO PARA CD/VCD
FUNCIONES DE LOS BOTONES
de inicio.
Presione el botón CD STOP ( ). Se borrará la memoria y la pantalla regresará a la posición
CÓMO BORRAR LA MEMORIA DEL CD
NOTA: Solo se puede programar el CD cuando esté detenido en la función STOP.
10.Cuando todas las canciones hayan sonado, el aparato se detendrá.
botón CD FORWARD / BACKWARD SKIP (+/-).
9.Si a la mitad de una canción se desea oír la siguiente canción del programa, presione el
8.Todas las canciones sonarán en el orden en que se programó.
7.La Pantalla mostrará “PROG” y el número de la pista que esté sonando.
el programa.
6.Cuando se termine de programar, presione el botón CD PLAY/PAUSE ( ) para reproducir
5.Repita los pasos 3 y 4 hasta que todas las pistas deseadas hayan sido programadas.
pista del programa.
4.Presione el botón PORGRAM para conrmar. La Pantalla mostrará “P02” para la segunda
deseada en la pantalla.
3.Presione los botones FORWARD / BACKWARD SKIP (+/-) hasta que se muestre la pista
2.La pantalla mostrará “PROG” y “P01”.
1.Presione el botón PROGRAM (programa) cuando el disco esté detenido en la función STOP.
disco está detenido en la función STOP.
(canción) puede ser repetida hasta 20 veces. La programación solo se puede hacer cuando el
Se puede programar hasta 20 pistas para que suenen en el orden deseado, o la misma pista
REPRODUCCIÓN DE PROGRAMA EN MEMORIA
5.Para detener la reproducción, presione el botón STOP (detener).
4.Para desactivar la función de repetición, presione el botón REPEAT una sola vez.
nuevamente.
Todas las canciones del disco CD sonarán en orden y el ciclo de reproducción se repetirá
3.Presione el botón PLAY (reproducir).
2.La luz indicadora de REPEAT se iluminará de manera permanente, no intermitentemente.
1.Cuando el disco CD se encuentre detenido, presione el botón REPEAT dos veces.
haga lo siguiente:
Para repetir la reproducción de TODAS LAS PISTAS del disco y escucharlas varias veces,
REPETIR REPRODUCCIÓN – TODAS LAS PISTAS (CANCIONES)
Page 13

1. STOP STOP PLAY KEY
2. b DECREASE THE TONALITY
3. RETURN TO THE ORIGINAL TONALITY
4. # INCREASE THE TONALITY
5ˊDIGIT 1-10.10+ NUMERIC KEYS.
6ˊGOTO A SPECIFIC POINT
7. .PBC TO SELECT PBC ON OR OFF MODE FOR VCD MENU
8. .PROG PROGRAMMING KEY (PLAY SEQUENCE).
9.MUTE SOUND CUT OFF KEY.(FOR VCD/CD)
10.STEP DURING VCD PLAYBACK. PRESS STEP KEY WILL
MOVE PICTURE ONE STEP FORWARD. PRESS PLAY
KEY TO RESUME NORMAL
11.RESUME PRESS THIS KEY WILL RESUME PLAYING AT WHERE
IT STOPPED PREVIOUSLY (WHEN POWER SUPPLY
NOT SHUT OFF AND STILL IN VCD MODE).
12.FREEZE FREEZE VIDEO DESPLAY.
13.REPEAT PRESS ONCE MEANS REPEATING 1 SONG.,PRESS
AGAIN MEANS REPEATING ALL SONGS. PRESS
AGAIN MEANS CANCELING THIS FUNCTION.
14.RETURN PRESS THIS KEY TO RETURN TO MAIN MENU
(PBC ON MODE)
15.REM DISPLAY OF REMAINING SONG PLAY TIME.
16.INTRO INTRODUCTION SHORT PLAY (ABOUT 10 SECONDS
OF EACH TRACK, NOT FOR MP3)
17TIME HOW MUCH TIME LEFT
18.SLOW SLOW PLAY (1/2.1/4.1/8.1/16)
19.VIEW 9 SCREEN DISPLAY DURING VCD PLAYBACK.
20.OSD PRESS ONCE MEANS DISPLAYING CURRENT SONG
PLAY TIME. PRESS AGAIN TO CANCEL THIS
FUNCTION.
21.N/P SYSTEM SELECTION.
22 ▲. UP SHIFT
23. ► RIGHT SHIFT
24. ▼ DOWN SHIFT
25. ◄ LEFT SHIFT
26.ZOOM ZOOM EFECT KEY(ZOOM2,4)
27.RAN PLAY RANDOMLY.
28.R/L LEFT/RIGHTCHANNEL SELECTION(MONOL,
MONOR,STEREO)
29.VOL+ MAIN UNIT VOLUME UP
30 A-B press to repeat play between two specific points
( A-B ).Press once to select start point A,press
again to select end point B.Press it third time to
cancel the function.
39.OPEN/CLOSE Solo para VCD
38. Retorno a la canción anterior
37. Pasar a la siguiente canción
36. Comienzo de la opción de reproducción
35.3D (( )) Sonido surround
34.VOL- Disminución de volumen
33. Retroceso rápido (velocidad -1, -2, -3, -4)
32. Avance rápido (velocidad 1,2,3,4)
31. Detención temporal de la reproducción
esta función.
vez para seleccionar el punto de n B. Presione una tercera vez para cancelar
sione una vez para seleccionar el punto de inicio A y presione una segunda
30.A-B Presione para repetir la reproducción entre dos puntos especícos (A-B). Pre
29.VOL+ Aumento de volumen
28.R/L Selección de canal izquierdo/derecho (MonoL, MonoR, Estéreo)
27.RAN Reproducción aleatoria
26.ZOOM Botón de acercamiento (2,4)
25. Hacia la izquierda
24. Hacia abajo
23. Hacia la derecha
22. Hacia arriba
21.N/P Selección de sistema
para cancelar esta función
20.OSD Presione una vez para ver el tiempo de la canción actual. Presione de nuevo
19.VIEW Para ver en pantalla durante la reproducción VCD
18.SLOW Reproducción lenta (1/2, 1/4, 1/8, 1/16)
17.TIME Cuanto tiempo queda
para MP3)
16.INTRO Introducción corta de la reproducción (unos 10 segundos de cada pista, no
15.REM Muestra el tiempo restante de la canción
14.RETURN Presione este botón para retornar al menú principal. (opción de PBC activado)
canciones. Presione una vez más para cancelar esta función
13.REPEAT Presione una vez para repetir una canción. Presione de nuevo para todas las
12.FREEZE Congela el video
mente (cuando no se desenchufe el equipo y bajo la opción VCD)
11.RESUME Presione este botón para reanudar la reproducción donde se quedó previa
paso adelante. Presione el botón PLAY para reanudar la reproducción normal
10. STEP Durante la reproducción de VCD, presione STEP para mover la imagen un
9. MUTE Supresión del sonido (para VCD/CD)
8. PROG Botón de programación (reproducción en secuencia)
7. PBC Para seleccionar PBC activado o desactivado para el menú VCD
6. GOTO Un punto especíco
5. Dígito 1-10.10+ Botones numéricos
4. # Aumentar la tonalidad
3. Retornar a la tonalidad original
2. b Disminuir la tonalidad
1. STOP Botón para detener la reproducción
Page 14

31.▌▌ TEMPORARILY STOP PLAY
32.►► FAST FORWARD (1,2,3,4 SPEED)
33.◄◄ FAST BACKWARD(-1,-2,-3,-4 SPEED)
34.VOL- MAIN UNIT VOLUME DOWN
35.3D ((●)) SURROUND SOUND
36► .START PLAY MODE
37.►►▌ GO TO NEXT SONG.
38 ▌◄◄ BACK TO PREVIOUS SONG.
39 OPEN/CLOSE ONLY USED FOR VCD
WARNING
THE APPARATUS SHALL NOT BE EXPOSED TO DRIPPING OR SPLASHING AND
THAT NO OBJECTS FILLED WITH LIQUIDS,SUCH AS VASE,SHALL BE PLACED ON
APPARATUS.TO PREVENT FIRE OR SHOCK HAZARD. DO NOT USE THIS PLUG
WITH AN EXTENSION CORD, RECEPTACLE OR OTHER OUTLET UNLESS THE
BLADES CAN BE FULLY INSERTED TO PREVENT BLADE EXPOSURE. TO
PREVENT FIRE OR SHOCK HAZARD, DO NOT EXPOSE THIS APPLIANCE TO RAIN
OR MOISTURE.
DIAGNOSIS OF THE COMMON MALFUNCTION
Check if the FUNCTION switch is set to CD position and
the power is turned on.
Whether the disc is compatible with the unit.
Whether the playing side is facing up, or the discis click to
the dented place.
If the disc surface is dirty,clean it with a soft cloth.
Unit does
not play
disc
Whether the defective disc is used.
No sound,or
only noise is
heared
Check if the volume control was set at MIN level.
Check if the disc is dirty.
Errors can
not be
corrected
Switch off the power,and turn on again several seconds
later to letsystem resume to original status automatically.Or
consult with qualified service personnel.
The lightning flash with arrowhead
symbol, wi t hi n an equi la te ral
triangle, is intended to alert the
user to the presence of uninsulated
dangerous voltage" within the
product's enclosure that may be of
sufficient magnitude to constitute a
risk of electric shock to persons
TO R EDU CE THE RISK OF
ELECTRIC SHOCK, DO NOT
REMOVE COVER (OR BACK)
NO USER-SERVICEABLE PARTS
INSIDE. REFER SERVICING TO
Q U A L I F I E D S E R V I C E
PERSONNEL.
The exclamation point within
an equilateral triangle is
intended to alert the user to
the presence of important
operating and maintenance
(servicing) instructions in the
literature accompanying the
appliance.
WARNING
RISK OF ELECTRIC SHOCK
DO NOT OPEN
consulte con el servicio técnico calicado.
corregirse su estado original automáticamente. De lo contrario,
pueden unos segundos para permitir que el sistema retome
Los errores no Apague el equipo y enciéndalo de nuevo después de
ruido
solo se escucha Verique que el disco no esté sucio.
No hay sonido o Verique que el volumen no esté en el nivel mínimo.
Verique que no se esté usando un disco defectuoso.
la con un paño suave.
Verique que la supercie del disco no esté sucia. Límpie
colocado en la bandeja.
Verique que el disco no esté de cabeza o que esté bien
equipo.
reproduce el Verique que el disco sea compatible con el disco
No se posición de CD y que el equipo esté encendido.
Verique que el botón de funciones esté en la
DIAGNÓSTICO DE DESPERFECTOS COMUNES
acompañan el electrodoméstico.
tenimiento en los manuales que
de servicio técnico y de mancia de instrucciones importantes
n alertar al usuario de la presenun triángulo equilátero tiene como
El signo de exclamación dentro de
NO ABRIR
CALIFICADO.
CON EL PERSONAL TÉCNICO
SERVICIO TÉCNICO CONTÁCTESE
QUE LE PUEDAN SER ÚTILES. PARA
TERIOR. NO ENCONTRARÁ PIEZAS
RETIRE LA TAPA ANTERIOR NI POSDE UNA DESCARGA ELÉTRICA, NO
CON EL FIN DE REDUCIR EL RIESGO
RIESGO DE DESCARGA ELÉCTRICA
ADVERTENCIA
ADVERTENCIA
para una persona.
tar un riesgo de una descarga eléctrica
sucientemente alto como para represenpeligroso en la parte interna del producto,
la presencia de voltaje no aislado y
tiene como n alertar al usuario de
echa dentro de un triángulo equilátero
La gura de un rayo de luz en forma de
ELÉCTRICA, NO EXPONGA ESTE APARATO A LA LLUVIA O A LA HUMEDAD.
PARCIALMENTE EXPUESTAS. PARA PREVENIR UN POSIBLE INCENDIO O DESCARGA
SER QUE LAS EXTREMIDADES DEL ENCHUFE ENCAJEN TOTALMENTE Y NO QUEDEN
EL ENCHUFE CON UN CABLE DE EXTENSIÓN U OTRO TIPO DE TOMACORRIENTE A NO
TO. CON EL FIN DE PREVENIR UN INCENDIO O DESCARGA ELÉCTRICA, NO UTILICE
COLOCARSE OBJETOS CON AGUA, TALES COMO UN FLORERO, ENCIMA DEL APARANO DEBE DE EXPONERSE ESTE APARATO A GOTERAS O SALPICADURAS DE AGUA NI
 Loading...