

Page 1
MODEL:
EARC15RE1
EARC18RE2
EARC22RE2
EARC24RE2
Page 2

Page 3
Page 4

INTRODUCTION
IMPORTANT SAFETY INSTRUCTION ...........................................................................
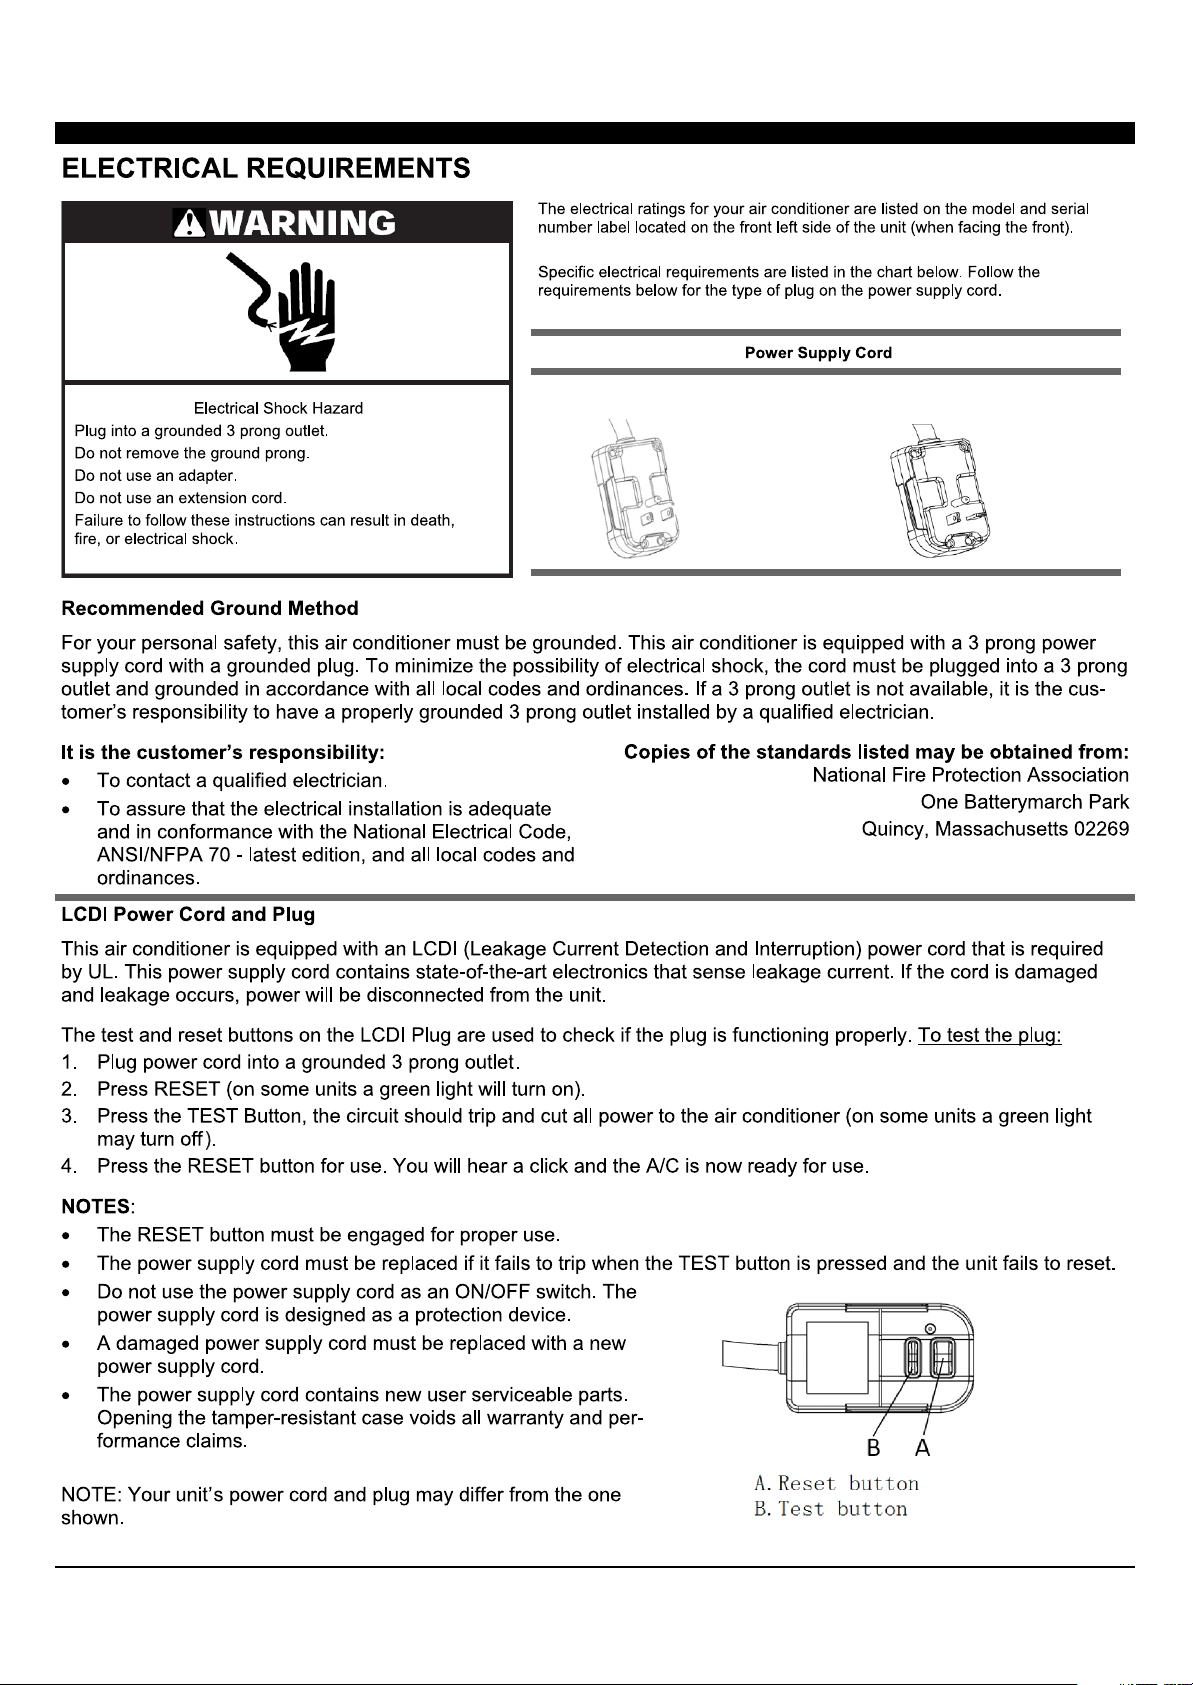
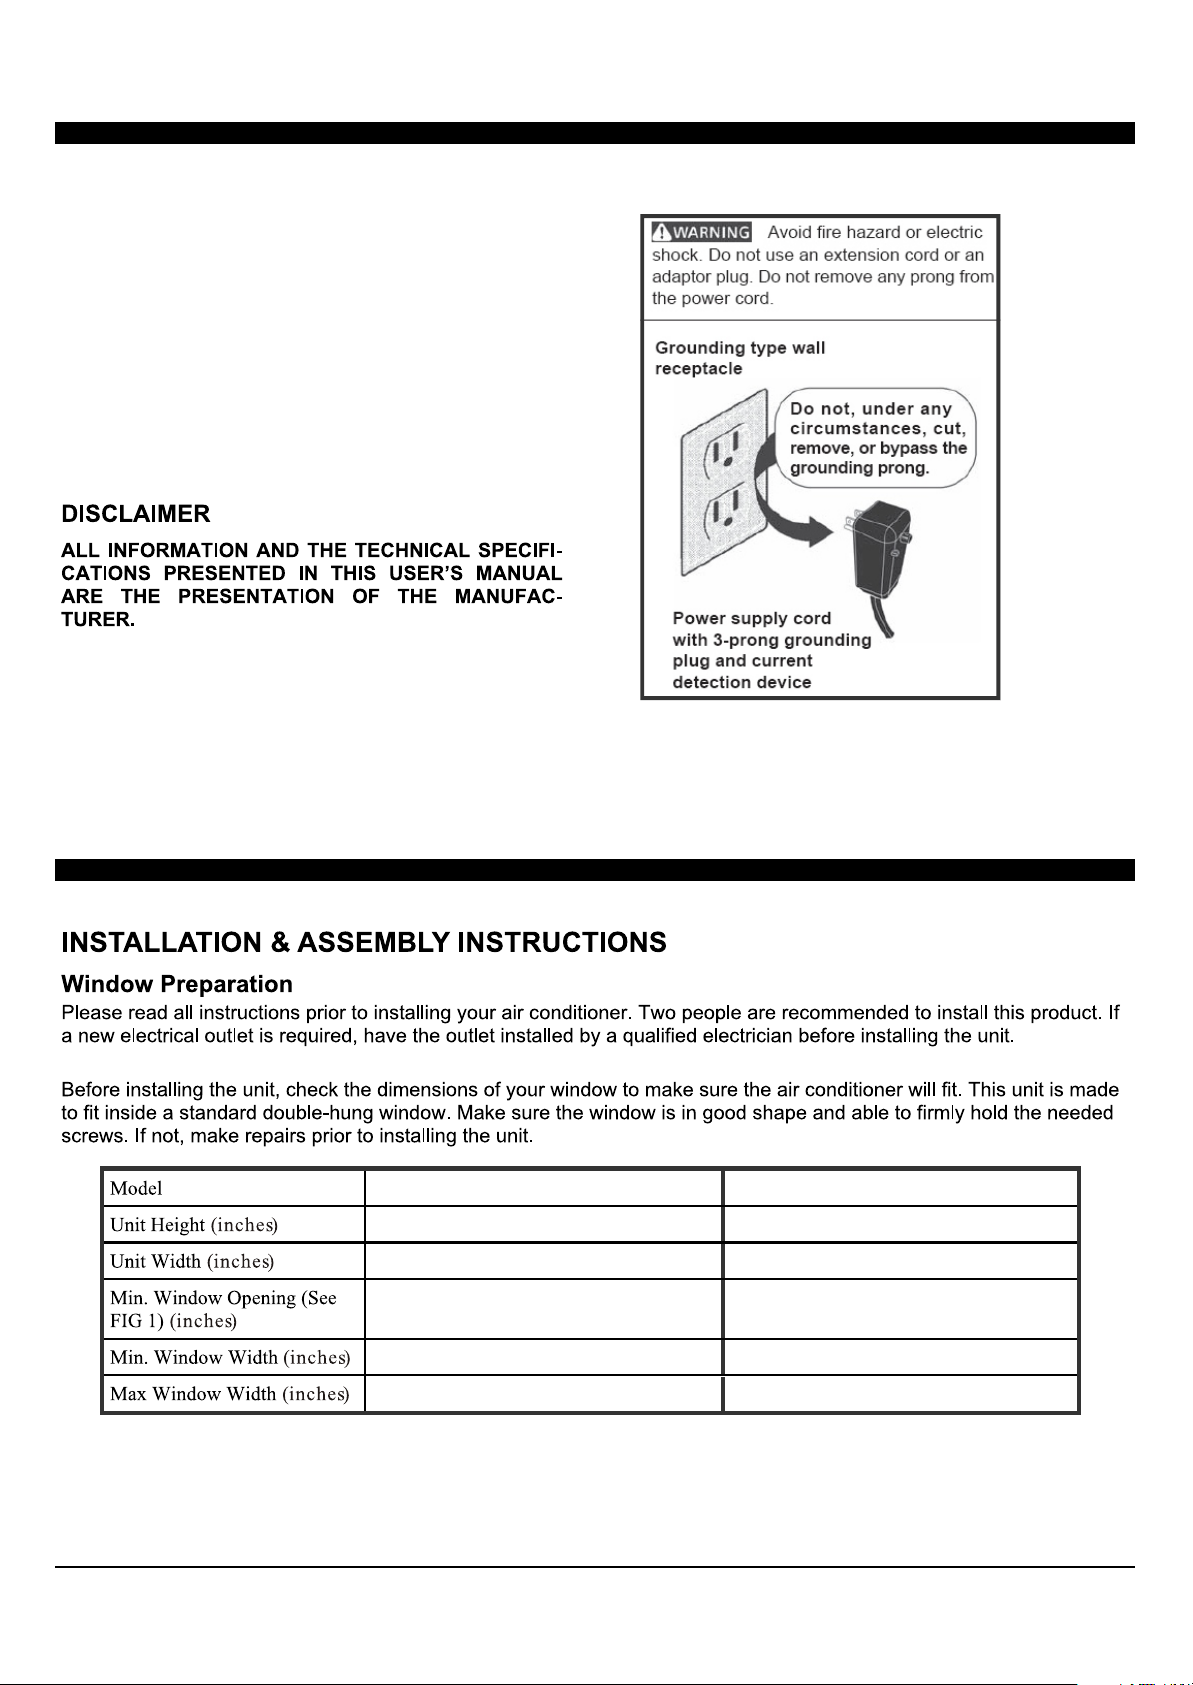
ELECTRICAL REQUIREMENTS
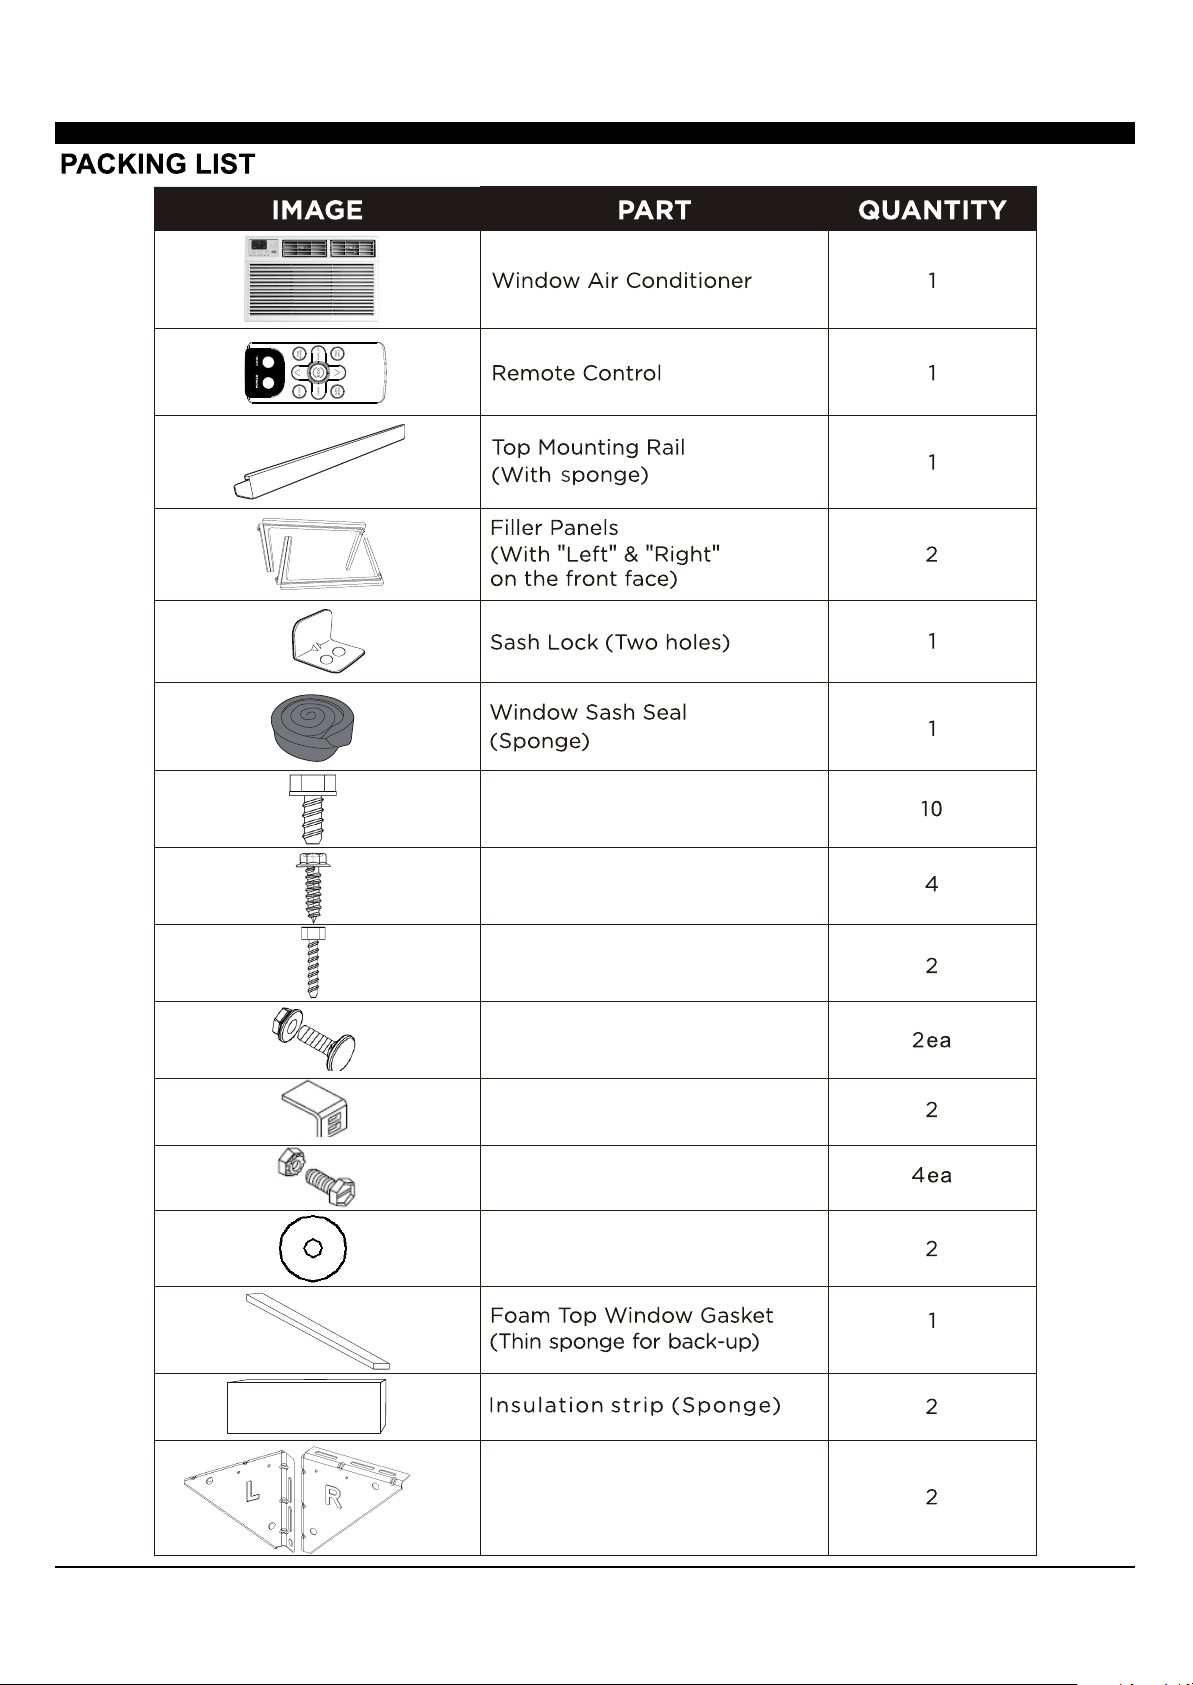
PACKING LIST ............................................................................................................
INSTALLATION & ASSEMBLY INSTRUCTIONS .............................................................
USING YOUR AIR CONDITIONER ................................................................................
OPERATING YOUR AIR CONDITIONER
CARE AND CLEANING ................................................................................................
TROUBLESHOOTING .................................................................................................
...................................................................................
........................................................................
1
2
3
4
13
15
16
17
Page 5
below:
1
Page 6
15K 18K/22K/24K
2
Page 7
5/16" Long Hex-head Screw
5/8" Long Hex-head Screw
1/2" Long Hex-head Screw
5/8" Long Flat Head Bolt and
Locknut
Sill Angle Bracket
1/2" Long Flat Head Bolt and
Locknut
Gasket
Support Bracket (with R and L )
3
Page 8
15K/18K
17.91 18.625
23.625 26.50
22K/24K
19.00
28.00 30.00
41.00 41.00
4
19.50
Page 9

(15K/18K See FIG.1/FIG.2 ; 22K/24K See FIG.3/FIG.4).
FIG.1
FIG.3
SASH
19 MIN
1/2 MIN
Storm Window Frame or Obstruction
SASH
19 1/2 MIN
1/2 MIN
FIG.2
1/2 MIN
Storm Window Frame
or Obstruction
1/2 MIN
FIG.4
1/2 MIN
1/2 MIN
SASH
19 MIN
SASH
19 1/2 MIN
Storm Window Frame or Obstruction
Storm Window Frame
or Obstruction
5
Page 10

FIG.5
FIG.6
FIG.5
FIG.7
FIG.7 & 8
FIG.6
FIG.9
FIG.9
FIG.8
6
Page 11

6. Remove the six screws from the cabinet. (Top, left, and right has two screws.) (FIG.10)
FIG.10
FIG.11
FIG.11
8.Take the pearl cotton for 24K. (FIG.12)
FIG.12
7
Page 12

FIG.13a
Head
5/16
Long
Hex-head
Screw
FIG.13a
FIG.13b-14.
FIG.13b
5/16" Long
Hex-head Screw
FIG.14
(Suggest to keep a downward , to let
accumulated rain water to drain out, from back side
of the unit bottom.)
angle
8
Page 13

(It should set on the gasket for 22K/24K)
Long Flat head
Bolt and Locknut
5/8" Long Flat Head Bolt
5
Long
Flat head Bolt
and Locknut
5/8" Long
Hex-head Screw
Gasket
5/8" Long
Hex-head Screw
1/2" Long
Hex-head Screw
9
Page 14

sash lock
Sash Lock
5/8" Long
Hex-head Screw
FIG.15
10
Page 15

15K/18K
22K/24K
18 1/4 (46.4 cm)
23 7/8 (60.6 cm)
19 1/2 (49.5 cm)
26 9/10 (68.3 cm)
FIG.16
Y
(Page 6 and 7)
11
FIG.17
FIG.18
Page 16

FIG.19
FIG.20
12
Page 17

1
2
AUTO
SPEED
AUTO
MODE
3
456789
1. Shows the set temperature.
Digital Display:
Operation modes are: Cool, Dry, Fan, and Auto.
Time is displayed using the timer setting.
Use these buttons on the
2.
and Button:
control panel and remote to increase or decrease
the Set Temperature or Timer.
Temperature range: 61 ~88 or 16 ~31 .
3. Turn the air conditioner on and
Power Button:
off.
Press the mode button to cycle
4. Mode Button:
through the various modes: Cool, Dry, Fan and
Auto.
Cool Mode: The cooling function allows the air
conditioner to cool the room and at the same time
reduces humidity. Press the MODE button to
activate the cooling function. To optimize this
function adjust the temperature by pressing the up
and down arrows and the speed by pressing the
Fan Speed button.
Dry Mode: This function reduces the humidity of
the air to make the room more comfortable. Press
MODE button to set the DRY mode. An automatic
function of alternating cooling cycles and air fan
is activated.
Fan Mode:
This mode will only circulate the air.
Press MODE button to select FAN MODE.
Pressing the FAN SPEED button allows you to
change the fan speed setting from HI, MED, and
LO. If using the remote control, it will store the fan
speed setting of the previous use.
Auto Mode: In AUTO mode the unit automatically
chooses the fan speed and the mode of operation
(COOL, DRY, or FAN). In this mode the fan speed
and the temperature are set automatically
according to the room temperature (
temperature
is determined by the temperature
sensor located in the indoor unit.
Room
).
Use buttons on the control panel
5. Timer Button:
and remote to set the TIMER.
Timer Off: The timed stop is programmed by
pressing the TIMER button. Set the time by
pressing the button or
stop
until your
desired stop time is displayed, then press TIMER
button again.
Timer On:
button first
the button or .
a second time, set the stop time
button or .
When the unit is off, press TIMER
, set the temperature with pressing
Press TIMER button
with pressing the
Press TIMER button a
third time, confirm your settings and stop time.
The display will show the time your machine will
automatically turn on.
Note: It can be set to automatically turn off or on in
0.5-24 hours. Each press of the
buttons will increase or decrease the timer. The
Timer can be set in 0.5 hours increment below 10
hours and 1 hour increment for 10 hours or above.
The SET light will turn on while setting.
To cancel the set function, press the TIMER button
again.
13
Page 18

When the unit is in ECO mode, the
6. Eco Button:
light will turn on. In ECO mode, the unit will
turn-off once the room is cooled to the user set
temperature. The fan will also be off at this point.
The unit will turn back on when the room
temperature rises above the user set temperature.
Before the compressor stars, the fan motor will
run for a while, then it will stop for a while-and will
repeat to provide a much more comfortable-feeling
and save energy.
Press the SLEEP button, the Sleep
7. Sleep Button:
Light will be on after 10s. and the remaining lights
on the display will be off. In SLEEP mode, the airconditioner will automatically adjust the
temperature and fan speed to make the room more
comfortable during the night. The set temperature
will automatically raise by 1 every 30-60
minutes and at most change six times until the set
10.
Use the horizontal wheels
Directional Louvers:
to control horizontal airflow and the air deflectors
to control vertical airflow.
horizontal wheelair deflector air deflector
temperature is 28 .
Run time will depend on set temperature.
Press the FAN SPEED button
8. Fan Speed Button:
to select the fan speed. In COOL MODE you can
choose the following settings: HI, MED, LO, or
AUTO. In FAN MODE you can choose from HI,
MED, and LO.
The Filter Check light will only turn
9. Fiter Button:
on as a reminder to clean the filter after the fan
motor has been in operation for a total of 500
hours. To turn the light off, press the Filter Check
button.
14
Page 19

1
3
4
5
6
3
2
7
8
9
10
Use buttons on the control panel
5. Timer:
and remote to set the TIMER.
Timer Off: The timed stop is programmed by
pressing TIMER button. Set the time by
pressing the button or
desired stop time is displayed, then press TIMER
button again.
Timer On:
button first
the button or .
a second time, set the stop time
button or .
third time, confirm your settings and stop time.
The display will show the time your machine will
automatically turn on.
Note: It can be set to automatically turn off or on in
0.5-24 hours. Each press of the
buttons will increase or decrease the timer. The
Timer can be set in 0.5 hours increment below 10
hours and 1 hour increment for 10 hours or above.
The SET light will turn on while setting.
To cancel the set function, press the TIMER button
again.
When the unit is off, press TIMER
, set the temperature with pressing
Press TIMER button
Press TIMER button a
stop
until your
with pressing the
1. Turn the air conditioner on and off.Power:
2. Press the COOL button to COOL mode.Cool:
and :3. Use these buttons on the control
panel and remote to increase or decrease the
Set Temperature or Timer. Temperature range:
61 ~88 or 16 ~31 .
Press the SLEEP button, the Sleep
4. Sleep:
Light will be on after 10s. and the remaining
lights on the display will be off. In SLEEP mode,
the air-conditioner will automatically adjust the
temperature and fan speed to make the room
more comfortable during the night. The set
temperature will automatically raise by 1
every 30-60minutes and at most change six
times until the set temperature is 2
And every Run time will depend on set
temperature.
8 .
In AUTO mode the unit automatically
6. Auto Mode:
chooses the fan speed and the mode of operation
(COOL, DRY, or FAN). In this mode the fan speed
and the temperature are set automatically
according to the room temperature ().Room
temperature is determined by the temperature
sensor located in the indoor unit.
Press the FAN SPEED button
7. Fan Speed:
to select the fan speed. In COOL MODE you can
choose the following settings: HI, MED, LO, or
AUTO. In FAN MODE you can choose from HI,
MED, and LO.
To press the DISPLAY button, it can
8. Display:
switch off/on all lights or LED display.
When the unit is in ECO mode, the
9.
Eco:
light will turn on. In ECO mode, the unit will
turn-off once the room is cooled to the user set
temperature. The fan will also be off at this point.
The unit will turn back on when the room
temperature rises above the user set temperature.
Before the compressor stars, the fan motor will
run for a while, then it will stop for a while-and will
repeat to provide a much more comfortable-feeling
and save energy.
Press the Fan Only button to FAN
10.
Fan Only:
ONLY mode.
15
Page 20

The
Check Filter light will automatically turn on after
the fan motor has been in operation for a total of
500 hours.
FIG.21
FIG.21
16
Page 21

17
Page 22

For any questions or Technical Support,
Please Call Customer Service: 1-844-801-8880
18
Page 23

Page 24

 Loading...