

Page 1
1
AS80MA11
Magnetic Detector
Installation Instructions
General Introduction
The Magnetic Detector is used in security or home automation applications to detect
opening or closing of doors/windows. It consists of two parts; a Detector and a
Magnet. Opening the protected door/window will remove the magnetic field, sending
an alarm signal to the gateway.
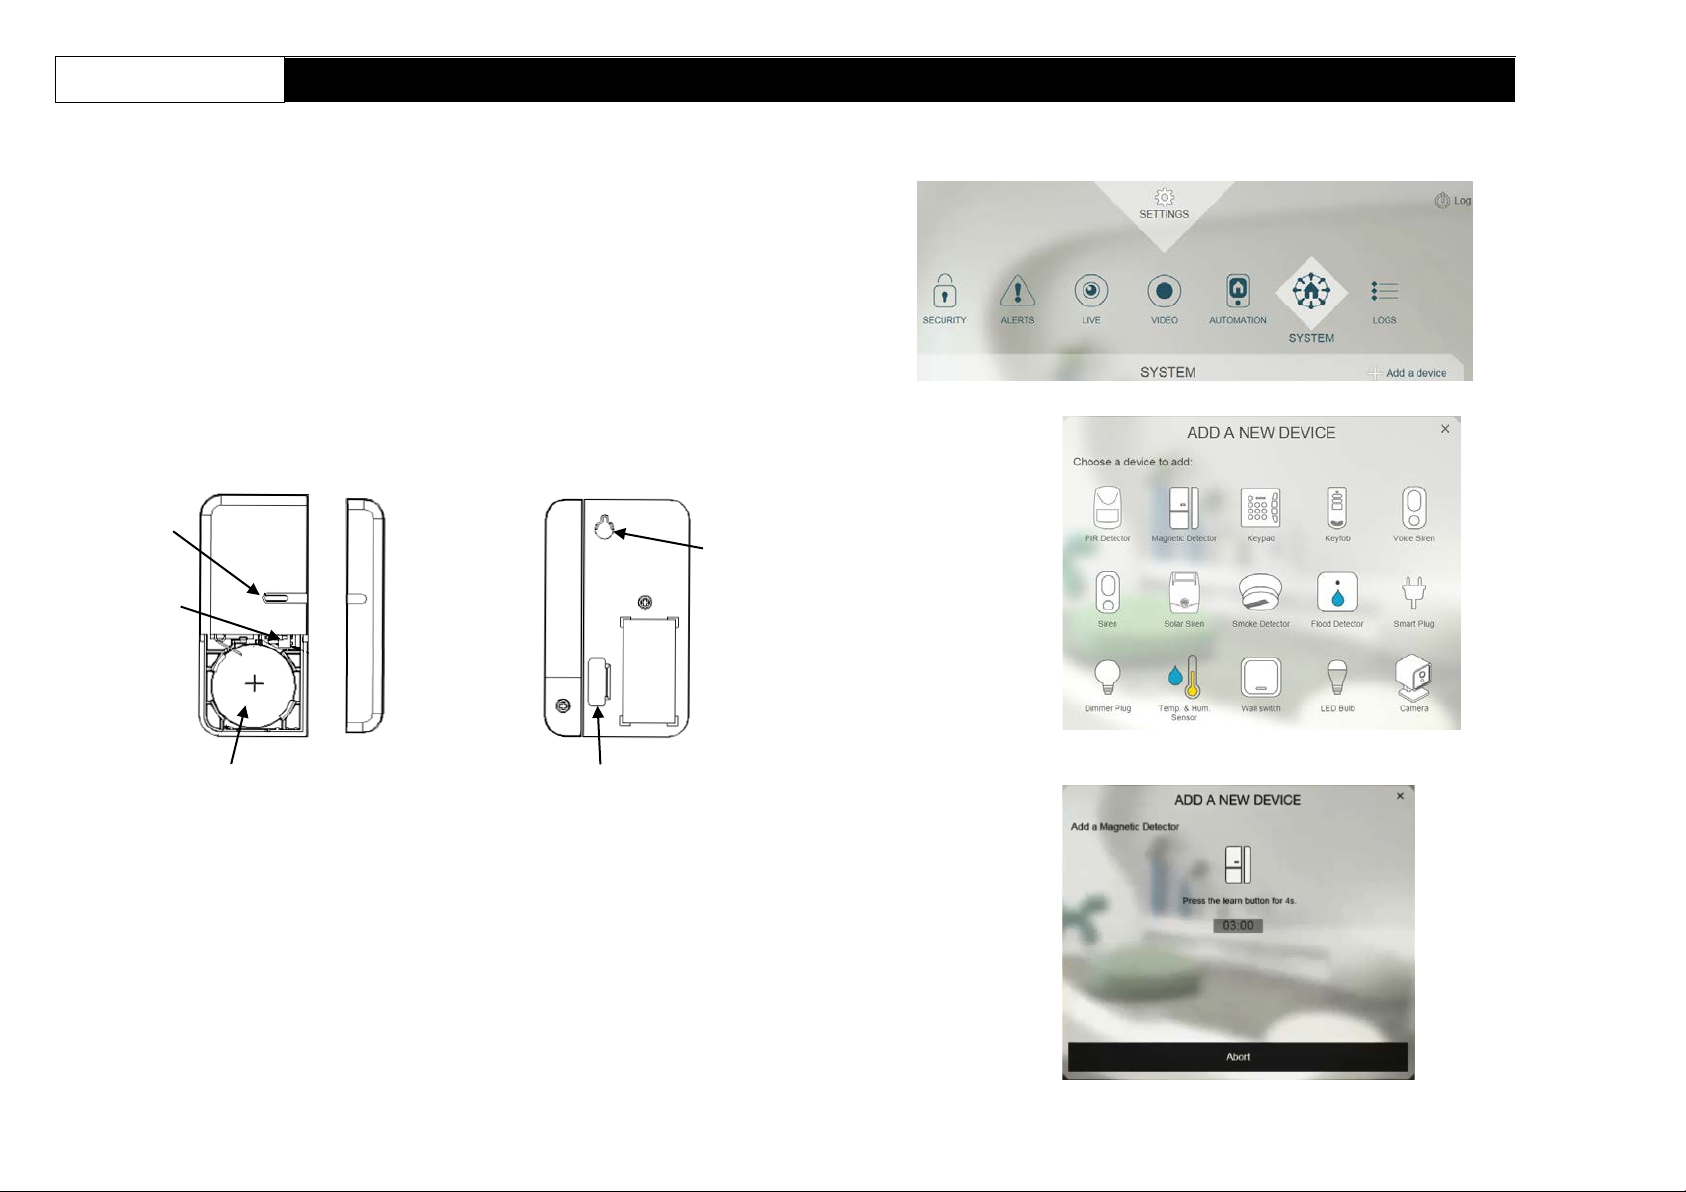
Product Overview
Tamper
switch
LED
Detector Magnet
Battery
Screw
mounting
hole
Battery Mylar
4.
Select “Magnetic Detector”.
5.
The following screen will appear. This means the gateway is entering binding
mode.
Binding with Homesys
1.
Models with battery included: The battery is isolated by a mylar film to deactivate
the detector during shipment. Do not remove the mylar film yet.
Models without battery included: Do not insert the battery yet.
2.
Log into th eELRO Smart Home Alarm account from a web browser.
3.
Select “System”, then “Add a Device”.
(for models with
battery included)
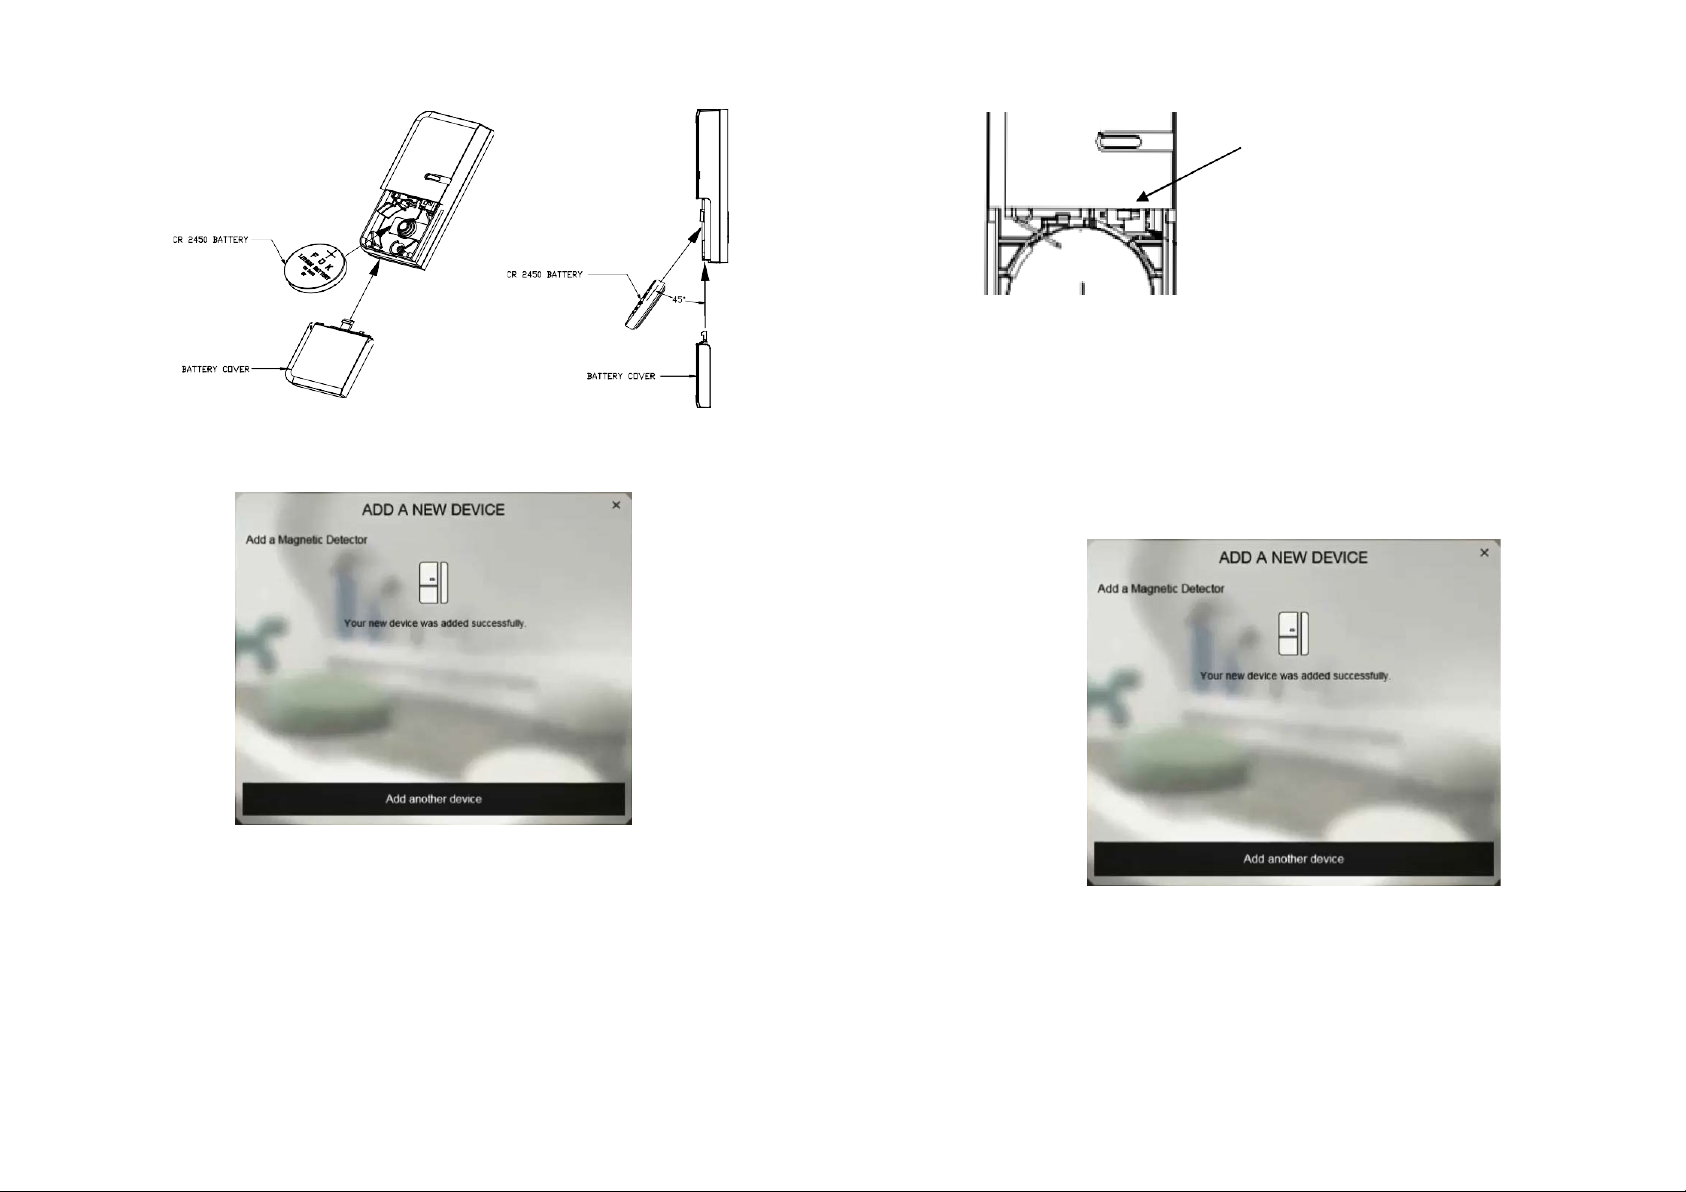
6.
Models with battery included: Pull out the mylar film, the LED should turn ON.
Page 2
2
Models without battery included: Open the battery cover and insert the battery.
7.
The screen below will appear within 10 seconds if the process is successful.
Tamper switch
4.
Press and hold the T amper switch for about 4 s econds and releas e. The LED
will start to blink repeate dly. This implies detector h as now entered the binding
mode and is waiting to receive binding signals from the gateway.
5.
Within 5 seconds, the LED indicator will then stop flashing and turn off,
indicating the learni ng procedure is completed. T he screen below will appear
indicating the process is successful.
8.
Time-out will occur if the binding process was unsuccessful. Please refer to the
Troubleshooting section.
Manual Binding
1.
Remove the battery cover of the detector leaving the battery inside the detector.
2.
Repeat steps 4 to 5 of the Binding with ELRO Smart Home Alarm section.
3.
Locate the Tamper switch as shown below.
Page 3

3
Testing
(1)
Go to System, and select ARM
(2)
Wait for 30 secs, then separate the detector from the magnet (at least 3.5cm
distance apart).
(3)
If the test is successful the system will trigger an alarm (alarms are listed in
“Events”).
Notes: It is necessary that the system is powered and connected to internet.
(4)
If the test is unsuccessful, please check the troubleshooting section.
Mounting
1.
Mount the Magnetic Detector in dry interior locations only.
2.
Do not place the unit near combustible substances or any source of heat, e.g.
fires, radiators, boilers etc.
Note: Mounting the detector to a metal fram e or within 1 m eter of m etalwork (e.g.
radiators, water pi pes) may affec t radio range of the device. Pleas e use plastic or
wooden spacers to separate the detector and metal surface when required.
Installation
1.
Fit the magnet on the moving part of the door / window opposite the detector (or
vice versa, if necessary). Use the provided self-adhesive tape to secure them in
place.
2.
Make sure the parallel gap between the magnet and detector is less than 20mm
and that they are aligned. An alarm will be triggered if the gap is greater than
35mm.
3.
Perform the test using the same steps described in Operation & Testing section
above to ensure the unit is working properly.
Maintenance
1.
Low Battery: When the battery becomes low, the detector will report bac k to the
gateway every 20 m inutes. If the door or w indow is open the LED will flash to
indicate low battery condition to the user.
2.
If the battery needs to be c hang ed, p le as e inser t th e b at teri es at a 45° ang le as
shown below.
Page 4

4
Troubleshooting
Symptom
Cause of Failure
Recommendation
LED does not light up
1.
Run out of battery
1.
Remove the battery cover to
LED
polarity.
With battery cover
removed (Test mode),
the LED lights up but
there is no response
from gateway.
1.
Check if detector has
1.
Follow the steps for Manual
Battery
CR2450 3.0V 620mAh Lithium battery
Operating Temperature
-10°C to 40°C
Frequency Range
868MHz
The troubleshooting table lists some possible causes and solutions. Please contact
your original retailer or nearest service center if the below solutions cannot solve
your problem.
power.
2.
Reverse battery
polarity.
enter hardware test mode.
Remove the magnet and the
should light up.
If not, replace the replace the
battery.
2.
Refit the battery with correct
WARNING:
Do not dispose of electrical appliances as unsorted municipal waste, use separate
collection facilities.
Contact your local government for information regarding the collection systems
available.
If electrical appliances are disposed of in landfills or dumps, hazardous substances
can leak into the groundwater and get into the food chain, damaging your health
and well-being.
When replacing old appliances with new ones, the retailer is legally obligated to
take back your old appliance for disposal at least for free of charge.
completed binding with
Gateway.
2.
Cannot communicate
Reset to Factory Settings
To reset back to factory default state:
(1)
Press and hold the Tamper switch for 3 seconds until the LED flashes
moderately. Release the button. The un it enters code bin ding mode and a 30second countdown starts.
(2)
Within the 30-second countdown, press and hold the link button for more than 6
seconds until the LED turns off.
(3)
Remove the batteries and re-insert them again. If the LED blinks slowly for 30
seconds this implies the device is reset back to factory mode.
Specifications
** Specifications are subject to change without notice.
Binding
2.
Place the magnetic detector
closer to the gateway.
 Loading...