

Page 1
-www.elonex.com 0 -
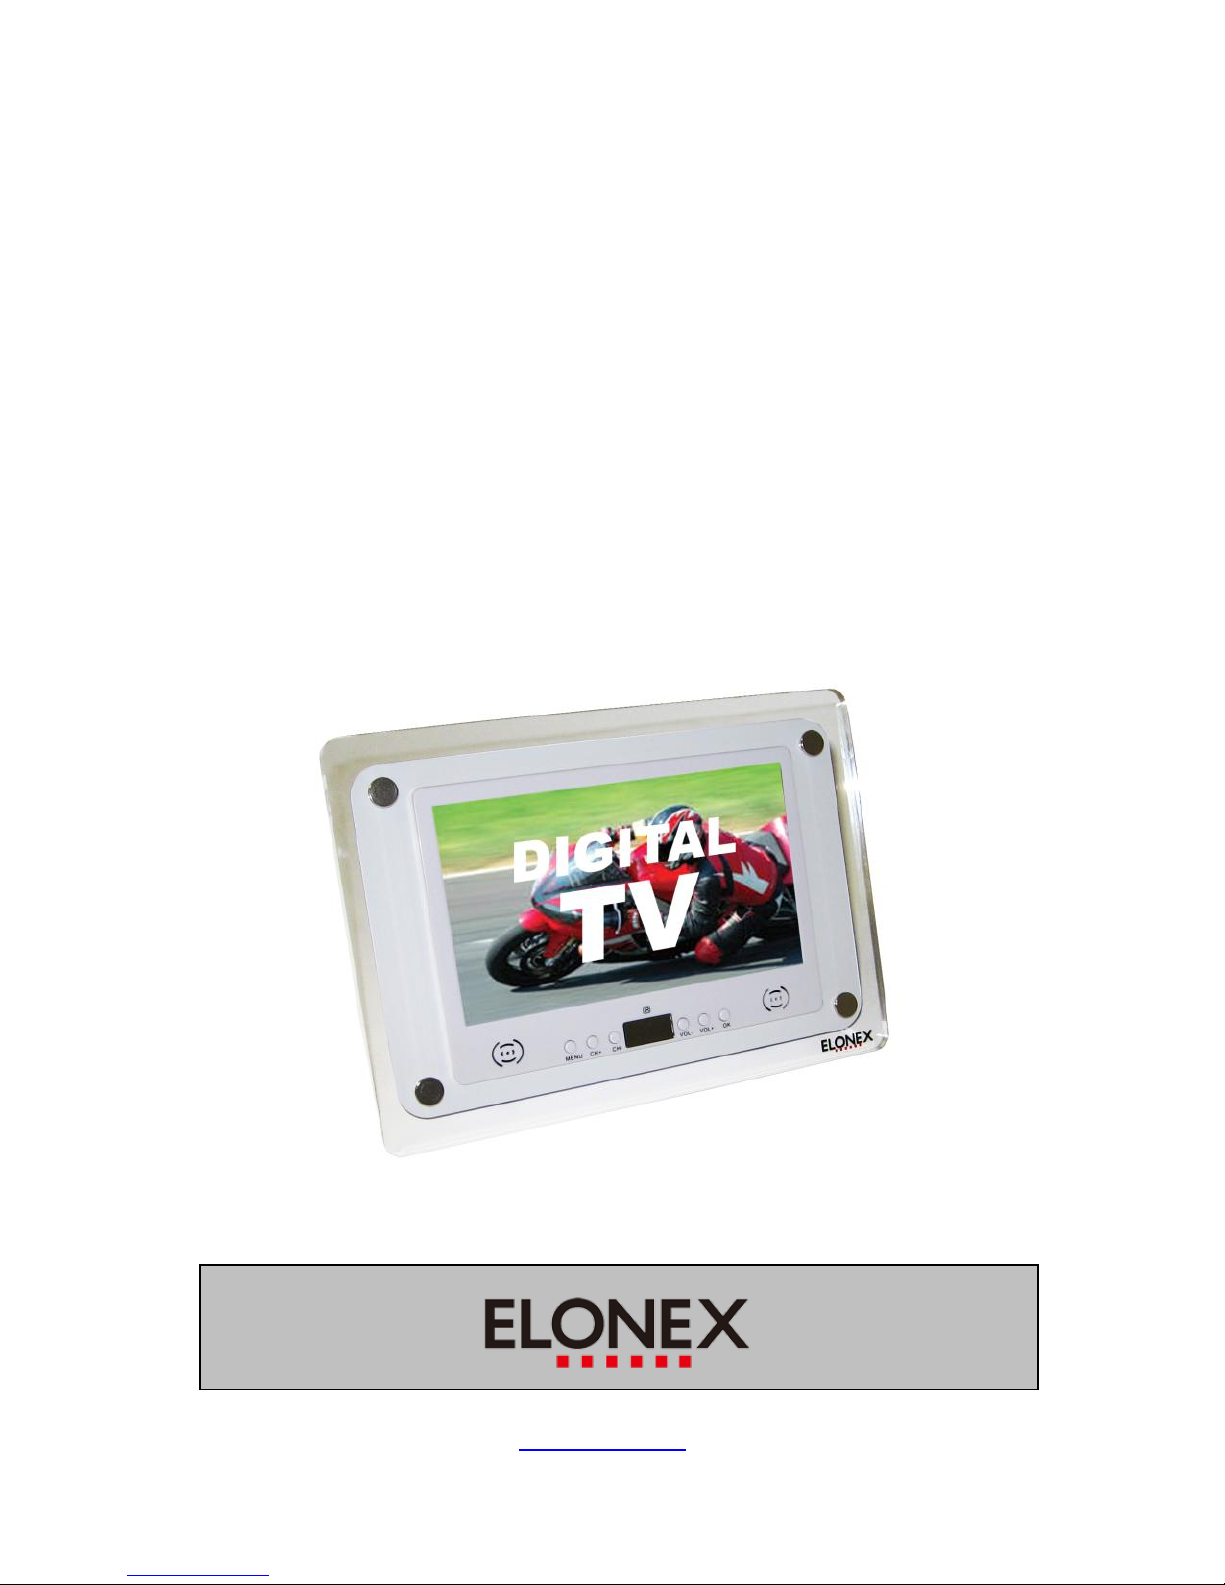
7” LCD DVB TV With
USB and 4-in-1 Card Reader
USER`S MANUAL
LNX-PFD7501
Page 2
-www.elonex.com 1 -
Instruction Markings:
CONSISTS OF TWO PARTS
General:
These markings shall appear on the cover page , the reverse side of
the cover page, or the very next page of the instruction manual,
painted prominently in contrasting color to the background, marking
height is optional, the arrangement depicted is an example, other
arrangements which convert the same intent to the user may be
acceptable.
PART 1
The two graphical symbols and the supplemental marking, will a full
text explanatory notice.
WARNING
PART 2
Each graphical symbol with an explanation of this meaning.
The lightning flash with arrowhead symbol, within an
equilateral triangle, is intended to alert the user to the
presence of un-insulated “dangerous voltage” within
the product's enclosure that may be of sufficient
magnitude to constitute a risk to persons.
The exclamation point, within an equilateral triangle, is
intended to alert the user to the presence of important
operating and maintenance (servicing) instructions in
the literature accompanying the appliance.
Page 3

-www.elonex.com 2 -
Contents
I . General Information .....................................................................4
1. Preface........................................................................................4
2. Main Features..............................................................................4
3. Hardware.....................................................................................5
3.1 Front Panel................................................................................5
3.2 Back Panel.................................................................................6
3.3 RCU...........................................................................................7
4. Receiver Connection...................................................................9
5. Installation...................................................................................9
6. Menu Structure...........................................................................11
7. System Setting...........................................................................11
7.1 Time Setting.......................................................................12
7.2 Language Setting...............................................................13
7.3 Parental Setting..................................................................13
7.4 A/V Setting.........................................................................14
7.5 Factory Setting...................................................................14
7.6 Booking List........................................................................15
8. Channel Setting.........................................................................16
9. Channel List...............................................................................17
10. Favorite List...............................................................................18
11. System Info................................................................................19
12. EPG (Electronic Program Guide)...............................................20
13. USB & 4-in-1 card reader………................................................21
13. 1 Select the device………......................................................21
13. 2 Open folder………..............................................................21
13. 3 Add to play list………..........................................................22
Page 4

-www.elonex.com 3 -
13. 4 Play list……….....................................................................22
13. 5 Select filter content………..................................................23
13. 6 play mode……....................................................................23
13. 7 Slide show with background music.....................................24
14. Main Short Cut Guide................................................................25
14.1 SUBT(Subtitle).................................................................25
14.2 TTXT(Teletext).................................................................25
14.3 FAV(Favorite Group)........................................................26
14.4 EPG……………………….. ..............................................26
14.5 MODE ………………................................................26
14.6 AUDIO…………………….................................................26
14.7 ……………………..……….………………………...26
14.8 FUNC………………………………………………...............26
14.9 AV I/O…………………………………………………………27
14.10 ………………………………………………………..27
14.11 ………………………………………………………..27
15. Accessories...............................................................................27
II . Trouble Shooting .........................................................................28
Page 5

-www.elonex.com 4 -
I. General Information
1. Preface
Thanks for your purchase 7” LCD digital terrestrial TV with digital
photo frame function. The latest technology and the outstanding
design are adopted to provide high reliability and picture stability, for
your convenient operation, strongly advised reading the manual
before using.
2. Main Features
1. Powerful Zoran single chip
2. Fully DVB-T/MPEG-2 compliant
3. Demodulation: QPSK, QAM16, QAM64
4. Multi Bandwidth selection: 6M & 7M & 8M
5. RF modulator for TV standard (optional)
6. Teletext: DVB-TXT ETSI/EN 300 472
7. EPG (Electronic Program Guide) support
8. Favorite channel & TV lock editor
9. 7”Liquid Crystal Display (LCD) panel build in
10. Contrast, Brightness, Saturation, Hue, Mirror adjustment
11. Multi-Language OSD (Such as: English, German, French etc.)
12. Software upgrade via USB interface
14. PAL/NTSC auto-conversion
15. Max 1000 channels of TV and radio program
16. Automatic and manual search
17. Parental lock control
18. USB1.1 interface supported
19. 4-in-1 (XD, SD, MS, MMC) memory carder slot
20. MP3, MPEG-2, JPEG format support
21. AV in/out
22. Slide show function supported
23. Remote controller
Page 6
-www.elonex.com 5 -
3. Hardware
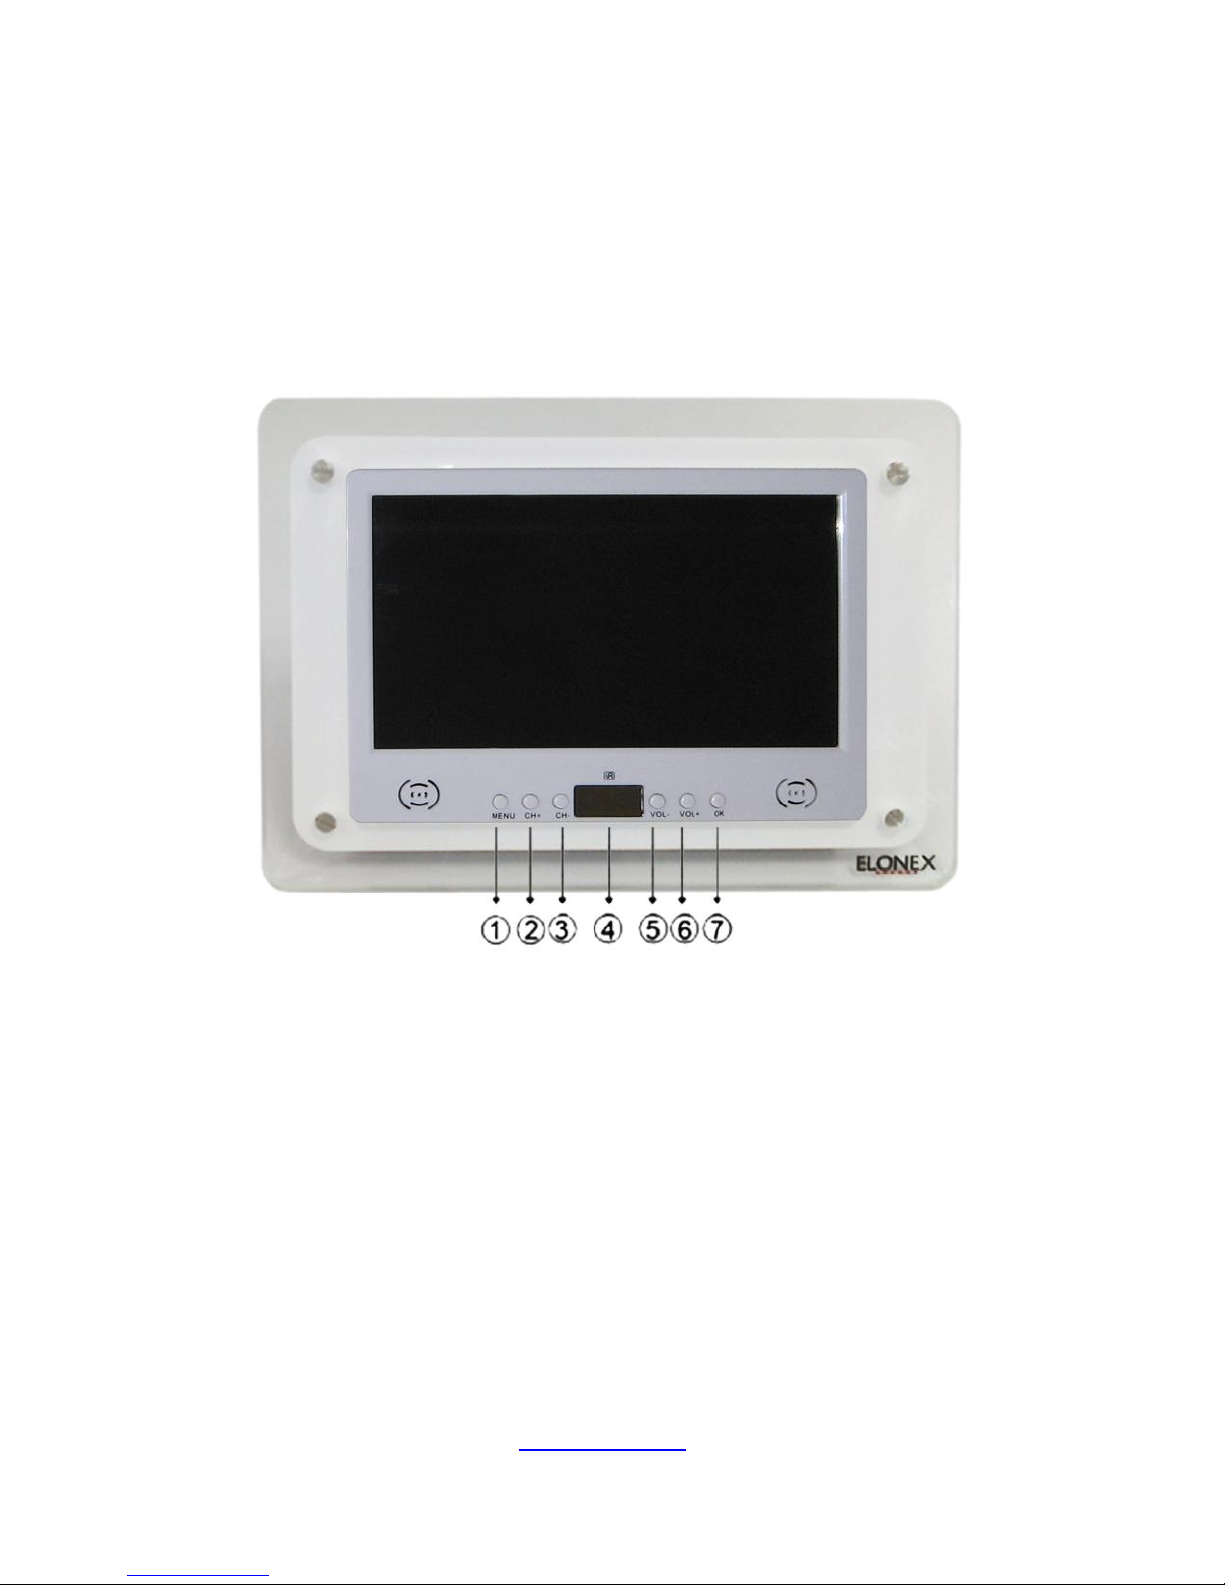
3.1 Front Panel
6 Keys and LED:
(1) Menu Key: Enable Menu
(2) CH+: Channel Up! Used to turn channel up
(3) CH- : Channel Down! Used to turn channel down
(4) IR Receiver & LED Display: Display the power(Red lamp), channel
lock(Green lamp), and IR receiver
(5) V+: Volume Up! Used to turn the volume up
(6) V- : Volume Down : Used to turn the volume down
(7) OK: Enter into the function
Page 7
-www.elonex.com 6 -
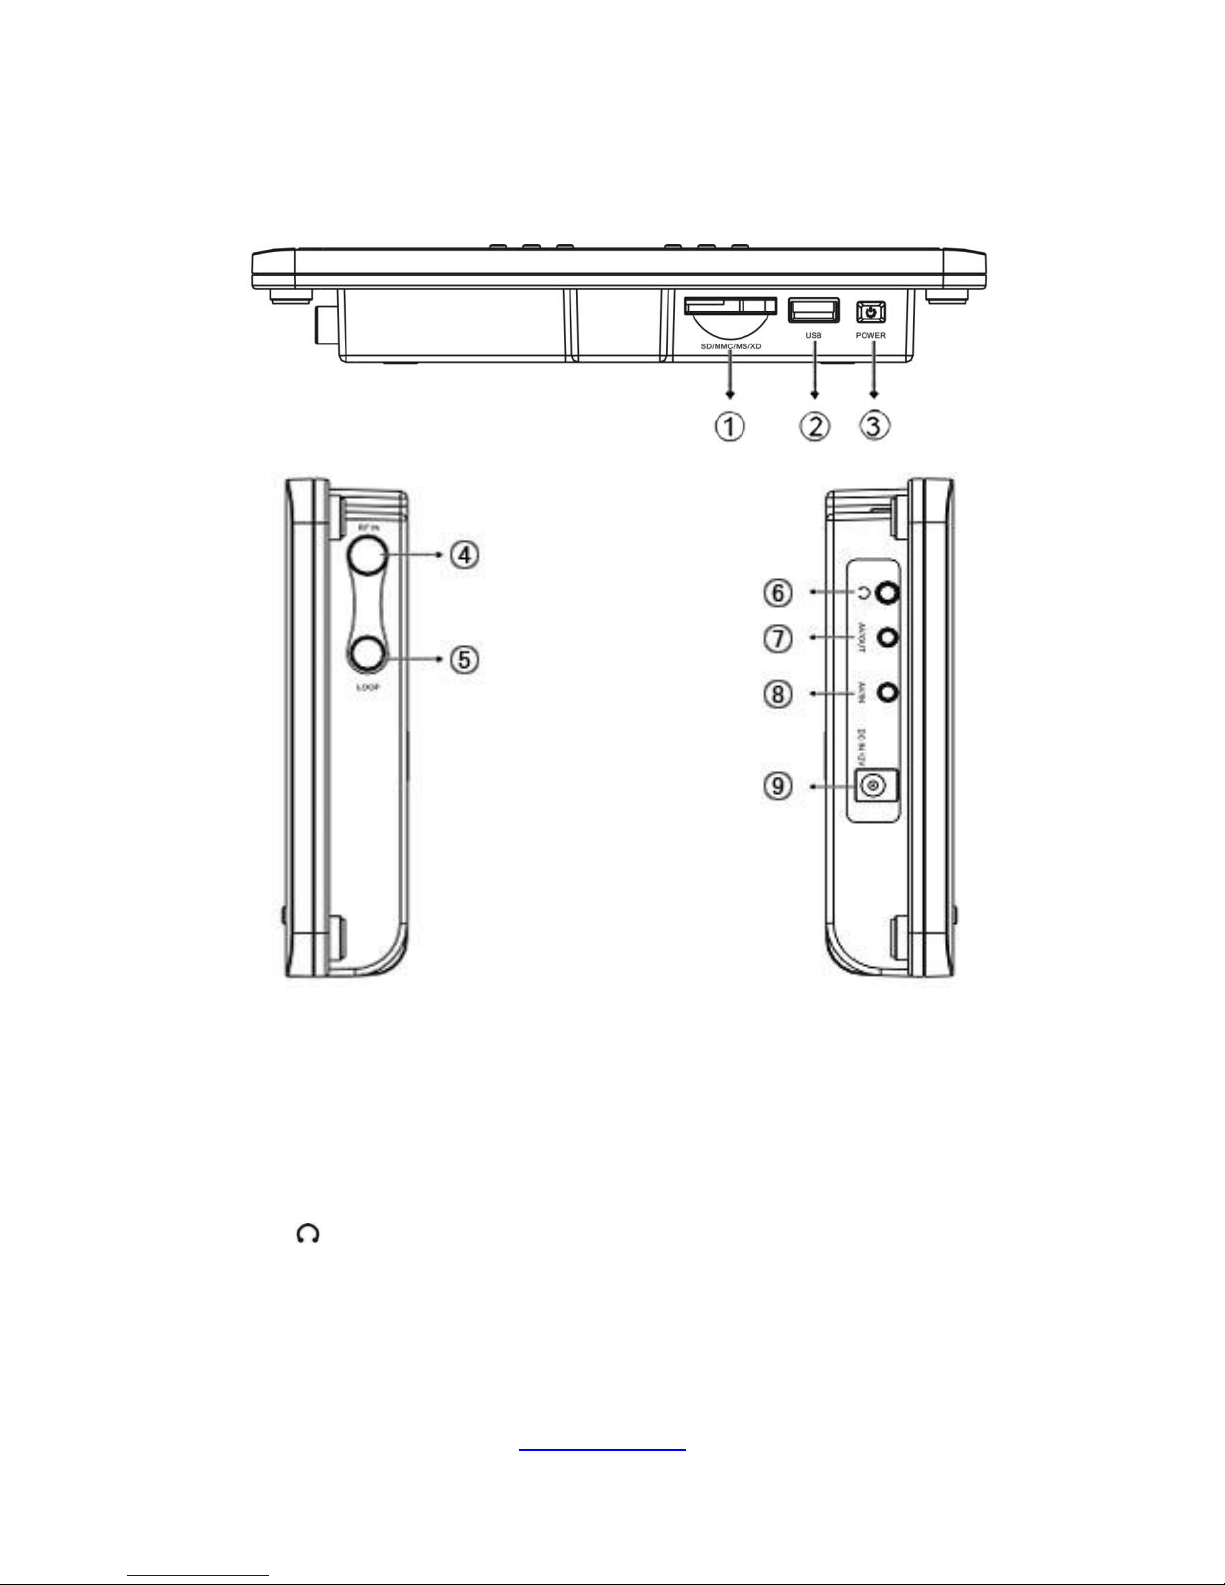
3.2 Rear Panel
(1) SD/MMC/MS/XD : Memory card slot. Support the SD, MMC, MS
and XD memory card.
(2) USB : USB connector.
(3) POWER : Power On/Off button.
(4) ANT IN : TV aerial input.
(5) LOOP : RF Loop though for an external TV aerial.
(6) : Earphone connector
(7) AV/OUT : Video signal output connector. Output the video signal
to TV/Monitor.
(8) AV/IN : Video signal input connector. Input the video signal to
display on this 7” LCD panel.
Page 8
-www.elonex.com 7 -
(9) DC IN 12V : Power DC jack connector. Supplied DC 12 Voltage.
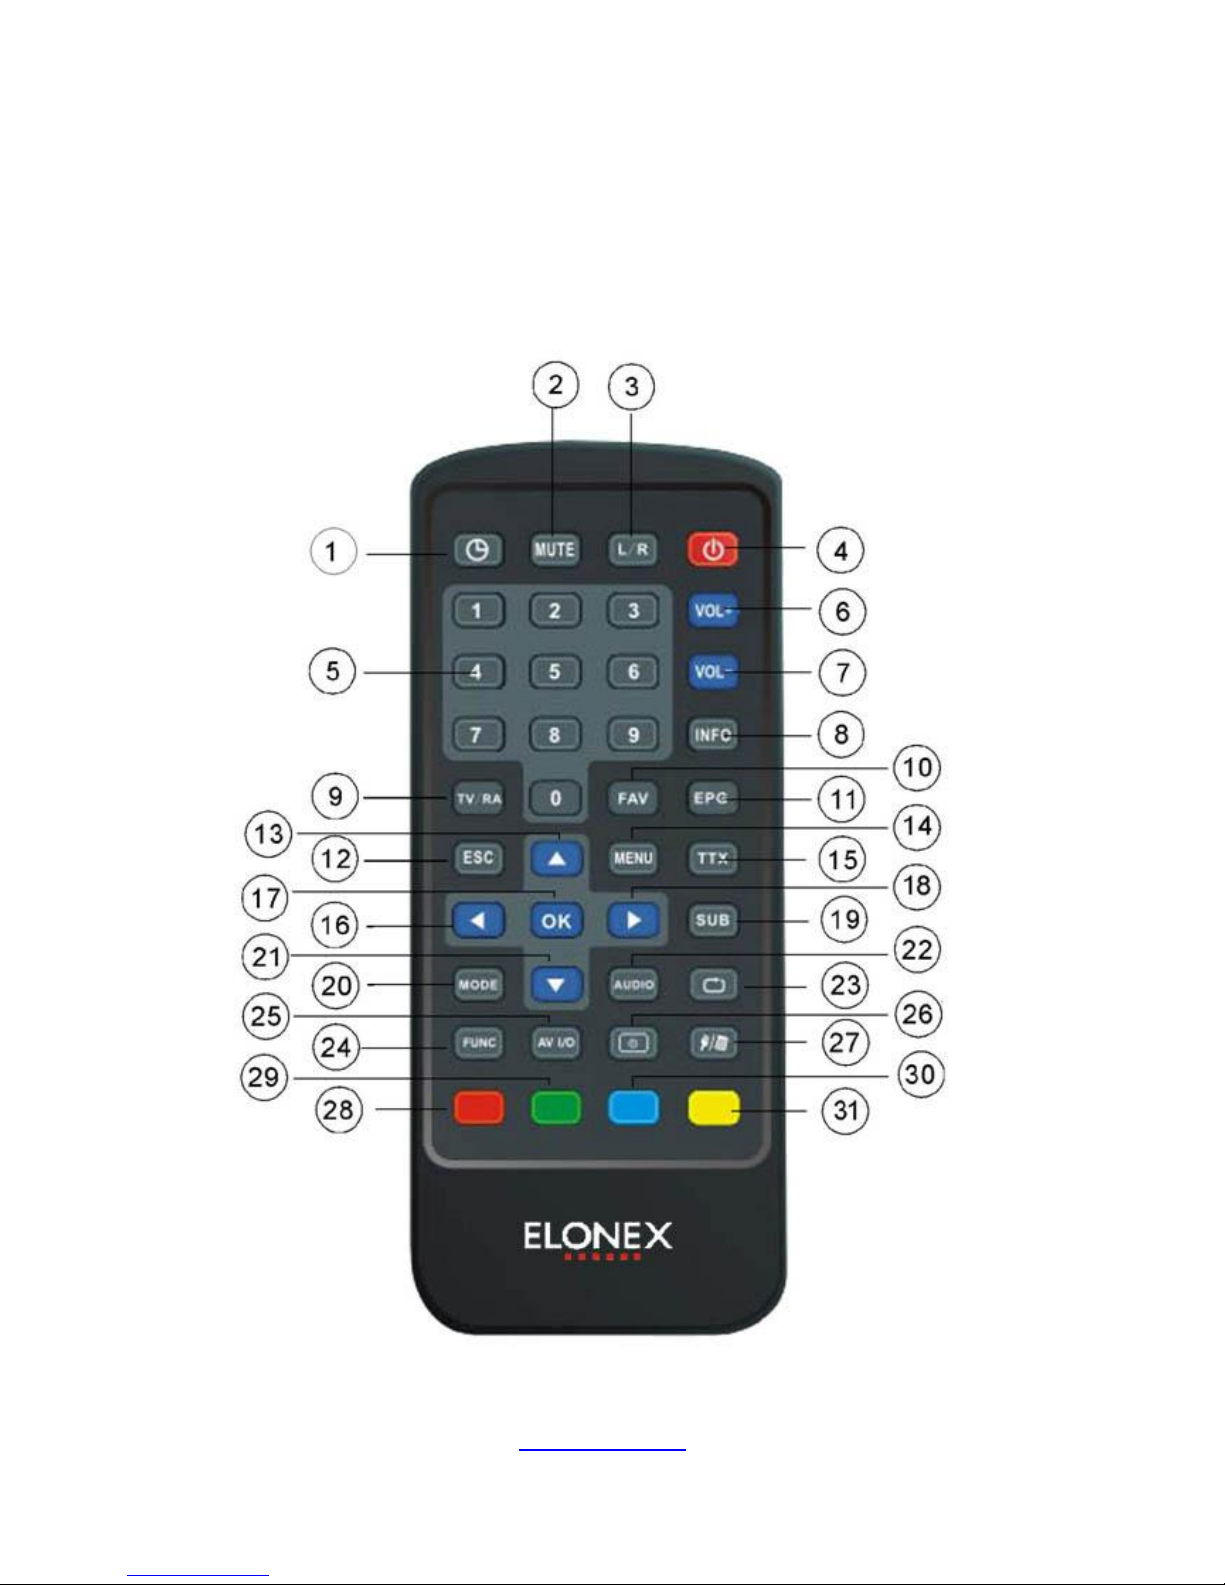
3.3 RCU (Remote Control Unit)
Page 9

-www.elonex.com 8 -
(1) POWER : Power ON/OFF
(2) MUTE : Mute selection
(3) L/R : Left or right audio selection
(4) POWER : Power ON/OFF
(5) 0-9 : Channel & numerical value selection
(6) VOL+ : Volume Up
(7) VOL - : Volume Down
(8) INFO : Program Info
(9) TV/RA : Digital TV/RADIO Selection
(10) FAV : Favorite
(11) EPG : Electronic Program Guide
(12) ESC : Exit
(13) ▲ : Up
(14) MENU : Main Menu
(15) TTX : Teletext On/Off
(16) ◄ : Left
(17) OK : Select
(18) ► : Right
(19) SUB : Subtitle On/Off
(20) MODE : Select the display mode. Aspect Selection.
(21)▼ : Down
(22) AUDIO : Audio language
(23) : Return
(24) FUNC : Useless key
(25) AV I/O : Select the video signal input mode or output mode
(26) : Power On/Off of TFT LCD
(27) : Select USB or card reader mode
(28) Color button(Red): Function will be displayed on screen display
(29) Color button(Green): Function will be displayed on screen display
(30) Color button(Blue) : Function will be displayed on screen display
(31)Color button(Yellow): Function will be displayed on screen display
Page 10

-www.elonex.com 9 -
4. Receiver Connection
Please refer to the following diagram connecting, which includes
the power, signal and other related equipment.
(1) ANT IN : TV aerial for signal
(2) LOOP OUT: RF Loop though for an external TV aerial
(3) AV OUT : Use the cable to link with TV/ monitor if you want to
use it.
(4) AV IN : Use the cable to link with your video source if you want
to use it.
(5) : Link with your earphone if you want to use it.
(6) DC IN 12V : Link the power adapter.
Page 11

-www.elonex.com 10 -
5. Installation
Step 1:
System connection examining
Please refer to the receiver connecting diagram, check the
antenna cable, and make sure you are in the broadcast coverage
area for Digital TV
Step 2:
Switch on the power of the 7” LCD TV
After connecting all the cables, power on the 7” LCD TV.
The power indicator light turns on (red). (If the 7” TV has already
Scanned for channels, there will be a Channel No. and Signal
Quality banner on the TV screen.)
Step 3:
All Auto Search
In case of without pre-exist programs, there will be open only
screen logo picture on the screen. Please press remote controller
"MENU", Use the "Left" or "Right" cursor button to select
"Channel Setting", then select related factors for preparing to
search and finally press "OK" start program searching.
User can find detailed searching information: during the
procedure of program searching. When searching finished, there
Page 12

-www.elonex.com 11 -
will be indicate on the screen how many programs you get totally.
Step 4:
The selection of TV and Radio
1. Use "Up " and "Down " to select your favorite program
2. In case of want to listen to the radio, switch the
“TV/RA”(TV/Radio) when Non-Menu Mode.
6. Menu Structure
On the mode of Non-Main Menu, press the shortcut Key
"MENU" on the Remote Control Unit, to enter the Main Menu,
function of the Main Menu include:
☆ System Setting: the menu of system or conditional setting.
☆ Channel Setting: the menu of manual or auto channel search.
☆ Channel List :the menu of listing all channels.
☆ Favorite List: the menu of showing the channels that you
added as favorite.
☆ System Info: the menu of showing software and hardware
information.
☆ EPG: the menu of indicates the entire TV program guide.
Page 13

-www.elonex.com 12 -
7. System Setting
There are functions as Setting: Time, Language, Parental, A/V,
Factory, Booking List and PVR Setting.
7.1 Time Setting
Select "Time Setting" when "Main Menu", press "OK" to enter
time setting, you would choose one of these categories as you
prefer, including Time-zone Setting, Sleep-time Setting and
Banner Time Setting.
Time-zone Setting: Select Time-zone Setting option using the button.
Press "OK" button when selected. The following menu will display.
Sleep-time Setting: Press the "Up" or "Down" button to select the
sleep time.
Press the "OK” button to confirm your selection.
Banner Time Setting: To adjust the info display time.
Page 14

-www.elonex.com 13 -
1s: (1 sec); 3s: (3 sec); 5s: (5 sec); 7s: (7 sec); 9s: (9 sec).
7.2 Language Setting
Select "Language Setting" when "System Setting", press "OK"
enter language system menu. Set the language as you prefer.
7.3 Parental Setting
Select "Parental Setting" when "System Setting", press "OK"
then there is a window required enter the Pin Code on the screen,
please enter the password. Meanwhile you can change the
password as you want anytime but six numbers is a must.
★ Attention: Pin Code default is 888888.
Page 15

-www.elonex.com 14 -
7.4 A/V Setting
Select "A/V Setting" when "System Setting", press "OK" enter various
A/V modes can be set in this menu, such as TV shape, conversion,
TV standard , video output , bright , contrast and saturation . Press
"Up" or "Down" to select between these modes, and press "Right" for
entering to select as you prefer. Finally press "EXIT" to return "MAIN
MENU" .
7.5 Factory Setting
Select "Factory Setting" when System Setting, Press "OK" to enter
factory setting. Then press "Up" and "Down" to either "Restore
Default" or "Clear Channels", in order to achieve that, just press "OK"
to confirm.
Page 16

-www.elonex.com 15 -
7.6 Booking List
Select "Booking List" when "System Setting", and then press "OK" to
enter.
It will display all the booking events you booked in EPG or added by
manually. That will display the info of ID. Start time, Duration, Type for
each booking program.
If you want to add on a booked program, press "OK" button of the
booking list menu and the menu will display as below:
Page 17

-www.elonex.com 16 -
Users can change ID by using Right to start a new booking program
press "OK" to select the channel. There are "Once", "Daily", "Weekly"
can be chose of the event type. The start time, start date and duration
should be valid. The "Purpose" can be "RECORD" or "PLAY". After all
above it confirmed, set the booking to "ON", the booking will operate it
automatically or it will display the errors message.
8. Channel Setting
Select "Channel Setting" when "Main Menu", press "OK" to enter.
Press "Up" or "Down" to select between these modes, and press
"OK" for entering to select as you prefer. Finally press "EXIT" to
return "MAIN MENU" .
Select the "Channel Search" and press "OK" to enter it. Choose
the Search type as "Auto Scan" and also set up the correct data
of Search Type, Channel No., Frequency, Bandwidth, Encrypted
Service, Update Mode, then press "Start Search" to show our
Page 18

-www.elonex.com 17 -
functions. Select the "Sort Channel" and press "Sort Channel"
button to sort it.
9. Channel List
Press "Up" or "Down" to select between these modes, and press
"OK" for entering to select as you prefer. Finally press "EXIT" to
return "MAIN MENU".
To access the channel list only without edit, press the "OK" button
directly in non-menu state.
To edit the channel list, press the "MENU" button and select
"Channel List" using the "Up" or "Down" keys, press the "OK" button
when it's highlighted.To view a different channel, press either the "Up"
or "Down" button, each channel selected will be previewed in the right
up box. To switch between TV and Radio channels, press the RED
button.
To view/listen to a channel, press the "OK" button.
To add on new program, Modify, Delete, Lock/Unlock and Move a
Channel, Press "Right" button.
Page 19

-www.elonex.com 18 -
To lock a channel to prevent other people from watching them,
highlight the channel that you want to lock by using either "Up" or
"Down" button, press the " Right" button, press the "OK" button when
highlight " Lock & Unlock" in the popup menu, enter the right PIN
code in the following PIN code form, the channel will be locked, a lock
icon will be displayed at the back of the channel name after a
successful lock operation, if the PIN code is entered incorrectly, the
"Pin Code Error" message will be displayed which indicate the
operation failed. Unlock operations work similar to the above lock
operations.
10. Favorite List
Select favorite program when "Main Menu", press "OK" enter the
"Favorite Menu". Press "Right" button to enter the programs, and then
press "Up" and "Down" to select your program that you want to add as
favorite, then press "OK" to confirm. Then you would choose your
favorite programs in your “Favorite List ".
Page 20

-www.elonex.com 19 -
Adding a Favorite Channel
You can use RED button to select a favorite group, the choices
are News, Movie, MTV, Finance, Other. Then press the "Right"
button and "OK" button to enter the Add menu, select the
channel you want to add to the group then press the "OK"
button, the added channel will be displayed in the list.
Repeat the same procedure until all your wanted channels
have been added to the group. Follow the same procedure
for each group until all your favorite channels have been added
to the favorite list.
Deleting a Favorite Channel
Similar procedure of above, select the channel that you want to
delete in the favorite list menu using the "Up" or "Down" button,
Press the "Right" button to enter the Delete menu, then press the
"OK" button to enter delete confirmation menu, press the "OK"
button to delete the selected channel from the favorite list and
press the "EXIT" button to cancel the delete.
Viewing a Favorite Channel
If you want to access the favorite list quickly, press the "FAV"
button directly In non-menu state.
To change the favorite group, press the Red button.
Select the wanted favorite channel using the "Up" or "Down"
button, press the "OK" button to confirm when highlighted,
now you can watch the Selected channel.
Page 21

-www.elonex.com 20 -
11. System Info
Select "System Info" when Main Menu, press "OK" to enter "System
Info" menu.
This category shows software version, hardware version and
signal information shown as below:
You can see the system technical info by pressing "OK" to enter it and
pressing "EXIT" to return “MAIN MENU”.
12. EPG (Electronic Program Guide)
Select "EPG" when Main Menu, press "OK" to enter "EPG" menu.
The following information can be found from the "EPG" .
To display the program info you are watching.
To view the weekly TV forecast and reserves your favorite program.
(UP to the different TV operator) Use "Up" and "Down" select
program and "Left" and "Right" view the TV forecast.
Page 22

-www.elonex.com 21 -
13. USB & 4-in-1 & Card Reader
User can use these interface to display it! It supported popular JPEG
digital picture and MP3 music file format!
You can put your USB or memory stick into the slot and press the
shortcut key “ ”. There are some features listed as below.
“ Select the device “
“ Open folder “
“ Add to play list “
“ Play list ”
“ Select filter content “
“ Play mode “
“ Slide show with background music “
13.1 Select the device
When you want to enter into the function of card reader, press “ “
then choose what memory stick you inserted.
You will see the list of memory devices on screen!
The 7” LCD TV will detect the USB then also detect the memory slot!
If you choose the USB port, the 7” LCD TV will show it on screen.
Then press “OK” to enter into it to display the content.
13.2 Open folder
User can press “OK ” then open this folder. The 7” LCD TV provided
some special function for user and list it as below:
Page 23

-www.elonex.com 22 -
User can press “left” or “right” key to select it! And press “ OK “ to
enter it!
13.3 Add to play list
User can use “up” and “down” key to select the music or picture. Then
press “ OK “ then it will add on to your play list. You can choose the
favorite the music and picture by this function. Then, picture, music
and even if the document will be arranged and separated as different
section and list it in “ Play list”.
13.4 Play list
When you choose the music or picture, you can see it by pressing
“ Play list “ then you can see all the list you chosen. You can double
check what you have chosen and make sure of it!
Page 24

-www.elonex.com 23 -
13.5 Select filter content
User can use “left” and “right” key to select it. Press “Select filter
content “ to enter into it. User can select to show out the audio only,
music only or all types! User can use the “up” and “down” key to select
it and press “OK” to enter it. Then the list will based on your selection
to show it!
13.6 Play mode
There are 6 kinds of play mode for user to choose it!
Play one: When you choose this mode, it just can play one time
then stop no matter picture or music!
User can press “OK” then enter into the mode.
Page 25

-www.elonex.com 24 -
Play all: When you choose this mode, it just can play all the list
included picture and music one time then stop!
User can press “OK” then enter into the mode.
Shuffle play : When you choose this mode, it just can play by
random of your list then stop!
User can press “OK” then enter into the mode.
Repeat one : When you choose this mode, it just can play
one time then repeat again and again till you stop it!
User can press “OK” then enter into the mode.
Repeat all: When you choose this mode, it just can play all the
list included picture and music again and again till user stop it!
User can press “OK” then enter into the mode.
Repeat Shuffle : When you choose this mode, it just can play
by random of your list again and again till user stop it!
User can press “OK” then enter into the mode.
13.7 Slide show with background music
There are 3 kinds of play mode for user to choose it! User can based
on his using to choose the different play modes and use “up” and
“down” to select and press “OK” to enter it!
Play without music : When user select this mode, it just
can playback the picture but without background music!
Play from current folder list : When user select this mode, it
can playback the picture and also playback the music playing
currently!
Page 26

-www.elonex.com 25 -
Play from play list : When user select this mode, it can
playback the picture and also playing the list of music! You can
arrange the music list in advance and playback the picture for a
longer time!
14. Main Short Cut Guide
14.1 SUB (Subtitle)
Press "SUB" button to open and close the subtitles or close
caption function. when the broadcaster provides this service.
14.2 TTX (Teletext)
Press "TTXT" on the RCU to open the Teletext function.
Page 27

-www.elonex.com 26 -
14.3 FAV (Favorite Group)
Press "FAV" to enter your favorite group to select the program.
14.4 EPG (Electronic Program Guide)
Please see the Chapter12 for more details information
14.5 MODE
The 7” LCD TV can provided “Auto”, “Pillar box”, “Vertical” and “Full
frame” display mode for users!
14.6 AUDIO (Audio Language)
If the TV program supports the different audio language, user can
choose it by this shortcut key. Press “AUDIO” then it will be changed
till you wanted.
14.7 (Return)
Return to last channel! User can press “ “ to return to last
channel!
14.8 FUNC
This key is a reserved key! For this generation is useless! User can
ignore it!
Page 28

-www.elonex.com 27 -
14.9 AV I/O (AV Input & Output Selection)
To change the AV input or output mode. User can press “ AV I/O ” then
choose it to input the video signal or output to other display monitor!
Attached a AV cable to link with other equipment.
14.10 ( Power On/Off of TFT LCD )
If you want to turn off the TFT LCD temporally or save the power , you
can press the short cut to turn on or turn off !
14.11 ( USB & Card Reader Select Mode)
User can press “ “ to enter into the multi-media mode and select
the USB or memory card. It just only display one path! So, user just
can choose one USB port or memory port to display the content!
If you are under the DVB-T mode, you need to exit it then you can
enter into the multi-media mode!
15. Accessories
1 Remote Control Unit 2 (AAA) Batteries
1 AV cable ( 3 in 1) 1 Users Manual
1 Antenna
Page 29

-www.elonex.com 28 -
II. TROUBLE SHOOTING
Problem
Possible Causes
What To Do
The display on the
front panel does not
light up.
Main cable is not
connected.
Check that the main
cable is plugged
into power socket.
Bad
Picture/Blocking
error
Signal is weal.
Try a signal
attenuator to the RF
In port.
No picture or sound.
Poor signal quality or bad
interconnections.
Check the antenna
system, Check
cable connections.
No sound and
picture, but the front
panel shows time.
The unit is in standby
mode.
Press the key on
the RCU.
The RCU is not
working.
Battery exhausted.
Replace batteries.
The remote control
will not operate your
LCD TV
(1) The batteries in
your remote control
need replacing
(2) There is an
obstruction
blocking the signal
path between the
remote control and
the box.
(1) Replace the
batteries
(2) Check that
there is nothing
in the way of
the path
between the
remote control
and the
receiver
Page 30

-www.elonex.com 29 -
★ Note: If you cannot solve the problem by referring to the above
trouble shooting, please contact your re-seller.
★ Important notice: The Warranty doesn’t cover any damage
caused by manipulation or modification of the software.
★ Important notice: For firmware upgrades please check
www.elonex.com.
 Loading...