

Page 1

Instruction Manual
Student Response System
CRV-24/32/40
Please read this manual before using this product.
Please retain this manual.
Page 2

2
IMPORTANT SAFETY INSTRUCTIONS
1) Read these instructions.
2) Keep these instructions.
3) Heed all warnings.
4) Follow all instructions.
5) Do not use this apparatus near water.
6) Clean only with dry cloth.
7) Do not block any ventilation openings,
Install in accordance with the
manufacturer’s instructions.
8) Do not install near any heat sources
such as radiators, heat registers, stoves,
or other apparatus (including amplifiers)
that produce heat.
9) Do not defeat the safety purpose of the
polarized or grounding-type plug. A
polarized plug has two blades with one
wider than the other. A grounding type
plug has two blades and a third grounding
prong. The wide blade or the third prong
are provided for your safety.
If the provided plug does not fit into your
outlet, consult an electrician for
replacement of the obsolete outlet.
10) Protect the power cord from being
walked on or pinched particularly at
plugs, convenience receptacles, and the
point where they exit from the apparatus.
11) Only use attachments/accessories
specified by the manufacturer.
12) Use only with the cart, stand, tripod,
bracket, or table
specified by the
manufacturer, or sold
with the apparatus.
When a cart is used,
use caution when moving the
cart/apparatus combination to avoid
injury from tip-over.
13) Unplug this apparatus during lighting
storms or when unused for long periods
of time.
14) Refer all servicing to qualified service
personnel. Servicing is required when
the apparatus has been damaged in any
way, such as power-supply cord or plug
is damaged, liquid has been spilled or
objects have fallen into the apparatus,
the apparatus has been exposed to rain
or moisture, does not operate normally,
or has been dropped.
The lightning flash with arrowhead symbol,
within an equilateral triangle, is intended to
alert the user to the presence of uninsulated
"dangerous voltage" within the product's
enclosure that may be of sufficient magnitude
to constitute a risk of electric shock to persons.
This marking is located at the bottom of
product.
The exclamation point within an equilateral
triangle is intended to alert the user to the
presence of important operating and
maintenance (servicing) instructions in the
literature accompanying the product.
Page 3

3
WARNING:
TO REDUCE THE RISK OF FIRE OR ELECTRIC SHOCK, DO NOT EXPOSE THIS
PRODUCT TO RAIN OR MOISTURE.
WARNING: Handling the cord on this product or cords associated with accessories sold with this product, will
expose you to lead, a chemical known to the State of California to cause birth defects or other reproductive harm.
Wash hands after handling.
NOTICE:
This Class B digital apparatus complies with Canadian ICES-003.
This device complies with Part 15 of the FCC Rules and with RSS-210 of Industry Canada. Operation is
subject to the following two conditions:
(1) this device may not cause harmful interference, and
(2) this device must accept any interference received, including interference that may cause undesired
operation.
Changes or modifications made to this equipment not expressly approved by ELMO CO.,LTD. may void
the FCC authorization to operate this equipment.
This equipment has been tested and found to comply with the limits for a Class B digital device,
pursuant to Part 15 of the FCC Rules. These limits are designed to provide reasonable protection
against harmful interference in a residential installation. This equipment generates, uses and can
radiate radio frequency energy and, if not installed and used in accordance with the instructions, may
cause harmful interference to radio communications. However, there is no guarantee that interference
will not occur in a particular installation. If this equipment does cause harmful interference to radio or
television reception, which can be determined by turning the equipment off and on, the user is
encouraged to try to correct the interference by one or more of the following measures:
• Reorient or relocate the receiving antenna.
• Increase the separation between the equipment and receiver.
• Connect the equipment into an outlet on a circuit different from that to which the receiver is connected.
• Consult the dealer or an experienced radio/TV technician for help.
Cet appareil numérique de la classe B est conforme à la norme NMB-003 du Canada.
Le présent appareil est conforme aux CNR d'Industrie Canada applicables aux appareils radio exempts
de licence. L'exploitation est autorisée aux deux conditions suivantes :
(1) l'appareil ne doit pas produire de brouillage, et
(2) l'utilisateur de l'appareil doit accepter tout brouillage radioélectrique subi, même si le brouillage est
susceptible d'en compromettre le fonctionnement.
Radiofrequency radiation exposure Information:
The radiated output power of the device is far below the FCC radio frequency exposure limits.
Nevertheless, the device shall be used in such a manner that the potential for human contact during
normal operation is minimized.
This equipment complies with IC radiation exposure limits set forth for an uncontrolled environment and
meets RSS-102 of the IC radio frequency (RF) Exposure rules. This equipment has very low levels of
RF energy that are deemed to comply without testing of specific absorption ratio (SAR).
Cet équipement est conforme aux limites d’exposition aux rayonnements énoncées pour un
environnement non contrôlé et respecte les règles d’exposition aux fréquences radioélectriques (RF)
CNR-102 de l’IC. Cet équipement émet une énergie RF très faible qui est considérée conforme sans
évaluation du débit d’absorption spécifique (DAS).
Page 4

4
IMPORTANT SAFEGUARDS
Follow these guidelines to use the product safely.
These "IMPORTANT SAFEGUARDS" indicate important points that should be followed to use
this product safely and correctly and prevent damage to the product or other property and injury
to you and others.
Read carefully before operating the product and retain for future reference.
Read the manual after making sure that you understand the meaning of the following displays
and symbols.
Warning
This symbol indicates information that, if ignored, could possibly
result in serious personal injury or even death due to incorrect
handling.
Attention
This symbol indicates information that, if ignored, could possibly
result in personal injury or damage to property due to incorrect
handling.
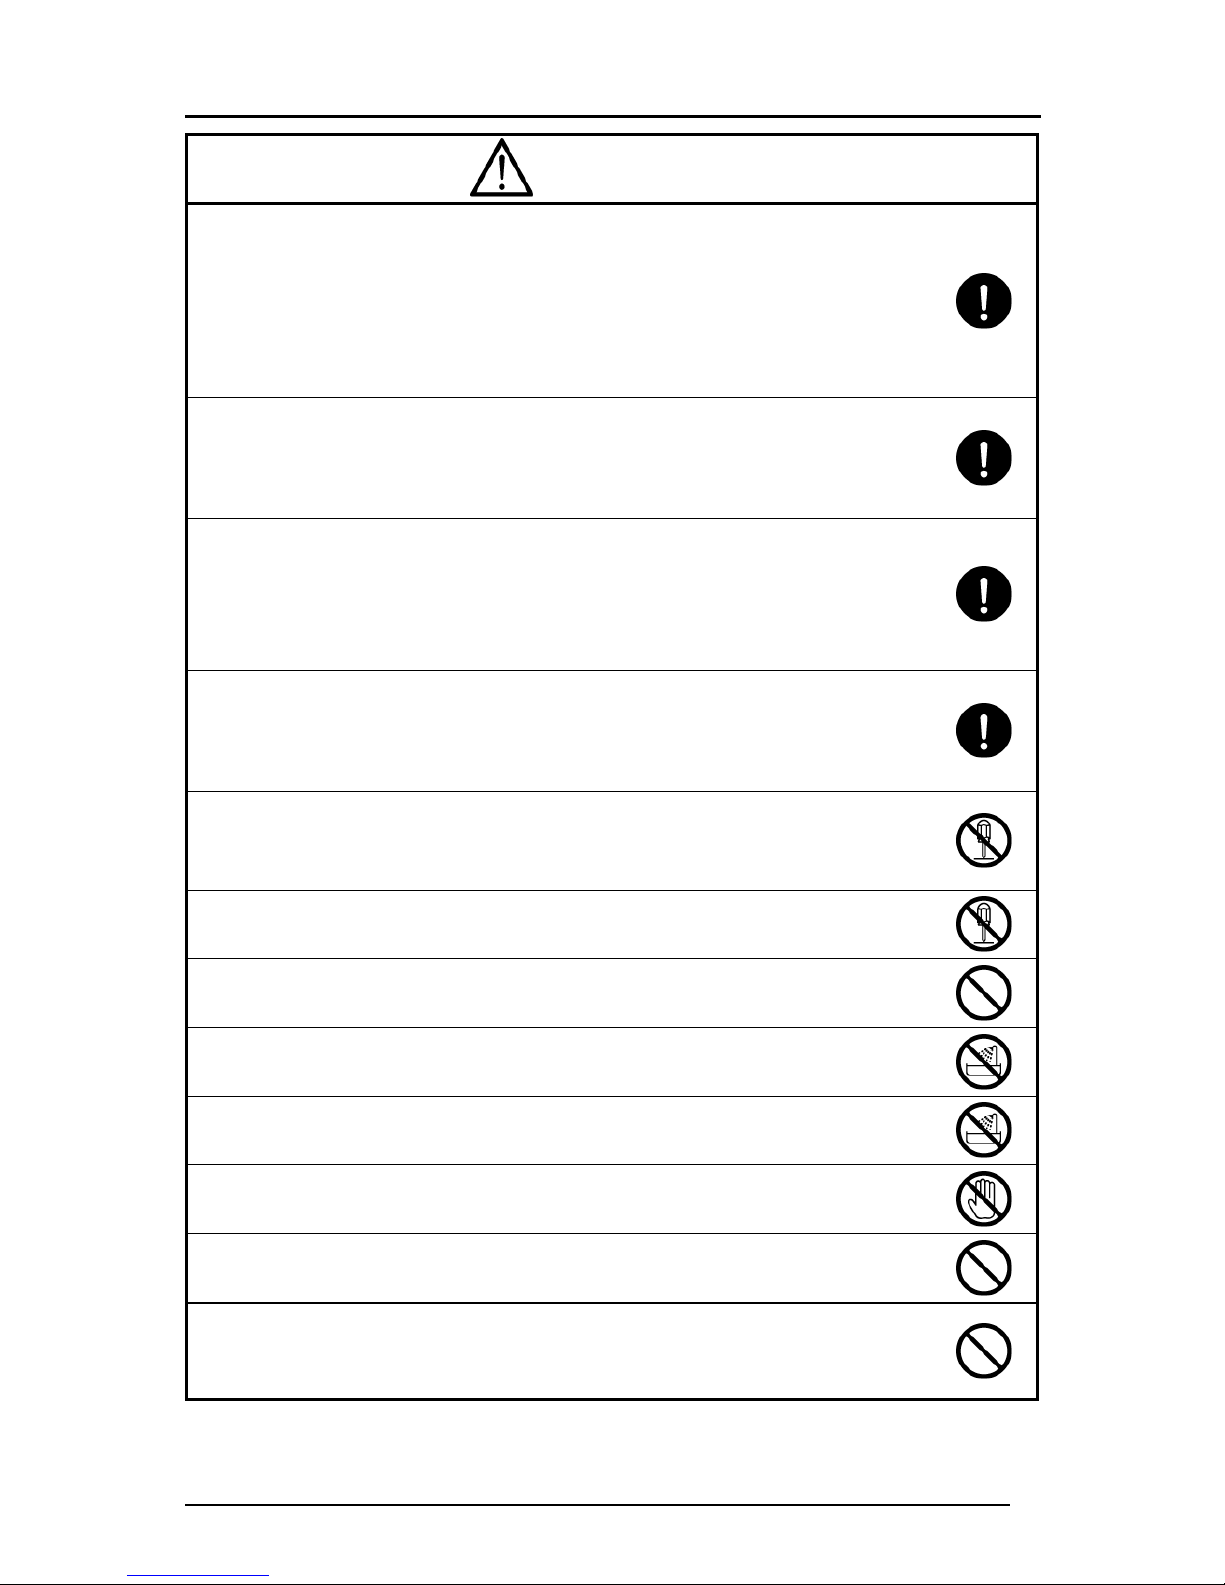
Symbols Used in this Manual
Name: Caution
Meaning: Indicates that the user must, without fail, pay careful attention to any sentences
or illustrations marked with a Caution symbol.
Name: Prohibited
Meaning: Indicates that the user must pay careful attention to any sentences or
illustrations marked with a Prohibited (do not do) symbol.
Name: Compulsory
Meaning: Indicates that the user must pay careful attention to any sentences or
illustrations marked with a Compulsory (must do) symbol.
Name: Do not use in a bathroom or shower cubicle
Meaning: Indicates that using the product in a bathroom or shower cubicle could result in
injuries through a fire or electric shock, and is strictly prohibited.
Name: Do not touch
Meaning: Indicates that touching the area could result in injuries through electric shock,
and is strictly prohibited.
Meaning: Do not disassemble
Meaning: Indicates that disassembling the product could result in injuries through electric
shock, and is strictly prohibited.
Page 5
5
Warning
If for any reason smoke comes out of the product, or you notice any unusual odors or
sounds, immediately turn off the power switch on the product and remove the batteries.
Then remove the wireless adapter from your computer.
Continuing to use the product in this condition could result in a fire or electric shock.
Check that smoke is no longer coming out of the product, and then contact your local
dealer to request maintenance. Do not attempt to service this product yourself.
If for any reason liquid is spilled into the product, immediately turn off the power switch
on the clicker and remove the batteries. Then remove the wireless adapter from your
computer and contact your local dealer immediately. Continuing to use the product in
this condition could result in a fire or electric shock.
If for any reason foreign objects enter the product, immediately turn off the power switch
on the clicker and remove the batteries. Then remove the wireless adapter from your
computer and contact your local dealer immediately. Continuing to use the product in
this condition could result in a fire or electric shock. (Be extra careful if there are
children in the area when using the product.)
If for any reason the product is dropped or damaged, turn off the power switch on the
clicker and remove the batteries. Then remove the wireless adapter from your computer
and contact your local dealer. Continuing to use the product in this condition could
result in a fire or electric shock.
Do not remove the cover from the product. Doing so may expose you to dangerous
voltage and could result in electric shock.
Contact your local dealer for any internal inspections, maintenance, or repair.
Do not remodel the product. This could result in a fire or electric shock.
Do not place the product on an uneven surface of unstable stand. It could fall or topple
over and result in an injury.
Do not spill water on the product. This could result in a fire or electric shock.
Do not use the product in a bathroom or shower cubicle. This could result in a fire or
electric shock.
Do not touch the product or the wireless adapter during a thunder storm. This could
result in an electric shock.
Do not place the product or the wireless adapter where someone can trip over it. This
could result in injury.
Do not drive a nail into, hammer or stamp on the product.
Otherwise the product may be damaged or deformed and shorted and result in leakage,
heat, smoke, explosion or fire.
Page 6

6
Warning
Do not apply any heavy impact to the product or throw it. Otherwise the product may be
damaged or deformed and shorted and result in leakage, heat, smoke, explosion or fire.
Do not use a battery that appears to be damaged or deformed in any way. This could
result in leakage, heat, smoke, explosion or fire.
Do not reverse the battery's polarity
(± reversed). Abnormal chemical reaction may
occur inside the battery which could result in leakage, heat, smoke, explosion or fire.
If any liquid from a battery leaks onto your skin or clothes, immediately flush the area
with clean water, without rubbing it, then seek medical attention right away.
Otherwise the liquid may harm your skin.
Keep parts of the product out of children's reach as there is a danger they could be
swallowed and cause bodily harm. If any of the parts are swallowed, consult a doctor
immediately.
Attention
Do not place the product in a damp or dusty location.
This could result in a fire or electric shock.
Do not place the product in a location where it could be exposed to smoke, steam, or
water droplets such as on a kitchen counter or near a humidifier. This could result in a
fire or electric shock.
If this product is not going to be used for a long time, take the batteries out of the
product. Otherwise it could result in fire.
Ask the dealer from where you purchased this product for regular maintenance. A
buildup of dust inside the product can cause fire or malfunction.
Do not put the product on an electromagnetic cooker or in a microwave oven or a
pressure cooker. The battery will be damaged and leakage, heat, smoke, explosion or
fire may occur.
Do not put the clicker, strap or other accessories into your mouth. It may harm your
health.
Do not swing the strap around with the clicker attached. The strap may be cut and the
clicker may hit someone causing injury or may damage an object in the vicinity.
Page 7

7
Usage precautions
■ About radio waves used by the clicker
The clicker uses radio waves on the 2.4 GHz band. When using the clicker, a radio station
license is not necessary. However, please note the following precautions.
Do not use the clicker near the following:
■ Microwave ovens or industrial, scientific or medical equipments, such as pacemakers
■ In-factory radio stations for mobile unit identification systems (radio stations that require a
license) used in production lines of factories.
■ Specified low power radio stations (radio stations that do not require a license)
■ IEEE802.11b/g/n wireless LAN devices
When the clicker is used near any of the equipment mentioned above, it is possible that
electric wave interference could occur.
When using the clickers, keep at least 20cm distance between the clickers.
Do not cover the upper part of the clicker with
your hand. The wireless connection with the
wireless adapter may be degraded.
In an environment where there are many
obstacles, the wireless connection with the
wireless adapter may be degraded.
■ About wireless equipment used on the 2.4 GHz band
This frequency bandwidth is the same as for industrial, scientific, and medical equipment such
as microwave ovens, mobile unit identification systems (radio stations that require a license)
used in factory production lines, and specified low-power radio stations (radio stations that do
not require a license).
■ Before using this product, check that there are no radio stations for mobile unit identification
systems or specified low-power radio stations nearby.
■ If this product emits radio waves which interfere with in-factory radio stations for mobile unit
identification systems, cease the use immediately and stop generating the radio waves. For
information on countermeasures, etc. (for example, erecting partitions), contact one of our
sales offices whose details are provided at the end of this manual.
■ If this unit emits radio waves which interfere with specified low-power radio stations used for
mobile unit identification systems, or causes similar problems, contact one of our sales offices
whose details are provided at the end of this manual.
Page 8

8
■Usage environment / Storage
・The clicker is designed for inside use. Outside use is not recommended.
・Do not place the clicker in any humid, dusty, salt bearing wind, or vibrating locations.
・Use the clicker product under the following environmental conditions:
Temperature: 0°C - 40°C (32°F - 104°F)
Humidity: 30% - 90% (No condensation)
・When storing the product, do not leave it under direct sunlight or by heaters. It may be
discolored, deformed, or damaged.
■Maintenance
・Perform cleaning of the clicker in a dry place. Make sure to remove the batteries before
cleaning.
・Use a soft, dry cloth for cleaning.
・To remove heavy dirt, moisten a soft cloth with diluted neutral detergent and wipe the
dirt after wringing the cloth.
・Do not use any volatile solvent such as thinner or benzene.
Page 9

9
CONTENTS
IMPORTANT SAFETY INSTRUCTIONS .............................................................................. 2
IMPORTANT SAFEGUARDS ............................................................................................... 4
Usage precautions .............................................................................................................. 7
Before Use ......................................................................................................................... 12
Main functions ................................................................................................................. 13
Supplied Items ................................................................................................................. 14
Part Names ..................................................................................................................... 15
Preparation ...................................................................................................................... 17
Remove an insulation sheet from the clicker ................................................................. 17
Replacing the batteries of the clicker ............................................................................ 18
Attach the clicker number sticker (if necessary) ............................................................ 18
Software installation ...................................................................................................... 19
Connecting the wireless adapter ................................................................................... 21
Launching Image Mate Accent for SRS......................................................................... 21
Database Selection ....................................................................................................... 22
About Image Mate Accent ................................................................................................. 23
Basic Screen ................................................................................................................... 23
Basic Screen Configuration ........................................................................................... 23
Various Operation Modes ................................................................................................ 24
Diagram of the modes ................................................................................................... 24
PC Annotation Mode ..................................................................................................... 25
PC Operation Mode ...................................................................................................... 25
Document Camera Mode .............................................................................................. 25
Whiteboard Mode .......................................................................................................... 25
Teaching Material Import Mode ..................................................................................... 26
Drawing Operation .......................................................................................................... 28
Drawing ......................................................................................................................... 28
Deleting ......................................................................................................................... 29
Recording a Lesson ...................................................................................................... 30
Operating the Document Camera ................................................................................. 32
Mask Function ............................................................................................................... 33
Highlight Function ......................................................................................................... 34
Scroll Function .............................................................................................................. 35
Using PowerPoint Support Function ............................................................................. 36
Setting the Pen .............................................................................................................. 37
List of Menu icons ......................................................................................................... 38
Using SRS .......................................................................................................................... 41
Page 10

10
Operation screen of SRS................................................................................................. 41
List of SRS operations ..................................................................................................... 42
List of SRS buttons ....................................................................................................... 42
List of clicker operations ................................................................................................ 48
Starting SRS .................................................................................................................... 49
From posing a question to close the question ................................................................. 51
Finishing SRS .................................................................................................................. 57
Group learning ................................................................................................................. 58
Review of the session...................................................................................................... 61
Giving an award............................................................................................................... 62
Utilizing the collected data ............................................................................................... 63
Using Result Display Software ........................................................................................ 63
Starting the software ...................................................................................................... 63
Displaying the Session report ........................................................................................ 64
Output the personal report ............................................................................................ 68
Saving in other formats ................................................................................................. 69
Various Settings ................................................................................................................ 70
Wireless setting for the clicker ......................................................................................... 70
Image Mate Accent for SRS Configurations .................................................................... 71
Starting the software ...................................................................................................... 71
Description of menu tabs ............................................................................................... 71
Settings ......................................................................................................................... 72
SRS Settings ................................................................................................................. 73
Software update ............................................................................................................ 75
About ............................................................................................................................. 76
SRS Data Settings ........................................................................................................... 77
Starting the software ...................................................................................................... 77
Check the connection .................................................................................................... 79
Battery level .................................................................................................................. 80
Clicker Information ........................................................................................................ 81
Register students information ........................................................................................ 82
Let’s take photos! .......................................................................................................... 83
Database Settings ........................................................................................................... 84
Create Database ........................................................................................................... 84
Select Database ............................................................................................................ 85
Edit profile of database .................................................................................................. 86
Adding or Changing the clicker ........................................................................................ 87
Other Function ................................................................................................................... 89
About LED ....................................................................................................................... 89
Page 11

11
Clicker ........................................................................................................................... 89
Wireless adapter ........................................................................................................... 90
Troubleshooting ................................................................................................................ 91
Specifications .................................................................................................................... 92
Product specifications...................................................................................................... 92
System Requirements ..................................................................................................... 93
Disclaimer ........................................................................................................................ 94
About Trademarks ........................................................................................................... 94
Repairable Period ............................................................................................................ 94
Page 12
12
Caution
Caution
Before Use
Thank you very much for purchasing Student Response System CRV-24/32/40 (SRS).
Please read this manual carefully to ensure proper use of SRS.
For the effective use of the questions and the collected data, please have your students
always use the same clicker by associating each of your students with the unique
serial number printed on the back of their clickers.
We recommend you to register the students to use SRS in advance.
All functions of SRS are controlled by Elmo’s Image Mate Accent for SRS.
Image Mate Accent for SRS is designed to allow you to operate SRS functions in addition to the Pen
Tablet functions, which are the basic features of Image Mate Accent (IMA).
※For details about the operations of the Pen Tablet, refer to the User’s Guide of ELMO Wireless Slate
/ Tablet.
※Functions of Image Mate Accent can also be used when a mouse is used instead of the Pen Tablet.
For details about the operation using a mouse, refer to〈About Image Mate Accent〉.
・When you use SRS with Elmo Pen Tablet CRA-1, the wireless settings
between the wireless adapter of SRS and the tablet need to be set up.
For details about the set up procedure, refer to the User’s Guide of ELMO
Wireless Slate/ Tablet.
・Do not use the wireless adapter supplied with the Pen Tablet. Use the wireless
adapter supplied with SRS.
・Firmware of the tablet may need to be upgraded.
For further information, contact the dealer from whom you have purchased
this product or one of our sales offices whose details are provided at the end
of this manual.
Please note that screens and figures used in this manual may differ from the actual
views.
N o t e
Page 13
13
Main functions
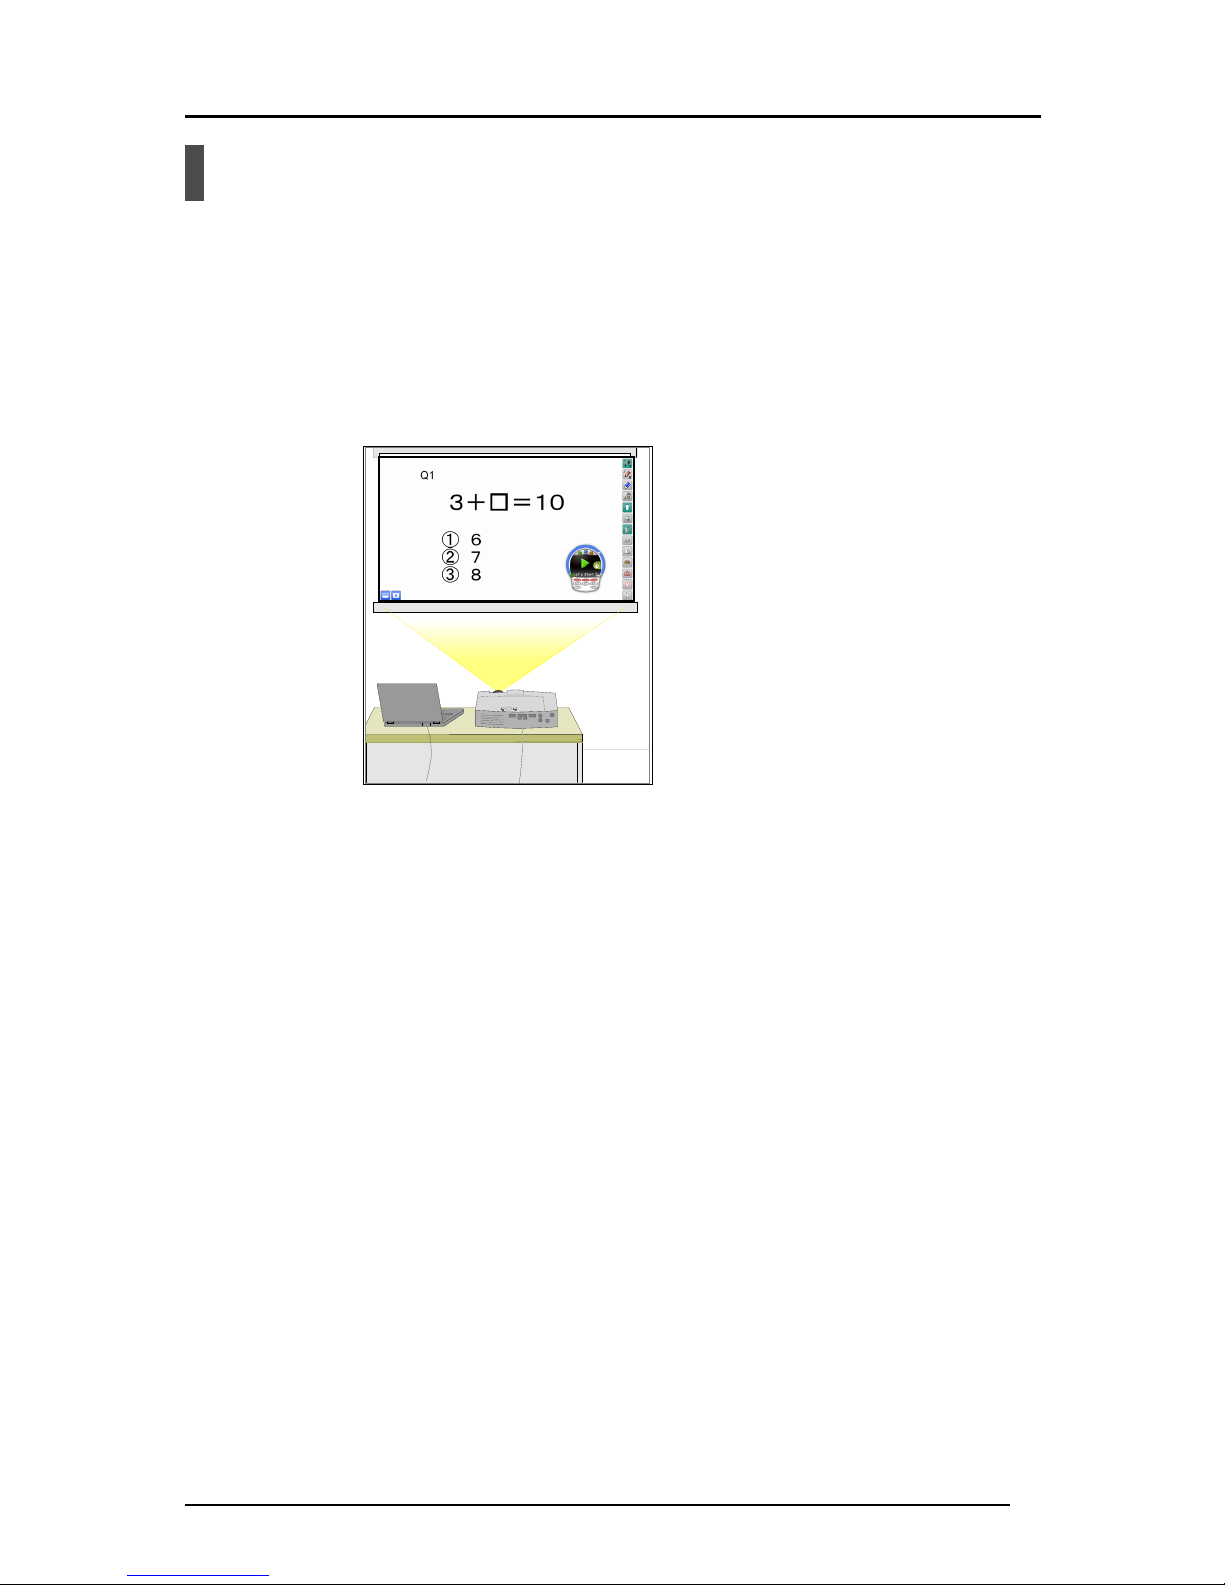
■Pose questions, collect responses and display the results.
With SRS, you can collect responses from all students in the class by using clickers.
Collected responses can be saved and displayed in graphs.
The overall proficiency of the class can be assessed with multiple-choice questions.
Majority Testing by Yes or No question can be easily performed.
■Utilize the collected data
The collected data is automatically stored on the users computer and can be converted to
standard formats. These standard files can be shared with other computers.
■Manage the clicker
You can add/ delete a clicker or display the battery level.
■Use with the Document Camera or the Pen Tablet
You can pose a question on the spot by using ELMO Document Camera or Pen Tablet (sold
separately) .
Page 14
14
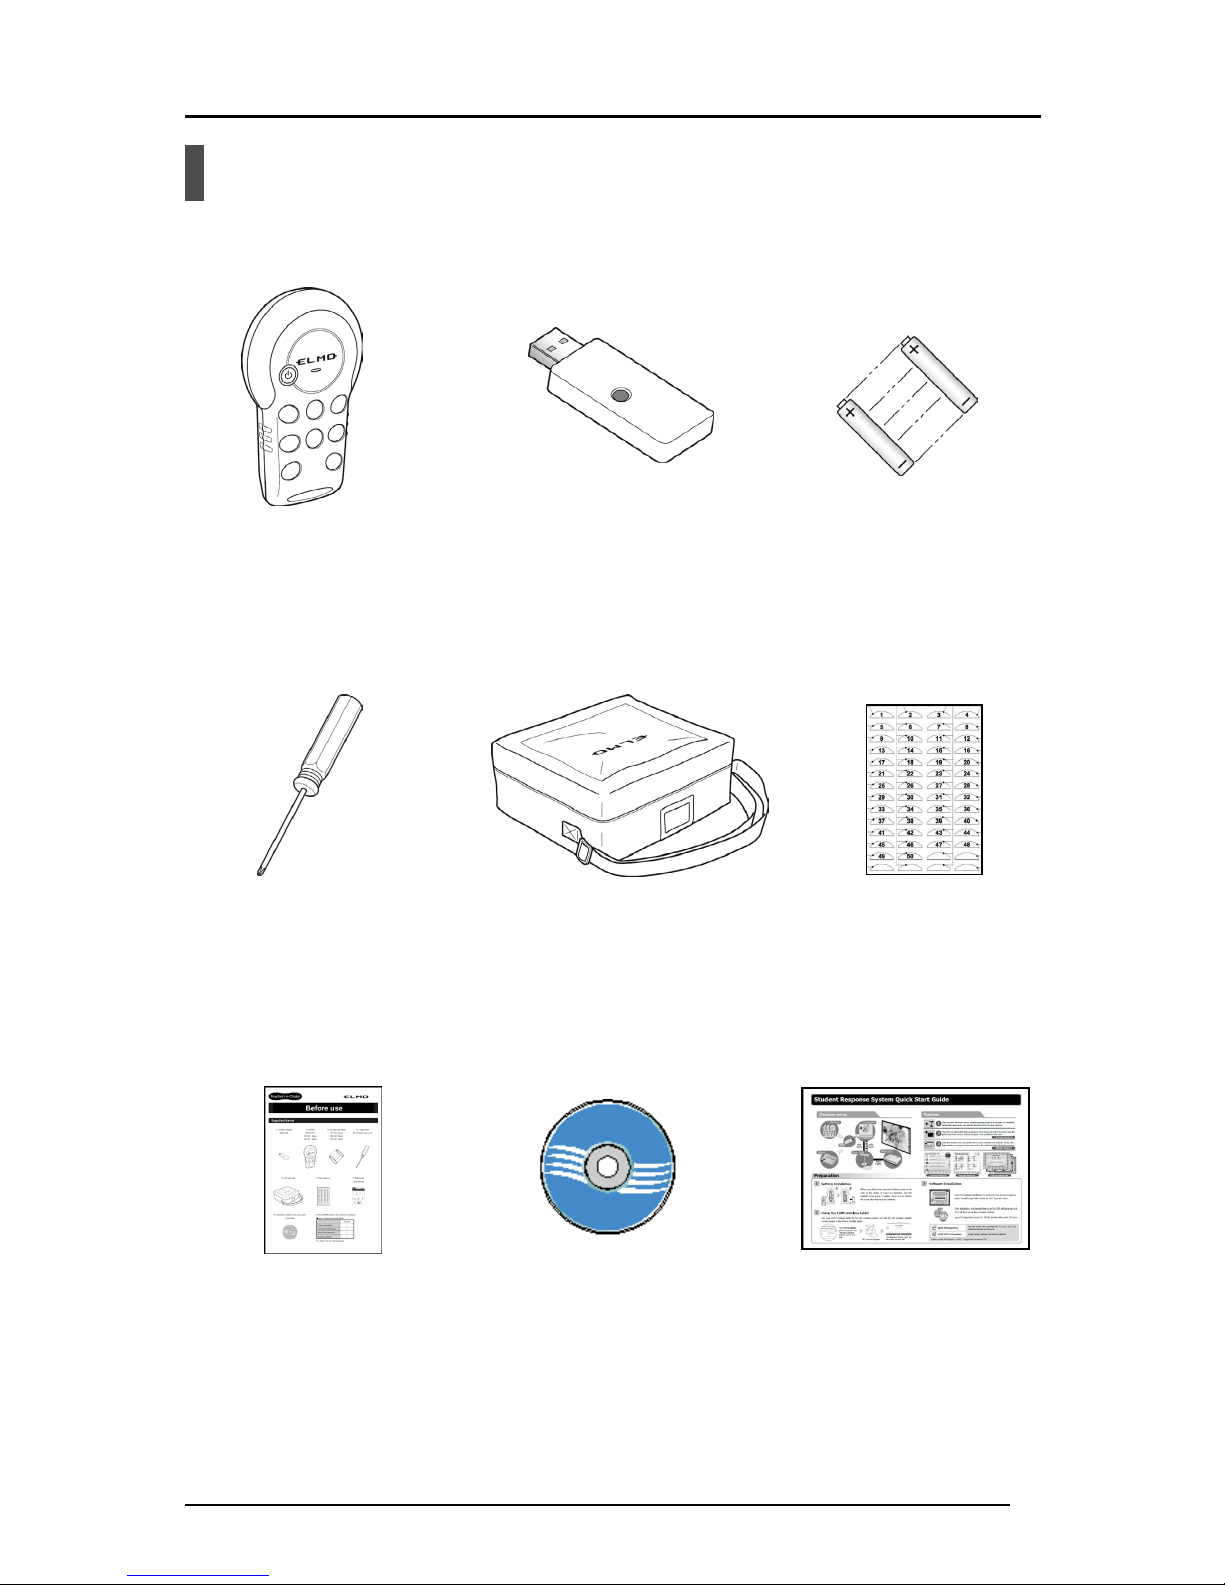
Supplied Items
Product's package has the following contents. Contact your dealer if any of the following
items are not included in the package you purchased.
Seal clicker no.
(Clicker number sticker sheet)
Wireless adapter
CRA-1R
Screw driver for M3
(For the back cover of the
clicker)
Carrying Case
Application software
(CD-ROM)
Before use
Quick Start Guide
Clicker: CRV-CK-1
CRV-24: 24pcs.
CRV-32: 32pcs.
CRV-40: 40pcs.
Dry cell AAA battery
(Included into the clicker)
CRV-24: 48pcs.
CRV-32: 64pcs.
CRV-40: 80pcs.
Page 15

15
Part Names
000000
000000
Power LED
Indicates the battery charge status.
The LED lights up when the clicker is turned on
and begins flashing when the battery level is low.
See〈
About LED
〉.
Power button
Turns ON / OFF the clicker.
Press this button for 3 seconds or longer to turn
OFF the clicker. See
〈Starting SRS〉.
Response button(1~6,T/F)
Students can respond to questions using 1(A)
~6(F) and T(Y)/F(N) buttons.
The last pressed button lights up or
flashes for 5seconds. See〈About LED〉.
Student number ( Clicker number )
By default, a sticker with a number from 1-24
( or 32/40) is attached.
Caution
The supplied clicker number
sticker can be attached.
Wireless setting button
Use this button when configuring the wireless
connection setting with the wireless adapter.
Open the battery box cover when performing
the configuration.
See 〈Wireless setting for the clicker〉.
Back
Battery box cover fixing screw
Use the supplied screw driver to tighten the
fixing screw.
Front
Battery box
Insert the alkaline dry cell AAA batteries. See
〈Replacing the batteries of the clicker〉.
Device ID
ID number of the clicker.
■
Clicker
Strap hole
For attachment of a commercially available strap.
Battery box cover
Use the fixing screw to open/close the cover.
Caution
Be careful not to lose it.
Only open when absolutely
necessary.
Page 16

16
Double zipper
The top of the bag opens 180 degrees.
Cable Storage Pocket
Storage for the RGB/USB composite cable
supplied with the separately sold Pen Tablet
or com
mercially available RGB cables or USB
cables.
Shoulder belt
The length can be adjusted.
Pen Tablet storage
Stores the Pen Tablet. It can be secured
with Velcro tape.
Accessory storage
Stores accessories such as the wireless
adapter and a screw driver.
Caution
Be careful not to lose the
accessories when you open
the zipper.
Inside
Clicker compartments
Stores clic
kers vertically as shown in the
picture.
Max.40pcs. of clickers can be stored.
Upper part of the clicker is slightly out of the
compartment for easier handling.
Caution
Store 1 clicker in each
compartment.
Outside
■
Carrying Case
Name holder
Name card and the like can be inserted.
Page 17

17
Caution
Preparation
Remove an insulation sheet from the clicker
An insulation sheet is inserted before shipping to avoid the battery exhaustion.
Remove the sheet before use for the first time
by following the below steps:
Remove the battery box cover on the back
of the clicker together with the fixing tape.
↓
Remove the insulation sheet while
pressing the batteries.
In case it is difficult to remove the cover with the tape, use the supplied screw driver to loosen
the battery box cover fixing screw.
Dispose of the tape and the insulation sheet after removal.
Make sure to attach the cover after removing the insulation sheet and tighten the fixing screw.
・Be careful when replacing the battery because it may pop out.
・The supplied dry cell battery is for an initial operation check. Its operating life
is not guaranteed.
Insulation
sheet
Page 18

18
Caution
Caution
Replacing the batteries of the clicker
Use the supplied screw driver to loosen
the battery box cover fixing screw.
Remove the battery box cover.
Make sure to attach the cover after
inserting the batteries and tighten the
fixing screw.
・Make sure that the polarity (+/-) of the dry cell battery is correct.
・Remove the dry cell battery if the clicker will not be used for a long time.
・Do not recharge or short-circuit the dry cell battery.
・Use an alkaline dry cell AAA battery. Do not use a rechargeable battery (such
as Ni-Cd).
・Replace the lid and tighten screw of the battery box after inserting the
batteries.
・Do not mix old and new batteries or ones of different types.
・When disposing of used batteries, follow the instructions from your local
government.
<Time for replacement of the batteries>
When the battery level is low, operational performance may be degraded. Replace the
batteries when the power LED begins to flash during power ON or after sending a
response.
・Be careful when replacing the battery because it may pop out.
・Replace the batteries at least once a year.
Attach the clicker number sticker (if necessary)
Attach the clicker number sticker supplied with this product.
When using a blank sticker, write a desired number on it.
By default, a sticker with a number from 1-24( or 32/40) is attached.
N o t e
Clicker number
sticker
Alkarine dry
cell AAA
batteries
Page 19

19
Caution
Software installation
All functions of SRS are controlled by Image Mate Accent for SRS.
Install the software before initial use of the SRS.
For details about the installation procedure, refer to “Before use” and the following
instructions:
■Windows
①
Insert the supplied CD-ROM to the CD-ROM Drive of your computer.
② Select “Install Image Mate Accent for SRS” in the menu.
Depending on your computer, the menu may not appear automatically.
In that case, open the drive where the supplied CD-
ROM is inserted from My
Computer and double-click “startup.exe” in the Win folder.
③
Follow the displayed instructions to install.
④
When the software is successfully installed, “Image Mate Accent for SRS” icon appears on
the desktop.
Page 20

20
Caution
■Macintosh(Mac)
① Insert the supplied CD-ROM to the CD-ROM Drive of your computer.
② Select “Mac” in the CD-ROM. Then run “ELMO_IMAforSRS.dmg”.
③ The launcher is displayed.
④ Run “ImageMateAccentforSRS ”.
⑤ Follow the displayed instructions to install.
⑥ Run “ELMOUSBDriver_1.0.0.pkg ”.
⑦ Follow the displayed instructions to install.
Depending on your computer, you may be asked to restart the computer. In that
case, press “YES” to restart the computer.
Page 21

21
Connecting the wireless adapter
Connect the supplied wireless adapter to your computer’s
USB port.
Launching Image Mate Accent for SRS
Launch Image Mate Accent for SRS launcher by double-clicking the shortcut icon created on
the desktop of your computer.
The SRS icon cannot be selected when the wireless adapter that supports SRS is not
connected.
The SRS control panel can also be displayed from the SRS icon in the IMA menu icon.
N o t e
SRS launcher
SRS icon:
To display the SRS control panel.
Select this icon to start SRS right
away.
PC Annotation mode icon:
To display menu icons when IMA is
started in the PC Drawing mode.
Select this icon to prepare
questions.
Page 22

22
Database Selection
In case there are several databases, a database selection window appears when the PC
Annotation mode icon or the SRS icon is selected for the first time after starting the Image
Mate Accent for SRS. In that case, please select the database to use.
Selected database turns to red. Press [OK] to confirm the database.
The software enters the PC Annotation mode or the SRS mode.
The database set as default database through “Select Database” is displayed in red first.
See〈
Database Settings〉.
N o t e
Page 23

23
About Image Mate Accent
In this section, you will learn various operation modes of Image Mate Accent (IMA) that can be
used through Image Mate Accent for SRS and how to draw lines with mouse.
Basic Screen
Basic Screen Configuration
This section describes the basic configuration of the screen that is displayed when using the
SRS.
■Startup screen of the SRS software (Image Mate Accent for SRS)
① SRS control panel
From this window, you can operate SRS.
See
〈
List of SRS operations
〉
.
② Drawing area
This area is for displaying the Document Camera image and
drawing. The entire monitor is the drawing area.
③ Drawing menu area
You can select the pen to use for drawing, or delete all drawings.
See
〈
List of Menu icons
〉
.
④ Menu area
These buttons are for configuration or operation of the Document
Camera. See
〈List of Menu icons〉.
⑤ Sub Menu area
These buttons are for advanced operations.
The buttons to be displayed varies depending on the mode.
See〈
List of Menu icons
〉
.
③
②
①
④
⑤
Page 24

24
Various Operation Modes
This section describes various operation modes of Image Mate Accent.
Diagram of the modes
As shown above, the basic operations (drawing, deleting and recording) are performed for the
Document Camera image in "Document Camera mode", for the background image in
"Whiteboard mode", and for an already-created teaching material in "Teaching Material Import
mode".
Computer operations or displaying the SRS control panel can be possible from any of these
modes.
Document Camera mode
Background image
Image of created teaching material
Screen
capture
Teaching Material Import
mode
Document Camera image
Basic operations
Drawing
Deleting
Recording
Background
image selection
Document Camera
image display
PC Annotation m
ode
Computer operations
Teaching material selection
(Thumbnail display)
Teaching Material selection
(Thumbnail display)
Page 25

25
PC Annotation Mode
In the PC Annotation mode, you can draw over the computer screen or save the drawing as a
picture. Click
to enter the PC Annotation mode.
PC Operation Mode
In the PC Operation mode, you can operate your computer. This mode is used to change the
background for the PC Annotation mode or pose questions with SRS.
Click
to enter the PC Operation mode.
Document Camera Mode
In Document Camera mode, you can draw on the Document Camera image or save the
drawing as a picture.
Click
to enter the Document Camera mode.
Whiteboard Mode
In the Whiteboard mode, you can set a whiteboard image as the background and draw over it
or save the drawing as a picture.
Click
to enter the Whiteboard mode.
Page 26

26
Teaching Material Import Mode
In the Teaching Material Import mode, you can view pictures that you have recorded in
advance. Click
to enter the Teaching Material Import mode.
■Selecting Pictures
Select a picture that you want to view from the list of saved pictures.
Pictures are displayed in order of last updated date.
Page
Any picture that cannot be displayed in a single screen will be
displayed in the next page(s).
Enable Filter
To enable the filter.
Filter Setting
To filter the pictures to be displayed.
The pictures created between the start date and the end date
are displayed.
(Drop-down list)
To select the file format of the picture.
Home
To display all the pictures in Teaching Materials screen.
Favorite
To display the pictures set as Favorite in Teaching Materials
screen.
Background
To display the pictures to be used as background.
Deletion
To delete the selected pictures.
The deleted pictures are moved to the Recycle Bin of the OS.
Cancel
To cancel the Teaching Material selection and returns to the
previous mode.
Background Shortcuts
To register up to 4 background pictures to the menu of
IMA as shortcuts.
Background Shortcuts Display
button
To show/hide the background shortcuts (1-4).
This button appears on the right bottom of the screen
only when the Background button is pressed.
Page 27

27
■ Setting a picture as Favorite
Drag & drop a picture to from the Teaching Materials screen.
■ Setting a picture as Background
Drag& drop a picture to
from the Teaching Materials screen.
■ Register the background shortcuts
Press the Background button
to show a list of background pictures.
Press the Background Shortcuts Display button
to show the background shortcuts 1 -4.
Drag& drop a picture that you want to set as background to the shortcut area of desired
number (1-4).
A background picture registered to the background shortcut is displayed at the first of the
list of the background pictures with a shortcut number. The registered background picture
can be overwritten by another picture by drag and drop.
The software enters the Whiteboard mode after the cancel button is pressed and the newly
registered background shortcut icon flashes for a certain period of time.(Menu Icon List)
To remove the shortcut, drag and drop the picture from the background shortcut area to the
list of background pictures or to
.
Drag and drop from the background shortcut area to
does not delete the original
background files in your computer.
■ Deleting a picture
Drag and drop a picture to from the Teaching Materials screen or click after
selecting a picture from the Teaching Materials screen.
N o t e
To display the background
shortcuts.
Background shortcut area
Delete
The shortcut number
Page 28

28
Drawing Operation
This section describes how to draw lines with mouse.
Drawing
➊
Select the desired pen icon or in the menu on the top right of the
screen.
Select to draw a red line, and select to draw a black line.
The initial setting is “pencil (red)” for Pen1 and “pencil (black)” for Pen2.
The pen types and the line types can be changed in the pen settings. See〈Setting the Pen〉.
➋
Draw lines by moving a mouse while pressing the left button of the
mouse.
N o t e
Page 29
29
Caution
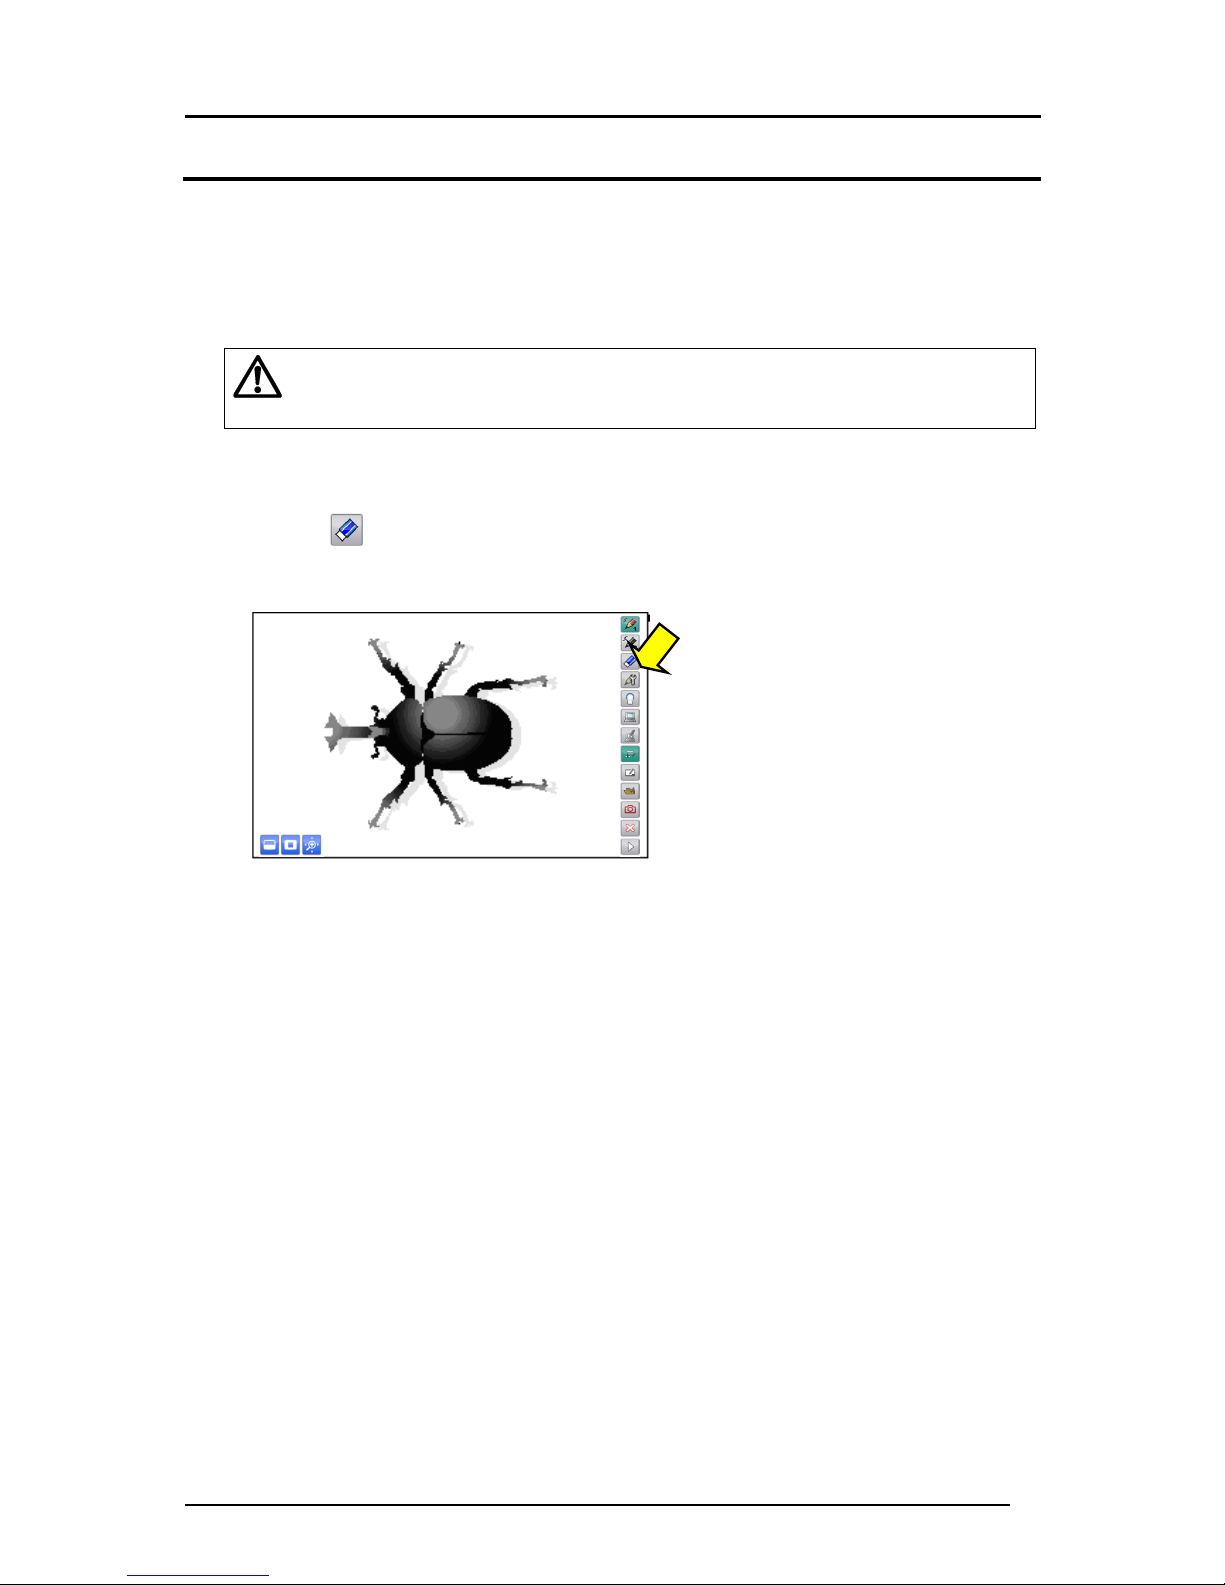
Deleting
■Partial deletion
If you only want to delete part of a drawing, align the cursor with the area
that you want to delete, and move the mouse while pressing the right
button of the mouse.
You cannot partially delete a line that was drawn continuously.
■Delete all
Select to delete all the lines on a screen.
Page 30

30
Caution
Recording a Lesson
■ Saving a picture
➊
Display the image that you want to save as a picture.
➋
Select
to save the picture.
・
For information on how to check the saved picture, see〈Selecting Pictures〉.
Page 31

31
■
Recording a video
➊
Display the image that you want to record as a video.
➋
Select
on the main menu.
The Recording Setting window appears. The recording format can be selected between High
(H.264) and Standard (MJPG).
An interval recording system is used for the recording. The recording interval can be set from
1 second to 24 hours.
➌
Select the recording start button in the Recording Setting window to
start the recording.
➍
Select the recording stop button to stop the recording.
To stop the recording, select the recording button in the menu and click the recording
stop button
. The recording indicator disappears.
Recording Setting window
Recording format setting
Recording stop
button
Recording
indicator
Hard disk
remaining space
Recording time
Recording start
button
Page 32

32
Operating the Document Camera
Operate the Document Camera by touching
,
and
on the main menu.
The presented Document Camera image can be paused by clicking
and flipped vertically
by clicking
.
Zoom In/Out
To control the zoom level of the Document Camera.
Auto Focus
To focus the Document Camera automatically.
Brightness
Up/Down
To adjust the brightness of the Document Camera.
Pause
To pause the Document Camera image.
Image flip
To flip vertically the Document Camera image.
The image flip icon can be shown by moving to the next page of the menu with
.
N o t e
Document Camera operation buttons
Page 33

33
Mask Function
The mask hides part of or whole Document Camera image that is displayed.
By temporarily hiding part of the image that you do not want to show while asking questions or
giving explanation, your lessons will become more effective.
Select
on the sub menu.
The entire screen is masked. Adjust the size of the mask by dragging it.
When the mouse cursor reaches the edge of the screen, it will not go further.
In that case, release the mouse cursor and restart the dragging from the upper position.
The mask size can be changed from 100 x 100 pixels to the size of the screen.
The darkness of the mask can be adjusted with
and .
The darkness of the mask increases when
is pressed.
The darkness of the mask decreases when
is pressed.
To cancel the mask, touch
on the sub menu again.
Page 34

34
Highlight Function
The highlight function brings attention to a part of the Document Camera image.
By highlighting only the area you want to bring to attention, your lessons will become more
effective.
Select
on the sub menu.
The highlighted area is displayed on the screen. Drag the highlighted area to move it.
You can change the size of the highlighted area by dragging the non-highlighted area.
The highlight size can be changed from 100 x 100 pixels to the size 300 pixels smaller than
the screen size.
The darkness of the non-highlighted area can be adjusted with
and .
The darkness of the non-highlighted area increases when
is pressed.
The darkness of the non-highlighted area decreases when
is pressed.
To cancel the highlight, select on the sub menu again.
Page 35

35
Scroll Function
The scroll function enlarges the Document Camera image.
By temporarily enlarging a small part and moving the image with the pen, your lessons will
become more effective.
Select on the sub menu.
An electronically magnified image is displayed on the screen. Drag the image to move it.
To cancel the scroll, select
on the sub menu again.
The scroll function cannot be operated in the PC Annotation mode.
N o t e
Page 36

36
Using PowerPoint Support Function
Start PowerPoint while the Image Mate Accent for SRS is running.
Start slideshow in PowerPoint. Then set the Image Mate Accent for SRS to the PC Annotation
mode or the SRS mode.
The PowerPoint Support icon appears in the bottom left of the screen.
You can move to the previous page by pressing
or to the next page by pressing .
The PowerPoint Support function does not support PowerPoint Viewer.
N o t e
PowerPoint Support icon
Page 37

37
Setting the Pen
➊
Select to display the pen settings.
Pen 1 / Pen 2
To select the pen that you want to configure.
/
Pencil / Marker
To select a type for the selected pen.
Pencil
Draw a line with the set line thickness.
Marker Draw a line with the set line thickness.
The colors are displayed semi-transparently.
Color button
To configure the color for the selected pen.
/ / /
Line type
To select a line type for annotations.
Free-hand Draw a free-hand line.
Straight Draw a straight line.
Square Draw a square shape.
Circle Draw a circle.
/ / / /
Pen thickness
To configure the thickness for the selected pen.
➋
Select the pen type, color and pen thickness for pen 1 or pen 2, and then
select OK.
Page 38

38
List of Menu icons
Pen 1
To select pen 1.
The initial setting is a red pencil. You
can change the
settings for this pen in "Pen Settings".
Pen 2
To select pen 2.
The initial setting is a black pencil.
You can change the
settings for this pen in "Pen Settings".
Delete all
To delete all the lines that are drawn on the screen.
If you only want to delete part of a drawing, align the cursor
with the area that you want to delete, and move the mouse
while pressing the right button of the mouse. See〈Partial
deletion〉.
Pen settings
To display the settings for pen 1 and pen 2.
See〈Setting the Pen〉for more details.
SRS mode
To enter the SRS mode.
PC Operation mode
To enter the PC Operation mode.
PC Annotation mode
To enter the PC Annotation mode.
Document Camera mode
To enter the Document Camera mode.
Whiteboard mode
To enter the Whiteboard mode.
Teaching Material Import
mode
To enter the Teaching Material Import mode.
Capture
To save the currently displayed contents as a picture.
Elements such as the Document Camera image that is
displayed on the background, the background image and
the drawn lines are recorded, but elements such as the
buttons and cursor are not recorded.
The pictures can be displayed in "
Teaching Material
Import mode".
Quit
To quit the software (Image Mate Accent for SRS)
Next
Displayed when the whole menu cannot be displayed on
one screen. Use this button to go to the next menu.
When the final menu is displayed, touch this button to
return to the first menu.
Page 39

39
Caution
Undo
To redo the last editing operation (such as drawing with the
pen or deleting with the eraser).
There is a limit on the
number of operations that can be undone.
Select
To change the pen to a pointer.
Record
To record the contents displayed on the screen as a video.
An interval recording system is used for the recording. The
recording interval can be set.
The background image such as the Document Camera
image and the drawn lines can be recorded.
Buttons and the cursor cannot be recorded.
Image Flip
To flip vertically the Document Camera image.
Zoom In/Out
To control the zoom level of the Document Camera.
Auto Focus
To adjust the focus of
the Document Camera
automatically.
Brightness
Up/Down
To adjust the brightness of the Document Camera.
Pause
To pause the Document Camera image.
Background Shortcuts
To display the registered background shortcuts.
4 background pictures which were registered in the
Teaching Material Import mode can be saved as shortcuts.
The favorite pictures are registered by default.
Change as you prefer.
Last used background
To display the last used background.
Mask
To hide part of or whole Document Camera image that is
displayed. You can move the masked area by dragging it.
In one operation, you can only move the mask up or down
or to the left or right. When the mouse cursor reaches the
edge of the screen, it will not go further. In that case,
release the mouse cursor and restart the dragging from the
upper position
Page 40

40
Caution
Highlight
To bring attention to a part of the Document Camera
image. You can move the highlighted area by dragging it.
In expert mode, you can change the size of the highlighted
area by dragging the non-highlighted area.
Scroll
To digitally enlarge the Document Camera image.
Use it to enlarge the area that is too small.
This is different from the zoom function of the
Document Camera.
PowerPoint Support
Previous page / Next page
To operate the PowerPoint without entering the PC
Operation mode.
You can move between pages of PowerPoint from the PC
Annotation mode.
Page 41

41
Using SRS
Operation screen of SRS
Operations such as posing questions, giving answers and displaying the results are
performed from the SRS control panel.
SRS control panel
Buttons
SRS icon
SRS Setting Menu
Buttons
IMA menu icon
IMA sub menu icon
Page 42

42
List of SRS operations
List of SRS buttons
Following command buttons in the SRS control panel are used to pose questions or display
the results.
■Before Testing(The color of the SRS control panel turns to blue.)
(Starting screen)
Menu button Name Function
Power
To start SRS.
Start Testing
To start receiving responses.
Group settings
To display the Group settings.
You can show the results by groups by
grouping clickers in advance.
See〈
Group learning
〉.
Countdown Timer
To display the Countdown Timer.
See〈Countdown Timer screen〉.
Answer Options
To display the answer options currently
available in red. (The drawing shows an
example of 6-choice question).
The current setting for the question type
(2-6 choice, True (Yes)/ False (No)) can be
changed using these buttons.
Menu
To display the setting menu. (To hide the
setting menu when the setting menu is on
display.) See〈Setting menu
〉
.
Iconize
To iconize the SRS control panel. Click the
icon
to return to the SRS control panel.
Group settings button
Iconize button
Countdown Timer button
Menu button
Answer Options button
Start Te s ti n g button
Power button
Page 43

43
(Countdown Timer screen)
Menu button Name Function
Start Testing
To start receiving responses.
The Countdown Timer starts automatically
at the same time.
Countdown Timer
To display the set time.
(The drawing shows an example when the
timer is set to 1 min.)
Increase /
Decrease
To increase or decrease the amount
of the time on the Countdown Timer.
The Minute/ Second selection button is
used to change the set time.
When “Minute” is selected, the set time can
be changed in increments of 1 min. When
“Second” is selected, the set time can be
changed in increments of 10 sec.
The set time can also be changed when the
Countdown Timer is in operation.
Minute/ Second
selection
To switch the minute and the second
when performing the Countdown Timer
setting. The selected icon turns to green.
(The drawing shows an example when
“Second” is selected.)
The set time can be changed using the
Increase/ Decrease button.
Close
To close the Countdown Timer to return to
the Starting screen.
Minute/ Second selection
button
Countdown Timer
Close button
Increase / Decrease button
Start Testing button
Page 44

44
■Testing is Open(The color of the SRS control panel turns to green.)
(Open Testing screen)
Menu button Name Function
Number of
responses
To display the number of clickers
responded.
By selecting this button, the unanswered
clickers can be displayed.
Close Testing
To close Testing. The results are saved as
a file.
Start Testing
To cancel the current Testing and return to
the “Before Testing” status.
Number of responses
Close Testing button
Start Testing button
Page 45

45
(Countdown Timer screen)
Menu button Name Function
Pause
To pause the Countdown Timer.
When this button is selected, the screen
changes to “Start Testing”.
Select the “Start Testing” button to restart
the countdown.
Increase/
Decrease
To increase or decrease the
amount of the time on the Countdown
Timer.
The Minute/ Second selection button is
used to change the set time.
When “Minute” is selected, the set time can
be changed in increments of 1 min. When
“Second” is selected, the set time can be
changed in increments of 10 sec.
The set time can also be changed when the
Countdown Timer is in operation.
Minute/ Second
selection
To switch the minute and the second
when performing the Countdown Timer
setting. The selected icon turns to green.
(The drawing shows an example when
“Second” is selected.)
The set time can be changed using the
Increase/ Decrease button.
Close
To close the Countdown Timer to return to
the Open Testing screen.
It is not possible to return to the Countdown
Timer screen from the Open Testing
screen.
N o t e
Pause button
Minute/ Second selection
button
Countdown Timer
Close button
Increase / Decrease button
Page 46

46
■Displaying the results(The color of the SRS control panel turns to blue.)
(Results screen)
Menu button Name Function
Display Results
To display the results by clicker.
Return to the question screen when the
results are displayed.
Display Group
Results
To display the results by group.
This function is activated when the group
setting is set. See〈Group learning〉.
Speed Ranking
To display the response time by clicker
(Speed ranking). See〈Speed Ranking〉.
Return to the question screen when the
speed ranking is displayed.
Response
To select a correct answer.
The color of the selected button turns to
green.
(The drawing shows an example when
[2/B] is selected.)
Start Testing
To return to the Starting screen.
Start Testing button
Response buttons
Display Results button
Display Group Results
button
Speed Ranking button
Page 47

47
■Setting menu
Select the menu button before posing a question.
Menu button Name Function
Review
To display (review) the questions and the
results in the session.
See〈Review of the session〉.
Award
To display the Award screen. You can give
awards to students who have performed
well. See〈Giving an award〉.
Report
To run the reporting software “SRS
Reporting” in order to display the results or
configure the clicker settings. See〈Utilizing
the collected data〉.
Settings
To run the configuration software “SRS
Configurations” in order to configure the
operation of the software. See〈Image Mate
Accent for SRS Configurations〉.
Award button
Review button
Report button
Settings button
Menu button
Page 48

48
List of clicker operations
These buttons are used to respond to the questions or cast a vote.
For details about the status of LED, refer to〈About LED〉.
Button Name Function
Power button
To turn ON/OFF the clicker.
The power LED
lights up when the clicker is turned on.
Press the button for 3 seconds or more to turn
off the clicker.
Power LED
The LED lights up when the clicker is turned
on.
When the battery level is low, LED flashes
for 5 seconds after the clicker is turned on
and during the wireless connection.
1/A ~ 6/F
Response button
To select answers.
Selected button flashes for max.7 seconds
when sending a response and lights up for
5 seconds if the response is successfully
accepted. (It flashes for another 5 seconds
if the response is not accepted.)
Yes o
r No
Response button
N o t e
Page 49

49
Starting SRS
SRS can be started either from the respective modes in Image Mate Accent for SRS or by
launching the application from your computer screen.
Refer to 〈About Image Mate Accent〉 for details about modes and operations other than SRS
functions.
➊
Display the SRS control panel.
Press the SRS icon to display the SRS control panel.
If no clickers are registered to the wireless adapter, the SRS icon will not display.
N o t e
N o t e
SRS control panel
SRS icon
Page 50

50
➋
Turn on the clicker.
Press Power button to turn on the clicker. The power LED
lights up and the clicker attempts to establish the wireless
connection with your computer.
When the battery level is low, the power LED flashes for 5 seconds.
In that case, replace with new batteries.
The clicker automatically enters standby status when there is no wireless communication.
(Pressing any button will resume the operation.)
After a certain period of time has elapsed in standby status, the power automatically goes off.
The time to power off can be changed with〈Image Mate Accent for SRS Configurations〉.
Default setting is 300 seconds.
N o t e
Page 51

51
From posing a question to close the question
Pose a question using the Document camera or your computer screen. Then open Testing by
selecting the Start Testing button in the SRS control panel or one of “[2]~[6],[T/F]” buttons in
the Response Sub Buttons.
The entire process from starting Image Mate Accent for SRS to finishing it is called “session” and the
results of each session are saved.
➊
Pose a question.
Pose a question using the Document camera or your computer screen.
You can use the annotation function when the system is not in the “Testing is Open” status.
➋
Open Testing to receive responses from clickers.
When “Start Testing” button is selected, Testing starts with current question type. (Default
setting: 3-choice question).
The question type can be changed using the Response buttons ([2]~[6],[T/F]) before
pressing the “Start Testing” button.
E.g.) When [3]
is selected, the question type becomes 3-choice question and the
color of [1] – [3] buttons turns to red.
The color of the SRS control panel turns to green when Testing is started.
The question type remains the same until SRS is finished. The setting becomes the default of the
question when starting SRS can be changed from〈Image Mate Accent for SRS Configurations〉.
N o t e
N o t e
N o t e
Start
Tes t in g
(When the Countdown Timer is used)
Page 52

52
Caution
➌
Respond to the question by using the Response buttons on the clicker.
Respond to the question by pressing the Response buttons on the clicker. Selected button
flashes for max.7 seconds when sending a response and lights up for 5 seconds if the
response is successfully accepted.
If flashing Response button LED goes off in less than 12 seconds, the response
is not accepted. Retry by pressing the Response button again after the LED is off.
If a button that is not in the options is pressed, such response is not included in
the number of responses.
As long as the Testing is open, students can resubmit their responses by pressing the Response
button again after the LED is off.
When the battery level is low, the power LED flashes for 5 seconds. In that case, replace the
batteries with new ones.
The SRS control panel can be iconized with the Iconize button.
Click the icon to return to the SRS control panel.
By using the Countdown Timer, you can show the
remaining time.
To use the Countdown Timer, display the Countdown Timer before starting Testing and start Testing
from the Countdown Timer screen.
The set time can be changed while the Countdown Timer is in operation.
N o t e
N o t e
Press one of
these buttons to
answer.
The number of
clickers responded.
By selecting this
button, unanswered
clickers can be
displayed.
The remaining time
(sec.) is displayed.
(When the Countdown Timer
is used)
Iconize button
(When iconized)
By selecting this
button, the icon
returns to the SRS
control panel.
Page 53

53
Check the number of clickers responded.
When the Number of responses is selected, the Unanswered Clickers screen is displayed to
check the clickers that did not respond to the question.
Also, you can configure the “Answer in place of the student” or “Absent” settings.
■Response Operation Window
Menu button Name Function
Absent button
Register/delete as an absentee.
The “Absent” mark appears next to the
clicker number when registered.
The Response buttons are deactivated
when the clicker with the “Absent” mark
is selected.
Response
buttons
You can answer the question in place of the
student by selecting the number.
When you answer the question in place of
the student, the relevant clicker number is
removed from the list.
You cannot modify the answer once you did
it.
N o t e
N o t e
Unanswered Clickers
screen.
When the student answered
or you answered in place of
the student, the relevant
clicker number is removed
The number of
unanswered clickers is
displayed (or cleared).
Clear Unanswered
Clickers screen.
The clicker number (Student number)
and the nickname (if registered) are
displayed.
When this is selected, the Response
Operation Window is displayed.
(When “Absent” is
registered)
Page 54

54
➍
Close Testing.
Close Testing with the Close Testing button .
The color of the SRS control panel changes to blue.
You can annotate on the screen using annotation
functions after Testing is closed.
➎
Display the results.
The overall results can be displayed in graph with the Display Graph button . Answer
options and the number of responses are displayed.
Show a correct answer by pressing
the Response button. The color of the selected button
changes to green and the percentage of correct answers (Accuracy) is displayed.
Each time the Results display button is pressed, the screen switches between the question screen and
the results screen. When the group setting is set, the results by group can be displayed. See〈Group
learning〉.
N o t e
N o t e
Close Te s ti ng
Selects the correct answer.
The selected answer turns to
green. Select the correct
answer again to release it.
The number of
students answered
correctly is displayed.
Displays the
Speed Ranking.
Student
information
display button
Pie chart display
button
Results display
button
When selected, numbers of
the responded clickers are
displayed.
The number of responses
for each option is displayed.
Displays the
Group results.
Switches the
screen between
the question
screen and the
results screen.
Bar graph display
button
The number of responses
is displayed.
Accuracy
Close button
Shrink Window button
Page 55

55
■Shrink the results screen
When the Shrink Window button is selected, the results are displayed as a window at the
bottom left corner over the question screen.
The results window can be moved freely by dragging it.
When the Full-screen button is selected, the results are displayed in full screen.
Press the Close button to close the results display.
Question screen
Results display window
Full screen button
Close button
Page 56

56
Caution
■Speed Ranking
Response time varies depending on the wireless condition between the clicker and the
wireless adapter.
➏
Finish the question.
You can pose next question by pressing the Start Testing button . The SRS control panel
returns to the default status.
The results and the screen (including the drawing) are automatically saved.
N o t e
Response time is displayed.
Select the number of students to be
displayed at a time (Top 5/ 10/ 15/ 20).
The drawing shows an example when
Top 5 is selected.
A scroll bar appears when all information
cannot be displayed at a time.
Switches the display range between “All”
and “Only correct answers”.
The drawing shows an example when
“All” is selected.
The correct answers are displayed in
green and the wrong answers are in red.
(only when “All” is selected)
The clicker number (student number)
and the nickname (if registered) are
displayed.
The clicker number (student
number) and the nickname
(if registered) are displayed.
Switches between the clicker number
display and the nickname display
Page 57

57
Finishing SRS
➊
Turn off the clicker.
When Power button of the clicker is pressed for 3 seconds or
longer, the clicker is powered off and the power LED goes off.
The clicker automatically enters standby status when there is no wireless
communication.
(Pressing any button will resume the operation.)
After a certain period of time has elapsed in standby status, the power automatically goes off.
The time to power off can be changed with〈Image Mate Accent for SRS Configurations
〉.
Default setting is 300 seconds.
➋
Clear the SRS control panel.
Clear the SRS control panel by selecting the SRS icon .
Both the SRS control panel and the launcher are closed at the same time when the Close button
in the IMA menu icon is selected.
N o t e
N o t e
Page 58

58
Group learning
You can show the results by groups by grouping clickers during a session.
➊
Configure group settings.
Select the Group setting button to display the Group setting window.
Configure group number and group type. You can also change respective group name (group
symbol).
Set the Group number and the Group symbol.
Select the Group symbol setting button and select either
[Default] (alphabet) or [Animals] (animals) from the
pull-down menu.
Drag and drop the symbol to the Group box. (The
color of the symbol changes.)
(The drawing shows an example when [Animals] is
selected.)
Select the Group number setting button. Then select the number of groups from the pull down
menu.
It is not possible to configure group settings during Testing.
N o t e
Group
participation
button
Group number
setting button
Group symbol
setting button
Group
symbol
Group box
Page 59

59
➋
Join in a group.
Join in a group by pressing one of the Response buttons on the clicker.
Press a button with the same number as the group you intend to join in. Your clicker number
is displayed inside group box. Now you joined in the group.
Press one of these
buttons to join in a
group.
The participant’s clicker
number (Student number)
and the nickname (if
registered) are displayed.
The participant can be
moved to other groups by
drag and drop.
You can reselect the clicker that once
participated in a group.
Finalize the settings.
Clear the settings.
Cancel the settings.
Page 60

60
➌
Finalize the group settings.
Finalize the group settings with OK button and the Setting window is closed.
➍
Ask a question and display the results.
The whole process from asking a question, starting Testing, closing Testing to displaying the
results is same as basic procedure.
Refer to ①~⑤in ■From posing a question to close the question .
➎
Display the group results.
Select the Group icon displayed in the overall results display screen.
The screen switches to the Group results display screen.
Personal results can also be displayed by selecting the Results display button.
N o t e
Detail of the results inside
group is displayed.
Results display button
Student information
display button
Group results button
(When the correct answer is selected)
Page 61

61
Review of the session
You can review the questions posed during the session.
➊
Prepare the review.
Select the Review button from the
settings menu to change the SRS control panel
to review mode.
➋
Display the question screen.
Select a question in the session by using the Move button to display the question screen.
➌
Finish the review.
Select the Review button from the settings menu to finish the review.
The SRS control panel returns to Starting screen.
The review can also be finished by selecting the review icon in the SRS control panel.
N o t e
Move button.
This turns to grey when it
is at the start or the end
of the session.
Question start date
(Recorded question screen)
Review button
Page 62

62
Giving an award
In each session, you can select one student to give an award. The Award screen can be
saved.
➊
Enter names of recipient and sender.
Select the Award button to display the Award screen.
Enter names of recipient and sender by using the drawing function.
Pen icon
Date is
displayed
automatically.
Finalize button
Enter the name
of the students
to be awarded.
Image selection
button.
The image can be
changed.
Enter the name of the teacher.
Print button.
You can print out the
screen image.
Page 63

63
Utilizing the collected data
With ELMO SRS Reporting, the collected data that is saved on your computer can be
displayed or converted into a format readable on other computers.
Using Result Display Software
Starting the software
Select a report from the menu in the SRS control panel to launch SRS
Reporting. Then select the [Reporting] tab.
Select the type of report (Session Report / Personal Report) from the tabs.
The software can also be launched from [Start]-[Program Files]-[ELMO]-[Image Mate
Accent for SRS]-[ELMO SRS Reporting].
N o t e
Session Report tab
Personal Report tab
Page 64

64
Displaying the Session report
The entire process from starting Image Mate Accent for SRS to finishing is called a “session”.
A list of questions in a session and details of the results of each question can be viewed.
➊
Display a list of sessions.
A list of saved sessions is displayed after the [Session Report] tab is selected. The sessions
displayed in the list first are the latest saved session and other sessions saved in the same
month as the latest saved session. Specify the period using the calendar buttons to set the
display range manually.
Items to be displayed in the list of sessions:
(Date and Time/Question Image (1
st
Question)/Questions)
Number of
questions
Scroll Page button
(15items are displayed in each page.)
Question thumbnail
Remove the tick to hide this
screen.
Session start date
(Image Mate Accent for SRS
start date)
Calendar
button
Under selection
(blue)
Delete button
Select button
Page 65

65
➋
Display a list of questions.
Select a session in the session list that you wish to view. The selected session turns blue.
Press the Select button to display a list of questions in the session.
Items to be displayed in the list of questions:
(Date and Time/Question Image/Number of Students/Accuracy/Number of choices/
Number of responses per choice)
The results of multiple sessions (or questions) cannot be viewed together.
Multiple sessions (or questions) can be deleted together.
N o t e
Question Image
Cells of correct answers
are colored and checked.
Question start date (Testing start date)
Number of Students
Accuracy
Number of choices
Number of responses
per choice
Page 66

66
➌
Draw over the question screen.
You can draw over the question screen by double-clicking a question image.
8 different pens(Black, Red, Green, Blue, Cyan, Magenta, Yellow, White) are available.
The software asks whether to save the annotations once the close button is pressed. If you
select “save”, a dialogue “Save as” appears to save the image.
➍
Display a report for the question.
Select a question in the question list that you wish to view. The selected question turns to
blue.
Press the Select button to display a report for the question.
N o t e
Eraser button
Undo button
Pen buttons
Page 67

67
➎
Print a report.
Contents of a report can be printed.
Select [PRINT] button while a report is displayed.
The printer needs to be installed on your computer.
N o t e
Results graph
Print button Close button
Question screen
(Saved screen with
added annotations
are displayed.)
Date・Time
Pie chart button
Bar graph button
Page 68

68
Output the personal report
Review the personal results from the saved record.
➊
Display the list of sessions.
Select the [Personal Report] tab to display the list of sessions.
The sessions displayed in the list first are the latest saved session and other sessions saved
in the same month as the latest saved session. Specify the period using the calendar buttons
to set the display range manually.
Items to be displayed in the list of sessions:
(Date and Time/Question Image (1
st
Question)/Number of questions)
Items to be displayed in the list of questions:
(Student number/Answers per questions/Percentage of students answered correctly)
Answers.
Correct answer is displayed
in green.
Session start
date
Question Image.
You can edit the contents
by double clicking it.
Question number
Student number
Percentage of
students answered
correctly
Calendar button
Page 69

69
Saving in other formats
The collected results can be saved by session in csv/ xml/ xel and xls formats.
Select [Export] from [Menu] while a list
of sessions (or questions) are
displayed.
Select [Export] after specifying a date,
save format and a destination folder
from the dialogue displayed.
A folder in which image files for the question screen are saved is created in the same folder as the
export file when the results are exported in XML format.
N o t e
Export button
Select a save format.
Tick here to save all the records.
Specify a destination folder.
Page 70

70
Caution
Caution
Various Settings
In this section, you will learn how to configure SRS.
Wireless setting for the clicker
If the wireless connection cannot be established after pressing Response buttons (the
“Response button LED” continues to flash) perform the wireless setting using the "Wireless
setting button” inside the battery box and on the wireless adapter.
・Perform the wireless setting within 30 seconds of pressing the "Wireless
setting button" inside the battery box.
・Hold the body of the wireless adapter when pressing the “Wireless setting
button” on the wireless adapter.
Turn on the power of the clicker.
↓
Press the “Wireless setting button” inside
the battery box.
↓
[2/B] button flashes at high speed.
↓
Press the “Wireless setting button” on
the wireless adapter.
↓
[1/A] button and [3/C] button on the
clicker flashes a few times. Now wireless
connection between the clicker and the
wireless adapter is established.
The wireless setting between the clicker and the wireless adapter was established prior to shipping.
When adding a clicker, the wireless setting for the added clicker needs to be performed before use.
If a clicker is used as described below, wireless connection with the wireless
adapter may become unstable:
- There is an obstruction between the clicker and the wireless adapter.
- The clicker is used while placed on top of a computer.
- A wireless device or electronic equipment is being used nearby.
- The clicker is moved excessively while being used.
- Clickers are used too close with each other.
- Hold the clicker with your hand covering the upper part of it.
Also, due to the inherent characteristics of the wireless connection, the wireless
connection may become unstable in some positional relationships between the
clicker and the wireless adapter.
N o t e
Power button
Battery box
Wireless adapter
Page 71

71
Image Mate Accent for SRS Configurations
With ELMO SRS Configurations, Image Mate Accent for SRS can be configured.
Starting the software
Select “Configurations” from “Menu” in the SRS control panel.
ELMO SRS Configurations can also be launched from [Start]-[Program Files]-[ELMO]-[Image Mate
Accent for SRS]-[ELMO SRS Configurations].
Description of menu tabs
Items to be configured or checked in each sheet are as follows:
[Settings]:Contents location
[SRS Settings]:Database Location / Timer settings / Default quiz type / Automatically display
graph results / Clicker Power
[Software update]:Image Mate Accent for SRS / Proxy setting
[About]:Software information
N o t e
Page 72

72
Caution
Settings
The destination to store the data created by Image Mate Accent for SRS can be set.
① Contents location
The destination to store the contents created by Image Mate Accent for SRS and the folder
to add stamps and background images can be set.
The contents are stored in “Image Mate Accent” folder created inside the specified “destination
folder”.
Image files can be added as stamps or backgrounds in jpg, bmp or png
formats.
(Note that it may not be able to display some files in these formats.)
The existing data inside the folder is not automatically transferred to a new
destination folder when the destination folder is changed.
The previous data cannot be displayed after making this change.
N o t e
①
Open the destination folder to store
background images.
The destination to store the contents
can be configured by pressing the
Browse button.
Page 73

73
Caution
SRS Settings
Image Mate Accent for SRS can be configured from “SRS Settings”.
① Database Location
The destination to store the database used by Image Mate Accent for SRS and the records
of SRS can be set.
The previous results cannot be displayed after making this change.
The contents are stored in “Image Mate Accent” folder created inside the specified “destination folder”.
For details on iRespond (sold separately), please contact a dealer.
N o t e
The destination to store the SRS
records can be configured by pressing
the Browse button.
③
②
①
⑤
④
Tick here to automatically output the SRS data after
the session. The SRS data can be imported by
iRespond (sold separately).
Page 74

74
② Timer Settings
The initial setting of the timer can be set in increments of 10 sec. between 10 sec. and 60
sec. and in increments of 60 sec. between 60 sec. and 300 sec. using up/down buttons.
Default setting of the timer is 60 sec.
③
Default quiz type
The question type when SRS is started can be set. (Default setting: 3-choice question)
Select a question type (2-6 choice, True (Yes)/ False (No)) from the pull-down menu.
④Automatically display graph results
Put a tick mark here when you want to show the results first in the Results Display screen.
⑤ Clicker Power
The time for auto power off of the clicker can be set in increments of 10 sec. between 10
sec. and 2,550 sec. using up/down buttons.
Default setting is 300 seconds.
Setting the time for auto power off longer may affect the lifetime of the batteries.
N o t e
N o t e
Page 75

75
Software update
The automatic update for the software can be set.
Access our update page to verify you are running the latest version of the software. You need to
have an internet connection to update your software.
① Image Mate Accent for SRS
Press the Check the latest version button to check the availability of the update.
N o t e
②
①
Tick here to
activate the automatic software update.
The software automatically checks the availability of the
update when the computer is started and when Image
Mate Accent for SRS is started.
Check the availability
of the update.
The browser starts and the Software
License Agreement is displayed.
Page 76

76
② Proxy setting
You can use the software with default settings.
When you need to configure this setting, put a tick mark in “Use Proxy Server”.
Consult your internet administrator or provider for details as to the configuration.
About
You can see the detailed information of the software.
N o t e
Tick here.
Page 77

77
Caution
SRS Data Settings
With ELMO SRS Reporting, you can manage the student’s data and the clicker.
Starting the software
Select a report from the menu in the SRS control panel to start SRS Reporting.
Then select the “SRS” tab.
ELMO SRS Reporting can also be launched from [Start]-[Program Files]-[ELMO]-[Image Mate
Accent for SRS]-[ELMO SRS Reporting].
To perform the other operation than “Battery level check”, close the Image
Mate Accent for SRS first. Make sure that the wireless adapter is connected
to your computer.
N o t e
Clicker management
Registration of the
students
Database management
Page 78

78
■Clicker
■Register
■Database
Menu button Name Function
Check the
Connection
To check the wireless connection.
Battery level
To display the last used time and the
battery level.
Clicker Information
To associate the clicker with a student
or add/delete the clicker.
Menu button Name Function
Register students
information
To register the students’ information.
Menu button Name Function
Create Database
To register the database.
See
〈Database Settings〉.
Select Database
To select the database.
Edit profile of
database
To edit the database profile.
Page 79

79
Check the connection
The wireless connection with the registered clicker can be checked.
Press a button of the clicker that you want to check after connecting the wireless adapter to
your computer. Device ID, the button that is pressed, the battery level and the clicker version
are displayed.
Connect the wireless adapter to your computer before performing the wireless connection check.
N o t e
Button that is pressed
Battery level:
Good:The battery level is enough .
Low:The battery level is low.
Caution
Replace the batteries
when “LOW” is displayed.
Clicker version
DeviceID
Added (or updated) in the 1st line after
the button on the clicker is pressed.
Page 80

80
Battery level
The last used time and the battery level for all the registered clickers can be displayed.
Perform the〈Check the connection〉to see the current battery level.
N o t e
Battery level:
Good:The battery level is enough.
Low:The battery level is low.
Caution
Replace the batteries
when “Low” is displayed.
Last connected time
Page 81

81
Clicker Information
When the wireless adapter is connected, the Device ID, the clicker number and the student’s
information (if registered) are displayed.
You can also add or change the clicker here.
Connect the wireless adapter to your computer before performing the above operation.
After the wireless setting for the added clicker is performed, a Device ID is newly assigned to the
added clicker and it is added to the bottom of the list.
Refer to 〈Adding or Changing the clicker〉 for details about adding or changing the clicker.
Max. 50 clickers can be registered.
N o t e
N o t e
Student’s nicknames
and pictures are
displayed (if
registered).
The clicker numbers
(student numbers)
are displayed.
The row of the specific clicker ID’s can
be selected by pressing any buttons
on the relevant clicker.
Press this button
to change the
clicker.
Enable or disable the clicker.
Put a tick mark here to enable the clicker.
Page 82

82
Caution
Register students information
The students’ information can be registered.
Pay strict attention to the protection of the personal information and the right
of publicity of the students. ELMO is not responsible for any loss or leak of
the personal information of the students in relation to the use of SRS.
Same number of the students as the clickers you use can be registered.
(Max. 50 clickers can be registered.)
N o t e
Register or change
a picture.
Register a
nickname.
Move (display) in the order
of the student number.
Student number
Student ID number
Nickname
Register the
Student ID number.
Clear the registered
information.
Clicker number
(Student number)
Take a picture with
the Document
Camera
Return to the default
picture.
Student Photo
Page 83

83
Let’s take photos!
You can take a picture of the student for the student information by using the Document
Camera.
Connect the Document Camera to your computer and switch it on.
Select the clicker number under which the picture is registered. Then press the “Let’s take
photos!” button to display the photo shooting window.
Press the shutter button to register the captured picture.
Zoom buttons
Shutter button
Image flip button
Shooting area
Auto Focus button
Page 84

84
Database Settings
Create Database
When the Create Database button is selected, a new database or a copy of the existing
database is created.
When creating a new database, select the “Create” button after entering the database name
and the database description.
When using an existing database, select such database after activating the tick box.
The details of the selected database are displayed. Confirm if the selected database is the
right one.
Then enter the name and the description of the database to create.
After completing all the procedures, select the Create button.
A database cannot be created without entering the database name.
A database cannot be created if a database with the same name exists.
N o t e
The details of the selected
database are displayed.
Select a database to use as the
Reference database.
Enter the name of the database
to create.
Enter the description of the
database to create.
Create the database.
Tick here to refer to the existing
database.
Page 85

85
Select Database
When the Select Database button
is selected, the default database can be set.
When a database is selected, the details of the selected database are displayed. Press the
[OK] button after confirming that the selected database is the right one.
The name of the current database
is displayed.
Select a database.
The student’s information of the
selected database is displayed.
The description of the selected
database is displayed.
Page 86

86
Edit profile of database
By selecting the Edit profile of database button
, you can edit the name and the
description of the registered database.
Select the database you wish to edit, then edit the name and the description.
Press the OK button after finishing the edit.
Select the database.
Edit the description.
Edit the name.
Page 87

87
Caution
Adding or Changing the clicker
In case you need to add the clicker or replace the clicker due to reasons such as malfunction,
follow the instruction described below.
Connect the wireless adapter to your computer before performing the above operation.
➊
Perform the wireless setting for the added clicker.
Establish the wireless setting between the added clicker and the wireless adapter.
Refer to 〈
Wireless setting for the clicker〉 in Various Settings for details.
➋
Launch ELMO SRS Configurations.
Launch the configuration software.
Select the Clicker Information button in
the “SRS” tab to show the list of clickers.
➌
Select the added clicker.
Turn on the added clicker and press one of the
Response buttons on the clicker. Verify that the
Device ID of the added clicker is displayed in blue.
If the Device ID of the added clicker is not displayed,
retry from the step
① “wireless setting”.
When adding the clicker, press the OK button to finish.
Register the student, if necessary.
When changing the clicker, continue to the step
④.
The Device ID for the added clicker can be selected by a mouse.
Make sure to follow the instruction correctly otherwise the system may not
recognize the added clicker.
N o t e
N o t e
Clicker
Information
The cell turns to blue when the
Response button of the clicker
is pressed.
OK button
Page 88

88
Caution
Caution
➍
Select the clicker to be replaced.
Select the Overwrite button. The Device ID of the
added clicker turns to green from blue.
Select the Device ID of the clicker to be overwritten
(deleted) from the list by using a mouse. The color
of the Device ID of the relevant clicker turns to
grey.
➎
Overwrite the data.
Select [OK] after confirming the message in a
dialogue box.
➏
Finalize the registration.
Finalize the registration by pressing [OK].
Only Device ID is overwritten. Other items remain unchanged.
Once the clicker is replaced (overwritten), such clicker will not be able to
communicate with the wireless adapter. Perform the 〈
Wireless setting for
the clicker
〉 to use the clicker again.
Make sure to select the OK button to activate the change.
Select the Device ID of the
clicker to be replaced.
Overwrite button
Page 89

89
Caution
Other Function
About LED
The power LED, the Response buttons LED and the wireless setting button LED on the
wireless adapter indicate the condition of the respective devices.
Clicker
■Power LED (Red)
LED status Condition
Off
The power is off.
Press the power button to turn on the power.
On
The power is on.
Press the power button for over 3 seconds to turn off the power.
Flashing
The battery level is low. Replace with new batteries.
※The LED flashes for max. 5 seconds and then lights up after the power on or
the wireless connection is successfully established.
■Response buttons (LED) (Red)
LED status Condition
Off
The power is off or in standby status.
On
The communication with the wireless adapter is established.
※ LED is on for max.5 seconds after the connection establishment.
Flashing
The clicker is trying to establish the connection with the wireless adapter or failed to
establish the connection with the wireless adapter.
※ The clicker attempts to establish the connection for max. 7 seconds after
pressing Response button.
When succeeded: LED lights up after flashing.
When failed: LED flashes for max. 5 seconds then goes off.
If Response button LED does not light up, the response is not
accepted. Retry by pressing Response button again after the
LED is off.
High-speed
flashing
The Wireless setting button is pressed.
※ During the wireless setting, only [2/B] button flashes. Once the wireless setting
is finished, [2/B] button goes off. Then [1/A] and [3/C] buttons flash and go off.
Page 90

90
Caution
Wireless adapter
■Wireless setting button(LED)(Blue)
LED status Condition
Off
The power of the computer is off.
Flashing
The power of the computer is on or the adapter is communicating with other device.
※
The interval of flash changes depending on the condition of the communication.
High-speed
flashing
The Wireless setting button is pressed.
For details about other LED status than starting SRS when using with Elmo
Pen Tablet CRA-1, refer to the User’s Guide of ELMO Wireless Slate/ Tablet.
Page 91

91
Troubleshooting
If you have a problem or questions about this product, please read this troubleshooting guide
first. If the problem still exists, consult the dealer from whom you purchased this product.
Communication between the clicker and the wireless adapter is unstable
Is third-party wireless device or
software installed?
If third-party wireless device or software is operating, it may
conflict with the operations of the clicker.
Do not operate third-party wireless device or software while
using the clicker.
Are the clicker and the wireless
adapter in proper condition?
Communication may become unstable if there is an
obstruction between the clicker and the wireless adapter.
Also, due to the inherent characteristics of wireless
communication, the installation angle of both devices may
affect the stability of the communication.
Remove the obstruction or change the installation location.
When holding the clicker, do not cover the upper part of it with
your hand.
Is a wireless device or electronic
equipment being used nearby?
Wireless devices or electronic equipments may interfere with
the communication between the clicker and the wireless
adapter. Refer to〈Wireless setting for the clicker〉
and then perform the wireless settings.
If this does not improve the situation, stop using the wireless
device or electronic equipment, or move to a location with no
interference.
When using the clickers, keep at least 20cm distance
between the clickers.
Cannot use SRS / SRS icon is not displayed
Is a proper wireless adapter used?
Make sure to use the wireless adapter supplied with SRS. Do
not use a wireless adapter supplied with the Pen Tablet.
Is the wireless setting between the
clicker and the wireless adapter
completed?
Wireless setting between the clicker and the wireless adapter
needs to be set before you use a newly purchased clicker
first.
Refer to〈Wireless setting for the clicker〉for the wireless
setting.
Cannot use Pen Tablet
Is the Pen Tablet which is not
compatible with SRS used?
When the firmware upgrade of your Pen Tablet is needed,
consult with the dealer from whom you have purchased the
Pen Tablet.
Is the wireless setting between the
Pen Tablet and the wireless adapter
completed?
Wireless setting between your Pen Tablet and the wireless
adapter supplied with SRS needs to be set before you use
your Pen Tablet with SRS.
Refer to User’s Guide of ELMO Wireless Slate/ Tablet for the
wireless setting.
Page 92

92
Specifications
Product specifications
■
Clicker
Model Name CRV-CK-1
Operating Temperature
0°C - 40°C (32°F - 104°F)
Wireless Band Used 2.4GHz
Communication Range
Approx.15m (49.2 feet) (differs depending on the usage
conditions)
Power Supply Alkaline dry cell AAA battery x 2
Continuous Operation
Time
Approx. 150 hours(differs depending on the usage conditions)
Auto Power Off time Approx. 300 seconds
Consumption Current
Max. 3.0V 60mA
External Dimensions L110(4 11/32”)×W64(2 17/32”)×H26(1 1/32”)(mm)
Weight
90g(0.1984lb) (including dry cell AAA battery x 2)
■
Wireless adapter
Model Name
CRA-1R
Operating Temperature 0°C - 40°C (32°F - 104°F)
Wireless Band Used
2.4GHz
Number of clickers to be
registered
Max. 50pcs.
PC Interface
USB typeA plug(USB2.0 HI-SPEED)
Power Supply USB bus power
Consumption Current
Max. 5.0V 50mA
External Dimensions L64(2 17/32”)×W22(7/8”)×H10(13/32”)(mm)
Weight
11g(0.02425lb)
■
Carrying Bag
Storage Temperature
-20°C - 60°C (-4°F - 140°F)
Number of clicker
compartments
40
Number of Pen Tablet
storage
1
External Dimensions L425(16 47/64”)×W365(14 9/16”)×H165(6 1/2”)(mm)
Weight
CRV-24:3.2kg(7.1lb) (Clicker x 24pcs.)
CRV-32:4.0kg(8.9lb) (Clicker x 32pcs.)
CRV-40:4.8kg(10.6lb) (Clicker x40pcs.)
※(
Including 1pce. wireless adapter and accessories)
Page 93

93
Caution
System Requirements
The SRS can be used in the following computer environments.
Computer model
IBM PC/AT compatible
Operating system
(OS)
■Windows
Microsoft Windows XP Home Edition / Professional SP2
Microsoft Windows Vista Home Basic / Home Premium /
Business / Enterprise / Ultimate SP1
Microsoft Windows 7 Starter / Home Premium /
Professional / Ultimate
64-bit versions supported (excluding Windows XP 64-bit
version)
■Mac
Mac OS X 10.7.x / 6.x Intel CPU
CPU
Intel Core 2 Duo 2 GHz equivalent or higher
Memory
2 GB or higher
Video board
Board compatible with Microsoft DirectX 9.0c
Hard disk
1 GB or higher empty space
Screen resolution 1024×768 pixels or higher
32-bit or higher
USB
USB 2.0 HI-SPEED
Compatible Document
Cameras
· L-1ex
· L-1zero
· L-1zero r
· TT-02RX
· TT-02s
· L-1n
· P10S
· P30S
· P10
· P100
· P100N
· HV-110u
· FF-1
· CO-10 (i-Pochette)
· TT-12
· L-12
· MO-1 (excluding Mac)
· P30HD
・If a sound device cannot be used, some of the functions may not operate.
・Operation is not guaranteed for all computer environments.
Page 94

94
Disclaimer
The information on this manual and Image Mate Accent for SRS are subject to change without
prior notice.
The software already installed in your computer or other devices connected to your computer
may affect the performance of Image Mate Accent for SRS.
ELMO is not liable for any direct or indirect damages resulting from the use of Image Mate
Accent for SRS.
About Trademarks
and Image Mate are registered trademarks of ELMO Co., Ltd.
is a trademark of ELMO Co., Ltd.
The full title for Windows® XP is the Microsoft® Windows® XP operating system.
The shortened form of the OS name is used in the text.
The full title for Windows® VISTA is the Microsoft® Windows® VISTA operating system.
The shortened form of the OS name is used in the text.
The full title for Windows® 7 is the Microsoft® Windows® 7 operating system.
The shortened form of the OS name is used in the text.
Microsoft and Windows are registered trademarks of the Microsoft Corporation in the U.S. and other
countries.
All other company/product names described in this manual are trademarks or registered trademarks of
their respective companies.
Repairable Period
■Repairable Period
ELMO will maintain and keep spare parts for this product for eight years after the
discontinuation of this product. After this period, ELMO will no longer offer repair service for
this product.
Page 95

95
6-14, Meizen-cho, Mizuho-ku, Nagoya, 467-8567, Japan
OVERSEAS SUBSIDIARY COMPANIES
ELMO USA CORP.
Headquarters 1478 Old Country Road
Plainview, NY 11803-5034, U.S.A
Tel:(516) 501-1400 Fax:(516) 501-0429
E-mail: elmo@elmousa.com Web: http://www.elmousa.com
West Coast Branch Cypress Pointe Business Park
5676 Corporate Avenue
Cypress, CA 90630, U.S.A
Tel:(714) 828-8457 Fax:(714) 828-8429
ELMO Europe SAS Immeuble Elysées la Défense,
7C, Place du Dôme,
92056 Paris la Défense, France
Tel: 33 (0) 1 73 02 67 06 Fax: 33 (0) 1 73 02 67 10
6X1CRVAC2 R3-Xdx
 Loading...