

Elko LARA User Manual
1/6
ELKO EP, s.r.o.
Palackého 493 | 769 01 Holešov, Všetuly | Česká republika
e-mail: elko@elkoep.cz | www.elkoep.cz | Technická podpora: +420 775 444 609
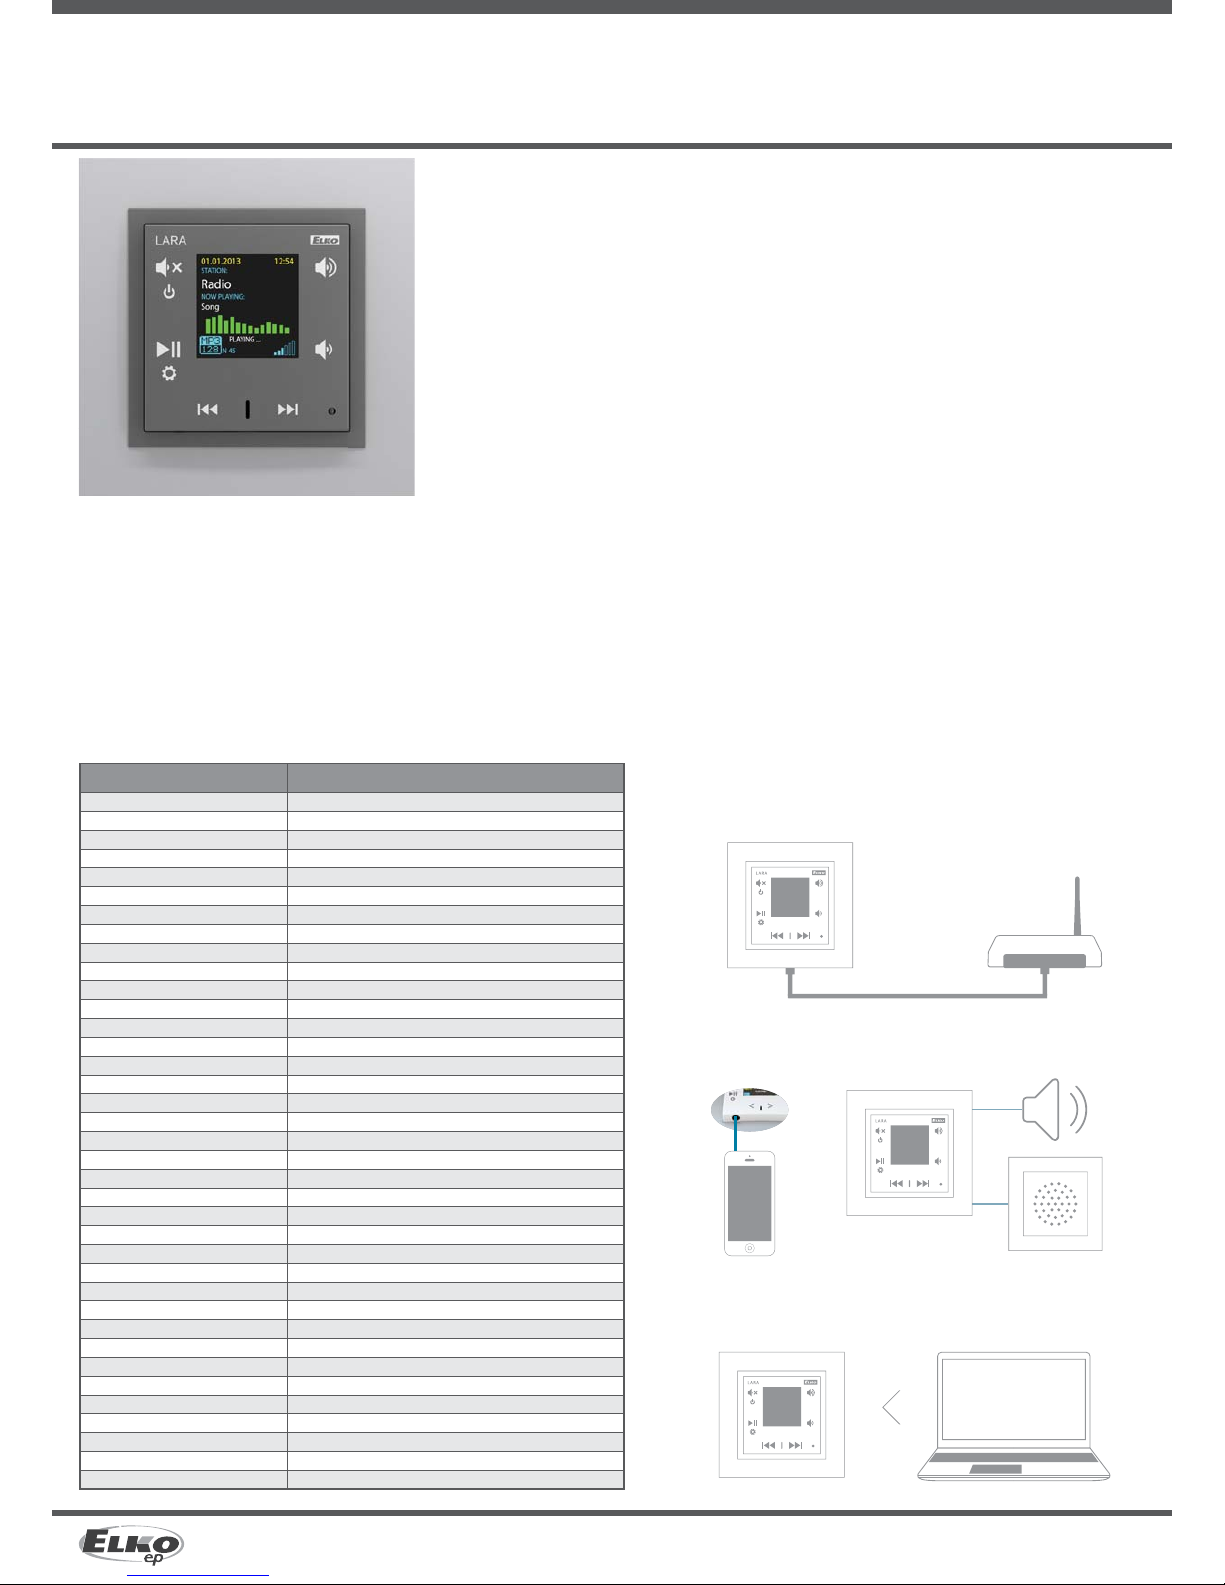
LARA
LARA
LAN
LARA Notebook / PC
//
//
LARA
User Guide
LARA / Internet radio
4871, 4922, 4925, 4924, 4923 -02-025/2014 Rev.:0
I N T E R N E T R A D I O
Supported data transfer formats:
C O N T R O L / S E T T I N G S
Front panel:
Remote control:
Communication Ethernet:
Button RESET:
I N T E R F A C E E T H E R N E T
Communications interface:
Connector:
Max. cable length UTP with power:
DISPLAY
Type :
Resolution:
Visible surface:
P O W E R S U P P L Y P A R A M E T E R S
Supply:
Min. input:
Max. input:
A M P L I F I E R P A R A M E T E R S
Ampli er:
Max. ampli er output
I N P U T S / O U T P U T S
Audio input:
Audio output 1:
Audio output 2:
C O N N E C T I O N
Terminal block:
O T H E R D A T A
Working temperature:
Overvoltage category:
Pollution degree:
Installation:
Dimensions:
Frame - plastic:
Frame - metal, glass, wood, granite:
Weight - plastic:
mp3, ogg, acc
touchscreen buttons
IR remote control (part of supply)
via PC setting up and communicating SW LARA con gurator
restart product / reset product to factory settings
0/100 Mbps
RJ45
50m
color OLED
128x128 pixels
26 x 26 mm
PoE 24 V DC/1.25 A
1.4 W
26W (peak at maximum playback performance)
stereophonic class D with digital output control
2 x10 W/8 Ω
3.5 stereo jack
terminals LINE OUT (used for external ampli er)*
terminals OUT L/OUT R (speaker output from int. ampli er)
0.5 - 1 mm
2
( audio outputs)
0 .. + 55 °C
IP20
II.
2
in an installation box
85 x 85 x 46 mm
94 x 94 x 46 mm
87 g (plastic frame)
Congratulations on purchasing your LARA device
(Internet radio in a switch).
The instruction manual provides information on
installing and operating the device. The instruction
manual is always a part of the supply. Only perform
installation after becoming thoroughly familiar with
this User Guide and device functions. Problem-free
function of the device also depends on the way it was
shipped, stored and handled. If you notice any signs
of damage, deformation, malfunction or a missing
part, do not install this product and return it to the
point of sale. At the end of its service life, the product
and its parts must be treated as electronic waste.
Before starting the installation, make sure that all
wires and connected parts are not under voltage.
When assembling and performing maintenance, you
must uphold safety regulations, standards, directives
and special provisions for working with electrical
equipment.
For successful installation, you will need: LARA Internet
radio, a set of speakers, PoE power source, UTP cable
with RJ45 connector, cable for speakers, PC with the
application LARA Configurator.
To protect yourself from electrical shock, connect only
safety extra-low voltage (SELV) circuits. For example
power supplies PoE (SELV ) or LAN circuits (SELV circuits).
Other power supplies (ELV) and WAN circuits (TNV
circuits) should not be connected directly to product.
Warning: some LAN and WAN ports use the same
connectors RJ-45 so be careful when connecting a
product.
- A music and Internet radio player - all in the dimension of a switch and a luxurious LOGUS90 design.
- When connecting to the Internet, LARA can play a stream created from a file on an NAS server (network storage). You can also connect an external music source (iPhone,
MP3 player, telephone) to the audio input via 3.5mm jack.
- Control is performed by simply touching the device front panel or by infrared remote control, which is included in the product packaging.
- Configuring the device settings is possible using the simple menu controlled from the front cover of the device, with configuration via your PC using the SW LARA Configurator.
- LARA has its own built-in amplifier 2x10W, which provides sufficient output for Hi-Fi speakers. For quality listening in the kitchen or bathroom, we recommend the LOGUS
90
21581, which can be installed into a triple frame together with LARA.
- Using the Internet radio, you gain easy access to countless radio broadcasting stations from the entire world without needing a computer.
- Complies with standards IEEE 802.3u (100BASE-Tx).
- Automatic cable crossing detection of Ethernet cable - MDIX
- 100Base Ethernet, auto-detection
- Powering by PoE – maximum voltage 27V / 1000mA max. consumption.
- Firmware update via the SW Configurator.
Before you begin
Charakteristic
1. Connect LARA and switch
3. Setting of LARA through LARA con gurator
2. Connect speakers to LARA
Easy installation in 3 step
* The cable from the LINE OUT terminals must be shielded, max. length should not exceed 5m.
Technical parametres
Speaker
(8, 16, 32 )
Speaker in design
LOGUS
90
21581
External
music
source
WiFi router with PoE

2/6
LARA
User Guide
LARA / Internet radio
4871, 4922, 4925, 4924, 4923
-02-025/2014 Rev.:0
Ceiling Speakers
IR controller
Installation Box
Hardware installation
Requirements for installation environment:
The product cannot be placed where it is exposed to moisture or excessive heat.
- Place the product at a spot where it can be connected to the Ethernet network. The
Ethernet cable with PoE supply should have a short a distance as possible between
the player and PoE source due to voltage drop occurring as the distance grows. Also
use quality cables and connectors of a renowned brand for installation.
- Never install the player without its installation box, and it is prohibited to mount it
directly into the wall, e.g. into drywall partitions, where the device chassis would be
directly wrapped in insulation material.
- Distributing individual elements of the installation must be defined prior to actual
installation, prior to interference (cutting) into walls or installation of boxes.
PoE (Power over Ethernet) is fed along a data network cable, without the need to
provide power to the machine by another separate cable.
Description of installation:
Install the bottom part of the LARA player into the box KU, we recommend a box that
enables mounting devices with greater depth.Connect the speaker cables into the
terminals OUT L +/- OUT R +/-. You can connect the input to an external amplifier
into the terminals LINE OUT L, LINE OUT R, GND. Snap the Ethernet cable into the
RJ45 connector. Secure the device using the installation box screws. Snap the upper
part of the player into the design frame LOGUS90. Snap the upper part of the player
with the frame to the lower part of the player.
Connection of these two parts must be performed with care to avoid damaging the
connectors. Connect the other end of the Ethernet cable to the PoE switch or via the
PoE adapter to the Wi-Fi router, switch. After providing power, the display shows the
system information, then after around five seconds the main display of the player.
External ampli er
Output of speakers, audio cables
Speaker output(W)
2x 4 ohm 2x 20W
2x 8 ohm 2x 10W
2x 16 ohm 2x 5W
2x 32 ohm 2x 2.5W
When installing the speakers, use quality
audio cables with minimum diameter
0.5 mm, with maximum length of 30 m.
It is best to have the same cable length
for the right and left channels.
left speaker right speaker
 Loading...