

Page 1
is a registered trademark of Elinchrom LTD, RENENS, SWITZERLAND
USER MANUAL P.02
GEBRAUCHSANLEITUNG P.09
MANUEL D’UTILISATION P.17
MANUALE D’USO P.25
MANUAL DE INSTRUCCIONES P.33
GEBRUIKSAANWIJZING P.41
РУКОВОДСТВО ПОЛЬЗОВАТЕЛЯ P.49
安 全ガイド P.57
用户手册 P.65
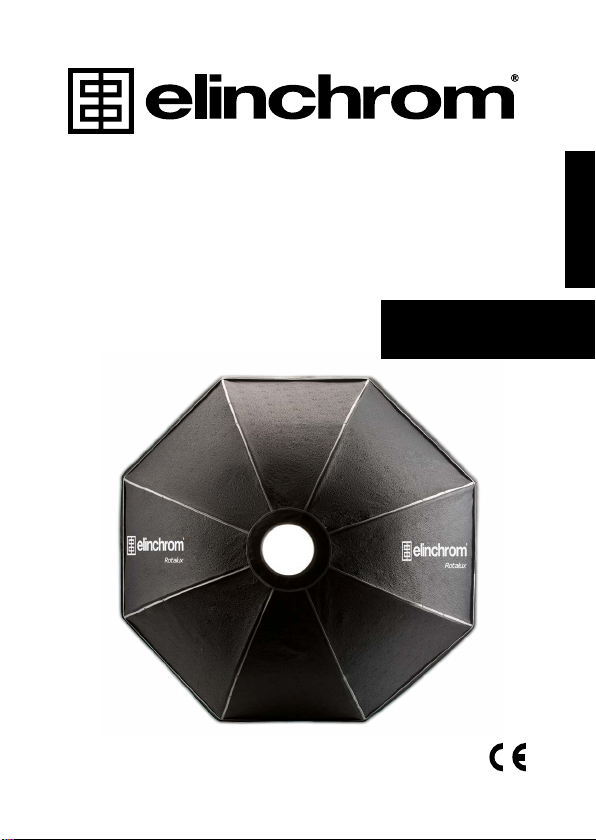
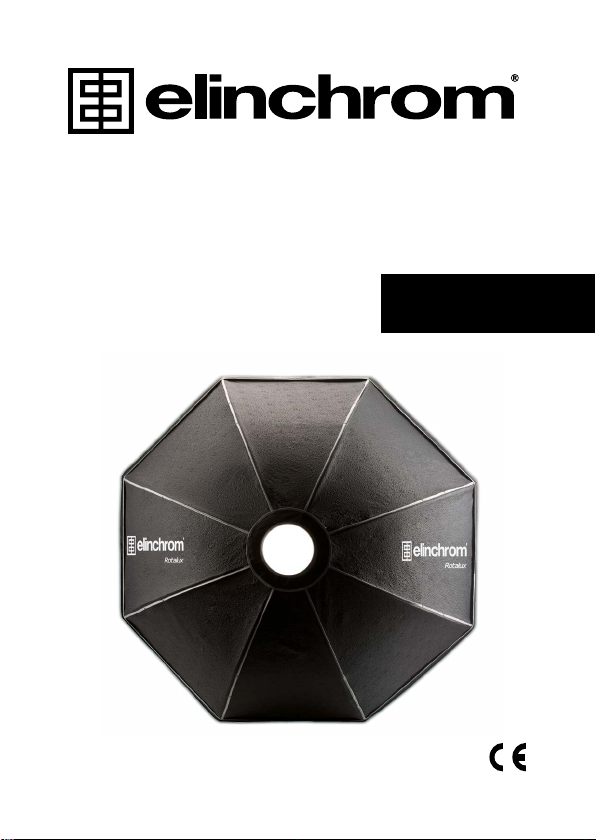
Rotalux
EN
DE
FR
IT
ES
NL
RU
JP
CN
Elinchrom SA Rotalux 03.01.2017 (73320)
Page 2

User Manual
Introduction
Dear Photographer,
Thank you for buying the Elinchrom Rotalux Softbox. All Elinchrom products are
manufactured using the most advanced technology. Carefully selected compo
nents are used to ensure the highest quality and the equipment is submitted to
many tests both during and after manufacture. We trust that it will give you many
years of reliable service.
Please read the instructions carefully, before use, for your safety and to obtain
maximum benet from many features.
Your Elinchrom-Team
Characteristics
The easy mounting Rotalux system is probably the most widely copied of all
Softbox systems. However, it is easier to copy a design than a quality and they
remain the best units in their class.
What continues to make the Elinchrom units unique are the optional sets of
deectors – gold, silver, frosted and translucent that enable the softness / hard
ness and colour to be modied; tting centrally over the ashtube at your chosen
distance. Folding down like an umbrella, they are easily transported or just kept
clean, in their included carrying bag.
-
-
Rotalux Speedring with improved mechanics and extremely lightweight, only
370 g. Improved nish of the Rotalux reector tissue with grey piping for better
light efciency. 360° revolving system.
Folds down like an umbrella, without dismounting the softbox.
Carrying bag for a folded Rotalux is included. Optional Hooded Diffusers to
control the light spread, are available for all Rotalux.
Optional Rotagrids for direct lighting are available for the Rotalux 70x70 cm,
60x80 cm and the 90x110 cm.
2
Page 3

User Manual
Lighttools™ offers a wide range of grids in different sizes and angles for Rotalux
softboxes.
Speedrings adapter for other ash brands such as * Broncolor
®
Bowens
, Hensel®, AlienBees®, Comet®, Photona® are available.
Security Advise
The maximum modelling lamp wattage for all Rotalux softboxes is limited to
300W. Ensure that the Rotalux is correctly assembled and locked to the ash unit.
The unit, the ash tube and accessories may become very hot during and after
use! To avoid injuries, handle with isolating cloth or wait until parts have cooled
down.
Even though we use re retardant materials the fabric should never get in contact
with the hot ash tube or the modelling lamp.
The metal speedring and the locking knob for the revolving system may heat up
enormously when the ash unit is used at maximum power levels of ash and
modelling lamp. Please wait until the parts have cooled down, before packing
away.
Always switch the ash unit off before tting or exchanging reectors and soft
boxes.
Ensure that the ventilation system of ash units is working correctly.
Double check that the internal fabric diffuser is correctly tted and does not make
contact with the hot ash tube and the modelling lamp.
Lower the modelling lamp power and reduce the number of ashes per minute,
when small size softboxes are used. The reective surface is very close to the
modelling lamp/ ashtube. The fabric can be damaged by excessive heat.
®
, Profoto®,
-
*Broncolor®, Profoto®, Bowens®, Hensel®, AlienBees®, Comet®, Photona® are protected trademarks that do not
belong to Elinchrom LTD.
3
Page 4
Rotalux Universal Speedring
Use the color marks to build your Rotalux softbox depending on your
product model. The universal speedring is the same for all units.
STRIP
Red Marks
SQUARE
Blue Marks
OCTA
All
Page 5

1.A 1.B
1.C
1.C
1.E
1.D 1.D
1.FG
1. Assembling the Rotalux Softbox:
A) Place the speedring with the locking knob at the top on a rm horizontal
surface.
B) Pull out each of the rod sockets and move them into the 90° vertical position
and release.
C) Place the speedring in the centre of the reection fabrics.
D) Ensure that the slots of the rod sockets coincide with the seams of the
reection fabrics.
E) Insert the bare ends of the rods into the sockets of the Speedring.
F) One at a time bend rods opposite outwards, applying gradual pressure on
the capped end to give slight curvature. Manipulate the respective capped
ends to t into the cloth pockets at the coinciding corners of the reection
fabrics. If necessary, readjust as shown in the picture 1.D.
G) The rods xed at both ends, have now a convex curve. Hold the rod and
twist each to make the curve concave.
5
Page 6

User Manual
1.H
1.I
H) Hold down the Speedring in a xed position. One at a time apply pressure
on the rods near the rod socket. The rod sockets return to the previous
horizontal position and lock. The reection fabrics now acquires a concave
tent-like curvature.
I) The Rotalux Softbox is now ready to be mounted on the ash unit.
2.B
2.E
2.C
2.A
2.D
2.E
6
Page 7

User Manual
2. Mounting the Rotalux Softbox on the Elinchrom flash-unit:
A) Turn the locking ring of the ash unit (mounted on the tripod), anti clockwise
to unlock the bayonet. Remove the protective cap from the ash unit anti
clockwise.
B) Ensure that the locking knob on the Speedring is tightened (see 2.C). Insert
the Rotalux speedring and turn clockwise. It clicks into place.
Turn the locking ring clockwise to lock the bayonet with the Rotalux
Speedring attached.
C) The angle of the Rotalux softbox can be adjusted with the revolving system.
Unlock the locking knob of the Speedring and turn the softbox into the
desired position. Make sure that the Speedring is locked in the bayonet of
the ash unit whilst turning the softbox.
NOTE : The Speedring and the locking knob may become hot when the Rotalux
is in use. Protect your hands with heat resistant gloves and switch off the unit and
disconnect it from the mains, when you need to adjust the softbox angle.
D) Attach the diffuser to the softbox.
E) Fix the diffuser with the Velcro tapes along the softbox sides and edges.
Download the user manual
Please get the user manual in other languages
at this link: http://bc.gs/41
7
Page 8

Page 9

is a registered trademark of Elinchrom LTD, RENENS, SWITZERLAND
GEBRAUCHSANLEITUNG
Rotalux
Elinchrom SA Rotalux 03.01.2017 (73320)
Page 10

Gebrauchsanleitung
Einleitung
Lieber Fotograf,
Vielen Dank, dass Sie sich für den Kauf der Elinchrom Rotalux Softbox entschie
den haben. Alle Produkte von Elinchrom werden unter Verwendung der neuesten
Technologie hergestellt. Es werden sorgfältig ausgewählte Komponenten verwen
det, um die höchste Qualität zu gewährleisten und die Ausrüstung wird während
und nach der Herstellung vielen Tests unterzogen. Wir hoffen, dass sie Ihnen viele
Jahre zuverlässige Dienste leistet.
Bitte lesen Sie zu Ihrer Sicherheit und für den größtmöglichen Nutzen vieler Funk
tionen vor dem Gebrauch sorgfältig die Anweisungen.
Ihr Elinchrom-Team
Merkmale
Das einfach zu befestigende Rotalux-System ist wahrscheinlich das am häugsten kopierte aller Softbox-Systeme. Allerdings ist es leichter, Design zu kopieren
als Qualität und sie bleiben die besten Geräte ihrer Art.
-
-
-
Was die Geräte von Elinchrom nach wie vor einzigartig macht, sind die optiona
len Deektoren – gold, silber, matt und transparent, mit denen Weichheit/Härte
und Farbe geändert werden können und die zentral in der von Ihnen gewün
schten Entfernung über die Blitzröhre passen. Da sie sich wie ein Regenschirm
umklappen lassen, können sie problemlos transportiert oder in der enthaltenen
Tragetasche sauber gehalten werden.
Rotalux Speedring mit verbesserter Mechanik und extrem leicht, nur 370g.
Verbesserte Oberäche des Rotalux-Reektor-Gewebes mit grauer Paspel für
bessere Lichtausbeute. 360° drehbares System.
Lässt sich ohne Demontage der Softbox wie ein Regenschirm umklappen.
Tragetasche für zusammengeklappten Rotalux ist im Lieferumfang enthalten.
Optionale Diffusortücher zur Kontrolle der Lichtstreuung sind für alle Rotalux
erhältlich.
10
-
-
Page 11

Gebrauchsanleitung
Optionale Rotagrids für direkte Beleuchtung sind für Rotalux 70x70cm, 60x80xm
und 90x110cm erhältlich.
Lighttools™ bietet eine breite Palette von Waben in verschiedenen Größen und
Winkeln für Rotalux-Softboxen an.
Speedring-Adapter für andere Blitzmarken wie *Broncolor
®
Hensel
, AlienBees®, Comet®, Photona® sind erhältlich.
Sicherheitshinweis
Die maximale Einstelllampenleistung aller Rotalux Softboxen ist auf 300W
beschränkt. Stellen Sie sicher, dass die Rotalux korrekt montiert und mit dem
Blitzgerät verriegelt ist.
Das Gerät, die Blitzröhre und Zubehör können während und nach dem Gebrauch
sehr heiß werden! Um Verletzungen zu vermeiden, sollten Sie zur Bedienung ein
isolierendes Tuch verwenden oder warten, bis die Teile abgekühlt sind.
Obwohl wir feuerhemmende Materialien verwenden, sollte das Gewebe niemals
mit der heißen Blitzröhre oder der Einstelllampe in Berührung kommen.
Metall-Speedring und Feststellknopf des rotierenden System können sich enorm
erwärmen, wenn das Blitzgerät auf maximaler Leistung von Blitz und Einstell
lampe verwendet wird. Bitte warten Sie, bis die Teile abgekühlt sind, bevor Sie sie
verstauen.
Schalten Sie das Blitzgerät vor dem Einbau oder Austausch von Reektoren und
Softboxen immer aus.
Stellen Sie sicher, dass das Belüftungssystem der Blitzgeräte ordnungsgemäß
funktioniert.
Überprüfen Sie, ob der innere Gewebediffusor richtig montiert ist und weder die
heiße Blitzröhre, noch die Einstelllampe berührt.
Wenn Sie kleine Softboxen verwenden, verringern Sie die Leistung der Einstell
lampe und die Anzahl der Blitze pro Minute. Die reektierende Oberäche
bendet sich sehr nah an der Einstelllampe/Blitzröhre. Das Gewebe kann durch
übermäßige Hitze beschädigt werden.
®
, Profoto®, Bowens®,
-
-
11
Page 12

Rotalux Universal Speedring
Verwenden Sie die Farbmarkierungen, um Ihre Rotalux-Softbox je nach Produktmodell zu bauen. Der universelle Speedring ist bei allen Geräten gleich.
STREIFEN
Rote Markierungen
RECHTECK
Blaue Markierungen
OCTA
Alle
Page 13
1.A 1.B
1.C
1.C
1.E
1.D 1.D
1.FG
1. Montage der Rotalux Softbox:
A) Legen Sie den Speedring mit dem Feststellknopf nach oben auf eine feste
Unterlage.
B) Ziehen Sie jede der Stabbuchsen heraus, verschieben Sie diese in die
90°-Vertikalstellung und geben Sie sie frei.
C) Platzieren Sie den Speedring in der Mitte des Reexionsgewebes.
D) Stellen Sie sicher, dass die Schlitze der Stabbuchsen mit den Nähten des
Reexionsgewebes übereinstimmen.
E) Stecken Sie die blanken Enden der Stangen in die Buchsen des Speedrings.
F) Knicken Sie die gegenüberliegenden Stangen einzeln nach außen und üben Sie
dabei stufenweise Druck auf das bedeckte Ende aus, um eine leichte Krümmung
zu erzeugen. Stellen Sie die entsprechenden bedeckten Enden so ein, dass sie
in die Tuchlaschen in den übereinstimmenden Ecken des Reexionsgewebes
passen. Bei Bedarf justieren Sie, wie in Abbildung 1.D ersichtlich, nach.
G) Die an beiden Enden befestigten Stangen haben nun eine konvexe Krümmung.
Halten Sie die Stange fest und drehen Sie jede, um die Krümmung konkav zu
machen.
13
Page 14
Gebrauchsanleitung
1.H
1.I
H) Drücken Sie den Speedring in einer festen Stellung nach unten. Üben Sie in
der Nähe der Stangeneinfassung einzeln Druck auf die Stangen aus. Die
Stangeneinfassungen kehren in die vorherige Horizontalstellung zurück und
rasten ein. Das Reexionsgewebe nimmt nun eine konkave, zeltartige
Krümmung an.
I) Die Rotalux-Softbox kann nun auf dem Blitzgerät angebracht werden.
2.B
2.E
2.C
2.A
2.D
2.E
14
Page 15

Gebrauchsanleitung
2. Montage der Rotalux Softbox am Elinchrom-Blitzgerät:
A) Drehen Sie den Sicherungsring des Blitzgeräts (auf dem Stativ montiert)
gegen den Uhrzeigersinn, um das Bajonett zu entriegeln. Entfernen Sie die
Schutzkappe vom Blitzgerät gegen den Uhrzeigersinn.
B) Vergewissern Sie sich, dass der Feststellknopf auf dem Speedring angezogen
ist (siehe 2.C). Fügen Sie den Rotalux-Speedring ein und drehen Sie im
Uhrzeigersinn. Er rastet ein.
Drehen Sie den Sicherungsring im Uhrzeigersinn, um das Bajonett mit dem
angebrachten Rotalux Speedring einzurasten.
C) Der Winkel der Rotalux Softbox kann mit dem Drehsystem angepasst werden.
Entriegeln Sie den Feststellknopf des Speedrings und drehen Sie die Softbox
in die gewünschte Position. Stellen Sie sicher, dass der Speedring in das
Bajonett des Blitzgerätes eingerastet ist, während Sie die Softbox drehen.
ANMERKUNG: Der Speedring und der Feststellknopf können heiß werden,
wenn das Rotalux in Gebrauch ist. Schützen Sie Ihre Hände mit hitzebeständi
gen Handschuhen und schalten Sie das Gerät aus und trennen Sie es von der
Stromversorgung, wenn Sie den Winkel der Softbox einstellen wollen.
D) Bringen Sie den Diffusor an der Softbox an.
E) Befestigen Sie den Diffusor mit Klettverschlussklebeband an den Seiten und
Rändern der Softbox.
-
Das Benutzerhandbuch herunterladen
Sie erhalten das Benutzerhandbuch in anderen
Sprachen über diesen link: http://bc.gs/41
15
Page 16

Page 17
is a registered trademark of Elinchrom LTD, RENENS, SWITZERLAND
MANUEL D’UTILISATION
Rotalux
Elinchrom SA Rotalux 03.01.2017 (73320)
Page 18

Manuel d’utilisation
Introduction
Cher photographe,
Nous vous remercions d’avoir acheté la boîte à lumière Elinchrom Rotalux. Tous
les produits Elinchrom sont fabriqués en utilisant la technologie la plus avancée.
Des composants soigneusement sélectionnés sont utilisés an d’assurer une
qualité maximale, et l’équipement est soumis à de nombreux tests, durant sa
fabrication et après celle-ci. Nous sommes certains qu’il vous rendra de nom
breuses années de service able.
Veuillez lire attentivement les instructions, avant toute utilisation, pour votre sécu
rité et pour obtenir le maximum des nombreuses fonctionnalités.
Votre équipe Elinchrom
Caractéristiques
Le système de montage rapide Rotalux est probablement le système de boîte à
lumière le plus largement copié. Cependant, il est plus simple de copier un design
qu’une qualité, et ces unités restent les meilleures de leur catégorie.
-
-
Les unités Elinchrom continuent à rester uniques du fait des gammes option
nelles de déecteurs — doré, argenté, givré et translucide — qui permettent de
modier la douceur, la dureté et la couleur, en les plaçant au centre du ash à une
distance réglable. En les repliant comme un parapluie, ils sont faciles à transpor
ter et à garder propre, dans leur sac de transport fourni.
Bague Rotalux avec système mécanique amélioré et extrêmement léger, seule
ment 370 g. Finition améliorée du tissu du réecteur Rotalux avec passepoil gris
pour une meilleure efcacité lumineuse. Système rotatif à 360 °.Se replie comme
un parapluie, sans démonter la boîte à lumière. Sac de transport pour Rotalux
plié fourni. Des capuchons de diffusion optionnels pour contrôler la propagation
de la lumière sont disponibles pour tous les Rotalux. Des Rotagrids optionnelles
pour un éclairage direct sont disponibles pour les Rotalux 70 x 70 cm, 60 x 80 cm
et 90 x 110 cm.
18
-
-
-
Page 19

Manuel d’utilisation
Lighttools™ propose une large gamme de grilles de différentes tailles et de différents angles pour les boîtes à lumière Rotalux.
Des adaptateurs de bague sont disponibles pour d’autres marques de ash telles
que Broncolor
Conseils de sécurité
La puissance maximale de lampe de mise au point pour toutes les boîtes à
lumière Rotalux est limitée à 300 W. Assurez-vous que la Rotalux est correcte
ment assemblée et xée à l’unité de ash.
L’unité, le ash et les accessoires peuvent devenir très chauds durant et après
leur utilisation ! Pour éviter les accidents, manipulez-les avec des tissus isolants
ou attendez que toutes les pièces aient refroidi.
Même si nous utilisons des matériaux ignifuges, le tissu ne doit jamais entrer en
contact avec le ash ou la lampe de mise au point.
La bague métallique et le bouton de verrouillage du système de rotation peuvent
devenir extrêmement chauds lorsque l’unité de ash est utilisée au niveau de
puissance maximale du ash et de la lampe de mise au point. Veuillez attendre
que toutes les pièces aient refroidi avant de remballer le matériel.
Éteignez toujours l’unité de ash avant de placer ou de changer les réecteurs et
la boîte à lumière.
Assurez-vous que le système de ventilation des unités de ash fonctionne cor
rectement.
Vériez soigneusement que le tissu du diffuseur interne est correctement xé et
qu’il n’entre pas en contact avec le ash et la lampe de mise au point.
Abaissez la puissance de la lampe de mise au point et réduisez le nombre de
ashs par minute lorsque des boîtes à lumière de petite taille sont utilisées. La
surface rééchissante est très proche de la lampe de mise au point et du ash. Le
tissu peut être endommagé par une chaleur trop importante.
*Broncolor®, Profoto®, Bowens®, Hensel®, AlienBees®, Comet®, Photona® sont des marques protégées qui
n’appartiennent pas à Elinchrom LTD.
®
, Profoto®, Bowens®, Hensel®, AlienBees®, Comet®, Photona®.
-
-
19
Page 20

Bague universelle Rotalux
Utilisez les marques de couleur pour assembler votre boîte à lumière Rotalux
selon le modèle de votre produit. La bague universelle est identique pour toutes
les unités.
STRIP
Marques rouges
SQUARE
Marques bleues
OCTA
Toutes
Page 21

1.A 1.B
1.C
1.C
1.E
1.D 1.D
1.FG
1. Assembler la boîte à lumière Rotalux :
A) Placez la bague avec le bouton de verrouillage sur une surface plane
horizontale et résistante.
B) Tirez tous les connecteurs et mettez-les en position verticale relâchée à 90 °.
C) Placez la bague au centre du tissu de réexion.
D) Assurez-vous que les fentes des connecteurs coïncident avec les coutures
des tissus de réexion.
E) Insérez les extrémités nues des connecteurs dans les fentes de la bague.
F) Un par un, repliez les connecteurs vers l’extérieur, en appliquant une
pression graduelle sur leur extrémité recouverte pour donner une légère
courbure. Manipulez leurs extrémités recouvertes an qu’ils rentrent dans les
poches en tissu dans les angles coïncidant du tissu rééchissant.
Si nécessaire, réajustez comme indiqué sur l’image 1.D.
G) Les connecteurs xés de chaque côté ont alors une courbure convexe.
Maintenez les connecteurs et exercez une torsion pour rendre la courbure
concave.
21
Page 22

Manuel d’utilisation
1.H
1.I
H) Maintenez la bague dans une position xe. Appliquez une pression sur
les tiges près des connecteurs, un par un. Les tiges reviennent à leur position
horizontale initiale et se verrouillent. Le tissu rééchissant prend une
courbure concave ressemblant à celle d’une tente.
I) La boîte à lumière Rotalux est à présent prête à être montée sur l’unité de
ash.
2.B
2.E
2.C
2.A
2.D
2.E
22
Page 23

Manuel d’utilisation
2. Monter la boîte à lumière Rotalux sur l’unité de flash Elinchrom :
A) Tournez la bague de verrouillage sur l’unité de ash (monté sur le trépied),
dans le sens antihoraire pour déverrouiller la baïonnette. Retirez le capuchon
de protection de l’unité de ash dans le sens antihoraire.
B) Assurez-vous que le bouton de verrouillage sur la bague est bien serré
(voir 2.C). Insérez la bague du Rotalux et tournez dans le sens horaire. Il se
met en place et émet un déclic.
Tournez la bague de verrouillage dans le sens horaire pour verrouiller la
baïonnette avec la bague du Rotalux xée.
C) L’angle de la boîte à lumière Rotalux peut être ajusté avec le système de
rotation. Déverrouillez le bouton de verrouillage de la bague et tournez
la boîte à lumière dans la position souhaitée. Assurez-vous que la bague est
verrouillée sur la baïonnette de l’unité de ash pendant la rotation de la boîte
à lumière.
NOTE : La bague et le bouton de verrouillage peuvent chauffer pendant l’uti-
lisation du Rotalux. Protégez vos mains avec des gants résistants à la chaleur,
éteignez l’unité, et déconnectez-la de son alimentation, lorsque vous désirez
ajuster l’angle de la boîte à lumière.
D) Attachez le diffuseur à la boîte à lumière.
E) Fixez le diffuseur avec les bandes velcro au long des arrêtes et angles de la
boîte à lumière.
Téléchargez le guide d’utilisation
Veuillez trouver le guide d’utilisation dans d’autres
langues en suivant ce lien: http://bc.gs/41
23
Page 24

Page 25

is a registered trademark of Elinchrom LTD, RENENS, SWITZERLAND
MANUALE D’USO
Rotalux
Elinchrom SA Rotalux 03.01.2017 (73320)
Page 26

Manuale d’uso
Introduzione
Caro Fotografo,
Grazie per aver acquistato ELINCHROM Rotalux Softbox. Tutti i prodotti Elin
chrom vengono realizzati secondo le più avanzate tecnologie. I componenti sono
stati accuratamente selezionati per garantire la massima qualità e le apparecchia
ture vengono sottoposte a numerosi test sia durante che dopo la fabbricazione.
Ci auguriamo che possa offrirti molti anni di afdabile servizio.
Ti preghiamo di leggere attentamente le istruzioni prima dell’uso, per la tua sicu
rezza e per ottenere il massimo benecio.
L’Elinchrom-Team
Caratteristiche
Il Sistema di montaggio facile Rotalux è probabilmente il più imitato al mondo tra
tutti i sistemi Softbox. Tuttavia, poiché è più facile imitare il design piuttosto che
la qualità, rimane il miglior sistema di questa categoria.
Ciò che rende ancora unici i sistemi Elinchrom sono i set opzionali di deettori –
dorati, argentati, satinati e translucidi che consentono di modulare la morbidezza
/ durezza della luce e le tonalità, grazie alla montatura centrale sopra il tubo ash
e alla distanza regolabile. Si possono ripiegare come degli ombrelli per essere
facilmente trasportati e mantenuti puliti nella loro borsa da trasporto inclusa.
-
-
-
Rotalux Speedring con proprietà meccaniche migliorate ed estremamente leg
gero, solo 370 g. Migliorata nitura del tessuto riettente Rotalux con tubazione
grigia per una migliore efcacia della luce. Sistema rotante a 360°.
Si ripiega come un ombrello, senza smontare il softbox.
È inclusa una borsa di trasporto per riporre Rotalux. Sono disponibili per tutti i
Rotalux dei diffusori opzionali con coperchio per regolare la diffusione della luce.
Rotagrid opzionali per l’illuminazione diretta sono disponibili per il Rotalux 70x70
cm, 60x80 cm e per quello da 90x110 cm.
26
-
Page 27

Manuale d’uso
Lighttools™ offre una vasta gamma di griglie in diverse misure e angolazioni per i
softbox Rotalux.
Sono disponibili adattatori speedring per altri marchi quali Broncolor
®
Bowens
, Hensel®, AlienBees®, Comet®, Photona®.
Consigli di sicurezza
La potenza massima della lampada pilota è limitata a 300 W per tutti i softbox
Rotalux. Assicurarsi che il Rotalux sia correttamente montato e ssato al ash.
L’unità, il tubo ash e gli accessori potrebbero surriscaldarsi molto durante e
dopo l’uso! Per evitare infortuni, maneggiare con panno isolante o lasciar raffred
dare i componenti.
Anche se impieghiamo materiali ignifughi il tessuto non dovrebbe entrare mai a
contatto con il tubo del ash o la lampada pilota caldi.
L’anello adattatore in metallo e la manopola di bloccaggio del sistema di rota
zione potrebbero surriscaldarsi notevolmente quando il ash viene utilizzato alla
massima potenza del ash e della lampada pilota. Si raccomanda di attendere
che tutti i componenti di siano raffreddati prima di riporre.
Spegnere sempre il ash prima di montare o sostituire i riettori o i soft- box.
Assicurarsi del corretto funzionamento del sistema di ventilazione del ash.
Vericare che il telo diffusore interno sia correttamente montato e che non entri a
contatto con il tubo ash e la lampada pilota caldi.
Quando si utilizzano softbox di dimensioni ridotte, diminuire la potenza della
lampada pilota e il numero di ash al minuto. La supercie riettente è molto
vicina alla lampada pilota/ tubo ash. L’eccessivo calore potrebbe danneggiare il
tessuto.
®
, Profoto®,
-
-
*Broncolor®, Profoto®, Bowens®, Hensel®, AlienBees®, Comet®, Photona® are protected trademarks that do not
belong to Elinchrom LTD.
27
Page 28

Speedring universale Rotalux
Utilizza i segni colorati per assemblare il softbox Rotalux in base al modello da te
scelto. Lo speedring universale è lo stesso per tutti i sistemi.
STRIP
Segni rossi
SQUARE
Segni blu
OCTA
Tutti
Page 29

1.A 1.B
1.C
1.C
1.E
1.D 1.D
1.FG
1. Come montare il softbox Rotalux:
A) Posizionare lo speedring con la manopola di bloccaggio rivolta verso l’alto su
una supercie orizzontale stabile.
B) Estrarre ciascuno dei cilindretti e ruotarli a a 90° in posizione verticale e
rilasciare.
C) Collocare lo speedring al centro dei tessuti riettenti.
D) Assicurarsi che gli alloggiamenti dei cilindretti coincidano con le cuciture dei
tessuti riettenti.
E) Inserire le estremità scoperte delle bacchette nei cilindretti dello speedring.
F) Inclinare una bacchetta alla volta verso l’esterno, esercitando una pressione
graduale sulle estremità incapsulate, in modo tale da imprimere una leggera
curvatura. Inserire le estremità incapsulate nelle corrispondenti tasche sugli
angoli del telo riettente. Se necessario, riallineare come mostrato nella
gura 1 D.
G) Le bacchette montate su entrambe le estremità presentano ora una curvatura
convessa. Ruotare le bacchette per ottenere una curvatura concava.
29
Page 30

Manuale d’uso
1.H
1.I
H) Tenere fermo lo Speedring. Esercitare pressione sulle bacchette poste in
prossimità dei cilindretti. I cilindretti ritorneranno alla precedente posizione
orizzontale e verranno bloccati. I tessuti riettenti acquisteranno ora una
curvatura concava simile a quella di una tenda.
I) Il Softbox Rotalux è adesso pronto per essere montato sul ash.
2.B
2.E
2.C
2.A
2.D
2.E
30
Page 31

Manuale d’uso
2. Montare il Softbox Rotalux sul flash Elinchrom:
A) Ruotare l’anello di bloccaggio del ash (montato sul treppiede), in senso
antiorario per sbloccare la baionetta. Rimuovere la capsula protettiva dal
ash in senso antiorario.
B) Vericare che la manopola di bloccaggio sullo Speedring sia serrata (vedi
2.C). Inserire lo speedring Rotalux e ruotare in senso orario. Si bloccherà in
posizione con uno scatto.
Ruotare l’anello di bloccaggio in senso orario per bloccare la baionetta con
inserito l’anello adattatore Rotalux.
C) L’angolo del softbox Rotalux può essere regolato con il sistema di rotazione.
Sbloccare la manopola di bloccaggio posta sullo speedring e ruotare il
softbox nella posizione desiderata. Durante la rotazione del softbox,
assicurarsi che l’anello adattatore sia perfettamente bloccato nella baionetta
del ash.
NOTE : Lo Speedring e la manopola di bloccaggio potrebbero surriscaldarsi
durante l’uso del Rotalux. Proteggere le mani con guanti resistenti al calore e
spegnere l’unità e scollegarla dall’alimentazione elettrica, quando si deve regolare
l’angolo del softbox.
D) Fissare il diffusore al softbox.
E) Fissare il diffusore lungo i lati e i bordi del softbox con i nastri di Velcro.
Scarica il manuale d’uso
È possibile scaricare il manuale d’uso in altre lingue
a questo link: http://bc.gs/41
31
Page 32

Page 33

is a registered trademark of Elinchrom LTD, RENENS, SWITZERLAND
MANUAL DE USUARIO
Rotalux
Elinchrom SA Rotalux 03.01.2017 (73320)
Page 34

Manual de Usuario
Estimado fotógrafo,
Gracias por haber comprado el Softbox Rotalux ELINCHROM. Todos los productos Elinchrom están fabricados utilizando las tecnologías más avanzadas.
Se utilizan componentes cuidadosamente seleccionado para garantizar la más
alta calidad y el equipo es sometido a varios tests durante y tras la fabricación.
Conamos en que le proporcione muchos años de servicio able.
Por favor, antes de usarlo, lea las instrucciones cuidadosamente para su seguri
dad y para sacar el máximo partido a sus funcionalidades.
El equipo Elinchrom
Características
El fácil sistema de montaje Rotalux es probablemente el más copiado de todos
los sistemas Softbox. Sin embargo, es más fácil copiar un diseño que su calidad
y estos siguen siendo los mejores de su clase.
Lo que sigue haciendo que las unidades de Elinchrom sean únicas son los juegos
opcionales de deectores - oro, plata, esmerilado y translúcido que permiten mo
dicar la suavidad /dureza y el color; Encajan centralmente sobre el tubo de ash
a la distancia que elija. Plegables como un paraguas, se transportan fácilmente o
simplemente se mantienen limpias, en la bolsa de transporte incluida.
Anillo de velocidad Rotalux con una mecánica mejorada y extremadamente
ligero, sólo 370 g. Acabado mejorado del tejido reector Rotalux con canalización
gris para una mejor eciencia luminosa. Sistema giratorio de 360 °.
Se cierra como un paraguas, sin desmontar el softbox.
Se incluye bolsa para transporte del Rotalux plegado. Opcionalmente disponibles
difusores con capucha para controlar la propagación de la luz, disponibles para
todos los Rotalux.
Rotagrids opcionales para la iluminación directa, disponibles para el Rotalux
70x70 cm, 60x80 cm y 90x110 cm.
-
-
34
Page 35

Manual de Usuario
Lighttools™ ofrece una amplia colección de rejillas de diferentes tamaños y
ángulos para los softboxes Rotalux.
Disponibles adaptadores de anillos de velocidad para otras marcas de ash
como Broncolor
Consejo de seguridad
La potencia máxima de la lámpara de modelado para todos los softboxes de
Rotalux está limitada a 300W. Asegúrese de que el Rotalux esté correctamente
montado y bloqueado en la unidad de ash.
La unidad, el tubo de ash y los accesorios pueden calentarse mucho durante
y después del uso. Para evitar lesiones, utilice un paño de aislamiento o espere
hasta que las piezas se hayan enfriado.
Aunque usamos materiales ignífugos, la tela nunca debe entrar en contacto con
el tubo de ash caliente ni con la lámpara de modelado. El anillo de velocidad
metálico y el botón de bloqueo del sistema giratorio pueden calentarse enorme
mente cuando se utiliza el ash en los niveles máximos de potencia del ash y de
la lámpara de modelado. Espere hasta que las piezas se hayan enfriado, antes de
guardar.
Apague siempre el ash antes de montar o intercambiar reectores y cajas.
Asegúrese de que el sistema de ventilación de las unidades de ash funciona
correctamente.
Compruebe que el difusor de tela interno esté correctamente colocado y que no
haga contacto con el tubo de ash caliente y la lámpara de modelado.
Baje la potencia de la lámpara de modelado y reduzca el número de destellos por
minuto, cuando utilice softboxes de pequeño tamaño. La supercie reectante
está muy cerca de la lámpara de modelado / tubo de ash. La tela se puede
deteriorar con el calor excesivo.
®
, Profoto®, Bowens®, Hensel®, AlienBees®, Comet® y Photona®.
-
*Broncolor®, Profoto®, Bowens®, Hensel®, AlienBees®, Comet®, Photona® are protected trademarks that do not
belong to Elinchrom LTD.
35
Page 36

Anillo de velocidad Universal Rotalux
Use la marca de color para construir su softbox Rotalux dependiendo del modelo
de su producto. El anillo de velocidad es el mismo para todas las unidades.
STRIP
Marcas rojas
SQUARE
Marcas azules
OCTA
Todas
Page 37

1.A 1.B
1.C
1.C
1.E
1.D 1.D
1.FG
1. Montaje del Softbox Rotalux:
A) Coloque el anillo de velocidad con el botón de bloqueo hacia arriba en una
supercie horizontal rme.
B) Extraiga las varillas del conector y muévalas 90° hasta posición vertical y
suelte.
C) Coloque el anillo de velocidad en el centro de la tela de reexión.
D) Asegúrese de que los huecos de las varillas del conector coinciden con las
costuras de los tejidos reectantes.
E) Inserte los extremos de las varillas en los conectores del anillo de velocidad.
F) Doble una de cada vez las varillas opuestas hacia afuera, aplicando una
presión gradual sobre el extremo tapado para dar una ligera curvatura.
Manipule los respectivos extremos tapados para encajar en los bolsillos de
tela en las esquinas coincidentes de los tejidos reectantes. Si es necesario,
reajuste como se muestra en la imagen 1.D,
G) Las varitas jadas en ambos extremos, tienen ahora una curva convexa.
Sostenga la varita y gire cada una de ellas para hacer la curva cóncava.
37
Page 38

Manual de Usuario
1.H
1.I
H) Mantenga presionado el anillo de velocidad en una posición ja. Aplique
presión sobre cada una de las varillas cerca de la varilla del conector. Las
varillas del conector retornan a la posición horizontal previa y se bloquean.
El tejido reectante adquiere ahora una curvatura cóncava de aspecto de
tienda de campaña.
I) El softbox Rotalux está ahora preparado para ser montado en la unidad de
ash.
2.B
2.E
2.C
2.A
2.D
2.E
38
Page 39

Manual de Usuario
2. Montaje del Softbox Rotalux en la unidad de flash Elinchrom:
A) Gire el anillo de bloqueo de la unidad de ash (montada en el trípode) en el
sentido contrario a las agujas del reloj para desbloquear la bayoneta. Retire
la capucha protectora de la unidad de ash en sentido contrario a las
agujas del reloj.
B) Asegúrese de que el botón de cierre del anillo de velocidad está ajustado
(ver 2.C.) Inserte el anillo de velocidad) Rotalux y gire en el sentido de las
agujas del reloj. Hace clic en el sitio. Gire el anillo de bloqueo en el sentido
de las agujas del reloj para bloquear la bayoneta con el anillo de velocidad
Rotalux conectado.
C) El ángulo de la caja del softbox Rotalux se puede ajustar con el sistema
giratorio. Desbloquee el botón de bloqueo del anillo de velocidad y gire el
softbox a la posición deseada. Asegúrese de que el anillo de velocidad
está bloqueado en la bayoneta de la unidad de ash mientras gira el
softbox.
NOTA: El anillo de velocidad y el botón de bloqueo pueden calentarse cuando el
Rotalux está en uso. Proteja las manos con guantes resistentes al calor y apague
la unidad y desconéctela de la red eléctrica, cuando necesite ajustar el ángulo
del softbox.
D) Una el difusor a la softbox.
E) Fije el difusor con la tiras de Velcro a lo largo de los lados y bordes del
softbox.
Descargue el manual de usuario
Por favor, descargue el manual de usuario en otras
lenguas en el enlace: http://bc.gs/41
39
Page 40

Page 41

is a registered trademark of Elinchrom LTD, RENENS, SWITZERLAND
GEBRUIKSAANWIJZING
Rotalux
Elinchrom SA Rotalux 03.01.2017 (73320)
Page 42

Gebruiksaanwijzing
Inleiding
Beste Fotograaf,
Dank u voor het aankopen van de ELINCHROM Rotalux Softbox. Alle produc
ten van Elinchrom worden ontworpen met de meest vooruitstrevende technologie. We zoeken zorgvuldig de beste onderdelen uit zodat we u de beste kwaliteit
kunnen garanderen. Het materiaal wordt ook aan strenge testen onderworpen
tijdens en na het productieproces. We zijn er zeker van dat u er jaren zult van
genieten.
Lees de gebruiksaanwijzing aandachtig alvorens u het toestel gebruikt. Dit is
belangrijk voor uw veiligheid en om uw toestel zo goed mogelijk te leren kennen.
Uw Elinchrom-Team
Eigenschappen
Het Rotalux- systeem is gemakkelijk op te stellen en wordt van alle Softbox-systemen het meest gekopieerd. Een design kopiëren is echter gemakkelijker dan de
kwaliteit kopiëren en Rotalux blijft het beste systeem in zijn klasse.
-
Elinchrom blijft uniek dankzij de extra sets deectoren – goud, zilver, mat en door
zichtig, die het mogelijk maken om de zachtheid/hardheid en kleur aan te passen.
Ze passen centraal over de itslamp op de afstand die u kiest. Ze vouwen in
zoals een paraplu, zijn gemakkelijk te vervoeren en te reinigen en worden ver
kocht met een draagtas.
Verbeterde Rotalux Speedring, zeer licht, slechts 370 g. Verbeterde afwerking
van de Rotaux reectorstof met grijze afwerking voor meer lichtefciëntie. 360°
draaiend systeem.
Op te vouwen zoals een paraplu, zonder de softbox te verwijderen.
Draagtas voor een opgevouwen Rotalux inbegrepen. Optionele Hooded Diffusers
om de spreiding van het licht te controleren zijn beschikbaar voor alle Rotalux.
42
-
-
Page 43

Gebruiksaanwijzing
Optionele Rotagrids voor rechtstreekse belichting zijn beschikbaar voor 70x70
cm, 60x80 cm en 90x110 cm.
Lighttools™ biedt een ruime waaier aan grids in verschillende afmetingen en
hoeken voor Rotalux softboxes.
®
Speedring adapters voor andere merken itslampen zoals Broncolor
®
Bowens
, Hensel®, AlienBees®, Comet®, Photona® zijn beschikbaar.
Veiligheidstip
De maximum wattage voor de instellamp van alle Rotalux softboxes is beperkt tot
300W. Zorg dat de Rotalux juist samengesteld en afgesloten is.
De unit, de itslamp en de accessoires kunnen erg heet worden tijdens en na het
gebruik! Gebruik isolerende stof of wacht tot de onderdelen afgekoeld zijn om
verwondingen te vermijden.
Hoewel we brandvertragende materialen gebruiken, mag de stof nooit in contact
komen met de itslamp of de instellamp.
De metalen Speedring en de afsluitknop voor het draaiende systeem kunnen
heel erg warm worden als de itslamp en instellamp worden gebruikt op maxi
mum kracht. Wacht tot de onderdelen afgekoeld zijn alvorens ze op te bergen.
Schakel de itslamp altijd uit alvorens u de reectoren of softboxes verwisselt.
Zorg ervoor dat het ventilatiesysteem van de itslampen juist werkt.
Controleer of de interne diffuser juist geplaatst is en geen contact maakt met de
hete itslamp en instellamp.
Als u een kleine maat softbox gebruikt, verlaag dan het vermogen van de instel
lamp en verminder het aantal itsen per minuut. Het reecterende oppervlak
bevindt zich erg dicht bij de instellamp/itslamp. De stof kan beschadigd worden
door overmatige hitte.
*Broncolor®, Profoto®, Bowens®, Hensel®, AlienBees®, Comet®, Photona® are protected trademarks that do not
belong to Elinchrom LTD.
, Profoto®,
-
-
43
Page 44

Rotalux Universele Speedring
Gebruik de gekleurde markeringen om uw Rotalux softbox te monteren. Dit hangt
af van het model. De universele Speedring is voor alle units dezelfde.
STRIP
Rode Markeringen
SQUARE
Blauwe markeringen
OCTA
Alle
Page 45

1.A 1.B
1.C
1.C
1.E
1.D 1.D
1.FG
1. De Rotalux Softbox monteren:
A) Plaats de Speedring met de afsluitknop aan de bovenkant op een stevig
horizontaal oppervlak.
B) Trek alle rode sockets uit en schuif ze in de 90° verticale positie. Laat los.
C) Plaats de Speedring in het midden van de reecterende stof.
D) Zorg ervoor dat de gleuven van de rode sockets samenvallen met de zomen
van de reecterende stof..
E) Steek het lege uiteinde van de roedes in de sockets van de Speedring.
F) Buig de roedes een voor een naar buiten, waarbij u geleidelijk druk uitoefent
op het uiteinde met het kapje om ze lichtjes te buigen. Zorg ervoor dat het
uiteinde met het kapje past in de hoesjes in de overeenkomende hoeken van
de reecterende stof. Als het nodig is, kunt u ze aanpassen zoals u ziet in
foto 1.D.
G) De roedes die aan beide uiteindes vast zitten, hebben nu een convexe boog.
Houd de roede vast en draai ze om de boog concaaf te maken.
45
Page 46

Gebruiksaanwijzing
1.H
1.I
H) Houd de Speedring in een vaste positie. Oefen een voor een druk uit op de
roedes bij de socket van de roede. De sockets gaan terug naar hun vorige hori
zontale positie en klikken vast. De reecterende stof heeft nu een concave vorm,
een beetje zoals een tent.
I) De Rotalux Softbox is nu klaar om op de ash unit geplaatst te worden.
2.B
2.E
2.C
2.A
2.D
2.E
46
Page 47

Gebruiksaanwijzing
2. De Rotalux Softbox op de Elinchrom flash unit monteren:
A) Draai de sluitring in tegenwijzerzin van de ash unit (staat op het statief) om
de bajonet los te maken. Verwijder de beschermkap in tegenwijzerzin van de
ash unit.
B) Zorg ervoor dat de afsluitknop op de Speedring vast zit (zie 2.C.). Plaats de
Rotalux Speedring en draai in wijzerzin. Het klikt vast.
Draai de afsluitring in wijzerzin om de bajonet vast te klikken met de Rotalux
Speedring eraan vast.
C) De hoek van de Rotalux softbox kan aangepast worden met het draaiende
systeem. Maak de afsluitknop los van de Speedring en draai de softbox in
de gewenste positie. Zorg ervoor dat de Speedring vast zit op de bajonet van
de ash unit terwijl u de softbox draait.
OPMERKING : De Speedring en de afsluitknop kunnen warm worden als de
Rotalux gebruikt wordt. Bescherm uw handen met hittewerende handschoenen
en schakel de unit uit en haal het uit het stopcontact als u de hoek van de soft
box wil aanpassen.
D) Maak de diffuser vast aan de softbox.
E) Maak de diffuser met velcro vast aan de zijdes en hoeken van de softbox.
Download de gebruiksaanwijzing
-
U kunt de gebruiksaanwijzing in andere talen
vinden via deze link: http://bc.gs/41
47
Page 48

Page 49

is a registered trademark of Elinchrom LTD, RENENS, SWITZERLAND
РУКОВОДСТВО ПОЛЬЗОВАТЕЛЯ
Rotalux
Elinchrom SA Rotalux 03.01.2017 (73320)
Page 50

РУКОВОДСТВО ПОЛЬЗОВАТЕЛЯ
Введение
Уважаемый фотограф!
Благодарим Вас за покупку софтбокса ELINCHROM Rotalux Soft
-
box. Все продукты Elinchrom производятся с использованием самых
передовых технологий. Тщательно отобранные компоненты используются
для обеспечения наивысшего качества, и оборудование проходит
многочисленные испытания во время и после изготовления. Мы верим, что
это позволит ему надежно служить вам в течение долгих лет.
Пожалуйста, внимательно прочитайте инструкцию перед использованием для
обеспечения вашей безопасности и использования многочисленных функций
с максимальной отдачей.
Ваша команда Elinchrom
Характеристики
Система Rotalux, которую легко можно смонтировать, — это, вероятно,
наиболее широко копируемая из всех систем софтбоксов. Однако
скопировать конструкцию проще, чем качество, и наши продукты остаются
лучшими изделиями в своем классе. Изделия Elinchrom по-прежнему
сохраняют свою уникальность благодаря опциональным наборам
отражателей — золотому, серебряному, матовому и полупрозрачному. Они
позволяют менять мягкость/контрастность и цвет при креплении по центру
на лампе-вспышка, установленной на выбранном вами расстоянии. Эти
софтбоксы легко складываются наподобие зонтиков, и их легко перевозить и
просто содержать в чистоте. В комплект также входит сумка для переноски.
Крепежное кольцо Rotalux Speedring обладает улучшенной механической
конструкцией и является очень легким — всего 370 г. Улучшенная отделка
ткани отражателя Rotalux с серыми трубками обеспечивает более
эффективное освещение. Система вращается на 360°.
Складывается как зонтик без демонтажа софтбокса.
Сумка для переноски сложенного софтбокса Rotalux входит в комплект
поставки. Для всех устройств Rotalux доступны дополнительные диффузоры
с колпаком для управления рассеиванием света
50
Page 51

РУКОВОДСТВО ПОЛЬЗОВАТЕЛЯ
Опциональные сетки Rotagrids для прямого освещения доступны для Rotalux
70x70 см, 60x80 см и 90x110 см.
Lighttools™ предлагает широкий ассортимент сеток с разными размерами и
углами для софтбоксов Rotalux.
Также доступны адаптеры Speedrings («Быстрые кольца») для вспышек
других брендов, таких как Broncolor™, Profoto™, Bowens™, Hensel™, Alien
-
Bees™, Comet™, Photona™.
Рекомендации по безопасности
Максимальная мощность лампы-пилота для всех софтбоксов Rotalux равна
300 Вт. Убедитесь, что устройство Rotalux правильно собрано и прочно
закреплено на вспышке.
Устройство, лампа-вспышка и аксессуары могут сильно нагреваться во время
и после использования! Чтобы избежать травм, используйте изолирующую
ткань при работе с ними или подождите, пока детали остынут.
Хотя если мы используем огнеупорные материалы, ткань никогда не должна
вступать в контакт с горячей лампой-вспышкой или лампой-пилотом.
Металлический адаптер speedring и ручка фиксации вращающейся системы
может очень сильно нагреться, когда устройство вспышки используется с
вспышкой и лампой-пилотом на максимальной мощности. Перед упаковкой
подождите, пока детали остынут. Всегда выключайте устройство-вспышку
перед установкой или сменой отражателей и софтбоксов. Убедитесь, что
система вентиляции вспышки работает правильно. Дважды проверьте, чтобы
внутренний тканевый диффузор был правильно установлен и не вступал в
контакт с горячей лампой-вспышкой и лампой-пилотом.
Снизьте мощность лампы-пилота и уменьшите число вспышек в минуту при
использовании софтбоксов небольшого размера. Отражающая поверхности
находится очень близко к лампе-пилоту/лампе-вспышке. Ткань может быть
повреждена чрезмерным нагревом.
*Broncolor®, Profoto®, Bowens®, Hensel®, AlienBees®, Comet®, Photona® are protected trademarks that do not
belong to Elinchrom LTD.
51
Page 52

Универсальный адаптер Rotalux Speedring
Используйте цветные метки, чтобы создать ваш софтбокс Rotalux в
зависимости от модели вашего продукта. Универсальный адаптер speedring
является одинаковым для всех устройств.
ПОЛОСКA
Красные метки
КВА ДРАТ
Синие метки
ВОСЬМИУГОЛЬНИК
Все
Page 53

1.A 1.B
1.C
1.C
1.E
1.D 1.D
1.FG
1. Сборка софтбокса Rotalux:
A) Закрепите адаптер speedring с помощью ручки фиксации в верхней части
устройства на твердой горизонтальной поверхности.
B) Вытяните все стержневые патроны, переместите их в вертикальное
положение под 90° и освободите.
C) Поместите speedring в центре отражающей ткани.
D) Убедитесь, что вырезы на стержневых патронах совпадают со швами на
отражающей ткани.
E) Вставьте открытые концы стержней в патроны Speedring.
F) По одному согните стержни в противоположное положение наружу,
постепенное надавливая на закрытый колпачком конец, чтобы добиться
небольшого искривления. Попадите соответствующими концами с
колпачками в карманы в ткани на соответствующих углах отражающей ткани.
При необходимости, откорректируйте, как показано на рисунке 1.D.
G) После фиксации стержней на обоих концах они теперь похожи на
выпуклую кривую. Удерживайте и сгибайте каждый стержень, чтобы добиться
формы вогнутой кривой
Page 54

РУКОВОДСТВО ПОЛЬЗОВАТЕЛЯ
1.H
1.I
H) Удерживайте Speedring в фиксированном положении. По очереди давите
на стержни возле патрона для стержня. Патроны для стержня возвращаются
в предыдущее горизонтальное положение и блокируются. Отражающая ткань
теперь приобретает вогнутую кривую форму, напоминающую палатку.
I) Софтбокс Rotalux теперь готов к монтажу на вспышке.
2.B
2.E
2.C
2.A
2.D
2.E
54
Page 55

РУКОВОДСТВО ПОЛЬЗОВАТЕЛЯ
2. Монтаж софтбокса Rotalux на вспышке Elinchrom:
A) Поверните фиксирующее кольцо на устройстве вспышки (монтируется на
треноге) против часовой стрелки, чтобы разблокировать байонетный замок.
Снимите защитный колпачок с устройства-вспышки, повернув его против
часовой стрелки.
B) Убедитесь, что зажимная ручка на Speedring затянута (см. 2.C).
Вставьте адаптер Rotalux Speedring и поверните его по часовой стрелке. Он
защелкнется в нужном месте.
Поверните фиксирующее кольцо по часовой стрелке, чтобы закрыть
байонетный замок с помощью прилагаемого Rotalux Speedring.
C) Угол софтбокса Rotalux можно откорректировать с помощью
вращающейся системы. Разблокируйте зажимную ручку Speedring и
поверните софтбокс в нужное положение. Убедитесь, что Speedring
зафиксировано в байонетном замке устройства-вспышки при повороте
софтбокса.
ПРИМЕЧАНИЕ: Speedring и зажимная ручка может нагреться при
использовании Rotalux. Защитите ваши руки жаропрочными перчатками
и выключите прибор и отключите его от электросети, когда вам нужно
отрегулировать угол софтбокса.
D) Присоедините диффузор к софтбоксу.
E) Прикрепите диффузор с помощью застежек-липучек вдоль сторон и
краев софтбокса.
Download the user manual
Загрузите руководство пользователя на других
языках по этой ссылке: http://bc.gs/41
55
Page 56

Page 57

is a registered trademark of Elinchrom LTD, RENENS, SWITZERLAND
安 全ガイド
Rotalux
Elinchrom SA Rotalux 03.01.2017 (73320)
Page 58

安 全ガイド
導入
写真家の皆様へ
ELINCHROM(エリンクローム)Rotalux (ロータ リュクス)ソフトボックスをご購
入いただきまして、誠にありがとうございます。ELINCHROMの製品は、すべて最新
の技術を利用しています。入念に選んだコンポーネントで、最高のクオリティを実現
し、また製造中および製造後に装置のテストを数多く実施しております。信頼できる
性能を発揮し、長年ご愛用いただけることを願っております。
皆様の安全を守り、多彩な機能を最大限にご活用いただけるよう、ご使用前に、ユ
ーザーマニュアルをよくお読みいただくようお願いいたします。
Elinchrom チーム
特長
取り付けが容易なRotaluxシステムは、数あるソフトボックス システムの中でも、最
も幅広くコピーされているものでしょう。しかし設計だけをコピーしても、品質をコ
ピーすることは困難です。当社の製品は同クラス内で最高のユニットとしての地位
を保ち続けています。
Elinchromユニットが並びない優れた製品であることを担保しているのは、オプシ
ョンのデフレクターセットです。金、銀、フロスト、半透明の各種類を取り揃え、柔か
み/硬さと、色の修正を可能にします。あなたの選んだ距離で、フラッシュチューブの
中心にぴったりと合わせることができます。傘のように折りたたむことができ、付属
の バ ッ グ で 、持 ち 運 び も 、汚 れ が 付 か な い よ う 保 管 す る こ と も 簡 単 で す 。
Rotaluxスピードリングは、機構を改良し、さらにわずか 370g と超軽量で
す。Rotaluxリフレクター繊維は、灰色のパイピングを使用することで、よりよい光
効率を実現しています。360°リボルビングシステム。
ソ フ ト ボ ッ ク ス を 分 解 せ ず 、傘 の よ う に 折 り 畳 む こ と が で き ま す 。
Rotaluxを折りたたんで持ち運べる、キャリーバッグも付属しています。フード付き
ディフューザーは、オプションで、光 のスプレッドをコントロ ー ルできます。すべての
機種のRotaluxでご利用いただけます。
Rotagridsは、直接照明のためのオプションで、Rotalux 70x70 cm、60x80 cm
および90x110 cmでご利用いただけます。
58
Page 59

安 全ガイド
Lighttools™では、Rotalux ソフトボックス向けとして、さまざまなサイズおよび角
度の広範なグリッドを提供しています。
®
Broncolor
Photona
、Profoto®、Bowens®、Hensel®、AlienBees®、Comet®、
®
といった 、他のフラッシュ ブランド用 のスピードリング アダプターもご
利用いただけます。
安全上の推奨事項
Rotaluxソフトボックスでは、全てのモデリングランプの最大出力が300Wに制限
されています。Rotaluxが正しく組み立てられており、フラッシュユニットにロックさ
れているかご確 認ください。 ユニット、フラッシュチューブ、アクセサリは、使 用中・使
用後は非常に高温になることがあります!傷害を防ぐため、絶縁クロスで扱うか、部
品の温度が下がるまで待機してください。
ファブリック部分には難燃性の素材を使用していますが、ファブリック部分が、熱く
なったフラッシュチューブやモデリングランプには絶対に触れないようお気をつけ
ください 。 フラッシュとモ デリング ランプを最 大 出 力レベ ル にしてフラッシュユニッ
トを使用した場合、リボルビング システムの金属製スピードリングおよびロックノ
ブが、非常に高い温度になることがあります。機器をしまう際には、機器の各部分の
温度が十分に下がるまでお待ちください。
リフレクターやソフトボックスの調 整の前には、必ずフラッシュユニットをオフにし
てください 。
フラッシュユニットの排気システムが正しく作動しているかご確認ください。
内 部のファブリックのディフュー ザ ー が 正しく取り付けられており、熱 いフラッシュ
チューブやモデリングランプに触れていないか、必ず2回以上確認してください。
モデリングランプの出力を下げ、
サイズの小さなソフトボックスを使用する場合は、一分あたりのフラッシュ回数を減
らし、過熱を避けてください。反射面は、モデリングランプ/フラッシュチューブのす
ぐ近くにあります。過熱により、ファブリックが
損傷する場合があります。
*Broncolor®, Profoto®, Bowens®, Hensel®, AlienBees®, Comet®, Photona® are protected trademarks that do not
belong to Elinchrom LTD.
59
Page 60

Rotaluxユニバーサル スピードリング
色のマークを利用し、あなたの製品モデルに対応するRotaluxソフトボックスを構
築できます。ユニ バーサルスピードリングは 、すべてのユニットで同一です。
STRIP
( ストリップ )
赤いマーク
SQUARE
(スクエア)
青いマーク
OCTA
(オクタ)
すべて
Page 61

1.A 1.B
1.C
1.C
1.E
1.D 1.D
1.FG
1. Rotalux ソフトボックスの組み立て
A) ロックノブを上にして、スピードリングを、堅く水平な面に置いてください。
B) 各々のロッドソケットを引き出し、90°垂直位置に移動させてから、離してくだ
さい。
C) 反射素材の中心に、スピードリングを置いてください。
D) ロッドソケットのスロットが、反射素材の縫い目と一致していることを確認し
てください 。
E) スピードリングのソケットに、ロッドの露出した両端を挿入してください。
F) 1つずつ、外側にロッドを曲げます。わずかに曲がるように、キャップのついた
両端に、徐々に圧力をかけてください。キャップのついた両端を、反射素材のそれぞ
れの隅にあるクロス・ポケットに、ひとつずつ入れてください。必要に応じて、図1.D
のとおり再調整してください。
G) これでロッドは、両端で固定され、形は凸面になっています。ロッドを持って、
各々をカーブ が 凹面になるようにねじってください 。
61
Page 62

安 全ガイド
1.H
1.I
H) スピードリングを、所定の位置に固定し、押さえてください。ロッドソケットに
近いロッドに、ひとつずつ圧力をかけてください。ロッドソケットは以前の水平位置
に戻り、ロックされます。反射素材は、テントのような凹面に曲がっています。
I) これで、Rotaluxソフトボックスをフラッシュユニットに取り付ける準備ができ
ました。
2.B
2.E
2.C
2.A
2.D
2.E
62
Page 63

安 全ガイド
2. RotaluxソフトボックスをElinchromフラッシュユニットに取り付ける
A) フラッシュユニット(三脚にマウント)の中ナットを反時計回りに回してバヨネ
ットのロックを解除してください。フラッシュユニットの保護キャップを反時計回り
にま わして取り 外してください 。
B) スピードリングのロックノブが締まっていることを確認してください(2.Cを参
照)。Rotaluxスピードリングを挿し込んで、時計回りに回してください。所定位置に
かちりとはまったことを確認してください。
Rotaluxスピードリングを取り付け、中ナットを右回りに回してバヨネットをロック
してください。
C) Rotaluxソフトボックスの角度はリボルビングシステムで調節することができ
ます。スピードリング のロックノブのロックを解 除し、ソフトボックスを希望の 位 置 に
向けてください。ソフトボックスを回している間は、必ずスピードリングがフラッシュ
ユニット の バ ヨネット に 固 定されて いるようにしてください 。
注意 :スピードリングおよびロックノブはRotaluxの使用中は高温になるおそれが
あります。ソフトボックスの角度を調節する必要がある場合、耐熱性のグローブで
手を保護して、ユニットのスイッチを切り、電源を落としてください。
D) ソフトボックスにディフューザーを取り付けてください。
E) ディフューザーを、ソフトボックスの側面および縁に沿って、面ファスナー(ベ
ルクロ)テープで固定してください。
ユーザーマニュアルのダウンロード
こちらのリンクからは、ユーザーマニュアルの他言語
版をダウンロードできます:http://bc.gs/41
63
Page 64

Page 65

is a registered trademark of Elinchrom LTD, RENENS, SWITZERLAND
用户手册
Rotalux
Elinchrom SA Rotalux 03.01.2017 (73320)
Page 66

用户手册
序言
亲爱的摄影师,
感谢您购买 ELINCHROM Rotalux 柔光箱。所有 Elinchrom 产品都采用了最先
进的技术。部件经精心挑选,保证最佳品质。无论是生产过程中亦或生产完成
后,该设备都经过层层测试。我们坚信,该设备性能可靠,能够伴随您多年。
为了您的安全并确保您能充分享用各种功能,使用前请认真阅读说明书。
Elinchrom 团队敬上
特点
Rotalux 系统安装方便,可能是所有柔光箱系统中最常被抄袭的。然而,设计
容易抄袭,质量却不能抄袭,它们的质量始终保持同类最佳。
Elinchrom 设备独树一帜,可选择金色、银色、磨砂和半透明导光板套装,使
光线软硬和颜色可更改;根据您选择的距离安装在闪光管中央上方。它们可以
像伞一样折叠,放进随附的携带包内,很容易运输或者保持清洁。
Rotalux 转接环结构经过改进,重量非常轻,只有 370 克。Rotalux 反光纸
的表面非常精细,再加上灰管,能够提高光线的利用效率。360° 旋转系统。
可以像伞一样折叠,无需拆卸柔光箱。
随附折叠 Rotalux 携带包。所有 Rotalux 柔光箱均可选购柔光罩控制光线传
播。
Rotalux 70 × 70 厘米、60 × 80 厘米和 90 × 110 厘米柔光箱可选购
Rotagrid 用于直接照明。
Lighttools™ 为 Rotalux 柔光箱提供各种大小和角度不同的网格。
®
另外提供适用于 Broncolor
®
、Photona® 等其他闪光灯品牌的转接环适配器。
Comet
66
、Profoto®、Bowens®、Hensel®、AlienBees
Page 67

用户手册
安全建议
所有 Rotalux 柔光箱造型灯最高瓦数限于 300W。确保 Rotalux 柔光箱正确
组装并锁定到闪光装置上。
使用中或使用后,设备、闪光管及配件可能会非常烫!为了避免伤害,操作时
请使用绝热布,或等部件冷却后再进行操作。
虽然我们使用了阻燃材料,但是布料仍然不应与发烫的闪光管或造型灯接触。
在闪光灯和造型灯的最大功率水平下使用闪光装置时,旋转系统的金属转接环
和止动旋钮可能会严重发烫。请等部件冷却后再进行包装。
安装或更换反光板和柔光箱之前,务必先关闭闪光装置。
确保闪光装置的通风系统正常工作。
仔细检查,确保内部柔光布正确安装且不会接触发烫的闪光管和造型灯。
在使用小型柔光箱时,请降低造型灯的功率,并减少每分钟的闪光次数。反光
面与造型灯/闪光管非常接近。温度过高会损坏反光布。
*Broncolor®, Profoto®, Bowens®, Hensel®, AlienBees®, Comet®, Photona® are protected trademarks that do not
belong to Elinchrom LTD.
67
Page 68

Rotalux 通用转接环
借助颜色标记来组装您的 Rotalux 柔光箱,具体取决于您的产品型号。通用
转接环适用于所有设备。
条形
红色标记
方形
蓝色标记
八角形
全部
Page 69

1.A 1.B
1.C
1.C
1.E
1.D 1.D
1.FG
1.组装 Rotalux 柔光箱:
A. 将转接环与止动旋钮置于坚固的水平表面上。
B. 拉出每一个支撑杆插孔,将其扳到 90° 垂直位置,然后松开。
C. 将转接环放置于反光布中央。
D. 确保支撑杆插孔槽口与反光布接缝处对齐。
E. 将支撑杆的裸露端插入转接环的插孔内。
F. 一次将一根支撑杆向外反向弯曲,逐步在盖帽端施加压力,使其形成轻
微的弧度。操纵相应的盖帽端,使其在反光布的相应角处装入布口袋。如有必
要,按照图 1.D 中所示重新调整。
G. 支撑杆两端固定,现在有了凸曲线。按住支撑杆,将每根都弯曲形成凹曲
线。
69
Page 70

用户手册
1.H
1.I
H. 在固定的位置按住转接环。在支撑杆插孔附近,一次向一根支撑杆施加压
力。支撑杆插孔返回至原来的水平位置并锁定。反光布现在呈现帐篷样的凹曲
线。
I. 这样,Rotalux 柔光箱即可安装到闪光装置上。
2.B
2.E
2.C
2.A
2.D
2.E
70
Page 71

用户手册
2.将 Rotalux 柔光箱安装在 Elinchrom 闪光装置上:
1. 逆时针旋转闪光装置(安装在三脚架上)的锁紧环,解开卡栓。逆时针从
闪光装置上取下保护盖。
2. 确保转接环上的止动旋钮拧紧(参见 2.C)。插入 Rotalux 转接环,顺
时针旋转。转接环即会卡入到位。
顺时针旋转锁紧环,使卡栓与随附的 Rotalux 转接环锁在一起。
3. Rotalux 柔光箱的角度可以利用旋转系统进行调整。解开转接环的止动旋
钮,并将柔光箱转到所需的位置。确保转接环锁定在闪光装置的卡栓内,同时
转动柔光箱。
注意:在使用 Rotalux 柔光箱时,转接环和止动旋钮可能变得非常烫。需要
调整柔光箱角度时,请用耐热手套保护您的双手,关闭设备并断开电源。
4. 将柔光罩安装到柔光箱上。
5. 沿柔光箱的侧面和边缘,用粘扣带固定柔光罩。
下载用户手册
欲查看其他语言版本的用户手册,请访问
http://bc.gs/41
:
71
Page 72

 Loading...