

Page 1
Top Track, Hardware and Hang Standards
Tip for getting started
TIP for getting started
Be careful not to drill into any electrical wires,
ductwork, plumbing or other damagable
components. If you have any questions on
the locations of these wires or lines, please
contact a professional electrician or plumber
before drilling.
Tools needed: pencil, scissors, level, power
drill, drill bits, #2 Phillips head bit for power
drill, #2 Phillips head screwdriver, hammer,
tape measure, ladder or step stool.
Elfa Lumi AB
Elfagatan 5, 593 87 Västervik
Tel: +46 392-389 10 Fax: +46 392-361 25. E-mail: info@elfalumi.com
www.elfa.com
Sida 1 av 13
Page 2
Top Track, Hardware and Hang Standards
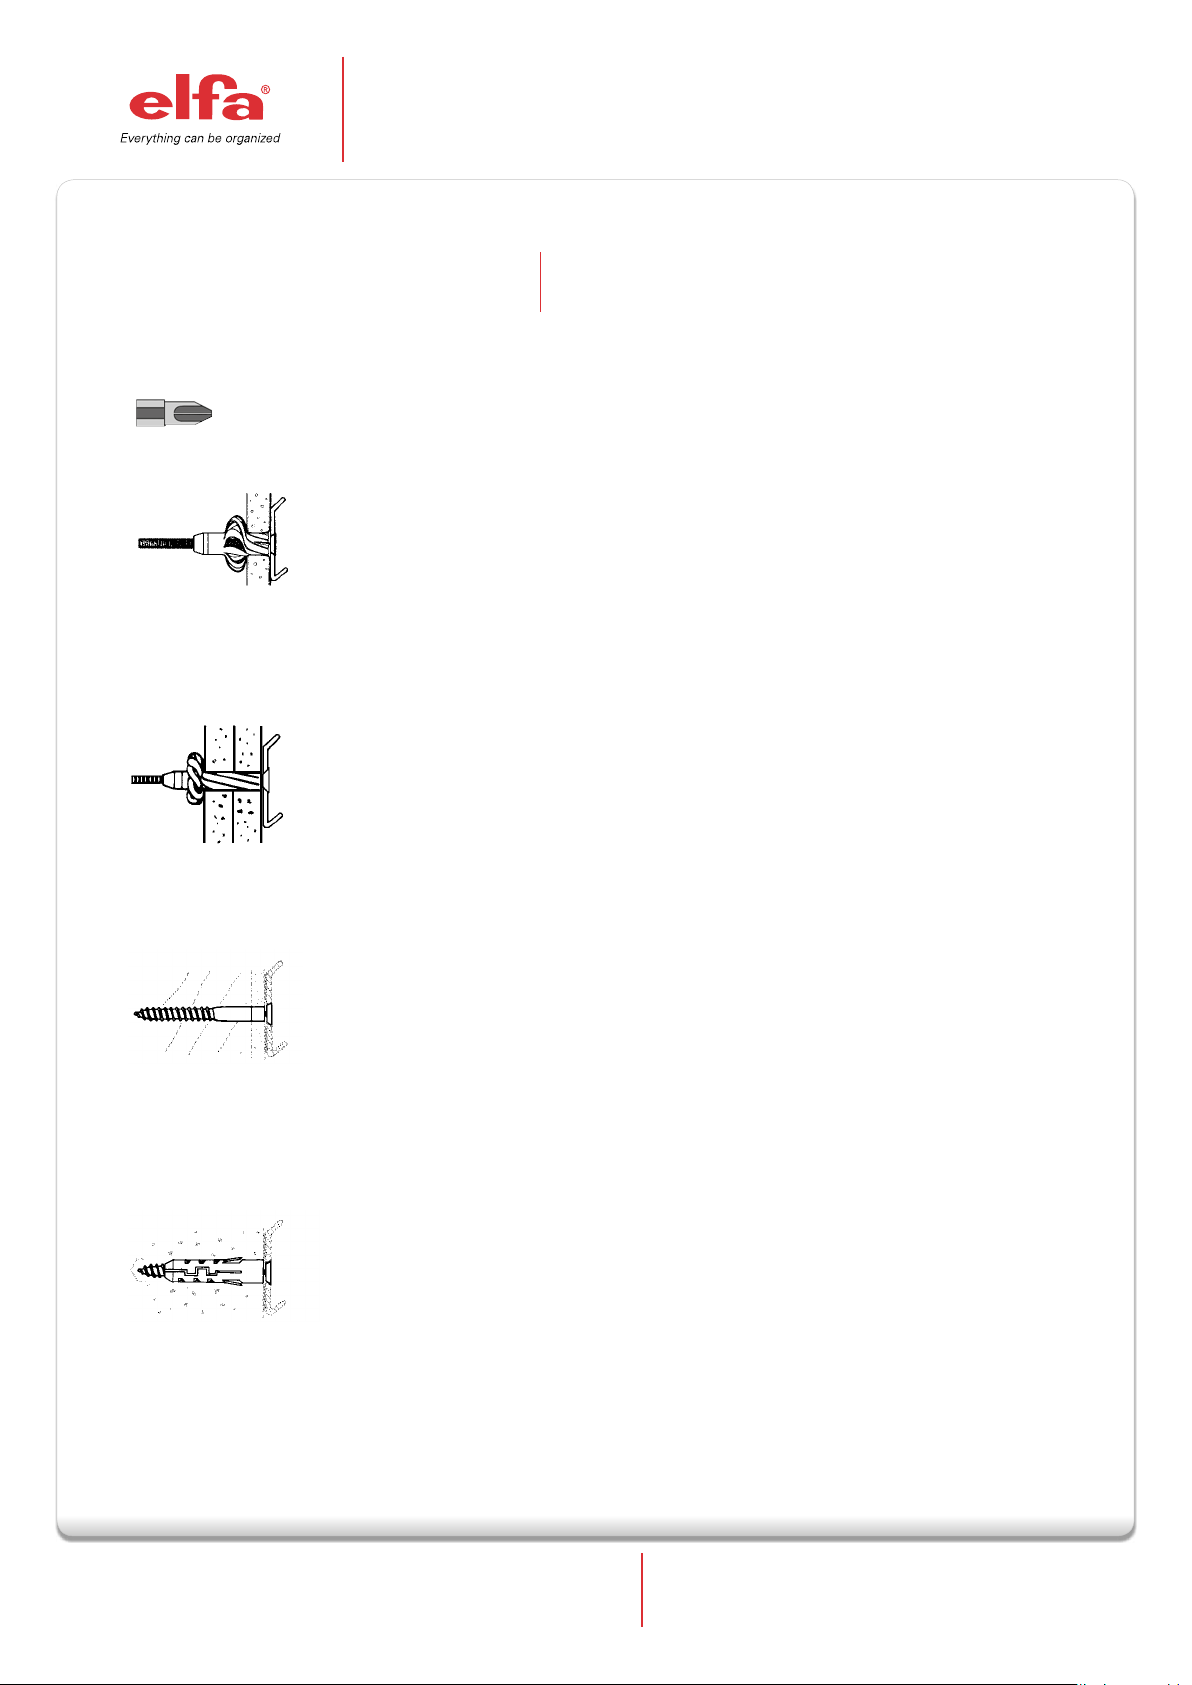
Hardware for installation of Top Track
#2 bit
NOTE!
Make sure to use the appropriate hardware
based on what type of wall you have.
Expander for single plasterboard (G5)
Used for 1/2”/3 mm or 5/8”/17 mm thick
drywall. Use 3/8”/10 mm drill bit to drill hole. Insert
dark blue anchor, remove and discard the gray spacer.
Use #2 Phillips head bit to tighten the screw.
Expander for double plasterboard (G6)
Used for 1”/18-30 mm thick plaster or drywall.
Use 3/8”/10 mm masonry drill bit to drill hole.Insert
red anchor, remove and discard the gray spacer.
Use #2 Phillips head bit to tighten the screw.
Screw and plug
Wood
Used for mounting into drywall over wood studs or
directly into wood. Use 1/8”/3 mm drill bit to drill a
pilot hole the length of the bit. Discard anchor. Use
#2 Phillips head bit to tighten the screw.
Concrete walls
Used for mounting into masonry walls, concrete,
brick, etc. Use 5/16”/8 mm masonry drill bit to drill
hole. Insert light blue anchor. Use #2 Phillips head
bit to tighten the screw.
Sida 2 av 13
Elfa Lumi AB
Elfagatan 5, 593 87 Västervik
Tel: +46 392-389 10 Fax: +46 392-361 25. E-mail: info@elfalumi.com
www.elfa.com
Page 3

Top Track, Hardware and Hang Standards
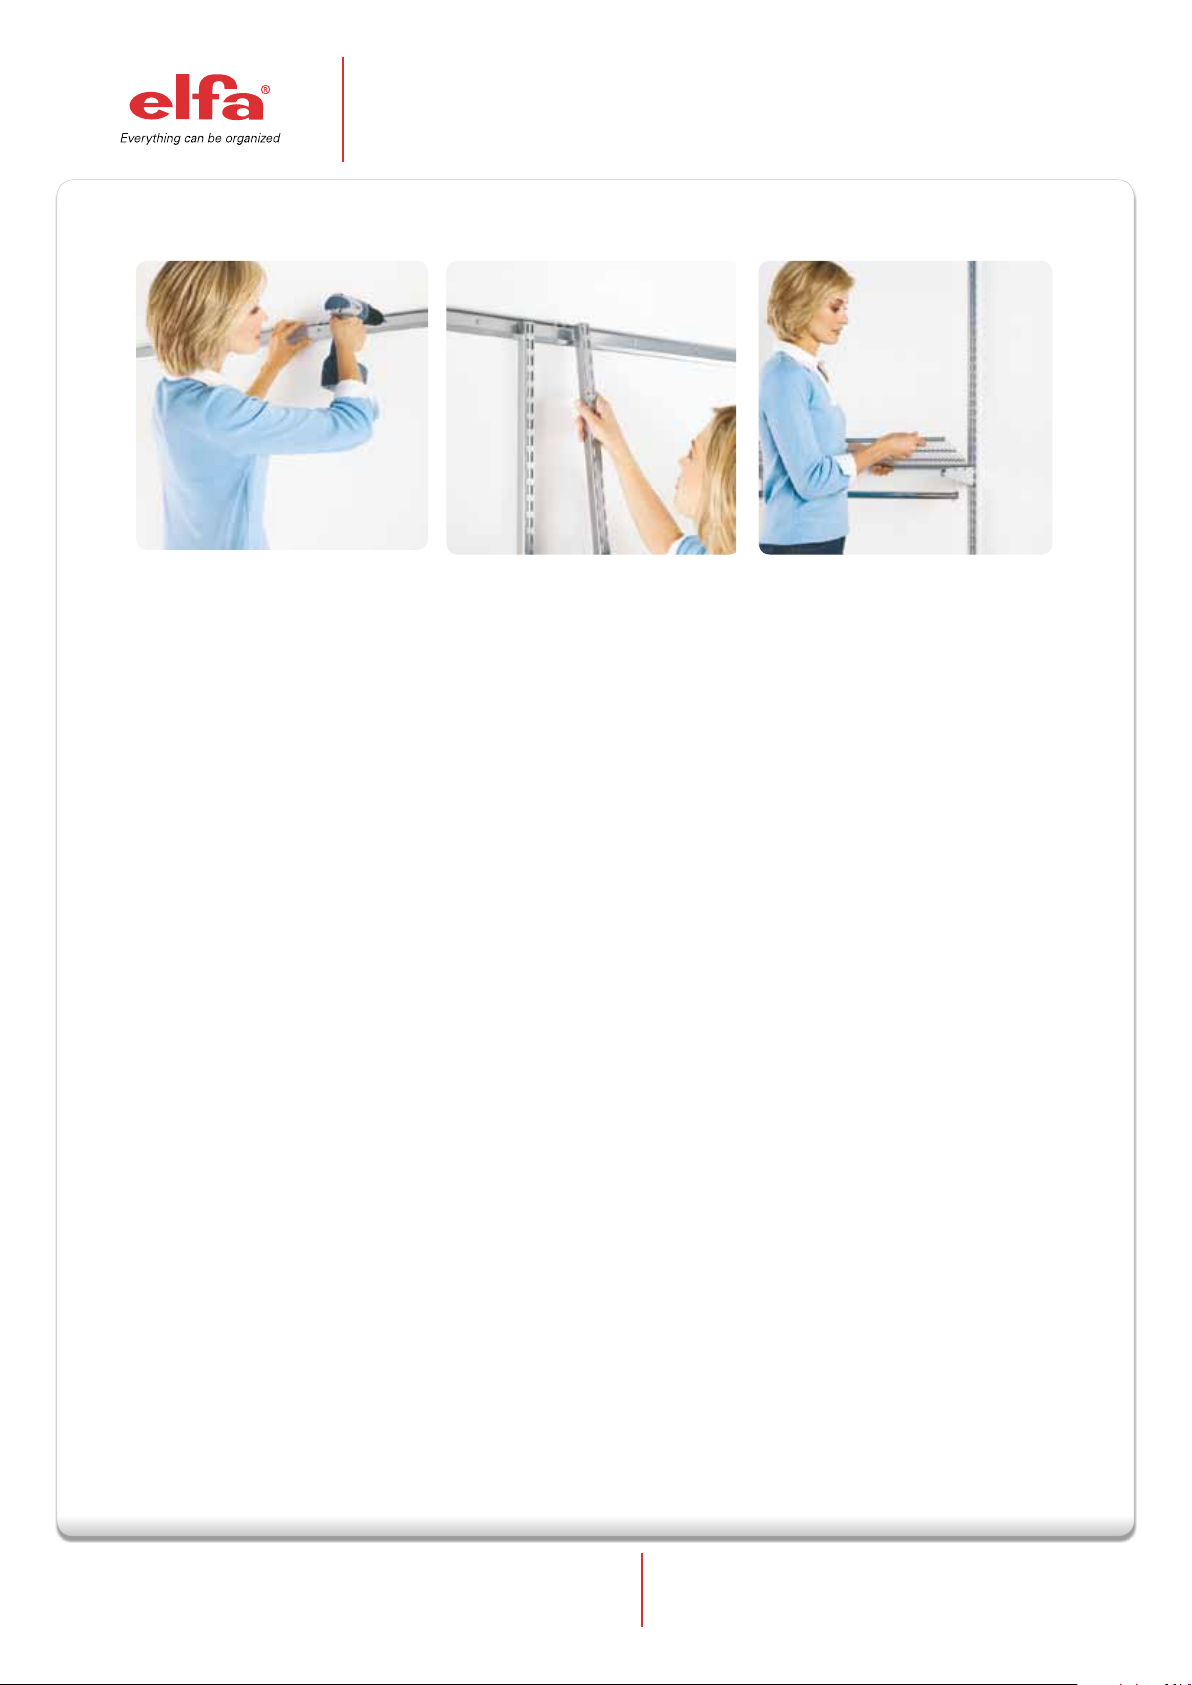
Mount the Top Track
Top tracks have a top and a bottom. The TOP is
designated by a label and has two notches to
allow hang standards to be inserted properly.
1
2
3
4
Position the Top Track
Place top track at desired height, mark one hole in the
middle, and take the top track down. It is usually placed at
ceiling or door height, but may be placed at any height.
Begin drilling the marked hole with a 1/8”/3mm drill bit. If
you hit wood, continue drilling the entire length of the bit. If
you hit the hollow part of the wall, enlarge the hole with a
3/8”/10mm drill bit for the hollow wall anchors.
Put the top track up with one screw and tighten it
enough to hold the top track against the wall.
To keep the top track level while you mark all of
the holes, place a level on the top of the top track
and adjust it as required.
5
Elfa Lumi AB
Elfagatan 5, 593 87 Västervik
Tel: +46 392-389 10 Fax: +46 392-361 25. E-mail: info@elfalumi.com
www.elfa.com
Drill all marked holes and put up the Top Track
Take the top track off of the wall. Drill holes with a 1/8”/3
mm drill bit, assuming you are going into wood. If you hit
wood, continue drilling the entire length of the bit. Put the
top track up and insert and tighten all the screws.
If you hit the hollow part of the wall, mark those holes with
an X, reminding yourself you need to go back and drill a
3/8”/10 mm hole for the hollow wall anchors.
Sida 3 av 13
Page 4

Top Track, Hardware and Hang Standards
Install Hang Standards, Brackets Click In and Top Track Cover
1
Insert the hang standards in
the top track notches.
2
bracket click in at the appropriate height
based on your space plan.
2. Slide the hang standards to their approximate position on the top track. Refer to your
1. Group hang standards together and insert
Click In
Brackets shown
custom space plan for placement of the
hang standards, if you have one.
3. Hang standards should be a minimum of
1/2”/10 mm from the ends of the top track.
Top Track Cover Installation
1. Because the top track cover is placed between the hang
standards, the shelves must be in place to ensure the
spacing between the hang standards is set.
2. Start with long pieces first. Place the bottom of the top
track cover into the bottom of the top track, then ease the
top of the top track cover into the top of the top track.
You should install your top track cover after you
have completed all the installation steps. Please
refer to the instructions once you have placed all
of your shelves and your drawers and are satisfied
with the positioning of your solution.
Elfa Lumi AB
Elfagatan 5, 593 87 Västervik
Tel: +46 392-389 10 Fax: +46 392-361 25. E-mail: info@elfalumi.com
www.elfa.com
3. Measure the area on the top track where smaller pieces
of the top track cover are needed.
4. Measure and mark the top track cover where the cuts
need to be. The cover is easily cut in a straight line with
scissors.
5. Do not overlap segments of the top track cover.
Sida 4 av 13
 Loading...