

Page 1
Sloped sliding doors
ASSEMBLY GUIDE
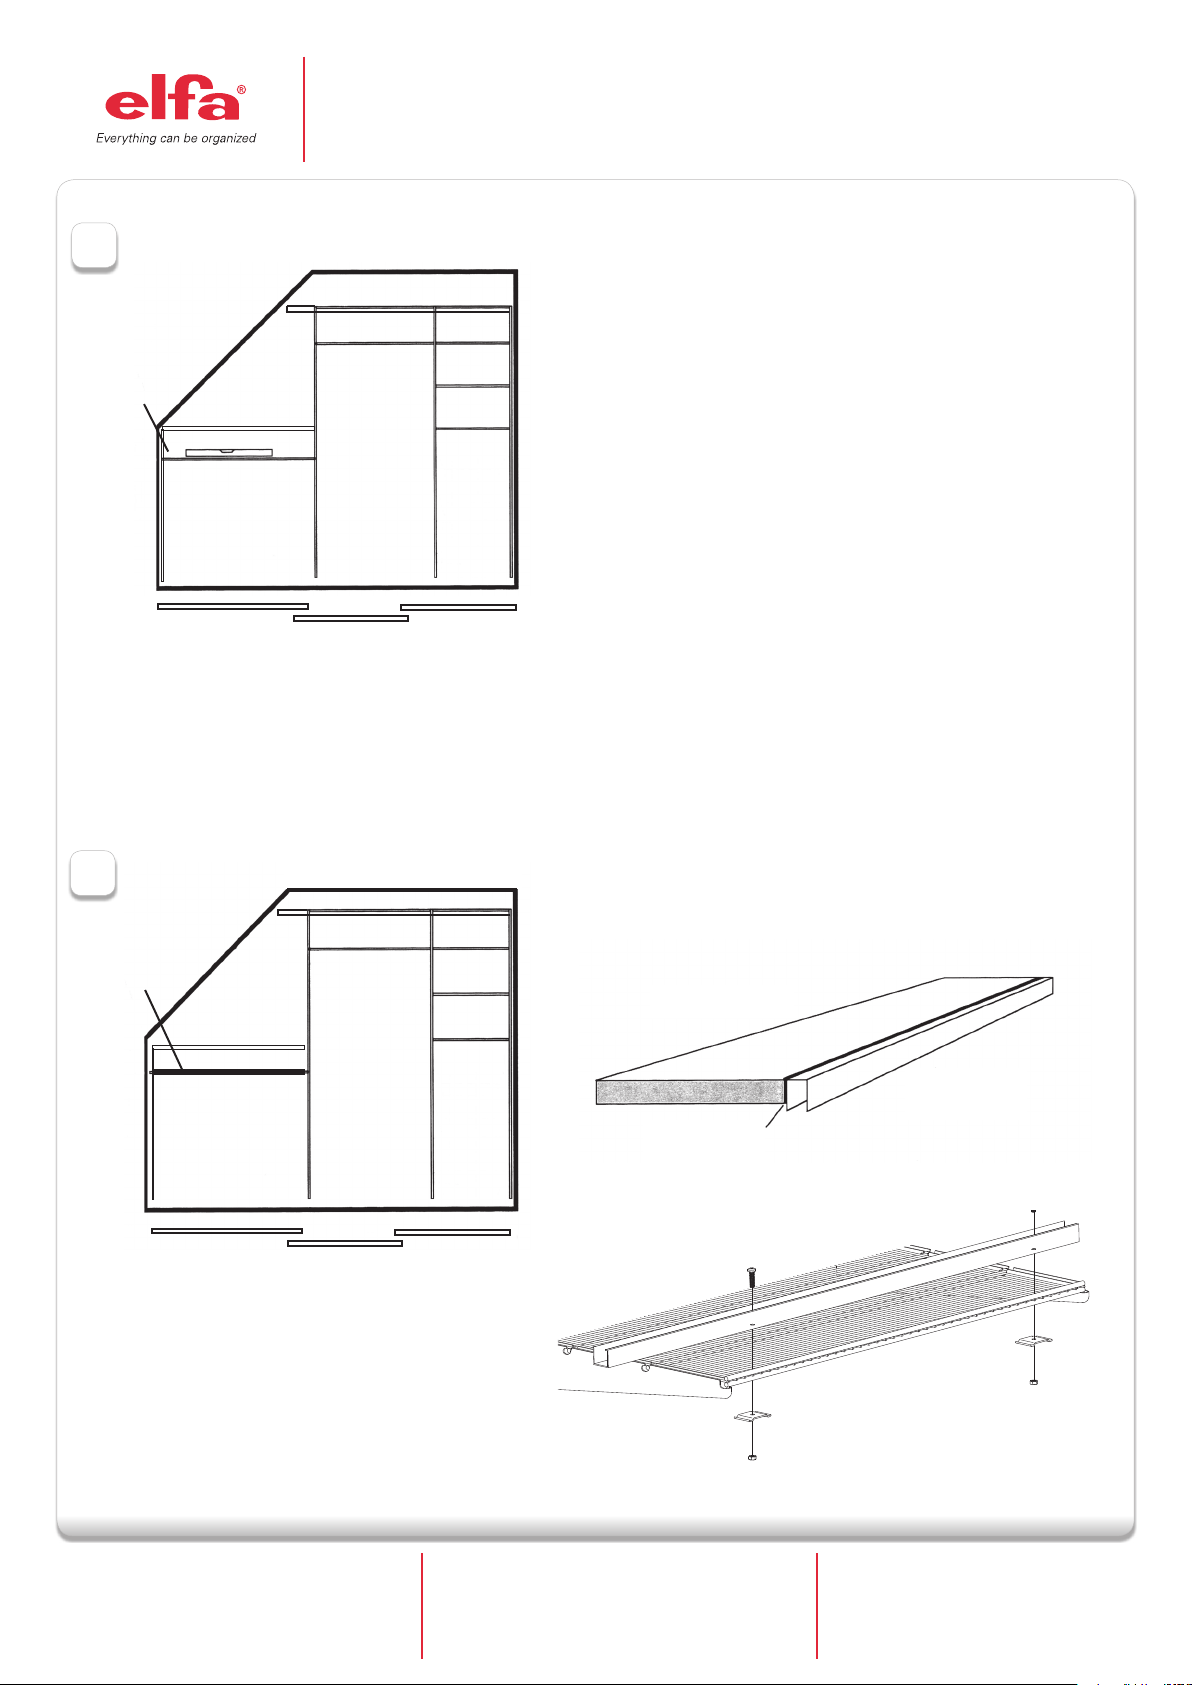
1
Shelf suitable for
installing the guide rail.
Start by assembling the interior
The interior must include a shelf that allows the essential guide rail, which is
required for sloped doors, to be mounted on the front edge.
Use a spirit level to make sure the shelf is perfectly horizontal.
Spirit level
2
Guide rail
Fit the guide rail to the front edge of the shelf
Shelf
Double sided tape
Shelf
Shelf bracket
Guide rail
Guide rail
Customer service / Kundendienst
Deutschland
Tel. 05242 3789375 Fax. 05242 9683632.
E-post:planung@elfa.de
Service client
France
Tel. 472 330 731 Fax. 472 345 260
E-post:elfa-france@wanadoo.fr
Page 1 of 4
Serwis
Polska
Tel. 42 611 64 01 Fax. 42 611 64 02
E-post:elfa@elfa.pl
www.elfa.com
Page 2
Sloped sliding doors
ASSEMBLY GUIDE
Top track
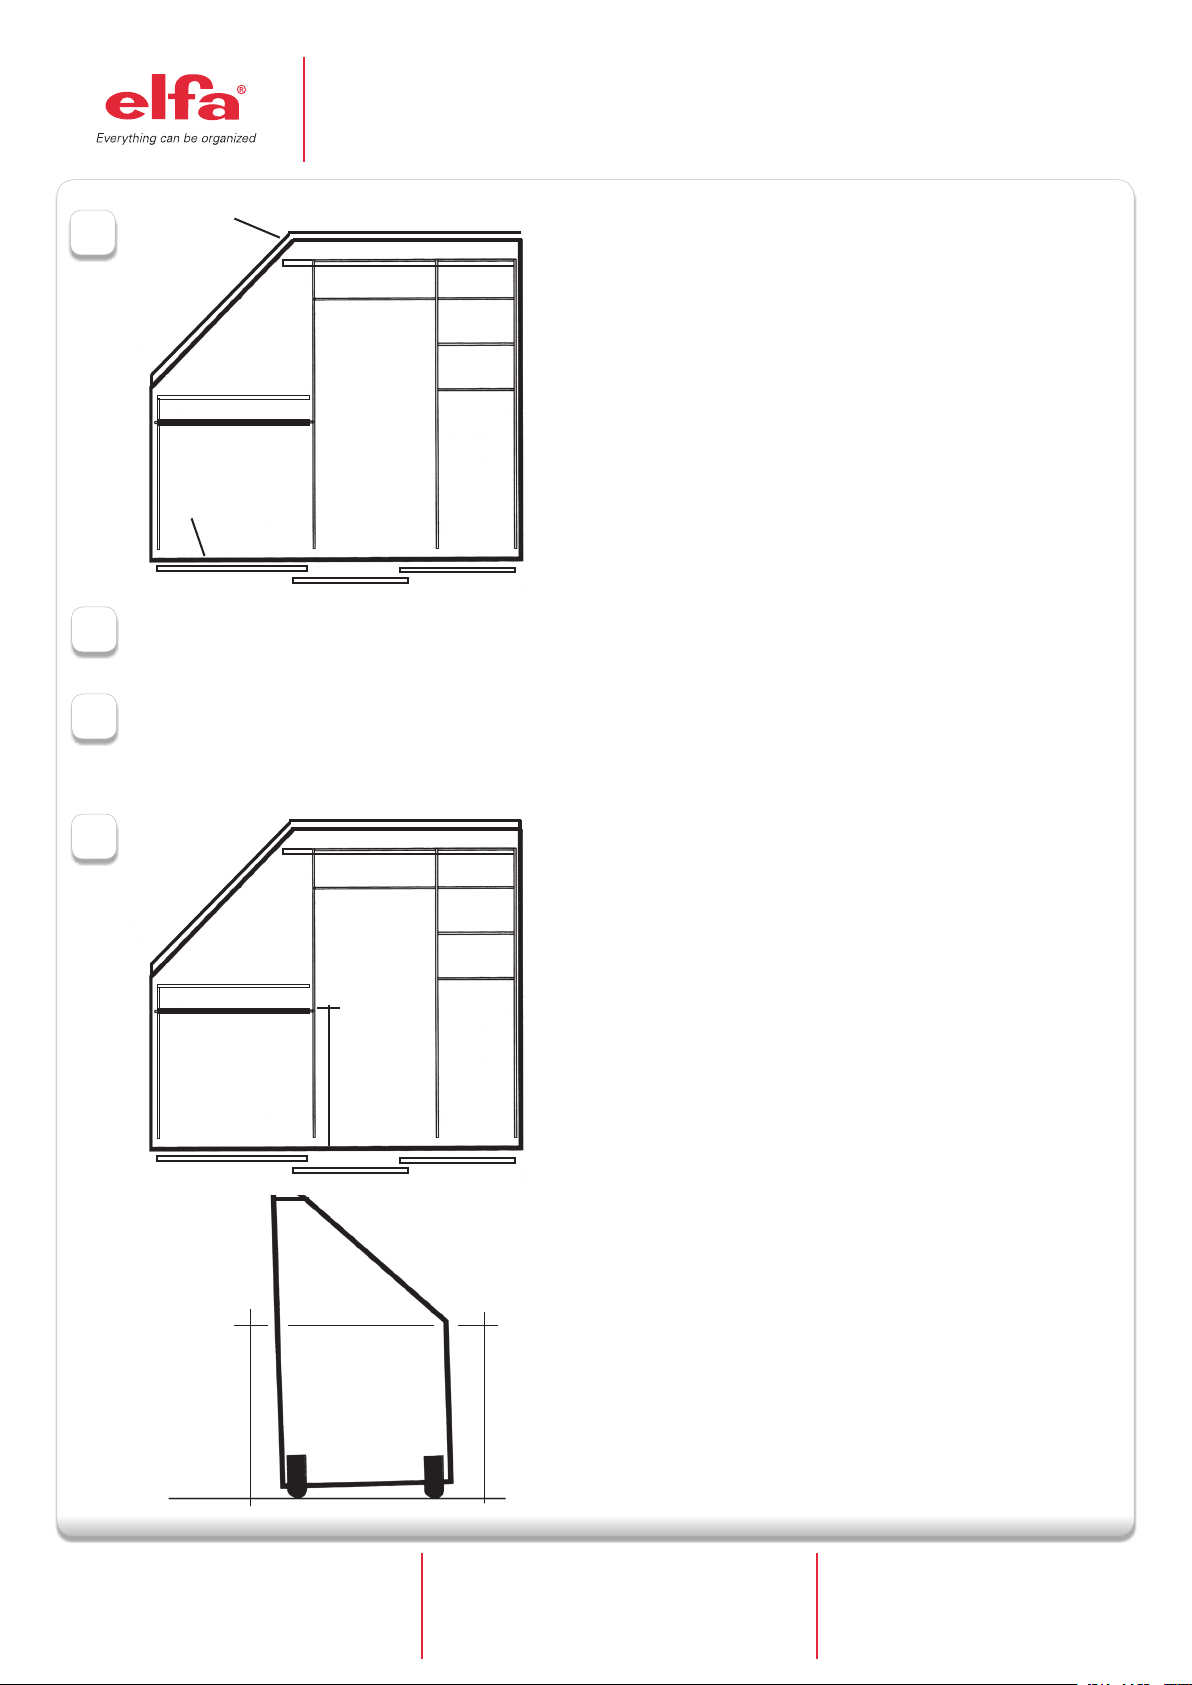
3
Assemble the top and bottom tracks
Follow the instructions in “Assembly guide for Ample, Artic, Grace
and Centric” to t the top and bottom tracks.
Bottom track
Fit the LED light on sloped door (accessory)
4
When the top rail is in place, unroll the light strip. Remove the tape from the
back and attach the light strip in the top track rail. Plug straight into the wall
socket.
Adjust the sloped door
5
Place the sloped door in the rear rail of the top and bottom tracks. Push
the door all the way against the wall. Hold the door in place and adjust the
bottom wheels according to the instructions in “Assembly guide for Ample,
Artic, Grace and Centric”. Lift out the door again.
6
Measure the
height H of the
upper edge of the
guide rail
Measure the height H, to the upper edge of the guide rail (see g. above).
Put the door on the oor with the front facing in to a wall. Measure from the
oor and up along each side prole to a measurement that matches H – 27
mm or H + 6 mm, depending on the interior (see g 2a and 2b) . Connect
the points with a line across the back of the door (see g. on the left).
The door may be slightly oblique when placed on the oor because of the
adjustment that was made to the wheels (see g. on left). If it is, this is
perfectly correct and the line must still be measured upwards from the oor.
The wheel adjustment will not then affect the function of the guide rail when
the door is retted in the bottom track
Line
Mark the height of the guide rail
or
H + 6 mm (g. 2 b)
H - 27 mm( g. 2 a)
Floor
Customer service / Kundendienst
Deutschland
Tel. 05242 3789375 Fax. 05242 9683632.
E-post:planung@elfa.de
or
H + 6 mm (g. 2 b)
H - 27 mm( g. 2 a)
Service client
France
Tel. 472 330 731 Fax. 472 345 260
E-post:elfa-france@wanadoo.fr
Page 2 of 4
Serwis
Polska
Tel. 42 611 64 01 Fax. 42 611 64 02
E-post:elfa@elfa.pl
www.elfa.com
Page 3

Sloped sliding doors
ASSEMBLY GUIDE
7
8
Seen from above
The guide arm is mounted centrally on each door
Guide rail
Seen from the side
Line
Mark the lateral position of the guide rail
min. 230mm
Assemble the guide bracket
Remove the protective sheet from the back of the bracket.
Secure the bracket in place on the marks.
Make sure it is straight!
Customer service / Kundendienst
Deutschland
Tel. 05242 3789375 Fax. 05242 9683632.
E-post:planung@elfa.de
Service client
France
Tel. 472 330 731 Fax. 472 345 260
E-post:elfa-france@wanadoo.fr
Page 3 of 4
Serwis
Polska
Tel. 42 611 64 01 Fax. 42 611 64 02
E-post:elfa@elfa.pl
www.elfa.com
Page 4

Sloped sliding doors
ASSEMBLY GUIDE
Adjust the sloped door in the top track
9
Guide rail
Shelf
Guide rail
Shelf
Back of sliding door
Turn the guide bracket arm to adjust the depth of the door (see g. on left).
Loosen the two screws, using a hex wrench. Place the door back in the
tracks and turn the guide bracket arm to a position so that the door runs
smoothly in the top track. Tighten both screws.
Greater distance
10
11
Back of sliding door
Less distance
Finally: Assemble the other doors
Fit the other doors in the tracks as instructed in ”Assembly guide for
Ample, Artic, Grace, Centric”.
Cleaning instructions
Mirrors
Use a window cleaner to remove stains from the mirror. If this does not
work, use a razor blade or steel wool.
(N.B. Only steel wool not Scotch-Brite™ or similar.) Razor blades and
steel wool will not scratch the mirror!
Any spots or glue residue left on the mirror from production, despite our
quality control, can be removed as described above.
Veneered panels
There may be some dust on the back of the veneered panels. Vacuum
clean the back surface and wipe with a damp cloth.
Customer service / Kundendienst
Deutschland
Tel. 05242 3789375 Fax. 05242 9683632.
E-post:planung@elfa.de
Service client
France
Tel. 472 330 731 Fax. 472 345 260
E-post:elfa-france@wanadoo.fr
Page 4 of 4
Serwis
Polska
Tel. 42 611 64 01 Fax. 42 611 64 02
E-post:elfa@elfa.pl
www.elfa.com
 Loading...