

Page 1

INDEX
1 Product features……………………………………………………………….
2 Knowing the Player……………………………………………………………
2.1 Controls & Connections………………………………………………..
2.2 Batter Capacity Indicator……………………………………………….
3 The Basic Functions…………………………………………………………..
3.1 Music mode: to play the music stored in the player………………
3.2 Record mode: to record the voice and save the voice file(s)……
3.3 Voice mode: to replay the saved voice file………………………….
3.4 FM mode: to use the player as a FM radio device………………….
3.5 SYS Set: to set various functions of the player…………………….
3.6 Tele Book: Phone book………………………………………………….
3.7 eBook: a text file manager……………………………………………….
4 Using the Player………………………………………………………………….
4.1 Music - Playing the music……………………………………………….
4.2 Record - Recording the voice …………………………………………..
4.3 Voice - Playing the recorded audio files……………………………….
4.4 FM Mode - Using the FM Radio………………………………………….
5 System Settings………………………………………………………………….
6 To work with computer as a removable Disk……………………………….
6.1 USB connection & MP3 file transfer…………………………………….
6.2 Installing Windows 98 driver……………………………………………..
7 Changing the Face Plate……………………………………………………….
Trouble shooting………………………………………………………………………
Technical Specifications……………………………………………………………..
Safety and Upkeep…………………………………………………………………….
Congratulations! You Element GC-120 is a music player, voice recorder, radio, phone book,
removable flash memory drive, all in one.
and computers, and enjoy your MP3 music collection anytime and anywhere.
1. PRODUCT FEATURES
. USB2.0 full speed.
. FM stereo radio, with 30 preset FM channels.
. Supports multiple audio formats (MP3, WMA).
. Built-in rechargeable Lithium battery.
. Plug and Play, needs no driver to work with computer.
. Multiple face panels included.
. Voice Recorder
. 6 Preset Equalizer modes
You can move and store files between GC-120
-1-
Page 2
. OLED Menu Display
. Multiple play modes
. Fast forward and fast rewind
. Synchronized lyrics
. Auto Power-OFF
. Friendly on-screen Menu display
. Long-time playback
Please read this manual carefully to obtain the best possible performance from your
player. Please keep this manual for future reference.
2. KNOWING THE PLAYER
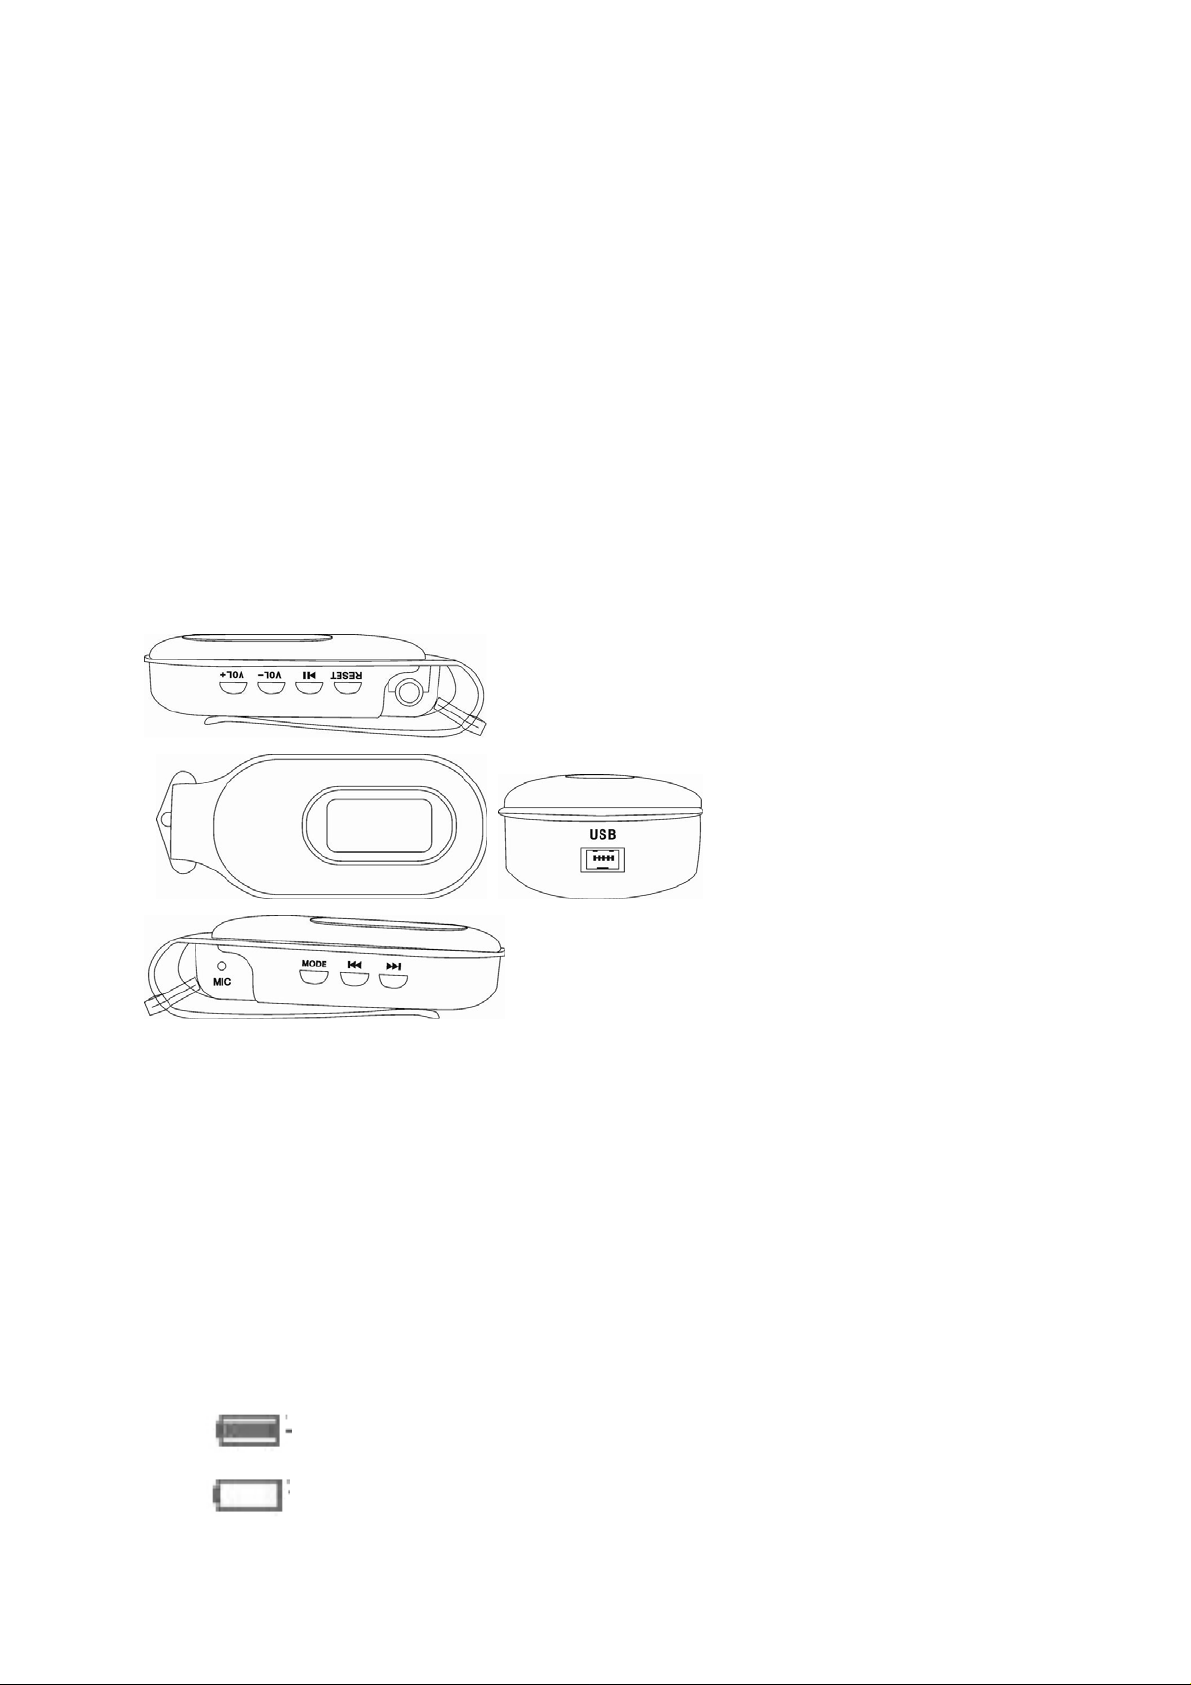
Controls & connections
Button Definitions & Connections
1. Power ON/OFF & Play/pause
2. MODE: to confirm your menu selection, or to exit to last menu
3. VOL+: volume increase.
4. VOL-: volume decrease.
5. USB: USB jack.
6. Earphone Jack: standard earphone jack.
7. RESET: reset the player to factory default setting
8. MIC: built-in microphone
Battery Capacity Indicator: Your MP3 Player contains a built-in rechargeable battery.
The capacity of the battery can be seen on the upper-right corner of the display:
Battery is fully charged,
The battery capacity is running out, please charge the battery.
-2-
Page 3
3. THE BASIC FUNCTIONS
The basic Button Operations
z Click: Press the button once, to activate the selected function.
z Press & Hold: Press and hold the button for more than 1.5 seconds to activate the
desired function. This button operation is mainly applied on the MODE button.
z Power ON/OFF - Press & Hold PLAY to power on the player. Press & hold PLAY
button again to turn off the player.
When the player is turned on, the display will show 7 main function menus:
3.1. Music mode: to play the music stored in the player
3.2. Record mode: to record the voice and save the voice file(s)
3.3. Voice mode: to replay the saved voice file.
3.4. FM mode: to use the player as a FM radio device
3.5. SYS Set: to set various functions of the player
z Language: to set the language version of the player
z Saving Mode: to select the display during power-saving mode
z Saving time: to set the time length to auto enable power-saving mode
z Record time: to set the date & time of each recording
z Exit: move back to main menu
z Firmware upg: to upgrade the firmware of the player
z Firmware Ver.: to see the firmware version of the player
z Memory info: to see the memory capacity status.
z Online mode: to set the player’s memory modes
z Contrast: to set the display contrast
z Replay mode: to set the player at auto or manual replay mode
z Power OFF: to set the time length to auto shoot off the player
3.6. Tele Book: Phone book
3.7. eBook: a text file manager.
When the player is turned on, you can move to the Music mode. Click PLAY to play
music titles in the player, click PLAY button again to stop or pause the played music.
To turn off the unit, press & hold PLAY button.
Entering the Main Function Menu
Press MODE to access the device’s various menus. Click l>> or <<l button to move to
various main function menus.
Click MODE to enter to sub-menu of each menu.
Press & hold MODE to exit from sub-menu to main menu
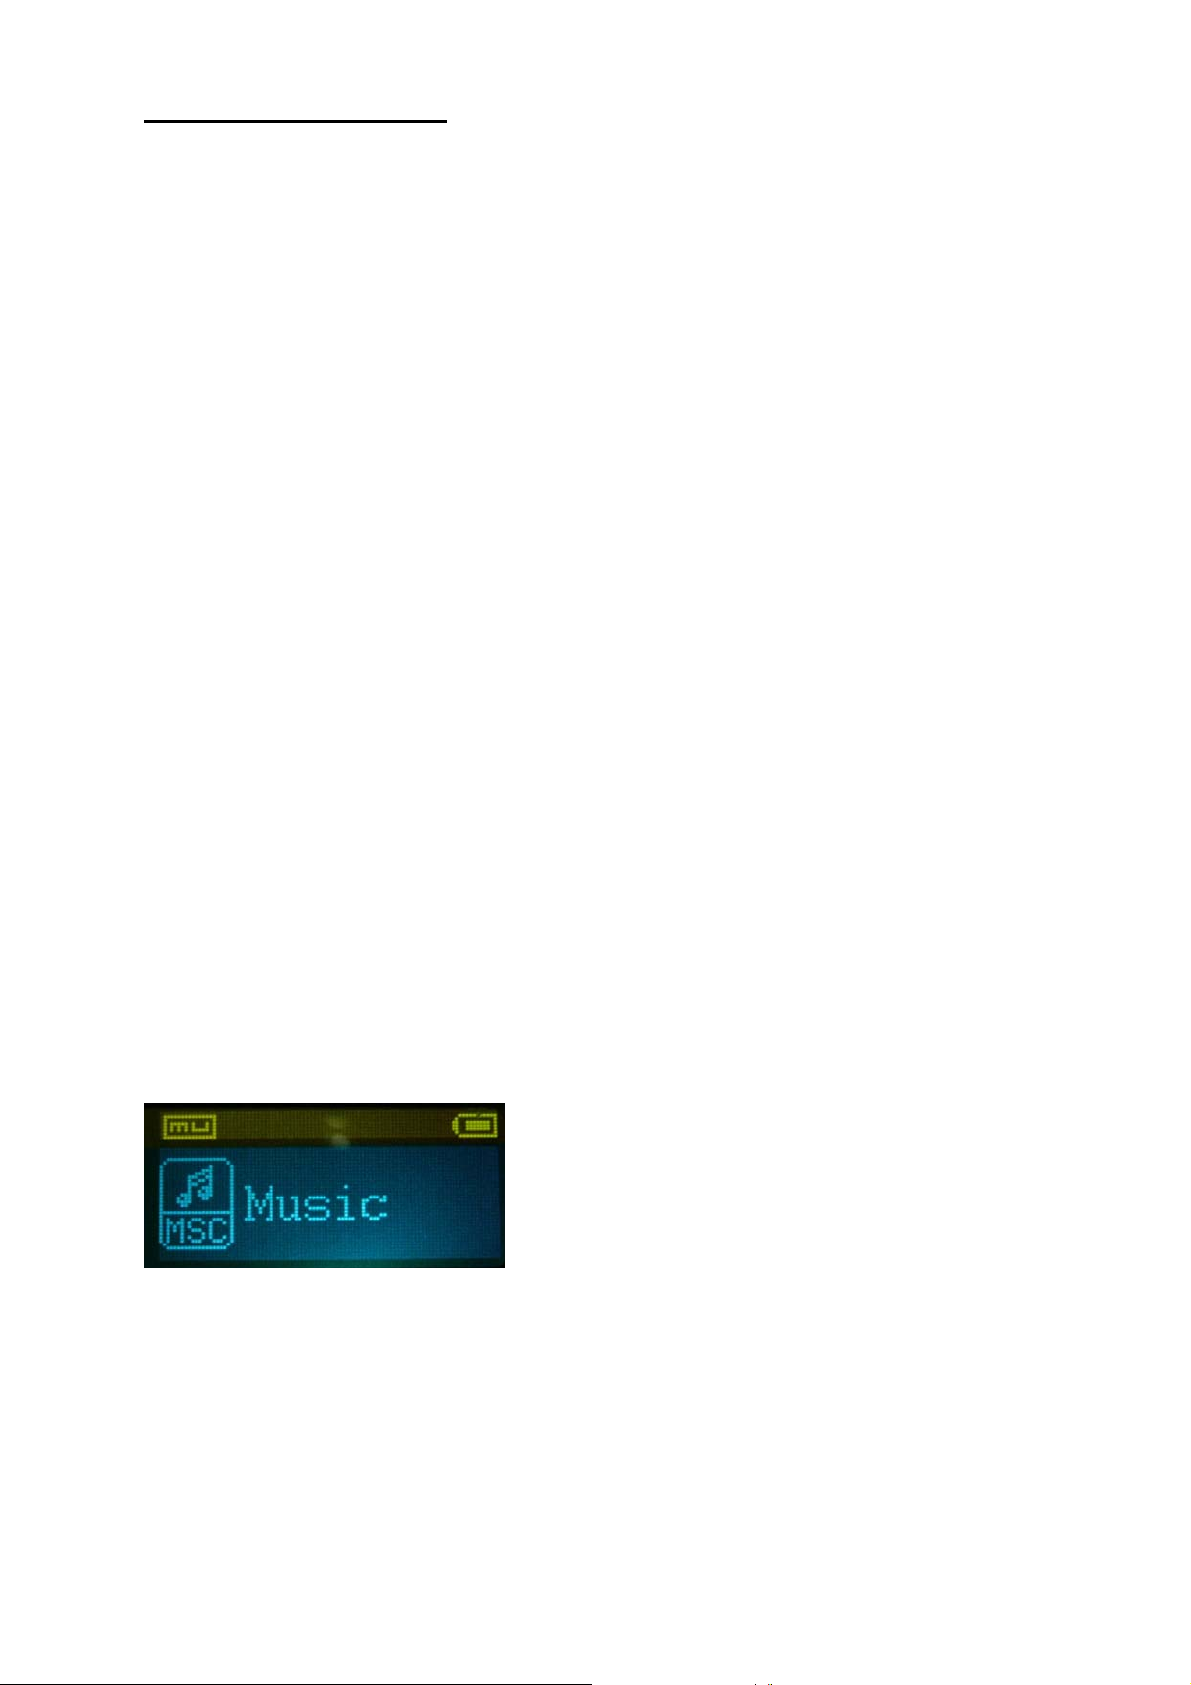
Music
-3-
Page 4
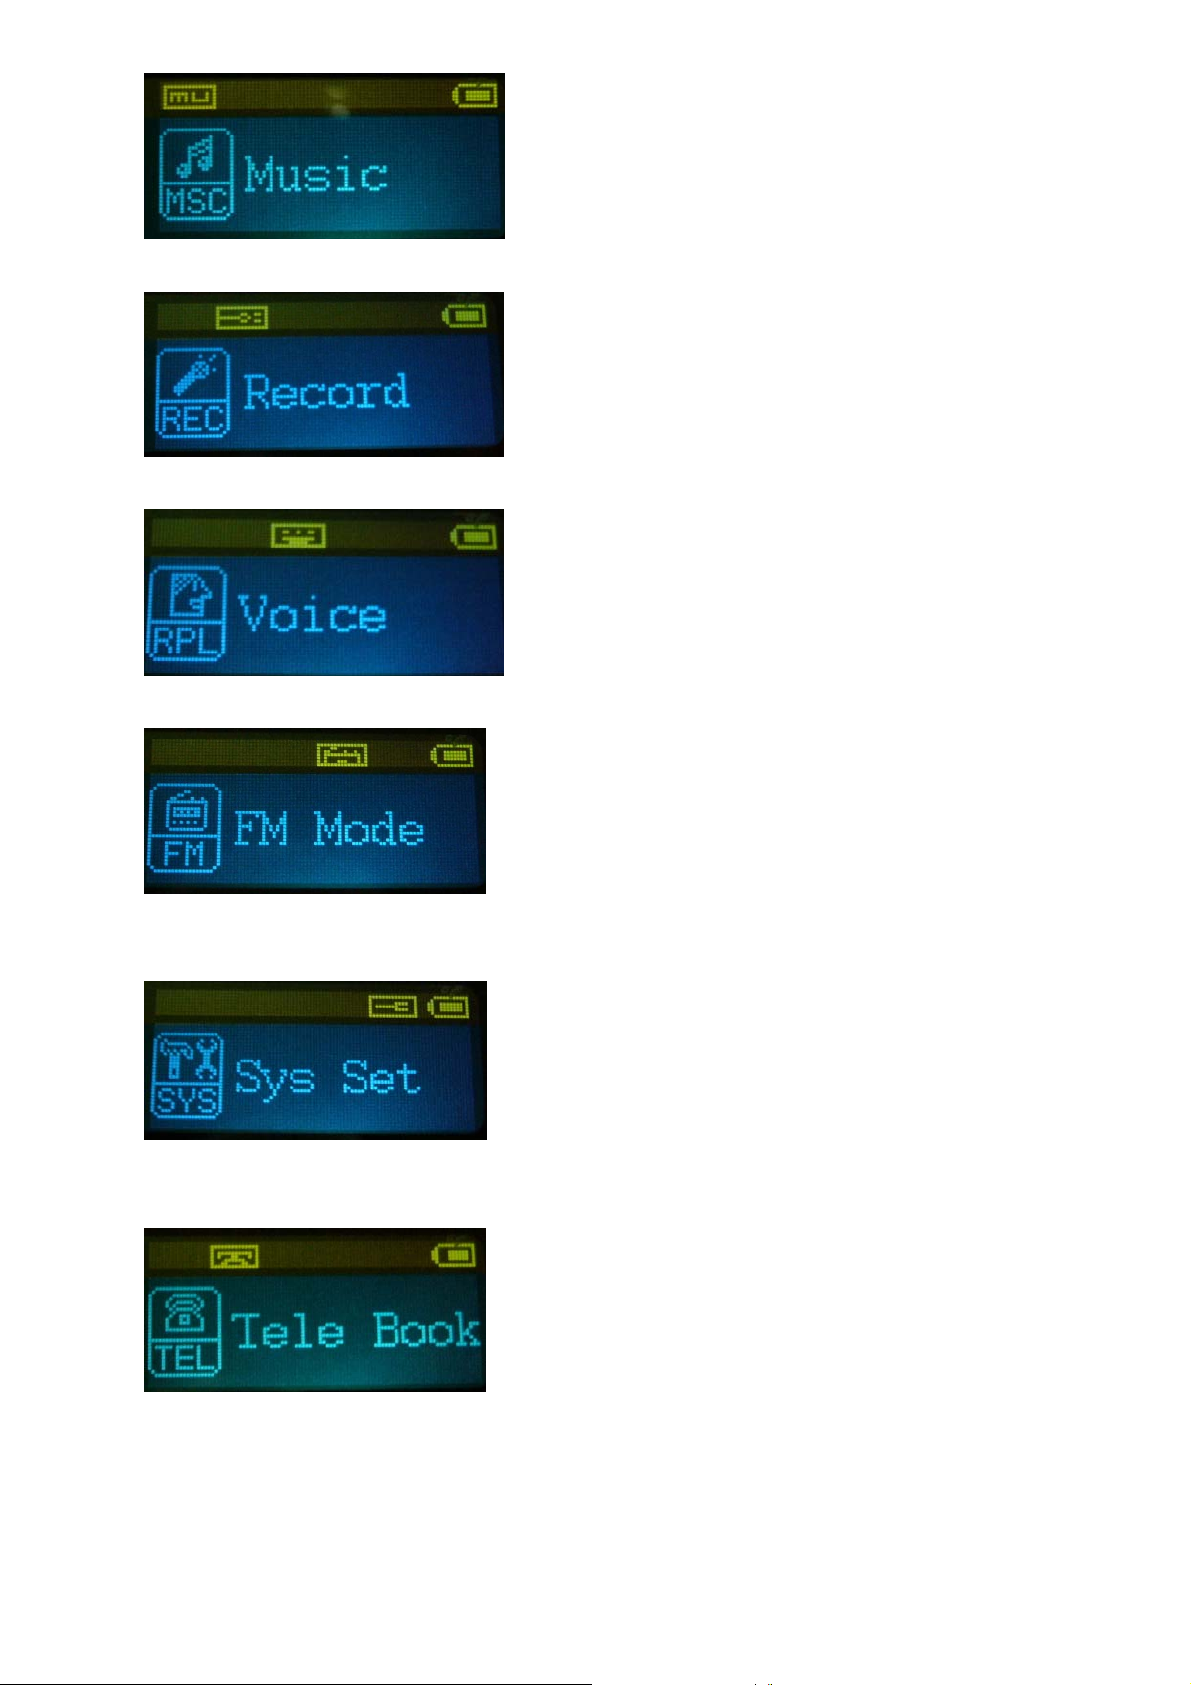
Record
Voice
FM Mode
SYS Set
Tele Book
Adjusting the volume
VOL+: increases volume
-4-
Page 5

VOL-: decreases volume
4. USING THE PLAYER
4.1. MUSIC-- Playing music
Plug the enclosed earphones into the earphone jack,
Click PLAY( the “>ll” button) or MODE to turn on and enter “Music mode”.
Click PLAY to start playing music.
Click PLAY while a song is playing to PAUSE the song.
To REPEAT a section of a song, select a song you want to play and click >ll button start
playing the selected song, click MODE during the song is being played to activate the
repeat playing mode.
The section you have marked will now repeat continually until you short click MODE
again.
The repeat playing section can be one or several selected songs;
z click MODE during the song is being played to activate the repeat, click MODE
button again to enter to set the select the repeat option.
Selecting Songs for Playback
Click l<< or >>l button to move in your list of saved music files
Synchronized Lyric Display
This player supports the Lyrics function of MP3 playback.
Note:
The lyric file format should be in the LRC format.
The lyric file name should be the same as the song’s name.
For example: Song name : Say you say me.mp3
Lyric file name : Say you say me.lrc
The lyric file should be saved in the same folder as the song
4.2. RECORD -- Recording a Voice File
Move to “Record” mode in the main menu.
Click MODE to enter the Record mode (see below) .Click PLAY to start recording a new
voice file. Press & hold MODE to end the recording and save the recorded voice file.
-5-
Page 6

4.3. VOICE mode – playing the recorded voice file
Move to “Voice” mode in the main men
Click MODE to enter the Voice mode (see below). Click l<< or >>l button to move to the
desired voice file, then .Click PLAY to start playing the selected voice file. Press & hold
MODE to end the voice file replay and exit to main menu.
4.4. FM Mode -- Using the FM Radio
Move to “FM Mode” in the main menu. And Click MODE to enter to FM Radio mode.
To tune to the radio station(s)
z click >>l button to tune to the radio channel in higher frequency band; or click l<<
button to the lower frequency band.
z Press and hold >>l button to auto scan to the radio channel in higher frequency
band; or press and hold l<< button to the lower frequency band.
z When a radio station is tuned, click MODE to enter radio menu and select “SAVE”
to store that station in the preset channel list. The player provides 30 presets to
store your favorite radio channels
z The preset radio channels can be directly accessed and selected by clicking PLAY
button.
z To delete the preset radio channels, click MODE to enter radio menu and select
“Delete” to remove the station in the preset channel list.
z To record the radio music, tune to the desired radio channel and click MODE, move
to “Record” in radio menu and click MODE to start recording radio music. Press
and hold MODE to stop recording and save recorded file.
-6-
Page 7

5. System Settings
The System Settings allows you to do various settings of the player such as the
Equalizer, Screen Contrast, Power Saving settings, etc.
Move to “SYS Set” in the main menu. Click Mode to enter to system setting menu.
There are 12 settings available for your to customize your player:
Language: to set the language version of the player
Saving Mode: to select the display mode during power-saving mode
Saving time: to set the time length( 0 ~ 120 seconds) to auto enable the
power-saving mode
Record time: use “VOL+” & “VOL-“ buttons select the time items, and use
“>>l” or “l<<”button to set the date & time of each recording. Use “MODE”
button to confirm the setting.
Exit: move back to main menu
-7-
Page 8

Firmware upg: to upgrade the firmware of the player
Firmware Ver.: to see the firmware version of the player
Memory info: to see the memory capacity status.
Online mode: to set the player’s memory modes
Contrast: to set the display contrast
Replay mode: to set the player at auto or manual replay mode
Power OFF: to set the time length to auto shoot off the player
-8-
Page 9

6. To work with computer as a Removable Disk
6.1. USB connection and MP3 file transfer:
If you have computer that runs Windows ME, Windows 2000, Windows XP or
Windows 2003, you can connect the MP3 Player to your computer with the included USB
cable, without installing a driver. Once the player is connected to the conputer, it will
appear in the “My Computer” resource manager of Windows (see below) as a
Removable Disk, then you can tranfer files between your player and computer by
“dragging and dropping “ like you would any other files from one hard drive to another
(You may also use the copy and paste feature.)
If you are using windows 98, you will have to install the device driver contained on the
CD-ROM included in your MP3 player packaging,
6.2. Driver installation for Windows 98
(NOTE:THIS INSTALLATION IS ONLY NECESSARY IF YOU ARE USING WINDOWS 98. QUIT ALL OPEN
PROGRAMS ON YOUR COMPTER BEFORE BEGINNING THE INSTALLATION PROCESS.)
Insert the installation disk in the MP3 Player box into the computer’s CD-ROM. Right
click the My Computer icon on the computer’s desk top.
Right click the CD-ROM drive icon.
-9-
Page 10

Double click to run the “SETUP.EXE” file. This will start the installation process. Follow
the on-screen instruction to completer Windows 98 driver installation. After the
installation, please reboot your computer to complete the driver installation.
7. CHANGING FACE PLATE ON YOUR CLIP PALYER
z While holding the player in your hand, insert a thin screwdriver(flat tip) into the
notch on the end of the cover, opposite the device clip.
z Apply a small amount of pressure with the screwdriver, lift the face plate.
z Replace with another face plate back to the player
z Apply pressure directly down on to the cover until you hear a series of
clicks and the cover is securely seated on the player.
TROUBLESHOOTING
Problem Solution
No power Charge the battery.
No sound can be heard. Confirm that the volume is not at 0 and that
there is not problem with the earphone
connection. Please keep the earphone
clean any dry, Damaged not be playable at
all. So, be sure that your files are not
corrupted..
Abnormal words displayed
FM radio reception is not good. Please confirm that correct language is
selected. As the earphone may be used as
antenna, adjust its position of.
You cannot down load music normally. Turn off any electric devices nearby.
Check the USB connection and be sure it
is connected properly. Check if the drive is
properly installed.(Windows 98 only)
Check if there is still space in the memory to
download additional files.
-10-
Page 11

TECHNICAL SPECIFICATIONS
Specification Parameters
Music format MP3, WMA
Bit rate 56Kbps- 256Kbps
Frequency range 20Hz- 20 KHz
Signal/noise ratio >=8dDB
Separation >=85dDB (1KHz reference signal)
Frequency response <=3DB(20Hz- 20KHz)
Output power of the earphone L 4mW, R 4mW
EQ mode Normal, Rock, Jazz, Classical, POP, Bass
Display OLED
Type of port Full speed 2.0, compatible with USB1.1
Memory 2GB
Play current <=80mA
Power off current <=300uA
Battery Lithium battery
Play time about 8 hours
File system FAT, FAT32
Safety and Upkeep
z Never attempt to fix the player yourself by opening and disassembling the unit as this will affect your
guarantee.
z When cleanin g the screen please use a soft dry cloth.
z Do not expose the player to direct sunlight for long periods of time.
z Do not expose the player to damp or moist co nditions
z Do not dispos e of this product in fire. Battery inside this product may explode or leak.
z Do not place near sharp objects as the screen can be easily scratched.
z When the player is not in use turn the player off to preserve the battery charge.
z This player uses a Lithium battery. When the battery is low, please charge the battery using the
adaptor supplied
Do not dispose of this product in your household waste. Contact your local authority for details
of local recycling schemes
-11-
Page 12

FCC PART 15 ST ATEMENT
This device complies with Part 15 of the FCC Rules.
Operation is subject to the fol lowing two condi tions:
(1) this device may not cause harmful interference, and
(2) this device must accept any interference received, including interference that may
cause undesired operation.
Warning: Changes o r modifications to this unit not expressly approved by the party
responsible for complian ce coul d void th e user’s a uthor ity to oper ate th e equipmen t.
NOTE: This equipmen t has been tested and found to comply with the limits for a
Class B digital device, pursuant to Part 15 of the FCC Rules. These limits are
designed to provide reasonable protection against harmful interference in a
residential installation. This equipment generates, uses and can radiate radio
frequency energy and, if not installed and used in accordance with the in structions,
may cause harmful interference to radio communications.
However, there is no guarantee that interference will not occur in a particular
installation. If this equipme nt does cause harmful interference to radio or television
reception, which can be determined by turning th e equipment off and on, th e user is
encouraged to try to correct the interference by one or more of the following
measures:
Reorient or relocate the receiving antenna.
Increase the separation between the equipment and receiver.
Connect the equipment into an outlet on a circuit different from that to which the
receiver is connected.
Consult the dealer or an experie nced radio/TV tech nician for help.
-12-
 Loading...