

Electrolux IC4 4821LF, IC4 4819LF, IC4 4825LF, IC4 4828LF, IC4 4832LF Operating Handbook
...Page 1

Operating handbook
Flatwork ironers
IC44819 – 4821 – 4825 – 4828 – 4832
LF/FLF/R/FR
• Flatwork ironer
• Flatwork ironer folder - LF
• Feeder fl atwork ironer folder - FLF
• Flatwork ironer with rear load removal - R
• Feeder fl atwork ironer with rear load removal - FR
Translated from french
01106073/GB
08.18
Page 2

.
Page 3

OPERATING
HANDBOOK
General
Precaution for use ...............................................................................................1/1
General ................................................................................................................1/2
Method of use
Dryer-ironer control panel ....................................................................................1/3
Simplifi ed instructions for using the ironer ...........................................................2/3
Feeder system control panel ...............................................................................3/3
Simplifi ed instructions for using the ironer ...........................................................4/3
Client mode .........................................................................................................7/3
Starting the machine ............................................................................................7/3
Cooling mode ......................................................................................................8/3
Automatic mode ...................................................................................................8/3
Manual mode .......................................................................................................9/3
With or without folding mode ...............................................................................10/3
Select the length of folds .....................................................................................11/3
Select the length of the fi rst fold ..........................................................................11/3
Service screen in automatic mode ......................................................................12/3
Service screen in manual mode ..........................................................................12/3
Additional instructions ..........................................................................................13/3
Precautions for use ..............................................................................................23/3
Stopping the machine ..........................................................................................26/3
Using the handle ..................................................................................................26/3
RABC Option .......................................................................................................27/3
Safety
Locking and tagging procedure ...........................................................................3/4
Safety devices .....................................................................................................4/4
Operating incidents
The linen remains stuck to the cylinder ...............................................................1/5
When the linen comes off the dryer-ironer it is not dry ........................................1/5
The folding system works without stopping .........................................................1/5
The heating does not work or works badly ..........................................................2/5
The folding system is defective ...........................................................................3/5
The machine temperature drops .........................................................................3/5
The machine stops suddenly ...............................................................................3/5
Additional instructions ..........................................................................................3/5
Maintenance
Preventive maintenance ......................................................................................1/6
Replacing ironing bands ......................................................................................7/6
Appendices
Explanation of graphic symbols ...........................................................................1/7
Washing symbols .................................................................................................2/7
Conversion of measurement units .......................................................................3/7
Lubrifi cation table ................................................................................................4/7
Table of contents
01106073
Notice
Date
00209
Page
Pages/Chapters
000
The manufacturer reserves the right to modify construction and equipment characteristics.
Page 4

01106073
0209 111
PageNotice Date
1
1. Precaution for use
OPERATING
HANDBOOK
Precaution for use
• The machine should not be used by children.
• This ironer must be used exclusively for textiles appropriate for machine ironing, which
have been previously and exclusively washed in water.
• Blankets should not be ironed.
• Be careful with synthetic linen and also with printed linen. They can melt and stick on the
cylinder.
• Do not iron articles that contain plastic, foam, sponge rubber or similarly textured rubberlike materials.
• Do not iron linens coated with solvent, paint, wax, grease or any easily infl ammable pro-
ducts.
Page 5

OPERATING
HANDBOOK
You should have found an instruction handbook and keys to open the machine casings, and
a maintenance poster to display in your laundry, inside your machine.
Depending on its destination, the dryer ironer is delivered bare or may be placed on a transport pallet and/or packed with plastic fi lm.
In some cases, it may be delivered in maritime packing (wood crate).
Please refer to the handling chapter in this instruction handbook for a description of handling
operations.
2. General
01106073
Notice
Date
10209
Page
2
Before any use, it is compulsory to read the instruction handbook.
Users must have learnt how to the machine operates.
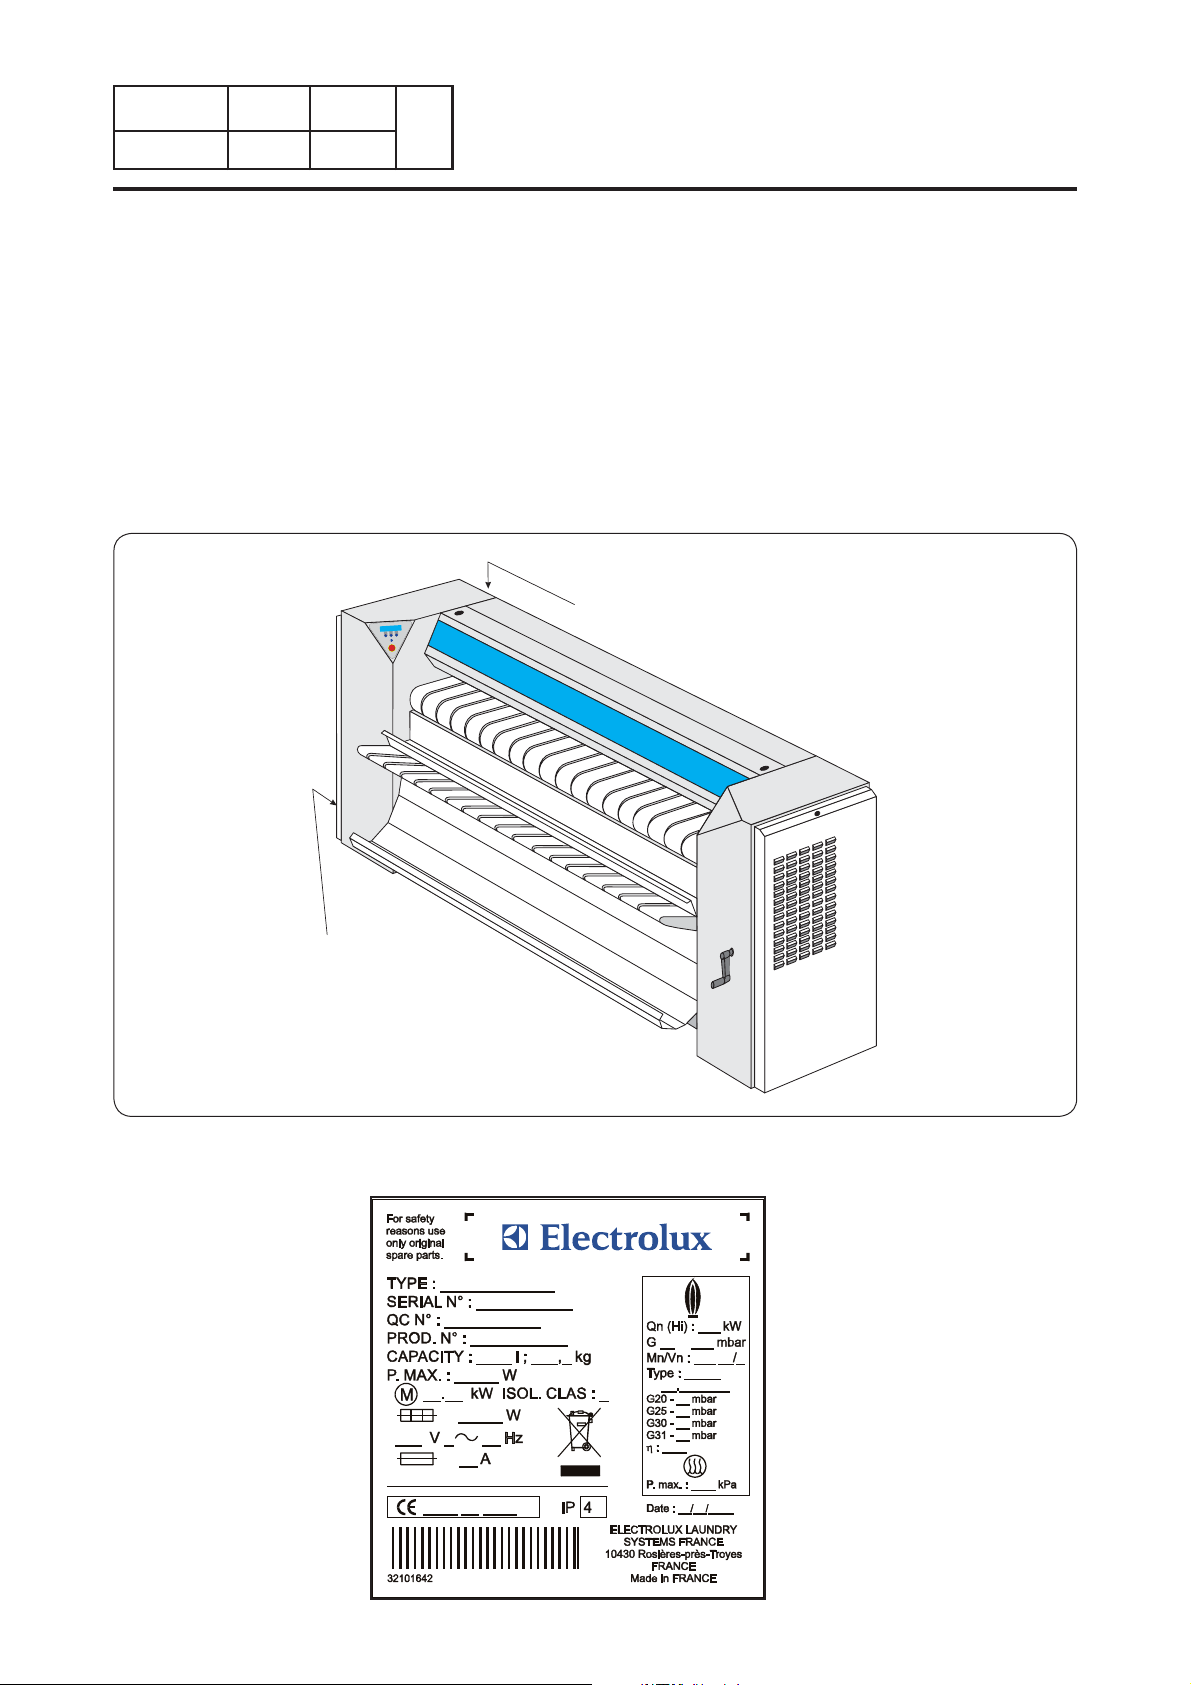
The identifi cation plate is situated on the left side.
This machine should be installed in conformance to the health and safety regulations, and only used in a suffi ciently aerated area.
Check the instructions before installing or using the machine.
Page 6
01106073
The machines described in this hanbook have a ironing capacity of 190, 210, 250, 280, 320
cm wide depending on the type. They are available with steam, electric, gas or thermal fl uide
heating.
A version of the machine with a fully automatic folding system enables one or two persons to
dry, iron and fold sheets longitudinally.
Another version with a mechanical system allows the washing to come out at the back of the
machine.
The ironing speed is adjustable as a function of the density (weight/m²) and humidity of the
washing.
0209 2
PageNotice Date
2
2. General
Adjustment label
(for gas machine only)
%
OPERATING
HANDBOOK
Identifi cation
plate
Identifi cation plate
D1090
Page 7
OPERATING
HANDBOOK
The electrically heated dryers-ironers can be equipped with a temperature regulation system
for the heating cylinder using circulating heat. Machines fi tted with a Dubixium cylinder have
a normal electric heating device.
This system provides an excellent tool to optimise the performance of the dryer-ironer for
those clients who mainly carry out staggered ironing. It prevents suddenly heating cut-outs
caused by partial use of the whole length of the machine (Patent No. 9608471).
The unused calories on the sides of the cylinder are redistributed towards the centre, where
the demand is greatest (please see the diagram below).
In this way, it is possible to limit the rise in temperature on the sides of the cylinder and the
fall in temperature in the centre of the cylinder.
2. General
01106073
Notice
0209
Date
3
2
Page
Ventilation
fan
Vacuum
chamber
Heating
element
Discharge
chambers
Cylinder
Long spindle
motor
Vacuum
chamber
D0572
Page 8
01106073
1741
4
2
PageNotice Date
OPERATING
HANDBOOK
We draw your attention on the following practices. they will have consequences on the quality of your
f nished items and can, in some cases, void the warrantly of your ironer.
RECOMMANDATIONS
AND WARNINGS
REGARDING
Multi layer items :
Worn polycotton Sheets
(cotton washed away) :
Large items
DESCRIPTIONS
(why ant what are the consequences)
sheets folded in two layers and more will be much
longer to dry. A double layer sheet will be longer to dry
than twice the time of a single layer.
The several layers of a sheet may slide against one
another depending on their material and quality. The
consequences can be a poor ironing quality (wrinkles),
will be a poor quality length foldingand most probably
an impossible cross-folding.
Polyester-cotton blended sheets have got a limited lifetime that needs to be considered. Old sheets will have
no cotton left after a certain amount of washes.
The consequences of ironing them on an ironer are :
- Increased electro-static unbearable by the machine
even if this one is equiped with an anti-static bar.
Sheets will stick to parts of the machine creating jams
and disrupting the length folding.
- Photocells may not detect the presence of the sheets,
also disrupting length folding.
Your machine cannot automatically feed items wider
than its width,
For an IC4 4819 the maximum width is : 1910 mm
For an IC4 4821 the maximum width is : 2120 mm
For an IC4 4825 the maximum width is : 2540 mm
For an IC4 4828 the maximum width is : 2750 mm
For an IC4 4832 the maximum width is : 3170 mm
Type of product concerned
Basic R LF FLF F-R FFS
XXXXXX
XXXXXX
XX X X
Size of items in general
Your machine cannot fold items longer than 3
meters
Your ironer will deliver optimum results when processing items which width is closest to the maximum
acceptable width.
Processing smaller items will alter the performance
of your ironer. In such cases, it's preferable to operate
your ironer in manual mode.
Example of sheets of 1.80 x 2.80m processed on an
IC44825FLF or FFS Gas or Electric heated:
They will have to be fed by the 1.80m width (2.80m
being wider than the machine can feed). The automatic feeding will feed in the middle of the machine leaving 37cm on either side of each sheet. This practice
will quickly lead to an overheating of the sides of the
cylinder and dramatically reduce the production of the
ironer.
You may delay the overheating of sides of the cylinder
by alternating the side through which you feed the
items.
You should always seek to use the maximum width of
your ironer.
XXXXXX
Page 9
OPERATING
HANDBOOK
01106073
Notice
1741 5
Date
Page
2
RECOMMANDATIONS
AND WARNINGS
REGARDING
Size of items for
automatic feeding
Size of items for
automatic folding
Thick items
Thin items
Particular items
Inappropriate materials
DESCRIPTIONS
(why ant what are the consequences)
The minimum size of items to be automatically Length
Folded is 90cm. Smaller sizes will be systematically
dropped or rejected if ironed in folding mode. Note
that it is highly recommended not to automatically
feed items that are much smaller than the width of the
ironer. See "Size of items in general"
The minimum size for items to be automatically cross
Folded is 110. Smaller sizes will be systematically
rejected to the rear of the FFS ironer.
Thick fabrics may lead to very thick folded items
depending on your choice of folding patern. The maximum thickness acceptable by the cross folding unit
is 40mm for the second cross fold and 80mm for the
third cross fold.
You can modify this thickness by modulating the
length folding patern and/or cancelling the third cross
fold (on IC44825FFS or IC44832FFS). Please refer to
the programming manual.
Thin and light fabrics (below 80 gr/m²) may cause
disruption in the length folding and not allow optimum
quality of folding. They may also jam. You can iron
them with precaution.
Your ironer is designed to process f atwork only, such
as sheets, duvet covers, pillow cases, table cloths and
napkins. Any other items may cause malfunctions of
your ironer and may void your warranty. If you are
unsure, refer to your nearest Elecrolux Professional
distributor for advise.
Your ironer is not designed for processing the following items :
- Padded covers : they are too thick and of inapro-
priate material
- Terrycloth : it must be tumble dried. Ironing them
will make them very rough.
- Fitted sheets : elastics may deteriorate following
exposure to excessive heat and possibly melt. Depending on their shape and material, they may be ironed if
fed into the ironer with elastics facing upward so that
they are not in direct contact with the cylinder. In no
case they must be automatically fed as the elastics will
greatly disrupt the feeding. They cannot be automatically folded for the same reason.
- Garments : they are of complex shape (not f at) and
must be ironed with appropriate f nishing equipment.
- Aprons : they are often f at but feature cords and
strings that will jam into moving parts of your ironer.
- Shower curtains : their material will not sustain the
heat and they will melt on the cylinder.
Your ironer is designed to safely process cotton, polyester-cotton and f ax. For any other material, please
refer to your linen supplier and you nearest Electrolux
Professional distributor.
Type of product concerned
Basic R LF FLF F-R FFS
XX X
X
X
XXXXXX
XXXXXX
XXXXXX
Page 10
01106073
1741
6
2
PageNotice Date
OPERATING
HANDBOOK
RECOMMANDATIONS
AND WARNINGS
REGARDING
Ironer maintenance
Reject ratio
PlivitTM Length Folding
DESCRIPTIONS
(why ant what are the consequences)
Your ironer is designed to run 8 hours without interruption. Every 8 hours and at other set intervals there
are a number of required maintenance operations to
be performed by yourself or your service engineer. It
is critical that you strictly follow these requirements
for your ironer to run properly. Please refer to chapter
"Preventive maintenance" of this manual. Should you
run your ironer for more than one shift, you must ensure that these maintenance operations are performed
between shifts.
In addition to these maintenance operations, your
ironer should be stopped, cooled and shut down for at
least one hour every 24 hours.
Because faltwork is only f at and rectangle the day you
buy it and then rapidly changes shape and charateristcs
after each wash, it is normal that 4% to 5% are rejected
by the machine.
Note that the quality of feeding will inf uence the
quality of folding. Items may be rejected because they
have not been fed properly. Static electricity and dirty
photocells will also interfere with the performance of
your ironer. Refer to "Preventive maintenance" chapter
of this manual.
Your ironer performs a Plivit
It is different from an edge to edge folding and from an
accordion folding. Refer to Chapter 03 page 26 for
explanation and illustrations of various folding paterns.
TM
Length Folding patern.
Type of product concerned
Basic R LF FLF F-R FFS
XXXXXX
XX X
XX X
Buttons on Duvet covers
In order to obtain consistent sizes of folded items, sorting f atwork per size before ironing is paramount.
Some duvet covers feature various types of fasteners
that can be buttons, velcro, in plastic, metal or wood
etc… These duvet covers may be ironed making sure
that fasteners are facing up on the feeding table. The
drying in the area of the fasteners will be longer than
the rest of the duvet cover. This is normal due to the
multi-layer of textile in this area and its complex
shape. Lying these layers f at on the feeding table will
help with a more homogeneous drying.
Note that if the thickness of the duvet cover plus the
buttons/fasteners is greater than 8mm, it may interfere
with the f nger guard protection of your ironer and
stop it. This f nger guard is a safety device to protect
operators getting their f ngers caught and driven into
the ironer.
XXXXXX
Page 11

OPERATING
HANDBOOK
Notice
1741 701106073
Date
2
Page
This page is left blank on purpose.
Page 12
01106073
0209
1
3
PageNotice Date
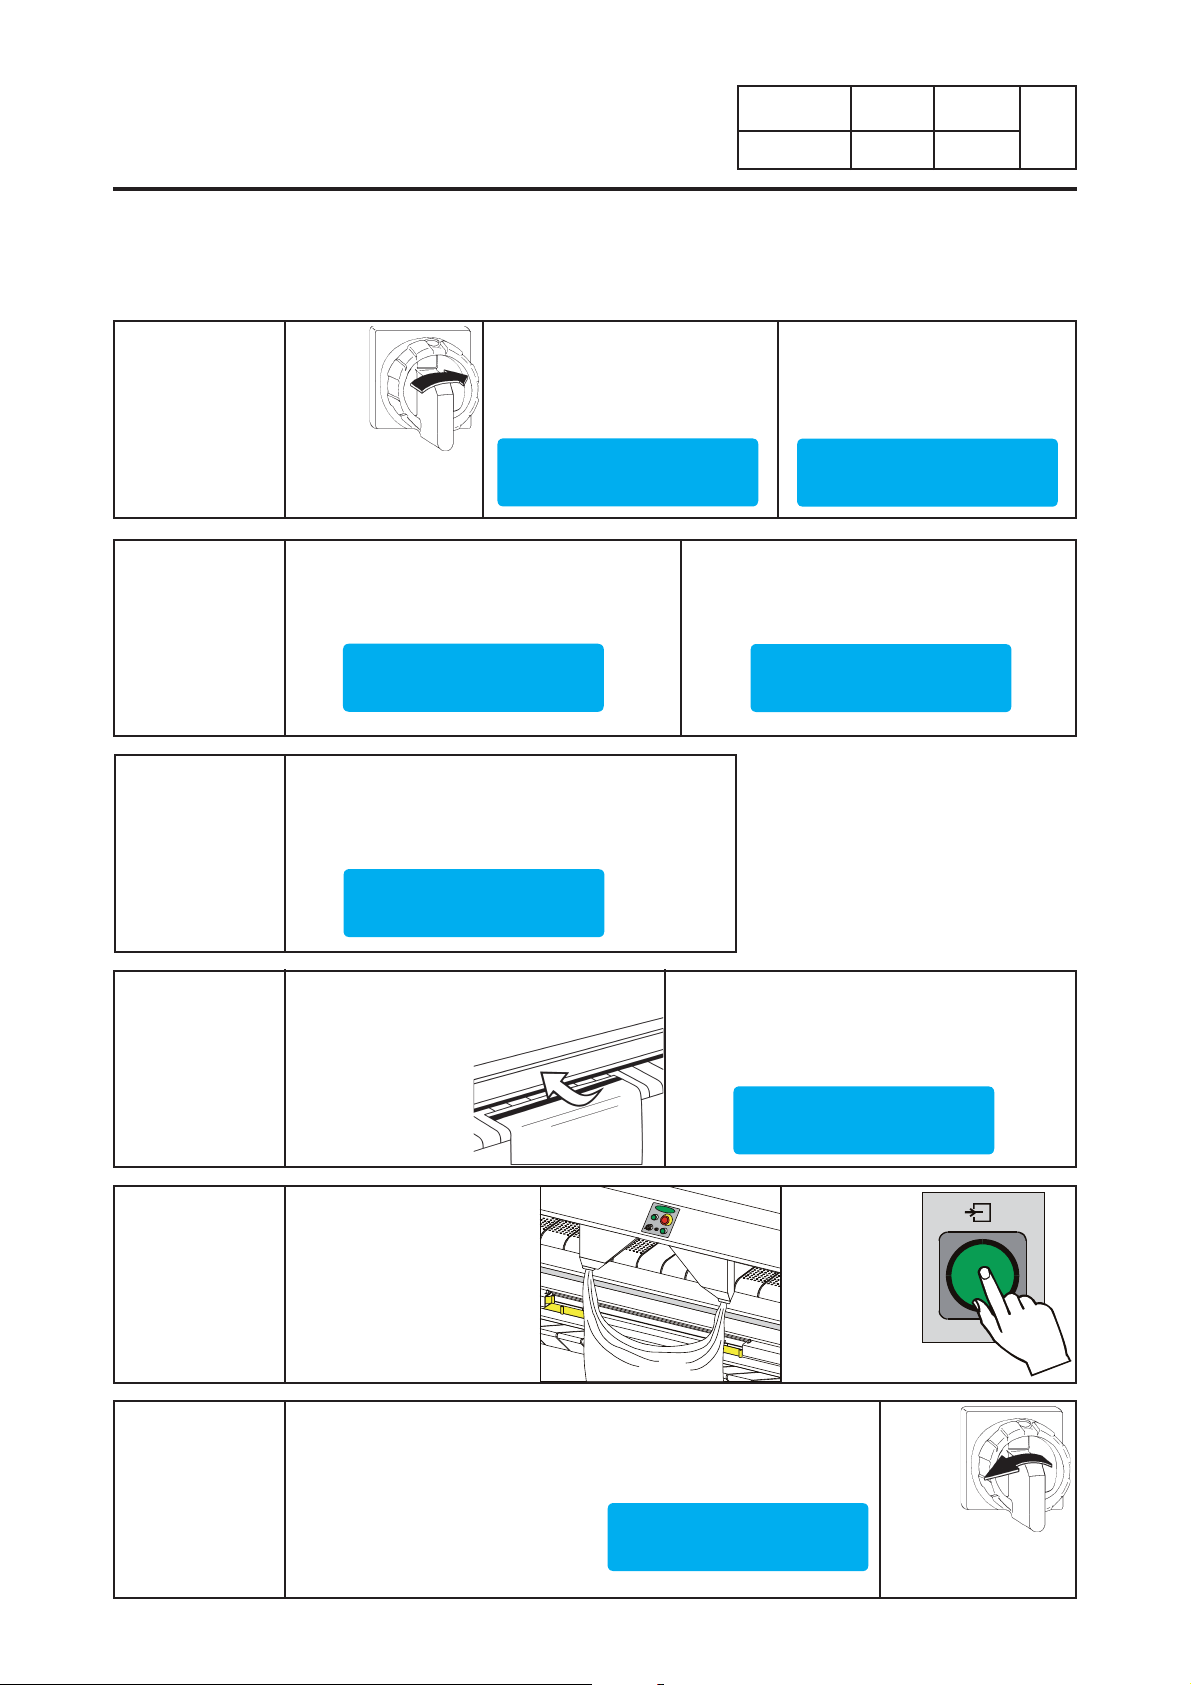
Dryer-ironer control panel
Stand by
START
%
3. Method of use
OPERATING
HANDBOOK
Display screen
Functions keys
Function key assignments vary
according to the menu displayed
on the screen during operation
This indicator lights up when the
linen removed from the dryerironer is not completely dry.
Emergency stop button
Emergency stop
The emergency stop must be unblocked, if not the machine will not work (to unblock, turn the
red button to the right).
If the machine for some reason has to be stopped, abnormal or dangerous running, press
emergency stop button.
Release the emergency stop, by turning it clokwise only after checking what motivated this
stop.
D1094
D0543
D0544
Page 13
OPERATING
HANDBOOK
3. Method of use
01106073
Simplifi ed instructions for using the ironer
Notice
0209 2
Date
Page
3
1
2
3
Switch
on the
main
switch,
open
the gas stop
valve or the steam
valve.
Manual Mode : Adjust the order temperature on the wished value thanks to keys (-)
or (+) and push on OK.
Set Temp : 180°C
- + OK
Folding : You should choose from the NO
folding, FIX folding (manual) or PLIVIT
(automatic) modes and move the reception
tank upwards.
NO FIX PLIVIT
Wait for displaying of the following message and press the
central key.
Stand by
START
Folding
When it begins operating, the
machine is set to "automatic
mode". You can now insert
sheets.
Dx °C 2.5m/mn 000
MANU PLI NEXT
Manual Mode : Adjust the ironing speed
on the wished value thanks to keys (-) and
(+) and push on OK.
Set Speed : 2.0 m/mn
- + OK
4
5
6
Safety : The machine must stop when the
mobile safety protector (hand safety) is
switched on.
Check operation
of this protection
every day.
Ironing :
Place the washing to be ironed on the
feeding table.
Stopping the machine : Push on any key to display "Select
Running Mode" and push on STOP.
Do not use the folding function during the cooling phase.
Leave the machine cool down until the following message has
disappeared.
In an emergency, pressing the
hand safety bar will stop the
machine.
Ignition fault on gas heating machine :
This message keeps on fl ashing over 30
seconds if a fault occurs when igniting the
gas burner.
Gas Ignition
Cool-Down : xx°C
START
Error
Switch
the
main
switch
off,
close the
gas stop valve or
the steam valve.
Page 14
01106073
0209
3
3
PageNotice Date
Feeder system control panel
Feeder system start
button and fl ashing
fault indicator light
3. Method of use
OPERATING
HANDBOOK
Emergency stop
button
Selector button With
feed, Semi-automatic
feed, or Without feed.
Gripper tension
adjustment button.
3
2
1
4
5
Feedind start pushbutton
D1118
Page 15
OPERATING
HANDBOOK
3. Method of use
01106073
Simplifi ed instructions for using the ironer
Notice
0209 4
Date
Page
3
1
2
3
Switch
on the
main
switch,
open
the gas stop
valve or the steam
valve.
Manual Mode : Adjust the order temperature on the wished value thanks to keys (-)
or (+) and push on OK.
Set Temp : 180°C
- + OK
Folding : You should choose from the NO
folding, FIX folding (manual) or PLIVIT
(automatic) modes and move the reception
tank upwards.
NO FIX PLIVIT
Wait for displaying of the following message and press the
central key.
Stand by
START
Folding
When it begins operating, the
machine is set to "automatic
mode". You can now insert
sheets.
Dx °C 2.5m/mn 000
MANU PLI NEXT
Manual Mode : Adjust the ironing speed
on the wished value thanks to keys (-) and
(+) and push on OK.
Set Speed : 2.0 m/mn
- + OK
4
5
6
Safety : The machine must stop when the
mobile safety protector (hand safety) is
switched on.
Check operation of
this protection every
day.
In Automatic mode :
- First select the mode
With feeding.
- Pinch both edges of a
sheet length in the clips.
Stopping the machine : Push on any key to display "Select
Running Mode" and push on STOP.
Do not use the folding function during the cooling phase.
Leave the machine cool down until the following message has
disappeared.
In an emergency, pressing the
hand safety bar will stop the
machine.
Ignition fault on gas heating machine :
This message keeps on fl ashing over 30
seconds if a fault occurs when igniting the
gas burner.
Gas Ignition
Feeding:
Push on the
button Start
Feeding.
Cool-Down : xx°C
START
Error
Switch
the
main
switch
off,
close the
gas stop valve or
the steam valve.
Page 16
01106073
0209
5
3
PageNotice Date
3. Method of use
OPERATING
HANDBOOK
Without folding
emp : 180°C
Set T
- + OK
Set Speed : 2.0m/mn
- + OK
ON
DIAMMS V xx.xx
Stand-by
START
Dx °C 2.5m/mn 000
MANU NEXT
T<100°C
Warm-up
Mx 160°C 2.5m/mn 000
DIAMMS NEXT
T<100°C
Warm-up
Warm-up
STOP RST-CNT NEXT
T<100°C
T>100°C
Cool-Down : xx°C
START
T<100°C
Stand-by
START
OFF
Page 17
OPERATING
HANDBOOK
3. Method of use
01106073
Notice
0209 6
Date
Page
3
With folding
Set Temp : 180°C
- + OK
Set Speed : 2.0m/mn
- + OK
ON
DIAMMS V xx.xx
Stand-by
START
Dx °C 2.5m/mn 000
MANU PLI NEXT
T<100°C
Warm-up
Mx 160°C 2.5m/mn 000
DIAMMS PLI NEXT
Folding
NO FIX PLIVIT
Size of folds : 20
- + OK
Offset 1st Fold : 00
- + OK
T<100°C
Warm-up
Folding
NO
FIX PLIVIT
Size of folds : 20
- + OK
Offset 1st Fold : 00
- + OK
Warm-up
STOP RST-CNT NEXT
T<100°C
T>100°C
Cool-Down : xx°C
START
Stand-by
START
OFF
T<100°C
Page 18
01106073
0209
7
PageNotice Date
Client mode
Starting the machine
3
3. Method of use
OPERATING
HANDBOOK
DIAMMS V: xx.xx
EMERGENCY STOP
RESET PUSH BUTTON
Start-up screen
Turn on the power to the machine using the
machine’s main switch.
appear on the screen for 4 seconds.
"Emergency stop" warning message
If the screen displays this message, check whether
the emergency stop button has been operated.
The software version will
EMERGENCY STOP
START
Stand by
START
Reset the emergency stop button and confi rm by
pressing the central key
In all cases, you will return to the previous menu.
Accessing the start-up menu
The machine now asks you to press the central key
to exit standby mode so as to display the pull-down
menus and select the machine’s operating modes.
.
Page 19
OPERATING
HANDBOOK
Warm-up
MANU NEXT
3. Method of use
01106073
0209 8
3
Notice
Warm-up
As soon as the machine is turned on, the "Start
heating" command is given. The cylinder temperature
begins to rise.
By default, the machine is set for automatic mode.
The service screen appears as soon as the sheets
have been inserted or when the required temperature
is reached.
Date
Page
Cooling mode
Warm-up
STOP RST-CNT NEXT
Cool-Down : xx°C
START
Automatic mode
Mx 160°C 2.0m/mn 000
DIAMMS NEXT
Cooling mode
When the STOP
operation, the machine will switch to standby and the
heating system will be switched off.
The screen will remain in this mode as long as the
temperature of the cylinder remains above 100°C
(212°F).
The screen then displays the following message.
function is requested during
Stand by
START
You can now switch off the machine.
RST-CNT resets the sheet counter.
Selection of the automatic mode
When it starts up, the machine is set for automatic
mode by default. However, you can switch over to
manual mode at any time.
The "
M" in the upper left-hand corner shows that you
are in manual mode. To return to automatic mode,
all you need to do is to press once on the "DIAMMS"
button.
The "X" behind the letter "M" can take several forms:
• "F" if you have chosen the "FIX" folding mode.
• "P", if you have chosen the "PLIVIT" folding mode.
• If nothing is shown, this means that folding is
deactivated.
Page 20
01106073
0209
Manual mode
9
3
PageNotice Date
3. Method of use
OPERATING
HANDBOOK
Dx °C 2.5m/mn 000
MANU NEXT
Set Temp : 180°C
- + OK
Selection of Manual mode
If you press MANU, you will switch to manual mode.
In this mode you use the following menus to select
the temperature and the ironing speed you wish to
apply to the machine.
The "X" behind the letter "D" can take several forms:
• "F", if you have chosen the "FIX" folding mode.
• "P", if you have chosen the "PLIVIT" folding mode.
•
If nothing is shown, this means that folding is
deactivated.
Each changeover from manual mode to automatic
mode automatically resets the sheet counter
Temperature setting
This screen does not appear on machines
equipped with a steam heating mode.
The screen will now ask you to set the ironing
temperature.
The ironing temperature can be adjusted in
increments of 5 degrees Celsius (or 9 degrees
Fahrenheit) by pressing.
Press
OK to confi rm the temperature.
Note: if you request a temperature lower than
120°C (248°F), the screen will display a (-) sign to
indicate that the heating has been switched off
and allow the machine to operate without heating.
.
Set Speed : 2.0m/min
- + OK
Ironing speed
The screen now asks you to select the ironing speed.
The ironing speed can be set between and minimum
and a maximum value specifi ed in the Settings menu.
The value can be adjusted in increments of 1/10 of a
metre (or 3/10 of an inch) by pressing.
Press
OK to confi rm the ironing speed.
It should be noted that the minimum and maximum
ironing values depend on the converter adjustment
settings.
Page 21

OPERATING
HANDBOOK
3. Method of use
With folding or without folding mode
Dx °C 2.5m/mn 000
MANU PLI NEXT
01106073
0209 10
3
Notice
Selection of With folding or Without
folding mode
This screen will only appear if you have replied
YES when setting the machine's starting
parameters.
The screen now asks you to select the with folding or
without folding mode.
Date
Folding
NO FIX PLIVIT
Page
If you do not want to fold, press "NO".
If you wish to use the manual folding function, (in
other words by adjusting the length of the desired
folds), press on "FIX".
In the opposite case, press on "PLIVIT" in order to
have the machine carry out automatic folding.
It should be noted that by returning to this screen
and reselecting one of the two options, you can
reinitialise the folding system in the event of
incorrect operation.
Page 22

01106073
0209
11
3
PageNotice Date
3. Method of use
OPERATING
HANDBOOK
Following screens are displayed only if your machine includes the folding option and the manual
fold adjusting.
Select the length of folds
Size of folds : 20
- + OK
Lenght of fold
This screen enables to manually select the fold length
while folding.
Before feeding in a sheet, choose the desired fold
length according to the length of the sheet.
To calculate the length of the folds, you should
measure the length of the sheet and then estimate a
fold length, bearing in mind that you should always
divide by an even number of folds (minimum four).
an example :
• Sample values : for a sheet of 240 cm, we obtain
6 folds of 40 cm or 8 folds of 30 cm. On the other
hand, it is not possible to have 4 folds of 60 cm.
After an initial trial, you should then fi ne-tune the
folding function by increasing or reducing the fold
length: for example by increasing an initial fold value
of 40 cm to 41 cm or reducing it to 39 cm.
The fold length can be adjusted from 20 to 48 cm per
steps of 1 by pressing the two left keys.
Valid by pressing the key OK.
As
Select the offset of the fi rst fold
Offset 1st Fold : 00
- + OK
Length of
folds
Shrinkage
of the fi rst
fold
Sheet with
6 folds
D1068
Length of the fi rst fold
This screen makes it possible to manually select the
length of the fi rst folds during the folding process in
order to adjust the length of the sheet tail with the
other folds.
•
Sample values: with a sheet of 265 cm and 8 x 35
cm folds, you can set the fi rst fold at 20 cm (with
an edge margin of 15 cm) followed by 6 folds of
35 cm.
• Sample values: with a sheet of 265 cm and 6 x 45
cm folds, you can set the fi rst fold at 40 cm (with
an edge margin of 5 cm), followed by 4 folds of 45
cm.
Feed problems or problems concerning the shape of
the sheets (which can sometimes be irregular), may
lead to the last fold "overshooting".
• Sample values: if you have selected folds of 45
cm and if after having modifi ed the edge margin
setting, the fi nal folds exceed 10 cm, you should
increase the fold length to 47 cm :
[45 cm + (10 cm / no. of folds)] = [45 + (10 / 5)]
in order to adjust the tail of the sheet.
By pressing the two buttons on the left, the value
for the fi rst fold can be adjusted from 0 up to half of
the "fold length" value previously set (with the value
increasing by 1 each time you press the button).
Valid by pressing the key OK.
Page 23

OPERATING
HANDBOOK
3. Method of use
Service screen in Automatic mode
Dx °C 2.5m/mn 000
MANU NEXT
01106073
0209 12
3
Notice
Service screen in automatic mode
The values for the current use of the machine are
shown on the fi rst line of the screen.
• The
The two following values show:
• The ironing speed
• The sheet counter information
In automatic mode (DIAMMS), the cylinder
temperature will not be displayed. This is managed by
the machine itself. Only the fl ashing "°C" indicator is
shown.
The second line displays the commands accessible
from the buttons on the panel.
"D" shows that you are in automatic mode
(DIAMMS).
Date
Page
Service screen in Manual mode
Mx 160°C 2.0m/mn 000
DIAMMS NEXT
Service screen in Manual mode
The fi rst line of the screen displays the values for the
current use of the machine.
• The
The following three values show:
• The current cylinder temperature
• The ironing speed
• The sheet counter information.
Various indications regarding the temperature of the
ironing cylinder are displayed:
"M" shows that you are in manual mode.
• If the temperature indicator blinks, this means the
machine is preheating.
• A (-) sign indicates that the temperature of the
cylinder is below 100°C (212°F).
• The current temperature is displayed when the
temperature of the cylinder is between 101°C and
245°C (213°F and 470°F)).
Note: values 101-245°C are minimum and
maximum temperature that the electronic
programmer can display. The maximum ironing
temperature cannot reach 245°C (470°F), a
safety thermostat automatically cuts off heating
before reaching this value.
• A (+) sign indicates that the temperature of the
cylinder is above 245°C (470°F).
At this point, press one of the three keys to return to
the manual/automatic mode selection display. Use
this function to change the set temperature or ironing
speed.
The second-line displays the commands accessible
from the buttons on the panel.
Page 24

01106073
0209
13
3
PageNotice Date
3. Method of use
OPERATING
HANDBOOK
Complementary instructions for starting up a machine with gas
heating.
The ignition of the burner is delayed by 30 seconds following the start command in order to
allow for the pre-ventilation of the combustion chamber.
The machine will be ready to be used after the following message disappears :
"Error Gas Ignition".
NOTE: the noise at the inter-ignition is not an explosion. It is a normal phenomenon.
Complementary instructions for starting up a machine with
electrical heating.
The typical ironing temperature is 150 to 180 °C (300 °F to 356 °F). You just have to set the
electronic thermostat to the required temperature.
In automatic mode, the ironing temperature is defi ned and managed by the machine.
Complementary instructions for starting up a machine with
steam heating.
Note that the temperature is directly related to the steam pressure (see table bellow).
The typical ironing temperature is 150 to 180 °C (302 °F to 356 °F).
On the contrary of a gas or electric heated machine, for a steam heated machine, you just
have to adjust the ironing speed regardingthe linen and its water retention.
Correspondence between Steam pressure / Temperature
Manometric pres-
sure in bars
300 400 500 600 700 800 900 1000
(3) (4) (5) (6) (7) (8) (9) (10)
Temperature in
°C
143 151 158 164 169 174 179 183
Page 25

OPERATING
HANDBOOK
3. Method of use
01106073
Notice
Date
140209
Page
Additional instructions for using an ironer with rear delivery
Two emergency push buttons are located at the rear of the machine in order to
ensure the safety of the employees.
To underline that a sudden stop of the ironing cylinder with temperature above 120
°C (248 °F) can damage the ironing belts.
After an action on the emergency push
button, re-starting the ironer is only possible after pushing the ON key and then the
heating ON key.
D1091
3
Page 26

01106073
0209
15
3
PageNotice Date
3. Method of use
OPERATING
HANDBOOK
Additional instructions for using a machine with automatic folding
Even if your ironer is equipped with the automatic folding function, a "With folding/Without
folding" mode makes it possible for you to use your ironer without the automatic folding
function. In this case, you simply need to move the reception tank upwards in order to enable
the linen to leave the machine unfolded, and then select the "Without folding" function on the
command panel.
Ironing of small items of linen, without using the feeding system or the
automatic folding system.
• Close the fl ap (A) so as to be able to
stand as close as possible to the machine.
B
• Leave the linen collector (B) in the
horizontal position to receive the small
items of linen as they are ironed.
If the tank is in the wrong position to receive unfolded linen, an electronic device prevents
you from using the ironer in the folding mode, even if you have selected the folding mode via
the command panel. The message "Warning: tank position error" is then displayed on the
command panel.
To return to the automatic folding mode, you should select the "with folding" mode and then
lower the reception tank. The linen will then be released directly on to the reception table.
Ironing with the automatic feeding
system and the automatic folding system
A
D1099
• Open the fl ap (A) to allow the linen to
hang correctly during smoothing.
• Swing the linen collector (B) into the
vertical position to form a box with the
fl ap.
NOTE: to ensure easy handling of the reception tank, it is recommended that you
operate this manually from its centre (between the two arrows inlaid on the front
edge of the tank).
A
B
D1100
Page 27

OPERATING
HANDBOOK
3. Method of use
01106073
Notice
0209 16
Date
Folding characteristics (machine with folding function only)
• Dimension of sheets compatible with folding:
Min. length : 90 cm (35")
Max. length : 355 cm (140")
• Fold dimensions :
Min. length: 20 cm (8")
Max. length : 50 cm (24")
• Number of folds :
4 folds min.
10 folds max.
• Minimum feeding separation distance between two sheets : 10 cm (4")
• Dimension of the fi rst fold before the complete sheet measurement (advance folding) :
25 cm (10")
• Dimension of the second fold before the complete sheet measurement (advance folding) :
35 cm (14")
Page
3
• When a sheet is too long, folding starts before the complete sheet measurement, this is
advance folding. The machine then automatically adjusts the folds as a function of the
measurement made.
Automatic feed characteristics (machine with feed function only).
• Gripper movement speed
• The sheet size must be between 85% and 100% of the usable width of the dryer-ironer.
Page 28

01106073
0209
17
3
PageNotice Date
Table for adjustment of folding values
Note : Only the following values garantee a correct folding.
3. Method of use
OPERATING
HANDBOOK
L
100
105
110
115
120
125
130
135
140
145
150
155
cm
90
95
N
=25 - -
X
26
28
29
30
31 21 -
33 22 -
34 23 -
35 23 -
36 24 -
38 25 -
39 26 -
40 27 -
41 28 21
--
--
--
--
N
L
cm
185 X
190
195
200
205
210
215
220
225
230
235
240
245
250
6 8 10 12 8 10 1246 8
=33 24 - -
33 25 - -
34 26 21 -
35 26 21 -
36 27 22 -
37 28 22 -
38 28 23 -
38 29 23 -
39 29 24 -
40 30 24 -
41 31 25 20
42 31 25 21
43 32 26 21
43 33 26 22
N
L
cm
280 X
=36 29 24
285 37 30 25
290
295
300
305
310
315
320
325
330
335
340
345
38 30 25
38 31 25
39 31 26
39 32 26
40 32 27
41 33 27
41 33 28
42 34 28
43 34 28
43 35 29
44 35 29
44 36 30
N
32007985
L (cm)
255160
260165
265170
270175
275180
44 33 27 2243 28 21
45 34 27 2344 29 22
46 34 28 2345 30 23
47 35 28 2346 31 23
48 36 29 2448 32 24
350
45 36 30
R=5
20< <48X
(cm)
Page 29

OPERATING
HANDBOOK
3. Method of use
01106073
Notice
Instructions for using the feeding system
The feed device includes a command panel with fi ve buttons or indicators.
The feeder operates independently of the automatic folding system.
The ironer can be used in a variety of ways:
• ironer on its own for small items of linen,
• the ironer together with the feeding system,
• the ironer together with the automatic folding system,
• ironer together with the feeding system and the automatic folding system.
0209 18
Date
Page
3
Ironing of small items of linen, without using the feeding system or the
automatic folding system.
• Close the fl ap (A) so as to be able to
stand as close as possible to the machine.
• Leave the linen collector (B) in the
horizontal position to receive the small
items of linen as they are ironed.
• Leave the shelf (C) in a vertical posi-
tion to allow access to the container of
the feeding table in order to store the
linen in it.
B
A
D1101
C
D1102
Page 30

01106073
0209
19
3
PageNotice Date
Ironing with the automatic feeding
system and the automatic folding system
• Open the fl ap (A) to allow the linen to
hang correctly during smoothing.
• Swing the linen collector (B) into the
vertical position to form a box with the
fl ap.
3. Method of use
A
OPERATING
HANDBOOK
B
D1103
• Raise the shelf (C) as shown in the
diagram opposite to cover the container of the feeding table so that it rests
on the stop (4).
• If you wish to lower the shelf (C), pro-
ceed as shown in the diagram opposite.
C
4
1
3
2
D1104
C
1
2
D1105
Page 31

OPERATING
HANDBOOK
• Turn the selection button to select the
mode :
- Automatic feed
- Semi-automatic feed
3. Method of use
• Press the initialisation button to po-
sition the clamps in operating mode
(clamps in the centre of the machine).
01106073
Notice
0209 20
Date
Page
3
Note: in the event of blockage or
stoppage of the machine, of restarting,
power failure or if this indicator begins
fl ashing, you must press this same
button again to reinitialise the feeder.
• Take a large edge of the sheet in your
hands and place one corner in one
clamp and the other corner in the other
clamp. Do not leave over 3 to 4 cm
outside the clamp.
3-4 cm
D1119
Page 32

1
2
3
4
5
01106073
0209
21
3
PageNotice Date
• Press the feeder start button.
Note : If the machine is set on the
semiautomatic feeding mode, you must
push this start button to move the clamps
in front position.
• Turn this button to adjust the sheet
tension using the grippers before it is
released on to the feeder table.
3. Method of use
OPERATING
HANDBOOK
• In the event of a problem, press the
emergency stop button.
Page 33

OK OKOK
3
2
1
OPERATING
HANDBOOK
3. Method of use
01106073
Notice
0209 22
Date
Additional instructions to optimise a dryer-ironer.
When ironing small sheets or small washing, pass abreast the washing of the heating cylinder to provide correct regulation of the cylinder temperature.
As a general rule, the whole of the cylinder should be used (1). Either iron the linen from the
front (2) or iron alternately (3), which makes maximum use of the heat units available over
the surface of the cylinder. It also overcomes diffi culties arising from random control values
caused by partial use of the cylinder.
Page
3
Cylinder
Linen
D1097
Page 34

01106073
0910
23
3
PageNotice Date
Precautions for use
Please respect the following usage recommendations to get the best out of your ironer:
In manual mode
• Avoid when running, too low or badadjusted temperatures as consequence of :
- a too high ironing speed with high moisture content in sheets : bad sliding on metallic sparts.
- a partial use of the ironing lenght of the cylinder : creating overheating (be carreful
especially, to the risk for the polycotton sheets to loose their shape, generally stabilised at
200 °C (392 °F).
• You should begin ironing when the "Warming up" message disappears.
• Check that the washing can be ironed and check the temperature at which it is to be iro-
ned.
The productivity and quality of ironing / folding depend on the washing quality ; make sure
that all these conditions are satisfi ed.
3. Method of use
OPERATING
HANDBOOK
• We recommend as far as possible, that you should feed pieces of fl at washing (towels,
sheets, etc.) by their hem, with the seam facing top, to obtain maximum ironing quality.
• Carefully engage the washing to be ironed, because it is impossible to disengage a badly
engaged washing.
• Allow 10 cm between washing to be ironed when using a machine with an automatic folding system
• Do not iron washing folded in four, because it will be too thick to achieve the
drying/ironing/folding quality that you are entitled to expect from your machine.
• If possible, use the entire ironing width of the dryer ironer.
CAUTION
Do not push small pieces of laundry in
front of the DIAMMS turners to avoid
jamming.
74032535
Page 35

OPERATING
HANDBOOK
3. Method of use
01106073
Notice
0209 24
Date
Practices to avoid
• Make sure that the width of the washing does not exceed the useful width of the machine.
• Linen units under 0,90 m (machine with the automatic folding or/and feeding option).
• Sizes not fi tting the cylinder working length, partial use of the cylinder.
• Draw-sheets or any other double-layer sheet or sheet pulled into the machine
side by side.
Practices not recommended
• Folding of tableclothes (of poor quality).
• Folding of tablesclothes (of poor quality).
• Worn polycotton sheets (cotton worn away) : uneven fi nish look when folded, high static
electricity.
Page
3
• Large cotton or fl ax-made sheets > 200 g/m².
Cautions
• Prepare the large sheets before feeding : ironing and longitudinal folding defects.
• Avoid the torn, worn or holed sheets, that may hook and alter the measurements and the
longitudinal folding.
• Comply with the mini-maxi sizes of sheets (machine with automatic feeding).
In all cases, you should ensure that the folding characteristics are respected.
Page 36

01106073
0209
25
3
PageNotice Date
3. Method of use
OPERATING
HANDBOOK
1
1 Fitted-sheet 2 Comforter cases with fl ap 3 Butcher's apron
Draw- Fitted- Comforter Butcher's Linen Linen
sheets sheets cases apron < 200 g/m² > 200 g/m²
Flatwork ironer
Flatwork ironer
+ Folder
Flatwork ironer featuring
rear load removal
2
3
D0411
Flatwork ironer
with feeding
+ Folder
Flatwork ironer with
feed device featuring
rear load removal
Yes Cautions Practices to avoid
• Fitted-sheet (1) : might cause folding problems, measurements altered.
• Comforter cases with fl ap (2) (folding problems).
• Linen other than fl atwork (butcher's apron (3) : watch that the cords do not slide between
the feeding strips).
• Linen < or = 80 g/m² : gravitational pull diffi cult at lengthwise folding.
Page 37

OPERATING
HANDBOOK
3. Method of use
01106073
Notice
1010 26
Date
Stopping the machine
To avoid potentially serious damage to the ironing belts and other components, follow these
instructions when shutting down the machine :
• On steam heated machines, turn off the steam supply to stop the heating and slowly open
the trap-bypass valve to bleed.
• Use the STOP function on control panel to begin the shut-down cooling process.
• When the screen displays "Stand by/Start", switch the main switch to the "OFF" position.
• On gas heated machines, close the gas supply valve.
You can switch the machine off at any time by pressing on the machine stop switch; but
note that if the ironing cylinder is too hot (above 120 °C (248 °F), it can damage the
bands.
Page
3
Using the handle
The dryer ironer is fi tted with a handle.
This is very useful to take out the washing
if there is a power failure while you are
ironing; or you can use it to feed a piece
of wet washing to protect the ironing
bands when the ironing temperature is too
high.
Lift the safety plate (1) then push (2) and
turn the handle in the clockwise direction
(3) to rotate the cylinder and take out the
washing.
3
Handle
2
1
D1092
Page 38

01106073
0209
27
3
PageNotice Date
3. Method of use
OPERATING
HANDBOOK
RABC option (Risks Analysis Biocontamination Control)
RABC (Risks analysis and bio contamination control) is a method used for checking hygiene
in laundry shops. It records vital data to ensure processing is performed according to procedures.
Traceability for quality control :
All of the dryer-ironers are compatible with the traceability systems corresponding to the
RABC method.
• CMIS software
• RABC printer
Page 39

OPERATING
HANDBOOK
01106073
4. Safety
CAUTION
Disconnect the machine electrical power
supply before doing any repair or servicing
work.
CAUTION
Do not use the machine unless it is plugged
into a correctly earthed power socket
complying with standards in force.
Notice
4011 1
Date
Page
4
WARNING
The presence of dangerous mechanims
inside the machine can cause serious
injuries. Respect all safety instructions
before doing any work on the machine.
Replace protective casings after doing any
work.
CAUTION
For your personal safety, never use the
machine without the protective housings.
CAUTION
For your own safety, it is prohibited and dangerous to solder the ironing cylinder. If a leak
occurs, never try to repair it yourself.
Ask our technical departments for advice
.
Page 40

01106073
0209
2
4
PageNotice Date
CAUTION
The temperature of the ironing cylinder
after use can reach 200 °C (392 °F) and
can cause serious burns if you touch it.
Allow the machine to cool down before
doing any repair or servicing work.
SAFETY
Never iron if the mobile safety protec-
tor (hand protection bar) is not operating.
4. Safety
OPERATING
HANDBOOK
CAUTION
Never open the Dubixium cylinder’s fi l-
ling cap. This may void the guarantee.
IMPORTANT
To ensure optimal operation of the ma-
chine (gas heating, electronic boards,
etc.), ensure that the ambient temperature does not fall below 15°C.
All repair and servicing work must be undertaken by a competent person.
Never wear full clothes during work (wide sleeves, ties, scarves, etc.).
Disconnect all energy sources and let the ironing cylinder cool down before doing any work
on the machine.
In order to avoid any danger of fi re or explosion, never use infl ammable products to clean the
machine.
If you smell gas, turn off the gas supply, open the windows, do not touch any switches and
inform the maintenance service.
Evacuation of vapour from a dryer ironer with gas heating must never be connected to the
evacuation used for a gas heating machine and a dry cleaning machine or other machine of
the same type.
Page 41

OPERATING
HANDBOOK
Locking and tagging procedure
A red insert at the beginning of this instruction handbook schematically shows the locking
and tagging procedure described below. If you wish, you can detach this insert and display it
close to the machine to remind maintenance personnel of the safety instructions.
1
2
2
4. Safety
Always respect items
2, 3 and 4 carefully
before doing any repair or maintenance
work on the machine.
Put the main switch
to Off and lock the
handle with a padlock
in one of the three
holes provided for this
purpose.
01106073
Notice
Close the stop valves for
0209 3
Date
the other supplies
(steam,gas, thermal fl uid, com-
pressed air) to stop
and lock their handle with a padlock.
Page
4
3
3
4
4
Open the fi xed protec-
tors (casings, doors)
with the key provided
or a special tool.
Close and carefully
lock the fi xed protec-
tors.
Do the maintenance.
Unlock the stop
valves and the
main switch.
Page 42

01106073
0209
4
4
PageNotice Date
4. Safety
OPERATING
HANDBOOK
Safety devices
Feed safety device
The space between the feed safety fl ap and the drive bands is too small for you to enter your
fi ngers. The machine stops automatically as soon as the fl ap is pushed in.
Protection of motors
The motors have overload protection :
• by thermomagnetic circuit breakers and
• by the electrical selector (for movement).
Restarting the machine
You will not be able to restart the machine after it has stopped (power failure, emergency
stop, action on the feed safety device), until you have pressed one of the keys on the control
panel.
Gas heating
The gas burner is ignited and the fl ame is controlled by an electronic box that provides inte-
gral safety, for example if the fl ue draft is poor or if the gas supply is cut off.
An message on the control panel shows that the system has been put in a safe condition.
A pressure switch connected to the combustion products outlet turns off the machine’s hea-
ting function should extraction problems arise.
Accessibility
All casings can be disassembled using a special tool.
Heating safety device
The control panel applies an initial safety level at the time the machine starts up.
If the temperature is not reached after a given time, the heating command is deactivated.
The operation of the heating function is linked to the rotation of the cylinder. If the cylinder
should stop rotating for any reason, the machine stops heating.
A safety thermostat, which is independent of all electronic systems, limits the heating temperature of the ironing cylinder in all circumstances, (except in the case of a steam heating
machine).
Power supply failure
If there is a mains power supply failure, use the handle to remove any washing engaged in
the machine. If the temperature is too high, use the handle to feed some wet washing and
protect the ironing bands.
Page 43

OPERATING
HANDBOOK
01106073
4. Safety
SAFETY
Make sure that the protection casings are in position before use.
Notice
0209
Date
Complementary instructions for operation
Check daily that the hand safety bar is working correctly, the machine must stop when you
press it. The screen on control panel displays "Emergency Stop/ Reset Push Button". Press
any key to resume ironing.
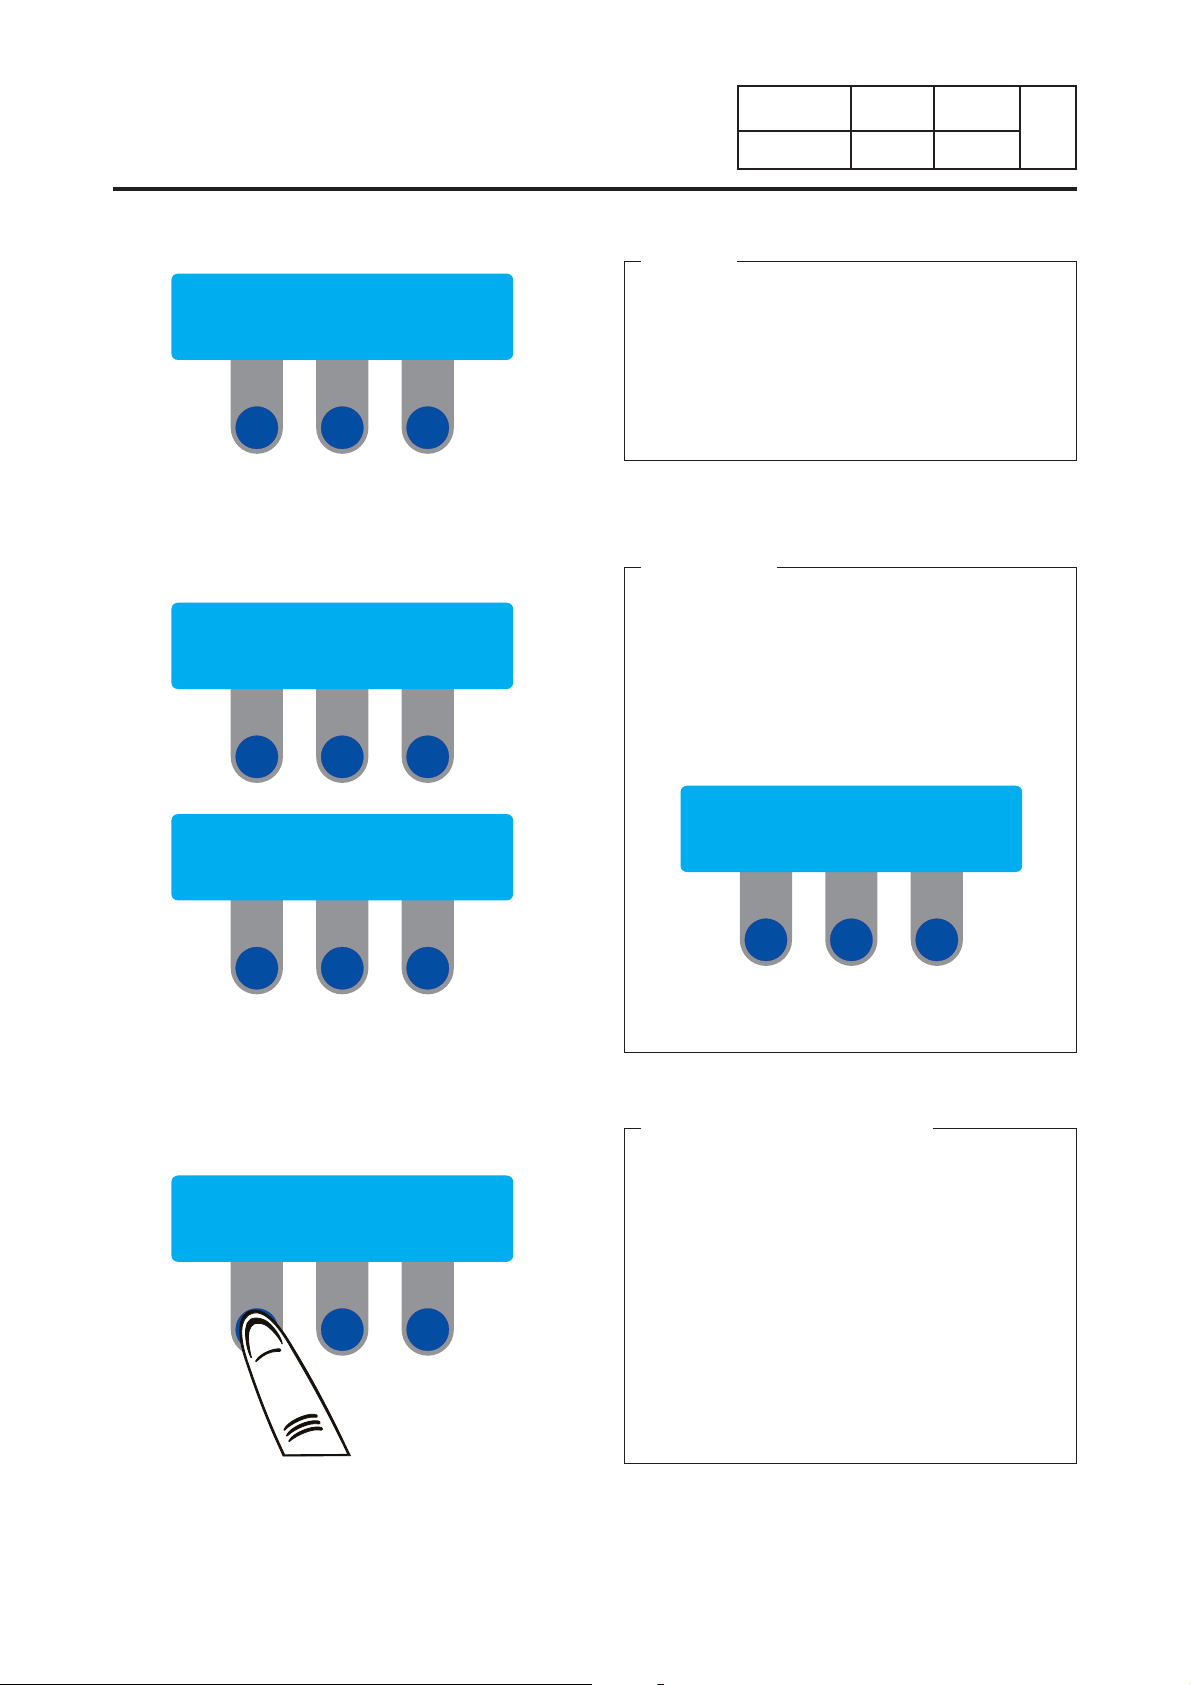
Ironing Temperature Display
The control enclosure includes an electronic thermostat panel which shows in real time the
temperature of the ironing cylinder.
A running temperature over the selected temperature is normal. This happening is not a
failure of measuring devices but it is due to heating inertia.
In automatic mode, temperature and speed management are handled by the machine itself.
5
4
Page
The use of steam heating machines.
Steam heating machines are designed to operate only using dry saturated steam at a maximum pressure of 1000 kPa (10 bar). You should take care not to exceed this limit in order to
avoid premature damage to pressurised components.
Each time the machine cools down, water vapour is inevitably created. The use of dry saturated steam reduces the risk of erosion and corrosion of the tubes and pressurised components.
There is a risk of deformation, cracking and bursting if pressure levels are used which exceed the recommended 1000 kPa (10 bar). Check that the safety valve operates correctly in
order to avoid the risks of excess pressure building up.
Fire-related risks.
Should a fi re breakout inside the machine, it is recommended that you use a CO2 extin-
guisher.
Note : in the case of a machine using gas heating, it is strictly forbidden to attempt to put
out the fi re before having fi rst turned off the gas inlet valve.
The client must ensure conformity with the Labour Code and his supplier of fi re-fi ghting equi-
pment who issues the Q4 certifi cate to him.
Repair and maintenance work on the machine.
All work on the machine must be carried out by qualifi ed personnel, able to carry out the work
required.
Ensure that the applicable safety conditions for the destination country are fully observed.
Page 44

01106073
0209
1
5
PageNotice Date
Encountered problem Cause of problem Solution
5. Operating incidents
OPERATING
HANDBOOK
The washing remains
stuck to the cylinder
When the linen comes off
the dryer-ironer it is not
dry
Your washing is not rinsed correctly Check rinsing with a 1 %
phenolphthalein solution diluted in
alcohol. If this colorless liquid turns to
pink on the washing as it comes out
of the washing machine, and it still
contains detergents.
if the washing is insuffi ciently rinsed. Increase the number of rinsings if
necessary or reduce product doses.
Check that ironer separating ribbons
are intact.
Check the cylinder temperature.
The washing is not suffi ciently spun.
Your linen is starched There is a risk of starch deposits
forming on the cylinder
Your washer-spin dryer has a spin
rating of below 300G.
Check the drying quality of your
washing machine.
You should plan on a short pre-drying
session in a dryer (5 – 10 mins).
The residual moisture content of the
washing should be about 50 %.
The folding system
works without stopping
The ironing speed is too high.
The ironing temperature is too low.
The linen that you are trying to iron is
too thick.
Check operation of the heating.
Check operation and cleanliness of
the vacuum intake system.
Check the condition of ironing bands
(fi bers containing scale).
Check the pressure of the ironing
roller on the ironing cylinder.
Check that the photoelectric cell is
opposite its refl ector.
The cell is correctly positioned
opposite its refl ector.
Reduce the ironing speed.
Check that these are clean and clean
them if required.
Page 45

OPERATING
HANDBOOK
5. Operating incidents
01106073
Notice
Encountered problem Cause of problem Solution
0209
Date
2
5
Page
The heating does not
work, or works badly
Check the temperature preselection.
Check the safety thermostat.
Check to see if the panel is showing
overheating or a high temperature.
Check the cylinder’s rotation
detection system.
Gas heating
Check the gas inlet.
Clean pressure reducer fi lters.
Check electronic ignition.
Check the position of the ignition
electrodes and fl ame control.
Check operation of the gas solenoid
valve.
The fl ame is yellow Check that the vapour intake fan is
Check the panel’s sensors.
working and is turning in the right
direction.
Check that air inlets are not blocked.
Electrical heating
Check heating contacts KM6, KM7
and KM8.
Check heating resistances.
Check resistance connections.
Check phases.
Steam heating
Check the steam inlet and the boiler
pressure.
Check the steam quality.
Check the non-return valve and the
steam purge.
Check the combustion products
exhaust fl ue.
Check injector calibration.
Clean machine air inlet fi lters.
Page 46

01106073
0209
3
5
PageNotice Date
Encountered problem Cause of problem Solution
5. Operating incidents
OPERATING
HANDBOOK
The folding system is
defective
The machine temperature
drops
The machine stops suddenly
Check that the photoelectric cell and
its refl ector are clean.
Check the folding arm limit switch.
Condensation given off by the linen
when still damp has affected the
operation of the photoelectric cell.
Check the sensor in the thermostat
regulation system.
Check the thermostat by measuring
the cylinder temperature with a
thermometer.
Check that the regulation shoe is in
contact with the cylinder.
Check the electric power supply.
Check the hand safety fl ap switches
S5 and S6.
Check that the linen is perfectly dry
after being ironed.
Check the movement and ventilation
fans.
Check circuit breakers.
Static electricity makes the folding diffi cult to achieve (machine with the folding
system only)
Synthetic textiles are used increasingly in laundry. The low rate of relative moisture on
•
output from drying allows high ironing speeds, which leads to production of harmful static
electricity when the linen is ironed in the machine.
• Use of softening and anti-static products attenuates this phenomenon.
• So, static electricity might cause important diffi culties at folding, especially when ironing
polyester/cotton. It si adviced to add a rincing anti-static liquid at the end of washing cycle
in order to reduce the formation of static elecricity when ironing.
Static electricity
Any friction generates static electricity. Remember the plastic ruler people rub over their
•
pullover to attract little bits of paper. With the same causes producing the same effects,
the linen being subjected to friction in the course of ironing, the rubbing of the linen
against the cylinder generates static electricity. If too much static electricity builds up,
friction has to be reduced, which can be done by removing the driving chain of the presscylinder to reduce the generation of static electricity.
Page 47

OPERATING
HANDBOOK
5. Operating incidents
01106073
Notice
0209
Date
Linen colouring
The brown coloring is due to detergent residues, and will disappear at the next washing.
•
• Colouring caused by the temperature being too high is permanent. Reduce the ironing
temperature or increase the ironing speed.
• The washing should be correctly rinsed so that it does not turn yellow and does not make
the cylinder dirty.
- Check the quality of the washing water (TH/TAC).
- Check the washing and rinsing cycles (see "phenolphthalein" operating incidents).
- Check incrustation of the washing (ash content).
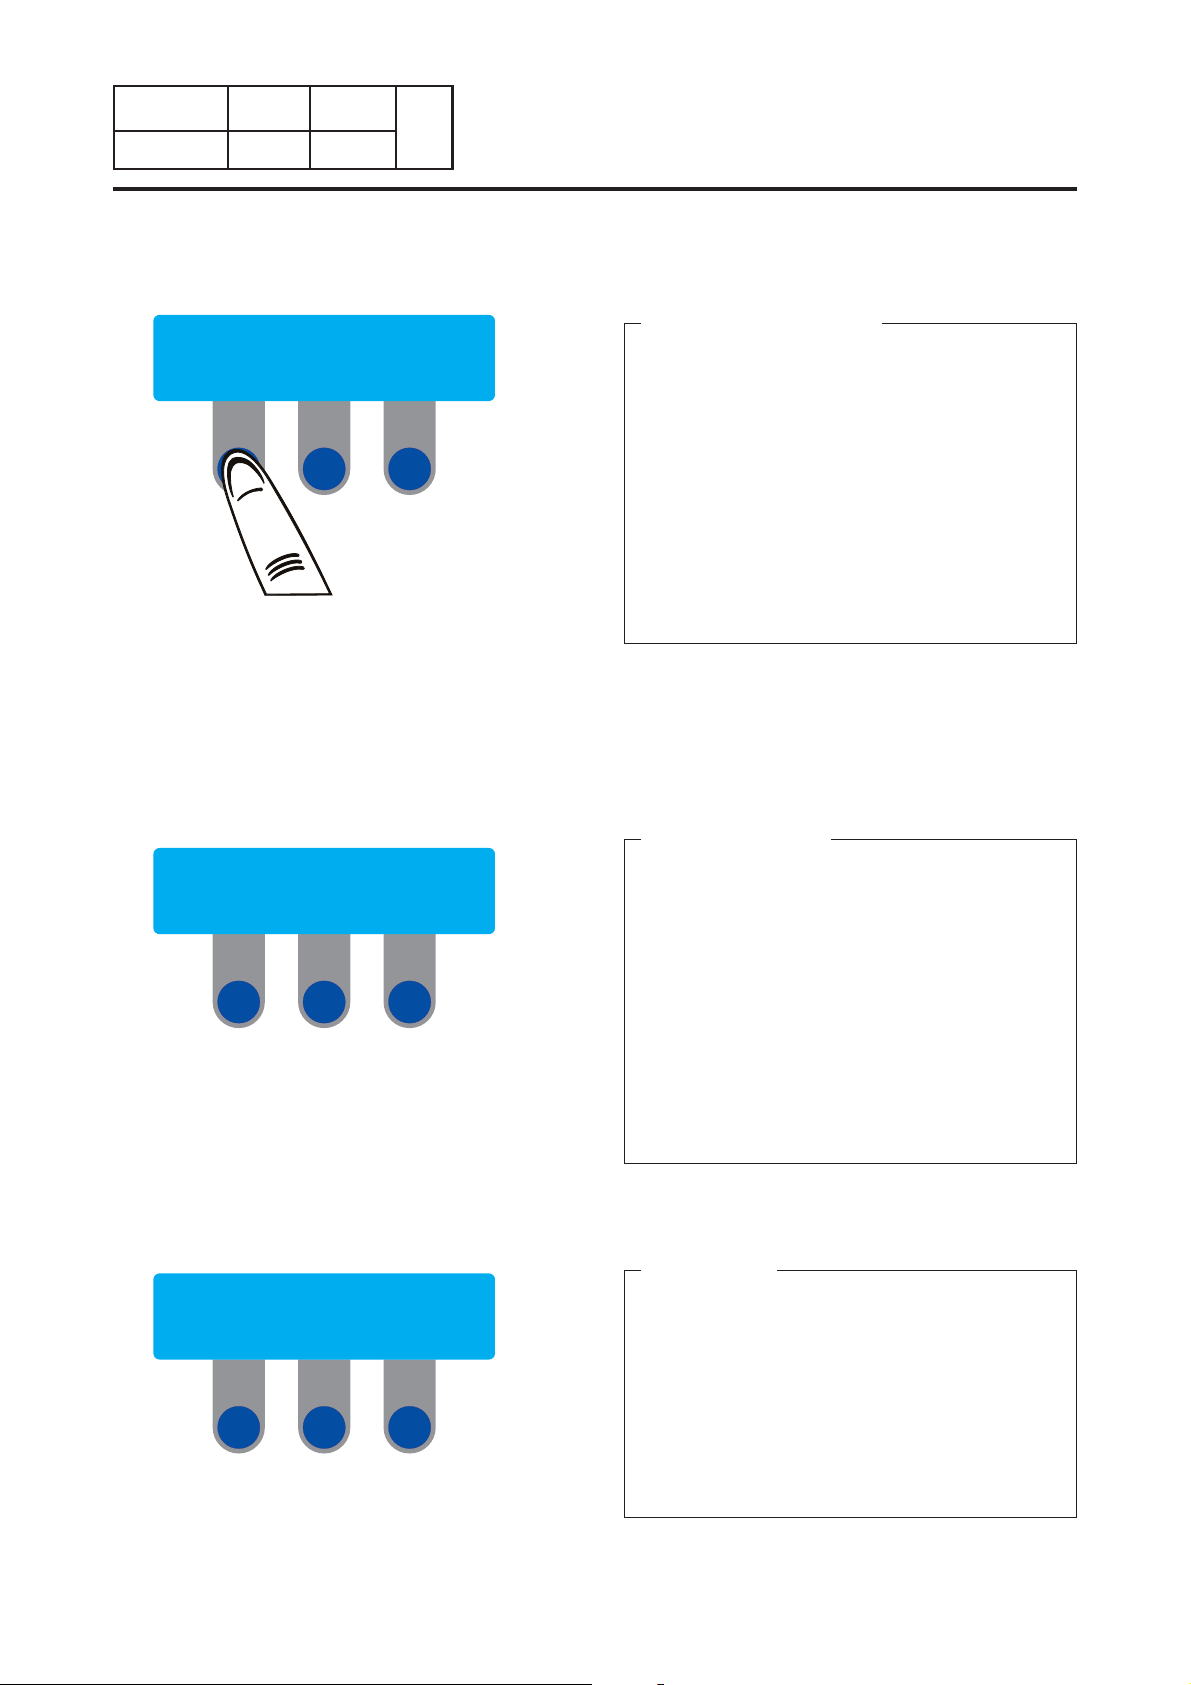
The feed bands are not turning
This type of incident is normal when it only affects a few bands.
•
When washing will not engage any more, adjust the tension of all the bands by changing
the setting of the feed table bearings.
Do not overtighten the bands.
The band must stop turning when you press on it with your fi nger. It must start again
when you remove your fi nger.
4
5
Page
Complementary instructions for starting up a machine with gas heating.
The message "Error Gas Ignition" is fl ashing on display screen during 30 seconds to show
that the gas burner is being ignited. If this message is still displayed after 6 seconds, there
may be an ignition fault, a failure in gas valve opening or a lack of gas.
Switch the machine off and call your local repairman if this occurs regularly.
About 10 minutes is necessary to warm up.
Note :
Do not forget to open the stop valve on the gas supply line before starting to use the
machine, and then close it again after use.
The noise at the inter-ignition is not an explosion. It is a normal phenomenon.
Complementary instructions for starting up a machine with steam heating.
Note : do not forget to open the by-pass or the condensate return valve for about a minute
to purge the pipes so that the cylinders can warm up more quickly; do this before starting to
switch on the machine. Close it afterwards.
Slowly open the steam inlet valve and check the temperature on the control display panel.
Page 48

01106073
0209
5
5
PageNotice Date
Overheating of cylinder sides
Error
Overheating on side
5. Operating incidents
Overheating of cylinder sides (when feeding
is carried out on the centre of the cylinder too
often)
In the event that one of the two sides of the cylinder
overheats due to it being partially used, a fl ashing
message will be displayed on the screen, alternately
with the service screen.
The heating system of the machine will remain shut
down while this fl ashing message is displayed.
T
o continue ironing, allow the cylinder to cool until
the fl ashing display disappears.
OPERATING
HANDBOOK
Overheating of centre of cylinder
Error
Overheating
Overheating of centre of cylinder (when small
linen units are too often fed on the centre of the
cylinder)
In the event that the centre of the cylinder overheats
due to it being used laterally, a fl ashing
will be displayed on the screen alternately with the
operating screen.
The heating system of the machine will remain shut
down while this message continues to be displayed.
To continue ironing, allow the cylinder to cool until
the fl ashing display disappears.
message
Page 49

OPERATING
HANDBOOK
Converter fault
CONVERTER FAILURE
START
5. Operating incidents
01106073
0209
6
5
Notice
"Converter failure" message
If this message appears on the screen, the converter
has developed a fault. Please refer to the converter
manual for information repairing the fault.
The machine will only be able to be restarted once the
fault has been repaired.
To reinitialise the machine, press the central key
If the fault remains, switch off then switch back on the
power supply using the main switch.
Date
Page
.
Fault Emergency stop
EMERGENCY STOP
RESET PUSH BUTTON
Message: "Emergency stop-check button"
If the screen displays this message, one of the
emergency stop buttons has been triggered. The
machine enters safety mode, the heating is turned of
and the cylinder stops.
Check why the button was pressed and then reset it.
The screen should now display this message :
EMERGENCY STOP
START
You can now press on the central button on the panel
to return to the machine operation mode.
If resetting the button does not solve the problem, you
should then check the others.
f
Page 50

01106073
0209 7
5
PageNotice Date
Gas burner ignition fault (only for machines using gas heating)
Error
Gas Ignition
5. Operating incidents
"Gas ignition fault" message
(only on gas-heated machines).
The screen will alternately display this fl ashing
message and the service screen. This means that the
lighting of the gas burners has been requested.
If this message has been displayed over 30 seconds,
the gas burner is not ignited.
into safety state and heating is cut off. Try again and
follow the starting procedure.
Press any key to display the following menu.
After an additional failure, please check the gas
heating running. If the fault remains, consult your
after-sales service.
OPERATING
HANDBOOK
The heating system falls
Reset the igniter (only for machines using gas heating)
Message: "Reset igniter"
The message on the screen will then ask you if you
wish to reset the igniter.
Dx °C 2.5m/min 000
Reset Ignitor STOP
Fault with the heating system
Problem
Fault with the heating system
Press on one of the two buttons on the left to restart
the gas igniter
Press the "STOP" button to stop the machine.
Message: "Problem - fault with the heating
system".
The screen appears if, after a certain time
(approximately 20 minutes) the cylinder temperature
remains below 100°C.
Try to restart the machine.
If the problem continues, please consult your after-
sales service department.
.
Page 51

OPERATING
HANDBOOK
The following three screens will only appear if you have a machine with a folding option and manual fold adjustment.
5. Operating incidents
01106073
Notice
0209
Date
8
Page
Error of communication with the folding option
"Com. Error Folder" message
Error
Com. Error Folder
The screen will alternately display this fl ashing
message and the service screen.
This message means that there is a communication
failure between the control panel and the folding
programmable logic controller.
• Check the link between the control panel and the
programmable logic controller.
• Check the setting of the programmable logic
controller.
• In the Set 2 menu of the service program check
the confi guration for the control panel. The MANU
parameter should be selected.
If the fault remains, consult your after-sales service.
5
Error of the folder running
Error
Folder Error 002
Positioning fault with the reception tank
Error
Reception not ready
"Folder Error 002" message
The screen will alternately display this fl ashing
message and the service screen.
This message followed by a number means a failure
in the folder running.
Switch off then switch back on the power supply using
the main switch. If the fault remains, consult your
after-sales service.
Message: "Problem - tank positioning error".
The screen displays the following fl ashing message,
alternating with the service screen.
This message shows that the reception tank on the
machine is not in the correct position for the folding
option that you have chosen:
•
Raised to use the machine without folding (folding
mode: WITHOUT).
• Lowered to use the machine with folding (folding
mode: FIX or PLIVIT).
Page 52

01106073
2313 1
6
PageNotice Date
Preventive maintenance of the ironer
6. Preventive maintenance
OPERATING
HANDBOOK
Daily (8 h)
1. Check that the machine stops when you press the mobile safety protector (hand safety
2. Check that the "emergency stop button" works correctly.
(at the beginning of each working day)
device).
Weekly (40 h)
3. Clean motor ventilation grills.
4. Clean the drive system of the dewrinkling strips.
5. Clean the separators.
6. Clean the detection cell and its refl ector (on models with the folding function only).
7. Check and clean the fl uff fi lter and the cover fi lter with suction device.
Monthly (170 h)
8. Remove dust from outside the machine.
9. Check the condition of the separating ribbons, and replace them if necessary.
10. Ensure that the thermostatic regulation and overheat safety shoes are always clean and
in contact with the cylinder.
11. Lubricate the steam heater bearings (see lubrication chart in next pages).
Every six months (1000 h)
12. Check for any possible oil seepage, particularly at the fi ller plug (only on Dubixium cylin-
ders).
13. Grease chains (see lubrifi cation table on the following pages).
14. Clean and inspect the cylinder support rollers, along with the stop roller wear indicator
(except on the steam machine). If there is any premature wear, see technical support,
ref. 04102018.
15. Check operation of the handle.
16. Inspect tightness of electrical connections on the power supply terminal block and electrical earthing connections.
17. Clean exhaust system.
18. Inspect heating elements, cables and electrical connections (on electrical heating only).
19. Clean gas fi lter inside the gas valve (on gas heating only).
20. Check the condition of ironing bands and their staples.
21. Check the feed bands and their drive and ejection bands (on models with the folding
funciton only).
22. Clean inside the machine.
Page 53

OPERATING
HANDBOOK
6. Preventive maintenance
01106073
Notice
4311 2
Date
Every year (2000 h)
23. Check if the cylinder is dirty and clean it if necessary.
24. Clean external pipes done by customer.
25. Check that the burner works correctly (gas machines only).
Clean the inner gas burner with suction device.
Check the sight of the ceramic plates joints and change them if necessary.
26. The bearings must be grease once a year, you may grease them using a grease which
same characteristics as that originally used (grease CELTIA G2).
Every three year (6000 h)
27. Clean the ceramic plates with suction device.
28. Change the high temperature joints made of mineral wool.
Page
6
29. Check the tightness of the venturis.
18
16
14
1
22
2
26
25
%
19
27
28
29
13
7
18
8
23
17
6
20
21
12
11
24
26
17
13
3
15
22
8
17
5
10 1010
321
D1093
Page 54

01106073
4311 3
PageNotice Date
6
6. Preventive maintenance
OPERATING
HANDBOOK
17
22
4
3
16
22
%
3
2
8
22
4
22
17
3
9
SAFETY
Any repairing or maintenance opera-
tion should be carried out by a specialist.
CAUTION
For an optimal service of your machi-
ne, execute this instructions at regular
intervals and according to the frequency of use.
3
D1113
Page 55

OPERATING
HANDBOOK
6. Preventive maintenance
01106073
Notice
Preventive maintenance of the feeder system
0212 4
Date
Page
6
Daily (8 h)
1. Check that the "emergency stop button work correctly.
(at the beginning of each working day)
Weekly (40 h)
2. Clean motor ventilation grills.
3. Clean the drive system of the dewrinkling strips.
Monthly (170 h)
4. Remove dust from outside the machine.
5. Check the condition of the separating ribbons on the press roller, and replace them if ne-
cessary.
Every six months (1000 h)
6. Inspect tightness of electrical connections on the power supply terminal block and electri-
cal earthing connections.
7. Clean exhaust system.
8. Remove dust from inside the machine.
WARNING
Carry out these instructions at regular
intervals, depending on the frequency
of use, to keep your machine in optimum working condition.
Note:
The drier-ironing machine textile components must be considered as wearing parts. The lifetime of
these parts (ironing strips, feeding strips, clamping belts, transfer belts, etc.) is highly dependent on
the usage conditions and maintenance frequencies. Consequently, their replacement may not be
claimed under any guarantee.
Page 56

01106073
0209 5
PageNotice Date
6
6. Preventive maintenance
OPERATING
HANDBOOK
This page is left blank on purpose.
Page 57

OPERATING
HANDBOOK
6. Preventive maintenance
01106073
Notice
0209 6
Date
Motors
• The fan motor is life lubricated.
• The movement reduction gear is life lubricated.
Bearings
• The bearings must be grease once a year, you may grease them using a grease which
same characteristics as that originally used (grease CELTIA G2).
• Only the two bearings on the steam cylinder should be regreased periodically (please see
"Preventive maintenance") using a grease which is resistant to high temperatures.
Cylinder
• The cylinder must be maintained very carefully so that ironing is easy and good quality.
• Detergent or scale deposits must be removed as soon as they reduce ironing quality (jam-
ming, creases on the washing, etc.).
Page
6
Page 58

01106073
0209 7
PageNotice Date
6
6. Preventive maintenance
OPERATING
HANDBOOK
Replacing ironing bands
• Remove the feed tray to obtain easy access to the ironing bands.
• Remove staples from the two ends of the bands to be replaced and staple the end of the
old band with the end of the new band.
• Rotate the cylinder using the handle.
• Unstaple the ends of the old and the new band, and staple the two ends of the new band
together.
• Do the same for the other bands.
• Replace the feed tray.
CAUTION
Pull on
the old
band
The tension of the ironing bands was adjusted in the factory with the
machine hot.
Never retension the bands.
Their tension must be as low as possible (just enough to drive them)
since excessive tension will cause fast wear of these bands.
Remember these comments if you need to make an adjustment or a
replacement.
Satellite
Cylinder
direction of
Old band
Staples
rotation
New band
Tensioning
satellite
D1098
Page 59

OPERATING
HANDBOOK
7. Appendices
Explanation of graphic symbols
A fl ash of lightning with an arrow at its end
displayed inside an equilateral triangle, warns
the user about the presence of uninsulated
"dangerous current" suffi cient in intensity to
cause electrocution.
An exclamation mark inside an equilateral
triangle offers the user important advice about
usage, servicing and hazardous conditions.
01106073
Notice
0209 1
Date
Page
7
This symbol warns the user that there are
mechanisms inside the machine which can be
dangerous. The protective housing must be in
place during use.
This symbol warns the user of the presence of
high temperatures which could cause severe
burns. Some surfaces can reach close to 200
°C (392 °F).
Page 60

9595
D1232
9595
D1233
70
D123460D1235
60
D1236
50
D1237
50
D1238
40
D1239
40
D1240
30
D1242
30
D1243
D1245
D1247
D1248
D1249
D1250
D1251
D1252
D1253
D1255
D1257
D1258
D1261
D1262
D1263
D1264
D1246
40
D124130D1244
D1256
D1254
D1259
D1260
01106073
0209 2
7
PageNotice Date
Explanation of washing symbols (ISO 3758:2005 standard)
To overcome language barriers, the following are symbols used internationally to give you
guidance and recommendations when washing different textiles.
7. Appendices
OPERATING
HANDBOOK
Washing The tub symbolizes washing.
Max. washing
temperature in °C
Mechanical
action
95 normal
95 mild
70 normal
60 normal
60 mild
50 normal
50 mild
40 normal
40 mild
Dry or water
cleaning
The circle symbolizes dry or water
cleaning.
Normal dry cleaning with perchloroethyl,
solvent of hydrocarb.
Mild dry cleaning with perchloroethyl,
solvent of hydrocarb.
Normal dry cleaning with solvent of
hydrocarbon.
Mild dry cleaning with solvent of hydrocarbon.
Do not dry clean.
Normal water cleaning.
Mild water cleaning.
Very mild water cleaning.
40 very mild
30 normal
30 mild
30 very mild
40 wash by hand
do not wash
Bleaching
The triangle symbolizes bleaching.
Bleaching allowed (chlorine or
oxygen).
Bleaching allowed (only oxygen).
Drying
Ironing
The circle in a square symbolizes
tumble drying.
Can be put in a tumble dryer. Normal temperature.
Can be put in a tumble dryer.
Lower temperature.
Do not put in a tumble dryer.
The iron symbolizes the domestic
ironing and pressing process.
Max. temperature 200 °C.
Max. temperature 150 °C.
Max. temp. 110 °C. The steam can
cause irreversible damages.
Do not iron.
Do not bleach.
Page 61

OPERATING
HANDBOOK
7. Appendices
01106073
Notice
0209 3
Date
Page
Conversion of measurement units
The following is a list of correspondences of the main frequently used units, to avoid the need
to use measurement unit conversion tables.
7
bar : 1 bar = 100 000 Pa
1 bar = 1.019 7 kg/cm²
1 bar = 750.06 mm Hg
1 bar = 10 197 mm H
O
2
1 bar = 14.504 psi
british thermal unit : 1 Btu = 1 055.06 J
1 Btu = 0.2521kcal
calorie : 1 cal = 4.185 5 J
1 cal = 10
-6
th
1 kcal = 3.967 Btu
1 cal/h = 0.001 163 W
1 kcal/h = 1.163 W
continental horse power :1 ch = 0.735 5 kW
1 ch = 0.987 0 HP
cubic foot : 1 cu ft = 28.316 8 dm³
1 cu ft = 1 728 cu in
1 kg/cm² = 10 000 mm H
O
2
1 kg/cm² = 735.557 6 mm Hg
pound : 1 lb = 453.592 37 g
meter : 1 m = 1.093 61 yd
1 m = 3.280 83 ft
1 m = 39.37 in
cubic meter :1 m³ = 1 000 dm³
1 m³ = 35.314 7 cu ft
1 dm³ = 61.024 cu in
1 dm³ = 0.035 3 cu ft
pascal : 1 Pa = 1 N/m²
1 Pa = 0.007 500 6 mm Hg
1 Pa = 0.101 97 mm H
O
2
1 Pa = 0.010 197 g/cm²
1 Pa = 0.000 145 psi
1 MPa = 10 bar
cubic inch : 1 cu in = 16.387 1 dm³
foot : 1 ft = 304.8 mm
1 ft = 12 in
gallon (U.K.) : 1 gal = 4.545 96 dm
1 gal = 277.41 cu in
gallon (U.S.A.) : 1 gal = 3.785 33 dm
1 gal = 231 cu in
horse power : 1 HP = 0.745 7 kW
1 HP = 1.013 9 ch
inch : 1 in = 25.4 mm
joule : 1 J = 0.000 277 8 Wh
1 J = 0.238 92 cal
kilogramme :1 kg = 2.205 62 lb
kg/cm
2
: 1 kg/cm² = 98 066.5 Pa
1 kg/cm² = 0.980 665 bar
3
or l
3
or l
psi : 1 psi = 0.068 947 6 bar
thermie : 1 th = 1 000 kcal
1 th = 10
1 th = 4.185 5 x 10
6
cal
6
J
1 th = 1.162 6 kWh
1 th = 3 967 Btu
watt : 1 W = 1 J/s
1 W = 0.860 11 kcal/h
watt-hour : 1 Wh = 3600 J
1 kWh = 860 kcal
yard : 1 yd = 0.914 4 m
1 yd = 3 ft
1 yd = 36 in
temperature degrees :
0 °K = -273.16 °C
0 °C = 273.16 °K
t °C = 5/9 (t °F-32)
t °F = 1.8 t °C + 32
Page 62

01106073
0210 4
PageNotice Date
Lubricant table
Rolling bearings
USES
TYPES OF
LUBRICANTS
AND STANDAR-
DIZATION
Bearings
Lithium soap
grease
Grade ISO NLGI2 Grade ISO NLGI3 Grade ISO NLGI1 Grade ISO NLGI2 Grade ISO NLGI2 Grade ISO
7
MACHINE LUBRICATION
Rolling bearings
Bearings hight
temperature
Lithium soap
grease + silicone
oil
Assembly paste
(fretting corrosion)
Lithium soap
paste + mineral
oil + mineral
solid greases
Bare gears
Chains shafts
Thread
Slides
Lithium soap
grease with
MOS2 additive
Flange joints
Union pipes
Steam circuits
Graphite grease
mini 60%
graphite, special
leakproof
Reducers with
wheels and
screws
Extreme hight
pressure oil
VG150
Reducers with
gears
Extreme hight
pressure oil
Grade ISO
VG220
OPERATING
HANDBOOK
Circuits and
pneumatic
devices
Inhibited oil
SAE5
Grade ISO VG22
TEMPERATURE
LIMIT RANGE
RECOMMENDED
CODE PRODUCT
ANTAR
BP
CASTROL
ELF
ESSO
FINA
C
O
R
GBSA
R
E
GRAFOIL
S
P
O
KLUBER
N
D
MOBIL
E
N
KERNITE
C
E
SETRAL
-20°C + 140°C -40°C + 200°C -20°C + 150°C -20°C + 135°C -30°C + 700°C 0°C + 100°C 0°C + 120°C +10°C + 65°C
CELTIA G2 NTN SH44 M ALTEMP Q NB 50 MI-SETRAL 43N GRACO AF 309 REDUCTELF
96 011 011 96 011 019 96 011 014 96 011 000 96 011 004 96 010 001 96 010 004 96 010 030
ROLEXA 2
LS EP 2
SPEEROL EP2
EP2
BEACON EP2
MARSON EP2 GIRAN SR150 GIRAN SR220
CENTOPLEX 2
MOBILUX
LUBRA K LC LUBRA K MP
UNISILKON L50Z ALTEMP
Q.NB50
STATERMA
MO10
MULTI PURPOSE
GREASE MOLY
UNIMOLY GL82
MISETRAL 43N
BELLEVILLE N
GRACO AF 309
WOLFRACOAT C
SP150
ENERGOL CRXP
150
ALPHA SP 150 ALPHA SP 220
REDUCTELF
SP150
SPARTAN
EP150
LAMORA 150 LAMORA 220 CRUCOLAN 22
MOBILGEAR 629 MOBILGEAR 630
TOP BLENB
ISO 80W90
REDUCTELF
SP200
ENERGOL CRXP
220
REDUCTELF
SP220
SPARTAN
EP220
TOP BLENB
ISO 220
LUBRAK ATL
SAE 5W
MISOLA AHEPONA Z 220EPOXA MO 2 EPONA Z 150
SHF 22
SPINEF 22
SPINESSO 22
DTE 24
LUBRA K ATL
SAE5W
SHELL
TOTAL
MOLYKOTE
OPAL
ITECMA
DOW COR-
NING
ALVANIA R2
MULTISS EP2 CARTER EP150 CARTER EP220 EQUIVIS 22
MOLYCOTE 44 PATE DX
GEVAIR SP SUPER MOS 2
GRL-ULTRA VULCAIN GMO LHT-C AEROSYN
SH 44 N
SILUB-P
RETINA AM OMALA 150 OMALA 220 TELLUS 22
GEAROPAL GM
65 ISO 150
DURAGEAR BL
GEAROPAL GM
75 ISO 220
DURAGEAR BL
HYDROPAL HO
110 HM++22
Page 63

.
Page 64

Electrolux Laundry Systems Sweden AB
341 80 Ljungby, Sweden
www.electrolux.com/professional
Share more of our thinking at www.electrolux.com
 Loading...