

Page 1

EWP 1064 TDW
EWP 1264 TDW
EWP 1464 TDW
................................................ .............................................
EN WASHING MACHINE USER MANUAL 2
FR LAVE-LINGE NOTICE D'UTILISATION 22
Page 2

www.electrolux.com
2
CONTENTS
1. SAFETY INFORMATION . . . . . . . . . . . . . . . . . . . . . . . . . . . . . . . . . . . . . . . . . . . . . . . . . . . 3
2. SAFETY INSTRUCTIONS . . . . . . . . . . . . . . . . . . . . . . . . . . . . . . . . . . . . . . . . . . . . . . . . . . 3
3. PRODUCT DESCRIPTION . . . . . . . . . . . . . . . . . . . . . . . . . . . . . . . . . . . . . . . . . . . . . . . . . 5
4. CONTROL PANEL . . . . . . . . . . . . . . . . . . . . . . . . . . . . . . . . . . . . . . . . . . . . . . . . . . . . . . . 6
5. WASHING PROGRAMMES . . . . . . . . . . . . . . . . . . . . . . . . . . . . . . . . . . . . . . . . . . . . . . . . . 6
6. CONSUMPTION VALUES . . . . . . . . . . . . . . . . . . . . . . . . . . . . . . . . . . . . . . . . . . . . . . . . . . 9
7. OPTIONS . . . . . . . . . . . . . . . . . . . . . . . . . . . . . . . . . . . . . . . . . . . . . . . . . . . . . . . . . . . . . 10
8.
BEFORE FIRST USE . . . . . . . . . . . . . . . . . . . . . . . . . . . . . . . . . . . . . . . . . . . . . . . . . . . . . 11
9. DAILY USE . . . . . . . . . . . . . . . . . . . . . . . . . . . . . . . . . . . . . . . . . . . . . . . . . . . . . . . . . . . . 11
10.
HINTS AND TIPS . . . . . . . . . . . . . . . . . . . . . . . . . . . . . . . . . . . . . . . . . . . . . . . . . . . . . . . 14
11. CARE AND CLEANING . . . . . . . . . . . . . . . . . . . . . . . . . . . . . . . . . . . . . . . . . . . . . . . . . . . 15
12.
TROUBLESHOOTING . . . . . . . . . . . . . . . . . . . . . . . . . . . . . . . . . . . . . . . . . . . . . . . . . . . . 19
13. TECHNICAL INFORMATION . . . . . . . . . . . . . . . . . . . . . . . . . . . . . . . . . . . . . . . . . . . . . . . 21
14.
ENVIRONMENT CONCERNS . . . . . . . . . . . . . . . . . . . . . . . . . . . . . . . . . . . . . . . . . . . . . . 21
WE’RE THINKING OF YOU
Thank you for purchasing an Electrolux appliance. You’ve chosen a product that brings with it
decades of professional experience and innovation. Ingenious and stylish, it has been designed
with you in mind. So whenever you use it, you can be safe in the knowledge that you’ll get great
results every time.
Welcome to Electrolux.
Visit our website for:
Get usage advice, brochures, trouble shooter, service information:
www.electrolux.com
Register your product for better service:
www.electrolux.com/productregistration
Buy Accessories, Consumables and Original spare parts for your appliance:
www.electrolux.com/shop
CUSTOMER CARE AND SERVICE
We recommend the use of original spare parts.
When contacting Service, ensure that you have the following data available.
The information can be found on the rating plate. Model, PNC, Serial Number.
Warning / Caution-Safety information
General information and tips
Environmental information
Subject to change without notice.
Page 3

1. SAFETY INFORMATION
Before the installation and use of the appliance, carefully
read the supplied instructions. The manufacturer is not
responsible if an incorrect installation and use causes injuries and damages. Always keep the instructions with
the appliance for future reference.
1.1 Children and vulnerable people safety
WARNING!
Risk of suffocation, injury or permanent disability.
• Do not let persons, children included, with reduced
physical sensory, reduced mental functions or lack of
experience and knowledge use the appliance. They
must have supervision or instruction for the operation
of the appliance by a person who is responsible for
their safety.
• Do not let children play with the appliance.
• Keep all packaging away from children.
• Keep all detergents away from children.
• Keep children and pets away from the appliance door
when it is open.
• If the appliance has a child safety device, we recommend you activate it.
ENGLISH 3
2.
1.2 General Safety
• Before maintenance, deactivate the appliance and disconnect the mains plug from the mains socket.
• Do not change the specification of this appliance.
• Obey the maximum load volume of 6 kg (refer to the
“Programme chart” chapter).
SAFETY INSTRUCTIONS
Page 4

www.electrolux.com
4
2.1 Installation
• Remove all the packaging and the
• Keep the transit bolts. When you move
• Do not install or use a damaged appli-
• Do not install or use the appliance
• Obey the installation instruction sup-
• Make sure that the floor where you in-
• Do not install the appliance where the
• Always be careful when you move the
• Make sure that there is air circulation
• Adjust the feet to have the necessary
Electrical connection
• The appliance must be earthed.
• Make sure that the electrical information
• Always use a correctly installed shock-
• Do not use multi-plug adapters and ex-
• Make sure not to cause damage to the
• Connect the mains plug to the mains
• Do not pull the mains cable to discon-
transit bolts.
the appliance again you must block the
drum.
ance.
where the temperature is less than 0 °C
or where it is exposed to the weather.
plied with the appliance.
stall the appliance is flat, stable, heat
resistant and clean.
appliance door can not be fully opened.
appliance because it is heavy. Always
wear safety gloves.
between the appliance and the floor.
space between the appliance and the
carpet.
WARNING!
Risk of fire and electrical shock.
on the rating plate agrees with the power supply. If not, contact an electrician.
proof socket.
tension cables.
mains plug and to the mains cable.
Should the appliance power supply cable need to be replaced, this must be
carried out by our Service Centre.
socket only at the end of the installation. Make sure that there is access to
the mains plug after the installation.
nect the appliance. Always pull the
mains plug.
• Do not touch the mains cable or the
mains plug with wet hands.
• This appliance complies with the E.E.C.
Directives.
Water connection
• Make sure not to cause damage to the
water hoses.
• The appliance is to be connected to the
water mains using the new supplied
hose-sets. Old hose sets must not be
reused.
• Before you connect the appliance to
new pipes or pipes not used for a long
time, let the water flow until it is clean.
• The first time you use the appliance,
make sure that there is no leakage.
2.2 Use
WARNING!
Risk of injury, electrical shock, fire,
burns or damage to the appliance.
• Use this appliance in a household environment.
• Do not change the specification of this
appliance.
• Obey the safety instructions on the detergent packaging.
• Do not put flammable products or items
that are wet with flammable products
in, near or on the appliance.
• Do not touch the glass of the door
while a programme operates. The glass
can be hot.
• Make sure that you remove all metal
objects from the laundry.
• Do not put a container to collect possible water leakage under the appliance.
Contact the Service to ensure which
accessories can be used.
2.3 Care and Cleaning
WARNING!
Risk of injury or damage to the
appliance.
• Before maintenance, deactivate the appliance and disconnect the mains plug
from the mains socket.
• Do not use water spray and steam to
clean the appliance.
Page 5

• Clean the appliance with a moist soft
cloth. Only use neutral detergents. Do
not use abrasive products, abrasive
cleaning pads, solvents or metal objects.
2.4 Disposal
WARNING!
Risk of injury or suffocation.
3. PRODUCT DESCRIPTION
1 2 3
• Disconnect the appliance from the
mains supply.
• Cut off the mains cable and discard it.
• Remove the door catch to prevent children and pets to get closed in the appliance.
Worktop
1
Detergent dispenser
2
Control panel
3
Door handle
4
Rating plate
5
Feet for the appliance level
6
4
5
ENGLISH 5
3.1 Child safety device
3.2 Fixing plate kit (405517114)
Use this special accessory, when you install the appliance on a plinth.
It prevents the movements of the appliance when it operates.
6
When you activate this device, you cannot
close the door. This prevents children or
pets to be closed in the drum. To activate
the device, turn it clockwise, until the
groove is horizontal. To deactivate the device, turn it counter-clockwise, until the
groove is vertical.
Read carefully the instructions supplied
with this accessory.
You can buy it in all approved Service.
Page 6

www.electrolux.com
6
4. CONTROL PANEL
1 2 3 4
5 Shirts
Sports
Curtains
Jeans
Spin
Drain
Rinse
Programme knob
1
Spin reduction touchpad
2
Temperature touchpad
3
Display
4
Prewash touchpad
5
4.1 Display
AB
ED
A)
The time area:
Cottons
Duvet
Cottons Eco
Synthetics
Delicates
Wool/Handwash
Silk
40°
60°
90°
Temp.
Spin
800
1200
1400
400
20°
30°
Prewash
Easy Iron
Delay Start
Extra Rinse
Start/Pause
6
7
8
910
5
Delay start touchpad
6
Extra rinse touchpad
7
Easy iron touchpad
8
Start pause touchpad
9
10
Time Manager touchpads
– Programme time.
– The alarm codes. Refer to the chap-
C
ter “Troubleshooting” for their description.
–
The level of the Time Manager
.
B)
The Delay Start indicator.
C)
The Child Lock indicator.
D)
The Door Lock indicator:
– It is on, you cannot open the door.
– It is off, you can open the door.
– It flashes, you cannot open the
door. Wait for some minutes until
the indicator is off.
E)
Washing phase indicators.
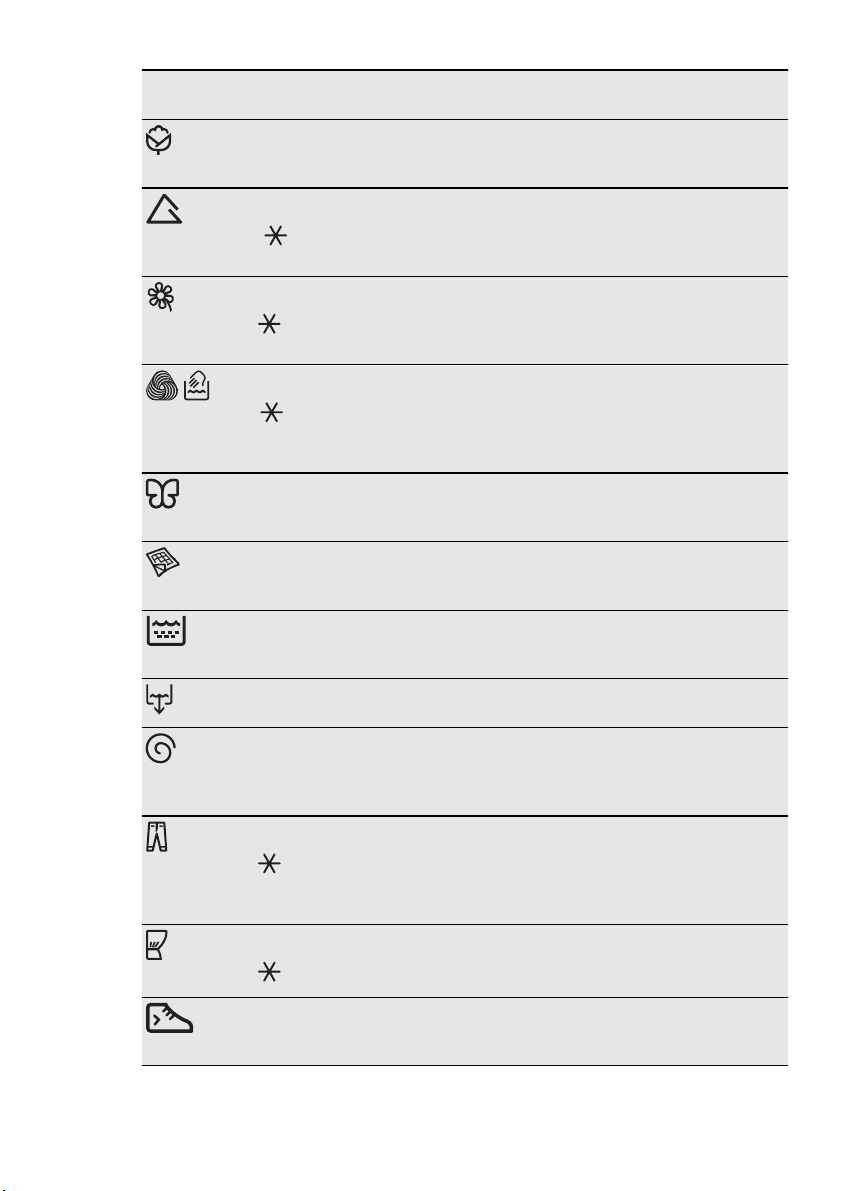
5. WASHING PROGRAMMES
Programme
Temperature range
Cottons
90°C — Cold (
)
Type of load and soil
Maximum load, Maximum spin
White cotton and coloured cotton. Normal soil
and light soil.
6 kg, 1000 rpm (EWP 1064TDW), 1200 rpm
(EWP 1264TDW), 1400 rpm (EWP 1464TDW)
Page 7
ENGLISH 7
Programme
Temperature range
Cottons Eco
1)
60 °C – 40 °C
Synthetics
60 °C— Cold (
)
Delicates
40 °C - Cold (
)
Wool/Handwash
40 °C – Cold (
)
Silk
30 °C
Duvet
60 °C – 30 °C
Rinse
Drain
Spin
Jeans
60 °C - Cold (
)
Curtains
40 °C - Cold (
)
Sports
30 °C
Type of load and soil
Maximum load, Maximum spin
White cotton and colour-fast cotton. Normal soil.
6 kg, 1000 rpm (EWP 1064TDW), 1200 rpm
(EWP 1264TDW), 1400 rpm (EWP 1464TDW)
Synthetic items or mixed fabric items. Normal
soil.
3 kg, 1000 rpm (EWP 1064TDW), 1200 rpm
(EWP 1264TDW, EWP 1464TDW)
Delicate fabrics as acrylics, viscose, polyester
items. Normal soil.
3 kg, 1000 rpm (EWP 1064TDW), 1200 rpm
(EWP 1264TDW, EWP 1464TDW)
Machine washable wool, hand washable wool
and delicate fabrics with «hand washing» care
symbol.
2 kg, 1000 rpm (EWP 1064TDW), 1200 rpm
(EWP 1264TDW, EWP 1464TDW)
Special programme for silk and mixed synthetic
items.
1 kg, 800 rpm
Special programme for one synthetic blanket, duvet, bedspread and so on.
2 kg, 800 rpm
To rinse and spin the laundry. All fabrics.
6 kg, 1000 rpm (EWP 1064TDW), 1200 rpm
(EWP 1264TDW), 1400 rpm (EWP 1464TDW)
To drain the water in the drum. All fabrics.
6 kg
To spin the laundry and to drain the water in the
drum. All fabrics.
6 kg, 1000 rpm (EWP 1064TDW), 1200 rpm
(EWP 1264TDW), 1400 rpm (EWP 1464TDW)
Items in denim and jersey. Also for items in dark
colors. The Extra Rinse option activates automatically.
3 kg, 1000 rpm (EWP 1064TDW), 1200 rpm
(EWP 1264TDW, EWP 1464TDW)
Special programme for curtains. The prewash
phase activates automatically.
2)
2 kg, 800 rpm
Synthetic and delicate items. Light soil or items or
items to refresh.
3 kg, 800 rpm
Page 8

www.electrolux.com
8
Programme
Temperature range
5 shirts
30 °C
Type of load and soil
Maximum load, Maximum spin
Synthetic and mixed fabric items. Light soil and
items to freshen up.
For 5 - 6 shirts.
800 rpm
1)
Standard programmes for the Energy Label consumption values
According to regulation 1061/2010, the “Cottons Eco 60 °C” and “Cottons Eco 40 °C” are
respectively the “standard 60 °C cotton programme” and the “standard 40 °C cotton
programme”. They are the most efficient programmes in terms of combined energy and
water consumptions for washing normally soiled cotton laundry.
The water temperature of the washing phase may differ from the temperature declared for the selected programme.
2)
Do not use any detergent for prewash phase.
Programme options compatibility
Programme
∎ ∎ ∎ ∎ ∎ ∎ ∎
Eco
∎ ∎ ∎ ∎ ∎ ∎
∎ ∎ ∎ ∎ ∎ ∎ ∎
∎ ∎ ∎ ∎ ∎ ∎
∎ ∎ ∎ ∎
∎ ∎
∎
∎
∎
∎ ∎ ∎ ∎ ∎
∎
∎
∎
∎ ∎ ∎ ∎ ∎ ∎
∎ ∎ ∎ ∎ ∎
∎ ∎
∎ ∎
∎
∎
Page 9

6. CONSUMPTION VALUES
The data of this table are approximate. Different causes can change the data:
the quantity and type of laundry, the water and ambient temperature.
ENGLISH 9
(kg)
Load
(kWh)
Programmes
Energy consumption
Cottons
60 °C
Cottons
40 °C
Synthetics 40 °C
Delicates
40 °C
6 1.20 70 170 60 53 52
6 0.75 72 145 60 53 52
3 0.60 57 95 37 35 35
3 0.60 65 75 37 35 35
Wool/
Hand
wash 30
2 0.30 48 55 32 30 30
°C
Standard cotton programmes
Standard
60 °C
6 0.98 51 225 60 53 52
cotton
Standard
60 °C
3 0.67 42 153 60 53 52
cotton
Standard
40 °C
3 0.46 43 154 60 53 52
cotton
Off Mode (W) Left On Mode (W)
0.75 0.75
1)
At the end of spin phase.
Water consumption
(litre)
duration (minutes)
Approximate programme
1)
EWP 1064TDW
Remaining moisture (%)
1)
EWP 1264TDW
Remaining moisture (%)
1)
EWP 1464TDW
Remaining moisture (%)
Page 10

www.electrolux.com
10
7. OPTIONS
7.1 Temperature
Set this option to change the default temperature.
Indicator
The indicator of the set temperature
comes on.
= cold water.
7.2 Spin
With this option you can change the default spin speed.
The indicator of the set speed comes on.
Additional spin options:
No Spin
• Set this option to deactivate all spin
phases. Only the drain phase is available.
• The related indicator comes on.
• Set this option for very delicate fabrics.
• The rinses phase uses more water for
some washing programmes.
Rinse Hold
• Set this option to prevent the laundry
creases.
• The related indicator comes on.
• There is a water in the drum when the
programme is completed.
• The drum turns regularly to prevent the
laundry creases.
• The door stays locked.
• You must drain the water to unlock the
door.
To drain the water refer to ‘At the
end of the programme’.
7.3 Prewash
With this option you can add a prewash
phase to a washing programme.
Use this option for heavy soil.
When you set this option the programme
duration increases.
The related indicator comes on.
7.4 Delay Start
With this option you can delay the start of
a programme from 30 minutes to 20
hours.
The display shows the related indicator.
7.5 Extra Rinse
With this option you can add some rinses
to a washing programme.
Use this option for persons allergic to detergents and in areas where the water is
soft.
The related indicator comes on.
7.6 Easy Iron
The appliances carefully washes and
spins the laundry to prevent the creases.
The appliance decreases the spin speed
and uses more water.
The related indicator comes on.
7.7 Time Manager
When you set a washing programme, the
display shows the default duration.
Press
programme duration.
The Time Manager is available only with
the programmes in the table.
Time Manager compatibility
1)
2)
3)
or to decrease or increase the
indicator
1)
■ ■ ■ ■ ■
■ ■ ■ ■ ■ ■
■ ■ ■ ■ ■
2)
■3)■3)■3)■3)■3)■
Shortest: to freshen the laundry.
Longest: for very soiled laundry.
Default level.
Eco
3)
Page 11

7.8 Child Lock
With this option you can prevent that the
children play with the control panel.
• To activate/deactivate the option,
press
until the indicator
off.
You can activate this option:
• After you press
the programme knob are locked.
• Before you press
cannot start.
and at the same time
comes on/goes
, the options and
: the appliance
7.9 Permanent extra rinse
With this option you can permanently
have an extra rinse when you set a new
programme.
8. BEFORE FIRST USE
ENGLISH 11
• To activate/deactivate this option
press
the indicator
and at the same time until
comes on/goes off.
7.10 Acoustic signals
The acoustic signals operate when:
• The programme is completed.
• The appliance has a malfunction.
To deactivate/activate the acoustic signals, press
for 6 seconds.
If you deactivate the acoustic signals, they continue operate when
the appliance has a malfunction.
and at the same time
1.
Put 2 litre of water in the detergent
compartment for washing phase. This
activates the drain system.
2.
Put a small quantity of detergent in
the compartment for washing phase.
9. DAILY USE
• Open the water tap. • Connect the mains plug to the mains
9.1 Loading the laundry
3.
Set and start a programme for cotton
at the highest temperature without
laundry. This removes all possible dirt
from the drum and the tub.
socket.
1.
Open the appliance door.
2.
Put the laundry in the drum, one item
at a time. Shake the items before you
put them in the appliance. Make sure
not to put too much laundry in the
drum.
3.
Close the door.
CAUTION!
Make sure that no laundry stays
between the seal and the door.
There is a risk of water leakage or
damage to the laundry.
Page 12

www.electrolux.com
12
9.2 Using detergent and additives
Liquid or powder detergent
When you set a programme with a
prewash, put the detergent directly into the drum.
• Measure out the detergent and the fabric conditioner.
• Carefully close the detergent drawer.
Detergent compartment for washing phase.
Compartment for liquid additives (fabric conditioner, starch).
Flap for powder or liquid detergent.
1.
2.
A
3.
4.
B
Page 13

• Position A for powder detergent (factory setting).
• Position B for liquid detergent.
When you use the liquid detergent:
– Do not use gelatinous or thick liquid detergents.
– Do not put more liquid then the maximum level.
– Do not set the prewash phase.
– Do not set the delay start.
9.3 Setting a programme
1.
Turn the programme knob and set
the programme:
–
The indicator
– The display shows the level of the
Time Manager, the programme duration and the indicators of the
phases of the programme.
2.
If necessary, change the temperature
and the spin speed or add available
options. When you activate an option,
the indicator of the set option comes
on.
If you set something incorrect, the
display shows the message Err.
flashes.
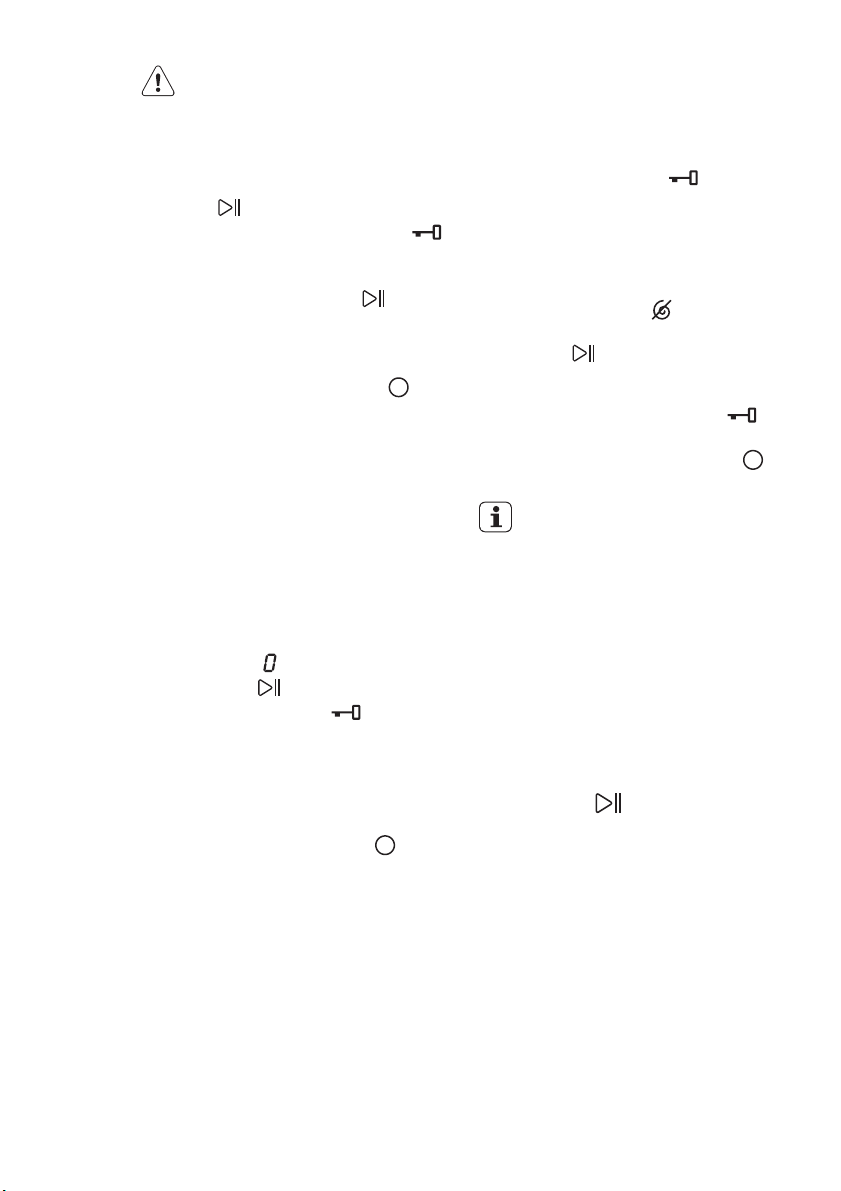
9.4 Starting a programme
without delay start
Press :
•The indicator
stays on.
•
The indicator
display.
• The programme starts, the door is
locked and the display shows the indi-
cator
• The drain pump can operate for a short
time when the appliance fills water.
After approximately 15 minutes
from the start of the programme:
• The appliance adjusts automatically the programme duration
agree with the laundry load.
• The display shows the new value.
stops to flash and
starts to flash on the
.
• Press
To cancel the delay start:
1.
2.
9.6 Interrupting a programme
and changing the options
You can change only some options before they operate.
1.
2.
3.
9.7 Cancelling a programme
1.
2.
ENGLISH 13
The related indicator comes on the display.
:
– The appliance starts the countdown.
– When the countdown is completed,
the programme starts automatically.
You can cancel or change the set
of the delay start before you press
.
Press to set the appliance to
pause.
Press until the display shows ’.
Press
gramme immediately.
Press . The indicator flashes.
Change the options.
Press again. The programme con-
tinues.
Turn the programme knob to to
cancel the programme and to deactivate the appliance.
Turn the programme knob again to
activate the appliance. Now, you can
set a new washing programme.
again to start the pro-
The appliance does not drain the
water.
9.5 Starting a programme with
delay start
•
Press
play shows the delay you want to set.
again and again until the dis-
9.8 Opening the door
While a programme or the delay start operates, the appliance door is locked and
the display shows the indicator
.
Page 14
www.electrolux.com
14
Open the appliance door when the
delay start operates:
1.
2.
3.
4.
Open the appliance door when the
programme operates:
1.
2.
3.
4.
9.9 At the end of the
programme
• The appliance stops automatically.
• The acoustic signal operates (if it is acti-
•
•The indicator
•
• Remove the laundry from the appliance.
• Keep the door ajar, to prevent the mil-
• Close the water tap.
•
CAUTION!
If the temperature and level of the
water in the drum are too high,
you cannot open the door.
Press to pause the appliance.
Wait until the door lock indicator
goes off.
You can open the door.
Close the door and press again.
The delay start continues to operate.
Turn the programme knob to to
deactivate the appliance.
Wait for some minutes and then open
the appliance door.
Close the appliance door.
Set the programme again.
vated).
In the display
The door lock indicator goes off.
Make sure that the drum is empty.
dew and odours.
Turn the programme knob to
activate the appliance.
comes on.
goes off.
to de-
The washing programme is
completed, but there is water in the
drum:
– The drum turns regularly to prevent the
creases in the laundry.
–
The door lock indicator
door stays locked.
– You must drain the water to open the
door.
To drain the water:
1.
If necessary, decrease the spin
speed. if you set
only drains.
2.
Press . The appliance drains the
water and spins.
3.
When the programme is completed
and the door lock indicator
goes off, you can open the door.
4.
Turn the programme knob to to
deactivate the appliance.
The appliance drains and spins
automatically after approximately
18 hours (except for Wool programme).
is on. The
, the appliance
9.10 Stand-by
Some minutes after the end of the washing programme, if you do not deactivate
the appliance, the energy saving status
activates.
The energy saving status decreases the
energy consumption when the appliance
is on the stand by.
• All indicators and the display go off.
•
The indicator
• Press one of the options to deactivate
the energy saving status.
flashes slowly
10. HINTS AND TIPS
10.1 The laundry load
• Divide the laundry in: white, coloured,
synthetics, delicates and wool.
• Obey the washing instructions that are
on the laundry care labels.
• Do not wash together white and coloured items.
• Some coloured items can discolour
with the first wash. We recommend that
you wash them separately for the first
times.
• Button up pillowcases, close zippers,
hooks and poppers. Tie up belts.
• Empty the pockets and unfold the
items.
Page 15

• Turn inside out multilayered fabrics,
wool and items with painted illustrations.
• Remove hard stains.
• Wash with a special detergent heavy
soil stains.
• Be careful with the curtains. Remove
the hooks or put the curtains in a washing bag or pillowcase.
• Do not wash in the appliance :
– Laundry without hems or with cuts
– Underwired bras.
– Use a washing bag to wash small
items.
• A very small load can cause balance
problems with the spin phase. If this
occurs, adjust manually the items in the
tub and start the spin phase again.
10.2 Stubborn stains
For some stains, water and detergent is
not sufficient.
We recommend that you remove these
stains before you put the items in the appliance.
Special stain removers are available. Use
the special stain remover that is applicable to the type of stain and fabric.
10.3 Detergents and additives
• Only use detergents and additives specially made for washing machines.
• Do not mix different types of detergents.
• To help the environment, do not use
more than the correct quantity of detergent.
ENGLISH 15
• Obey the instructions that you find on
the on packaging of these products.
• Use the correct products for the type
and colour of the fabric, the programme
temperature and the level of soil.
• If your appliance has not the detergent
dispenser with the flap device, add the
liquid detergents with a dosing ball.
10.4 Ecological hints
• Set a programme without the prewash
phase to wash laundry with normal soil.
• Always start a washing programme with
the maximum load of laundry.
• If necessary, use a stain remover when
you set a programme with a low temperature.
• To use the correct quantity of the detergent, check the water hardness of your
domestic system
10.5 Water hardness
If the water hardness in your area is high
or moderate, we recommend that you use
a water softener for washing machines. In
areas where the water hardness is soft it
is not necessary to use a water softener.
To know the water hardness in your area,
contact your local water authority.
Use the correct quantity of the water softener. Obey the instructions that you find
on the packaging of the product.
11. CARE AND CLEANING
WARNING!
Before maintenance, disconnect the appliance from the mains supply.
11.1 External cleaning
Clean the appliance only with soap and
warm water. Fully dry all the surfaces.
CAUTION!
Do not use alcohol, solvents or
chemical products.
11.2 Descaling
If the water hardness in your area is high
or moderate, we recommend that you use
a water softener for washing machines.
Page 16

www.electrolux.com
16
Regularly examine the drum to prevent
limescale and rust particles.
To remove rust particles use only special
products for washing machine. Do this
separately from the laundry wash.
11.3 Maintenance wash
With the low temperature programmes it
is possible that some detergent stays in
11.4 Door seal
11.5 Cleaning the detergent dispenser
Always obey the instructions that
you find on the packaging of the
product.
the drum. Make regularly a maintenance
wash. To do this:
• Remove the laundry from the drum.
• Set the cotton programme with the
highest temperature with a small quantity of detergent.
Regularly examine the seal and remove all
objects from the inner part.
1.
1
2
3. 4.
2.
Page 17

11.6 Cleaning the drain filter
WARNING!
Do not clean the drain filter if the
water in the appliance is hot.
1.
3. 4.
ENGLISH 17
2.
5. 6.
Page 18

www.electrolux.com
18
11.7 Cleaning the inlet hose and the valve filter
1.
1
2
3
3. 4.
11.8 Frost precautions
If the appliance is installed in an area
where the temperature can be less than 0
°C, remove the remaining water from the
inlet hose and the drain pump.
Do this procedure also when you
want to do the emergency drain.
1.
Disconnect the mains plug from the
mains socket.
2.
Close the water tap.
3.
Remove the water inlet hose.
4.
Remove the drain hose from the rear
support and unhook it from sink or
spigot.
2.
45°
20°
5.
Put the ends of the drain and inlet
hose in a container. Let the water
flow out of the hoses.
6.
When no more water flows, install the
inlet hose and the drain hose again.
WARNING!
Make sure that the temperature is
more than 0 °C before you use
the appliance again.
The manufacturer is not responsible for damages caused by low
temperatures.
Page 19

12. TROUBLESHOOTING
ENGLISH 19
The start of the appliance does not occur
or it stops during operation.
First try to find a solution to the problem
(refer to the table). If not, contact the service centre.
With some problems, the acoustic
signals operate and the display
shows an alarm code:
•
- The appliance does not fill with
water.
•
- The appliance does not drain
the water.
•
- The appliance door is open or
not closed correctly. Please check the
door!
•
- The mains supply is unstable.
Wait until the mains supply is stable.
WARNING!
Deactivate the appliance before
you do the checks.
Problem Possible solution
The programme does
not start.
Make sure that the mains plug is connected to the mains
socket.
Make sure that the appliance door is closed.
Make sure that there is not a damaged fuse in the fuse
box.
Make sure that the Start/Pause has been pressed.
If the delay start is set, cancel the setting or wait for the
end of countdown.
Deactivate the Child Lock function if it is on.
The appliance does
Make sure that the water tap is open.
not fill with water.
Make sure that the pressure of the water supply is not
too low. For this information, contact your local water
authority.
Make sure that the water tap is not clogged.
Make sure that the filter of the inlet hose and the filter of
the valve are not clogged. Refer to “Care and cleaning”.
Make sure that the inlet hose has no kinks or bends.
Make sure that the connection of the water inlet hose is
correct.
The appliance does
Make sure that the sink spigot is not clogged.
not drain the water.
Make sure that the drain hose has no kinks or bends.
Make sure that the drain filter is not clogged. Clean the
filter, if necessary. Refer to 'Care and cleaning'.
Make sure that the connection of the drain hose is cor-
rect.
Set the drain programme if you set a programme without
drain phase.
Page 20

www.electrolux.com
20
Problem Possible solution
Set the drain programme if you set an option which ends
The spin phase does
not operate or the
washing cycle lasts
longer than usually.
Make sure that the drain filter is not clogged. Clean the
Adjust manually the items in the tub and start the spin
There is water on the
floor.
Make sure that the drain hose have no damages.
Make sure you use the correct detergent and the correct
You cannot open the
appliance door.
Set the drain or the spin programme if there is water in
The appliance makes
an unusual noise.
Make sure that the packaging and/or the transit bolts are
Add more laundry in the drum. The load may be too
The appliance fills with
water and drain immediately.
The washing results
are not satisfactory.
Use special products to remove the stubborn stains be-
Make sure that you set the correct temperature.
Decrease the laundry load.
After the check, activate the appliance.
The programme continues from the point
of interruption.
If the problem occurs again, contact the
Service.
with water in the tub.
Set the spin programme.
filter, if necessary. Refer to 'Care and cleaning'.
phase again. This problem may be caused by balance
problems.
Make sure that the couplings of the water hoses are tight
and there is not water leakages.
quantity of it.
Make sure that the washing programme is finished.
the drum.
Make sure the levelling of the appliance is incorrect. Re-
fer to 'Installation'.
removed. Refer to 'Installation'.
small.
Make sure that the drain hose is in the correct position.
The hose may be too low.
Increase the detergent quantity or use a different deter-
gent.
fore you wash the laundry.
If the display shows other alarm codes.
Deactivate and activate the appliance. If
the problem continues, contact the Service.
Page 21

13. TECHNICAL INFORMATION
Dimensions Width / Height / Depth 600 / 850 / 500 mm
Total depth 542 mm
Electrical connection: Voltage
Level of protection against ingress of solid particles
and moisture ensured by the protective cover, except where the low voltage equipment has no protection against moisture
Water supply pressure Minimum 0,5 bar (0,05 MPa)
Water supply
1)
Maximum load Cotton 6 kg
Spin speed Maximum 1000 rpm (EWP 1064TDW)
1)
Connect the water inlet hose to a water tap with a 3/4'' thread.
Overall power
Fuse
Frequency
Maximum 8 bar (0,8 MPa)
Cold water
ENGLISH 21
230 V
2100 W
10 A
50 Hz
IPX4
1200 rpm (EWP 1264TDW)
1400 rpm (EWP 1464TDW)
14. ENVIRONMENT CONCERNS
Recycle the materials with the symbol
. Put the packaging in applicable
containers to recycle it.
Help protect the environment and human
health and to recycle waste of electrical
and electronic appliances. Do not dispose
appliances marked with the symbol
with the household waste. Return the
product to your local recycling facility or
contact your municipal office.
Page 22

www.electrolux.com
22
SOMMAIRE
1. CONSIGNES DE SÉCURITÉ . . . . . . . . . . . . . . . . . . . . . . . . . . . . . . . . . . . . . . . . . . . . . . . 23
2. INSTRUCTIONS DE SÉCURITÉ . . . . . . . . . . . . . . . . . . . . . . . . . . . . . . . . . . . . . . . . . . . . 24
3. DESCRIPTION DE L'APPAREIL . . . . . . . . . . . . . . . . . . . . . . . . . . . . . . . . . . . . . . . . . . . . 25
4. BANDEAU DE COMMANDE . . . . . . . . . . . . . . . . . . . . . . . . . . . . . . . . . . . . . . . . . . . . . . . 26
5. PROGRAMMES DE LAVAGE . . . . . . . . . . . . . . . . . . . . . . . . . . . . . . . . . . . . . . . . . . . . . . 27
6. VALEURS DE CONSOMMATION . . . . . . . . . . . . . . . . . . . . . . . . . . . . . . . . . . . . . . . . . . . 29
7. OPTIONS . . . . . . . . . . . . . . . . . . . . . . . . . . . . . . . . . . . . . . . . . . . . . . . . . . . . . . . . . . . . . 31
8.
AVANT LA PREMIÈRE UTILISATION . . . . . . . . . . . . . . . . . . . . . . . . . . . . . . . . . . . . . . . . . 32
9. UTILISATION QUOTIDIENNE . . . . . . . . . . . . . . . . . . . . . . . . . . . . . . . . . . . . . . . . . . . . . . 32
10.
CONSEILS . . . . . . . . . . . . . . . . . . . . . . . . . . . . . . . . . . . . . . . . . . . . . . . . . . . . . . . . . . . . 36
11. ENTRETIEN ET NETTOYAGE . . . . . . . . . . . . . . . . . . . . . . . . . . . . . . . . . . . . . . . . . . . . . . 37
12.
EN CAS D'ANOMALIE DE FONCTIONNEMENT . . . . . . . . . . . . . . . . . . . . . . . . . . . . . . . . 40
13. CARACTERISTIQUES TECHNIQUES . . . . . . . . . . . . . . . . . . . . . . . . . . . . . . . . . . . . . . . . 43
14.
EN MATIÈRE DE PROTECTION DE L'ENVIRONNEMENT . . . . . . . . . . . . . . . . . . . . . . . . . 43
NOUS PENSONS À VOUS
Merci d'avoir choisi ce produit Electrolux. Avec ce produit, vous bénéficiez de dizaines d'années
d'expérience professionnelle et d'innovation. Ingénieux et élégant, il a été conçu sur mesure pour
vous. Grâce à cet appareil, vous savez que chaque utilisation vous apportera satisfaction.
Bienvenue chez Electrolux.
Visitez notre site Internet pour :
Obtenir des conseils d'utilisation, des brochures, de l'aide, des informations :
www.electrolux.com
Enregistrer votre produit pour obtenir un meilleur service :
www.electrolux.com/productregistration
Acheter des accessoires, consommables et pièces de rechange d'origine pour votre
appareil :
www.electrolux.com/shop
SERVICE APRÈS-VENTE
N'utilisez que des pièces de rechange d'origine.
Avant de contacter le service, assurez-vous de disposer des informations suivantes :
Vous trouverez ces informations sur la plaque signalétique. Modèle, PNC, numéro de série.
Avertissement/Attention : consignes de sécurité.
Informations générales et conseils
Informations écologiques
Sous réserve de modifications.
Page 23

1. CONSIGNES DE SÉCURITÉ
Avant d'installer et d'utiliser cet appareil, lisez soigneusement les instructions fournies. Le fabricant ne peut être
tenu pour responsable des dommages et blessures liés à
une mauvaise installation ou utilisation. Conservez toujours cette notice avec votre appareil pour vous y référer
ultérieurement.
1.1 Sécurité des enfants et des personnes
vulnérables
AVERTISSEMENT
Risque d'asphyxie, de blessure ou d'invalidité permanente.
• Cet appareil n'est pas destiné à être utilisé par des enfants ou des personnes dont les capacités physiques,
sensorielles ou mentales, ou le manque d'expérience et
de connaissance les empêchent d'utiliser l'appareil
sans risque lorsqu’ils sont sans surveillance ou en l’absence d’instruction d’une personne responsable qui
puisse leur assurer une utilisation de l’appareil sans
danger. ou en l’absence d’instruction d’une personne
responsable qui puisse leur assurer une utilisation de
l’appareil sans danger.
• Ne laissez pas les enfants jouer avec l'appareil.
• Ne laissez pas les emballages à la portée des enfants.
• Ne laissez pas les détergents à la portée des enfants.
• Tenez les enfants et les animaux éloignés du couvercle
de l'appareil lorsque celui-ci est ouvert.
• Si l'appareil est équipé d'un dispositif de sécurité enfants, nous vous recommandons de l'activer.
FRANÇAIS 23
1.2 Sécurité générale
• Avant toute opération d'entretien, éteignez l'appareil et
débranchez la fiche de la prise secteur.
• Ne modifiez pas les caractéristiques de cet appareil.
Page 24

www.electrolux.com
24
• Respectez la charge maximale de 6 kg (reportez-vous
au chapitre « Tableau des programmes »).
2.
INSTRUCTIONS DE SÉCURITÉ
2.1 Installation
• Retirez l'intégralité de l'emballage et les
boulons de transport.
• Conservez les boulons de transport. Si
vous devez déplacer à nouveau l'appareil, il est conseillé de bloquer le tambour.
• N'installez pas et ne branchez pas un
appareil endommagé.
• N'installez pas l'appareil ou ne l'utilisez
pas dans un endroit où la température
ambiante est inférieure à 0 °C ou dans
un endroit exposé aux intempéries.
• Suivez scrupuleusement les instructions
d'installation fournies avec l'appareil.
• Assurez-vous que le sol sur lequel vous
installez l'appareil est plat, stable, résistant à la chaleur et propre.
• N'installez pas l'appareil dans un en-
droit où il ne pourrait pas être complètement ouvert.
• L'appareil est lourd, soyez toujours pru-
dent lorsque vous le déplacez. Portez
toujours des gants de sécurité.
• Assurez-vous que de l'air circule entre
l'appareil et le sol.
• Réglez les pieds pour laisser un espace
suffisant entre l'appareil et la surface en
moquette.
Branchement électrique
AVERTISSEMENT
Risque d'incendie ou d'électrocution.
• L'appareil doit être relié à la terre.
• Vérifiez que les données électriques fi-
gurant sur la plaque signalétique correspondent à celles de votre réseau. Si
ce n'est pas le cas, contactez un électricien.
• Utilisez toujours une prise de courant
de sécurité correctement installée.
• N'utilisez pas d'adaptateurs multiprises
ni de rallonges.
• Veillez à ne pas endommager la fiche
secteur ni le câble d'alimentation. Le
remplacement du cordon d'alimentation de l'appareil doit être effectué par
notre service après-vente.
• Ne connectez la fiche d'alimentation à
la prise de courant qu'à la fin de l'installation. Assurez-vous que la prise de
courant est accessible une fois l'appareil installé.
• Ne tirez jamais sur le câble d'alimentation électrique pour débrancher l'appareil. Tirez toujours sur la prise.
• Ne touchez jamais le câble d'alimentation ou la prise avec des mains mouillées.
• Cet appareil est conforme aux directives CEE.
Raccordement à l'arrivée d'eau
• Veillez à ne pas endommager les
tuyaux de circulation d'eau.
• L'appareil doit être raccordé au circuit
d'eau à l'aide des tuyaux neufs fournis.
N'utilisez pas de tuyaux provenant
d'anciens appareils.
• Avant de brancher l'appareil à des
tuyaux neufs ou n'ayant pas servi depuis longtemps, laissez couler l'eau jusqu'à ce qu'elle soit propre.
• Avant d'utiliser l'appareil pour la première fois, assurez-vous de l'absence
de fuites.
2.2 Utilisation
AVERTISSEMENT
Risque de blessure, de choc électrique, d'incendie, de brûlures ou
de dommage matériel à l'appareil.
Page 25

• Cet appareil est conçu uniquement
pour un usage domestique et des situations telles que :
• Utilisez cet appareil dans un environnement domestique.
• Ne modifiez pas les caractéristiques de
cet appareil.
• Suivez les consignes de sécurité figurant sur l'emballage du produit de lavage.
• Ne placez pas de produits inflammables ou d'éléments imbibés de produits
inflammables à l'intérieur, à proximité
ou sur l'appareil.
• Ne touchez pas la vitre du hublot pendant le déroulement d'un programme.
La vitre peut être chaude.
• Ne placez aucun récipient sous l'appareil pour récupérer tout éventuel écoulement. Contactez le service après-vente
pour connaître les accessoires disponibles.
2.3 Entretien et nettoyage
AVERTISSEMENT
Risque de blessure corporelle ou
de dommages matériels.
FRANÇAIS 25
• Avant toute opération d'entretien, éteignez l'appareil et débranchez la prise
secteur.
• Ne pulvérisez pas d'eau ni de vapeur
pour nettoyer l'appareil.
• Nettoyez l'appareil avec un chiffon doux
humide. Utilisez uniquement des produits de lavage neutres. N'utilisez pas
de produits abrasifs, de tampons à récurer, de solvants ou d'objets métalliques.
2.4 Mise au rebut
AVERTISSEMENT
Risque de blessure ou d'asphyxie.
• Débranchez l'appareil de l'alimentation
électrique.
• Coupez le câble d'alimentation au ras
de l'appareil et mettez-le au rebut.
• Retirez le dispositif de verrouillage de la
porte pour empêcher les enfants et les
animaux de s'enfermer dans l'appareil.
3. DESCRIPTION DE L'APPAREIL
1 2 3
4
5
6
Plan de travail
1
Distributeur de produit de lavage
2
Bandeau de commande
3
Poignée d'ouverture du hublot
4
Plaque signalétique
5
Pieds pour la mise à niveau de l'ap-
6
pareil
Page 26

www.electrolux.com
26
3.1 Sécurité enfants
3.2 Kit de plaques de fixation
(405517114)
Servez-vous de cet accessoire spécial
lorsque vous installez l'appareil sur un socle.
Il empêche les mouvements de l'appareil
lorsque ce dernier est en cours de fonctionnement.
4. BANDEAU DE COMMANDE
1 2 3 4
Lorsque ce dispositif est activé, vous ne
pouvez pas fermer le hublot. Cela évite
d'enfermer un enfant ou un animal dans
l'appareil par accident. Pour activer ce
dispositif, tournez-le vers la droite, jusqu'à
ce que la rainure soit horizontale. Pour
désactiver ce dispositif, tournez-le vers la
gauche, jusqu'à ce que la rainure soit verticale.
Lisez attentivement la notice fournie avec
cet accessoire.
Vous pouvez l'acheter dans tous les services après-vente agréés.
5 Shirts
Sports
Curtains
Jeans
Spin
Drain
Rinse
Sélecteur de programme
1
Touche de réduction de la vitesse
2
Cottons
Duvet
Cottons Eco
Synthetics
Delicates
Wool/Handwash
Silk
d'essorage
Touche de température
3
Affichage
4
Touche Prélavage
5
Touche Départ différé
6
Touche Rinçage plus
7
Touche Repassage facile
8
Touche Départ/Pause
9
Time Manager touches
10
40°
60°
90°
Temp.
Spin
800
1200
1400
400
20°
30°
Prewash
Easy Iron
Delay Start
Extra Rinse
Start/Pause
6
7
8
910
5
Page 27

4.1 Affichage
AB
ED
A)
La zone de l'horloge :
– Durée du programme.
– Les codes d'alarme. Reportez-vous
au chapitre « En cas d'anomalie de
C
5. PROGRAMMES DE LAVAGE
FRANÇAIS 27
fonctionnement » pour obtenir leur
description.
– Le réglage de la fonction Time Ma-
nager
B)
Le voyant Départ différé.
C)
Le voyant Sécurité enfants.
D)
Le voyant Couvercle verrouillé :
– Lorsqu'il est allumé, vous ne pouvez
pas ouvrir le couvercle.
– Lorsqu'il est éteint, vous pouvez ou-
vrir le couvercle.
– Lorsqu'il clignote, vous ne pouvez
pas ouvrir le couvercle. Attendez
quelques minutes jusqu'à ce que le
voyant s'éteigne.
E)
Voyants de la phase de lavage.
.
Programme
Plage de températures
Coton
90 °C - Froid (
Coton Éco
)
1)
60 °C - 40 °C
Synthétiques
60 °C - Froid (
)
Délicats
40 °C - Froid (
)
Laine/Lavage à la
main
40 °C - Froid (
)
Type de charge et degré de salissure
Charge maximale, vitesse d'essorage maximale
Coton blanc et couleurs. Normalement sale ou légèrement sale.
6 kg, 1000 tr/min (EWP 1064TDW), 1200 tr/min
(EWP 1264TDW), 1400 tr/min (EWP 1464TDW)
Coton blanc et couleur grand teint. Normalement
sale.
6 kg, 1000 tr/min (EWP 1064TDW), 1200 tr/min
(EWP 1264TDW), 1400 tr/min (EWP 1464TDW)
Articles en textiles synthétiques ou mixtes. Normalement sale.
3 kg, 1000 tr/min (EWP 1064TDW), 1200 tr/min
(EWP 1264TDW, EWP 1464TDW)
Articles en textiles délicats tels que l'acrylique, la
viscose ou le polyester. Normalement sale.
3 kg, 1000 tr/min (EWP 1064TDW), 1200 tr/min
(EWP 1264TDW, EWP 1464TDW)
Laine lavable en machine, lainages lavables à la
main et textiles délicats portant le symbole « Lavage à la main ».
2 kg, 1000 tr/min (EWP 1064TDW), 1200 tr/min
(EWP 1264TDW, EWP 1464TDW)
Page 28

www.electrolux.com
28
Programme
Plage de températures
Type de charge et degré de salissure
Charge maximale, vitesse d'essorage maximale
Soie
30 °C
Couette
60 °C - 30 °C
Rinçage
Programme spécial pour les articles en soie et en
textiles synthétiques mixtes.
1 kg, 800 tr/min
Programme spécial pour une couverture, une
couette, un couvre-lit, etc. en textile synthétique.
2 kg, 800 tr/min
Pour rincer et essorer le linge. Tous textiles.
6 kg, 1000 tr/min (EWP 1064TDW), 1200 tr/min
(EWP 1264TDW), 1400 tr/min (EWP 1464TDW)
Vidange
Essorage
Pour vidanger l'eau du tambour. Tous textiles.
6 kg
Pour essorer le linge et vidanger l'eau du tambour. Tous textiles.
6 kg, 1000 tr/min (EWP 1064TDW), 1200 tr/min
(EWP 1264TDW), 1400 tr/min (EWP 1464TDW)
Jeans
60 °C - Froid (
)
Articles en jean ou en jersey. Également pour les
articles de couleurs foncées. L'option Rinçage
plus est automatiquement activée.
3 kg, 1000 tr/min (EWP 1064TDW), 1200 tr/min
(EWP 1264TDW, EWP 1464TDW)
Rideaux
40 °C - Froid (
Sports
30 °C
5 chemises
30 °C
)
Programme spécial pour les rideaux. La phase de
prélavage est automatiquement activée.
2)
2 kg, 800 tr/min
Articles en textiles synthétiques et délicats. Légè-
rement sale ou articles à rafraîchir.
3 kg, 800 tr/min
Articles en textiles synthétiques ou mixtes. Légèrement sale ou articles à rafraîchir.
Pour 5 ou 6 chemises.
800 tr/min
1)
Programmes standard pour les valeurs de consommation de l'étiquette
énergétique
Conformément à la norme 1061/2010, les programmes « Coton Éco 60 °C » et « Coton
Éco 40 °C » sont respectivement le « programme standard à 60 °C pour le coton » et le
« programme standard à 40 °C pour le coton ». Ce sont les programmes les plus
économes en termes de consommation d'eau et d'électricité pour laver du linge en coton
normalement sale.
La température de l'eau de la phase de lavage peut différer de la température indiquée pour le programme sélectionné.
2)
N'utilisez pas de produit de lavage pour la phase de prélavage.
Compatibilité des options avec les
programmes
Page 29

Programme
FRANÇAIS 29
∎ ∎ ∎ ∎ ∎ ∎ ∎
Eco
∎ ∎ ∎ ∎ ∎ ∎
∎ ∎ ∎ ∎ ∎ ∎ ∎
∎ ∎ ∎ ∎ ∎ ∎
∎ ∎ ∎ ∎
∎
∎
∎
∎
∎
∎
∎ ∎
∎
∎ ∎ ∎ ∎ ∎
∎
∎ ∎ ∎ ∎ ∎ ∎
∎ ∎ ∎ ∎ ∎
∎ ∎
∎ ∎
6. VALEURS DE CONSOMMATION
Les données de ce tableau sont approximatives. Les données peuvent différer
pour différentes raisons : la quantité et le type de linge, la température ambiante ou de l'eau.
Page 30

www.electrolux.com
30
(kg)
Charge
(kWh)
Programmes
Consommation énergétique
Coton
60 °C
Coton
40 °C
6 1.20 70 170 60 53 52
6 0.75 72 145 60 53 52
Synthétiques
3 0.60 57 95 37 35 35
40 °C
Textiles
délicats
3 0.60 65 75 37 35 35
40 °C
Laine/La-
vage à la
main
2 0.30 48 55 32 30 30
30 °C
Programmes coton standard
Coton
60 °C
6 0.98 51 225 60 53 52
standard
Coton
60 °C
3 0.67 42 153 60 53 52
standard
Coton
40 °C
3 0.46 43 154 60 53 52
standard
Mode « Éteint » (W) Mode « Veille » (W)
0.75 0.75
1)
Au terme de la phase d'essorage.
Consommation d'eau
1)
1)
1)
(litres)
EWP 1064TDW
EWP 1264TDW
EWP 1464TDW
Durée approximative
du programme (en minutes)
Taux d'humidité restant (%)
Taux d'humidité restant (%)
Taux d'humidité restant (%)
Page 31

7. OPTIONS
FRANÇAIS 31
7.1 Température
Sélectionnez cette option pour modifier la
température par défaut.
Voyant
Le voyant de la température réglée s'allume.
= eau froide.
7.2 Essorage
Cette option vous permet de modifier la
vitesse d'essorage par défaut.
Le voyant de la vitesse sélectionnée s'allume.
Options d'essorage
supplémentaires :
Sans essorage
• Sélectionnez cette option pour éliminer
toutes les phases d'essorage. Seule la
phase de vidange est disponible.
• Le voyant correspondant s'allume.
• Sélectionnez cette option pour les textiles très délicats.
• Certains programmes de lavage utilisent une quantité d'eau plus importante
lors de la phase de rinçage.
Arrêt cuve pleine
• Sélectionnez cette option pour éviter
que le linge ne se froisse.
• Le voyant correspondant s'allume.
• Il reste de l'eau dans le tambour lorsque le programme est terminé.
• Le tambour tourne régulièrement pour
éviter que le linge ne se froisse.
• Le hublot reste verrouillé.
• Vous devez vidanger l'eau pour pouvoir
ouvrir le hublot.
Pour effectuer la vidange, reportez-vous au chapitre « À la fin du
programme ».
7.3 Prélavage
Cette option vous permet d'ajouter une
phase de prélavage à un programme de
lavage.
Utilisez cette option pour le linge très sale.
Lorsque vous réglez cette option, la durée
du programme est allongée.
Le voyant correspondant s'allume.
7.4 Départ différé
Cette option vous permet de différer le
départ du programme de 30 minutes à
20 heures.
Le voyant correspondant et la valeur réglée s'affichent.
7.5 Rinçage plus
Cette option vous permet d'ajouter des
rinçages à un programme de lavage.
Utilisez cette option pour les personnes
allergiques aux produits de lavage et dans
les régions où l'eau est douce.
Le voyant correspondant s'allume.
7.6 Repassage facile
L'appareil lave et essore délicatement le
linge afin d'éviter de le froisser.
L'appareil réduit la vitesse d'essorage et
utilise plus d'eau.
Le voyant correspondant s'allume.
7.7 Time Manager
Lorsque vous sélectionnez un programme
de lavage, sa durée par défaut s'affiche.
Appuyez sur la touche
duire ou augmenter la durée du programme.
L'option Time Manager est uniquement
disponible avec les programmes indiqués
dans le tableau.
Compatibilité des programmes
avec Time Manager
voyant
1)
■ ■ ■ ■ ■
■ ■ ■ ■ ■ ■
■ ■ ■ ■ ■
2)
1)
■3)■3)■3)■3)■3)■
Le plus court : pour rafraîchir le linge.
ou pour ré-
Éco
3)
Page 32

www.electrolux.com
32
2)
Le plus long : pour le linge très sale.
3)
Niveau par défaut.
manence lorsque vous sélectionnez un
nouveau programme.
•Pour activer/désactiver cette option,
appuyez simultanément sur les touche
7.8 Sécurité enfants
Avec cette option, vous pouvez empêcher
les enfants de jouer avec le bandeau de
commande.
•Pour activer/désactiver cette option,
appuyez simultanément sur les touches
et jusqu'à ce que le voyant
s'allume/s'éteigne.
Vous pouvez activer cette option :
• Une fois que vous avez appuyé sur la
touche
de programme sont verrouillés.
• Avant d'appuyer sur
peut pas démarrer.
, les options et le sélecteur
: l'appareil ne
s'allume/s'éteigne.
7.10 Signaux sonores
Les signaux sonores retentissent lorsque :
• Le programme est terminé.
• L'appareil présente une anomalie de
fonctionnement.
Pour désactiver/activer les signaux sonores, appuyez simultanément sur les
touches
7.9 Rinçage plus permanent
Cette fonction vous permet de maintenir
la fonction Rinçage plus activée en per-
8. AVANT LA PREMIÈRE UTILISATION
et jusqu'à ce que le voyant
et pendant 6 secondes.
Si vous désactivez les signaux sonores, ils continueront à retentir si
l'appareil présente une anomalie.
1.
Versez 2 litres d'eau dans le distributeur de produit de lavage pour la phase de lavage. Cela active le système
de vidange.
2.
Versez une petite quantité de détergent dans le compartiment de la phase de lavage.
9. UTILISATION QUOTIDIENNE
• Ouvrez le robinet d'eau. • Branchez l'appareil sur le secteur.
3.
Sélectionnez et faites démarrer, à vide, un programme pour le coton à la
température la plus élevée possible.
Cela élimine toute salissure éventuelle
du tambour et de la cuve.
Page 33

9.1 Chargement du linge
9.2 Utilisation de lessive et d'additifs
FRANÇAIS 33
1.
Ouvrez le hublot de l'appareil.
2.
Mettez le linge dans le tambour, un
article à la fois. Dépliez-les le plus
possible. Assurez-vous de ne pas
surcharger le tambour.
3.
Fermez le hublot.
ATTENTION
Veillez à ce qu'il n'y ait pas de linge coincé entre le joint et le hublot. Cela pourrait provoquer une
fuite d'eau ou endommager le linge.
Si vous sélectionnez un programme avec prélavage, versez la lessive directement dans le tambour.
• Dosez le produit de lavage et l'assouplissant.
• Fermez soigneusement la boîte à produits.
Compartiment à lessive pour la phase de lavage.
Compartiment réservé aux additifs liquides (assouplissant, amidon).
Volet pour produit de lavage en poudre ou liquide.
Lessive liquide ou en poudre
1.
A
2.
Page 34

www.electrolux.com
34
3.
4.
B
• Position A pour la lessive en poudre (réglage d'usine).
• Position B pour la lessive liquide.
Si vous utilisez une lessive liquide :
– N'utilisez pas de lessives liquides gélatineuses ou épaisses.
– Ne dépassez pas le niveau maximal.
– Ne sélectionnez pas de phase de prélavage.
– Ne sélectionnez pas la fonction Départ différé.
9.3 Réglage d'un programme
1.
Tournez le sélecteur pour régler le
programme :
–
Le voyant
– Le réglage de la fonction Time Ma-
nager, la durée du programme ainsi
que les indicateurs des phases du
programme s'affichent.
2.
Si nécessaire, modifiez la température
et la vitesse d'essorage ou ajoutez
des options compatibles. Lorsque
vous activez une option, le voyant
correspondant s'allume.
En cas de réglage incorrect, le
message Err s'affiche.
9.4 Démarrage d'un programme
sans départ différé
Appuyez sur :
• Le voyant
te fixe.
•
Le voyant
• Le programme démarre, le couvercle
est verrouillé et le voyant
• La pompe de vidange peut momentanément se mettre en fonctionnement
lorsque l'appareil se remplit d'eau.
clignote.
arrête de clignoter et res-
clignote.
s'affiche.
9.5 Démarrage d'un programme
avec départ différé
•
Appuyez sur
jusqu'à ce que l'écran affiche le délai
que vous souhaitez sélectionner. Le
voyant correspondant s'allume.
• Appuyez sur
– L'appareil commence le décompte.
– Lorsque le décompte est terminé, le
programme démarre automatiquement.
Pour annuler le départ différé :
1.
Appuyez sur pour mettre l'appareil
en pause.
2.
Appuyez une fois sur jusqu'à ce
que
Appuyez de nouveau sur
marrer le programme immédiatement.
Au bout d'environ 15 minutes
après le début du programme :
• L'appareil ajuste automatiquement la durée du programme
selon la charge de linge.
• La nouvelle valeur s'affiche.
à plusieurs reprises
:
Vous pouvez annuler ou modifier
le réglage du départ différé avant
d'appuyer sur
s'affiche.
.
pour dé-
Page 35

9.6 Interruption d'un
programme et modification des
options
Vous ne pouvez modifier que quelques
options avant qu'elles ne soient activées.
1.
Appuyez sur . Le voyant clignote.
2.
Modifiez les options.
3.
Appuyez de nouveau sur . Le programme se poursuit.
9.7 Annulation d'un programme
1.
Tournez le sélecteur de programme
pour annuler le programme et
sur
éteindre l'appareil.
2.
Tournez de nouveau le sélecteur pour
allumer l'appareil. Vous pouvez maintenant régler un nouveau programme
de lavage.
L'appareil ne vidange pas l'eau.
9.8 Ouverture du hublot
Lors du fonctionnement d'un programme
ou du départ différé, le hublot de l'appa-
reil est verrouillé et l'indicateur
lumé.
ATTENTION
Si la température et le niveau de
l'eau dans le tambour sont trop
élevés, vous ne pouvez pas ouvrir
le hublot.
Pour ouvrir le hublot lorsque le départ
différé est en cours :
1.
Appuyez sur pour mettre l'appareil
en pause.
2.
Attendez que le voyant Hublot verrouillé
3.
Vous pouvez ouvrir le hublot.
4.
Fermez le hublot et appuyez de nouveau sur la touche
féré se poursuit.
Pour ouvrir le hublot lorsqu'un
programme est en marche :
1.
Tournez le sélecteur de programme
sur
2.
Attendez quelques minutes avant
d'ouvrir le hublot.
3.
Fermez le hublot de l'appareil.
s'éteigne.
. Le départ dif-
pour éteindre l'appareil.
est al-
FRANÇAIS 35
4.
Sélectionnez à nouveau le programme.
9.9 À la fin du programme
• L'appareil s'arrête automatiquement.
• Un signal sonore retentit (s'il est activé).
•
Le symbole
• Le voyant
•
Le voyant de verrouillage du hublot
s'éteint.
• Sortez le linge de l'appareil. Vérifiez que
le tambour est vide.
• Laissez le hublot entrouvert pour éviter
la formation de moisissures et l'apparition de mauvaises odeurs.
• Fermez le robinet d'eau.
• Tournez le sélecteur de programme sur
pour éteindre l'appareil.
Le programme de lavage est terminé,
mais il y a de l'eau dans le tambour :
– Le tambour tourne régulièrement pour
éviter que le linge ne se froisse.
–
Le voyant de verrouillage du hublot
est allumé. Le hublot reste verrouillé.
– Vous devez vidanger l'eau pour pouvoir
ouvrir le hublot.
Pour vidanger l'eau :
1.
Si besoin est, diminuez la vitesse
d'essorage. Si vous avez sélection-
né l'option
uniquement une vidange.
2.
Appuyez sur . L'appareil effectue la vidange et l'essorage.
3.
Une fois le programme terminé et le
voyant de verrouillage du hublot
hublot.
4.
Tournez le sélecteur de programme
sur
L'appareil effectue automatiquement la vidange et l'essorage au
bout d'environ 18 heures (excepté
pour le programme Laine).
s'affiche.
s'éteint.
, l'appareil effectue
éteint, vous pouvez ouvrir le
pour éteindre l'appareil.
9.10 Veille
Quelques minutes après la fin du programme de lavage, si vous n'avez pas
mis à l'arrêt l'appareil, la fonction d'économie d'énergie se déclenche.
Page 36

www.electrolux.com
36
La fonction d'économie d'énergie réduit la
consommation d'énergie lorsque l'appareil est en veille.
• Tous les voyants et l'affichage s'éteignent.
10. CONSEILS
•
L'indicateur
• Appuyez sur l'une des touches d'option
pour désactiver la fonction d'économie
d'énergie.
clignote lentement
10.1 Chargement du linge
• Séparez le linge entre : blanc, couleur,
synthétiques, délicats et laine.
• Respectez les instructions de lavage
qui figurent sur les étiquettes des vêtements.
• Ne lavez pas ensemble les articles
blancs et en couleur.
• Certains articles en couleur peuvent déteindre lors des premiers lavages. Il est
recommandé de les laver séparément
lors des premiers lavages.
• Boutonnez les taies d'oreiller, fermez
les fermetures à glissière et à pression
et les crochets. Attachez les ceintures.
• Videz les poches des vêtements et dépliez-les.
• Retournez les vêtements en tissus multi-couches, la laine et les articles portant des illustrations imprimées.
• Enlevez les taches.
• Lavez les taches incrustées avec un
produit spécial.
• Traitez les rideaux avec précautions.
Enlevez les crochets et placez les rideaux dans un sac de lavage ou une
taie d'oreiller.
• Ne lavez pas dans l'appareil :
– Le linge sans ourlet ou déchiré
– Les soutien-gorges à armatures.
– Utilisez un sac de lavage pour les ar-
ticles très petits.
• Une très petite charge peut provoquer
des problèmes d'équilibre pendant la
phase d'essorage. Si cela se produit,
répartissez manuellement les articles
dans la cuve et lancez à nouveau la
phase d'essorage.
10.2 Taches tenaces
Pour certaines taches, l'eau et les produits de lavage ne suffisent pas.
Il est recommandé d'éliminer ces taches
avant de mettre les articles dans l'appareil.
Des détachants spéciaux sont disponibles. Utilisez le détachant spécial adapté
au type de tache et au tissu.
10.3 Produits de lavage et
additifs
• Utilisez uniquement des produits de lavage et des additifs spécialement conçus pour les lave-linge.
• Ne mélangez pas différents types de
produits de lavage.
• Afin de préserver l'environnement, n'utilisez que la quantité nécessaire de produit de lavage.
• Respectez les instructions qui se trouvent sur les emballages de ces produits.
• Utilisez les produits adaptés au tissu, à
la température du programme et au niveau de salissure.
• Si votre appareil ne dispose pas d'un
distributeur de produit de lavage avec
volet, ajoutez les produits de lavage
avec une boule doseuse.
10.4 Conseils écologiques
• Réglez un programme sans prélavage
pour laver du linge normalement sale.
• Commencez toujours un programme
de lavage avec une charge de linge
maximale.
• Si nécessaire, utilisez un détachant
quand vous réglez un programme à
basse température.
Page 37

• Pour utiliser la bonne quantité de produit de lavage, vérifiez la dureté de l'eau
de votre système domestique.
10.5 Dureté de l'eau
Si, dans votre région, la dureté de l'eau
est élevée ou modérée, il est recommandé d'utiliser un adoucisseur d'eau pour
les lave-linge. Dans les régions où l'eau
11. ENTRETIEN ET NETTOYAGE
FRANÇAIS 37
est douce, il n'est pas nécessaire d'utiliser
un adoucisseur d'eau.
Pour connaître la dureté de l'eau dans votre région, contactez votre compagnie
des eaux.
Utilisez la bonne quantité pour l'adoucisseur d'eau. Respectez les instructions qui
se trouvent sur les emballages de ces
produits.
AVERTISSEMENT
Avant d'intervenir sur l'appareil, débranchez-le.
11.1 Nettoyage extérieur
Nettoyez l'appareil uniquement avec de
l'eau savonneuse chaude. Séchez complètement toutes les surfaces.
ATTENTION
N'utilisez pas d'alcool, de solvants
ni de produits chimiques.
11.2 Détartrage
Si, dans votre région, la dureté de l'eau
est élevée ou moyenne, il est recommandé d'utiliser un adoucisseur d'eau pour lave-linge.
Examinez régulièrement le tambour pour
éviter la formation de calcaire ou de particules de rouille.
11.4 Joint du hublot
Pour éliminer les particules de rouille, utilisez uniquement des produits spéciaux
pour lave-linge. N'effectuez pas cette
opération avec du linge dans la machine.
Respectez toujours les instructions figurant sur l'emballage du
produit.
11.3 Entretien régulier
Avec les programmes à basse température, il est possible que certains produits de
lavage restent dans le tambour. Procédez
à un entretien régulier. Pour ce faire :
• Retirez le linge du tambour.
• Sélectionnez le programme pour le coton à température maximale avec une
petite quantité de détergent.
Examinez régulièrement le joint et enlevez
tous les objets situés à l'intérieur.
Page 38

www.electrolux.com
38
11.5 Nettoyage du distributeur de produit de lavage
1.
1
2
3. 4.
11.6 Nettoyage du filtre de
vidange
AVERTISSEMENT
Ne nettoyez pas le filtre de vidange si l'eau dans l'appareil est
chaude.
1.
2.
2.
Page 39

3. 4.
5. 6.
FRANÇAIS 39
11.7 Nettoyage du tuyau d'arrivée d'eau et du filtre de la vanne
1.
1
2
3
2.
Page 40

www.electrolux.com
40
3. 4.
11.8 Précautions contre le gel
Si l'appareil est installé dans un local dans
lequel la température peut être négative,
évacuez toute l'eau restant dans le tuyau
d'alimentation et la pompe de vidange.
1.
2.
3.
4.
Exécutez également cette procédure lorsque vous souhaitez effectuer une vidange d'urgence.
Débranchez la fiche de l'appareil de la
prise secteur.
Fermez le robinet d'eau.
Retirez le tuyau d'arrivée d'eau.
Retirez le tuyau de vidange du sup-
port arrière et décrochez-le de l'évier
ou du siphon.
45°
20°
5.
Placez les extrémités du tuyau de vidange et du tuyau d'arrivée d'eau
dans un récipient. Laissez l'eau
s'écouler des tuyaux.
6.
Une fois toute l'eau évacuée, réinstallez le tuyau d'arrivée d'eau et le tuyau
de vidange.
AVERTISSEMENT
Assurez-vous que la température
est supérieure à 0 °C avant d'utiliser à nouveau l'appareil.
Le fabricant ne pourra être tenu
pour responsable en cas de dommages dus aux basses températures.
12. EN CAS D'ANOMALIE DE FONCTIONNEMENT
L'appareil ne démarre pas ou se met à
l'arrêt en cours de programme.
Dans un premier temps, essayez de trouver une solution au problème (reportezvous au tableau). Si vous n'y parvenez
pas, contactez le service après-vente.
Pour certaines anomalies, un signal
sonore se fait entendre et l'écran
affiche un code d'alarme :
•
- L'appareil n'est pas approvision-
né en eau.
•
- L'appareil ne se vidange pas.
•
- Le couvercle de l'appareil est
ouvert ou n'est pas bien fermé. Vérifiez
le couvercle !
•
- L'alimentation électrique est instable. Attendez que l'alimentation électrique se stabilise.
AVERTISSEMENT
Mettez à l'arrêt l'appareil avant de
procéder aux vérifications.
Page 41

FRANÇAIS 41
Problème Solution possible
Le programme ne démarre pas.
Assurez-vous que la fiche du câble d'alimentation est
bien insérée dans la prise de courant.
Vérifiez que le couvercle de l'appareil est fermé.
Assurez-vous qu'aucun fusible n'a disjoncté dans la boî-
te à fusibles.
Assurez-vous que la touche Départ/pause est enfoncée.
Si vous avez sélectionné un départ différé, annulez-le ou
attendez la fin du décompte.
Désactivez la fonction Sécurité enfants si elle a été pré-
alablement activée.
L'appareil ne se rem-
Assurez-vous que le robinet d'eau est ouvert.
plit pas d'eau.
Assurez-vous que la pression de l'arrivée d'eau n'est
pas trop basse. Pour obtenir cette information, contac-
tez votre compagnie des eaux.
Assurez-vous que le robinet d'eau n'est pas obstrué.
Assurez-vous que le filtre du tuyau d'arrivée d'eau et le
filtre de la vanne ne sont pas obstrués. Reportez-vous
au chapitre « Entretien et nettoyage ».
Assurez-vous que le tuyau d'arrivée d'eau n'est pas tor-
du ni plié.
Assurez-vous que le raccordement du tuyau d'arrivée
d'eau est correct.
L'appareil ne vidange
Assurez-vous que le siphon de l'évier n'est pas obstrué.
pas l'eau.
Assurez-vous que le tuyau de vidange n'est pas tordu ni
plié.
Assurez-vous que le filtre de vidange n'est pas obstrué.
Nettoyez le filtre, si nécessaire. Reportez-vous au chapi-
tre « Entretien et nettoyage ».
Vérifiez que le raccordement du tuyau de vidange est
correct.
Sélectionnez le programme de vidange si vous avez
choisi un programme sans phase de vidange.
Sélectionnez le programme de vidange si vous avez
choisi une option se terminant avec de l'eau dans la cu-
ve.
La phase d'essorage
Sélectionnez le programme d'essorage.
ne démarre pas ou le
cycle de lavage dure
plus longtemps que
d'habitude.
Page 42

www.electrolux.com
42
Problème Solution possible
Assurez-vous que le filtre de vidange n'est pas obstrué.
Répartissez manuellement les vêtements dans la cuve et
Il y a de l'eau sur le
sol.
Assurez-vous que le tuyau de vidange n'est pas endom-
Assurez-vous d'utiliser une lessive adaptée en quantité
Impossible d'ouvrir le
couvercle de l'appareil.
Sélectionnez le programme de vidange ou d'essorage
L'appareil fait un bruit
inhabituel.
Vérifiez que l'emballage et/ou les boulons de transport
Ajoutez plus de linge dans le tambour. Il est possible que
L'appareil se remplit
d'eau et se vidange
immédiatement.
Les résultats de lavage ne sont pas satisfaisants.
Utilisez des produits spéciaux pour enlever les taches te-
Veillez à sélectionner la température correcte.
Réduisez la charge de linge.
Après avoir effectué ces contrôles, mettez
l'appareil en fonctionnement. Le programme reprend là où il s'était interrompu.
Si le problème persiste, contactez le service après-vente.
Nettoyez le filtre, si nécessaire. Reportez-vous au chapi-
tre « Entretien et nettoyage ».
lancez à nouveau la phase d'essorage. Ce problème
peut être dû à des problèmes d'équilibrage.
Assurez-vous que les raccords des tuyaux d'eau sont
bien serrés et qu'il n'y a aucune fuite d'eau.
magé.
correcte.
Assurez-vous que le programme de lavage est terminé.
s'il y a de l'eau dans le tambour.
Vérifiez que l'appareil est de niveau. Reportez-vous au
chapitre « Installation ».
ont été retirés. Reportez-vous au chapitre « Installation ».
la charge soit trop légère.
Vérifiez que la position du tuyau de vidange est correcte.
Il est possible que le tuyau soit placé trop bas.
Augmentez la quantité de produit de lavage ou utilisez-
en un autre mieux adapté.
naces avant de laver le linge.
Si l'écran affiche d'autres codes d'alarme,
Mettez à l'arrêt l'appareil puis de nouveau
en fonctionnement. Si le problème persiste, contactez le service après-vente.
Page 43

13. CARACTERISTIQUES TECHNIQUES
FRANÇAIS 43
Dimensions Largeur / Hauteur / Pro-
Branchement électrique : Tension
Niveau de protection contre l'infiltration de particules
solides et d'humidité assuré par le couvercle de protection, excepté là où l'équipement basse tension
ne dispose d'aucune protection contre l'humidité
Pression de l'arrivée
d'eau
Arrivée d'eau
Charge maximale Coton 6 kg
Vitesse d'essorage Maximale 1000 tr/min (EWP
1)
Raccordez le tuyau d'arrivée d'eau à un robinet fileté (3/4 pouce).
1)
fondeur
Profondeur totale 542 mm
Puissance totale
Fusible
Fréquence
Minimale 0,5 bar (0,05 MPa)
Maximale 8 bar (0,8 MPa)
Eau froide
600 / 850 / 500 mm
230 V
2100 W
10 A
50 Hz
IPX4
1064TDW)
1200 tr/min (EWP
1264TDW)
1400 tr/min (EWP
1464TDW)
14. EN MATIÈRE DE PROTECTION DE
L'ENVIRONNEMENT
Recyclez les matériaux portant le symbole
. Déposez les emballages dans les
conteneurs prévus à cet effet.
Contribuez à la protection de
l'environnement et à votre sécurité,
recyclez vos produits électriques et
électroniques. Ne jetez pas les appareils
portant le symbole
ménagères. Emmenez un tel produit dans
votre centre local de recyclage ou
contactez vos services municipaux.
avec les ordures
Page 44

www.electrolux.com/shop
192981840-A-212012
 Loading...