

Electrolux EWF8524CDWA User Manual

EWF8024CDWA
EWF8524CDWA
EN
User ManualWashing Machine
2

2 www.electrolux.com
IMPORTANT INFORMATION THAT MAY IMPACT YOUR
MANUFACTURER’S WARRANTY
Adherence to the directions for use in this manual is extremely important for health and
safety. Failure to strictly adhere to the requirements in this manual may result in personal
injury, property damage and affect your ability to make a claim under the Electrolux
manufacturer’s warranty provided with your product. Products must be used, installed and
operated in accordance with this manual. You may not be able to claim on the Electrolux
manufacturer’s warranty in the event that your product fault is due to failure to adhere to
this manual.
WE’RE THINKING OF YOU
Thank you for purchasing an Electrolux appliance. You’ve chosen a product that brings
with it decades of professional experience and innovation. Ingenious and stylish, it has
been designed with you in mind. So whenever you use it, you can be safe in the
knowledge that you’ll get great results every time. Welcome to Electrolux.
Visit our website to:
Get usage advice, brochures, trouble shooter, service information, buy accessories
& spare parts, online product registration : www.electrolux.com
CUSTOMER CARE AND SERVICE
We recommend the use of original spare parts.When contacting Service, ensure that
you have the following data available. The information can be found on the rating plate.
Model, PNC, Serial Number.
Warning / Caution-Safety information.
General information and tips
Environmental information.
Subject to change without notice.
CONTENTS
1. SAFETY INFORMATION
1.1 Conditions Of Use
1.2 Child Safety
1.3 General Safety
1.4 Installation
1.5 Use
PRODUCT DESCRIPTION
2.
2.1 Parts
2.2 Accessories
CONTROL PANEL
3.
3.1 Control Panel Description
3.2 Program Chart
3.3 Program Options Compatibility
3.4 Options
3.5 Settings
3.6 Start/Pause ( ) and Add Clothes ( ) Touchpad
.............................................................................................................................. 7
............................................................................................................................ 8
........................................................................................................................ 13
........................................................................................................................ 15
........................................................................................................ 4
.................................................................................................................. 5
............................................................................................................. 6
.................................................................................................................... 6
................................................................................................................. 9
........................................................................................... 10
............................................................................................................. 11
..................................................................................... 13
.................................................... 17

3
BEFORE FIRST USE
4.
DAILY USE
5.
5.1 Loading The Laundry
5.2 Using Detergent And Additives
5.3 Options Setting
5.4 Starting A Cycle
5.5 Interruption Of A Program
5.6 Changing A Program
5.7 Changing The Options
5.8 Opening The Door
5.9 At The End Of The Program
5.10 When The Washing Program Is Completed, But There Is Water In The Drum
5.11 AUTO Off Mode
WASHING HINTS
6.
6.1 Sorting The Laundry
6.2 Temperatures
6.3 Before Loading The Laundry
6.4 Maximum Loads
6.5 Removing Stains
6.6 Detergents Type And Quantity Of Detergent
INTERNATIONAL WASH CODE SYMBOLS
7.
CARE AND CLEANING
8.
8.1 External Cleaning
8.2 Descaling
8.3 After Each Wash
8.4 Maintenance Wash With “Tub Clean” Program
8.5 Cleaning The Dispenser Drawer
8.6 Cleaning The Drawer Recess
8.7 Cleaning The Pump
8.8 Cleaning The Water Inlet Filter
8.9 Frost Precautions
..................................................................................................................... 25
....................................................................................................... 17
.................................................................................................... 18
.................................................................................... 18
............................................................................................................ 19
............................................................................................................ 20
............................................................................................ 20
................................................................................................... 20
................................................................................................ 20
........................................................................................................ 20
........................................................................................ 20
......................................................................................................... 21
.................................................................................................... 22
............................................................................................................... 22
........................................................................................ 22
........................................................................................................... 22
.......................................................................................................... 23
............................................................... 24
................................................................ 21
........................................................................................................ 25
.......................................................................................................... 25
........................................................... 25
.................................................................................. 25
...................................................................................... 26
...................................................................................................... 26
.................................................................................... 28
......................................................................................................... 29
......... 21
TROUBLESHOOTING
9.
9.1 Possible Failures
9.2 Emergency Door Opening
TECHNICAL DATA
10.
INSTALLATION
11.
11.1 Unpacking
11.2 Positioning
11.3 Water Inlet
11.4 Water Drainage
11.5 Electrical Connection
ENVIRONMENT CONCERNS
12.
12.1 Packaging Materials
12.2 Old Machine
12.3 Ecological Hints
WARRANTY
........................................................................................................................... 43
.......................................................................................................... 34
................................................................................................................... 34
.................................................................................................................. 37
.................................................................................................................. 37
......................................................................................................... 38
............................................................................................................... 40
......................................................................................................... 40
........................................................................................................ 30
........................................................................................... 33
................................................................................................. 39
.................................................................................................. 40

4 www.electrolux.com
1.
SAFETY INFORMATION
1.1 Conditions Of Use
This appliance is intended to be used in household and
similar applications such as:
●
staff kitchen areas in shops, offices and other working
environtment;
●
farm houses;
●
by clients in hotels, motels, and other residential type
environments;
●
bed and breakfast type environtments;
●
areas for communal use in blocks of flats or in
launderettes.
WARNING! The appliance must not be supplied
through an external switching device, such as timer,
or connected to a circuit that is regularly switched on
and off by utility.
In the interest of your safety and to ensure the correct
use, before installing and first using the appliance, read
this user manual carefully, including its hints and
warnings.
To avoid unnecessary mistakes and accidents, it is
important to ensure that all people using the appliance
are thoroughly familiar with its operation and safety
features.
Save these instructions and make sure that they remain
with the appliance if it is moved or sold, so that everyone
using it through its life will be properly informed on
appliance use and safety.

1.2 Child Safety
●
This washing machine is not intended for use by
young children or infirm persons without supervision.
●
Young children should be supervised to ensure that
they do not play with the appliance.
●
The packaging components (e.g. plastic film,
polystyrene) can be dangerous to children - danger of
suffocation! Keep them out of children’s reach.
●
Keep all detergents in a safe place out of children’s
reach.
●
Make sure that children or pets do not climb into the
drum.
●
This machine is provided with child safety lock option
( ) to prevent children playing with the control panel.
(see page 16)
5

6 www.electrolux.com
1.3 General Safety
●
It is dangerous to alter the specifications or attempt to modify this product
in any way.
●
During high temperature wash
program the door glass may get hot.
Do not touch it!
●
Make sure that small pets do not
climb into the drum. To avoid this,
please check inside the drum before
using the appliance.
●
Any objects such as coins, safety
pins, nails, screws, stones or any
other hard, sharp material can cause
extensive damage and must not be
placed into the machine.
●
Wash small items such as socks,
laces, washable belts etc in a
washing bag or pillow case as it is
possible for such items to slip down
between the tub and the inner drum.
●
Only use manufacturer’s
recommended quantities of fabric
softener and detergent. Damage to
the fabric or appliance can occur if
you exceed the recommended
amount.
●
Do not use your washing machine to
wash articles with whalebones,
material without hems or torn
material.
●
Always unplug the appliance and turn
off the water supply after use, clean
and maintenance.
●
This appliance is not intended for use
by persons (including children) with
reduced physical, sensory or mental
capabilities, or lack of experience and
knowledge, unless they have been
given supervision or instruction
concerning use of the appliance by a
person responsible for their safety.
●
Under no circumstances should you
attempt to repair the machine
yourself. Repairs carried out by
inexperienced persons may cause
injury or serious malfunctioning.
Contact your local Service Centre.
Always insist on genuine spare parts.
1.4 Installation
●
This appliance is heavy. Care should
be taken when moving it.
●
When unpacking the appliance, check
that it is not damaged. If in doubt, do
not use it and contact the Service
Centre.
●
All packing and transit bolts must be
removed before use. Serious damage
can occur to the product and to
property if this is not adhered to. See
relevant section in the user manual.
●
After having installed the appliance,
check that it is not standing on the
inlet and drain hose and the worktop
is not pressing the electrical supply
cable.
●
If the appliance is installed on a
carpeted floor, please adjust the feet
in order to allow air to circulate freely.
●
Always be sure, that there is no water
leakage from hoses and their
connections after the installation.
●
Any plumbing work required to install
this appliance should be carried out
by a qualified plumber.
●
Any electrical work required to install
this appliance should be carried out
by a qualified electrician.
May cause electric shock! if the
machine is not connected to an
earthed/ground system. DO NOT
touch the wet clothes and metal parts.

1.5 Use
●
This appliance is designed for
domestic use. It must not be used for
purposes other than those for which
it was designed.
●
Only wash fabrics which are
designed to be machine washed.
Follow the instructions on each
garment label.
●
Do not overload the appliance. See
the relevant section in the user
manual.
●
Before washing, ensure that all
pockets are empty and buttons and
zips are fastened. Avoid washing
frayed or torn articles and treat stains
such as paint, ink, rust, and grass
before washing.
●
Garments which have been in
contact with volatile petroleum
products should not be machine
washed. If volatile cleaning fluids are
used, care should be taken to ensure
that the fluid is removed from the
garment before placing in the
machine.
●
Never pull the power supply cable to
remove the plug from the socket;
always take hold of the plug itself.
●
Never use the washing machine if
the power supply cable, the control
panel, the working surface or the
base are damaged so that the inside
of the washing machine is accessible.
7
8 www.electrolux.com
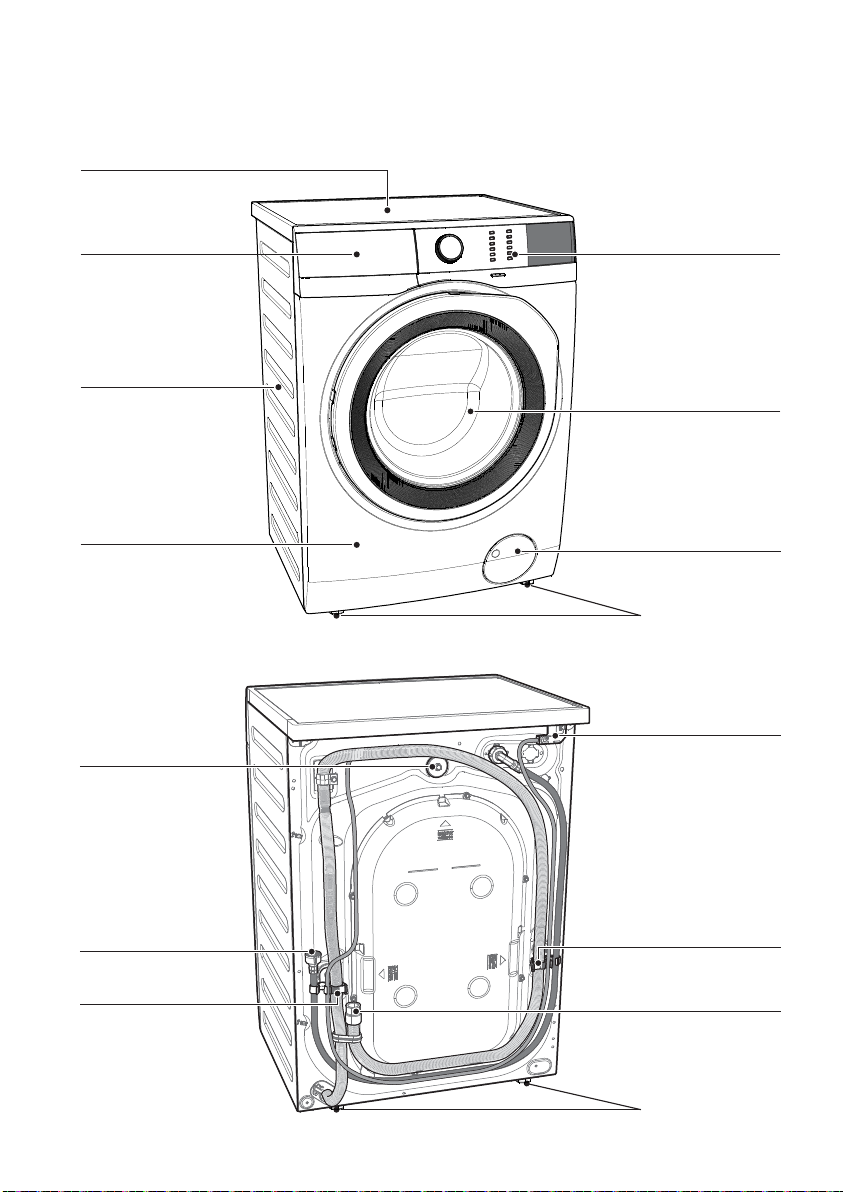
PRODUCT DESCRIPTION2.
2.1 Parts
Worktop
Detergent/Softener
Dispenser
(see page 18)
Cabinet
Front Panel
Transit Bolts
Control Panel
(see page 10)
Door
Drain Pump Filter
(see page 26)
Level Adjustment
Feet (Front)
Mains Cable
Water Inlet Hose
(see page 37)
Transit Bolts &
Hose Support
Transit Bolts &
Hose Support
Water Drain Hose
(see page 38)
Level Adjustment
Feet (Back)
9
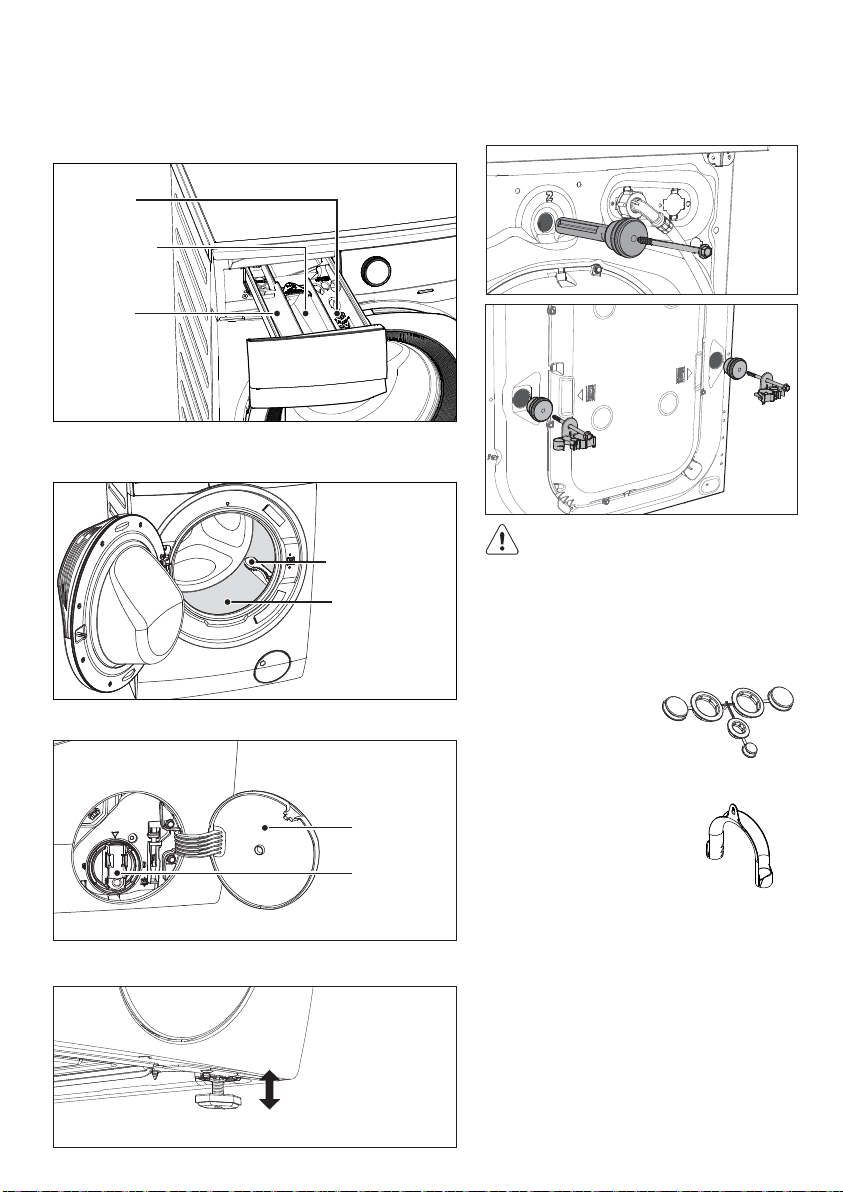
Detergent/Softener Dispenser
(For more informations, see page 18)
Softener
Main Wash
Prewash
Door (when open)
(for more informations, see page 18)
Drain Pump Filter (when open)
Drum Lifter (X3)
Stainless Steel
Washing Drum
Transit Bolt (when remove)
Transit bolts must be removed
before using the appliance.
2.2 Accessories
Plastic Caps
To close the holes on
the rear side of the
cabinet after the
removal of the transit
bolts.
Level Adjustment Feet
Drain Pump
Filter Door
Drain Pump
Filter
Plastic Hose Guide
To connect the drain hose
on the edge of a sink.

10 www.electrolux.com
CONTROL PANEL3.
3.1 Control Panel Description
SensorWash™
3 75
421 6
11 10
Vapour
12 13
9
Prewash
8
1
Program Selector Knob
Temperature Selection Touchpad
2
On/Off Button
3
Spin Selection Touchpad
4
5
Sensor Wash Touchpad
6
Vapour Touchpad
7
Prewash Touchpad
Start/Pause and
8
Add Clothes Touchpad
9
Time Manager Touchpad
10
Delay End Touchpad
11
Display
A)
B)
C)
D)
F
E
D
Program Time
Time Manager Level
Add Clothes Icon
Program Phase Indication Icon:
Ultramix phase
Wash phase
Rinse phase
Spin phase
Vapour phase
Anticrease Phase Icon
12
Save Favourite Program Option
13
Child Lock Option
A
B
C
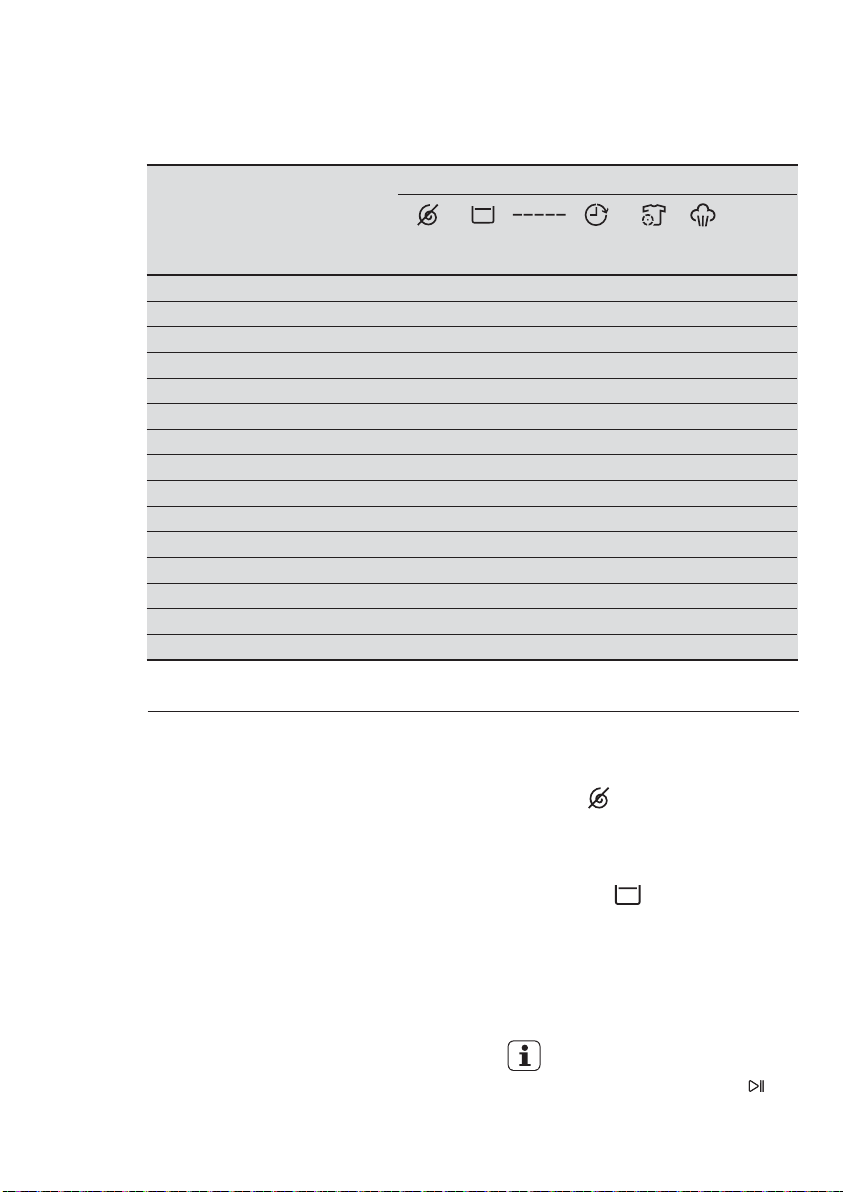
3.2 Program Chart
11
Program;
Temperature
range
Cottons;
Cold to 90°C
Mixed;
Cold to 60°C
Bedding; Special program for one synthetic blanket,
Cold to 60°C
Energy
Saver;
1)
40°C
and
Spin
Speed
1200
rpm
1200
rpm
800
rpm
1200
rpm
60°C
Baby Care;
Cold to 40°C
Vapour
1200
rpm
–
Refresh
Max. Load
(Dry Clothes)
Medel EWF8024CDWA
Medel EWF8524CDWA
Medel EWF8024CDWA
Medel EWF8524CDWA
Medel EWF8024CDWA
Medel EWF8524CDWA
Medel EWF8024CDWA
Medel EWF8524CDWA
Medel EWF8024CDWA
Medel EWF8524CDWA
Medel EWF8024CDWA
Medel EWF8524CDWA
:
:
8.5 kg
:
:
:
:
:
:
8.5 kg
:
:
:
1.5 kg
:
1.5 kg
Type of load and soil level Max.
White and coloured cotton. (Adjust wash
8 kg
time according to soil level. See Time
Manager table on page 14)
Synthetic or mixed fabric items. (Adjust
wash time according to soil level. See Time
4 kg
Manager table on page 14)
4 kg
3 kg
duvet, bedspread and so on. (Adjust wash
time according to soil level. See Time
Manager table on page 14)
3 kg
White and colourfast cotton. Set this
program to have a good washing results
8 kg
and decrease the energy consumption.
The time of the washing program is
extended.
Baby cotton clothes and delicate knitting
4 kg
items with normal soil.
4 kg
This cycle removes odours and helps to
dewrinkle the laundry.
Do not add detergent.
Tub Clean
Spin
Rinse + Spin To rinse and spin the laundry.
– –
1200
Medel EWF8024CDWA
rpm
Medel EWF8524CDWA
1200
Medel EWF8024CDWA
rpm
Medel EWF8524CDWA
:
:
8.5 kg
:
:
8.5 kg
For cleaning the tub.
To spin the laundry and drain the water in
8 kg
the drum.
8 kg
12 www.electrolux.com
Program;
Temperature
range
Sports;
30°C
Quick 15;
30°C
Daily 60;
30°C to 60°C
Wool ;
Cold to 40°C
Delicates;
Cold to 40°C
Favourite Recall you favourite program.
Spin
Speed
800
rpm
800
rpm
1200
rpm
1200
rpm
1200
rpm
– –
Max. Load
(Dry Clothes)
Medel EWF8024CDWA
Medel EWF8524CDWA
Medel EWF8024CDWA
Medel EWF8524CDWA
Medel EWF8024CDWA
Medel EWF8524CDWA
Medel EWF8024CDWA
Medel EWF8524CDWA
Medel EWF8024CDWA
Medel EWF8524CDWA
:
2.5 kg
:
2.5 kg
:
1.5 kg
:
1.5 kg
:
5.5 kg
:
5.5 kg
Type of load and soil level Max.
A gentle program designed for mixed
fabrics found in delicate clothes.
Lightly soiled synthetics or mixed fabrics.
Coloured cotton e.g. shirts, blouses,
towels and undergarments with normal
level of soil.
Specially tested program for woollen
:
2 kg
garments bearing the “Pure new woollen,
non-shrink, machine washable” label.
:
2 kg
Delicate fabrics such as acrylics, viscose,
polyester items. (Adjust wash time
:
4 kg
according to soil level. See Time Manager
table on page 14)
:
4 kg
1) Energy Saver program with 40degC and 1200rpm is recommended for a full load of
normally soiled cottons, and is the Water and Energy rating label program.
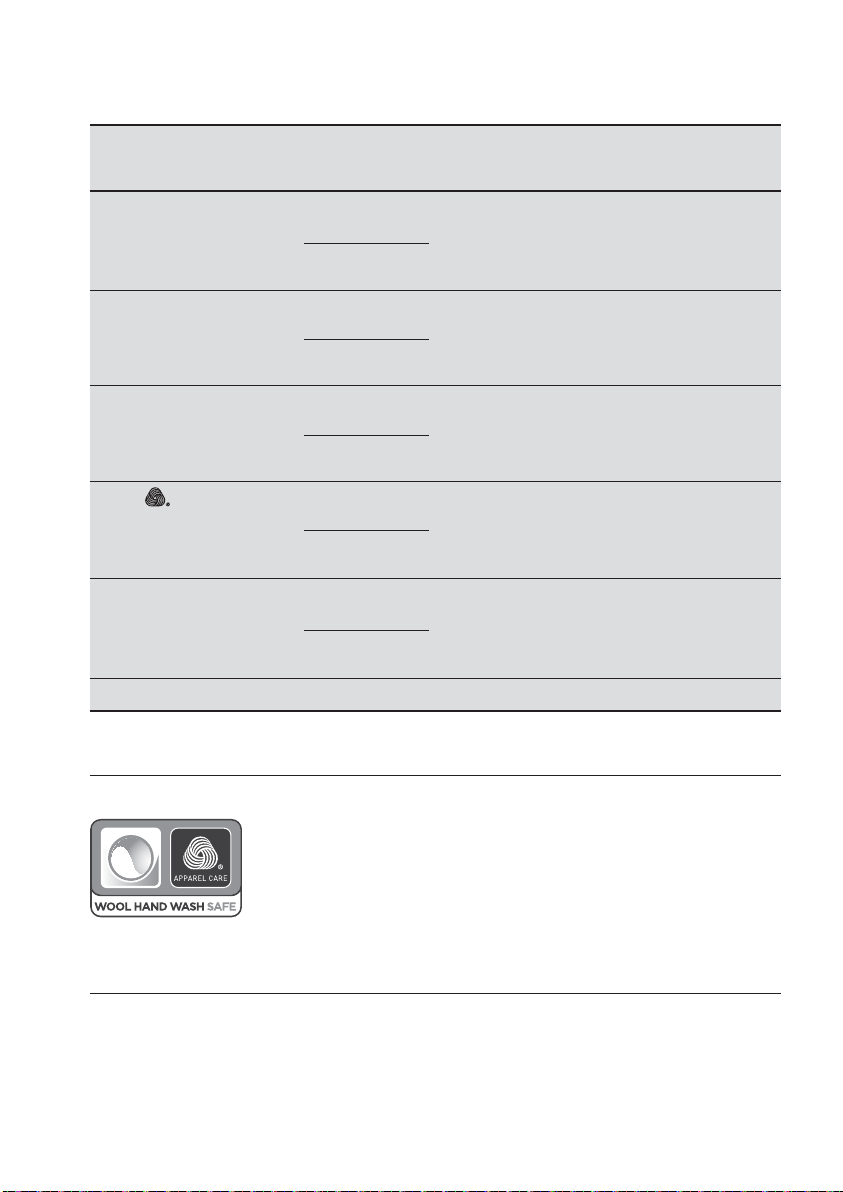
Woolmark Apparel Care - Blue
The wool wash cycle of this machine has been approved by The
Woolmark Company for the washing of wool garments labelled as
“hand wash” provided that the garments are washed according
to the instructions issued by the manufacturer of this washing
machine. Follow the garment care label for drying and other laundry
instructions.
M1361
The Woolmark symbol is a Certification mark in many countries.
3.3 Program Options Compatibility
13
Program
Cottons
Mixed
Bedding
Energy Saver
Baby Care
Vapour Refresh
Tub Clean
Spin
Rinse + Spin
Sports
Quick 15
Daily 60
Wool
Delicates
Favourite
Rinse
Hold
Manager
Spin
- - - - - - -
Time
Option
End
Sensor
Wash
1) Vapour option can be combined with temperature 40 to 90 °C only.
3.4 Options
1)
PrewashDelay
VapourNo
Temperature Touchpad
Press this touchpad repeatedly to
increase or decrease the wash
temperature if you want your laundry to
be washed at a temperature different
from the one proposed by the washing
machine.
Spin Selection Touchpad
Press this touchpad repeatedly to
increase or decrease the spin speed or
select Rinse Hold, if you want your
laundry to be spun at a speed different
from the one proposed by the washing
machine.
●
No Spin ( )
No spin option eliminates all the spin
phases and increase the number of
rinses.
●
Rinse Hold ( )
By selecting this option the water of
the last rinse is not emptied out and
the drum turns regularly to prevent the
laundry creases.
The door is still locked to indicate that
the water must be emptied out.
The door stays locked with the
water in the drum. To continue
the cycle, you must press
(Start/Pause).
14 www.electrolux.com
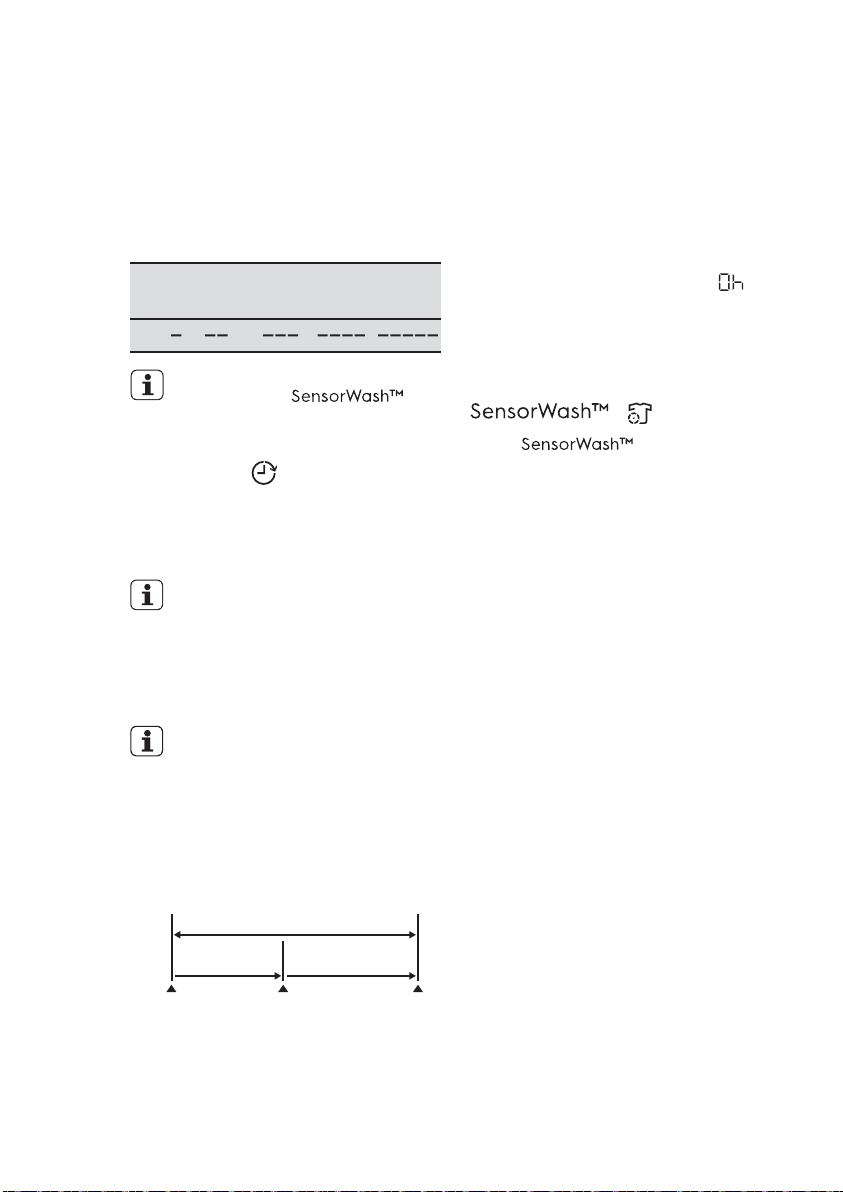
Time Manager
This option allows you to adjust the wash
time. Press this touchpad repeatedly to
decrease or increase the wash time
according to the soil level of your wash.
Use the table below as a guide.
Soil Level
LightLightly Medium Normal Heavy
Time Manager function is not
available when
is on.
Delay End ( ) Touchpad
Before you start the program, this option
makes it possible to define the end of the
washing program from minimum of 1 hour
to maximum of 20 hours.
If program duration is longer than
3 hours, minimum Delay End
option starts from 4 hours.
Press the Delay End touchpad to choose
the end time as you wish. The display
shows the number of hours and the
indicator beside the touchpad is on.
This option must be selected after
choosing the wash program, and
before pressing the “Start/Pause”
touchpad.
For example, if the program duration of
your selected program is 3.20 hours and
you define the “Delay End” time to 6
hours. This means your wash program
will finish in 6 hours. (See diagram)
“Delay End” Time : 6 hrs.
Countdown
Working Cycle
3.20 hrs.2.40 hrs.
If you wish to modify or cancel Delay End
option after starting the program, follow
the steps below:
set the washing machine to PAUSE by
pressing “Start/Pause” touchpad;
-
deselect this option by pressing
“Delay End” touchpad repeatedly till
the display shows delay time “ ”;
press the “Start/Pause” to start the
program.
( ) Touchpad
Press touchpad to toggle
wash and rinse sensor of the machine.
The machine will automatically detect
soil level and give the number of rinse to
your wash for a better wash and rinse
performance.
So, you will get the perfect care for you
favourite clothes, with less colour fading
and minimal textural damage.
Pressed
Start/Pause
After selecting Delay End time, press
Start/Pause touchpad to start the
program. Machine will then countdown
and update time on the display every
hours until it reaches the starting point of
the wash cycle.
Start the
Program
End of
Cycle
 Loading...