

Electrolux ERGOEASY ZTI7635 Owner's Handbook Manual
OWNER’S HANDBOOK
FOR ERGOEASY
MODEL : ZTI 7635
Welcome to the worldwide club of appliances.
Please read these operating instructions before operating your vacuum cleaner.
2
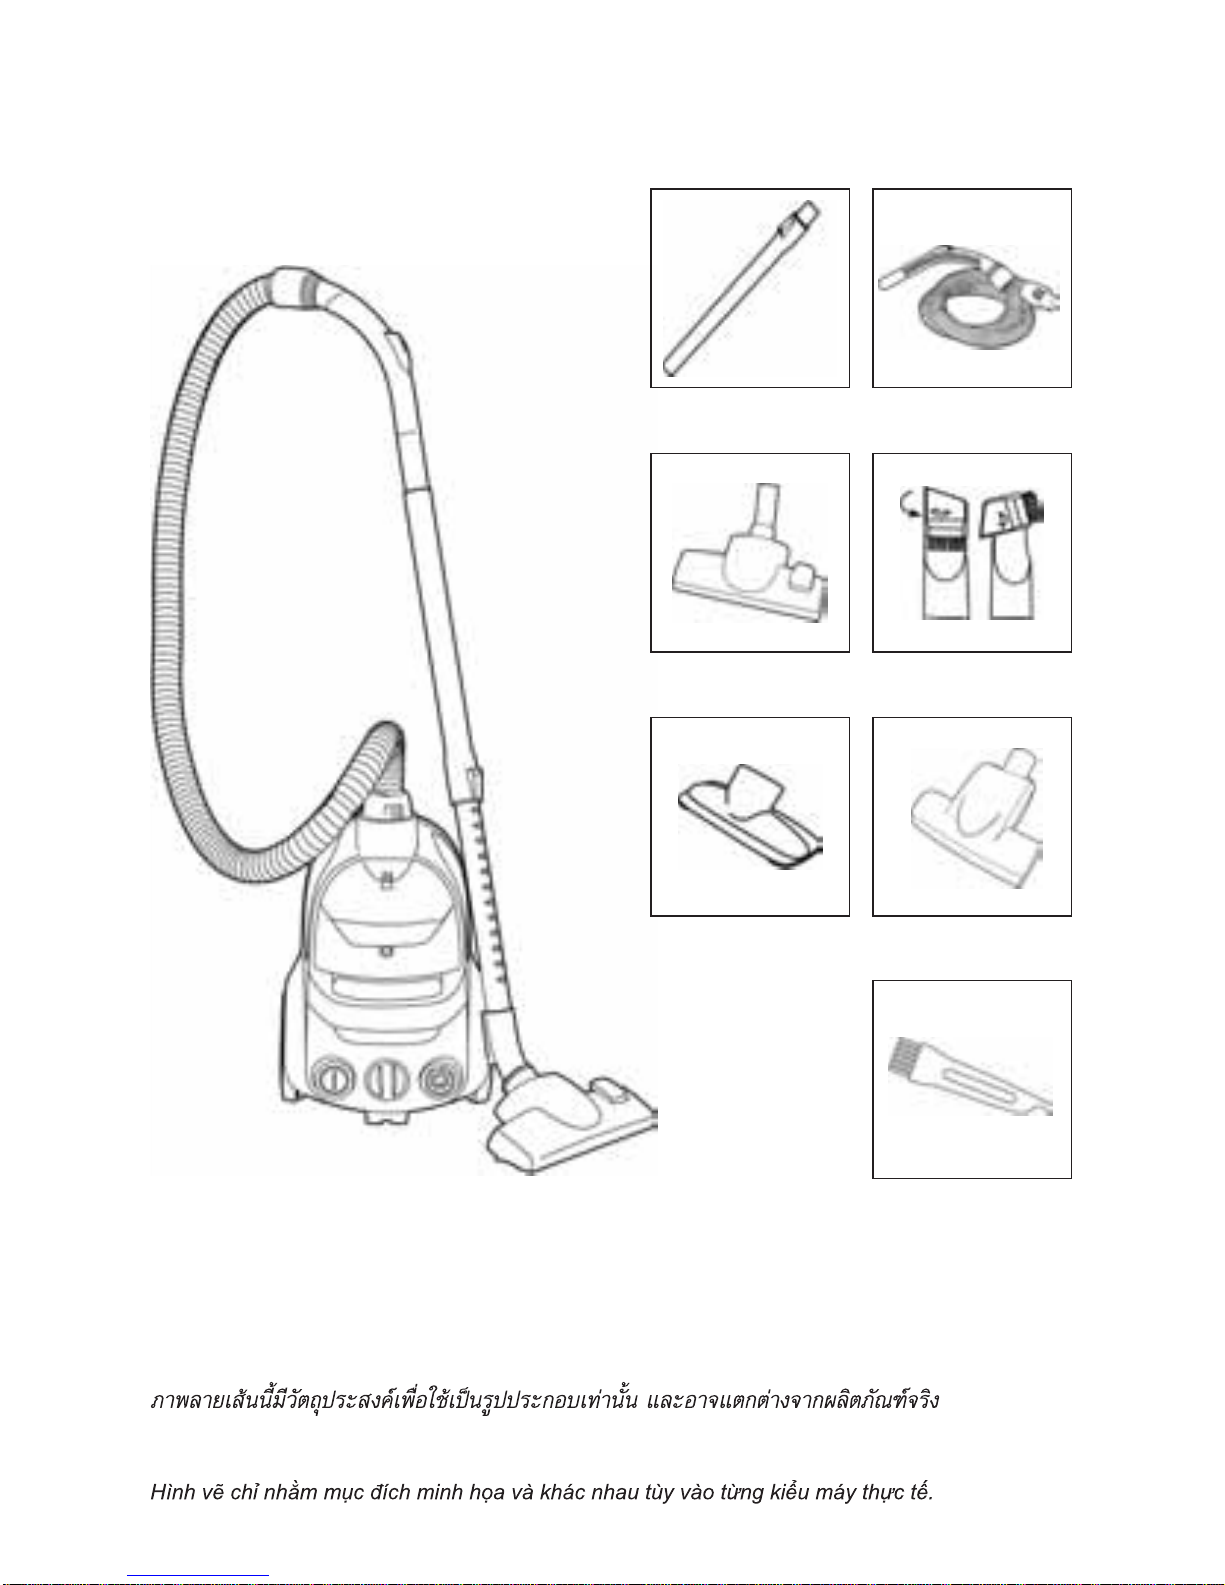
Line drawings are solely for illustration purposes and are subject to variations from actual product.
Garis yang tampak pada gambar hanya sebagai ilustrasi dan sebagai subjek untuk variasi dari
produk yang sebenarnya.
12
34
56
7

3
Important User
Information
Dear Customer, please read through
these operating instructions carefully.
Above all, please observe the safety
instructions on the first few pages of
this booklet. Please keep these
operating instructions for future
reference and pass them on to any
subsequent owner of this appliance.
The safety standards of Electrolux electrical
appliances are in keeping with the
recognised rules of technology and the
laws governing the safety of appliances.
Prior to operating this appliance please
familiarise yourself with the following safety
instructions:
Accessories
1 Telescopic tube
2 Hose handle + hose
3 Combination floor nozzle
4 Combination crevice nozzle
with dusting brush
5 Upholstery nozzle
6 Turbo nozzle
7 Filter brush (attached to the back
of the dust container)
Safety Precautions
If the supply cable is damaged, it must be
replaced by the manufacturer, its service
agent or similarly qualified person in order
to avoid a hazard. Never use the vacuum
cleaner if the cable is damaged. Damage
to the machine’s cable is not covered by
the warranty. This appliance is not intended
for use by persons (including children) with
reduced physical, sensory or mental
capabilities, or lack of experience and
knowledge, unless they have been given
supervision or instruction concerning the
use of the appliance by a person
responsible for their safety. Children should
be supervised to ensure that they do not
play with the appliance. Please remove
the plug from the socket outlet before
cleaning or maintaining the appliance.
Caution:
This appliance contains electrical
connections.
• Do not vacuum water.
• Do not immerse the machine in water
for cleaning.
The hose must be checked regularly and
must not be used if damaged.
Never use the vacuum cleaner:
• In wet areas.
• Close to flammable gases etc.
• When housing shows visible signs
of damage.
• On sharp objects.
• On hot or cold cinders, lighted cigarette
butts, etc.
• On fine dust, for instance from plaster,
concrete, flour, hot or cold ashes.
Using the vacuum cleaner in the above
circumstances may cause serious damage
to its motor. Such damage is not covered
by the warranty. Never use the vacuum
cleaner with out its filters.
Electric cable precautions:
Regularly check that the cable is not
damaged. Never use the vacuum cleaner
if the cable is damaged. Damage to the
machine’s cable is not covered by the
warranty.
If the supply cord is damaged, it must be
replaced by the manufacturer, its service
agent or similarly qualified person in order
to avoid a hazard. Please remove the plug
from the socket outlet before cleaning or
maintaining the appliance.
4
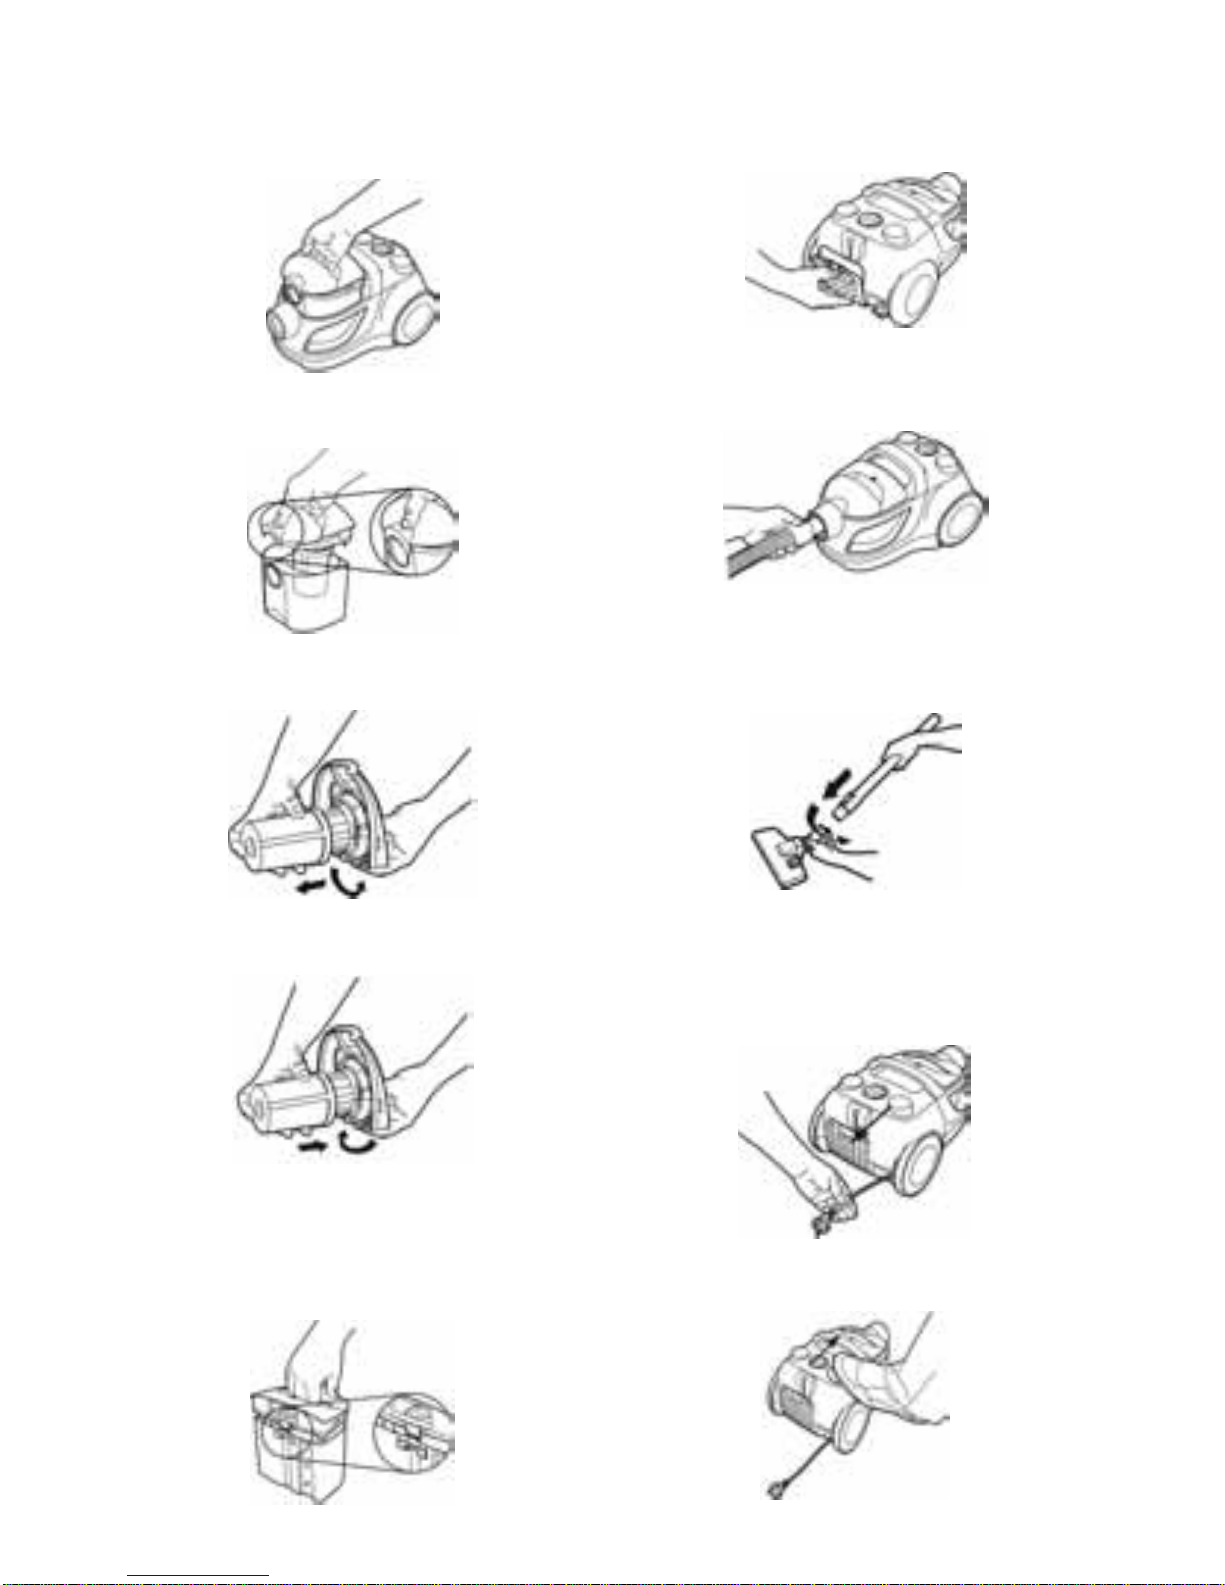
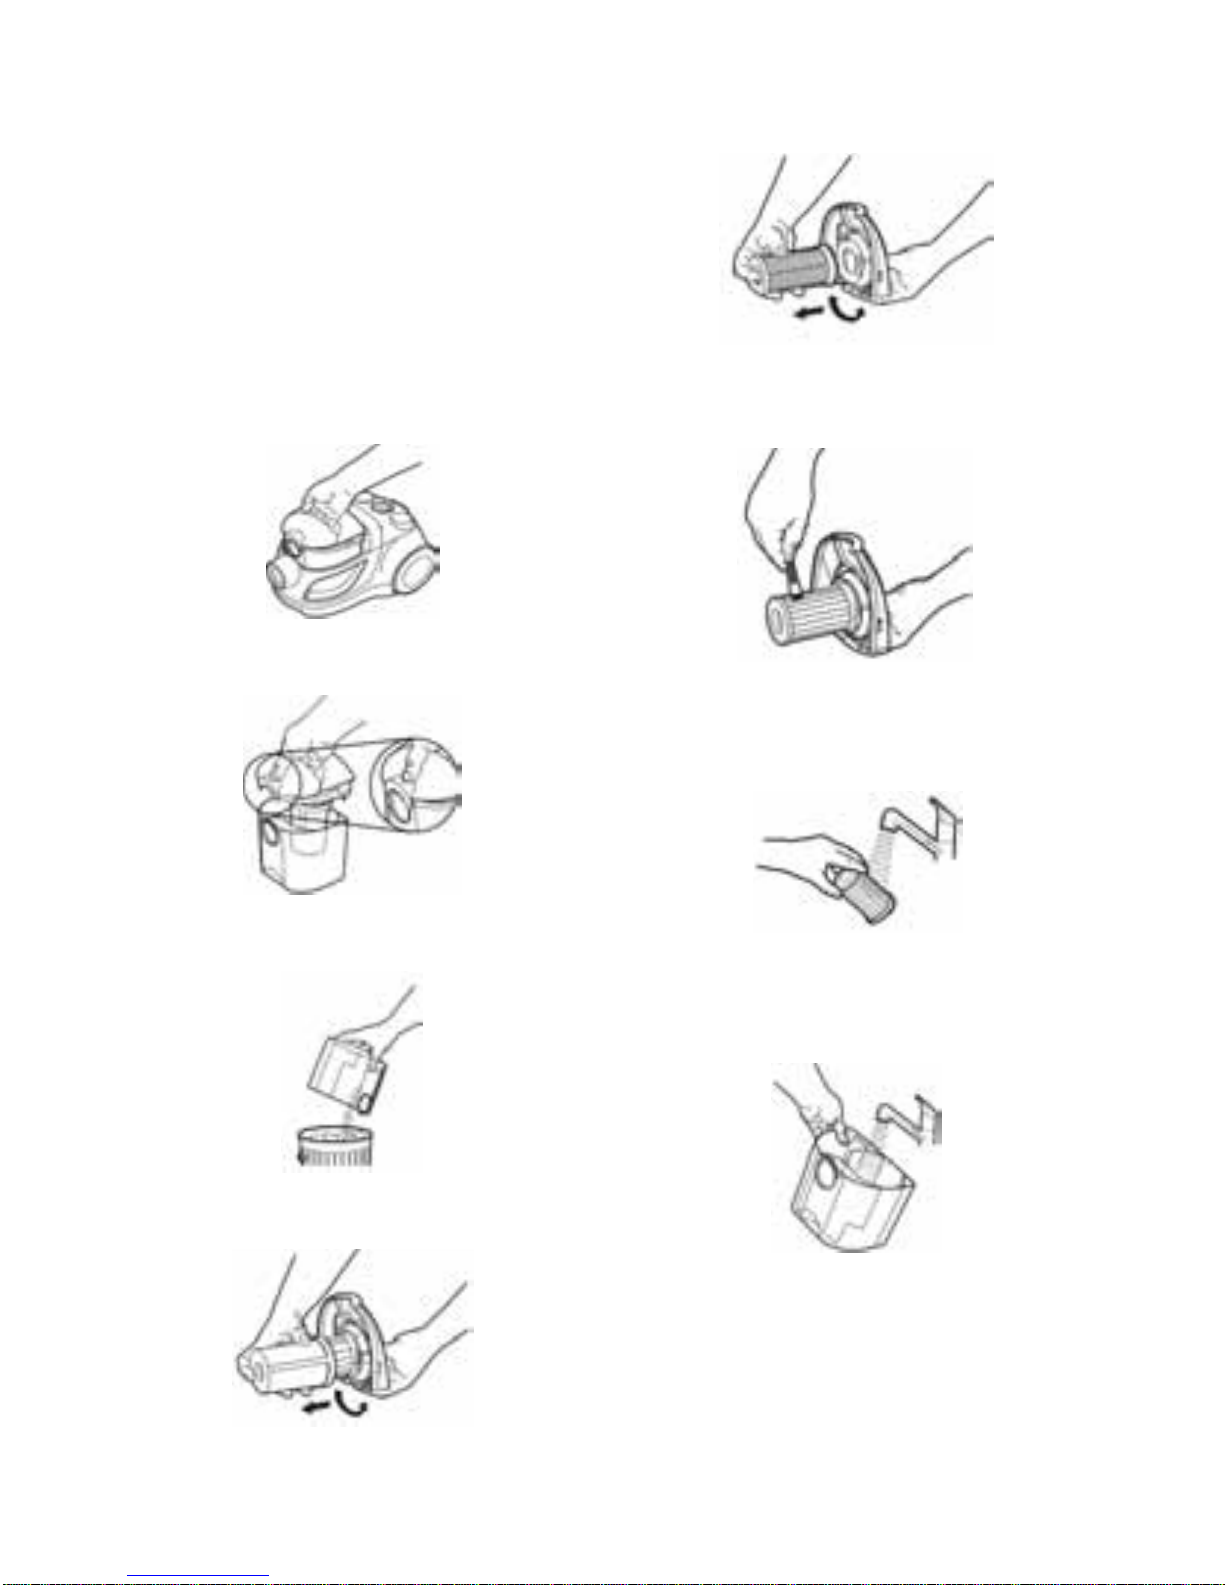
Before Starting
1. Lift the dust container out
2. Press the release button and open
the container.
3. Remove the pre-filter by twisting and
pull downwards.
4. Check that the HEPA filter is in place.
Replace the pre-filter.
5. Put the lid back on the container, make
sure that the tab on the dust container
lid is located securely into the hole on
the container base. Place the dust
container back into the cleaner.
6. Open the lid at the back of the machine
and check that the exhaust filter is in
place.
7. Insert the hose until the catches click
to engage (press the catches to release
the hose).
8. Attach the telescopic tube to the hose
handle and nozzle by pushing and
twisting together. (Twist and pull apart
to dismantle)
9. Extend the electric cable and connect
it to the mains. The vacuum cleaner is
fitted with a cable winder. Once the
electric cable has been extended,
it stays in that position.
10. To retract the cable, press the cord
rewinder pedal. The cable will then
retract.
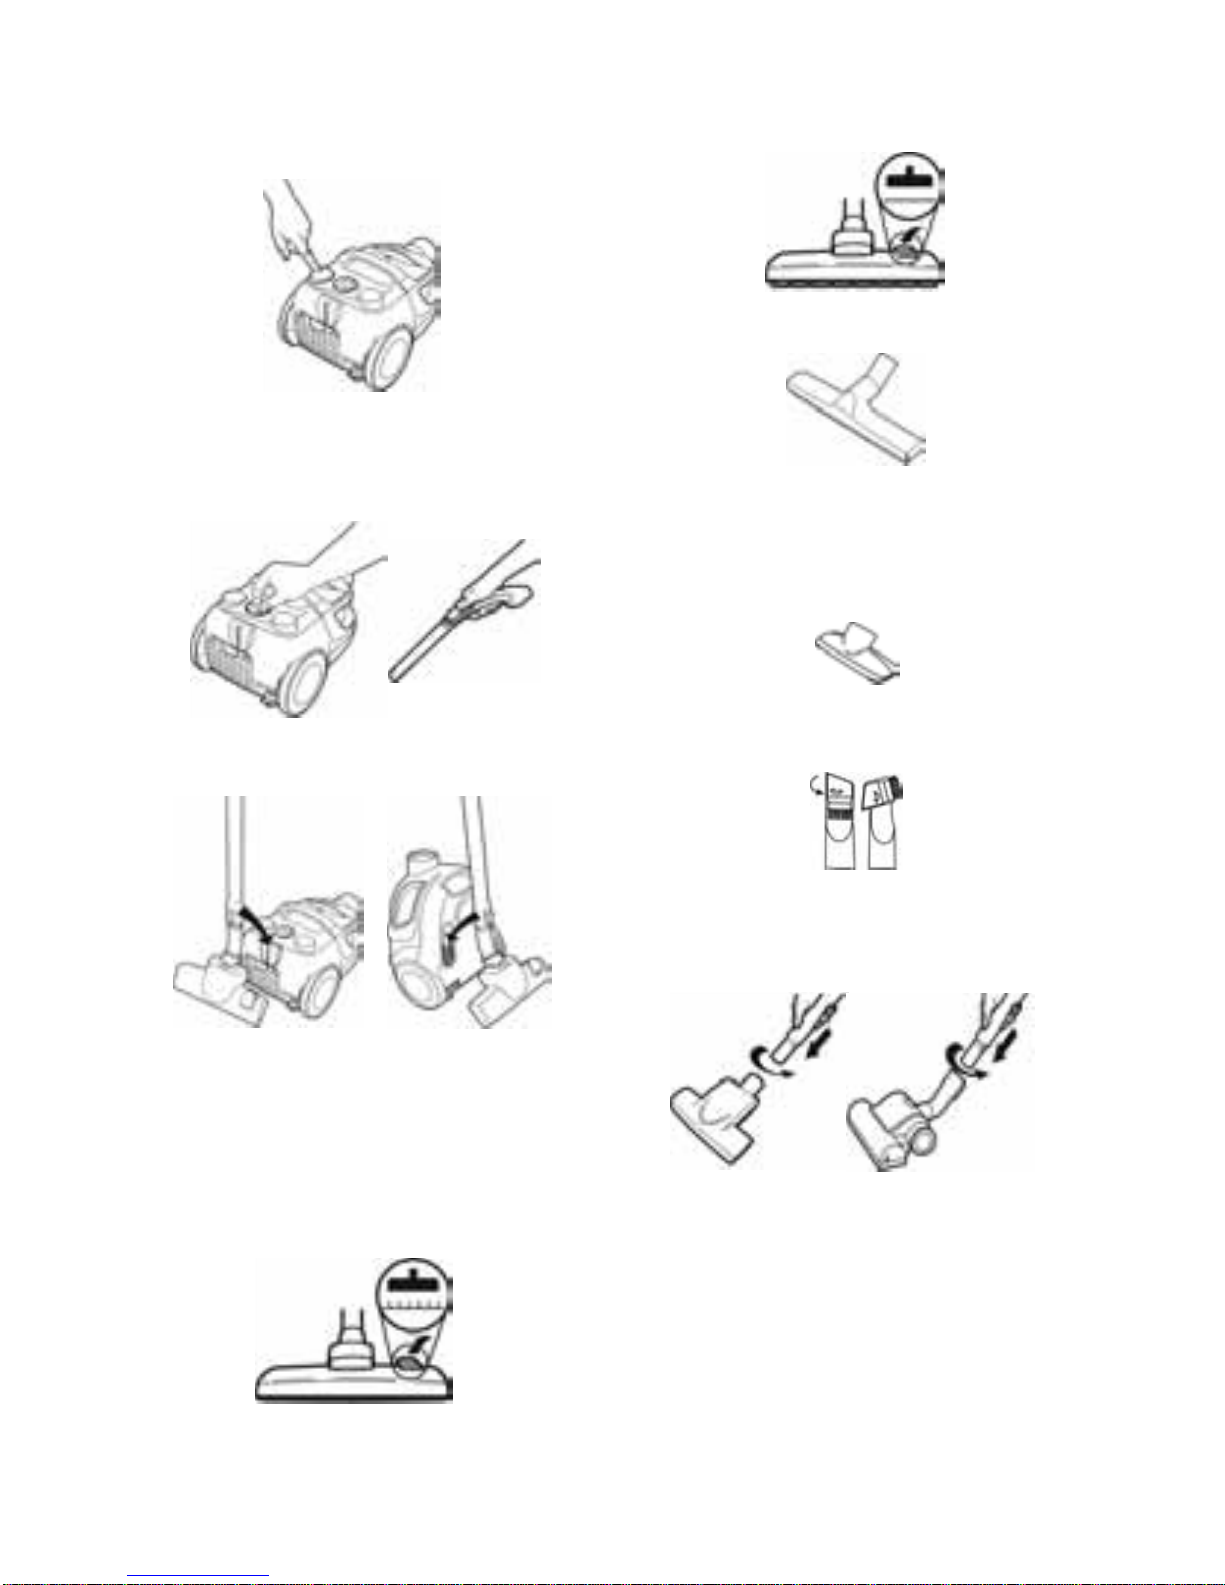
5
11. Start the vacuum cleaner by pressing
the power button. Stop the vacuum
cleaner by pressing once again.
12. Suction power can be adjusted
by using the power control on the
machine (12a) or on the hose
handle (12b).
13. Ideal parking position for pausing (13a)
and storage (13b).
Getting The
Best Results
Use the nozzles as follows:
Carpets: Use the combination floor nozzle
with the lever in position.
Hard floors: Use the combination floor
nozzle with the lever in position.
Upholstered furniture and fabrics: Use
the upholstery nozzle for sofas, curtains,
lightweight fabrics etc. Reduce suction
power if necessary.
Crevices, corners, etc.: Use the crevice
nozzle.
Using the turbo nozzle
Ideal for carpets and wall-to-wall carpeting
to remove stubborn fluff and pet hairs.
Note: Do not use the turbo nozzle on
animal skin rugs or carpet fringes. To avoid
damaging the carpet, do not keep the
nozzle stationary whilst the brush is rotating.
Do not pass the nozzle across electric
cables, and be sure to switch off the
vacuum cleaner immediately after use.
12a 12b
13a 13b
6
Cleaning The
Cylindrical HEPA Filter
And The Dust Container
• The dust container must be emptied
when it is full and needs to be clean
every now and then.
• Clean the HEPA filter when the
indicator turns red.
1. Lift the dust container out.
2. Press the release button on top of the
dust container. Open the container.
3. Empty the dust container in a waste
paper basket.
4. Remove the pre-filter by twisting and
pull downwards.
5. Release the cylindrical HEPA filter by
twisting and pull downwards.
6. Use the brush attached to the back
of the container to take away dust and
particles attached to the HEPA filter.
7. Rinse the cylindrical HEPA filter in
water. Let it dry before placing it back
into the cleaner. Replace the filter when
necessary.
8. Remove particles that have got stuck
in the dust container and rinse it with
water. Ensure it is dry before placing
it back into the cleaner.
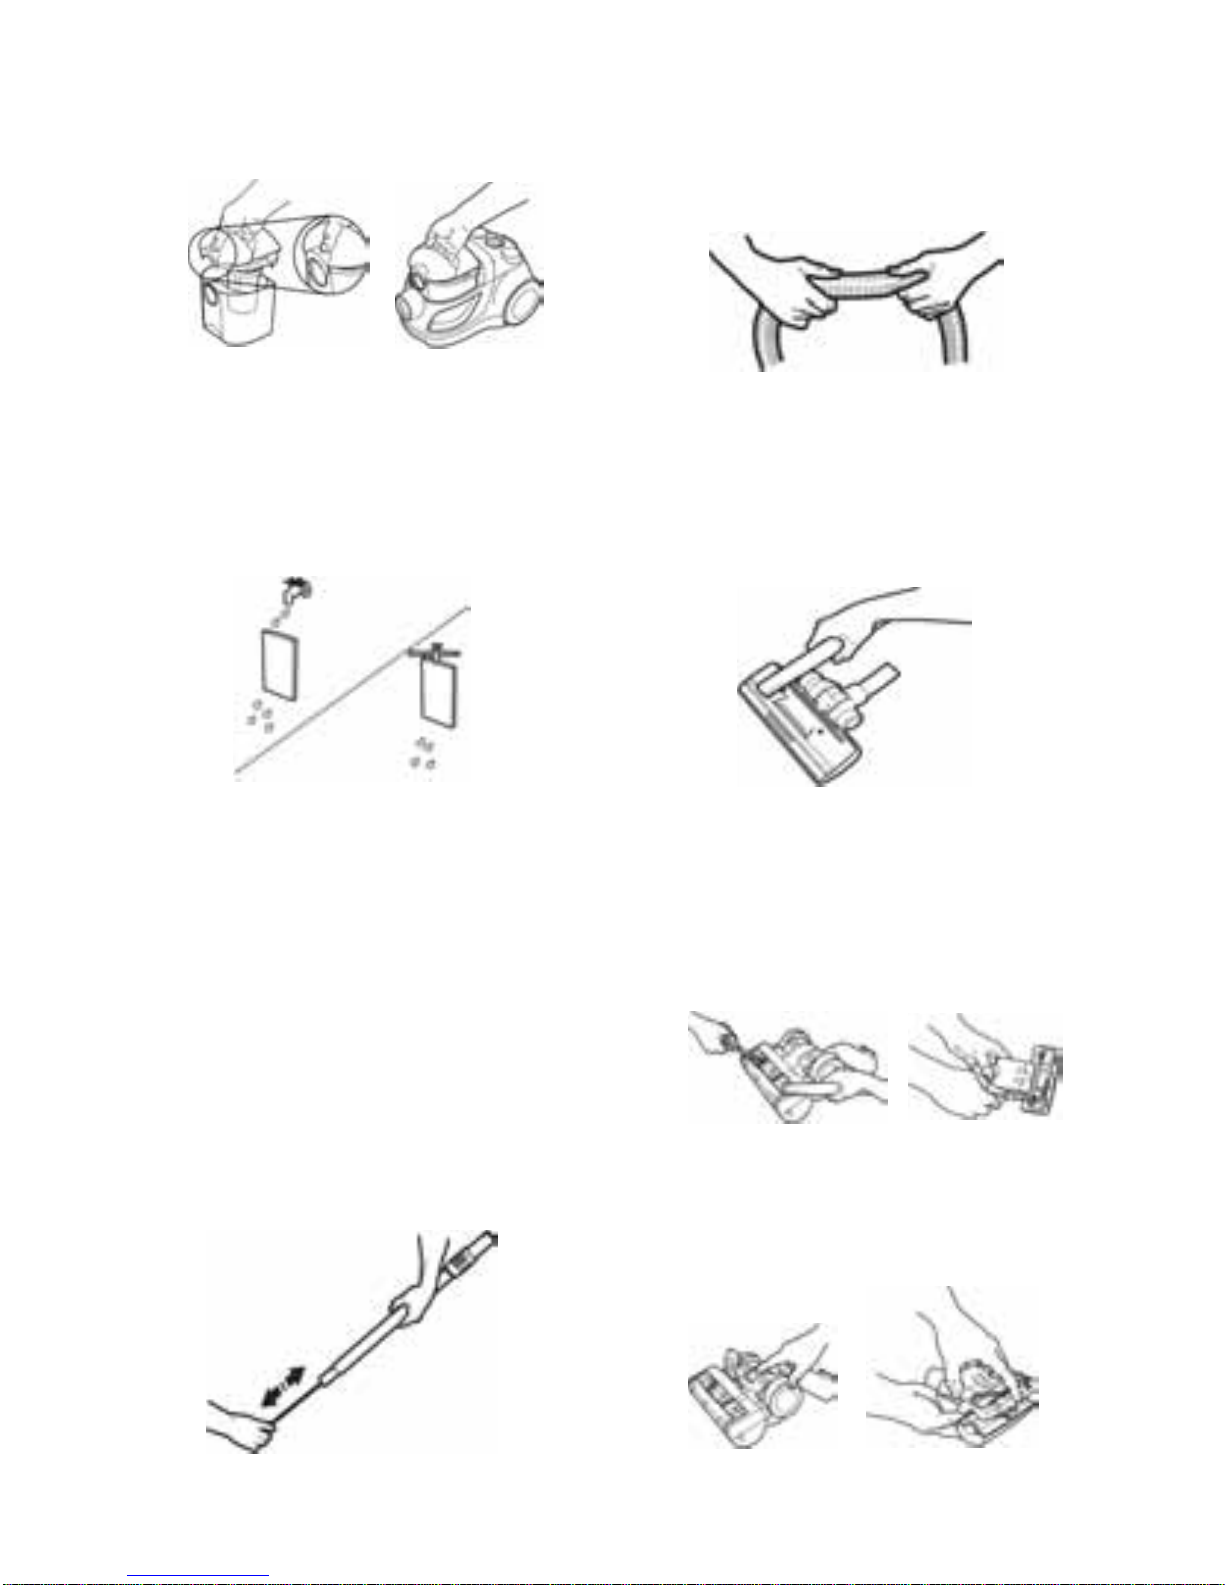
9. Put the pre-filter and lid back, make
sure that the tab on the dust container
lid is located securely into the holes
on the base (see 11- 12). Place the
dust container back into the cleaner.
7
10. Close the container with the lid and
place the container back into the
cleaner.
Cleaning The
Exhaust Filter
The washable exhaust filter can be cleaned
by rinsing it underwater. Let it dry before
placing it back into the cleaner.
Cleaning The Hose
And Nozzle
The vacuum cleaner stops automatically
if the nozzle, tube, hose or filters become
blocked and when the dust container is
full. In such cases, disconnect from mains
and allow to cool for 20~30 minutes.
Clear blockage and/or replace filters,
empty the dust container and restart.
TUBES AND HOSES
• Use a cleaning strip or similar to clear
the tubes and hose.
• It may also be possible to remove the
obstruction in the hose by squeezing
it. However, be careful in case the
obstruction is caused by glass or
needles caught inside the hose.
Note: The warranty does not cover damage
caused to the hose while cleaning it.
CLEANING THE FLOOR NOZZLE
Be sure to frequently clean the combination
floor nozzle. Use the hose handle to clean
the nozzle.
CLEANING THE TURBO NOZZLE
• Disconnect the nozzle from the
vacuum cleaner tube and remove
entangled threads, etc. by snipping
them away with scissors. Use the hose
handle to clean the nozzle.
• In case the turbo nozzle stops working,
open the cleaning lid by pressing the
button and remove any objects that
obstructs the turbine to rotate freely.

8
Trouble Shooting
The vacuum cleaner does not start
• Check that the cable is connected to
the mains.
• Check that the plug and cable are not
damaged.
• Check for a blown fuse.
The vacuum cleaner stops
• Check whether the dust container is
full. If so, empty it.
• Is the nozzle, tube or hose blocked?
• Are the filters blocked?
Water has entered the vacuum cleaner
It will be necessary to replace the motor
at an authorised Electrolux service centre.
Damage to the motor caused by the
penetration of water is not covered by
the warranty.
Consumer Information
Electrolux decline all responsibility for all
damages arising from any improper use
of the appliance or in cases of tampering
with the appliance. If the supply cable is
damaged, it must be replaced by the
manufacturer, its service agent or similarly
qualified person in order to avoid a hazard.
This product is designed with the
environment in mind. All plastic parts are
marked for recycling purposes.
For details see our web site:
www.electrolux.com
or
Contact your local Customer Service
number listed on this booklet.
marking Directive 93/68/EEC.
• Low Voltage Directive 2006/95/EC
• EMC directive 2004/108/EC
The symbol
on the product or on its
packaging indicates that th is product may
not be treated as househ old waste.
Instead it shall be handed over to the
applicable collection point for the recycling
of electrical and electronic equipment.
By ensuring this product is disposed of
correctly, you will help prevent potential
negative consequences for the environment
and human health, which could otherwise
be caused by inappropriate waste handling
of th is product. For more detailed
information about recycling of this product,
please contact your local city office, your
househ old waste disposal service or the
shop where you purch ased the product.
9
 Loading...